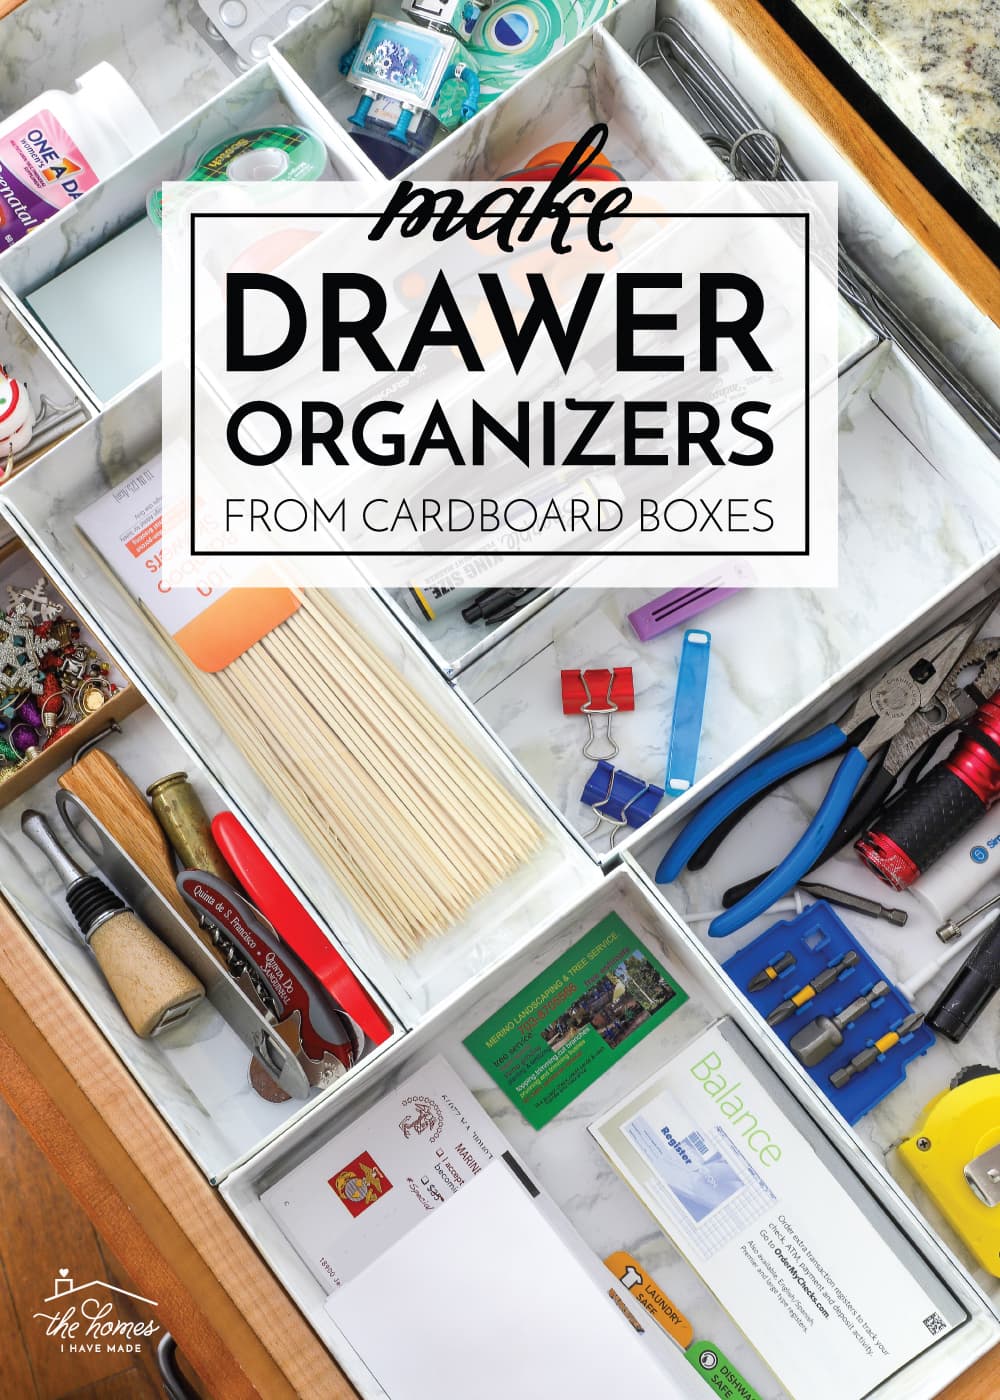
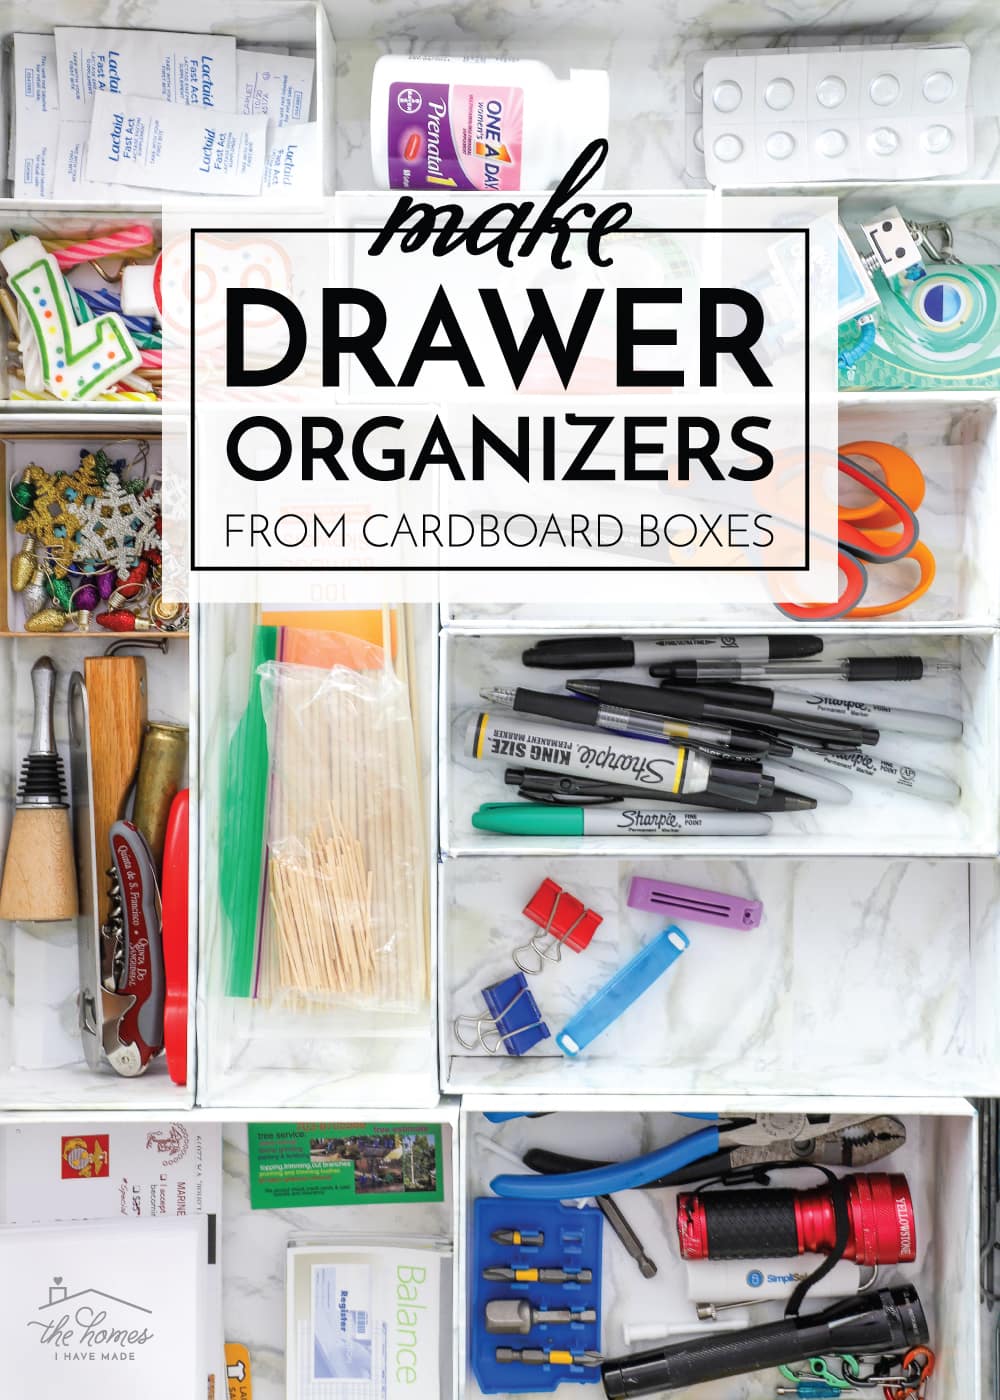
Make Drawer Organizers with Cardboard Boxes
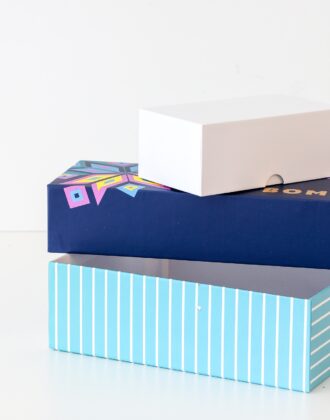
When we opened Christmas presents this past year, I couldn’t help but notice that so many of our gifts came in these gorgeous and super sturdy cardboard boxes. If you’ve ever bought a new iPhone, a set of fancy socks, a high-end planner, or pretty much anything these days, you know the kind of box I’m talking about. I couldn’t bring myself to just toss them out, knowing I could eventually do something fantastic with them. Fast forward to recently when I finally set out to organize our junk drawer. When none of our usual, off-the-shelf organizers fit, I decided to make my own with those hoarded boxes. Let me show you how easy (and satisfying!) it is to make custom drawer organizers with cardboard boxes!
Our Junk Drawer | Before & After
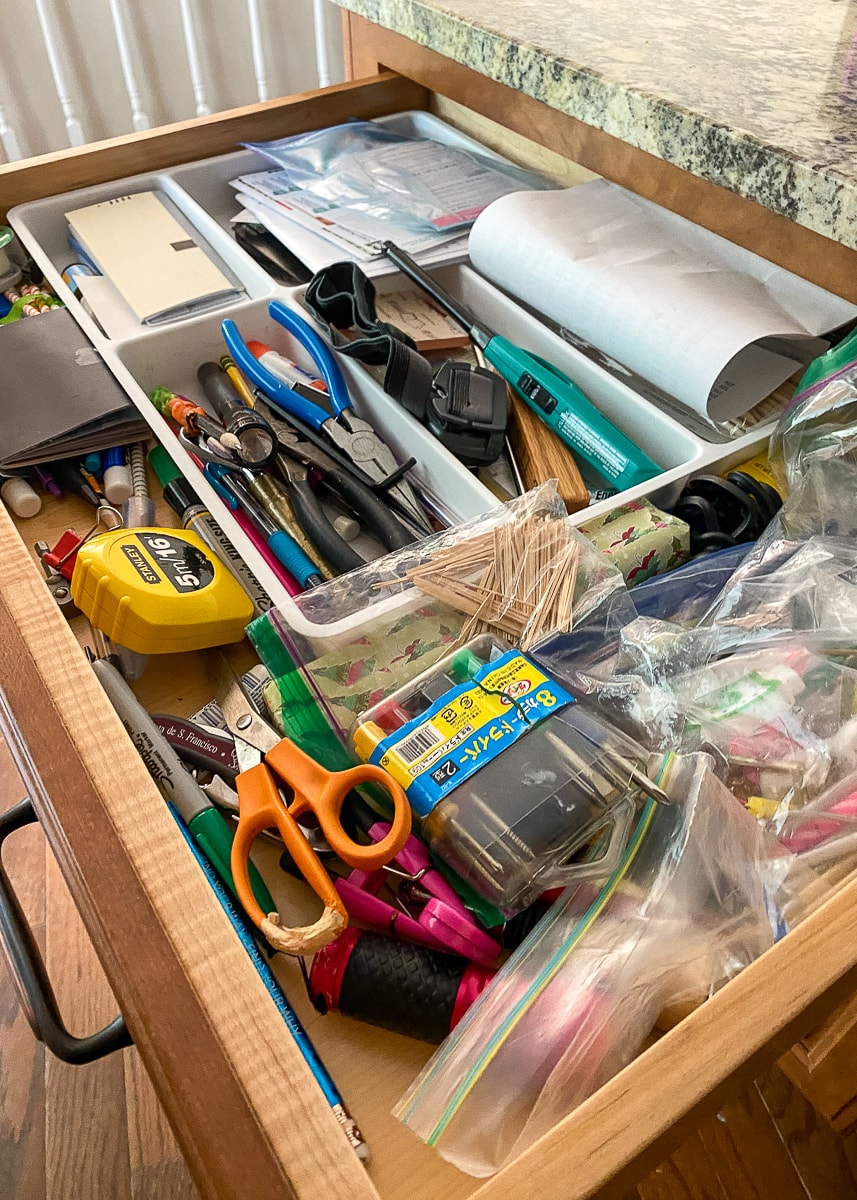
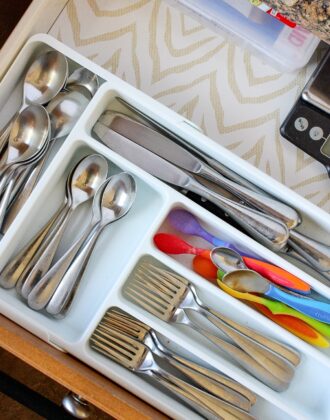
Our junk drawer was in really, really rough shape. I know most junk drawers are, but our’s was exceptionally bad (half the stuff was still in the Ziplock bags we used to move it all from California to Virginia!). And since we open and rummage through this drawer at least 20 times a day, the exasperation level with this one single spot was pretty darn high!

But by repurposing all those great cardboard boxes…

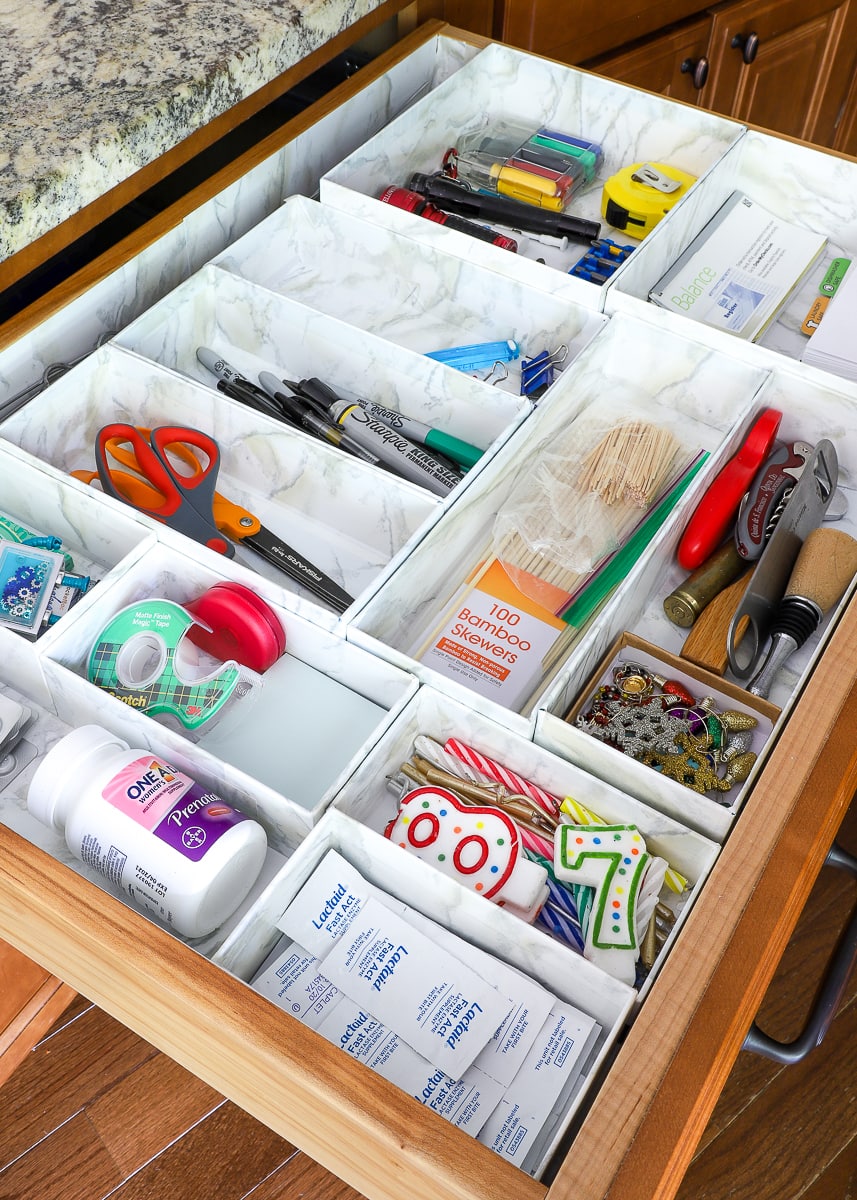
…I was able to make some serious drawer magic!!!
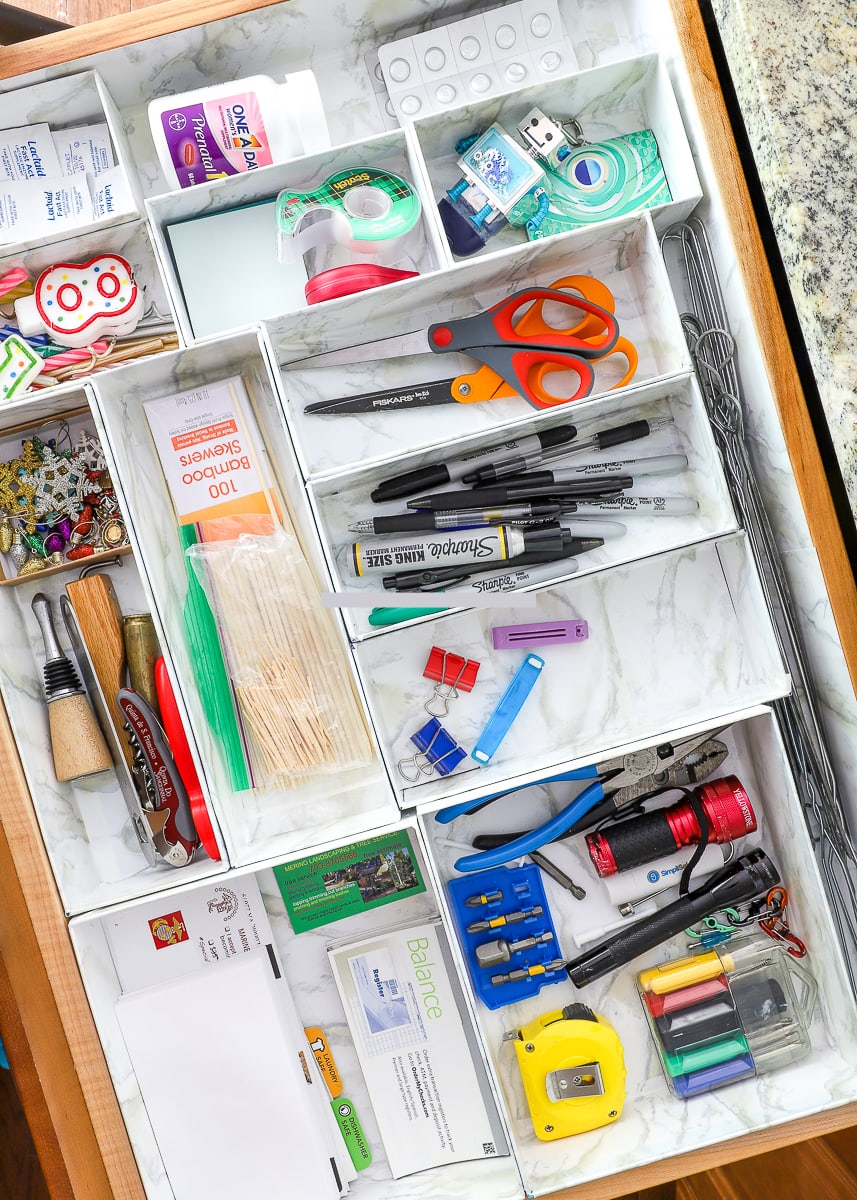
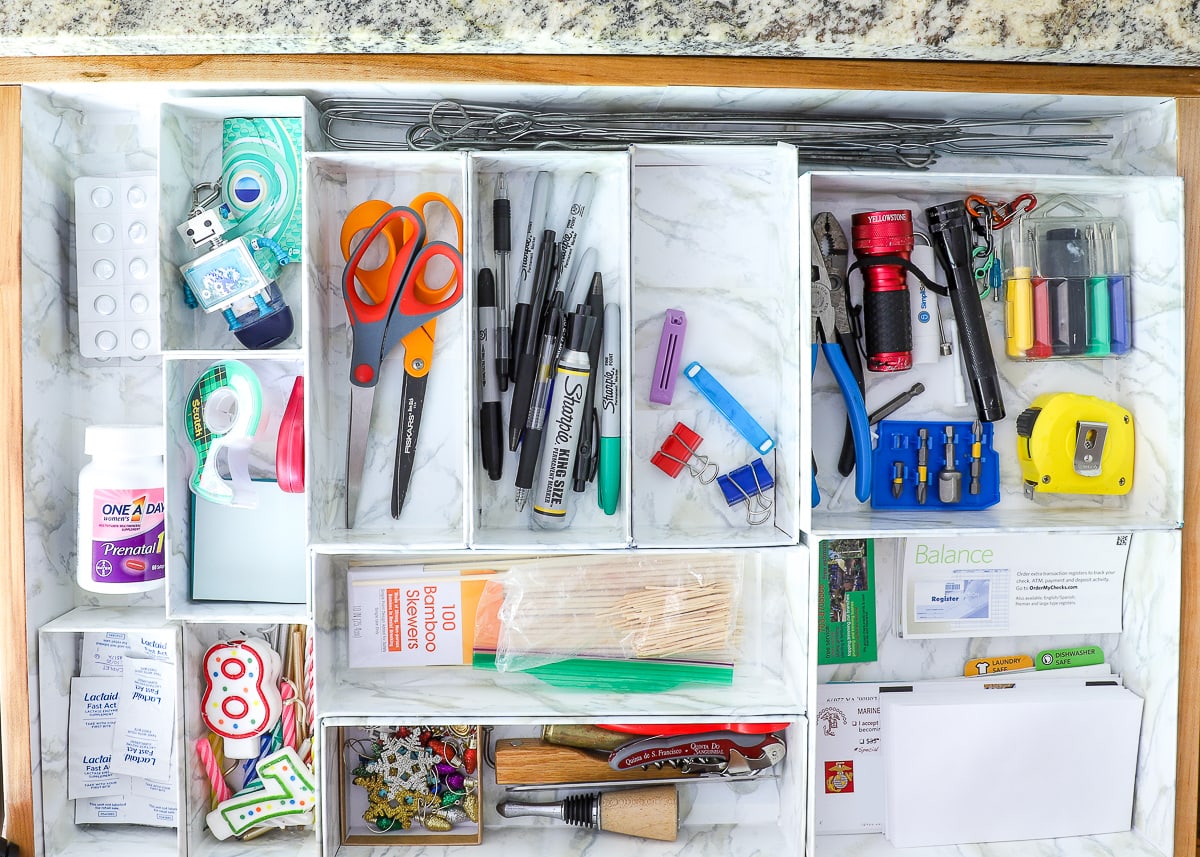
Not only does our drawer actually close now (priorities, right?), but it looks amazing AND we can find everything! This is definitely another project for the “Should Have Done It Sooner” column! Let me break down exactly how I did it!
Making SPACE In Our Junk Drawer
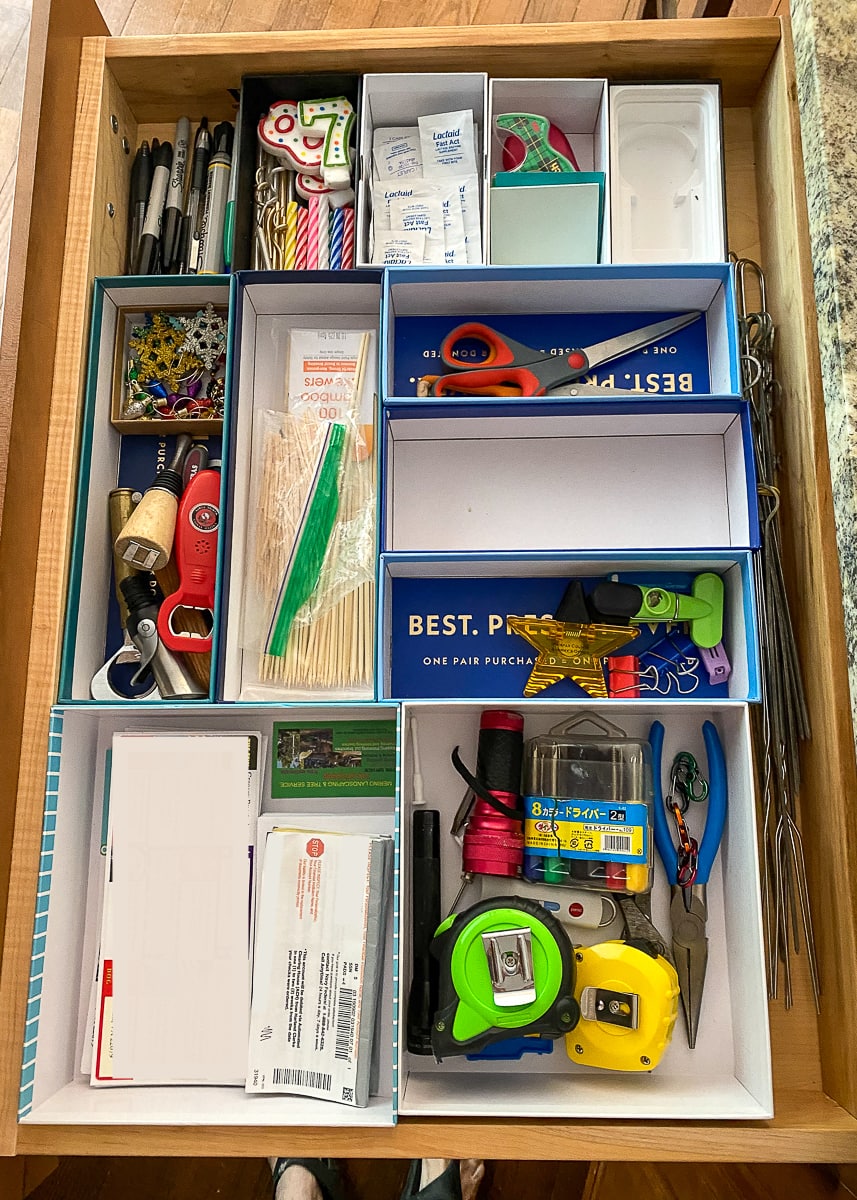
The first half of this project involved dealing with the clutter. Can you believe that everything in the photo below was stuffed into that single drawer?! No wonder we couldn’t get it shut!
I used my tried-and-true SPACE Method for sorting through the clutter. (Not familiar with my SPACE Method? Learn more HERE!)
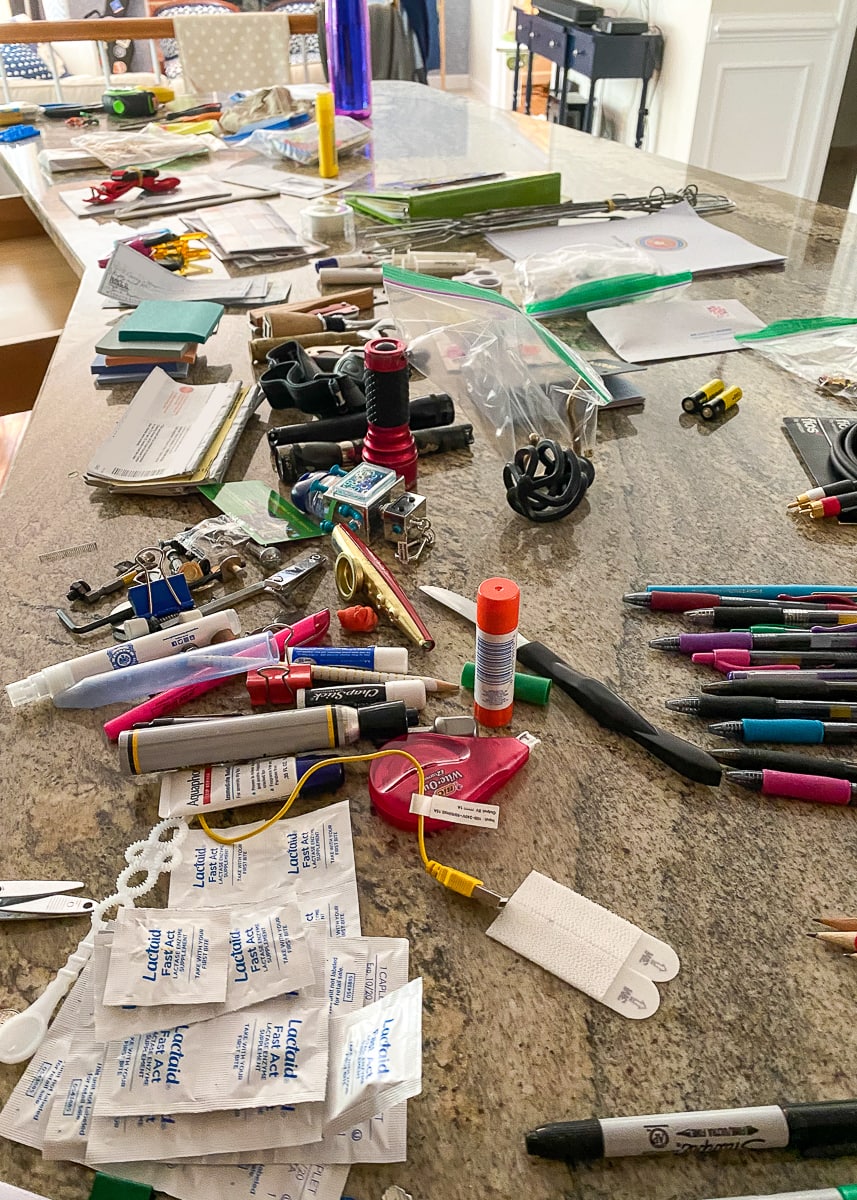
- SORT – I started by pulling everything out, sorting items into general categories (e.g., pens, tools, etc) and then wiping the empty drawer clean.
- PURGE – With the drawer empty and everything in basic piles, I could easily identify what was trash, what needed to be stored elsewhere, and what needed to be put back in the same drawer. I tested pens, checked medicine expirations, and ensured everything that remained truly belonged in this drawer.
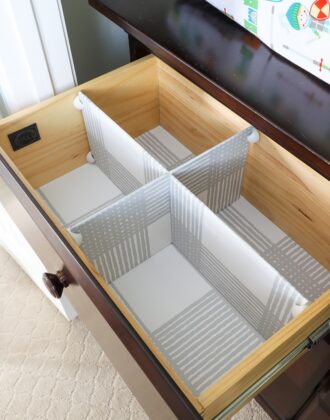
- ASSESS – The organizer I was previously using didn’t maximize space in the drawer, so I experimented with all those hoarded cardboard boxes. I spent a good while experimenting with various layouts and grouping/ungrouping different categories to see what worked best.
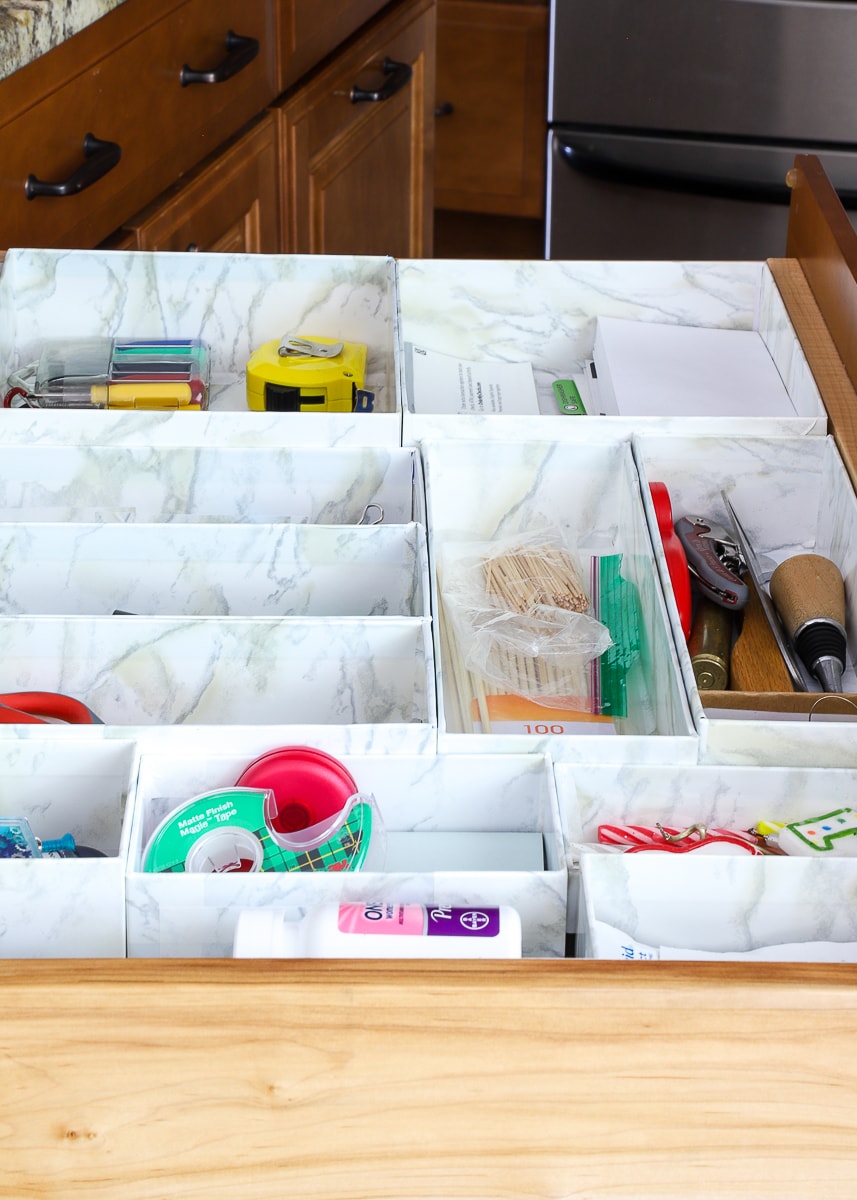
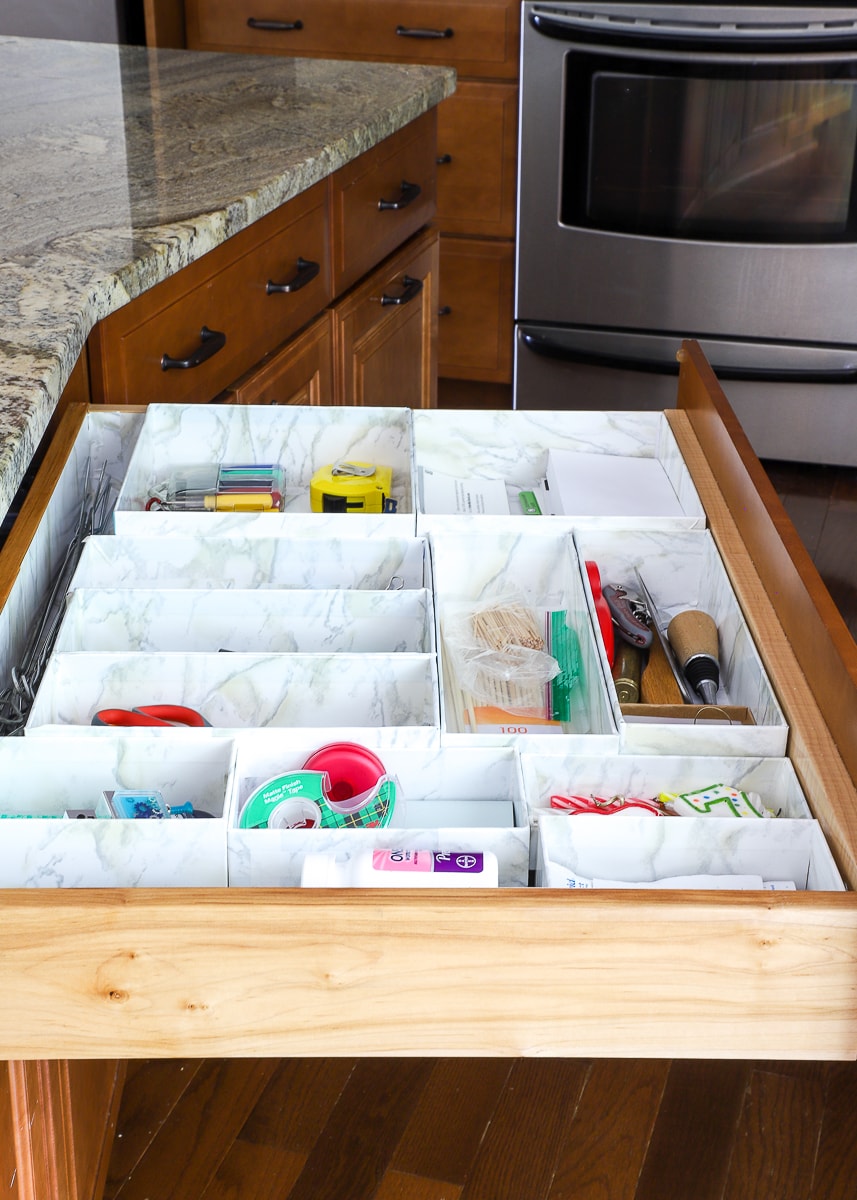
- CONTAIN – Once I finally settled on a layout that not only use every possible inch in the drawer, but also perfectly contained the exact items I needed to store, I loaded everything into its final spot.
- EMBELLISH – I finished off the project by wrapping each of the mis-matched cardboard boxes in inexpensive contact paper. This helped unify the entire drawer, making it look more clean, more tidy, and more eye appealing!
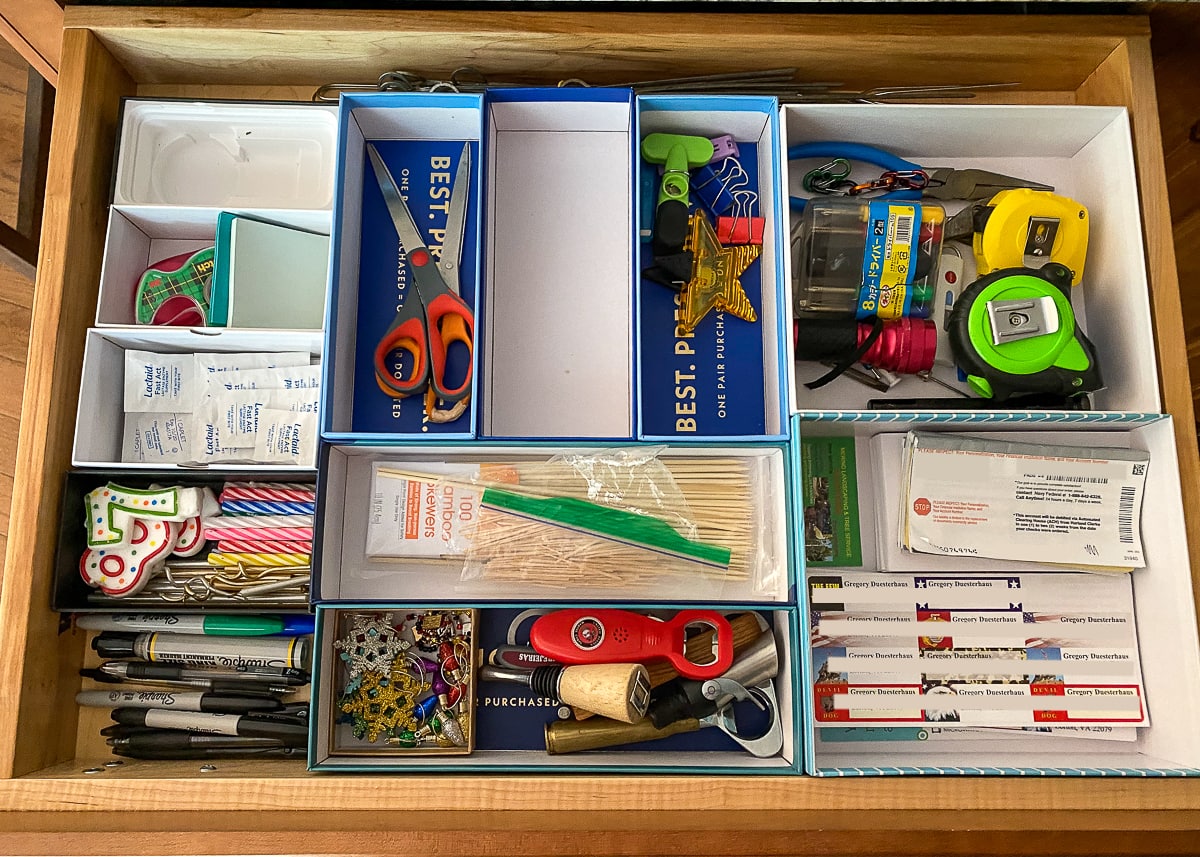
Tips For Using Boxes As Drawer Organizers
- Check to make sure the box heights allow you to easily close the drawer.
- Don’t forget to use the lids in addition to the boxes themselves.
- If you have a box that has a glued-in structure/holder, don’t hesitate to pry it out. You can cover all the mess with pretty paper!
- Play with both horizontal and vertical arrangements.
- If boxes don’t fit perfectly, try to arrange them to make empty “channels” for odd-sized items (like our kabob skewers along the top of the drawer).
- Don’t fuss too much over matching the heights of all the different boxes and lids. Once you paper the boxes, the differences in height are hardly noticeable.
- Once you finalized your arrangement, snap a picture so you can easily re-create it after you paper all the boxes.
Wrapping the Cardboard Box Organizers
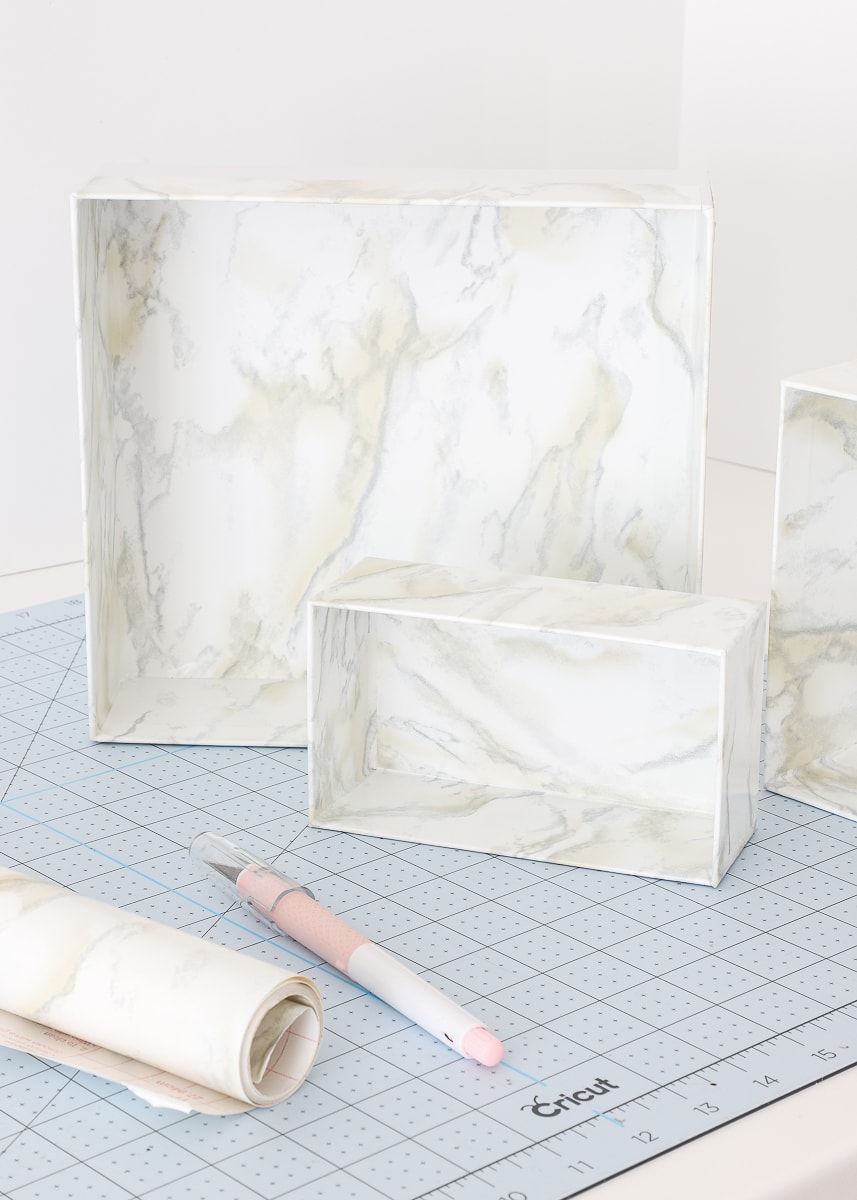
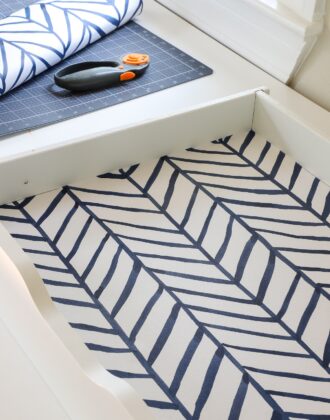
Once I landed on an arrangement that both 1) made the most of our specific drawer and 2) helped us corral everything we needed in this drawer, I could have stopped here. Truth be told, even with mis-matched boxes, the above display was worlds better than what we were dealing with previously. But! I can never leave well enough alone so I went the extra step and lined each box in some really inexpensive contact paper. This not only unified the display but worked wonders in concealing the different sizes and heights among the various boxes!
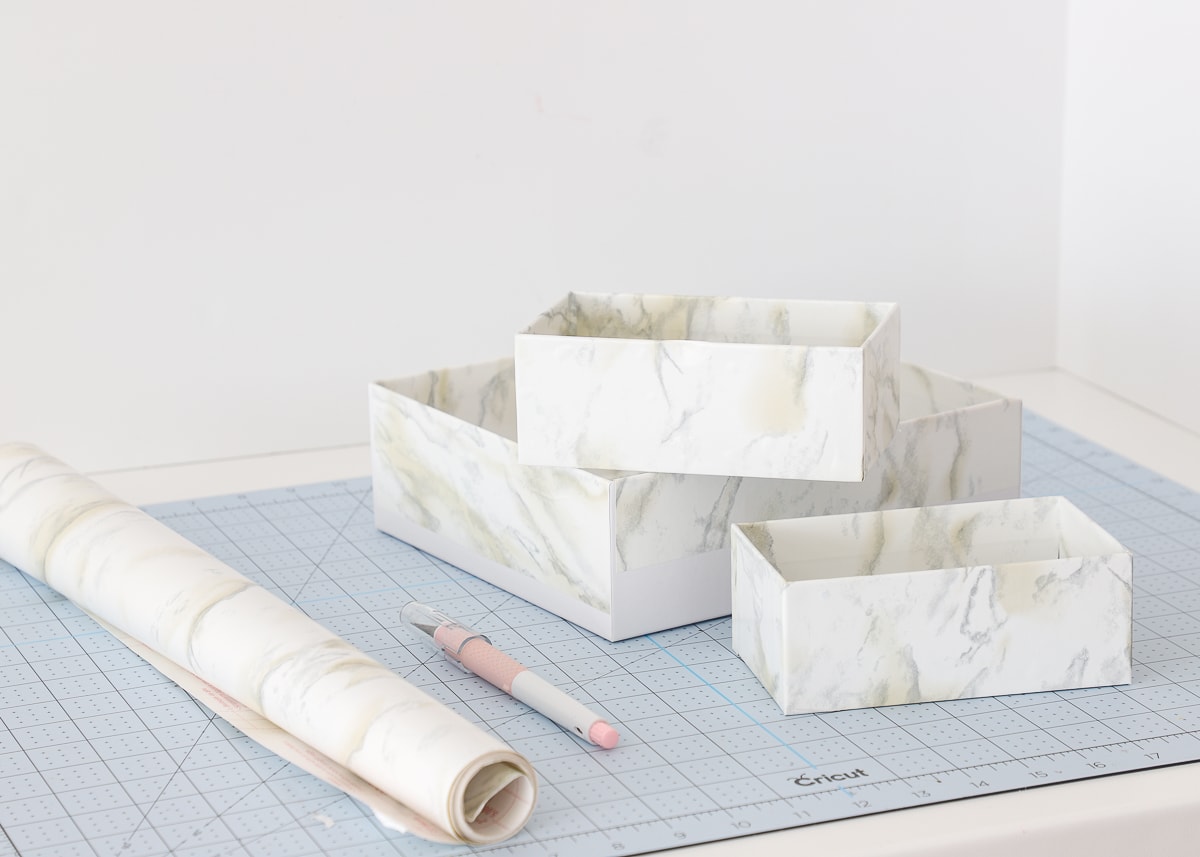
I really wanted to have a complete step-by-step on how to do this for you, but I couldn’t settle on a method I liked. I honestly think each box is wrapped slightly different. In general though, I cut a square large enough to cover the bottom of the box as well as up/over the sides and down into the inside of the box. I then cut another square (close to the dimensions of the box bottom) and placed it in the bottom of the box to cover the edges.
Want to save this post?
Here are a few additional tips to consider:
- Pick a contact paper or shelf liner that is thin and fairly easy to work with since you will be folding it over edges and into creases. I first tried this project with thicker wrapping paper and it was a disaster.
- Pick a contact paper that doesn’t have an obvious pattern. Lining the outsides, as well as the interior sides and bottom was tricky enough, I think I would have gone crazy if I had to match patterns too. A subtle, all over pattern will be much easier to work with!
- While it’s not imperative that you completely cover the outside of the box with paper (since the boxes are up against each other and in a drawer), do paper at least 1″ down the outside to conceal the differences in box heights.
- Contact paper (at least this one) can be very forgiving. While you’re wrapping, you may end up with bad seams, wrinkles or strange cuts. But I promise, once you place them all in the drawer, you won’t really notice! So don’t go too crazy trying to get the perfect wrap.
Finishing Steps
I really wanted to make the boxes appear to fit perfectly in this drawer even though they didn’t. So to camouflage all the gaps, I lined the drawer (including the sides) with the same contact paper. (Sorry for the bad iPhone pic!)
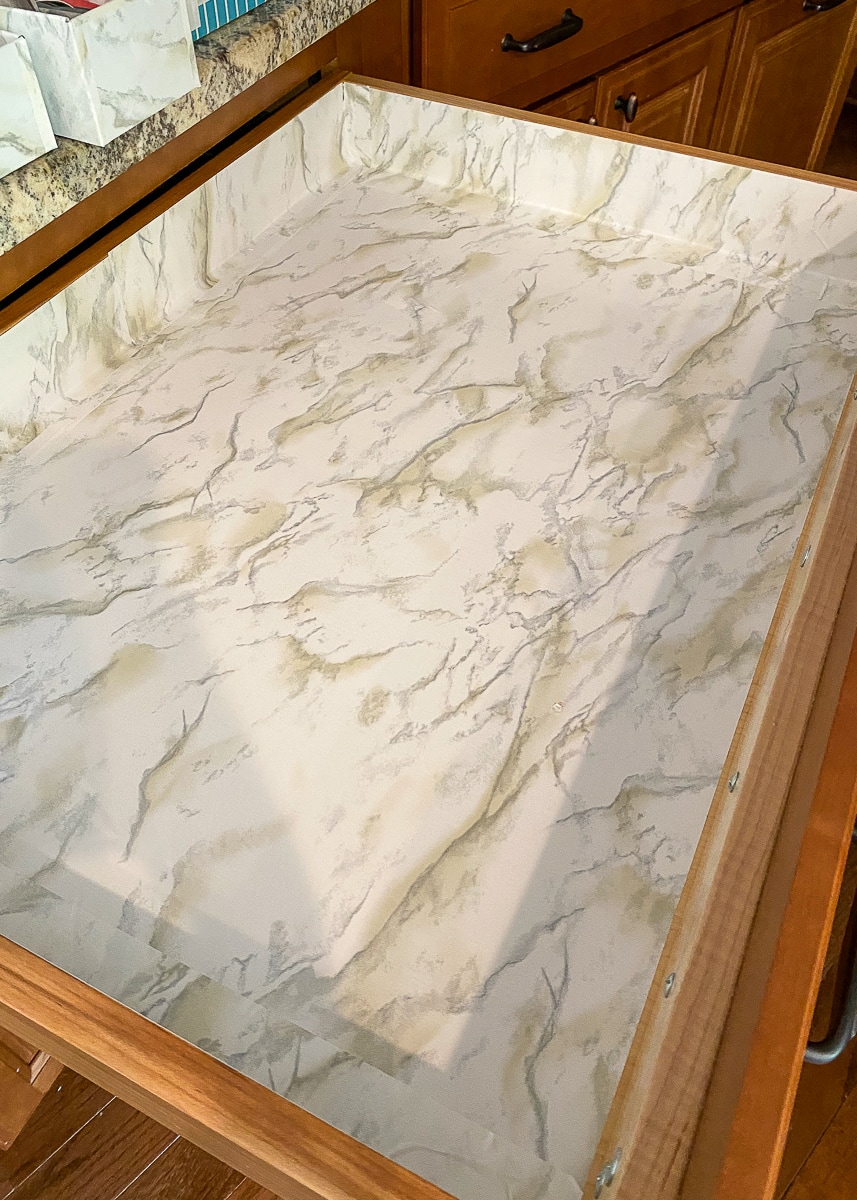
The final step was to place the beautified boxes back into the drawer and load them up. Since my boxes weren’t a tight fit in the drawer, I used some really strong double-stick tape to secure them all to the base of the drawer.
Now, my arrangement holds tight and nothing slides around as we open and close it!
I always think it’s interesting we call this drawer a “Junk Drawer,” because in reality, it’s some of the most used and needed stuff in the house, right?
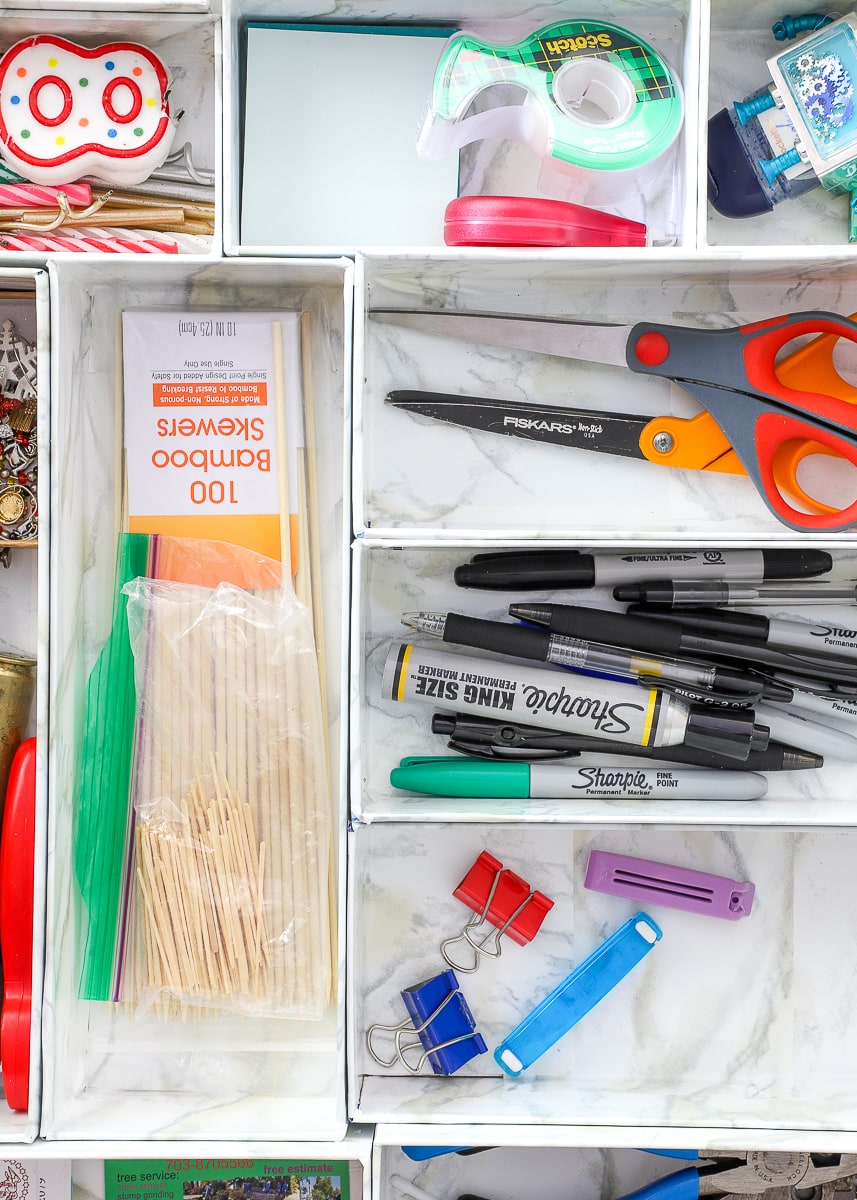
If you’re curious, here is what we keep in our “Junk Drawer”
- Sharpies, pens, and markers
- Scissors
- Bag clips
- Basic tools that we use the most (tape measure, screwdrivers, flashlights, etc)
- Post-It Notes
- Tape
- Birthday candles
- Bottle openers, corks and drink charms
- Daily medications and supplements
- Kabob skewers
- Toothpicks
- Chewing gum
- Hand sanitizer
- Bill pay supplies (checkbook, envelopes, return address labels, stamps and the business cards for the bills we write the most)
TIP! We pay most of our bills online. So when random bills arrived, they often sat and sat and sat since we didn’t have a system for them. Having all the “bill pay supplies” right here, ready to go, has been one of the biggest time/hassle saving strategies we’ve implemented in this house. It’s such a small thing thing, but now we can quickly and easily pay any bill and get it back into the mailbox right away!
This is a really big drawer with awkward dimensions. No standard off-the-shelf organizer would have fit nor made quite as good a use of all the space compared to what I accomplished with our small collection of cardboard boxes! This project has been done for a few weeks, yet I am still so pleasantly surprised when I open it since it looks so pretty and I can find exactly what I’m looking for (without any rummaging!)
More Great Drawer Organization Ideas
- The Easiest Way to Organize Any Drawer In Your Home
- Easy DIY Drawer Dividers (For Any Size Drawer)
- The Best Way to Line Drawers & Shelves with Pretty Papers
- How to Line Drawers with Wallpaper
- How to Put a DIY Charging Station In a Drawer
- How to Make Drawer Organizers with Cardboard Boxes
- Top 10 Tips for Organizing Kitchen Drawers
- 3 Ways to Organize Cords in a Drawer
- How to Organize Pantry Drawers
Although this project wasn’t an entirely free upgrade (I had to buy the $6 roll of contact paper since most of my stuff is very patterned!), it was much cheaper than buying something that might only fit in this house. We also got all those cardboard boxes out of the basement and repurposed them to perfection. As a result, we’re saving a whole bunch of time and hassle day in and day out…so I’d say it was $6 and an afternoon very well spent!
So now my head is spinning with other fun ways to re-purpose those solid retail cardboard boxes! What have you used them for?
Megan
14 Comments on “Make Drawer Organizers with Cardboard Boxes”
Love your drawer organizers! I get a lot of those gift boxes esp from my office. I did this in my kitchen drawers. I used a 3-4 inch high Kleenex box and cut it in half height wise, taped up the halves and filled in the long side of the drawer with both pieces. I also trimmed a gift box for the back of the drawer – that “void” space where the utensil organizer ends.
And I have that same marble-like contact paper!
Ha! Great minds think alike! Using Kleenex boxes is a GREAT idea since you can end up with lots the same size!
Thanks for sharing and hope your week is off to a great start!Megan
I love it! I too hoard the “nice” boxes for projects some day. Maybe I should go reevaluate my stash.
This is a minor thing, but we keep our bag clips in a box in the pantry, right by the bags of chips/pretzels/popcorn. It eliminates the extra step of walking ALL THE WAY across the kitchen to get one so the other members of my household have no excuse not to use one. 🙂
What a great tip, Jenelle! I’ll have to remember that for future use. Right now, our snacks are low. And if my middle son gets a chip clip in his hands he uses it to turn blankets into capes, and then they snap! So we actually have to keep the far away from little hands!
Thanks for chiming in and hope your week is off to a great start!Megan
Love this idea! I did this idea in my camp trailer, and boy did it help a bunch! Did this idea in my kids undie/sock drawer too…Oh how happy organized drawers make me!
Yes!!! Me too! I use another “nice” box to hold all my 3 year old’s bow ties (lol!) and my socks too!
Happy Tuesday!Megan
I also save all my gift boxes (they are so nice, I hate to throw them out!) but I never thought to cover them! We don’t actually have a “junk drawer” in our kitchen, but after looking at all the things you have in yours, I might have to re-purpose a few slots in my utensil drawers to hold some of those things. We keep basic office supplies in a vertical organizer in the cabinet, but I love the idea of laying them flat in a drawer. I’m adding “organize kitchen drawers ” to my weekend to do list!
I recently organized my bathroom drawer and made my own custom divider out of a shoe box and it makes me ridiculously happy every time I open it! Now because everything fits so nicely, I’m sure my favorite brand of something is going to drastically change their container shape! Ha!
I love your quote: “it makes me ridiculously happy every time I open it” – that’s pretty much how I feel when I open our junk drawer now (instead of cringing and holding my breath, lol!)
So glad you’re feeling inspired – can’t wait to hear how your drawers turned out!
Have a great Tuesday!Megan
Yes, your jam is budget friendly drawer dividers and I’ve used almost all of your ideas! Now I’m going to wait for Cricut graphics on the bottom of each box in coordinating gray to identify what goes back where! I joke but the type A eye candy you give us other type As is so inspiring.
Lol! You know me so well 😉 I’m just embarrassed that idea didn’t occur to me before I posted 😉
Hope you’re having a great week!Megan
I love what you did with your junk drawer. Ironically, that is my project for this week so this is perfect timing! I love your organizational tips! Keep them coming.
Hi Megan, Just curious. You mentioned that you papered the drawer to match, which I think is a brilliant idea, but it made me wonder. Does Contact Paper remove cleanly from a drawer? Thanks for all of your great ideas!
Hi Marilyn!
Thanks so much for reaching out on this! It’s kind of a tricky answer. There are some contact papers that peel up super clean, and others that don’t. I also think the drawer’s surface can affect its removability too.
One option is to test a small strip before you do a full drawer (or set of drawers). On the other hand, I’ve had great luck removing any sticky residue with Windex. It can be a pain for sure, but I’ve only had to do it a few times.
Does that help at all?
Megan
I am going to my local dollar tree to get some plastic bins to make things easier for my bedroom.