How to use Ready-to-Make Projects in Cricut Design Space
This is a sponsored conversation written by me on behalf of Cricut. The opinions and text are all mine.
Of all the Cricut-related questions and concerns I get from readers, most of them revolve around being overwhelmed or intimidated by their machine, the Design Space software, or even all the possibilities before them. While Cricut machines and the accompanying design software are truly powerful tools to all-level crafters, there can be a steep learning curve to be able to use them quickly and effortlessly…so I certainly understand that initial overwhelm. Fortunately, Cricut has made it incredibly easy to get creating amazing projects right away, even if you don’t know the first thing about opening…much less using…Cricut Design Space. Yep! There are hundreds of Ready-to-Make Projects in Cricut Design Space Library and available to you right now, ranging from shirts and signs to sewing projects, cards, decor and so much more. These projects are not only super simple to make (because all the fancy desinging is done for you!), but they are also an excellent way to build your confidence as you learn your way around your Cricut. Today, I want to show you how to use Ready-to-Make projects in Cricut Design Space and give you a peek at my very own Spring t-shirt designs now available and ready for making!
What Are Ready-to-Make Projects and Where Do I Find Them?
Ready-to-Make Projects are exactly what they sound like: projects that are already designed and ready to be cut without requiring any modification. You don’t need to know anything about the various tools and techniques in Cricut Design Space in order to use these designs…you can literally just pick one you like, open it up, and send it to your machine to cut. (You can also edit these projects as you would your own designs, and I’ll show you how to do that here in a minute.) Once assembled, you’ll have a professional-looking project complete in mere minutes!
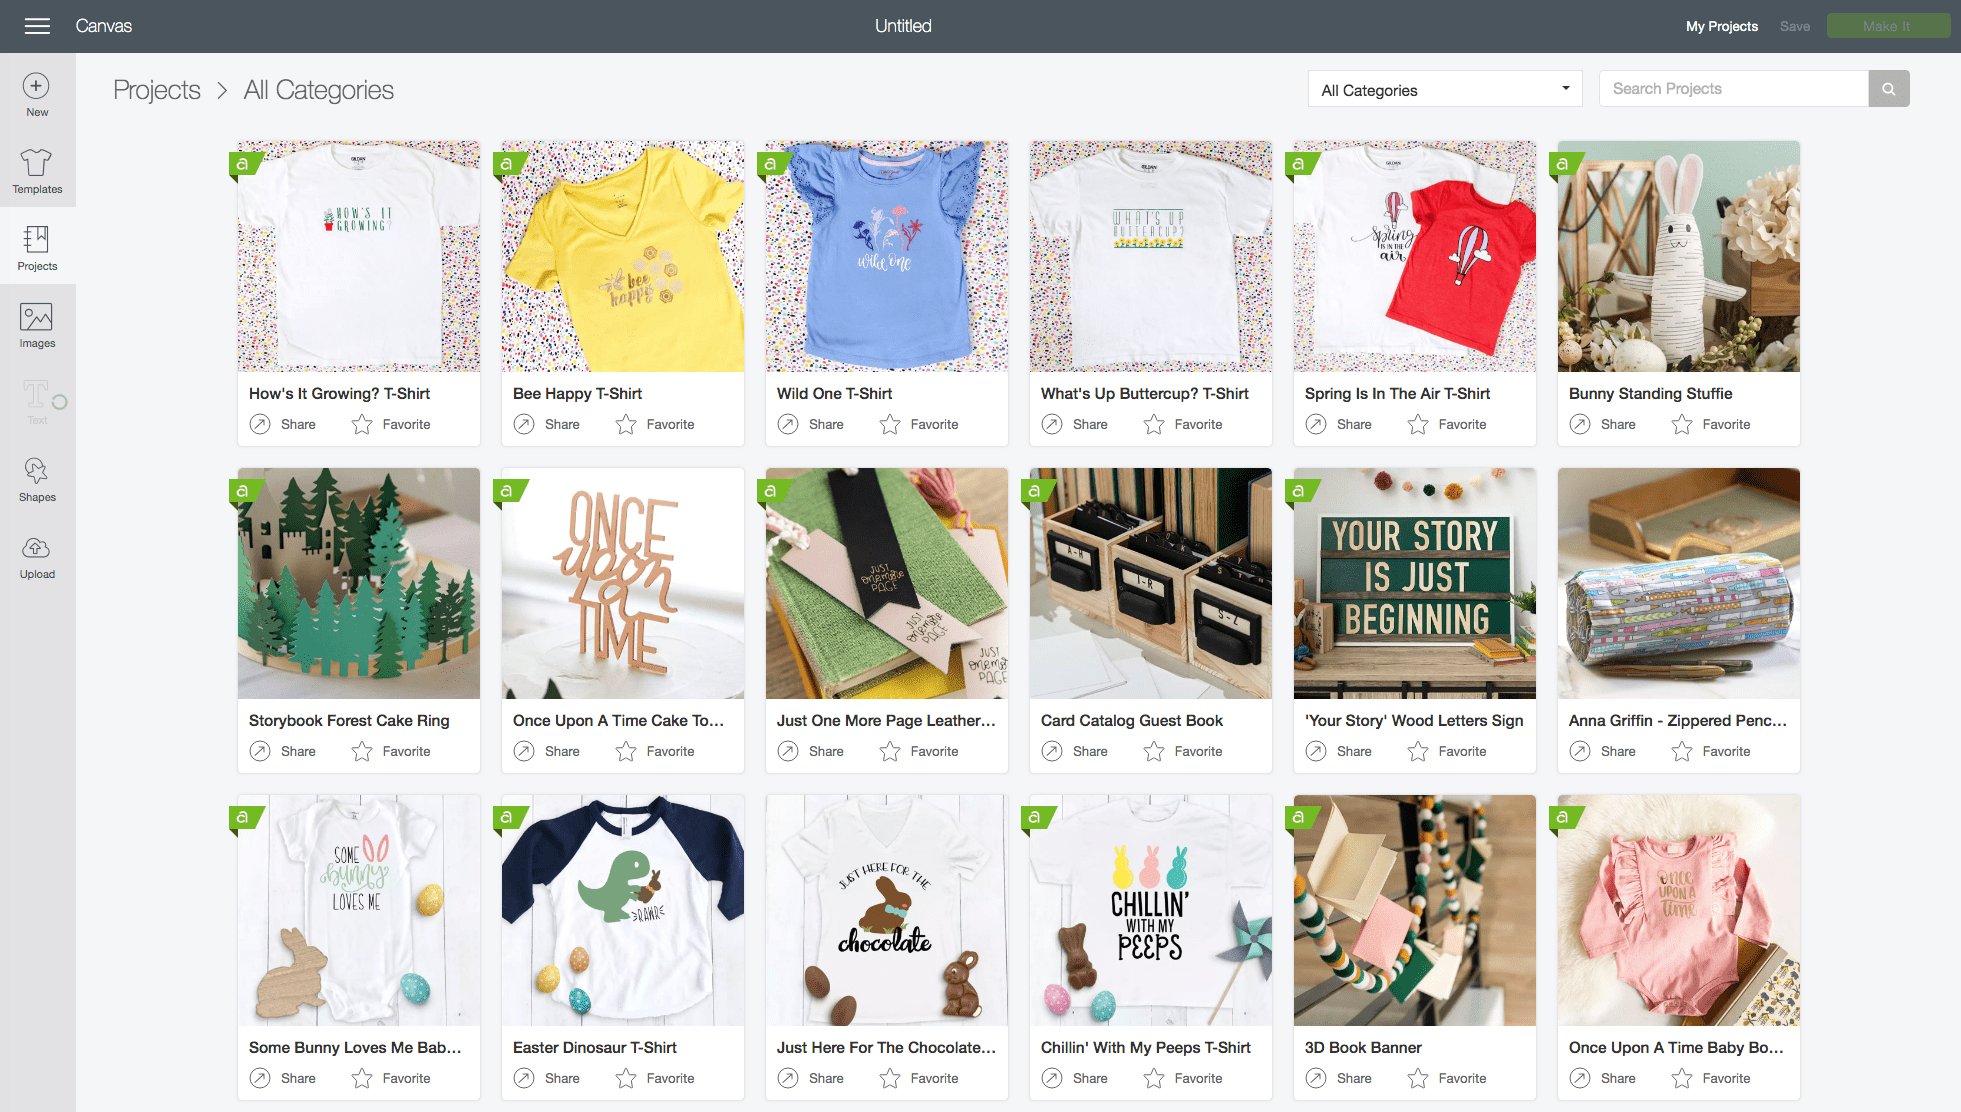
When you first open Cricut Design Space, you will automatically see a menu of Ready-to-Make projects along the bottom of your screen. You can also access the vast collection of projects, at any time, by clicking the “Projects” button along the left side toolbar.
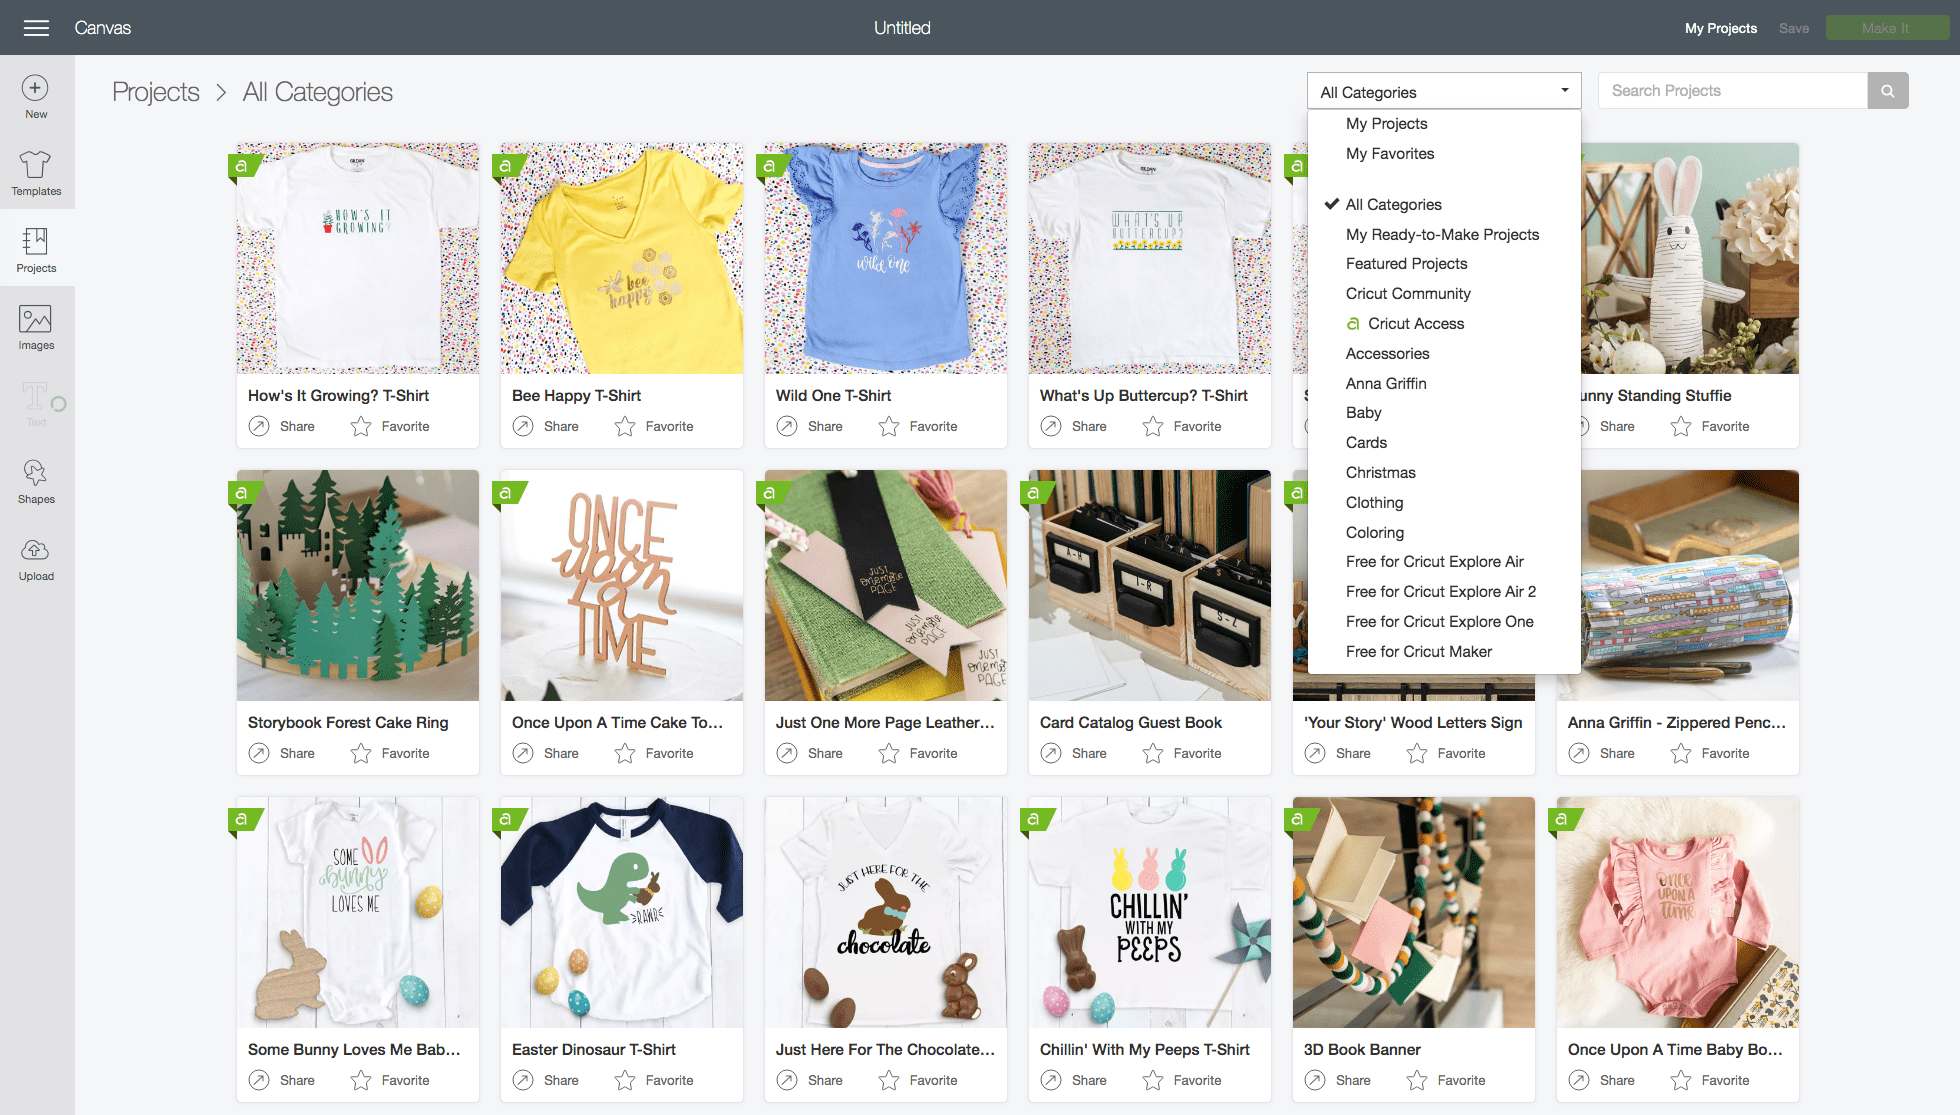
You can also narrow your search or browse by category using the Ready-to-Make Projects menu along the top toolbar. There are countless designs available, and I will often peruse through the categories to get my creative juices flowing or simply glean some ideas for my own projects! As long as you’re signed in, you can favorite any design you like so you can quickly and easily find it later by clicking “My Ready-to-Make Projects” in the dropdown menu.
Seasonal T-Shirt Designs in Cricut Design Space
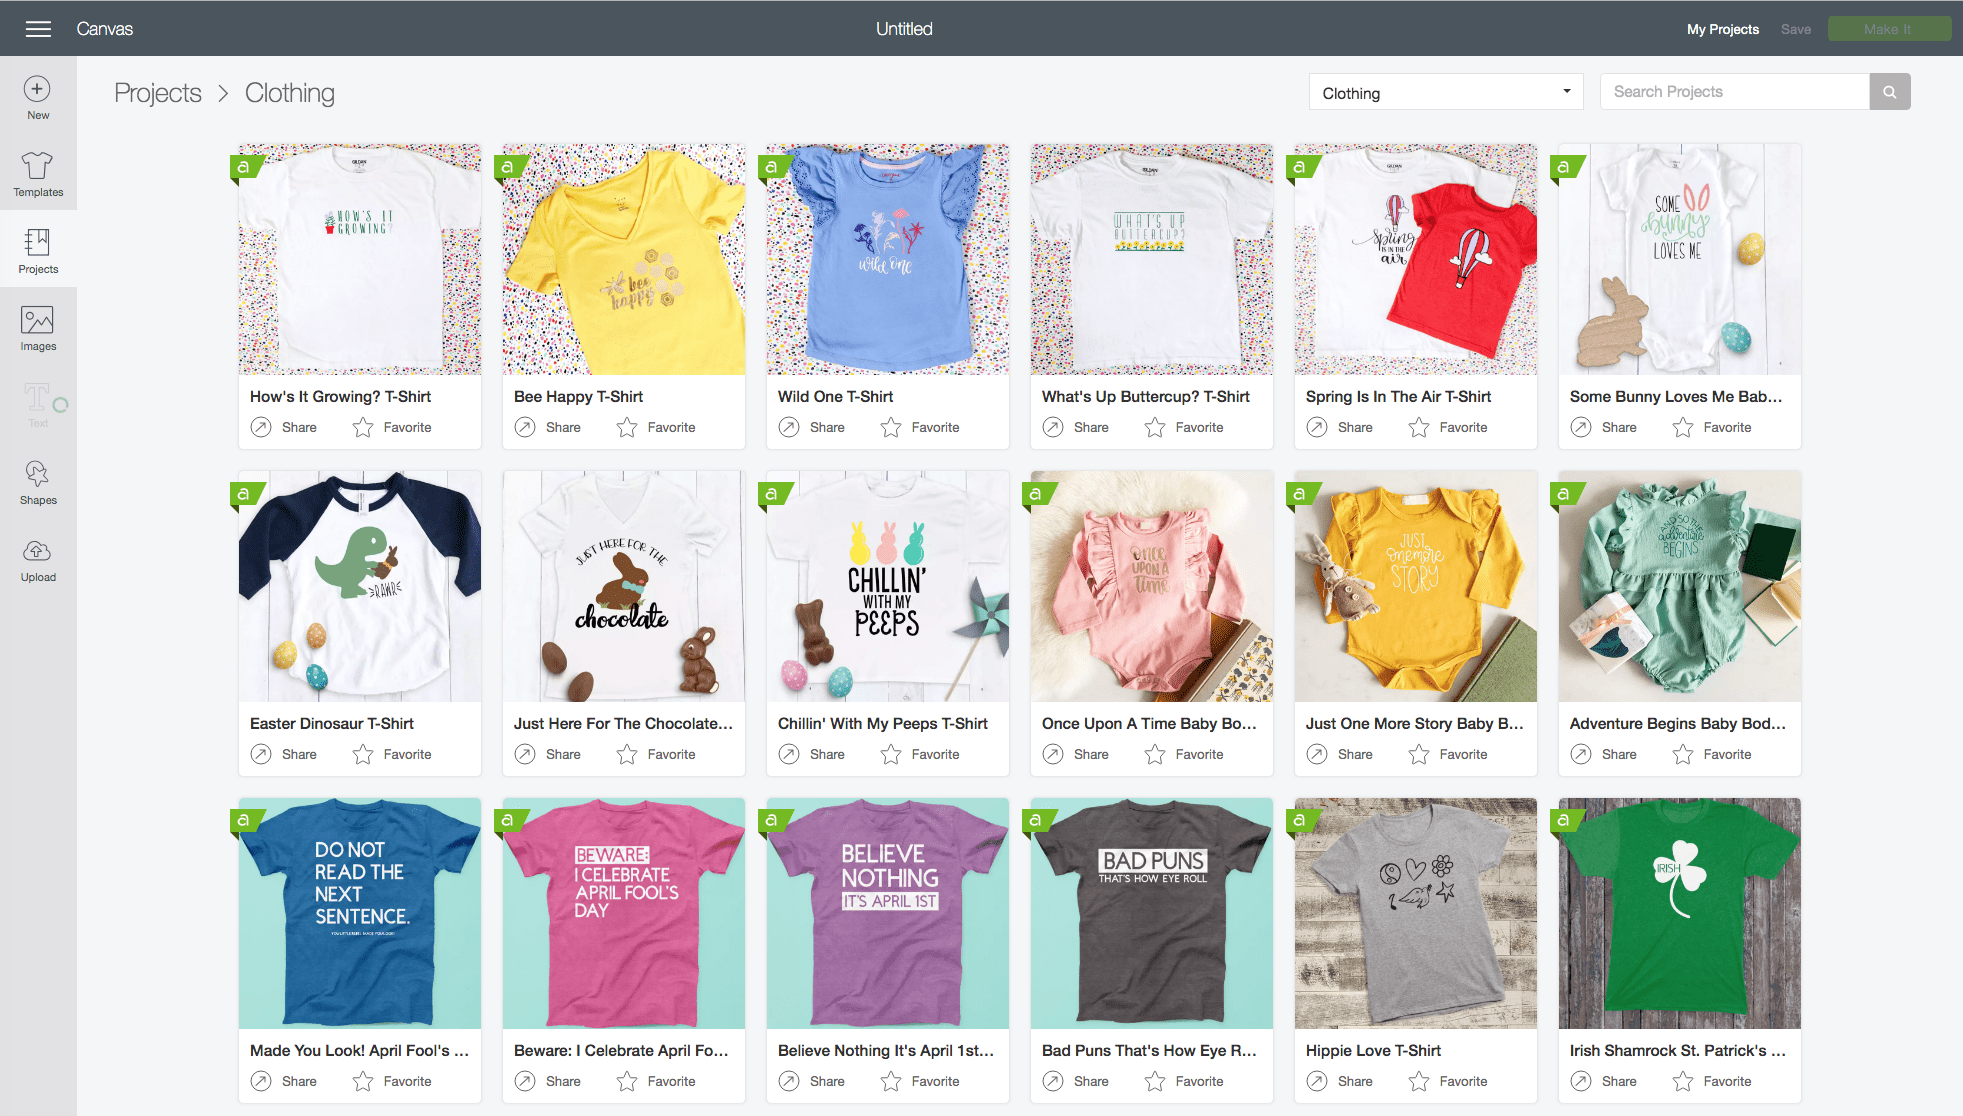
One of the most popular things crafters do with their Cricut machines is to make customized t-shirts, onesies and other apparel, so it probably won’t shock you to learn that the Ready-to-Make project library contains countless pre-made clothing designs. From sassy sayings to seasonal iconography, new designs are uploaded to the library each and every week!
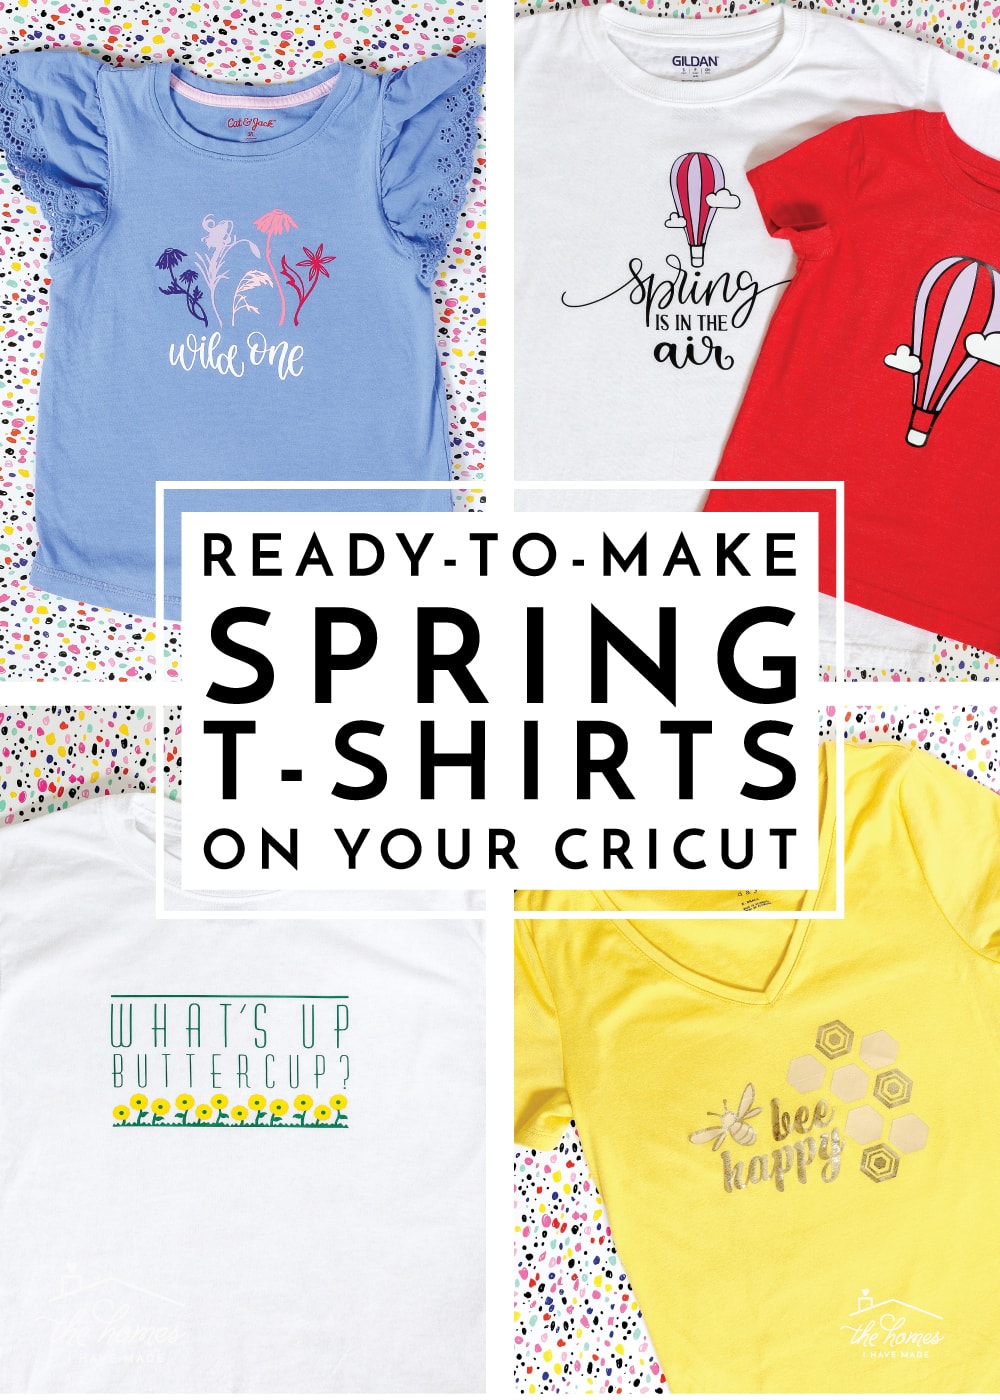
You better bet I was beyond excited when Cricut asked me to design some Spring-themed t-shirts to be added to the Ready-to-Make Project library this month! I love, love, love playing with all the designs and fonts within the Design Space library, and had a ball coming up with 5 fresh designs ready for you to cut and make into your own Spring wardrobe!
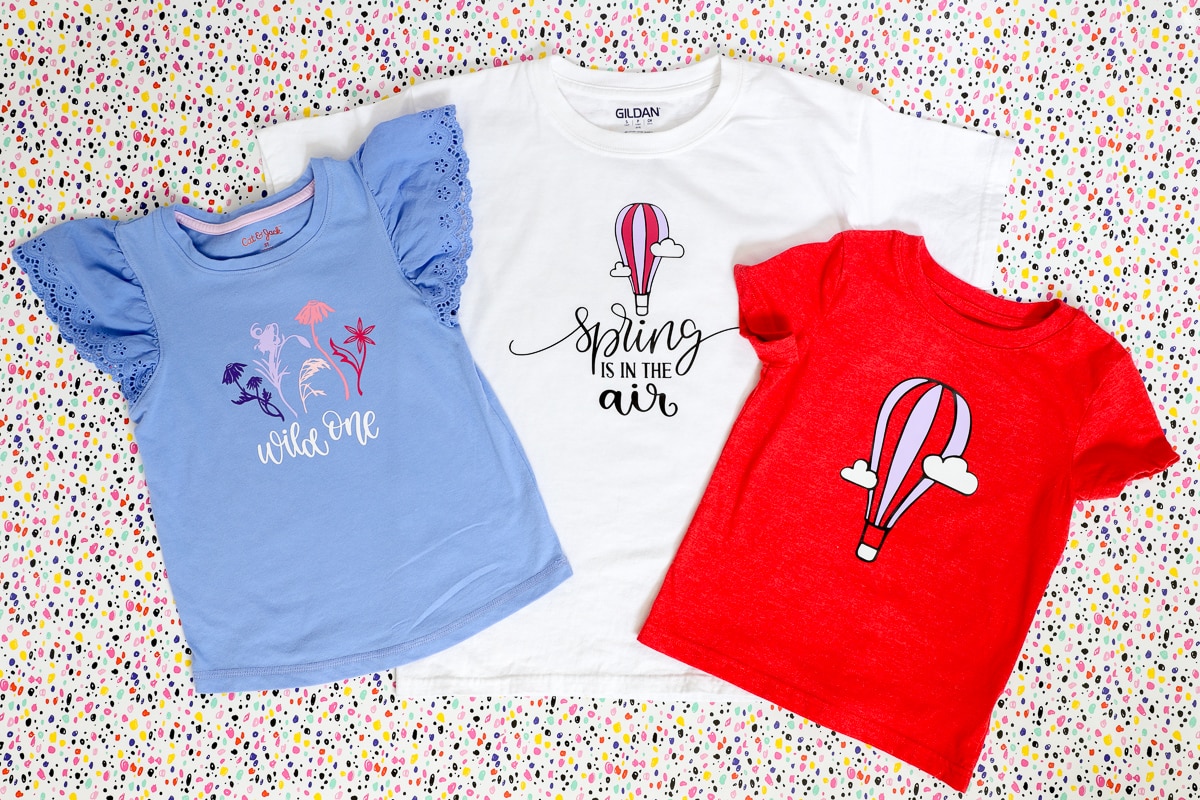
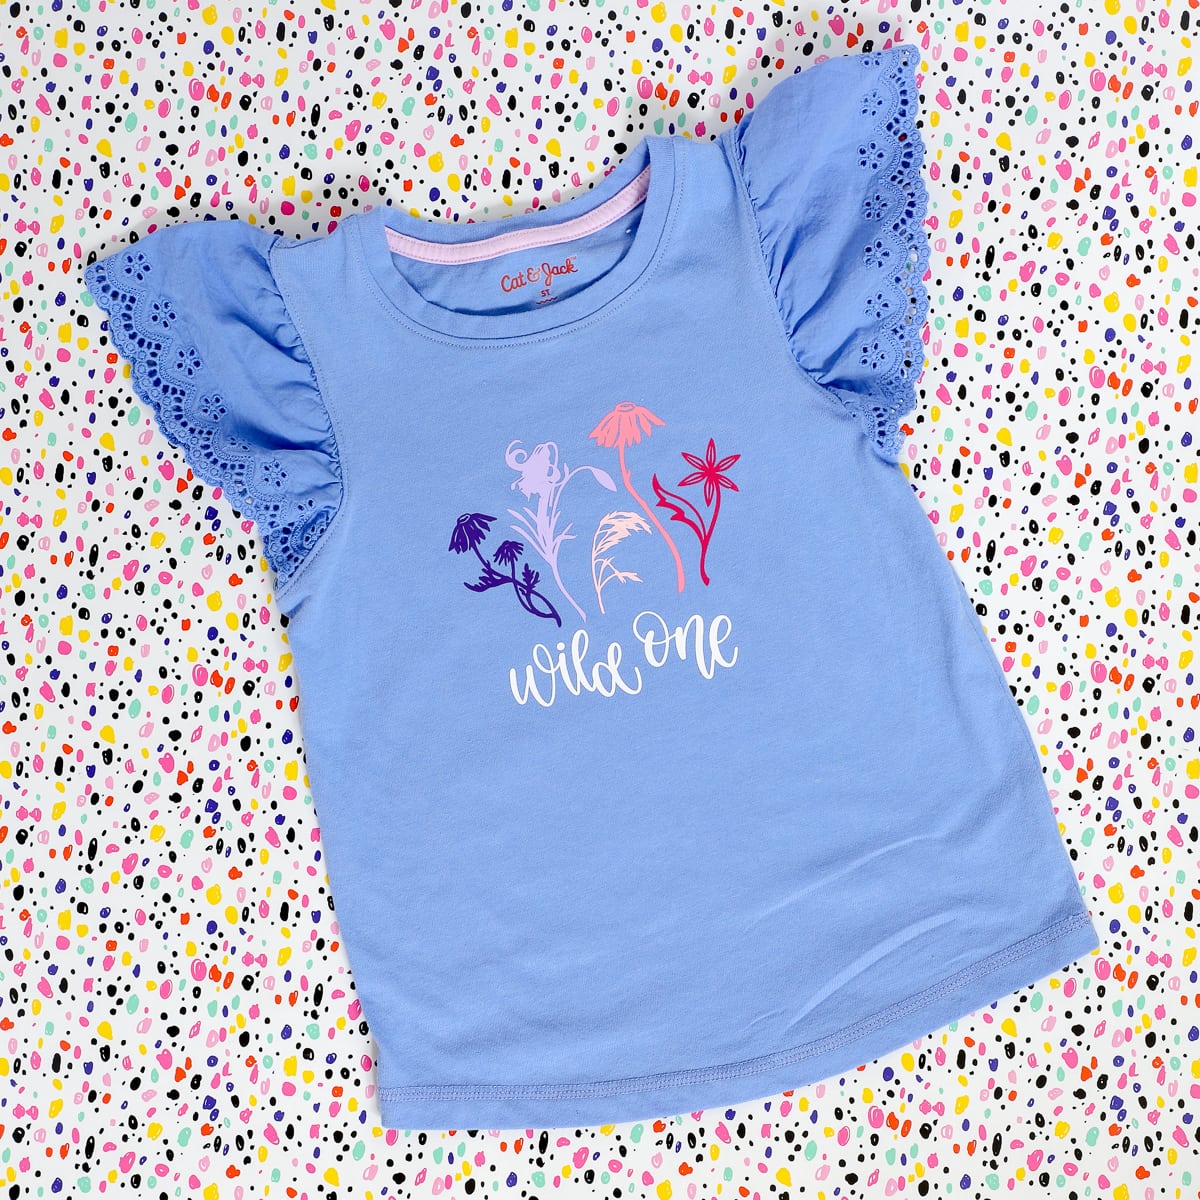
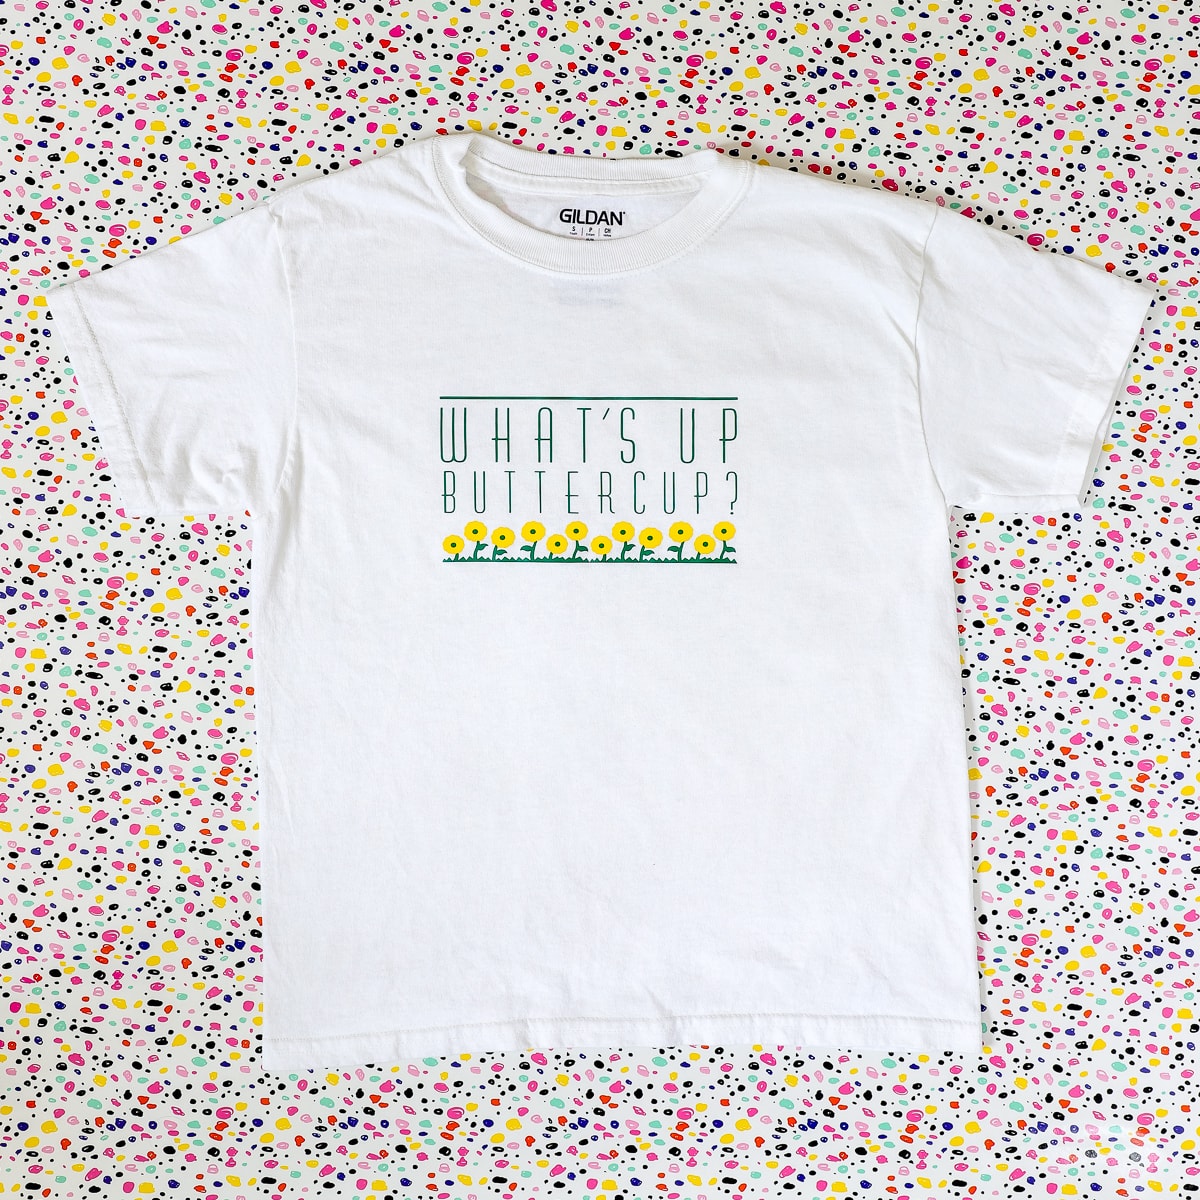
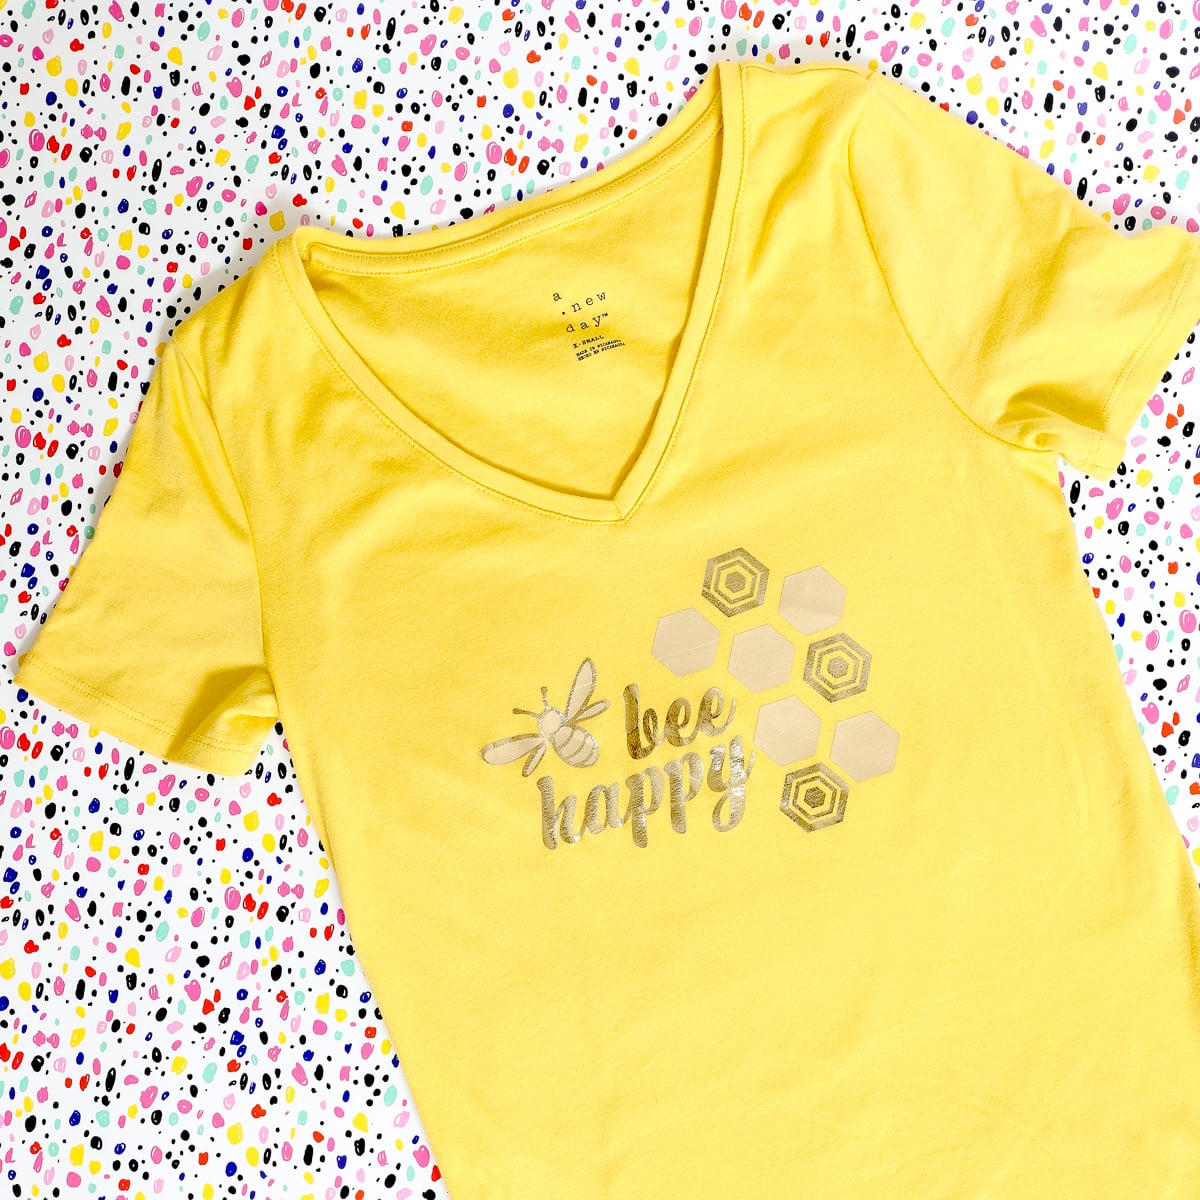
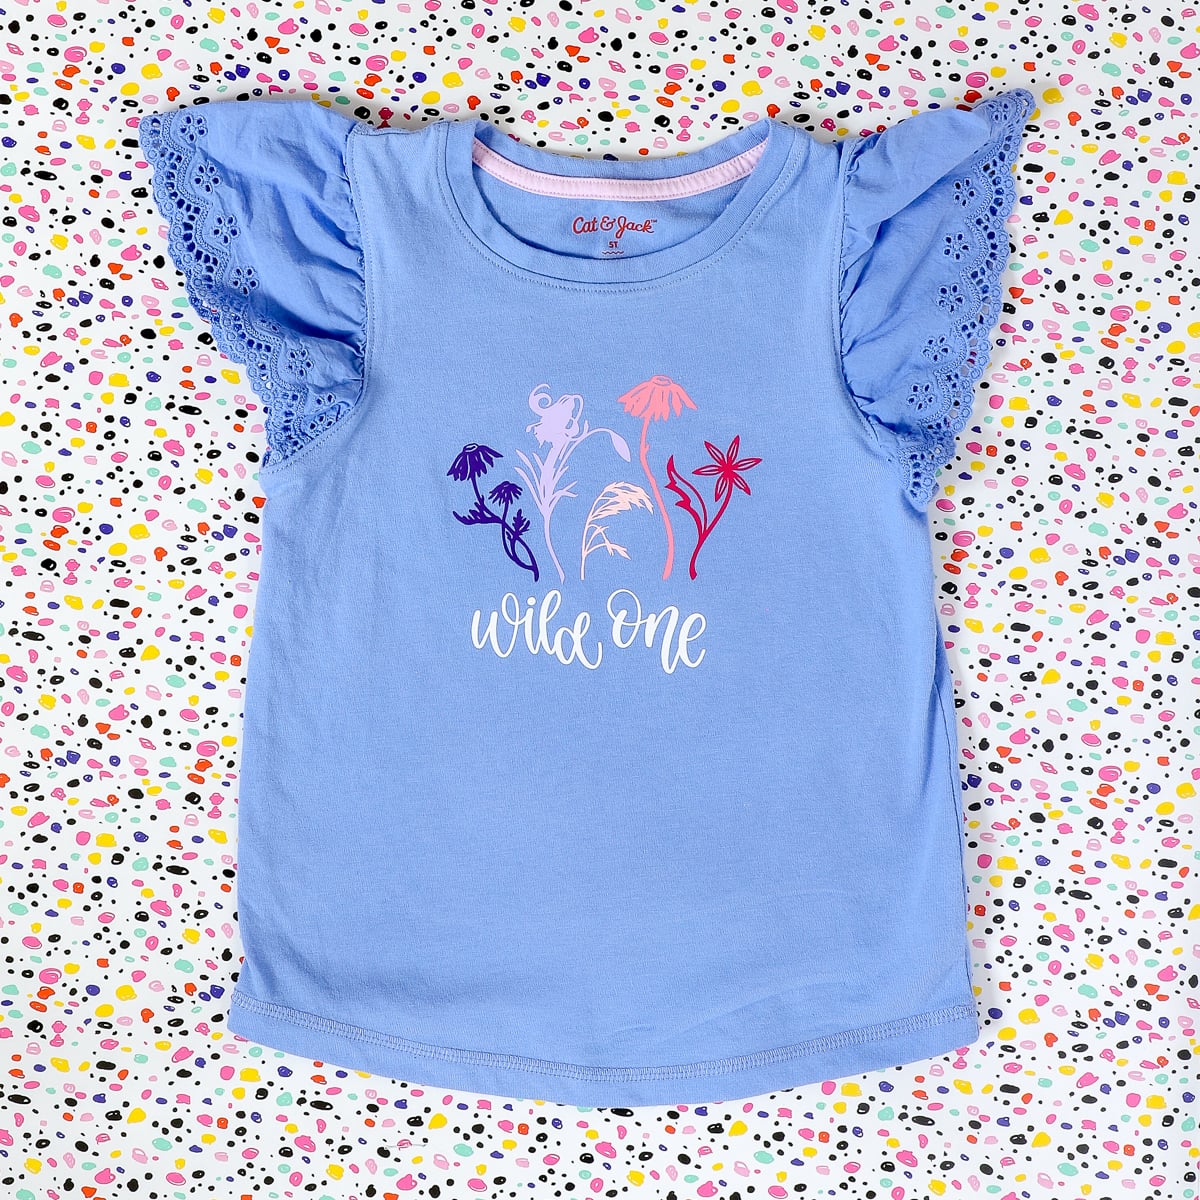
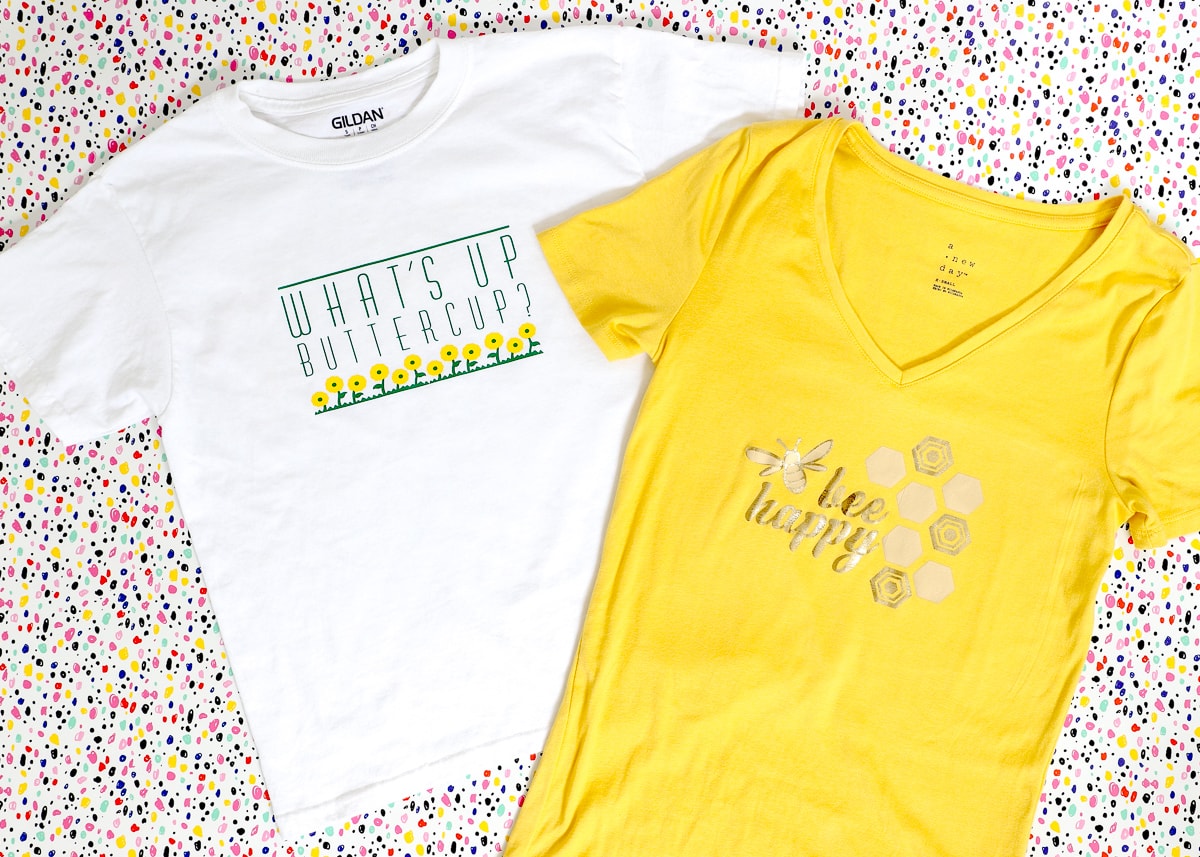
The theme for these shirts is “Spring is In the Air,” and each of the 5 designs feature bright colors, happy phrases, and Spring-themed images. They are the perfect way to dress up plain tees and onesies to help usher in the warmer weather and longer days! That Wild One shirt is by far my favorite, and I really wish I had made it in my own size!


Want to save this post?
Spring Is In the Air | Wild One | What’s Up Buttercup? | How’s It Growing? | Bee Happy
How to Use Ready-to-Make Projects in Cricut Design Space
As I said, one of the best things about the Ready-to-Make projects is that they couldn’t be easier and are ideal if you just want to see how a project comes together from start-to-finish. That said, you can customize any Ready-to-Make project, just as you would any design you create, to meet your personal style and preferences. Let me show you how to open, customize, and cut the Wild One t-shirt design!
Once you locate a Ready-to-Make project you want to try in the Design Space library, click on the picture. A pop-up window will open, which details all sorts of useful information. Not only does it list out all the supplies required to make the project exactly as shown, but it also provides step-by-step instructions that you can print out and keep by your side.
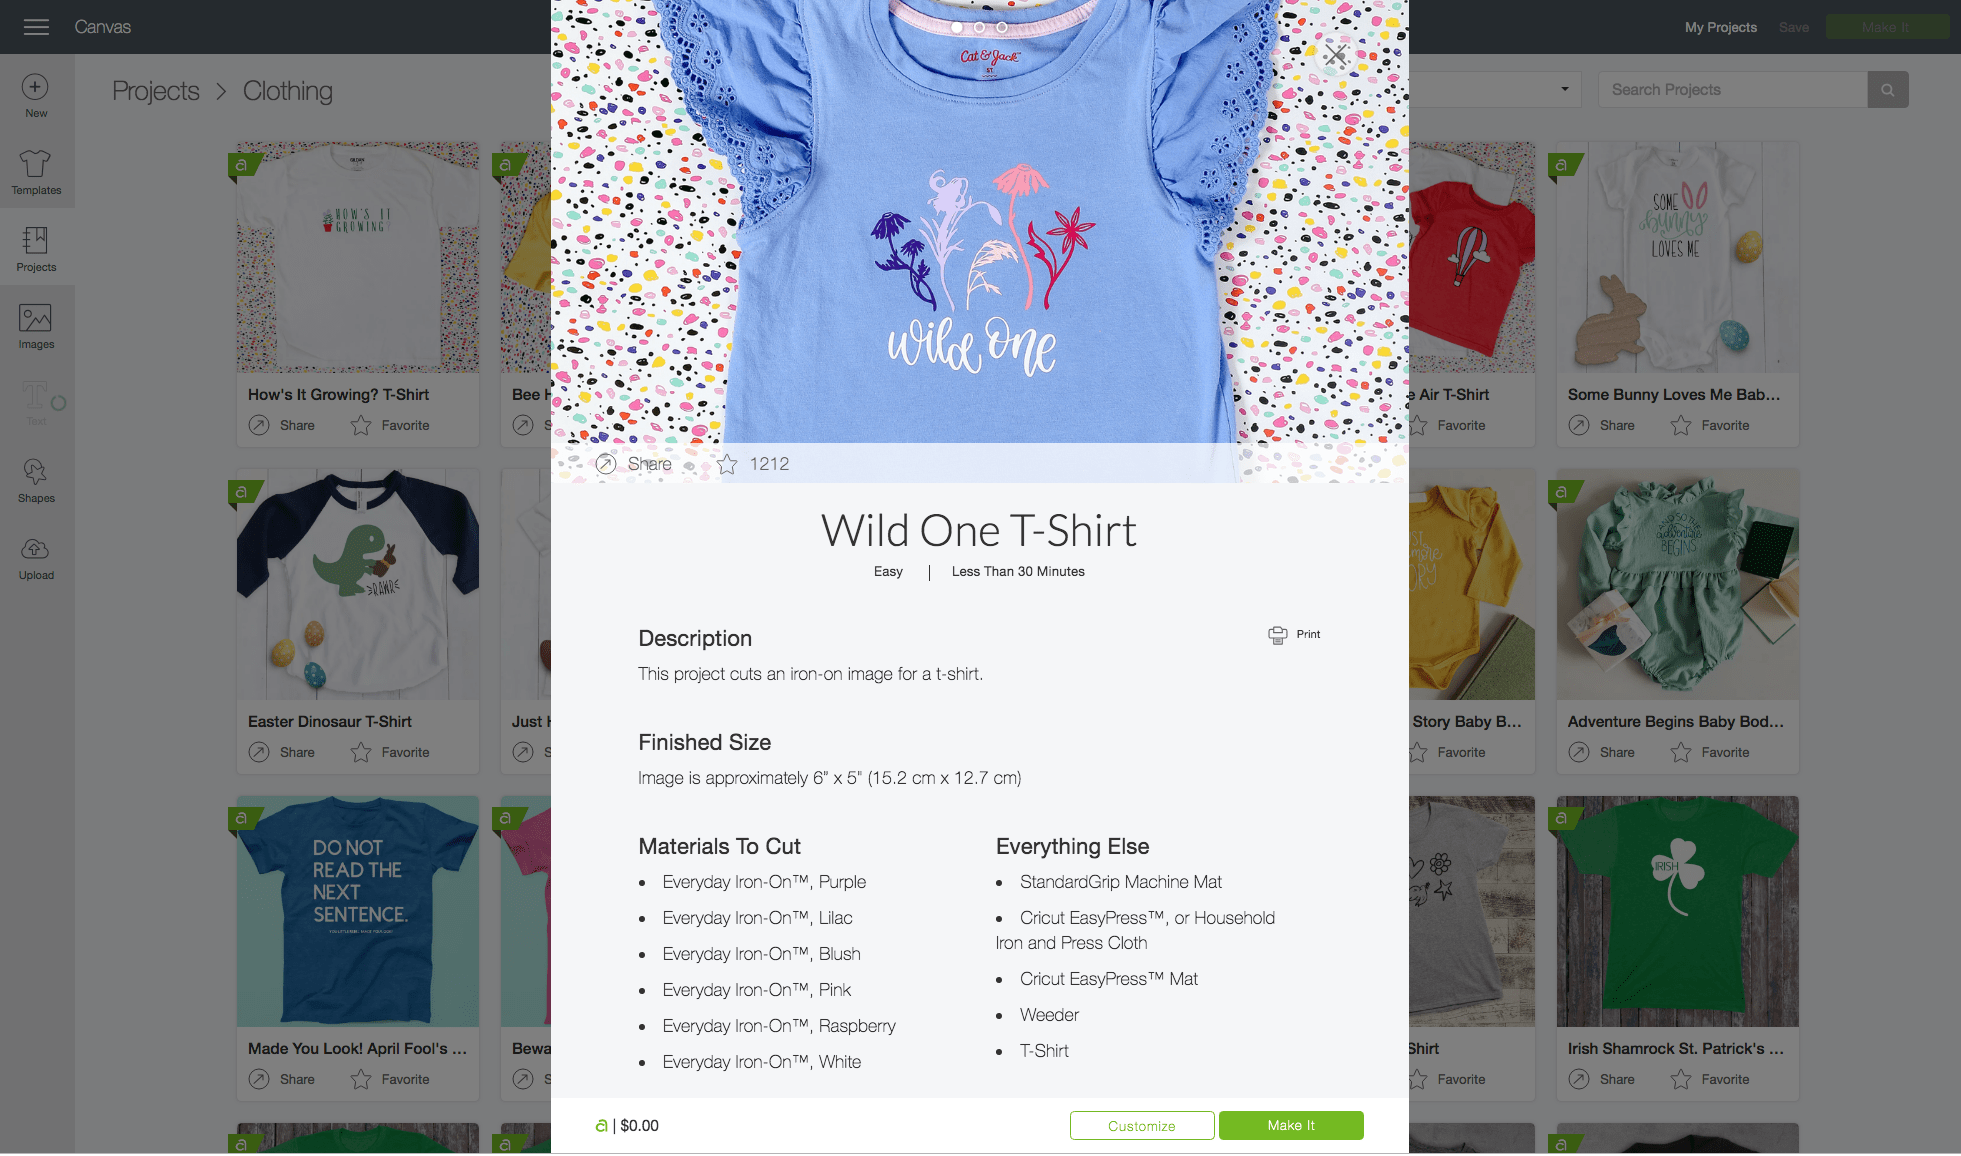
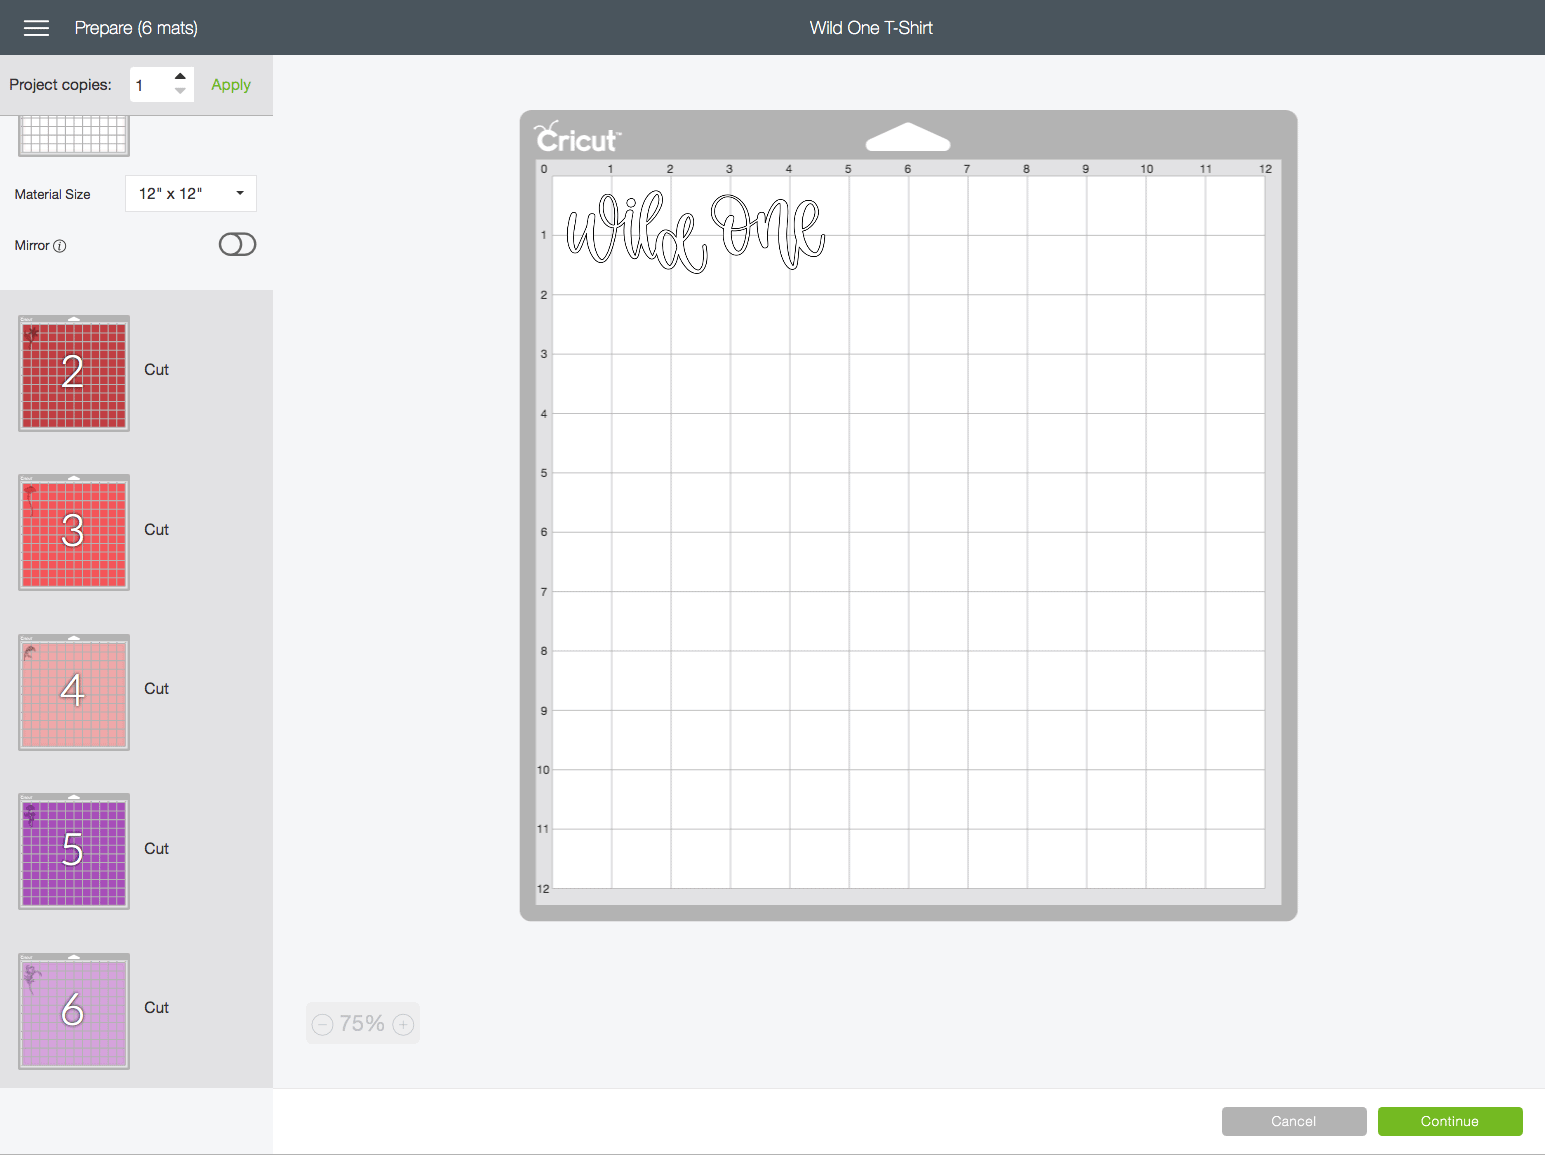
Notice there are two buttons along the the bottom of that pop-open window: a “Customize” button and the green “Make It” button. If you select the “Make It” button, you will be automatically forwarded to the cut screen in Design Space. All of the elements of the design will be sized and colored exactly as shown in the included picture, and all you have to do is hit the green “Continue” button in order to start cutting the design. It is important to note that at this stage (once on the cut screen), you cannot edit the size, color or any other detail of the design. So this option should only be used when you want to create the Ready-to-Make design exactly as shown (including finished dimensions).
TIP! Remember, if you are working with iron-on materials, you need to click the Mirror button on each cut mat; that won’t automatically be done for you! For more help working with iron-on, see my full tutorial here!
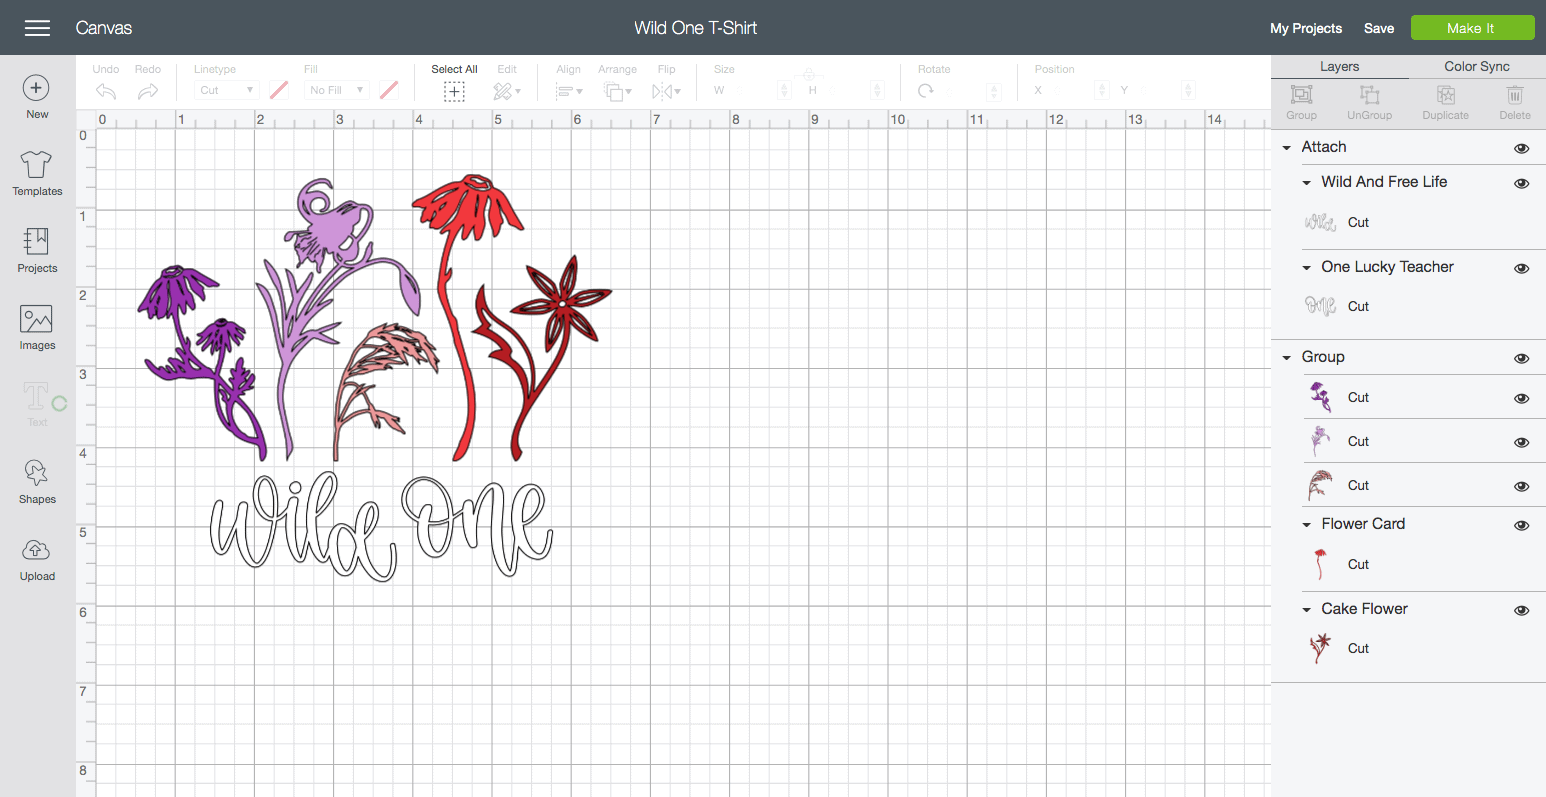
However, if you select the “Customize” button, the pre-made design will be loaded onto a Design Space canvas. Once here, you can edit any part of the design, just as you would your own projects. You can change the size, delete out elements, move details around, or even swap out phrases and imagery as desired! In this way, these pre-made designs can become great jumping off points for your own unique creations! Once you are satisfied with your edits/customizations, hit the green “Make It” button to send the design to be cut.
Each Ready-to-Make project includes instructions for cutting and assembling that specific project. If you need help cutting specific materials on your Cricut to use with the Ready-to-Make projects, check out these other tutorials:
If you are new to using your Cricut, I can’t recommend checking out the Ready-to-Make projects enough! Not only are they quick and easy to use, but you’ll end up with amazing-looking projects that are sure to boost your crafting confidence! And…if you’re looking for some fun new shirts to ring in the Spring season, be sure to check out my Spring Is In the Air collection here!
Happy crafting, friends!
READY TO CREATE MORE WITH YOUR CRICUT?
Explore these other helpful resources by clicking below!


Megan
8 Comments on “How to use Ready-to-Make Projects in Cricut Design Space”
I love this! I’m brand new to Cricut and have a cricut joy. It’s still in the box after reviewing it months ago! Definitely thinking about trying out the pre-made designs.
How do you edit text from a ready made design?
Hi there!
How the text is added to the project can be different. Sometimes it’s text (which CAN be changed); other times, the text is actually an image from the design library (which can’t be changed). If you let me know what project you’re trying to edit, I’ll take a look and let you know if it can be changed!
Thanks!Megan
The Art Deco foil wedding invitation.
Is it not possible for any of the text to be edited with different names?
Thank you!!
I have a cricut make and am making a pre-made to be done before. The problem is now when I click customize it just says project not available project saved as private ? The cricut project name is : Baby Age Tracking Bodysuits it’s really cute !
Hi Teresa!
Thanks for writing. I just tried to open the post you mentioned and got the same error. I’m not entirely sure why, but if you scroll down to the bottom of the project window (before you click Customize), you can see all the graphics used in that project. You can likely find them in the DS library and still make the same onesies!
Hope that helps a bit!Megan
Thsnk you so very much for making this information available to all of us. I have a older cricut that uses cartridges. For Christmas my husband got me a cricut maker! You have helped me alot to be comfortable with my new machine. Do you have any suggestions on where I can get a cricut cartridge adapter so I can access the cartridges. Ant other suggestions would be great. Th3snk you
Hi
I am trying to do a ready made project for pop up money boxes it give me materials but no way to fold the pop up box I see no instructions for how to put the box together such as where to fold snd how to place rubber band am I missing something