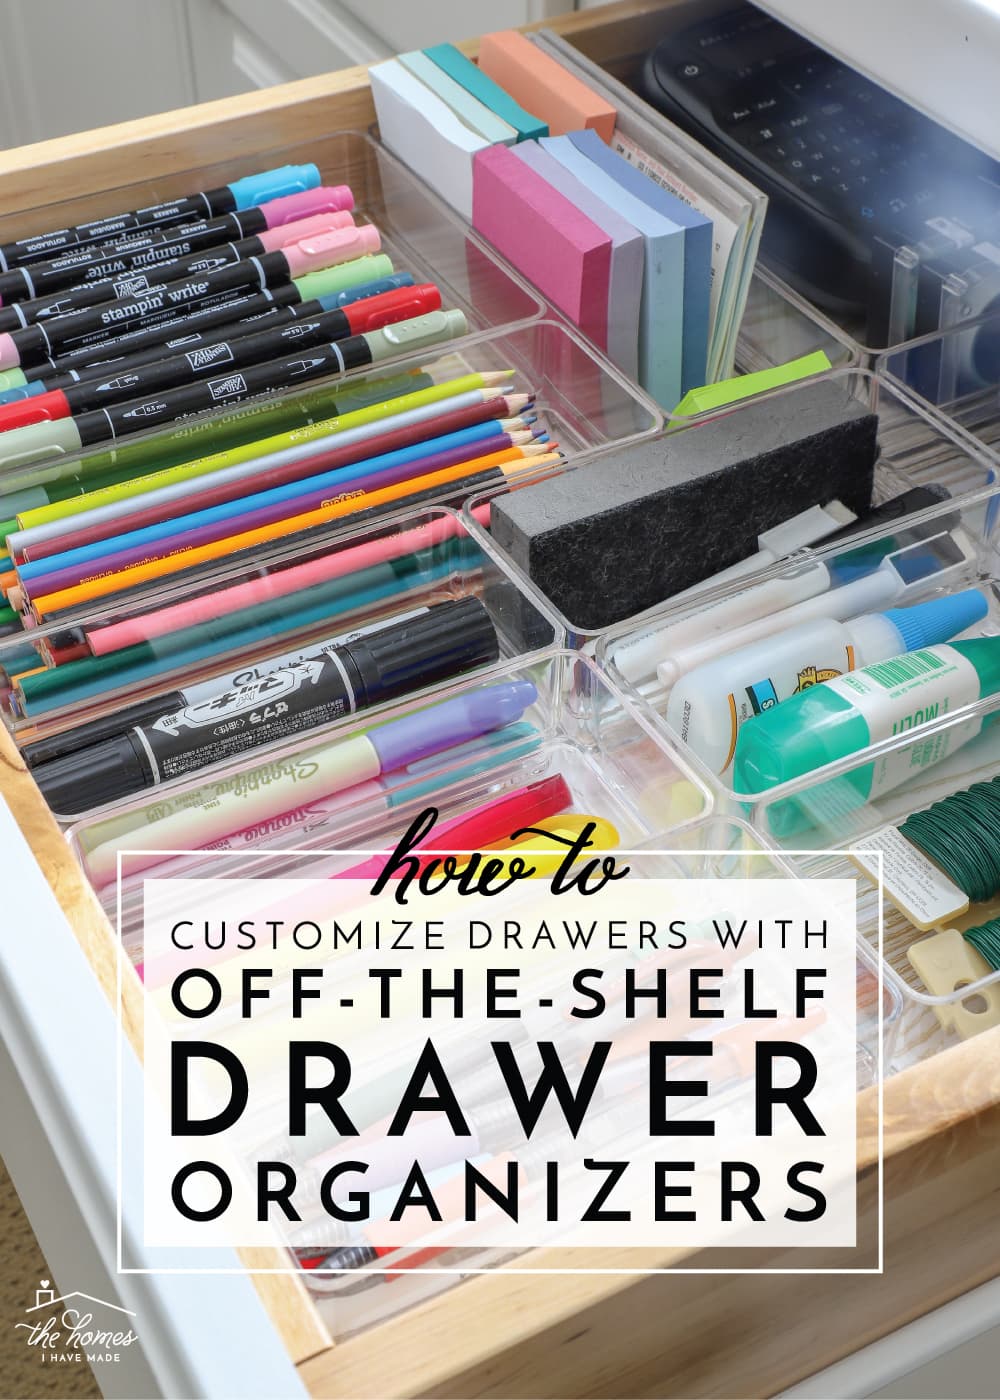
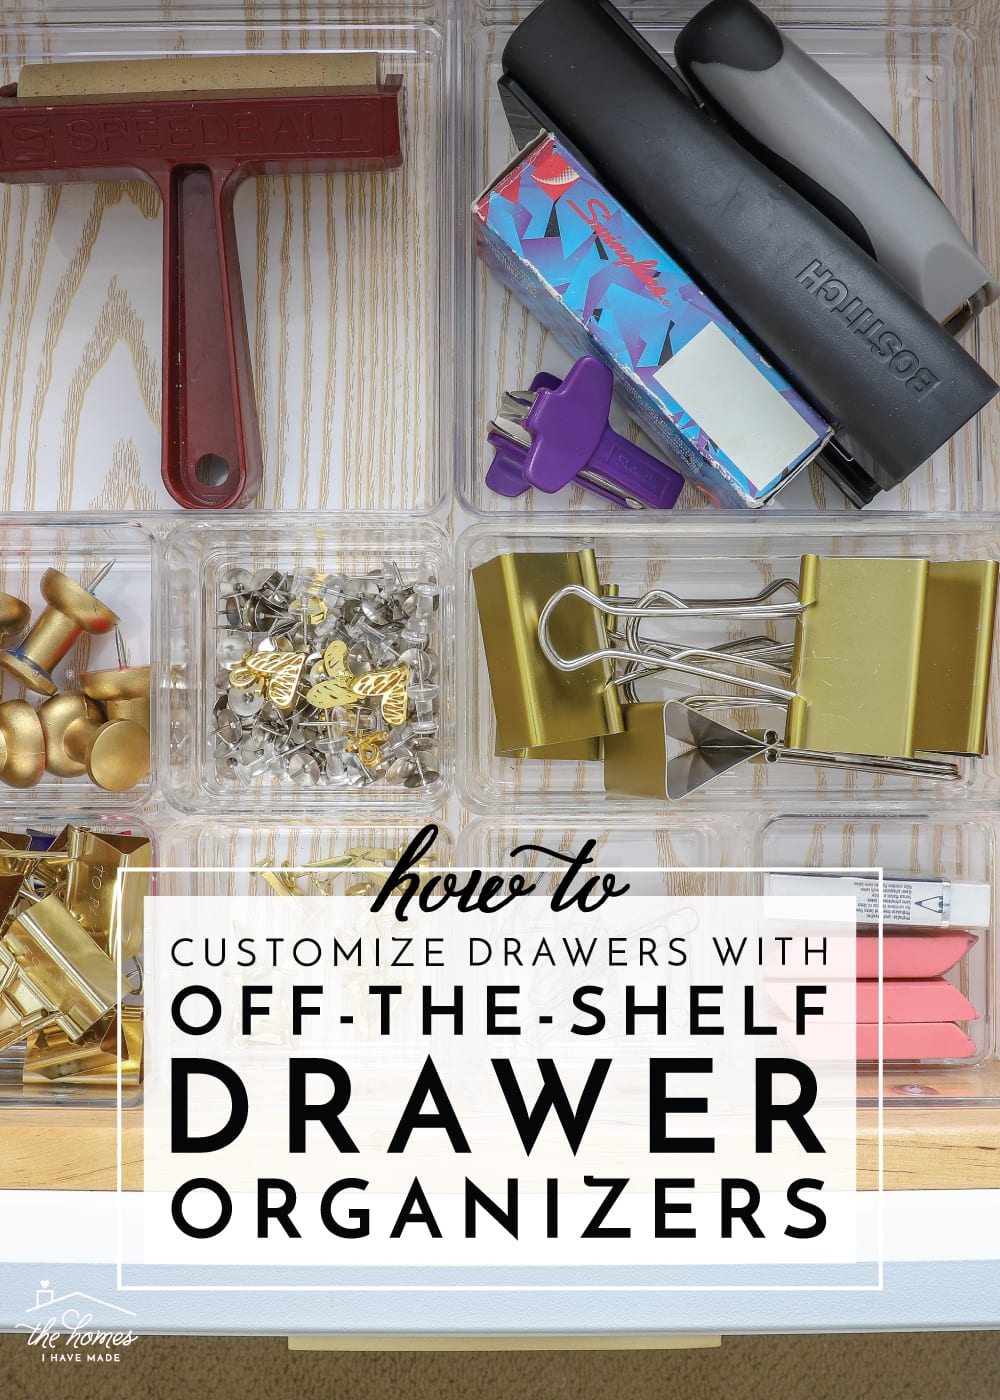
How to Customize Drawers with Off-the-Shelf Drawer Organizers
One project that has been nagging at me, pretty much since we moved in, were the 5 drawers in my office/craft room. Not only were they a mess and generally unattractive; but since I interacted with them day-in and day-out, I became acutely aware of how much better they could look and function with some more streamlined organization. I had a plan for DIYing some perfectly-fitting drawer organizers for these drawers; but for some reason, I couldn’t get myself to make them. Then I stumbled upon a super versatile set of clear, acrylic, modular, and reasonably-priced drawer organizers and a plan, quite literally, snapped into place! Today I want to show you how I created some fully customized drawer organization using off-the-shelf drawer organizers…and show you lots of pretty drawers along the way!
In my office/craft room, I am quite fortunate to have an expanse of 5 base cabinets along an entire wall. Not only does the countertop serve as my desk and primary work surface, but the cabinets and drawers beneath hold a large majority of my supplies.

The Problem
Although they appear built in, these cabinets actually belong to us. We’ve had them since our NC home and have moved them three times. While their configuration has changed with each move, they have always held craft and office supplies. Yet beyond papering the drawers themselves, I never really came up with a “permanent” organization solution for the drawers. In fact, when we moved into this house, I haphazardly threw in a bunch of mis-matched drawer organizers I had on-hand just so I could put supplies away…
…and unfortunately, they stayed that way for the past few years.
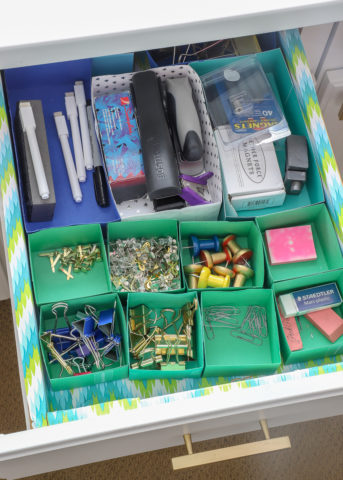
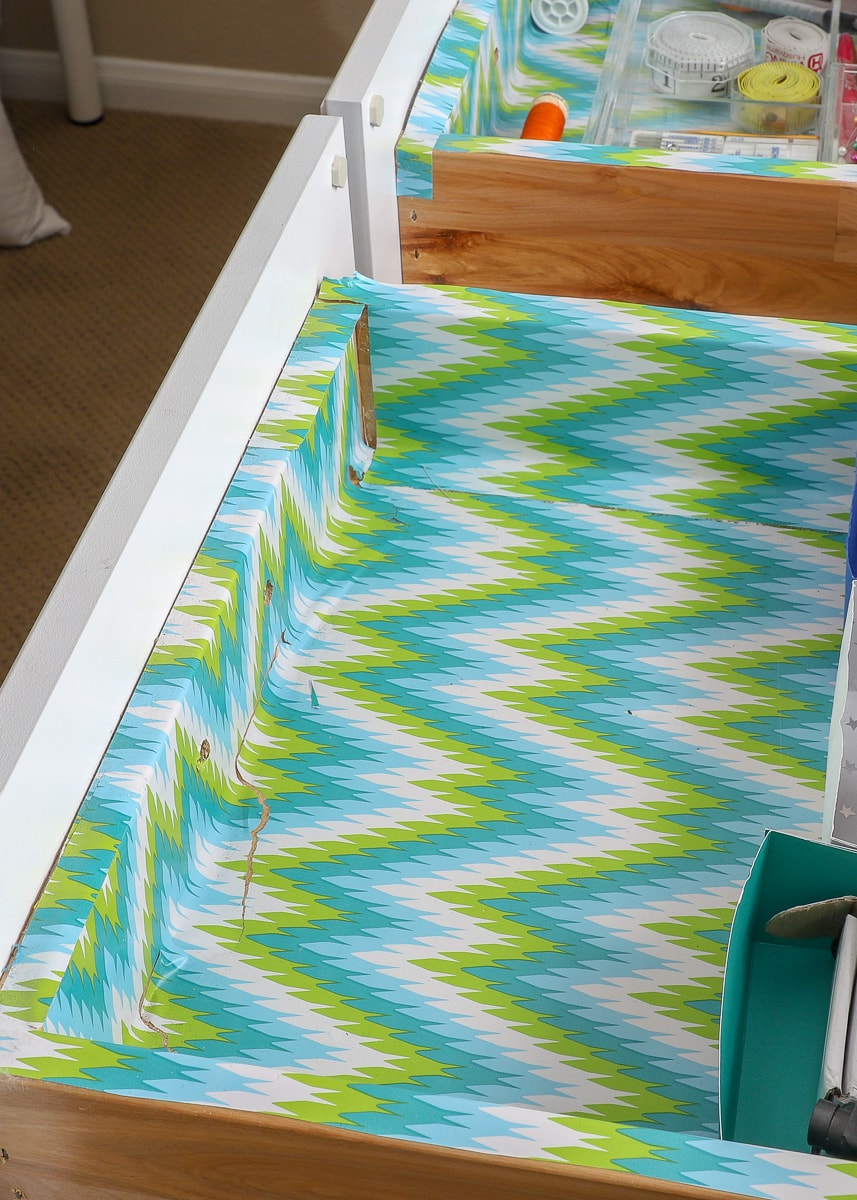
Poorly fitting organizers meant that a lot of space was wasted and items didn’t quite fit into their designated compartments. The organizers easily floated around the drawers each time they were opened and shut, and because the drawers looked a mess, I was really bad about putting items back where they belonged. Further, these drawers were one of the very first things I lined with contact paper…ever…and to say my job was terrible would be an understatement:
Finally, upon moving into this house, we needed to add a 5th cabinet to fill the entire wall, and it was never outfitted with paper or organization at all. (Although I did finally add the hardware a few months ago! #score)
These drawers clearly needed some attention, so my original plan was to make a series of custom paper drawer organizers from heavy cardstock just like I did a few years ago. I seriously loved that project, especially how the organizers allowed me to utilize every single inch of the drawers and were super inexpensive to make. But admittedly, the project was a bit tedious; and since my energy seems to be at a premium these days, I had a hard time gearing myself up to DIY dozens of paper organizers.
Then…when I was browsing around Amazon for something else one day…I discovered these STORI drawer organizers. They are modular, clear acrylic, reasonably-priced and were very similar to another set I had purchased at HomeGoods years ago and successfully used in our kitchen. I knew they were the perfect way to outfit my office drawers for good…but first, I had to figure out what I needed and how many of each!
An Easy Way to Plan Out Custom Drawer Organizers
You guys know that outfitting drawers with bins, boxes, baskets, organizers, etc is my all-time favorite (and easiest!) way to organize a drawer (learn more about how I do it here). But sometimes figuring out how things fit together just right can take a lot of trial-and-error. And what do you do when you have a lot of drawers to organize and/or have lots of organizer sizes at your disposal? The STORI organizers come in 8 different sizes (!!!) and I didn’t just want to blindly order them in the hopes they’d work or fit together just right. So I created a mock-up of our drawers and the available organizers on my computer and set to planning!
NOTE: I did the following exercise in Adobe Illustrator, but you can likely do the same thing in Canva, Photoshop, or even Microsoft PowerPoint. You could also do this on graph paper, but doing it electronically allows you to move things around much easier! Just make sure you set your dimensions to inches/centimeters (whatever you use/prefer).
- I first created 5 “boards” (shown below in white) that were sized to the exact dimensions of my office drawers.
- I then created boxes to represent each of the STORI drawer organizers (all the colored boxes below), including their exact sizes as well as the quantities they came in. As an example, the 3×3″ organizers (shown below in red) come in sets of 12.
- Finally, I listed out everything that needed to be stored in these drawers. As I planned, this allowed me to ensure that each item was given a home, and that those homes were the right size for that item!
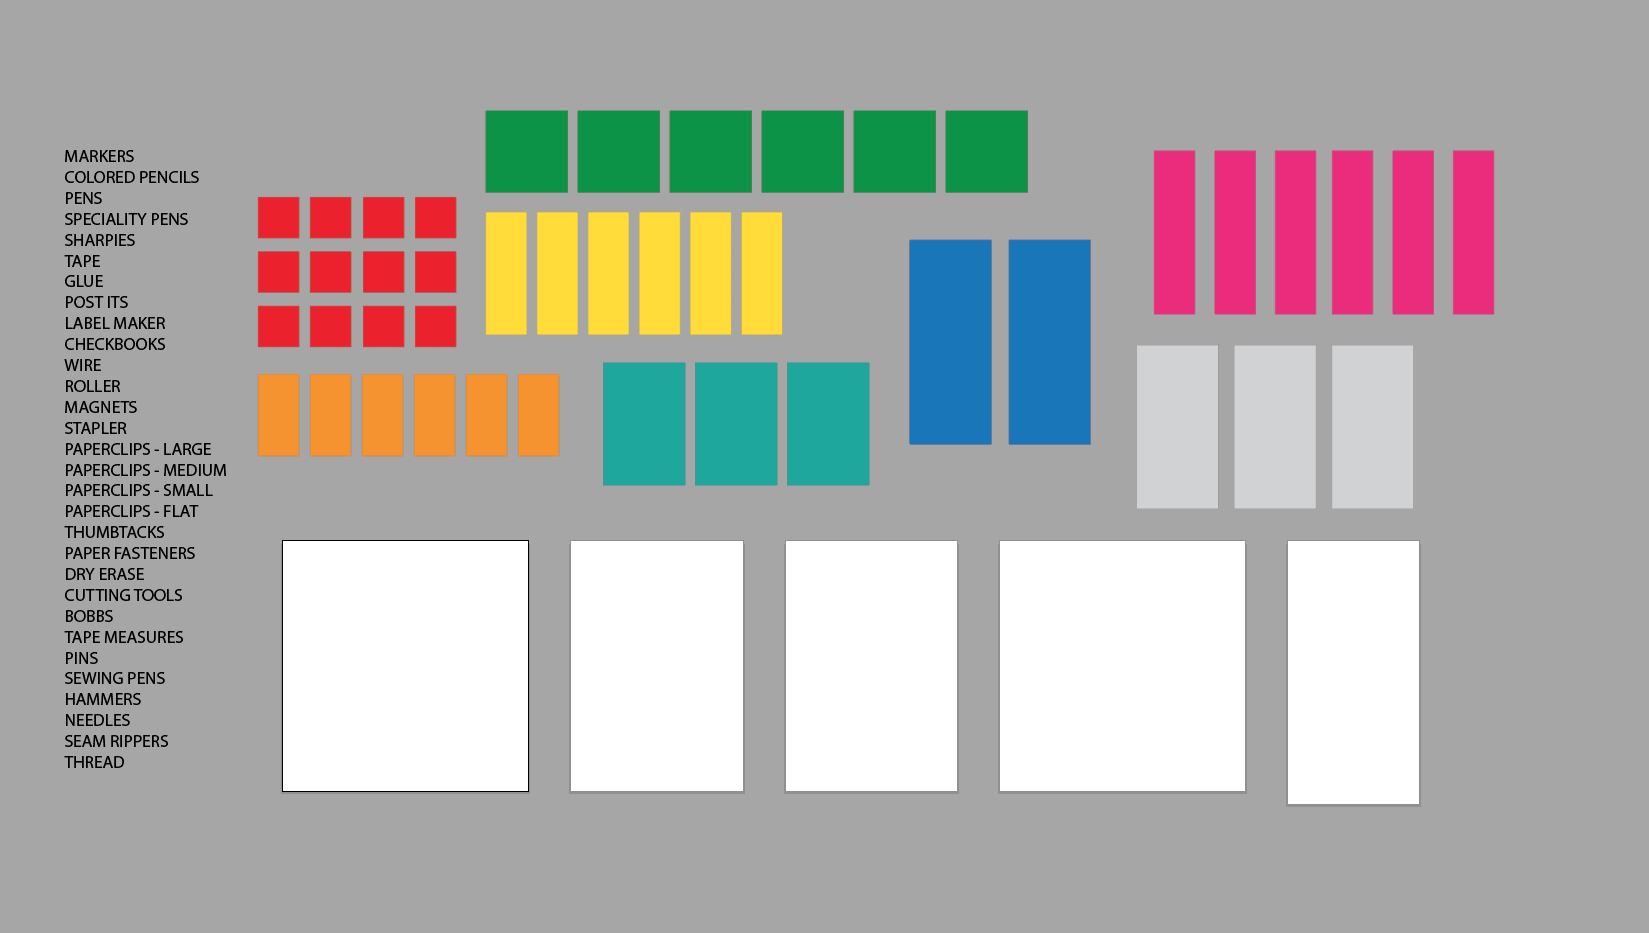
Next, I simply played around with all the colored boxes on my drawer art boards until 1) the colored blocks were all used up; 2) each item on my list was given a well-fitting home; and 3) the layouts used the drawer space in the best possible way. I ultimately ended up here:
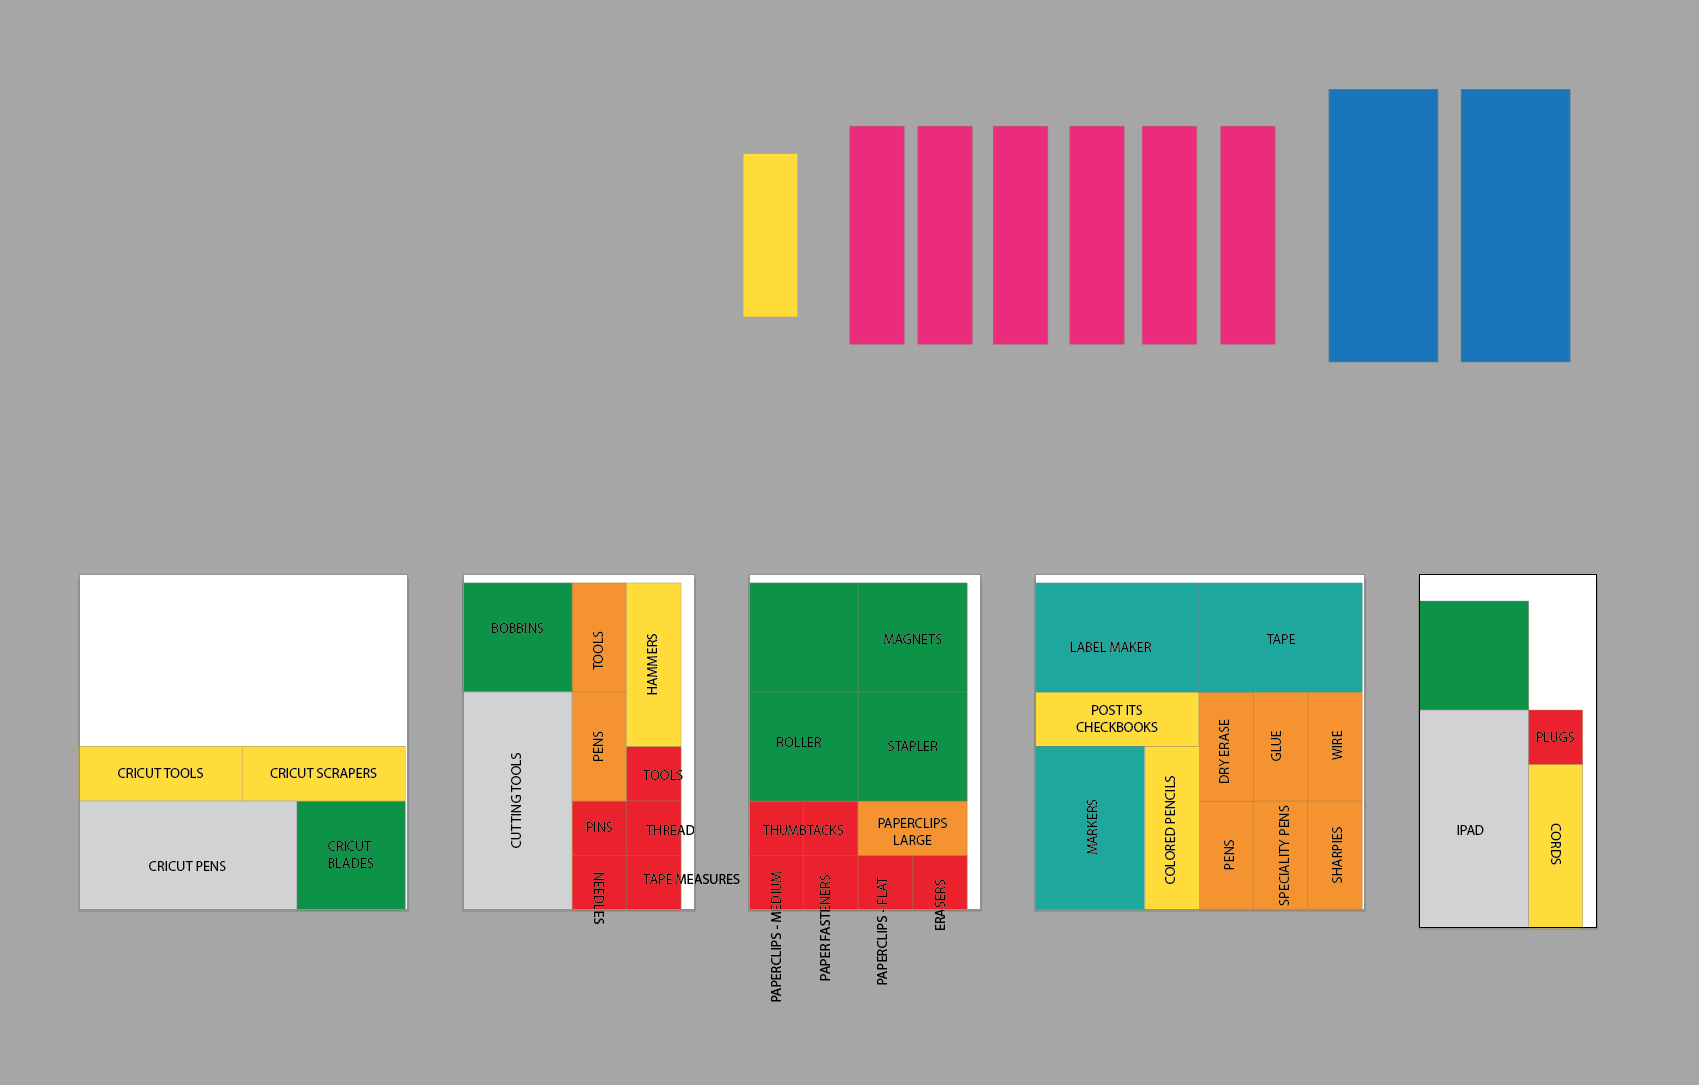
There are a few things I’d like to point out about the graphic above:
- First, all the STORI drawer organizers come in sizes divisible by 3″. My drawers always had 0.5-.75″ left over both horizontally and vertically no matter what configuration I tried. I’ll show you how I dealt with that leftover space below.
- I was prepared to buy all the different-sized organizers; but as I was playing with various layouts, I found I didn’t need the pink set (the 12×3″) or the blue set (the 15×6″).
- This configuration left me with 2 6×6″ units without anything to put in them. I always like to plan in space to grow, so having this extra space was A-OK with me!
I ended up purchasing single boxes of the 3×3″, 3×6″, 3×9″, 6×6″, 6×9″ and 12×6″ organizers (see all the options here) for a total of about $100. After placing my order, I turned to getting my drawers prepped and ready!
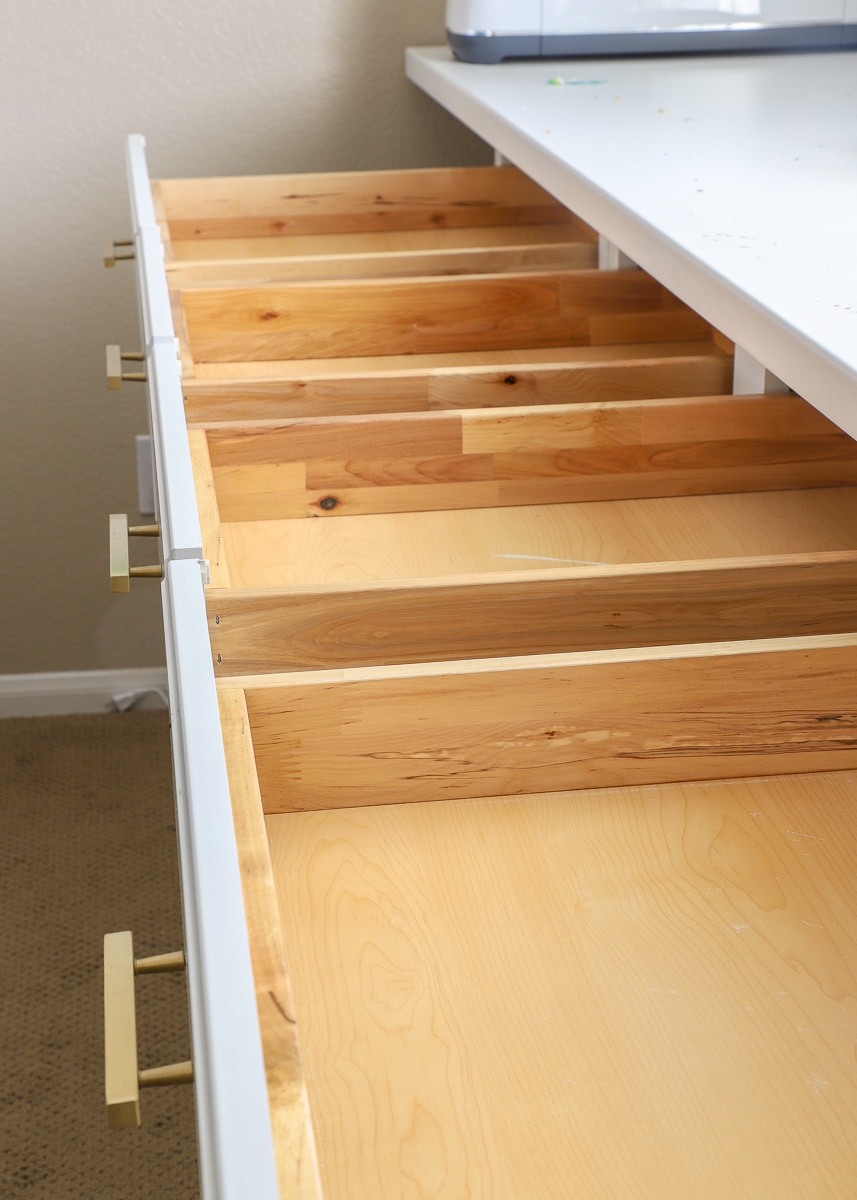
Preparing the Drawers for Organizers
The next step was to take out all the supplies currently in the drawers and remove the existing contact paper. That should have taken all of about 10 minutes. However, that turquoise-and-green contact paper had been on there for YEARS and endured some very hot moving trucks, so it was legit work to get it all off and my drawers looking (and feeling) pristine again. Honestly? It took me HOURS with a hairdryer, GooGone and a scraper in hand to get the drawers back to their original state but we’re not going to talk about that 😉
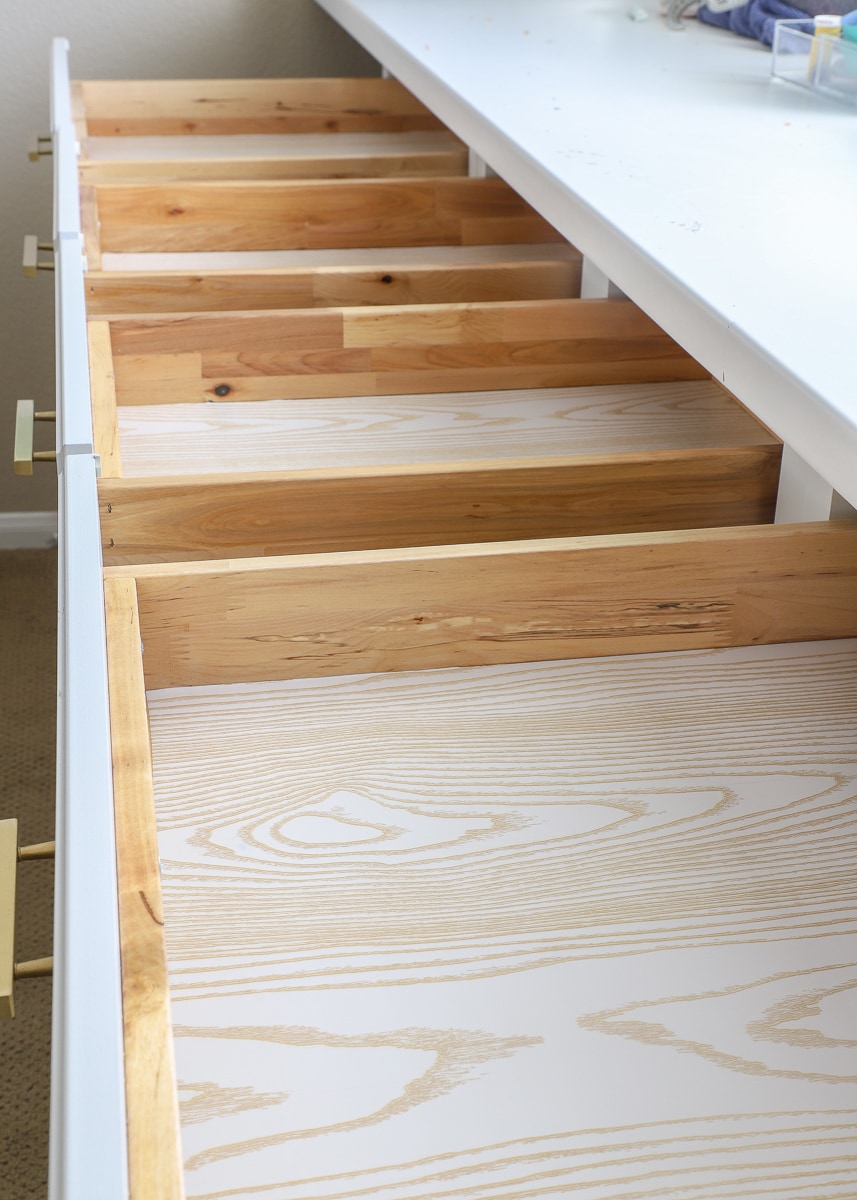
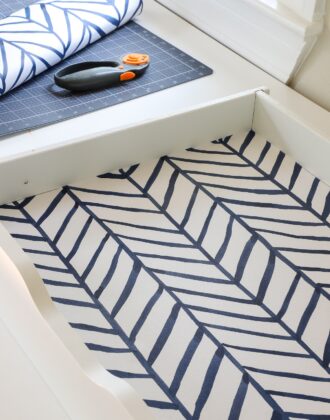
Although it took me forever to remove the old contact paper, I didn’t really hesitate to add new paper to the bottom of the drawers. Why? I LOOOOVE the look of a subtle pattern in the bottom of drawers and I feel like it gives everything a much more polished look. Instead of papering the sides this time, I just papered the bottoms, and I picked some gorgeous neutral paper that will hopefully stand the test of my design whims over the years to come!
Tip! Want to see exactly how I paper drawers and cabinets? See my full tutorial here!

I chose this white-and-gold woodgrain paper because it was thick, sturdy, and more neutral than what I had before. I also loved that the gold veining had a metallic sheen to it that plays off other elements in my office.
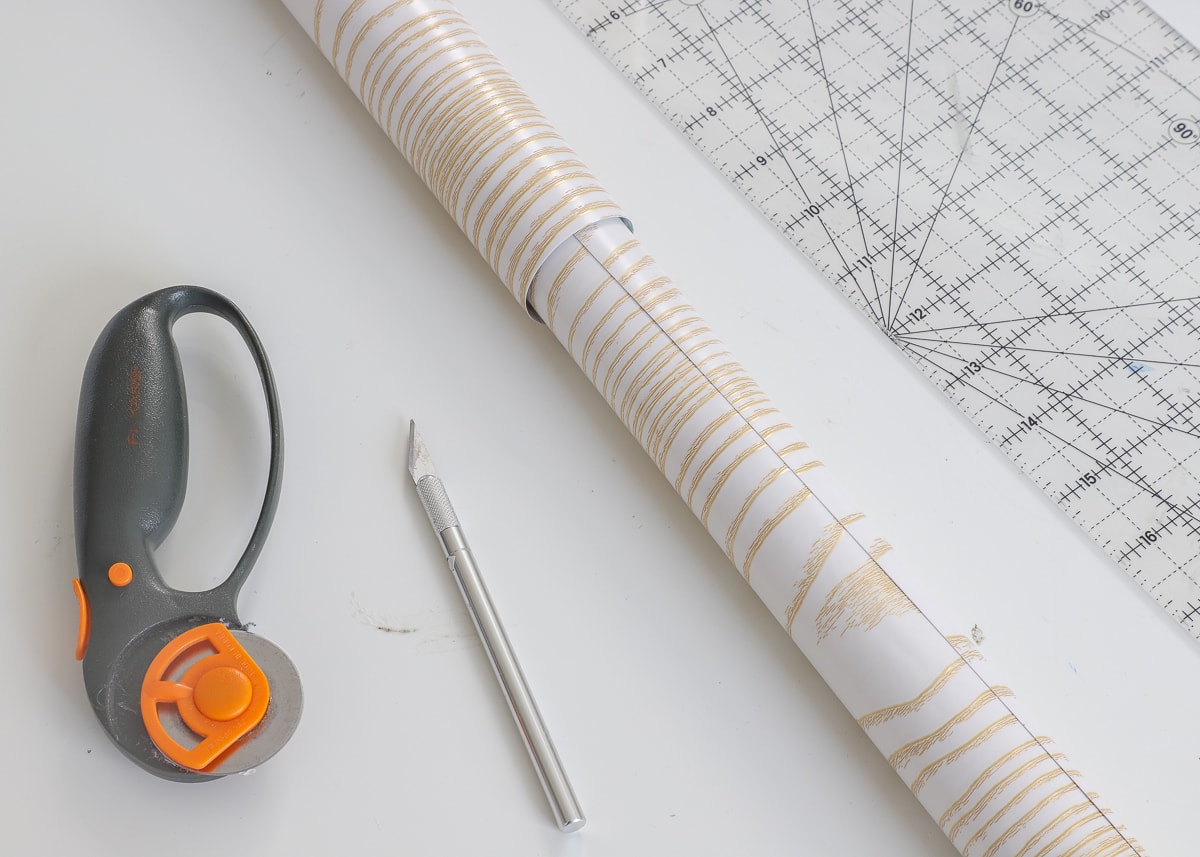
I didn’t quite expect the paper to work SO well with the natural color of the drawers and the white counters/cabinetry. Already, the drawers were looking so much crisper and cleaner!
Outfitting the Drawers with the Drawer Organizers
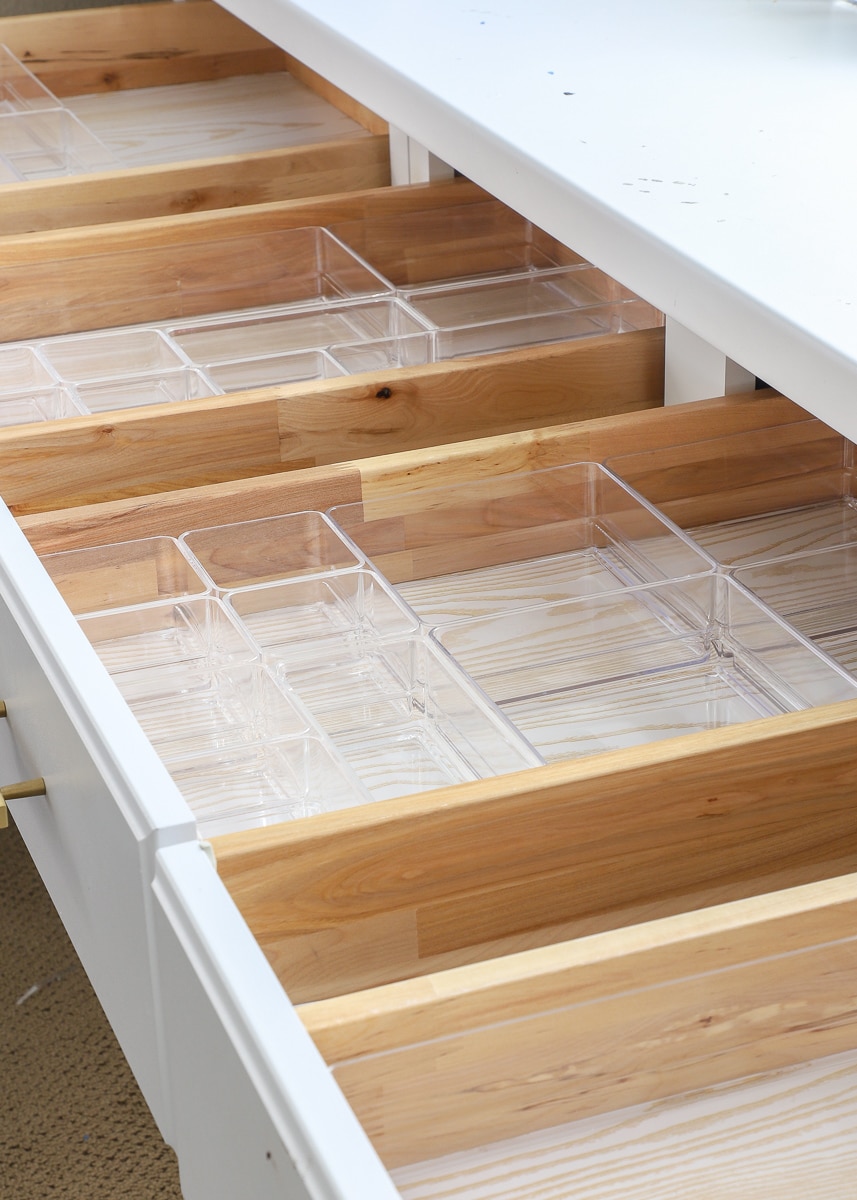
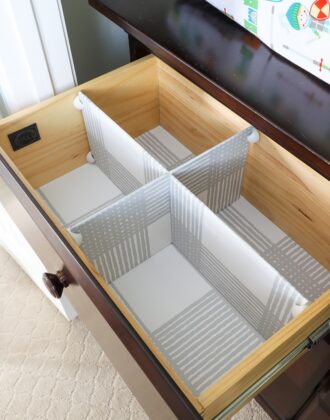
Once the drawers were cleaned out and re-papered, it was really smooth sailing from here since I had done all the planning ahead of time! When I unboxed the acrylic organizers, I was admittedly a little giddy and super impressed.
Want to save this post?
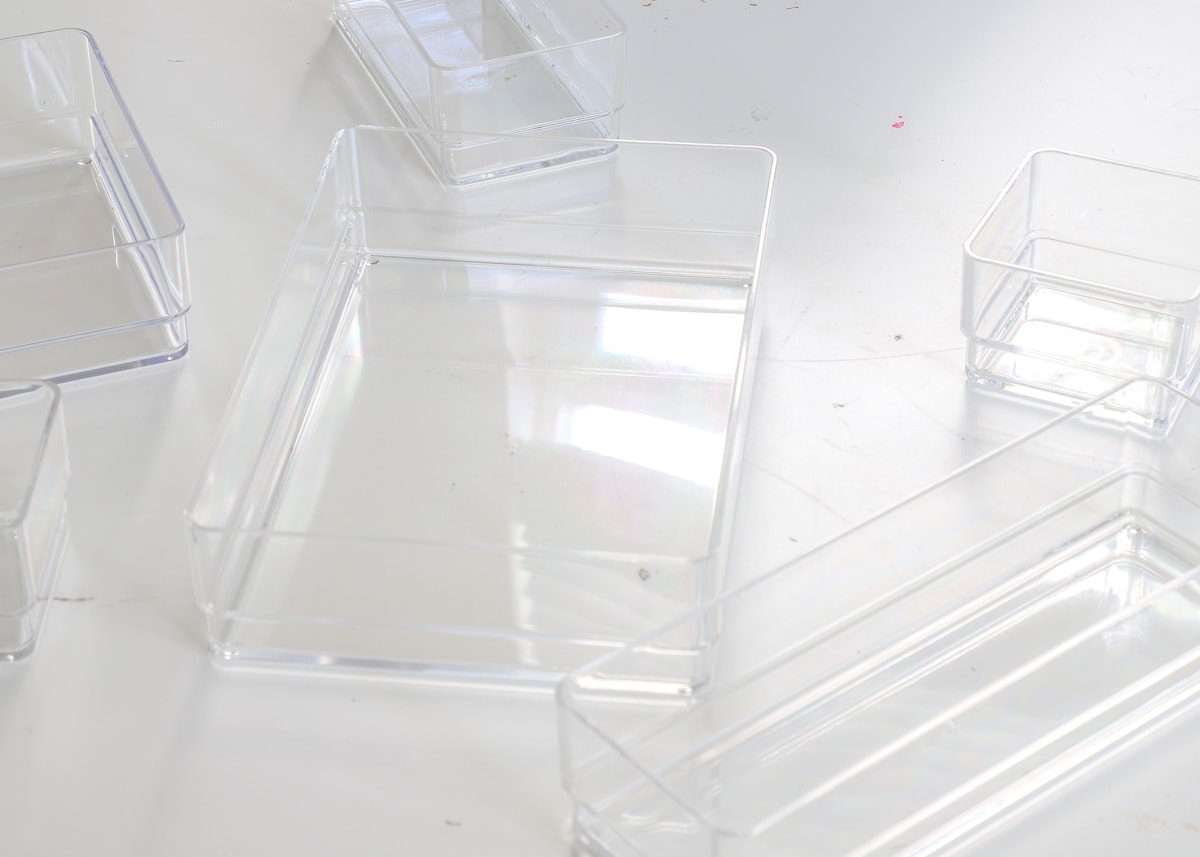
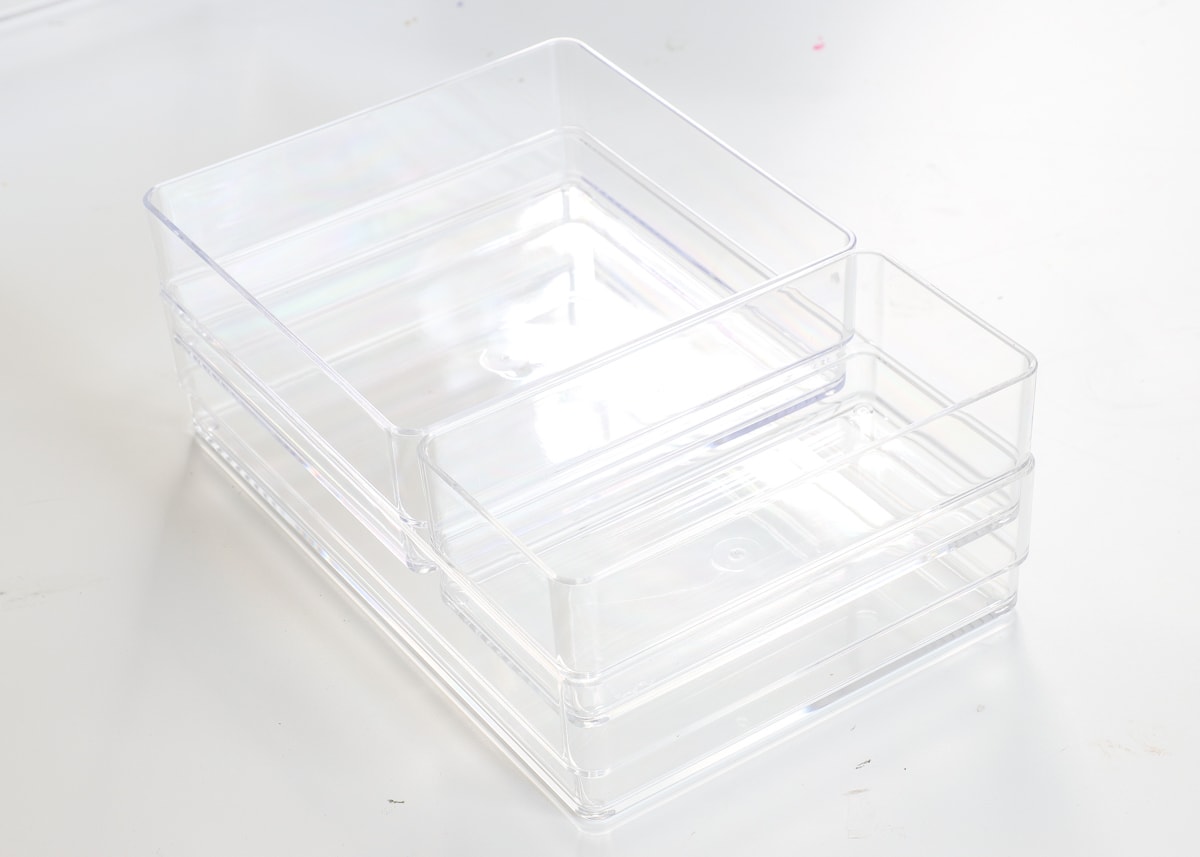
Not only do they all line up really nicely side-by-side, but they also nest perfectly. PERFECTLY! It didn’t occur to me that I could have put two layers of organizers in my drawers. I actually don’t need that much space but it’s good to know that’s always an option!
Because all my planning was pre-done, I just loaded the various organizers into my drawers per the layout on my computer!
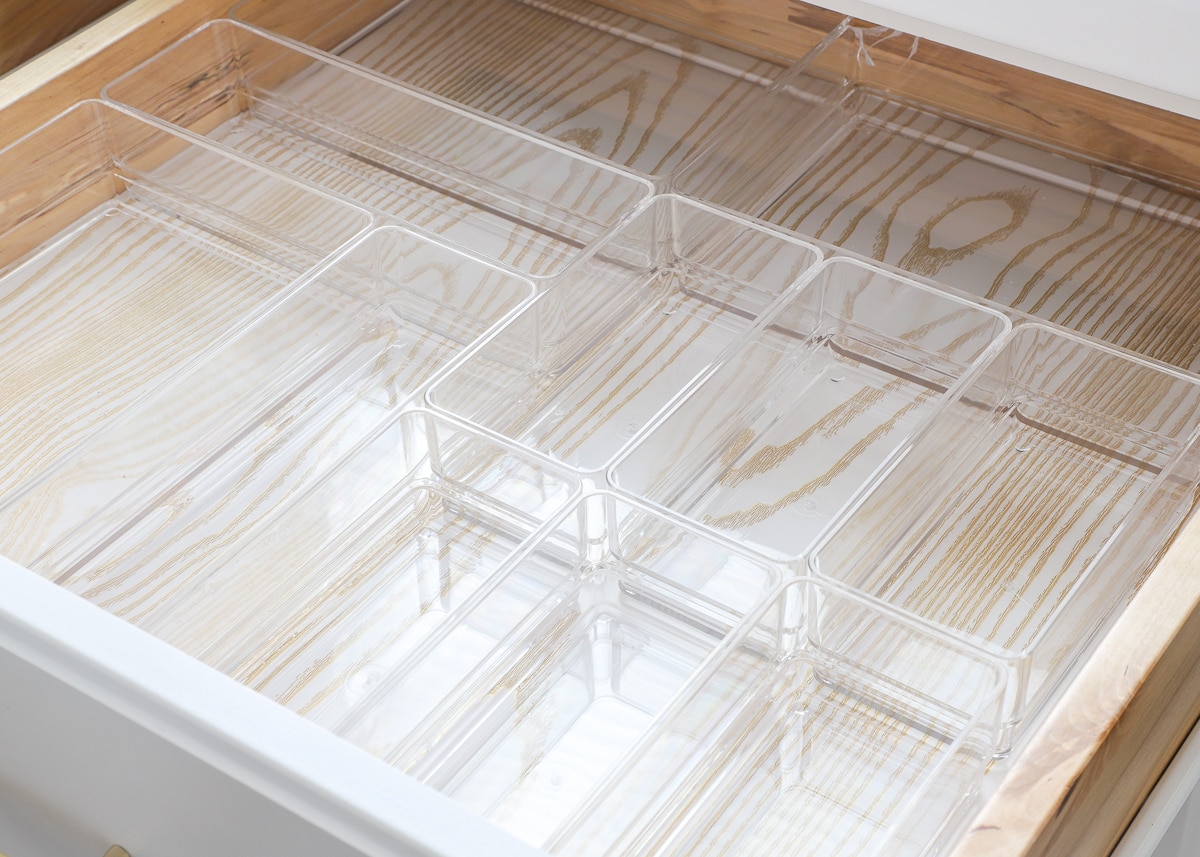
Now…I sure do wish that these drawer organizers fit my drawers EXACTLY…but that’s pretty wishful thinking with an off-the-shelf product. Since I had about 0.5-0.75″ gaps along the side and back of each drawer, I needed to keep the organizers from sliding all around. To do so, I returned to my old trick of placing thick double-stick tape (similar) on the four corners of the organizers.

But listen…you don’t need to add tape to the undersides of all the organizers (unless you want to). Move all the organizers tight to one side and to the front of each drawer. Then secure the far (non-buffered) side and very top undersides with tape as denoted by the black lines above.
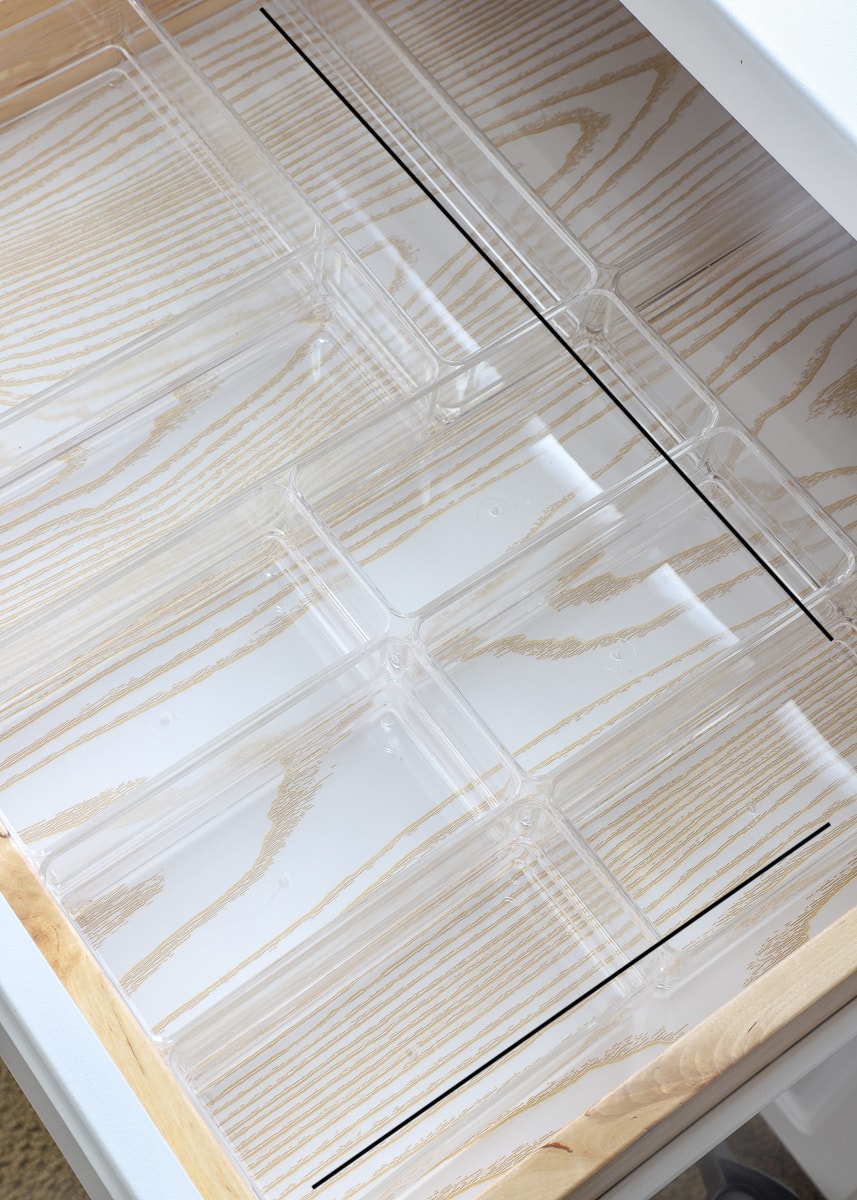
By simply securing the outermost organizers, all the rest will stay put as you open and close the drawers. Those small gaps between the organizes and drawer side can be used for skinnier items such as rulers!
And just like that (snap!), you have perfectly customized drawers, for your specific things, laid out exactly as you need them, all using off-the-shelf items!
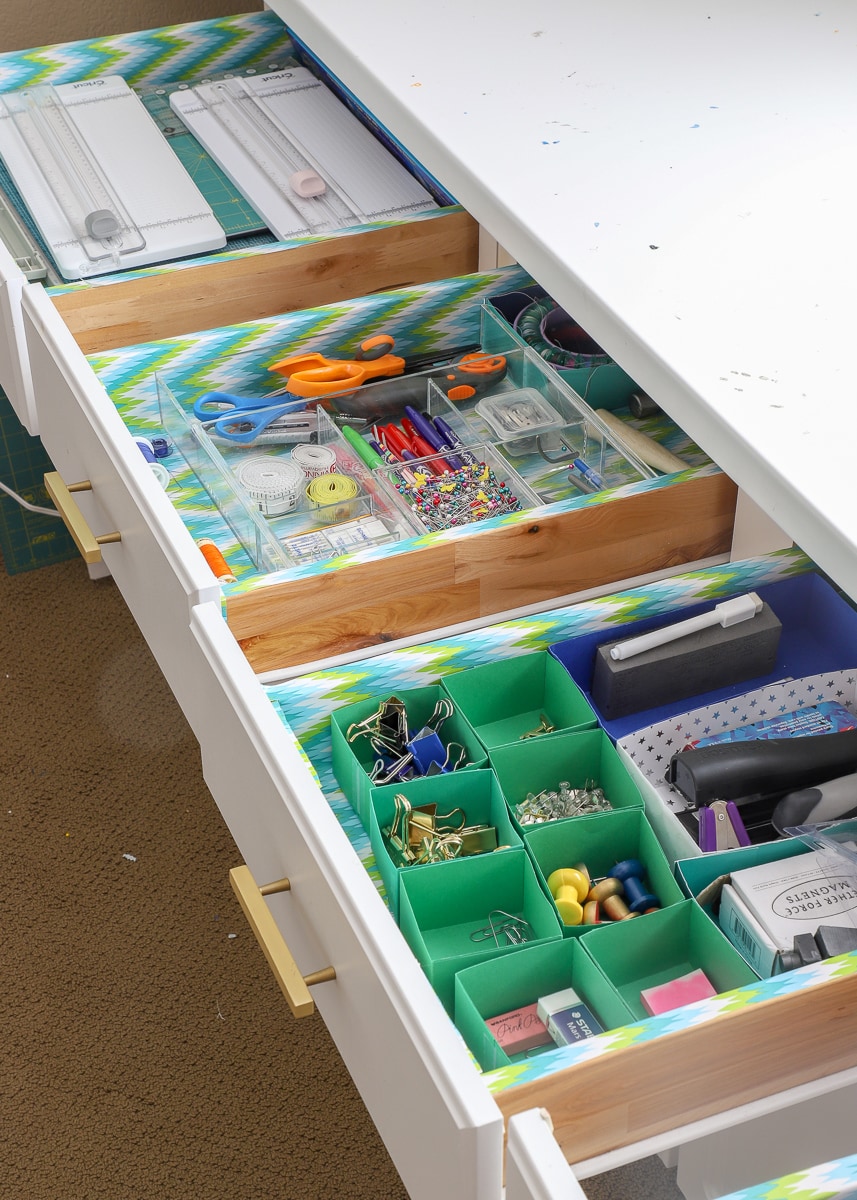
The final step is to fill your drawers back up, which again, should go smoothly since you already planned everything out! Ready for some lovely drawer eye candy?!?
Filling Up the Drawer Organizers
The far left drawer sits right below my Cricut machine. As such, it made most sense to outfit it with all my Cricut tools.
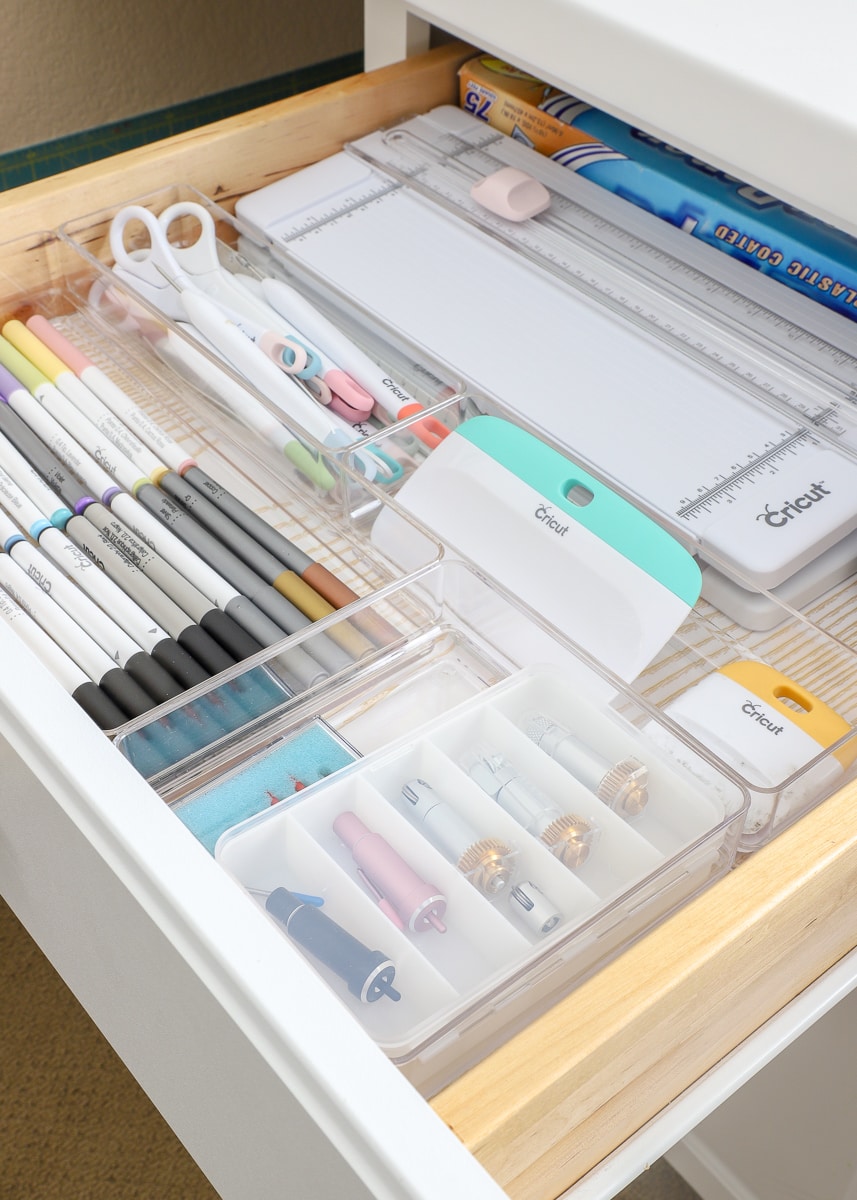

Cricut machine blades are stored in this bead box!
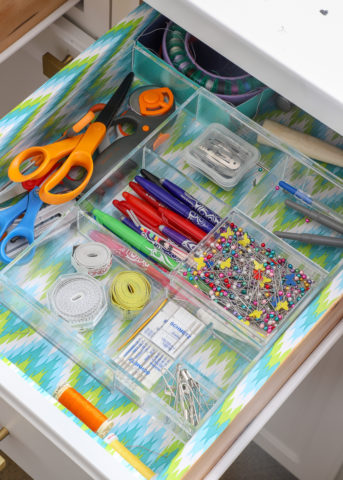
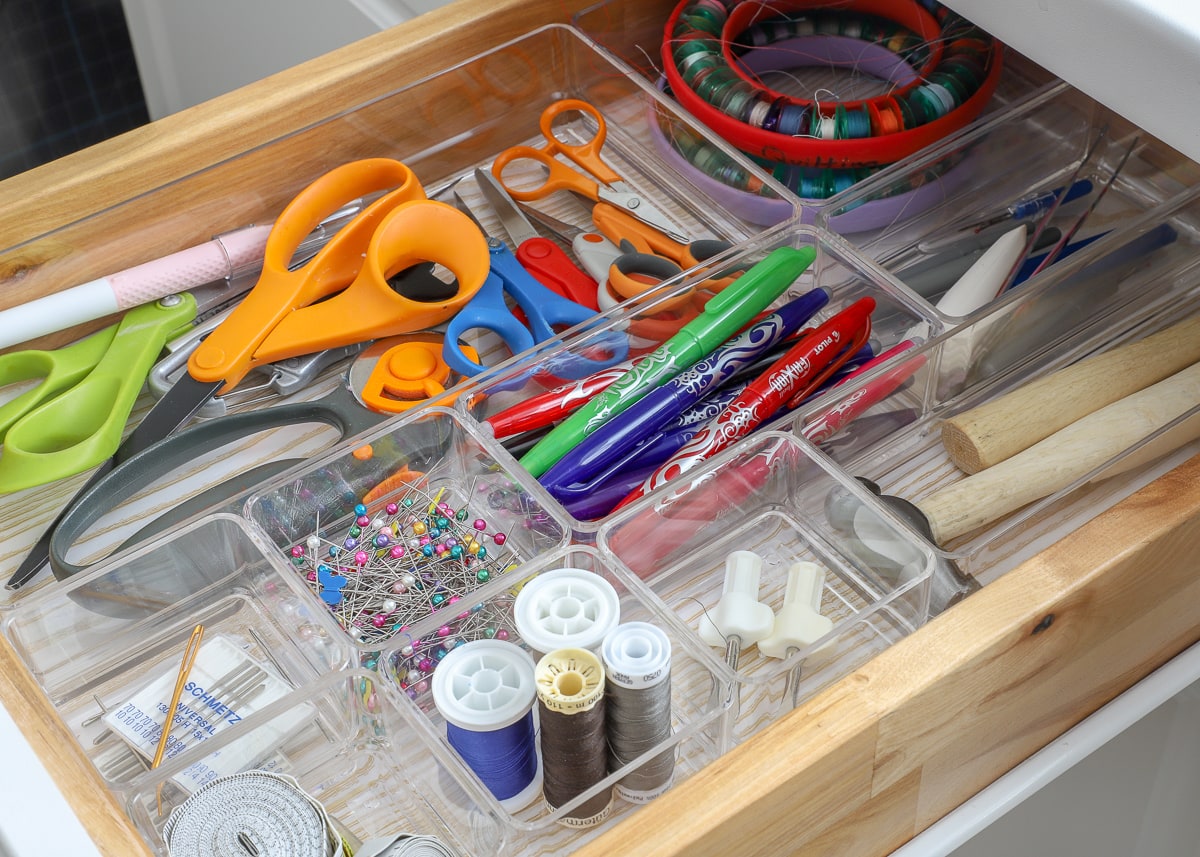
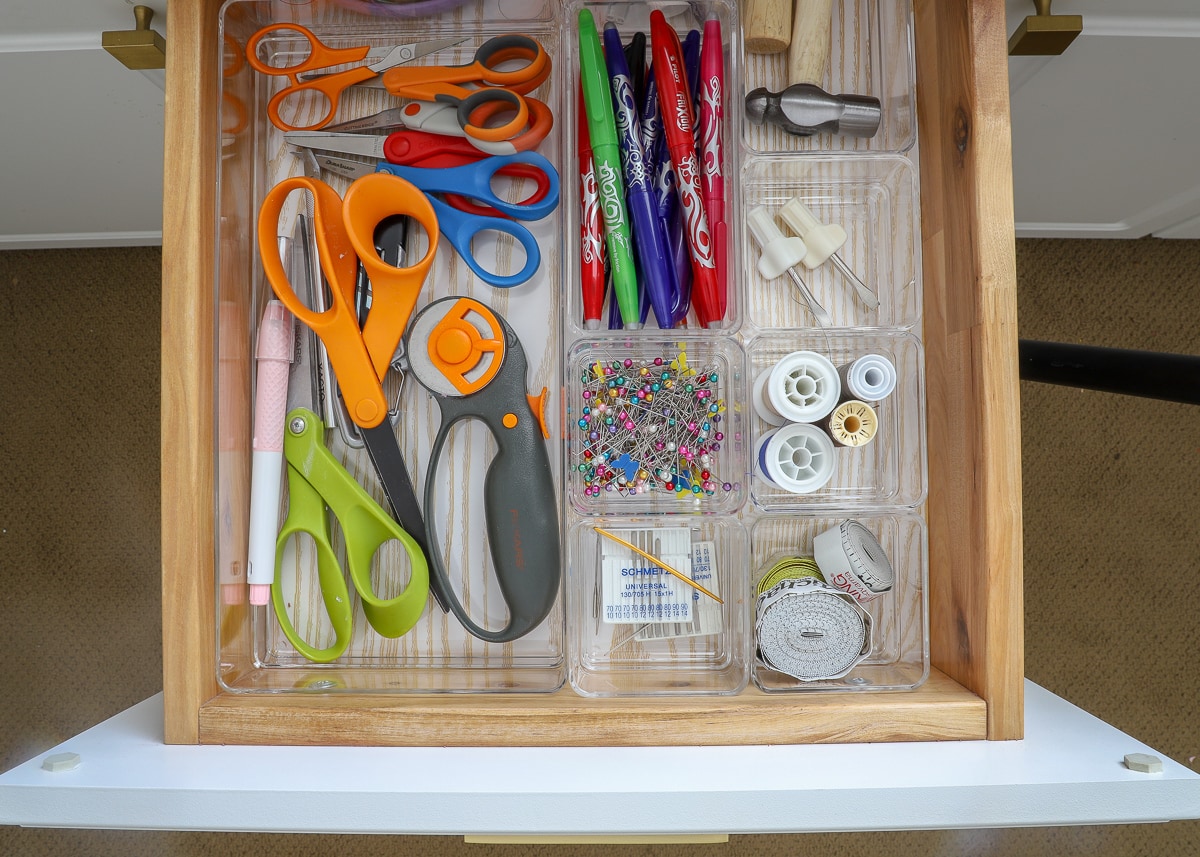
The next drawer is my sewing drawer. While I have other tools and notions stored in the cabinets below, these are the tools I use most when doing simple projects.
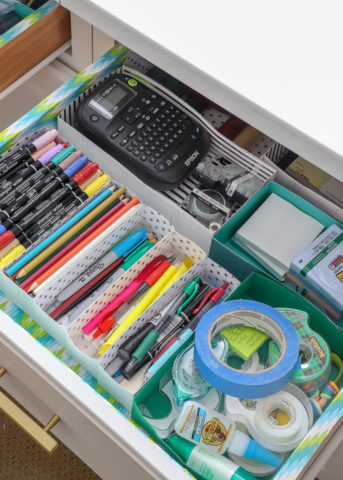
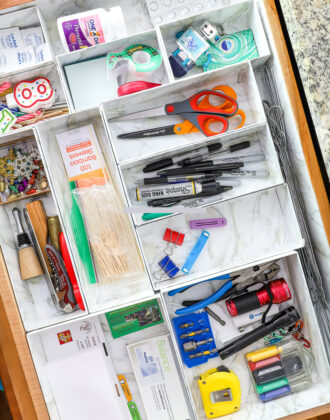
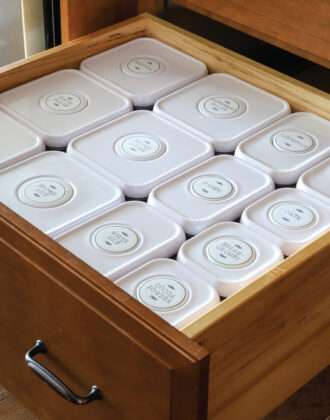
The next two drawers are primarily office supplies and items I use for my photo shoots…
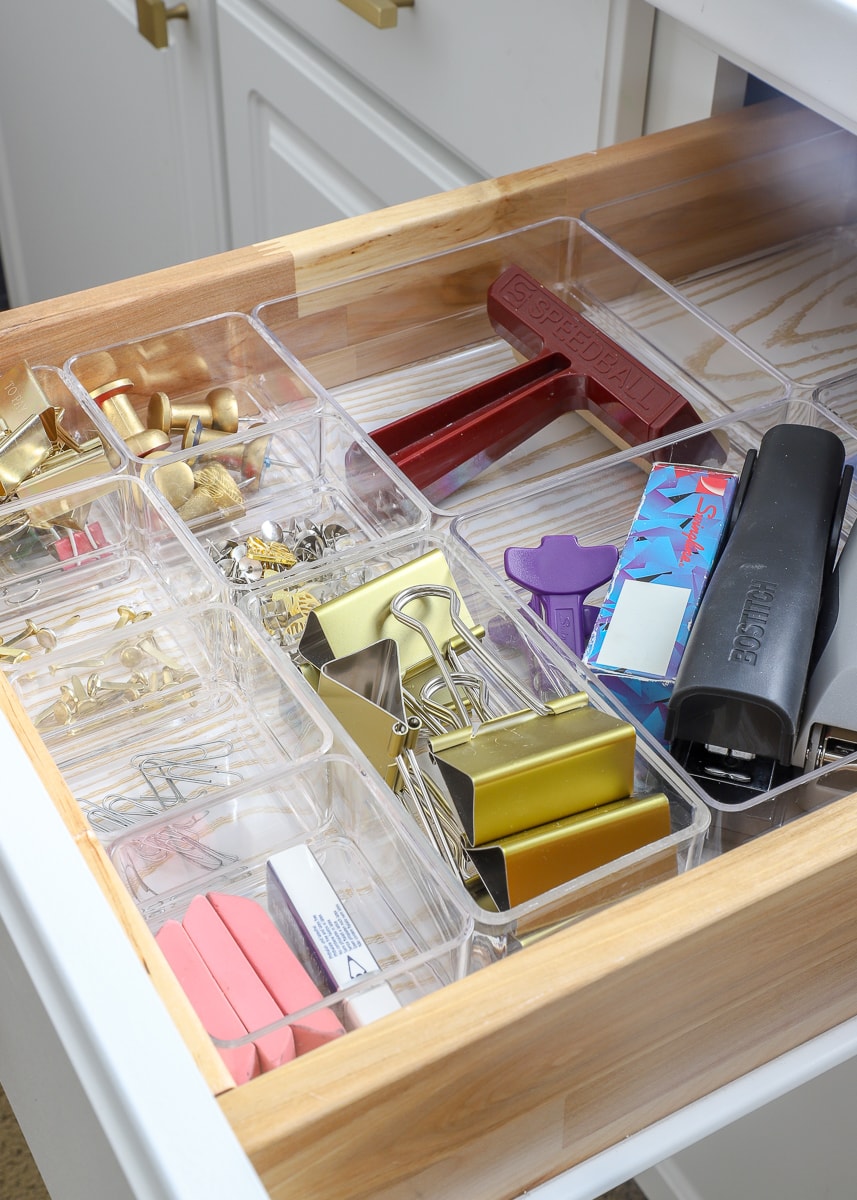
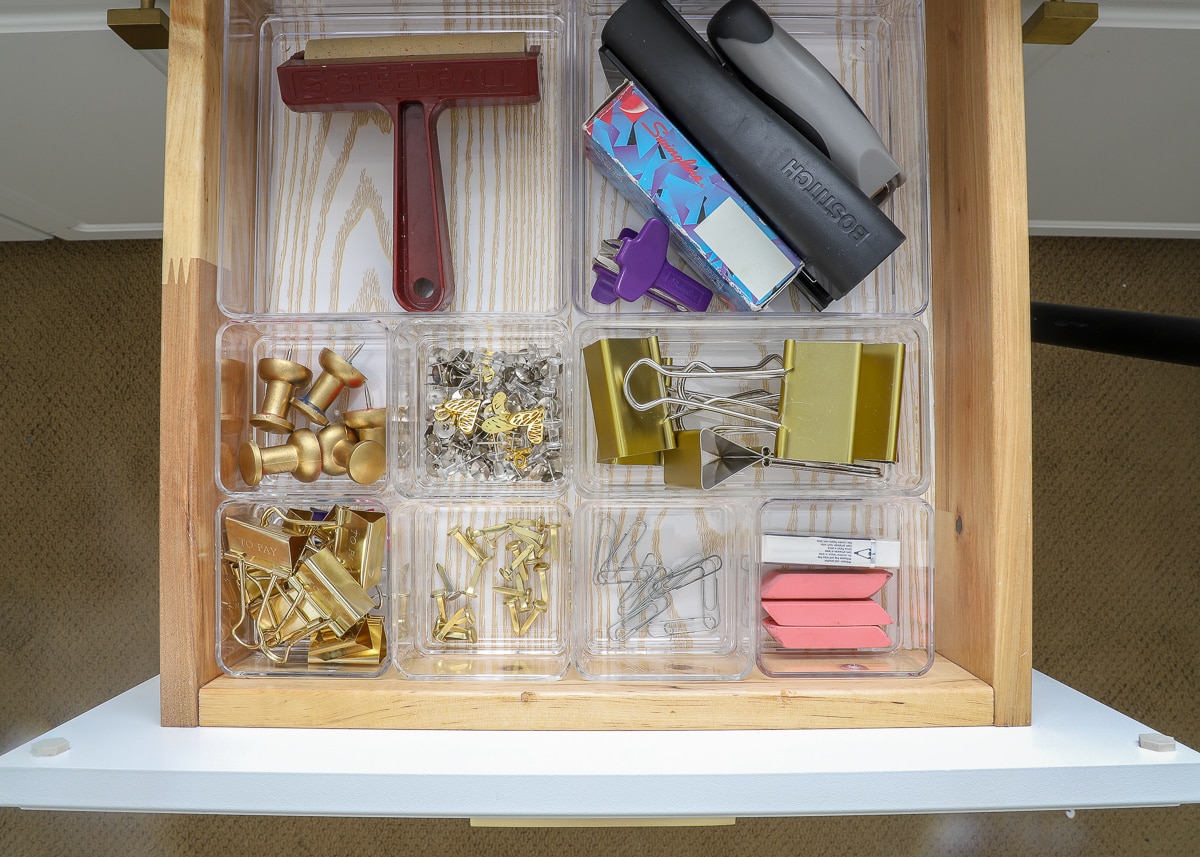
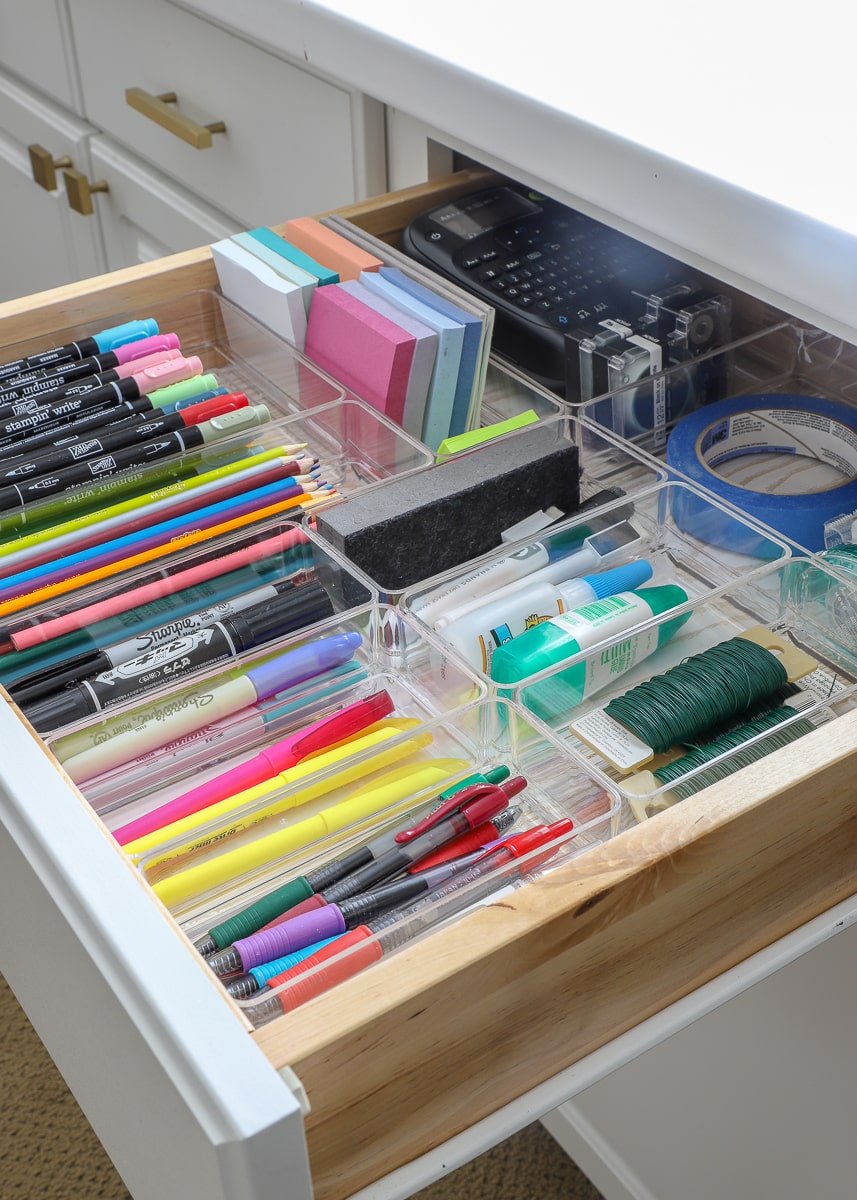
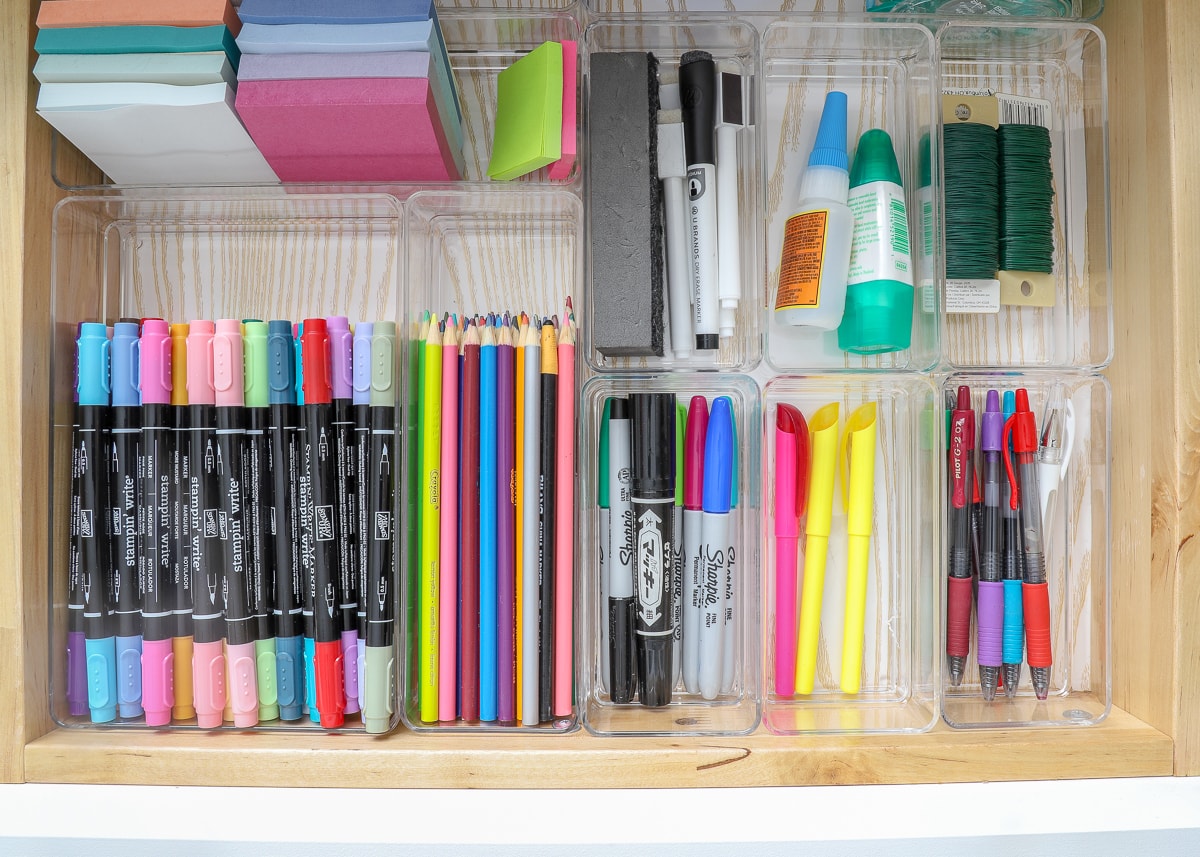
The drawer closet to my computer is for the things I reach for most often when I am sitting at the desk…
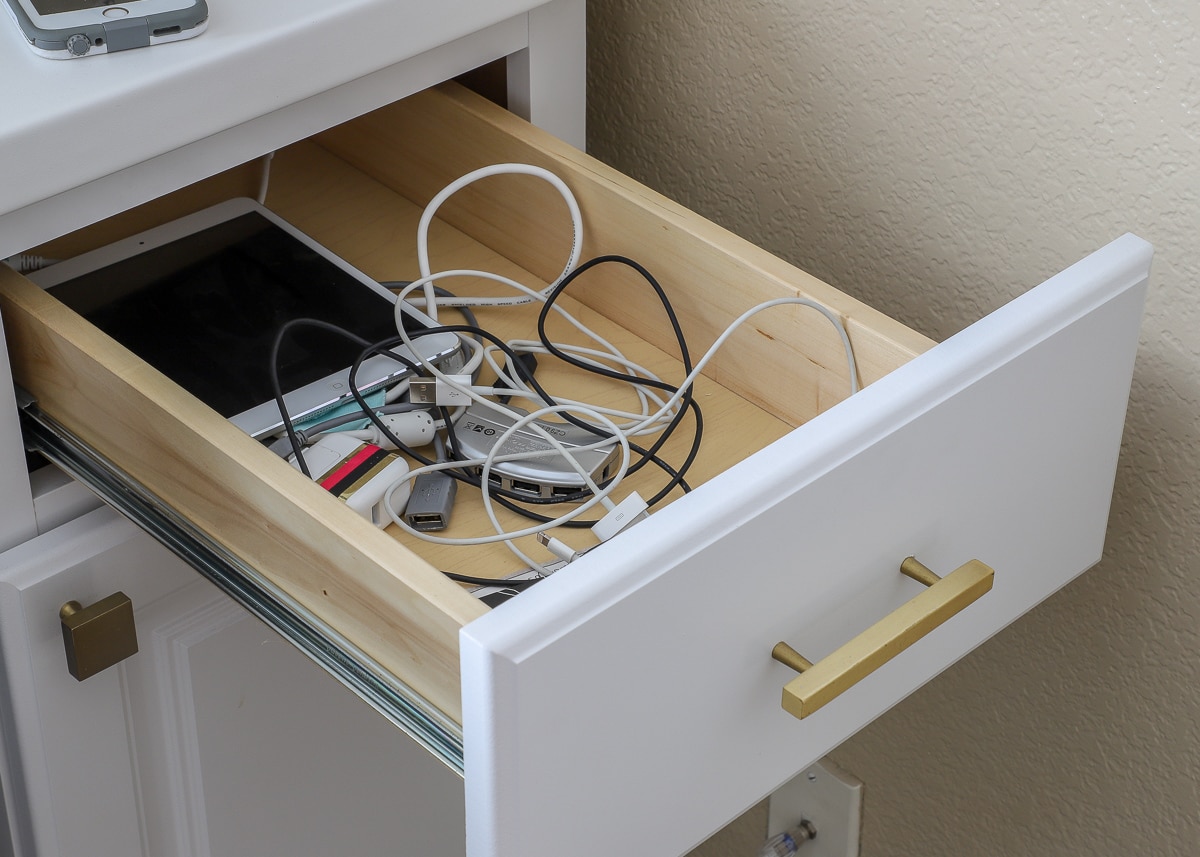
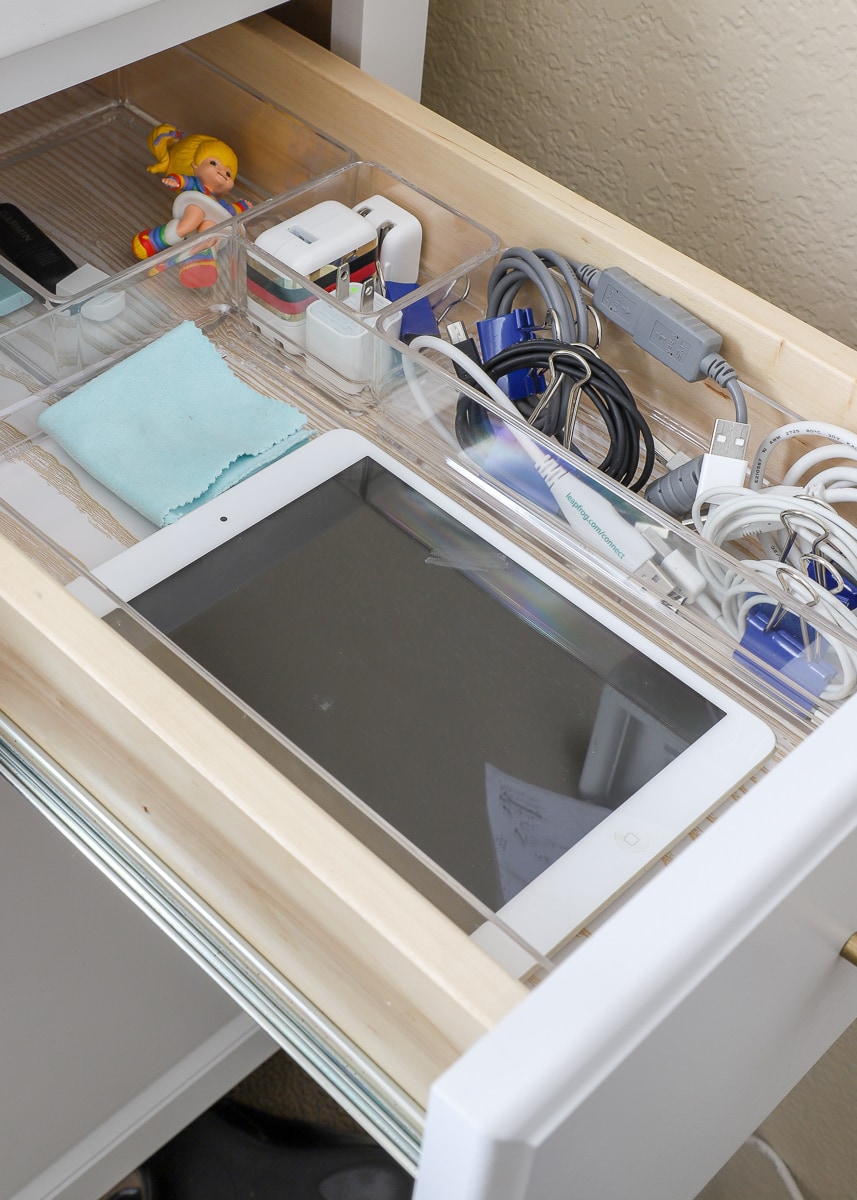
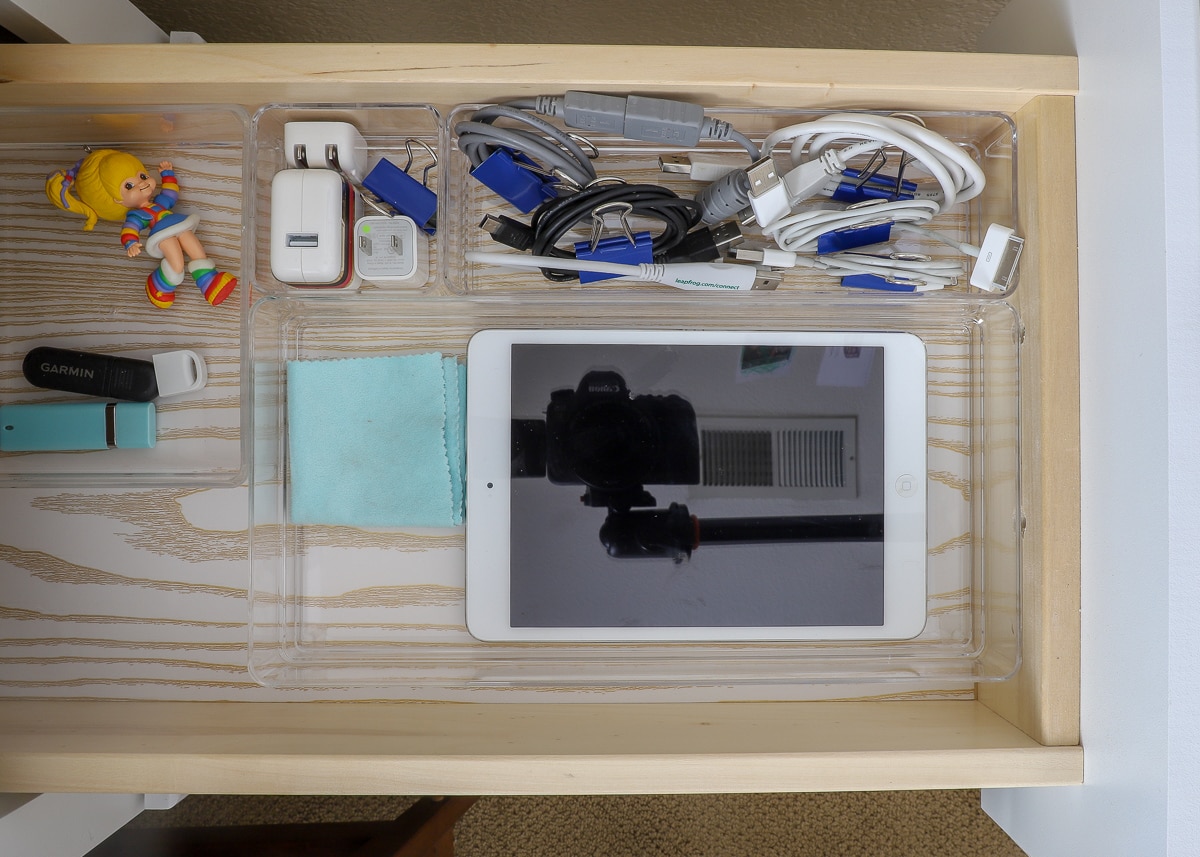
And finally, the drawer to the right of the computer holds electronic items and cords.
Sometimes, outfitting drawers with off-the-shelf drawer organizers that you find at HomeGoods or Target can be a bit of an exasperating experience. Either the organizer doesn’t fit, your items don’t fit, or there is so much extra room leftover that the organizer is hardly worth it!
Rather than relying on all-in-one organizers, this modular system allowed me to not only fill up (almost) every inch of space in my drawers, but also select organizers that sufficiently hold what I need to store and place it exactly where I want it. This combination provided me with perfectly customized drawers that didn’t cost a fortune nor took me ages to DIY! That’s a win, win around here these days!
More Great Drawer Organization Ideas
- The Easiest Way to Organize Any Drawer In Your Home
- Easy DIY Drawer Dividers (For Any Size Drawer)
- The Best Way to Line Drawers & Shelves with Pretty Papers
- How to Line Drawers with Wallpaper
- How to Put a DIY Charging Station In a Drawer
- How to Make Drawer Organizers with Cardboard Boxes
- Top 10 Tips for Organizing Kitchen Drawers
- 3 Ways to Organize Cords in a Drawer
- How to Organize Pantry Drawers
In my entire office, these drawers are the most prime real estate. As such, I took a lot of care to ONLY place things in these drawers that get used regularly. The whole family is going in and out of these drawers on a daily basis, and it’s so nice that we can now clearly see where everything is!
I have a hunch you may want to see some of my unique storage solutions in more detail . Click here to see my entire office/craft room, including inside those cabinets!
Megan
18 Comments on “How to Customize Drawers with Off-the-Shelf Drawer Organizers”
Rainbow Bright!!! Beautiful drawers and I love how you used Adobe Illustrator for this project – genius!
I have never commented on any of your posts… but this one blows.my.mind. I wish I had used this when doing my kitchen cabinets two years ago. Great work!
Love this! Do you have a post about the cabinets? My hubby would like to do something similar in our next house when we PCS this summer. Thank you!
Hi there!
Sorry for the delay in getting back to you!
I first wrote this post ages ago when we first installed the cabinets: https://thehomesihavemade.com/2012/08/she-dreamt-it-he-built-it-craft-counter/
We bought the cabinets at either The Home Depot or Lowes, I honestly can’t remember which one…and we bought them during a Labor Day sale which cut down on the cost. We’ve since gotten rid of the dark stock countertop shown in that post and have replaced it with white countertops from IKEA.
Hope that helps a bit and let me know if you have any other questions!
Megan
I brought home large kitchen drawer divider from Ikea that I was positive would fit in my “junk” drawer. And it did, but not until I razored off the rolled top edge! It was very inexpensive, so I didn’t mind too much. Aloha, Teney
I am so excited about this post!!! 🙂 I found these exact same organizers at the dollar spot at Target about 3 months ago. I was smitten with how you could stack and slide them, and I have a weakness for all things plastic, clear, storage so bought what they had left (which was not much). I organized my daughter’s bathroom drawers with them, and it turned out wonderful! (Although I need to add the double-stick tape, because they currently slide a little.) Anyway, I wanted to buy more and of course cannot find them at Target Dollar spot – so I am elated I can buy through Amazon, and will be sure to do so through your link!!! Thanks for sharing! I am ready to organize my husband & I’s bathroom drawers with these!!!
Hi Megan, wow! I’m blown away and so impressed with your creative and “can do” attitude. And then the patience to do all the configurations to make everything fit so nicely and perfectly. We just moved into a new home, our forever home. The only room upstairs will be my sewing room. The room sits over the garage and the only downfall is that the walls are slanted. I also have a small storage room within the room. I think I will use that for Christmas decor, luggage and whatever I can store in there neatly. My question is, have you ever dealt with slanted walls and, if so, how did you make it work for you. If you have a chance, will you please check out my short video of the room and give me a few pointers. I would really appreciate that. I really enjoy following you. Your blog posts really come in handy when I’m trying to organize. I read about the installation of your base cabinets with your husband and, wow, you guys answered every question I had about installing those cabinets. We will be installing cabinets in the sewing room and at least one base unit in the pantry. Thanks for reading my entire message. Sorry its so long. 😏😊 Hope to hear from you soon. Thank you.
Becky
So organized. I am organizing my new Carolina and bought similar 6×9 containers from target. I jujitsu have to figure out to organized. This will make it so much easier. I was also wondering where you got the organizer for your cricut blades. Thanks
Hi Cheri!
It’s from Michaels – you’ll find it with the bead organizers!
Hope that helps,Megan
What is the bin your blades are in?!?!
Hi Rylee! Try searching “ Everything Mary Plastic 5 Compartment Storage Box” at on the Joanns website. Not sure if it’s the exact brand but it looks pretty similar!
Hi there!
I have my Cricut blades stored in a box that comes in this set. One of the boxes has the long compartments.
Hope that helps!Megan
Wow! Now that’s some lovely organized drawer eye candy! Like you, I also find that organized spaces are so beautiful to look at. As a fellow crafter too, I’m always curious about what other crafters find are their most used tools. I noticed you had a brayer in your office supplies drawer. I’m curious, what do you use the brayer for? I haven’t used one since my days in art school in my printing class. I used them to evenly apply the ink to my wood cut or linoleum cut board prior to printing. I really value your blog and the perspective you bring to prioritizing organization! Thanks Kristin
Hi Kristin!
Thanks so much for this comment…I love that you were “looking through my drawers” lol!
It’s funny, I use the brayer a ton…but probably not what it’s intended for. I use it to smooth/stick paper and vinyl to my sticky Cricut mats. I will also use it to smooth out wrinkles/bubbles in wallpaper or vinyl on projects (when the scraper might be too rough). I’m actually surprised how often I pull it out!
Happy Tuesday!Megan
Hi there, I love this post. I have not figured out how to make the boxes to organize the drawers in adobe express, Canva lol I spent hours trying to figure it out
Fantastic article, as always Megan. I thought I was organised but you take the cake!
Planning out your drawer inserts to scale in Adobe Illustrator. We’re soul mates. Except I don’t also have the stamina to take pics and do a whole blog post about it lol. You rock.
I really appreciate you sharing your creativity and brilliance! The way you planned ahead to only get the organizers you needed is awesome. I’m going to use your idea for my kitchen drawers. I have a folder in my email dedicated to your emails so I can refer back to them. Thank you again for sharing your knowledge.