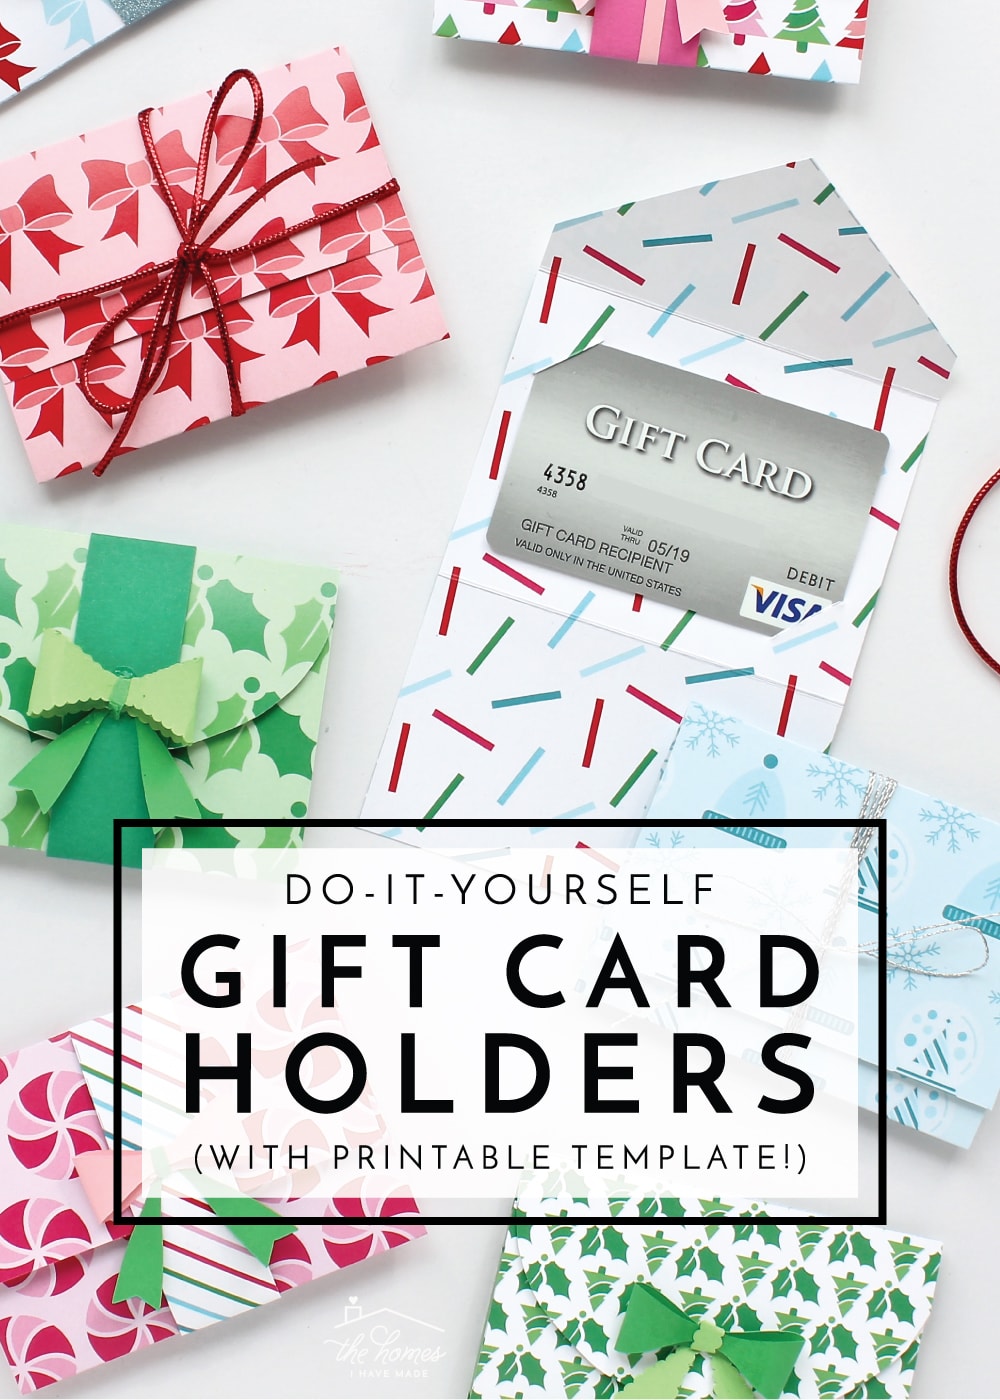
DIY Gift Card Holders (with Printable Template!)
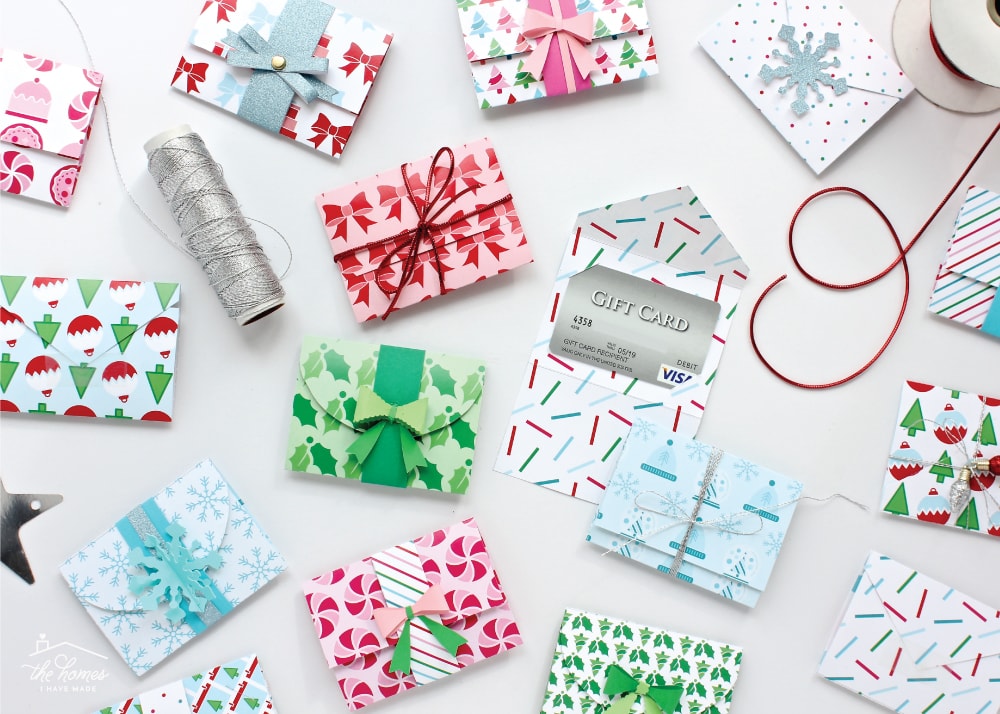
As I shared a few weeks ago, I am always on the lookout for cute and creative, but most of all easy, ways to package up simple gifts this time of year. Just as I dressed up a box of cookies with some clever wrapping and personalized tags, I really believe that special packaging can take a boring, generic, and maybe even impersonal gift and transform it into something memorable. As I’m sure you do too, I often snag a handful of gift cards to give the mailman, housecleaners, babysitters, coaches, etc. But the plain little envelopes that usually accompany gift cards are so underwhelming, aren’t they? Since I can never leave well enough alone, I came up with a fun and festive way to package them up using nothing but some paper from the printer! I am absolutely ga ga over these DIY Gift Card Holders (both with how easy they are and how cute they turned out!), and I just know you guys are going to love this perfect last-minute wrapping idea!
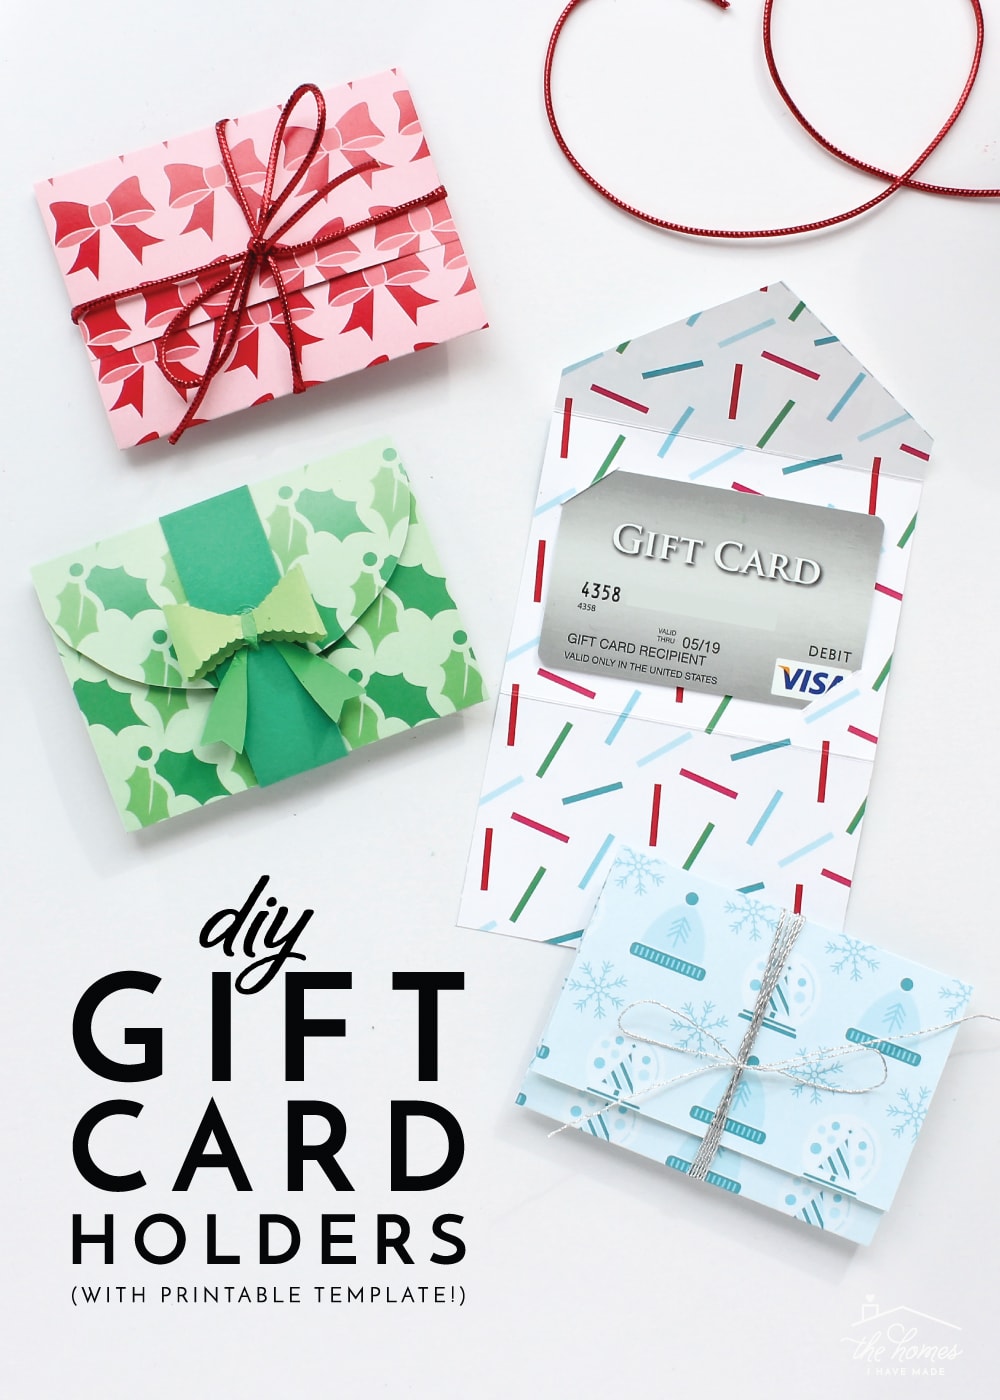
Every now and then I come up with a project that makes me down right giddy. I’ll tell you up front that this is one of them. The simplicity of this project paired with the too-cute-for-words results makes this one of my favorite paper crafts ever. And since I created these DIY gift card holders with my own printable template (rather than my Cricut), any of you can make them too. Nothing fancy required!
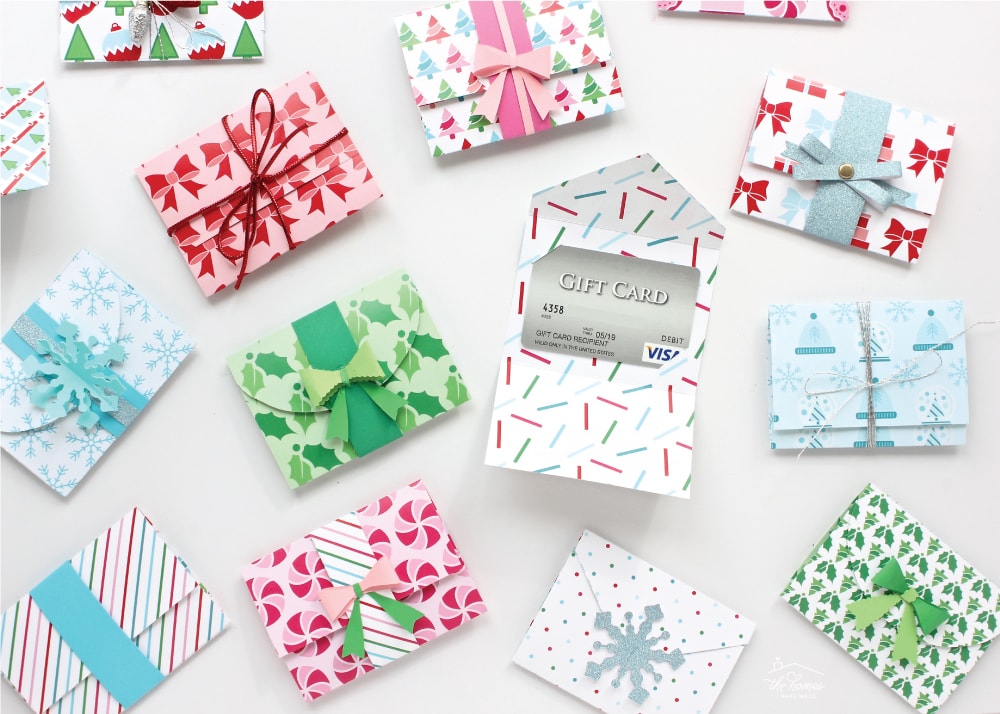
All those adorable gift card holders shown above are made with some white cardstock and a few simple tools, just in a matter of minutes! Seriously. I kinda can’t believe it either! What makes these DIY gift card holders so adorable (and so quick) is that they are cut from double-sided cardstock. So when they are folded up, you see one pattern; and when they are opened, you see another…all without any glueing or lining or tracing or excess cutting. They are fun and whimsical and the perfect way to say “Happy Holidays”!
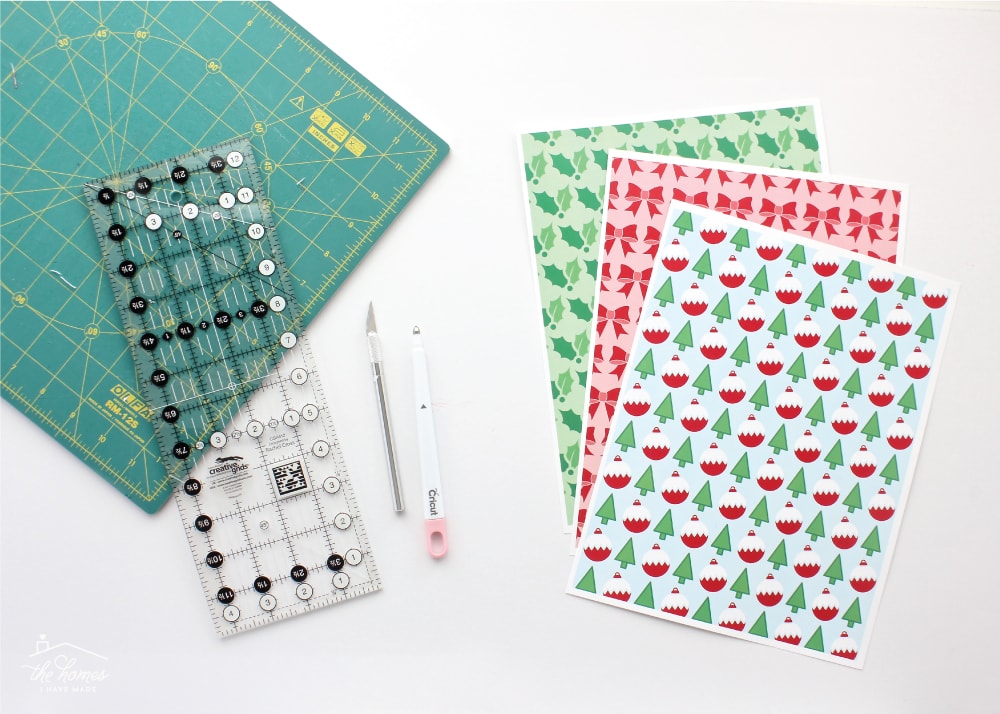
Supplies Needed
Here is what you need to make your own DIY Gift Card Holders:
- Double-sided holiday-themed cardstock (more on this below)
- Scoring tool (a knitting needle, letter opener, or butter knife will also work)
- Sharp Craft Knife (a small sharp scissors will also work)
- Self-heeling mat (or other knife-safe surface) and ruler
- Scissors and/or paper trimmer
- Printable Gift Card Holder Template (here)
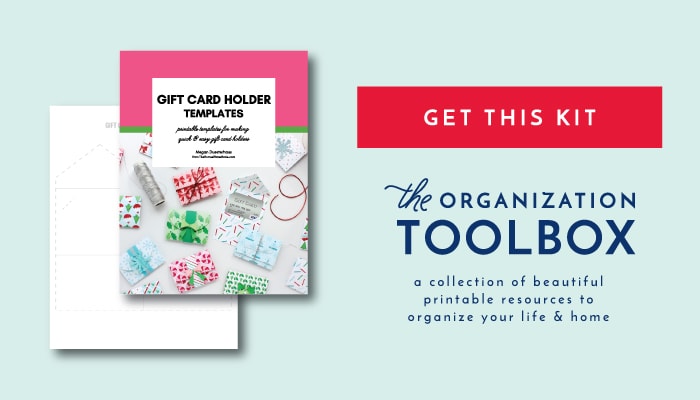
FREE Gift Card Holder Templates!
Click below to get all three Gift Card Holder Templates for FREE!
Double-Sided Holiday Papers
Before we get into the “how to” of this project, let me first quickly chat about what paper to use. I can’t emphasize enough to use double-sided cardstock for this project. You’ll want cardstock for the weight and bulk (to hold the gift card in nice and snug), and you’ll want color or pattern on both sides of the paper. Why? These gift card holders aren’t anything special if you open them up to white paper on the inside. So find some double-sided papers you love. Here are some of my favorite finds that would be great for this project!

TIP! If you buy 12×12″ paper for this project, you’ll need to trim them down to 8.5×11″ to feed through your printer!
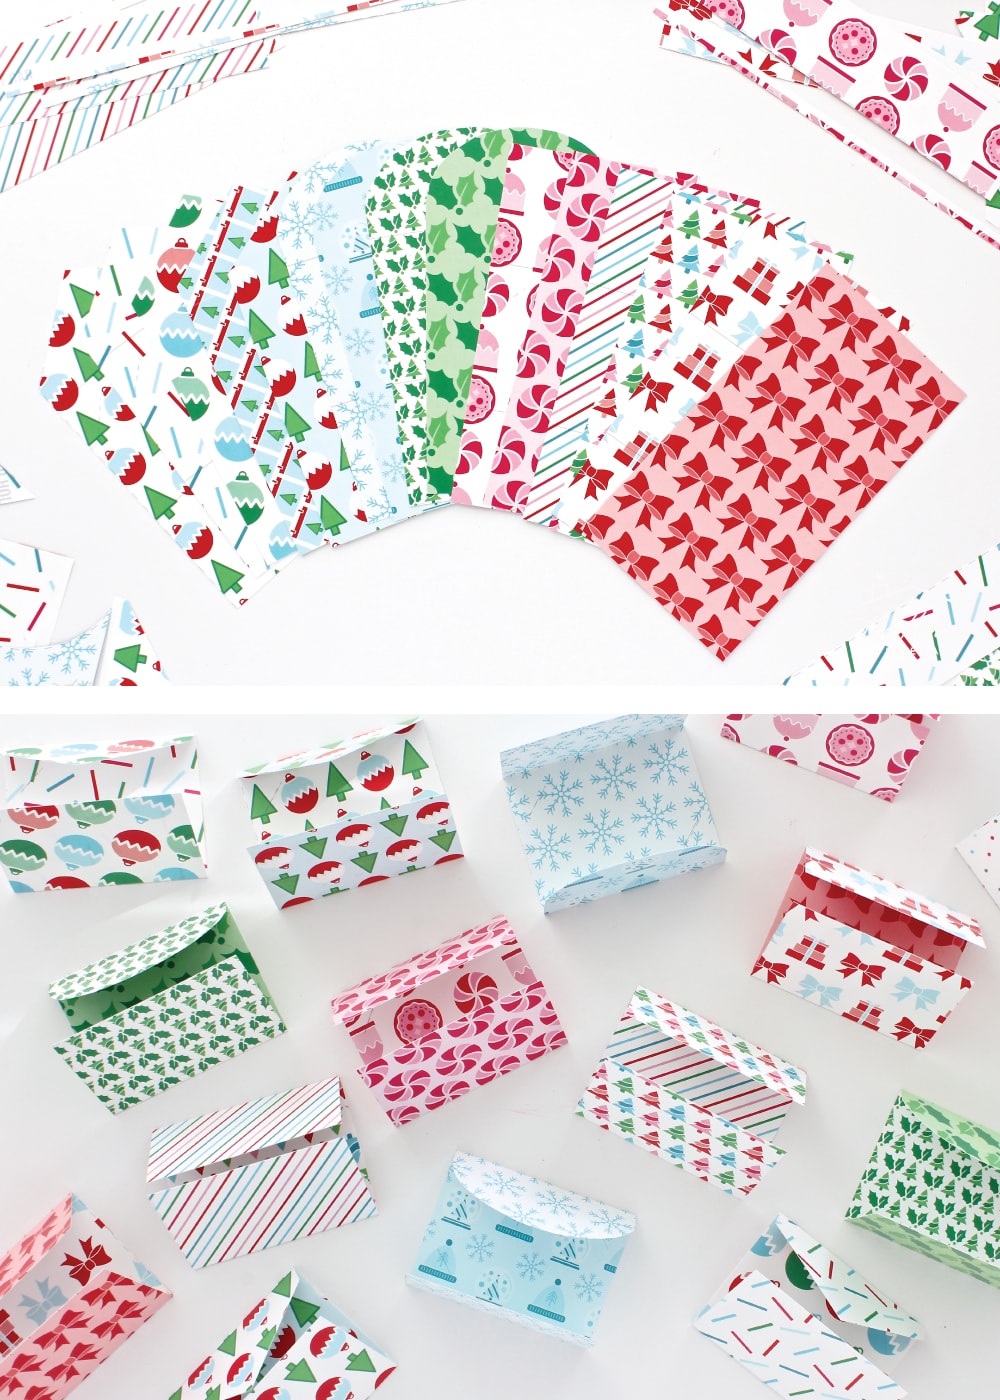
Another option is to make your own like I did… I’m admittedly a little obsessed with the patterns I designed for the Printable Holiday Planner (did you know there are 17 holiday patterns included in back of that kit?!?!), so I printed them, double-sided, onto white cardstock.
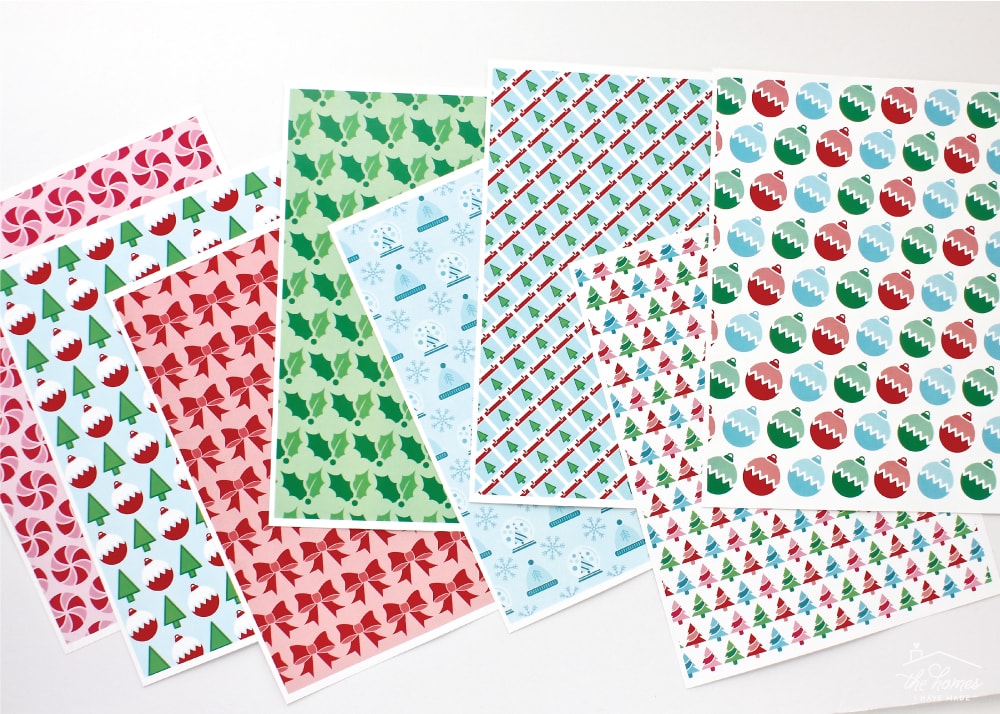
Patterns from the Printable Holiday Planner
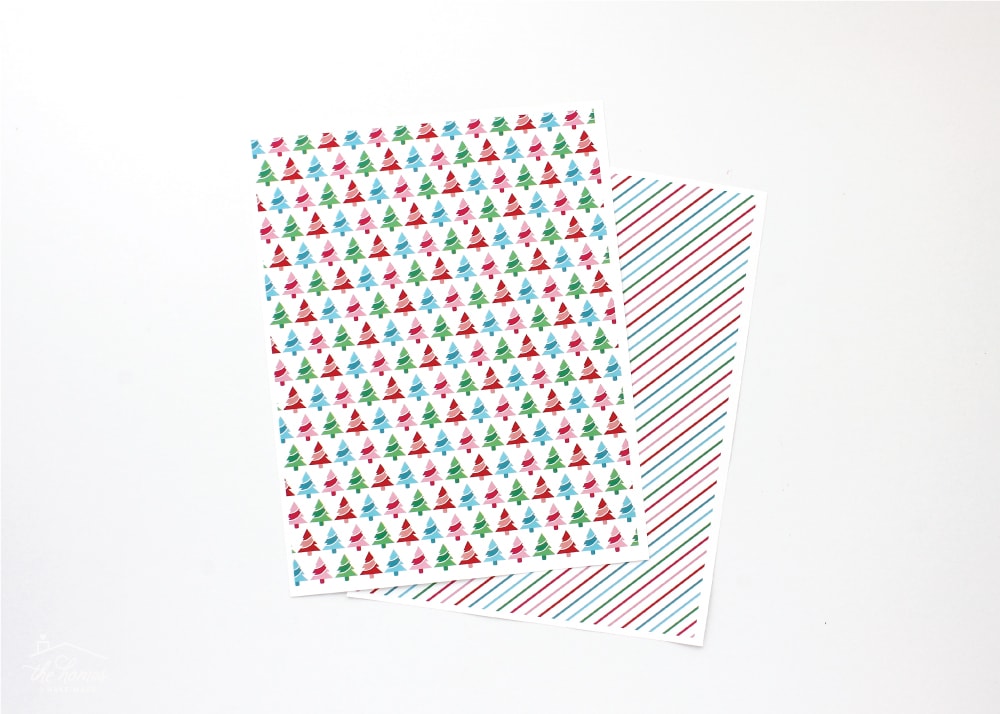
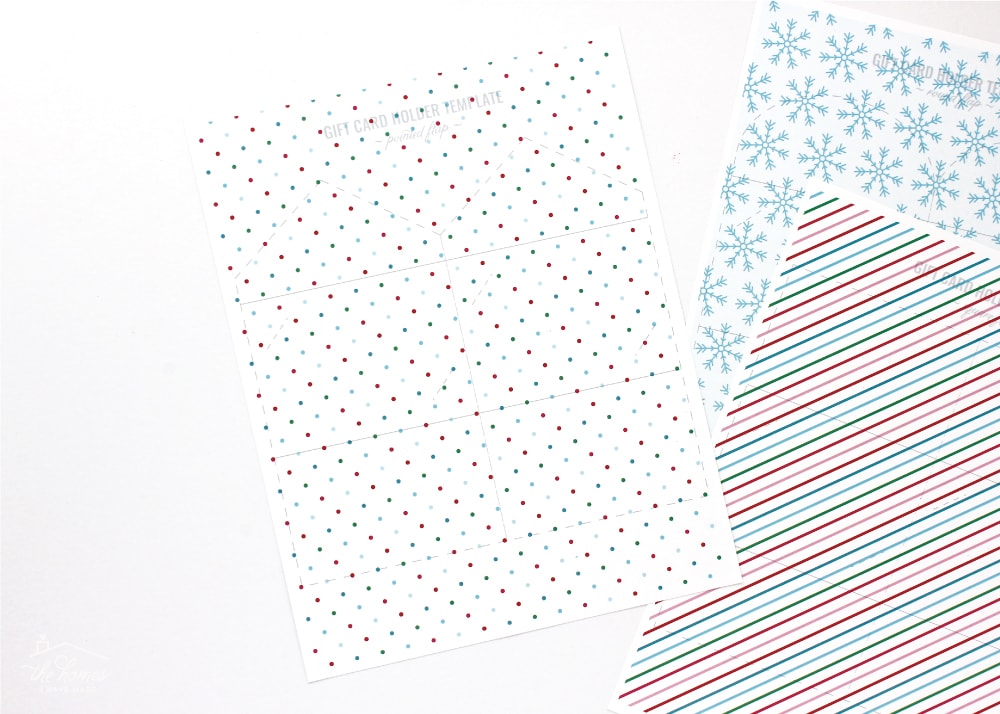
Whether you send them off to a print shop or simply feed them through your printer at home, try to pair patterns that work well together. So when you assemble the gift card holder, the pattern inside and the pattern outside coordinate perfectly. Below is an example of two I patterns I matched together, but note that for this project, you’d want them printed back-to-back (not on separate sheets as shown).
TIP! Looking for other fun printable patterns, start here!
TIP! For nice vibrant color, I strongly suggest sending printable patterns off to a print shop. I can’t justify the cost of professional printing for everyday items, but since these are gifts, paying for the high quality color and sturdy paper can be worth it!
Assembling the DIY Gift Card Holders
The first step is to download my free printable Gift Card Holder Templates. You’ll notice that the file includes three templates, all the exact same except for different flap shapes: square, round, and pointed. Each page makes 2 gift card holders. You can use any or all of the three as you desire.
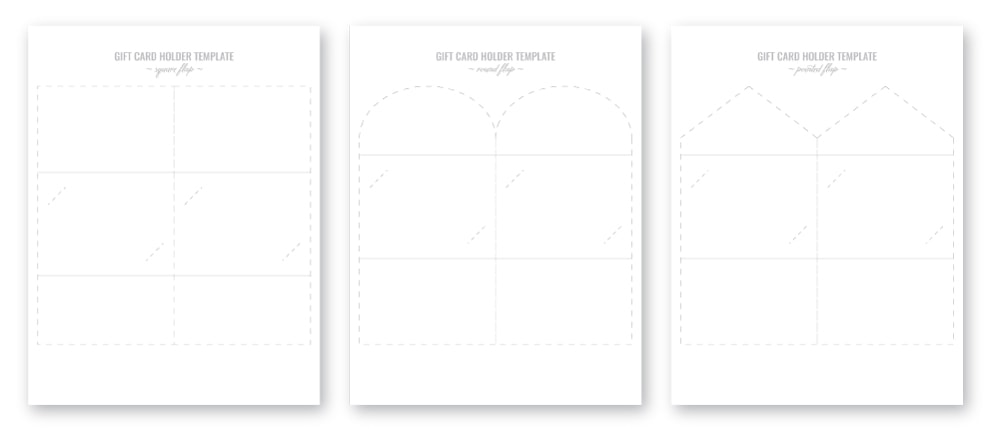
Once you have the file downloaded, your first step is to print the template onto your patterned cardstock. Yep – just feed your patterned paper through your printer again. Admittedly, the lines on the template are very light (so they won’t be noticeable once the gift card holders are assembled), so try to print the template on the lighter of your two pattern (if there is one).
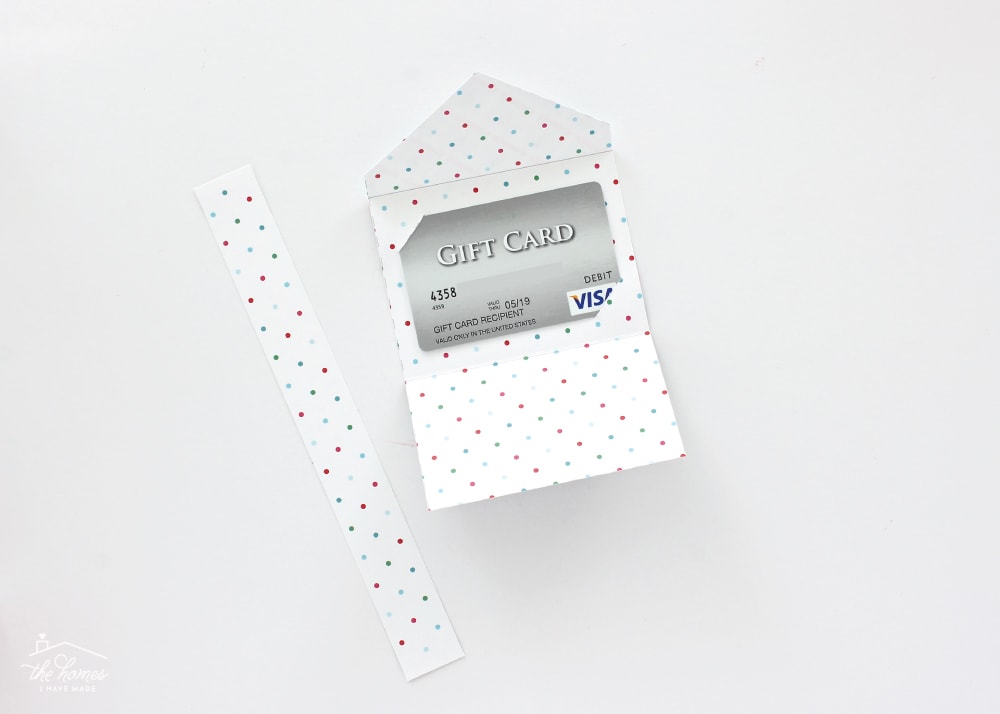
The templates feature two types of lines: dashed and solid.
You will CUT on all the dotted lines and SCORE on all the solid lines.
For the long, straight cuts around the perimeter and down the center of the two holders, I highly recommend using a paper trimmer if you have one.
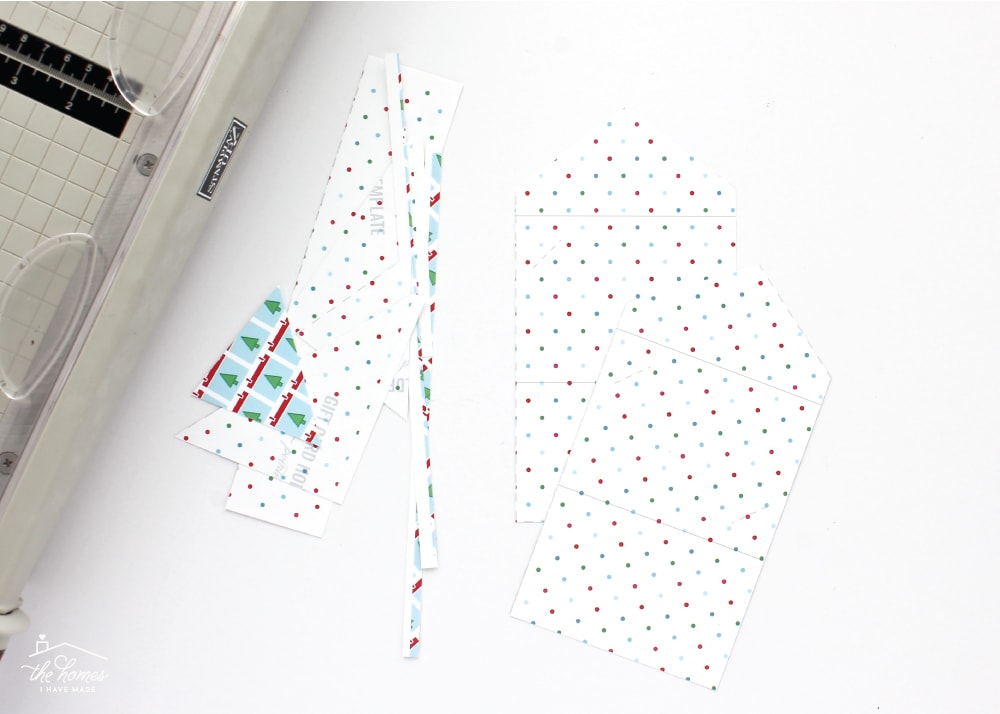
The square and pointed templates can be cut exclusively with a paper trimmer. For the round flap template, you will need to use a scissors.

Want to save this post?
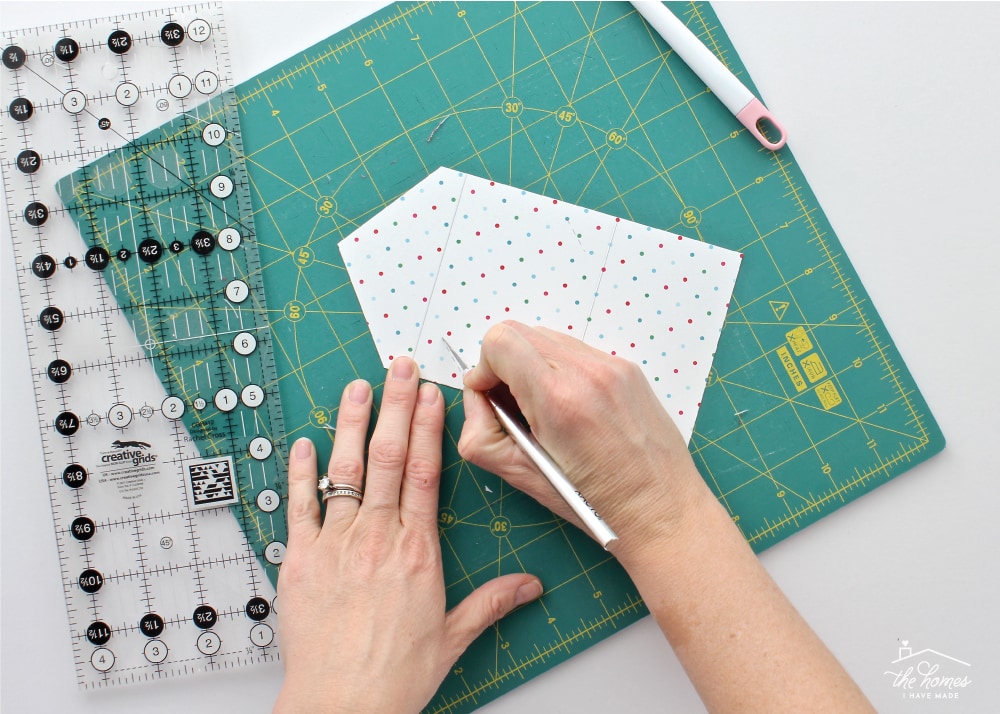
Next, use a ruler and scoring tool to score across the two solid lines on the template. You want to press deep enough to make folding easy but not so hard that you puncture the paper.

Then, use an X-actio knife to cut the two small, dashed, diagonal lines in the center of the template. These cuts should go all the way through the paper, as they are what hold the gift card in place.
With the cutting and scoring done, you simply need to fold both score lines as shown below…

…and then insert your gift card into those diagonal cuts! The fit will be snug, but I promise you will be able to get it in there. I recommend bending the card a bit as you slide it in (rather than forcing the paper slits around the card’s corners).
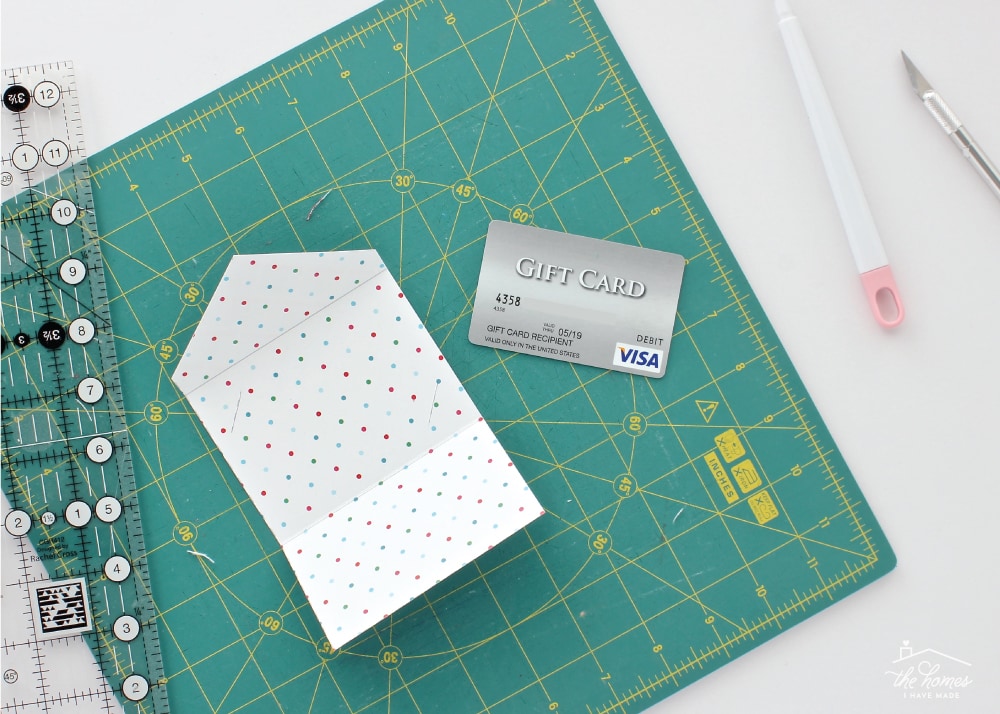
Now…when you close up the gift card, you’ll see one pattern on the outside and another (coordinating) pattern waiting as a surprise on the inside!

Yep! It’s that easy! Just keep printing and cutting and folding until you have a whole host of adorable gift card holders for anyone and everyone on your list!
Closing & Decorating the DIY Gift Card Holders
As designed, the gift cards will not stay folded up on their own. As such, you need to secure them with tape, a tag, a band, a ribbon…something…anything!
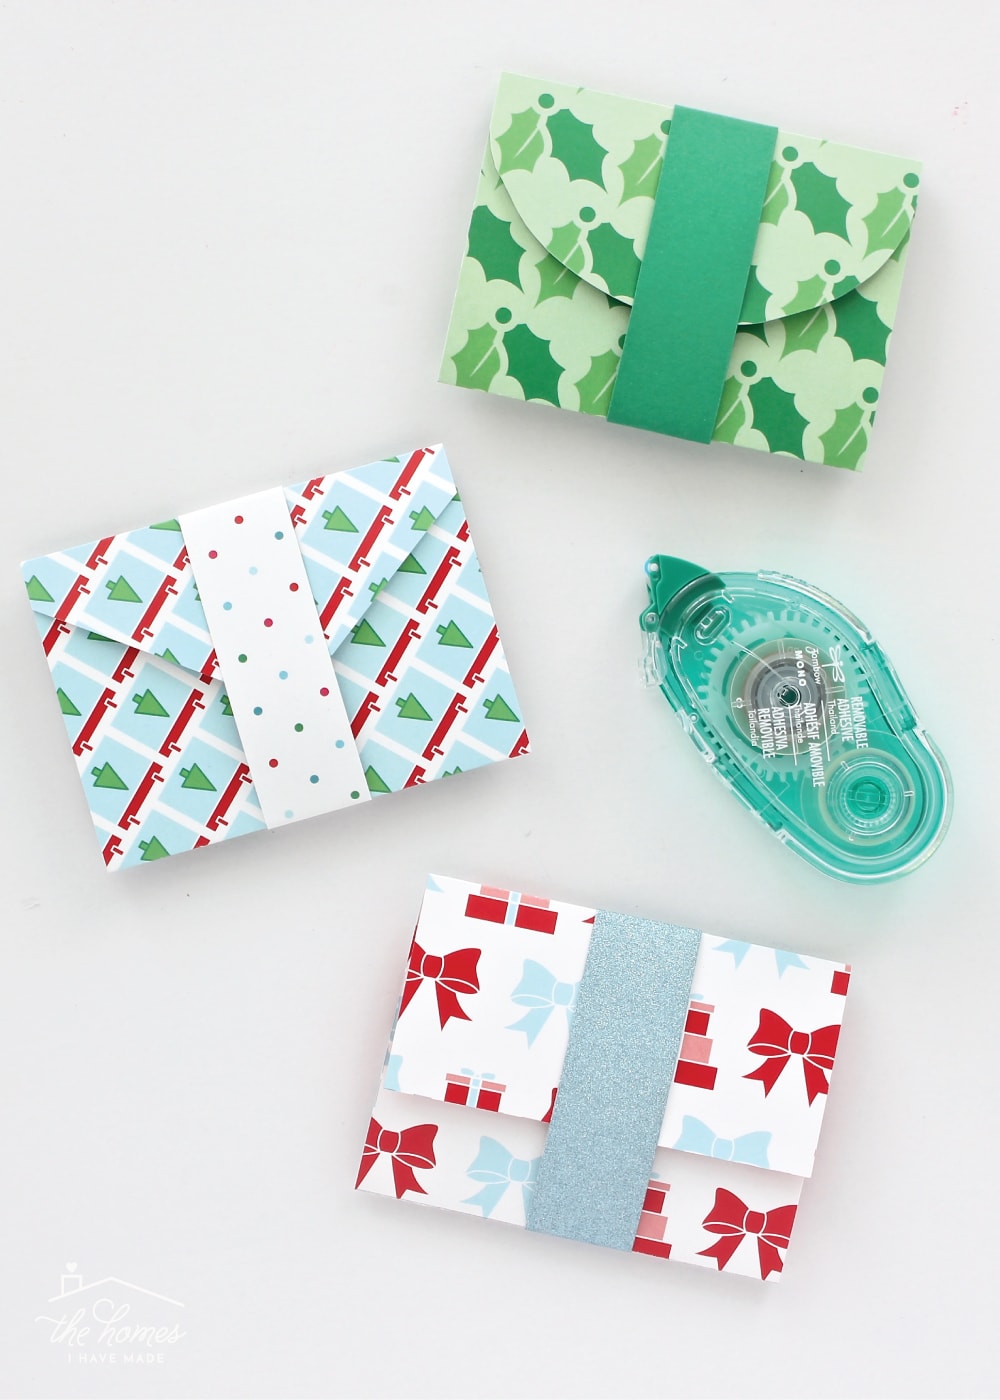
Next to a stretch of tape, the quickest and easiest way to close up your gift card is to make a band with the excess paper leftover from the gift card holders themselves. You’ll notice the printable template leaves about 2″ of blank space along the bottom, perfect for trimming down into 1″ strips to wrap around the gift card holder. And since you can flip the patterns back and forth, you’re sure to have a coordinating band!
Don’t over think this step. Just wrap the 1″ strip of paper around the gift card holder and secure along the back with some sort of adhesive (tape even works here too!) It can then easily slide on and off so your recipient can open the gift card and close it back up for safe keeping!

A simple band or ribbon around the gift card holder is a great solution, but don’t hesitate to add a few more decorative details if you desire!
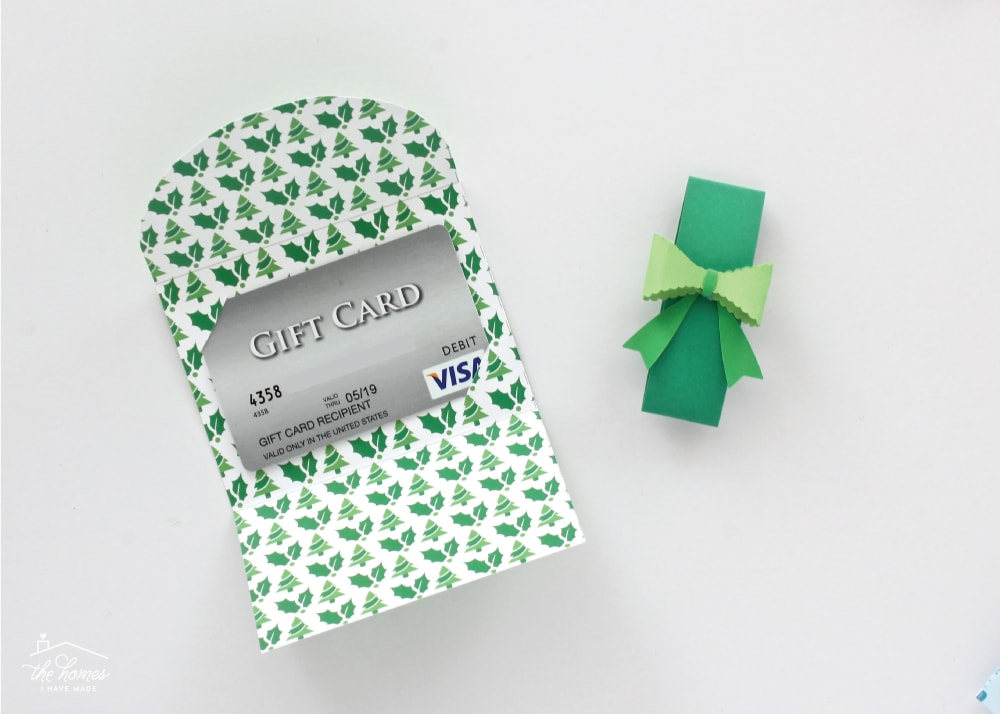
Paper bows, mini ornaments, punched out snowflakes, basic twine, tags, pom-poms and other small items are the prefect way to finish off these print-and-cut gift card holders.
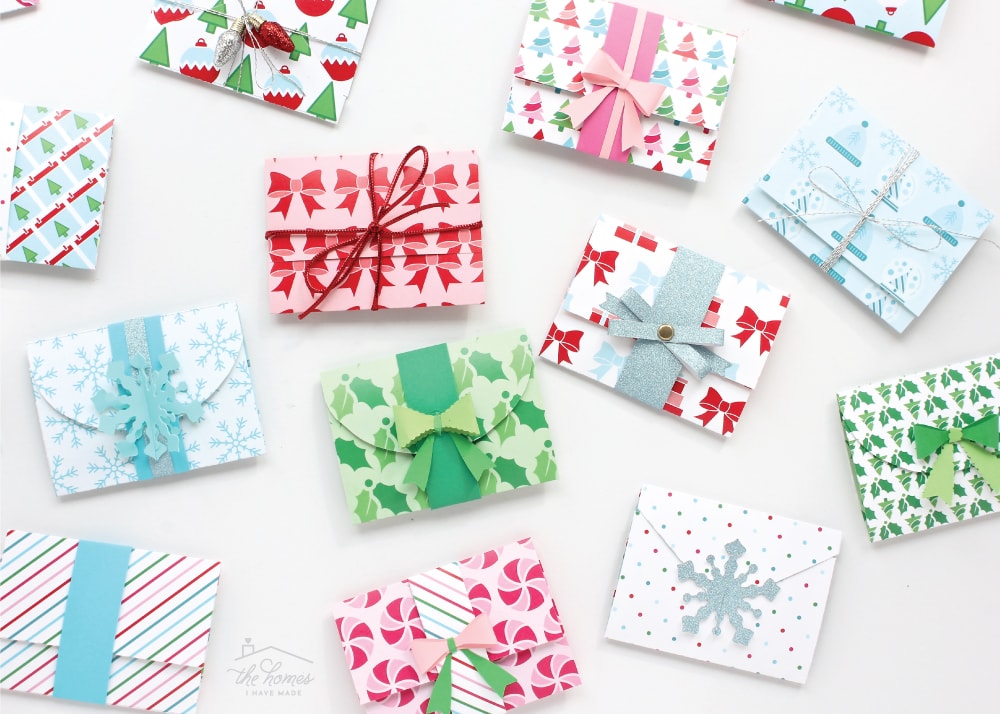
You can truly make these as quick and easy or as elaborate and decorative as you wish! But one thing is for sure: they are much cuter than the plain little envelopes gift cards usually come with, don’t you think?!?!
I hope you guys love this project as much as I do. I will admit this was one I really had to think through and experiment with. I knew I wanted to make some sort of print-and-cut gift card holders, but I also wanted them to be really colorful and eye-catching. More than anything though, I wanted them to be quick. And easy. At this point in the holiday season, I know tedious projects that require cutting lots of pieces and extensive assembly aren’t realistic for you or for me. I wanted these gift card holders to be something you said…in a pinch as you’re running off to the neighbor’s party…”Oh…I can make that really quick!” Because I promise you, these really are that quick!
Happy folding, my friends!
Megan

9 Comments on “DIY Gift Card Holders (with Printable Template!)”
Hi Megan, these gift card holders are super cute!! I’ll be sure to use them, not just for Christmas but other Holidays as well. Thank you for great idea.
Thanks so much for your great pattern. Just used it for my Christmas gift cards..Merry Christmas to you.
Great idea ! Beautiful graphics. AMAZING job !!!
I never got the template, it’s not on this page
I loved your demonstration. I was not able to find where you print the gift card template. Would you please send it to me. Many thanks.
Hi Felicia!
Sorry you weren’t able to find the download. Did you put in your information HERE?
Once you do, it should arrive via Email (check your Spam/Trash/Promotion folders if you can’t find it!)
~Megan
I would love to receive the template. Thanks
I didn’t receive the template after I commented. I would really like to have it as I’m sending so many gift cards this year.
Love your inspiration! And craftiness Thank you!