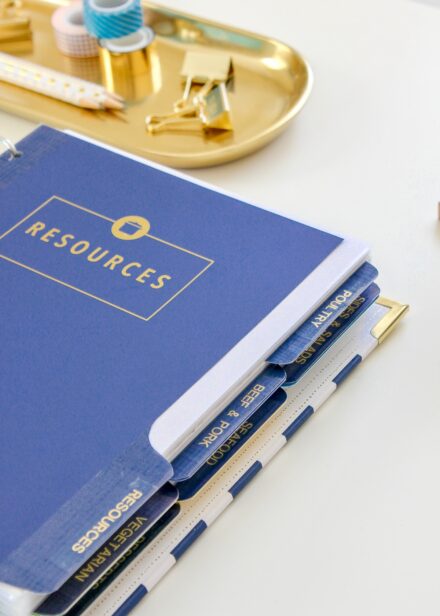
How to Make DIY Binder Dividers on a Cricut Machine
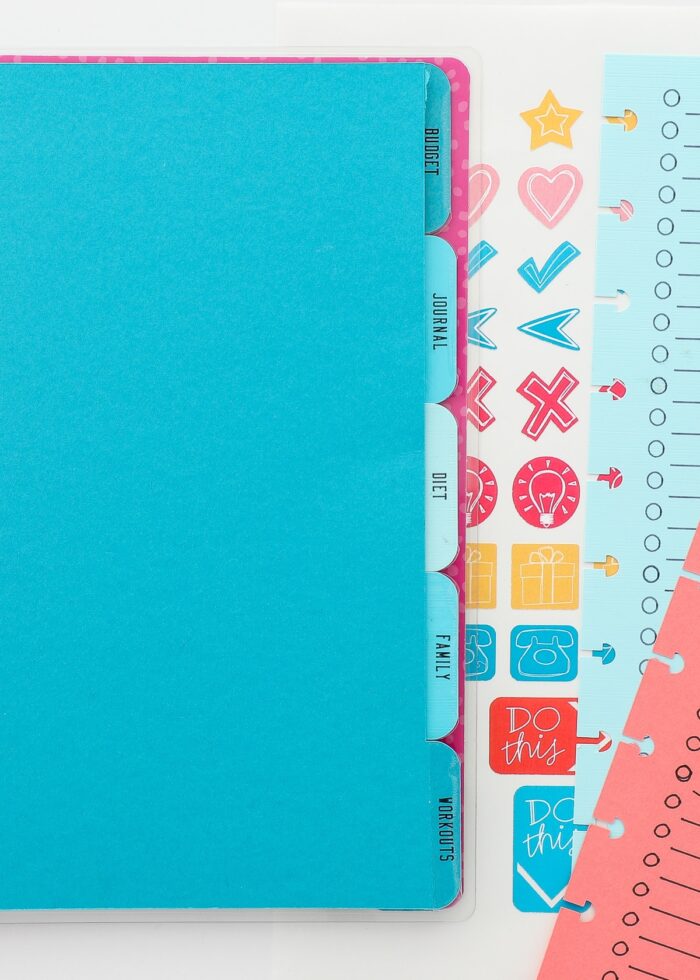
I recently shared a bunch of really fun ways to print-and-cut your way to a cute and organized binder. And while I personally use my printable dividers a ton, I also really like to make my own tabbed dividers using cardstock and my Cricut machine. Not only is DIYing tabbed dividers super convenient and budget-friendly (I can usually whip out a set in minutes using supplies I already have at home), but this method also allows me to customize them for my unique needs. Whether I want three tabs down the edge or 10, square tabs or fancy ones, all the same color pages or multi-colored, standard size or small, solid paper or patterned…you get it…the customization options are endless! Today, I’m breaking down how to make DIY binder dividers with a Cricut machine so you too can easily customize any binder system!
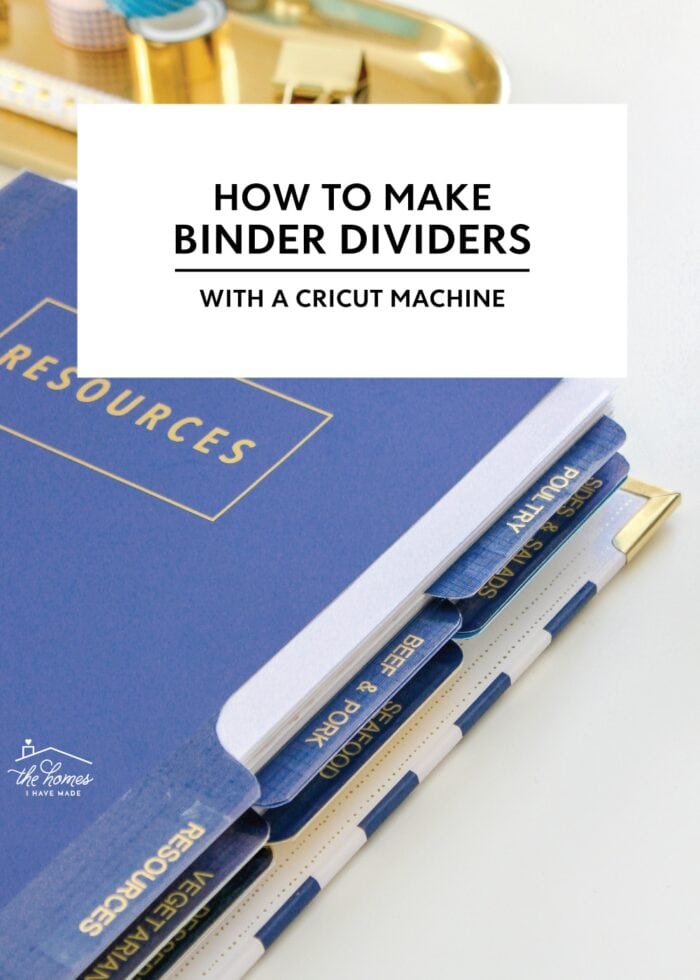
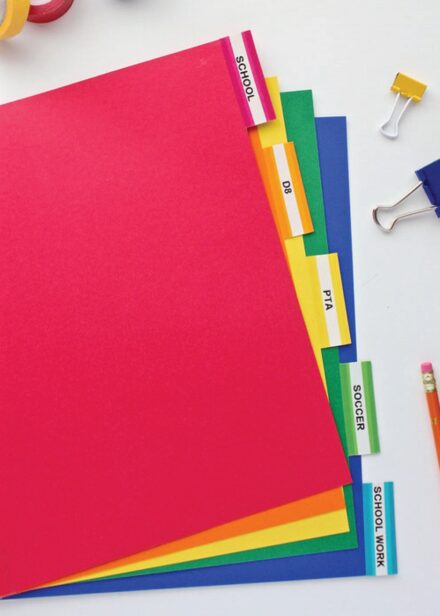
Making your own DIY binder dividers is one of the quickest organization projects you can tackle with your Cricut machine. After desinging your tabbed dividers in Cricut Design Space, you can cut them out of any pretty paper you have on hand and then take a few extra steps to label and reinforce them.
So whether you’re organizing your recipes, important documents, your planner, or your DVDs, using your Cricut machine is a great way to get the exact system you need!


Supplies Needed
To make your own DIY binder dividers, you just need some basic supplies!
For the Tabbed Binder Dividers
- A Cricut Cutting Machine – in order to make “standard” binder dividers, you will need to use either a Cricut Explore or Cricut Maker machine. The Cricut Joy cannot cut anything bigger than 4.5″ wide.
- Heavy Card Stock – if you are making divider sheets for a standard-size binder, you will need to use 12×12″ cardstock or heavy-duty paper
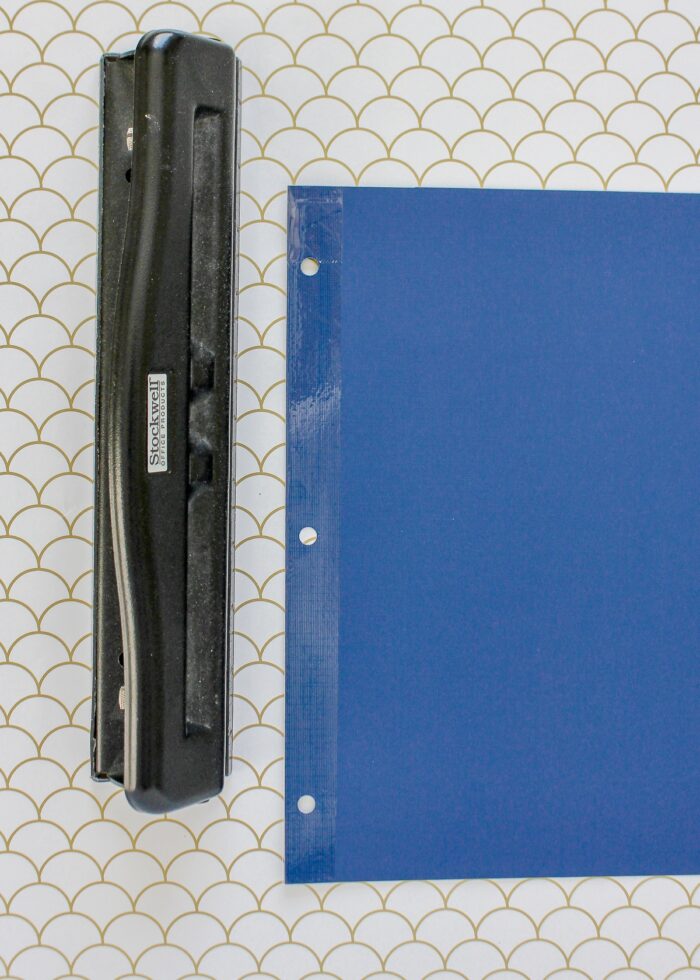
- Hole Punch – I like this one because you can adjust the hole placement.
- Clear Packing Tape
To Label the Tabs
- With a Cricut Machine:
- Cricut Pens in your preferred color, thickness, and sheen
- With Cricut Print Then Cut:
- With a Label Maker:
How to Design Tabbed Binder Dividers in Cricut Design Space
Without question, the longest “step” in this project is designing your dividers in Cricut Design Space. Not because it’s hard, but because there are so many options for customization!
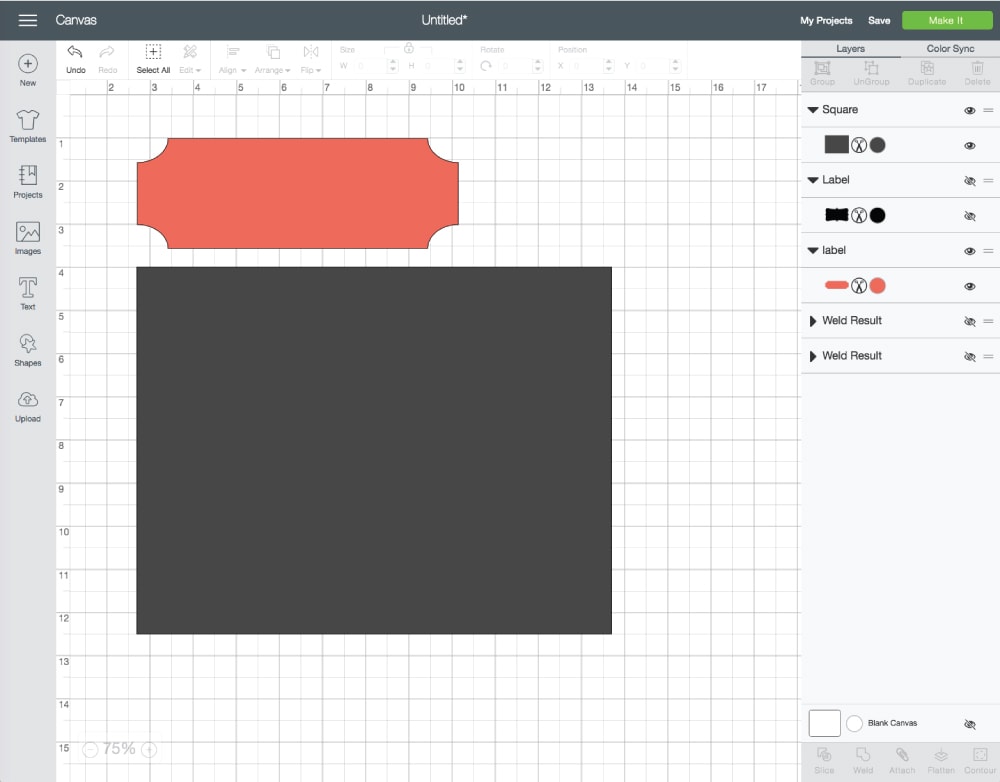
Open a “New Project” and place two objects on your canvas:
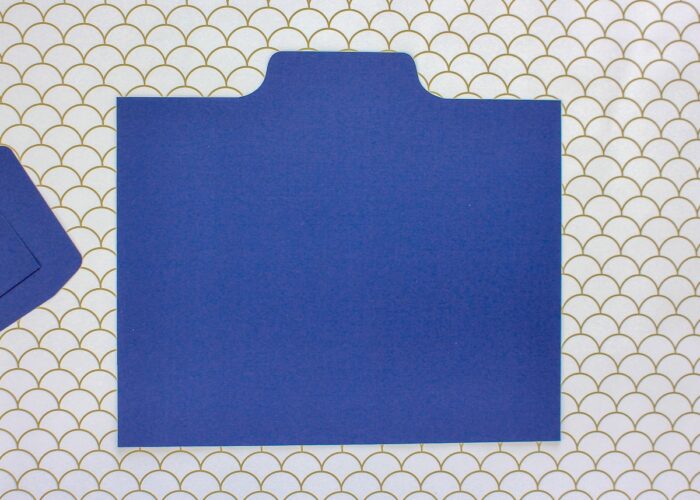
- A rectangle – sized to match the paper that fits inside your binder; if making DIY dividers for a standard binder, make this rectangle 8.5×11.”
- Any label/tag/tab shape you want for the divider tab; I used a basic notched rectangle.
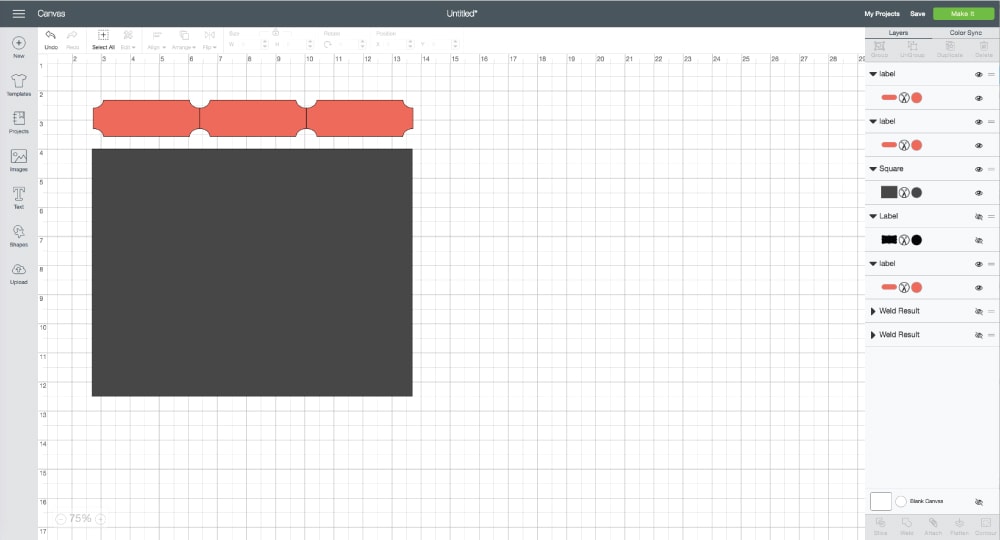
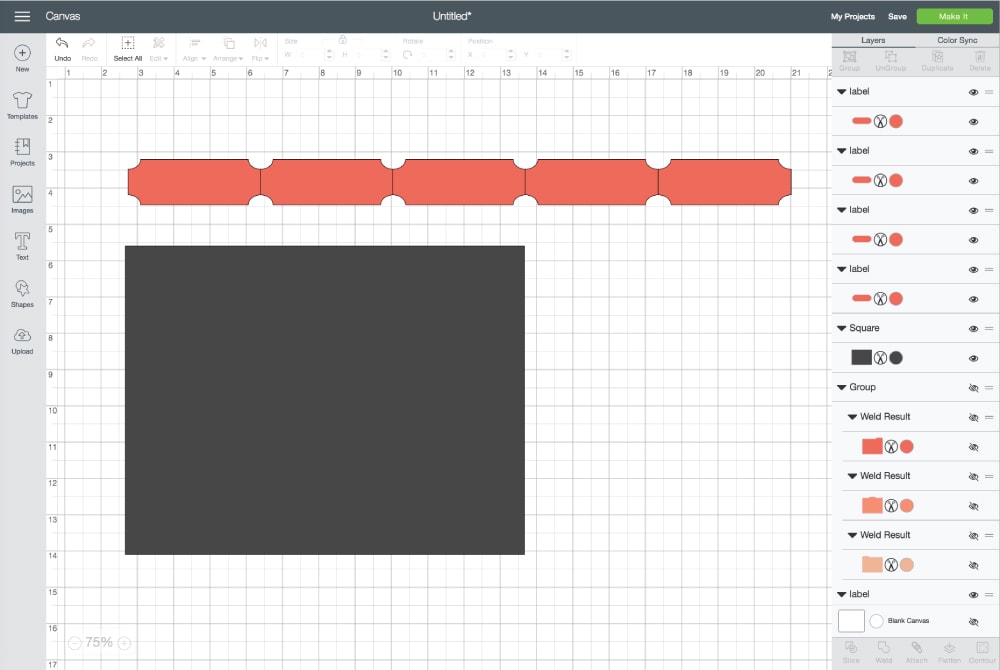
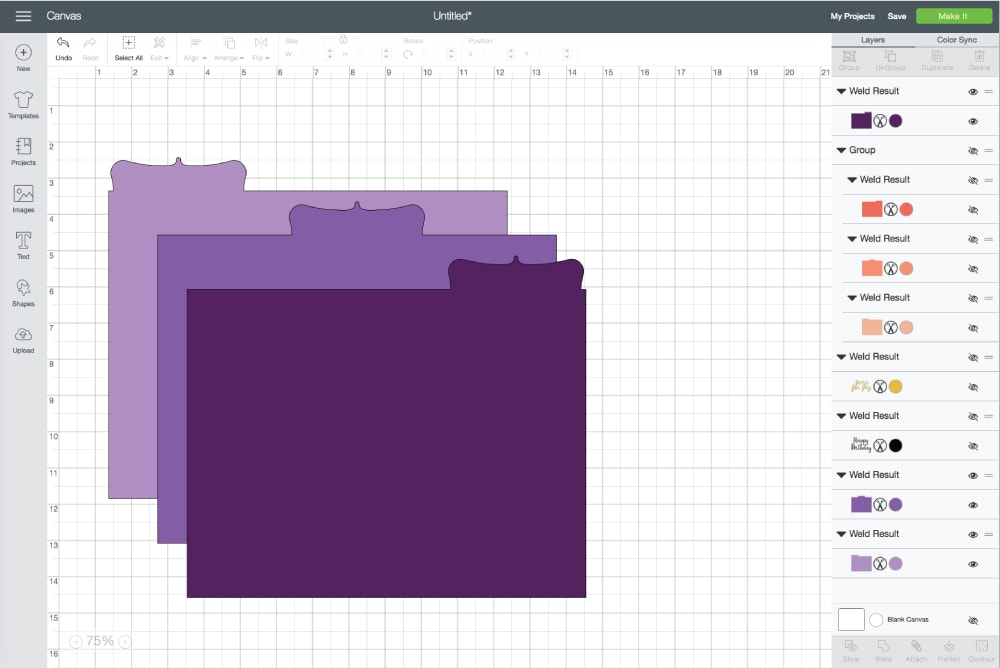
Determine how many tabs you want on your dividers and duplicate the label that many times. I wanted dividers with three tabs down the page, so I replicated the label three times.
Next, bump the labels RIGHT next to each other edge to edge (without overlap), and use the Align tools (in the top toolbar) to line them up along the top.
Then, select ALL THREE TABS together and re-size the entire GROUP to match your rectangle length (in my case, 11″).
At this point, the tabs are the perfect size to fit down the entire length of your divider page.
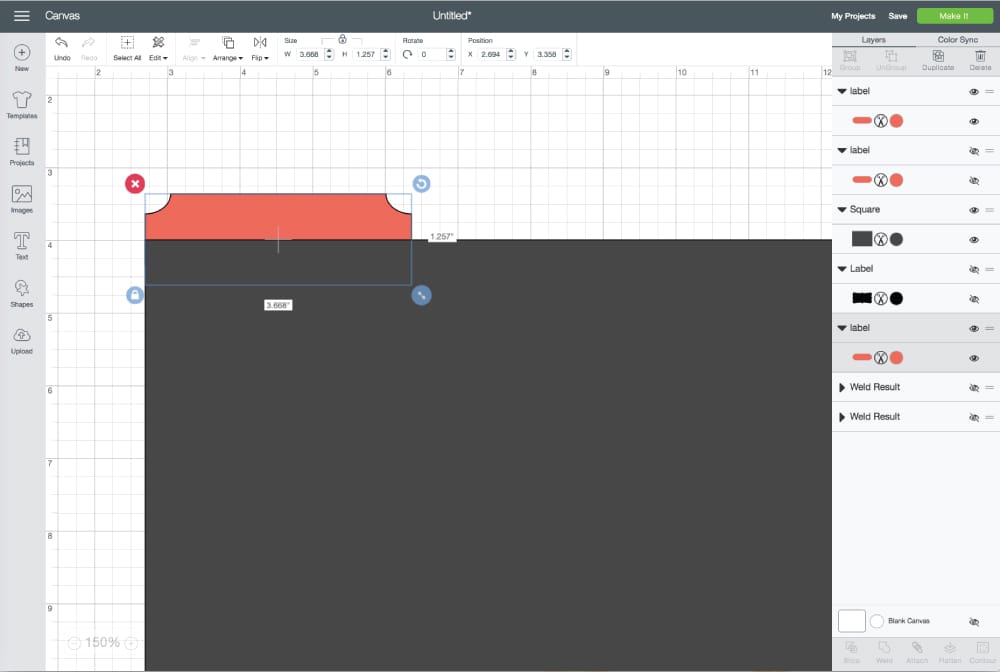
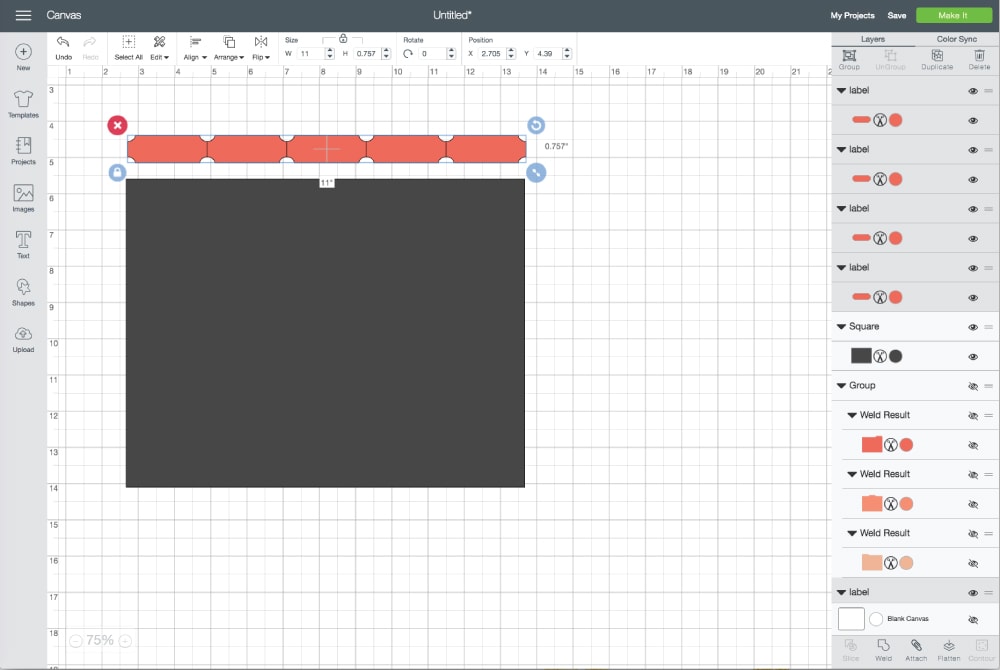
Before proceeding, hide the middle and right-sided tabs while you work on the far left one.
Next, nudge the tab down until it overlaps with the rectangle. You may certainly decide how “high” you want your tab to sit, but I recommend using the + in the middle of the image to line up the center of the tab with the edge of the divider. Then, use the “Align” tools to align both the tab and the rectangle all the way to the left.
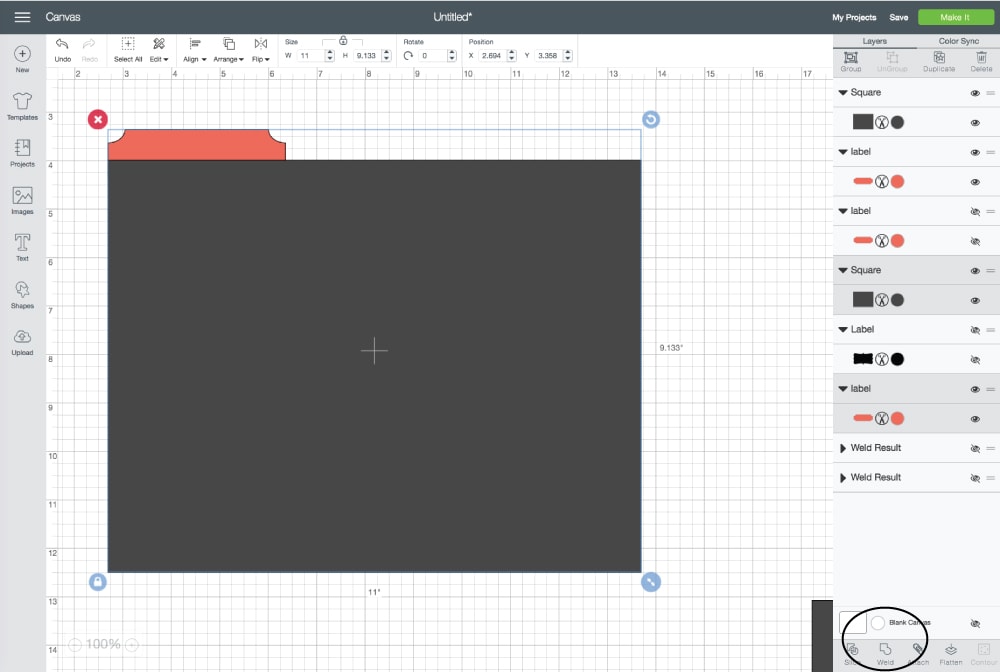
Once you have the tab placement exactly where you want it (make sure they are aligned left!), select both objects and hit the “Weld” button on the bottom right toolbar. This will combine the two shapes into a single tabbed divider!
Psssttt – If you are unfamiliar with the Weld tool, learn more here: How to Use the Weld Tool in Cricut Design Space
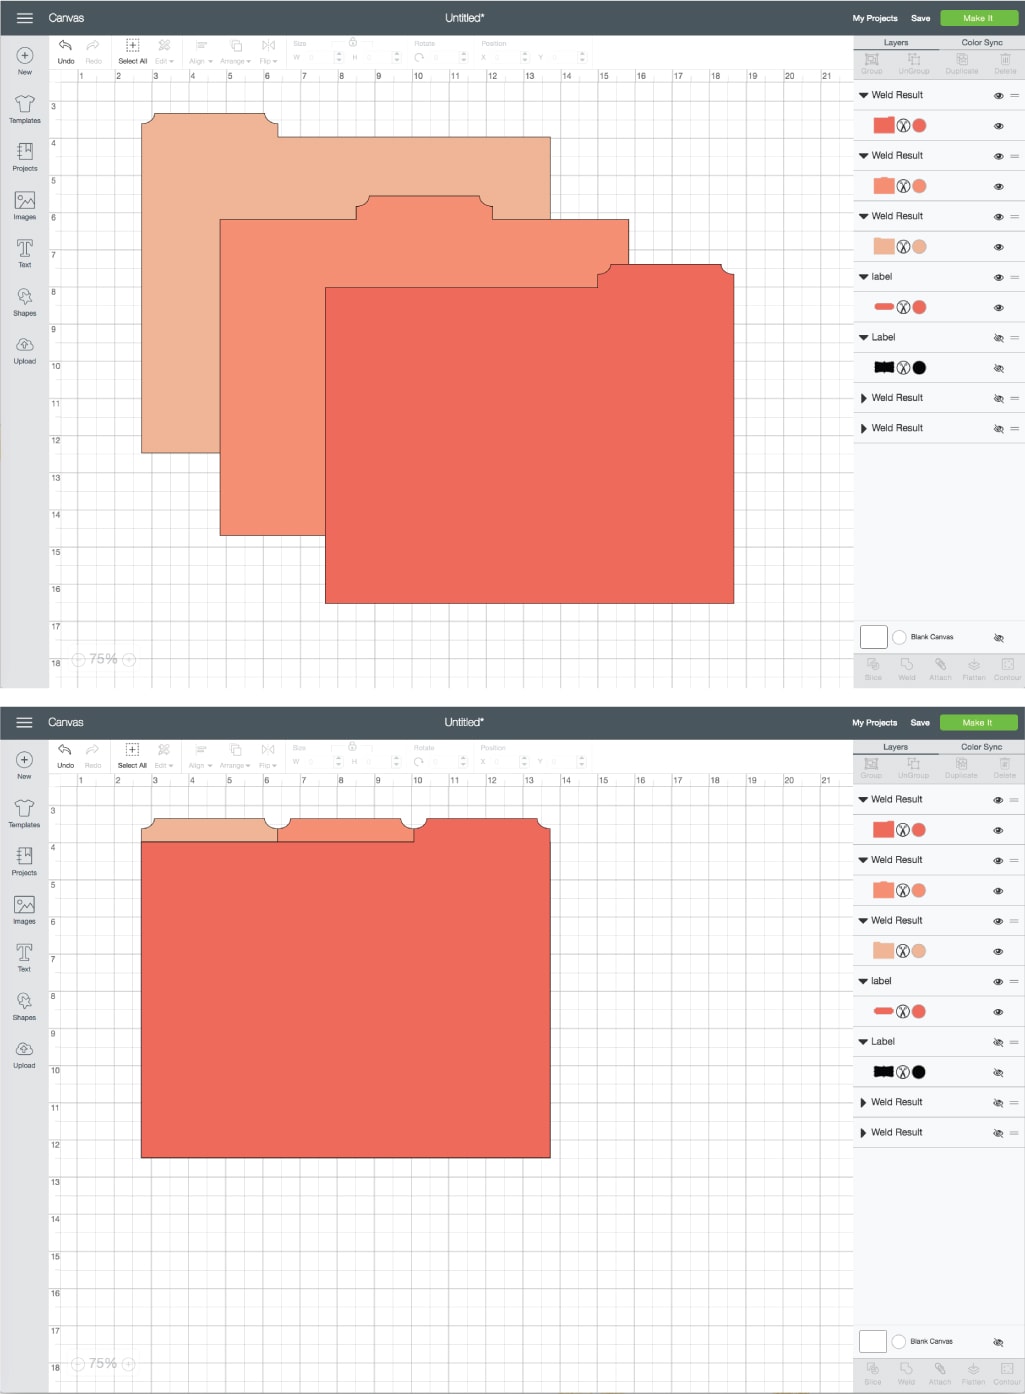
To make the other two tabs:
- For the far right divider: duplicate the first divider and “Flip” it (in the top toolbar) horizontally.
- For the middle divider: use the same steps as above, but instead of aligning the tab and rectangle to the left, align the tab and rectangle to the middle before welding.
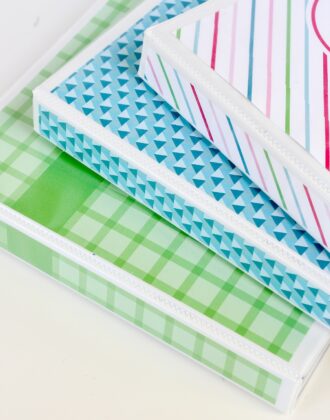
Once complete, you will have three perfectly customized dividers that can be cut from any 12×12″ paper you wish!
Adjusting the Tab Count
Using this same process, you can essentially make any size and number tabs you wish for your binder. Instead of three tabs down the side, let’s make a set with 5 tabs down the page!
Start with the same tab and rectangle (sized to your paper size); but this time, place 5 tabs end-to-end and align along the top.
Again, select all 5 tabs and size the entire group to be 11″ (or fit to your length of paper).
Nudge the tabs down onto the rectangle until they are at a height you like…
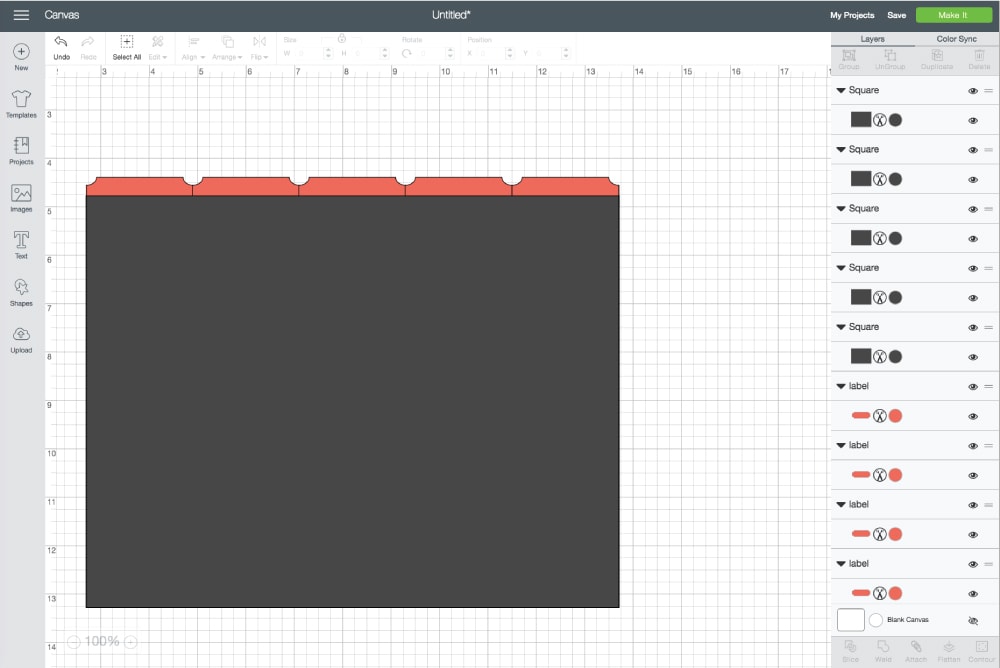
…and then Weld them one at a time to an 8.5×11″ rectangle.
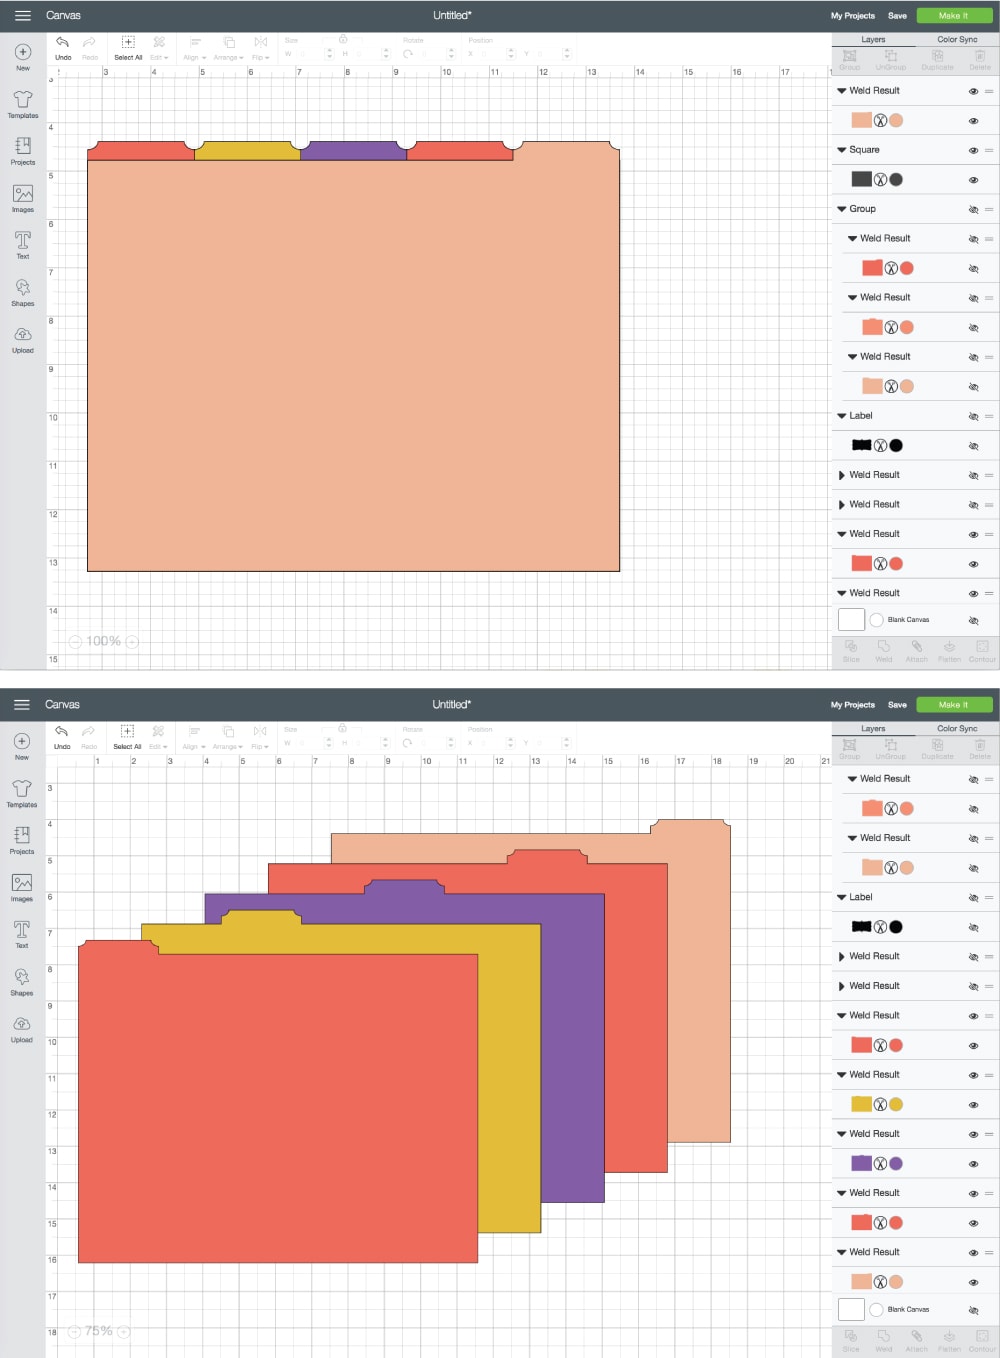
Just like before, you only really need to make the two left tabs plus the middle. The two left tabs can be duplicated and then flipped horizontally to make the two right tabs and complete the set!
I’ve only shown 3 and 5 tabs in this tutorial, but you can essentially make as many tabs as you want using these same steps.
Changing Up the Tab Design
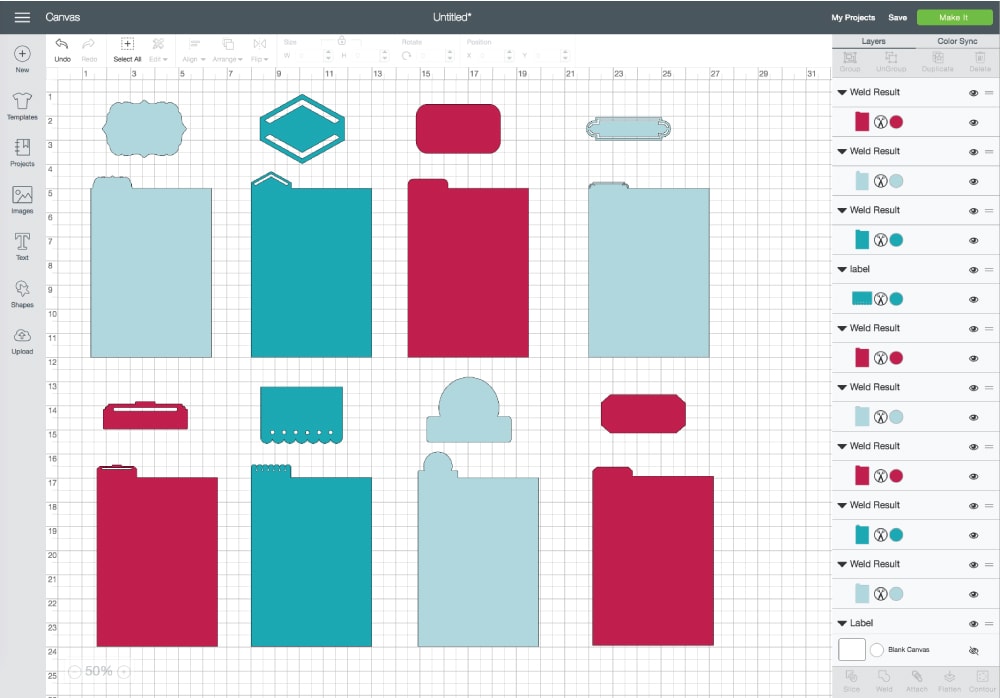
How about one more fun variation?! You can change up the look of the tabs too! Below, I used a more curvy shape instead of the notched rectangles…
…and here are just a few more shapes (straight out of the Cricut Design Space Image Library) that would also make really fun tab designs too!
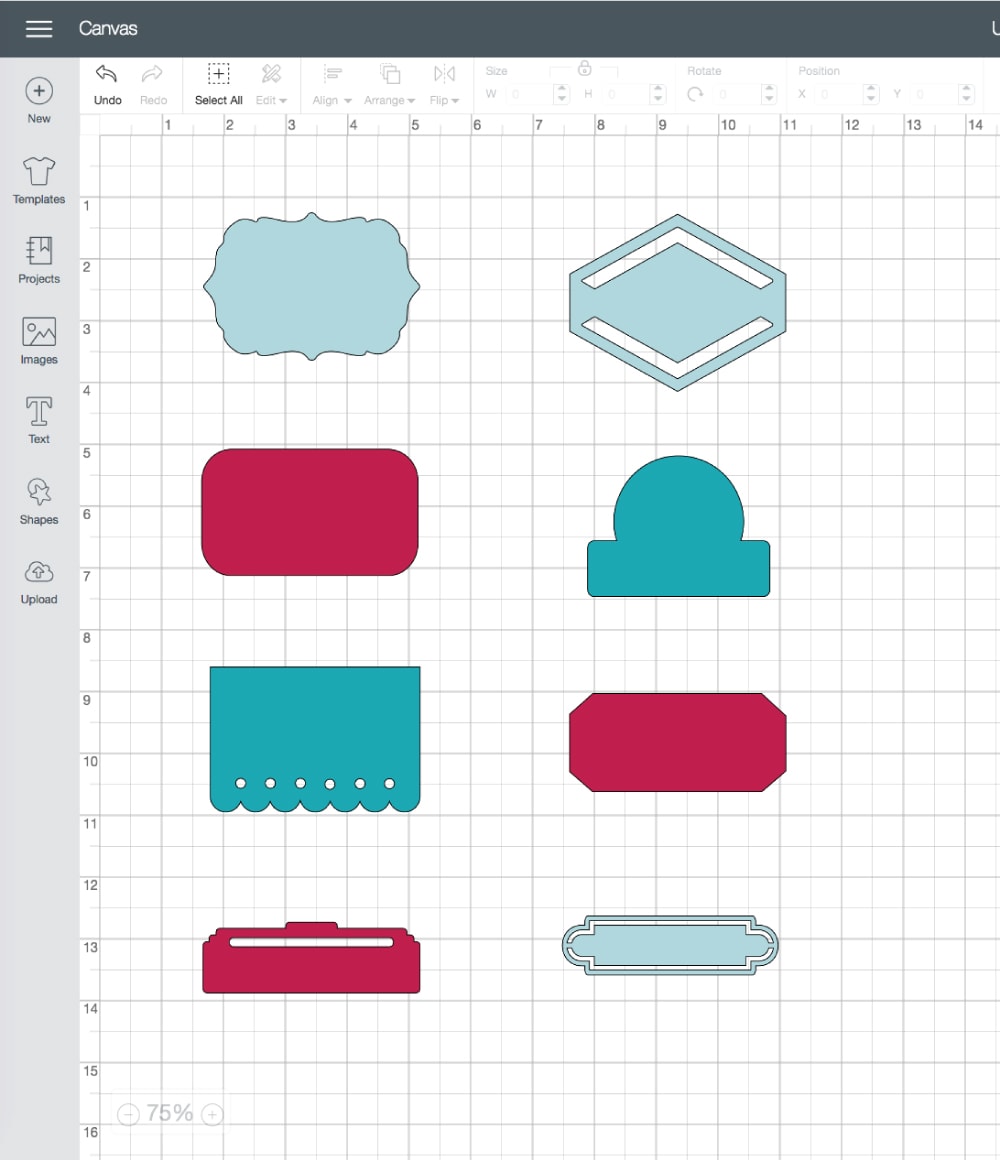
By using the same Weld concept with these different tab shapes, you sure can create some really fun binder dividers!
Cutting Out the Binder Dividers
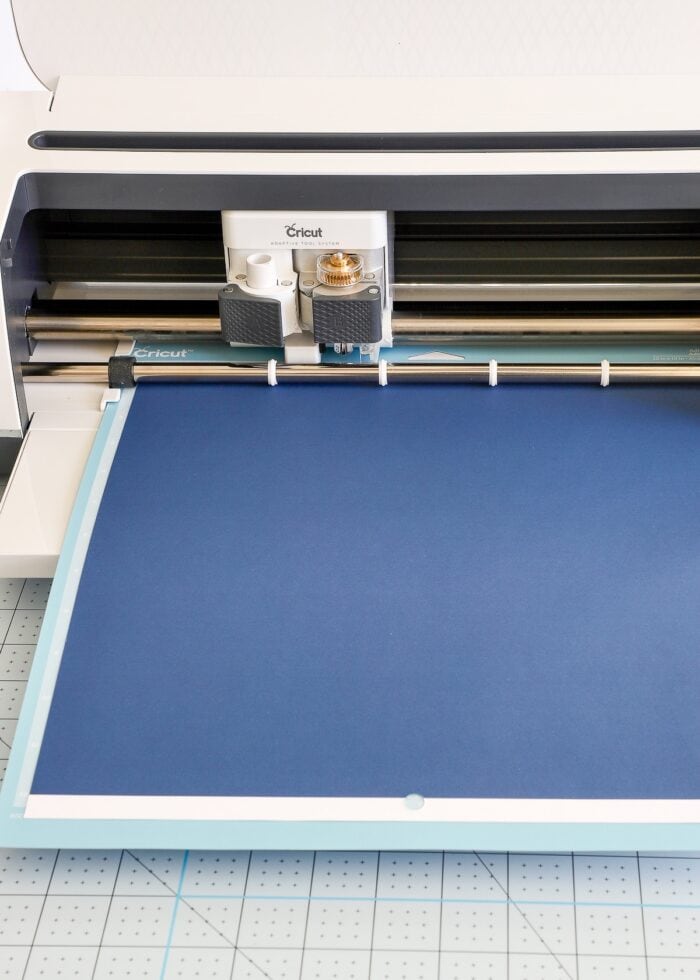
Once your binder dividers are designed exactly as you want them, cut them out with your Cricut machine, ensuring you make the proper material selection based on what paper you choose.
How many dividers you can cut per mat will depend on how big your dividers are. For standard binder dividers, you will be able to cut 1 divider per 12×12″ piece of cardstock.
Once your dividers are cut, proceed with the following steps for labeling and reinforcing.
NOTE: One labeling method mentioned below (i.e., Cricut Pens) should be done before cutting the dividers out.
Want to save this post?
How to Label the Divider Tabs
There are three great ways to label your tabbed dividers, two are using your Cricut machine and one is using a regular ol’ label maker!
Label the Tabbed Dividers with Cricut Pens
One way to add text labels to your DIY Binder Dividers is using Cricut Pens during the cutting process. While this method is easy and looks great, it’s important to note that this method will ONLY put drawn text onto the front side of your tabbed dividers (which means you won’t be able to read them once they are flipped over).
NOTE: This will need to be done during the original design process outlined above. The text should be added before you cut the dividers out so that everything (cutting and writing) is done at the same time by your machine.
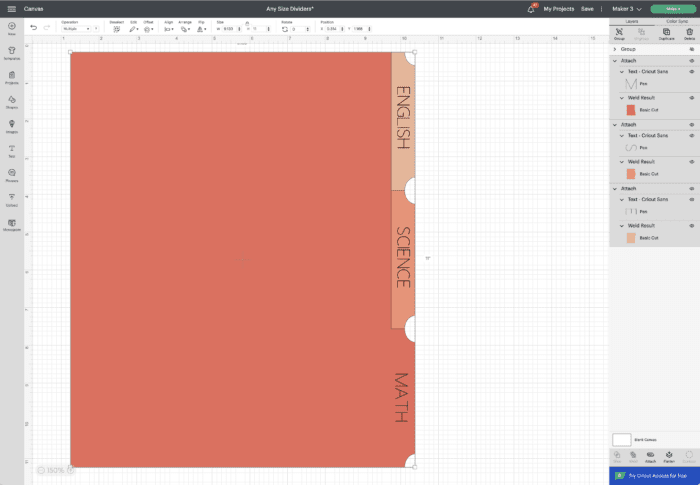
Back in Cricut Design Space, use the Text Tool (on the lefthand toolbar) to add a text box to your canvas. Type in a label for the first tab.
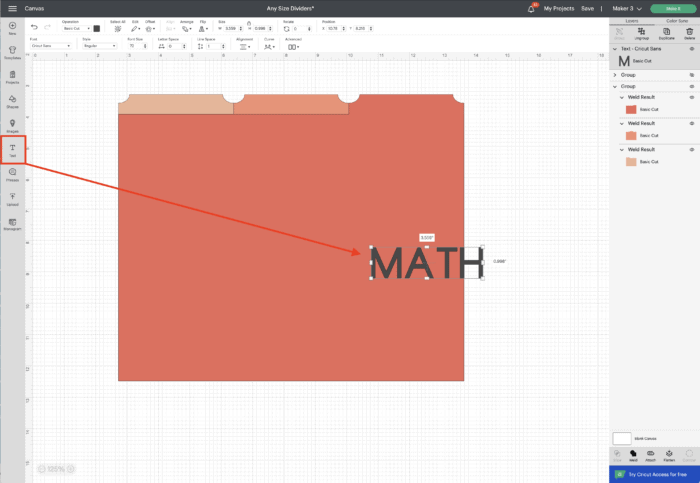
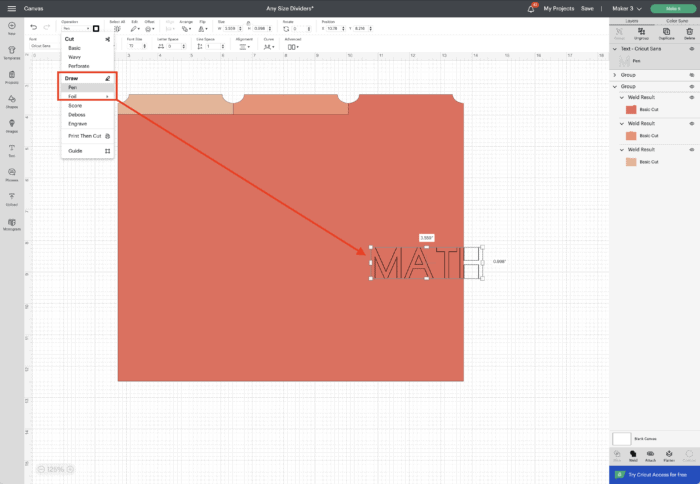
Under “Operations,” change the text to “Pens” so that your Cricut machine knows to execute the text with a Cricut Pen (rather than the blade).
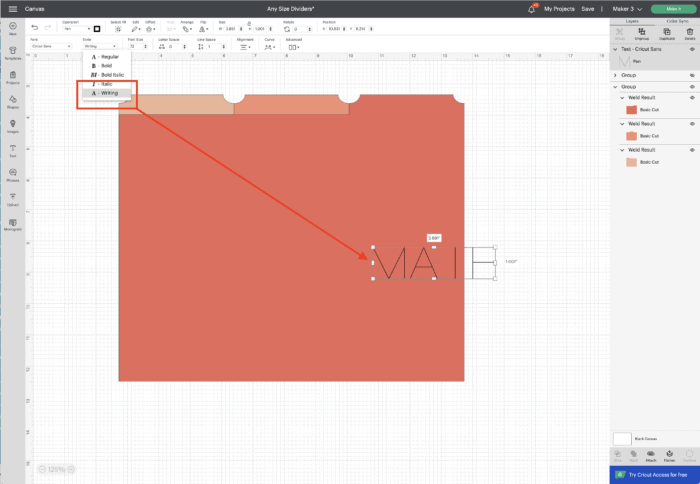
Then in the Font Toolbar, select the font you want for your label.
TIP! In order for the text to look “written” or “printed,” I recommend using a “Writing Style” font. Learn more about what that is here: A Comprehensive Guide to Using Cricut Pens.
Next, place the text onto the tab, and size and position it to your preferences.

Finally, select BOTH the divider and the text and click “Attach” in the bottom right-hand toolbar.
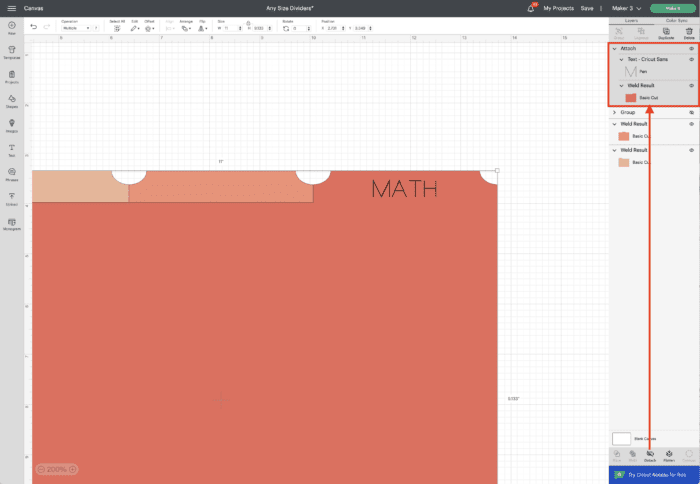
Now the text label will be drawn directly onto your DIY binder divider during the cut process!
Label the Tabbed Dividers with Cricut Print Then Cut
Another labeling option is to use the Print Then Cut feature to make stick-on labels that can be put onto the tabs after the dividers are cut. Although this process involves a second round of designing and cutting, it’s a great way to end up with labels on both sides of the dividers.
My preference is to make Print Then Cut labels onto clear sticker paper that can then be folded right over the tops of the tabs. This way, the pretty paper you used for the dividers is still visible under the labels.
Printable DIY binder tabs are a bit involved, so if you want to give this a try, refer to my full instructions here: Print Then Cut Labels for Tabbed Dividers
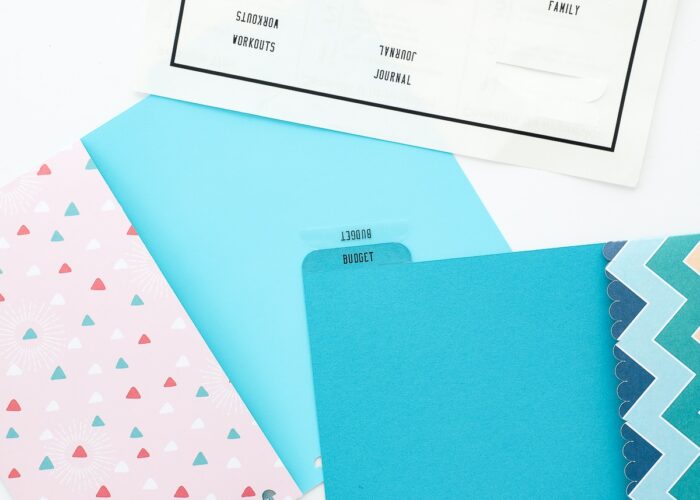
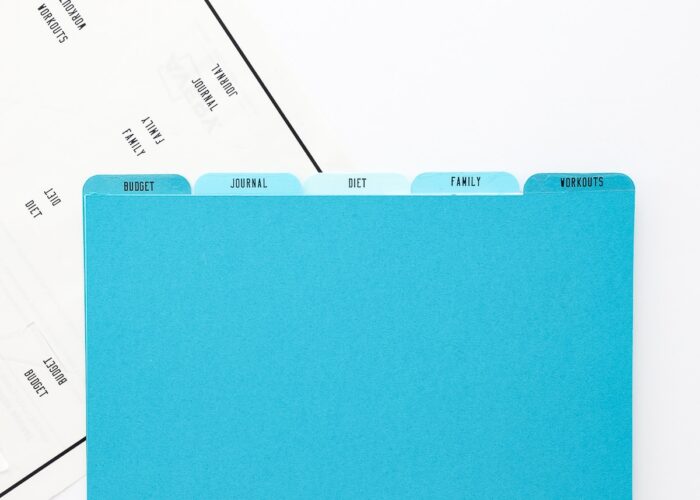
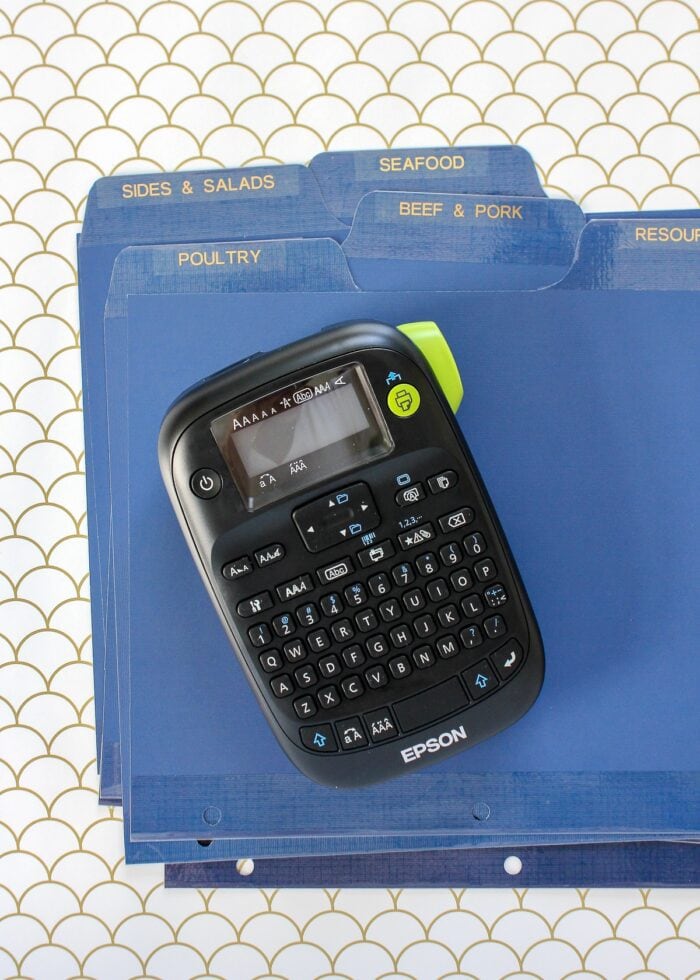
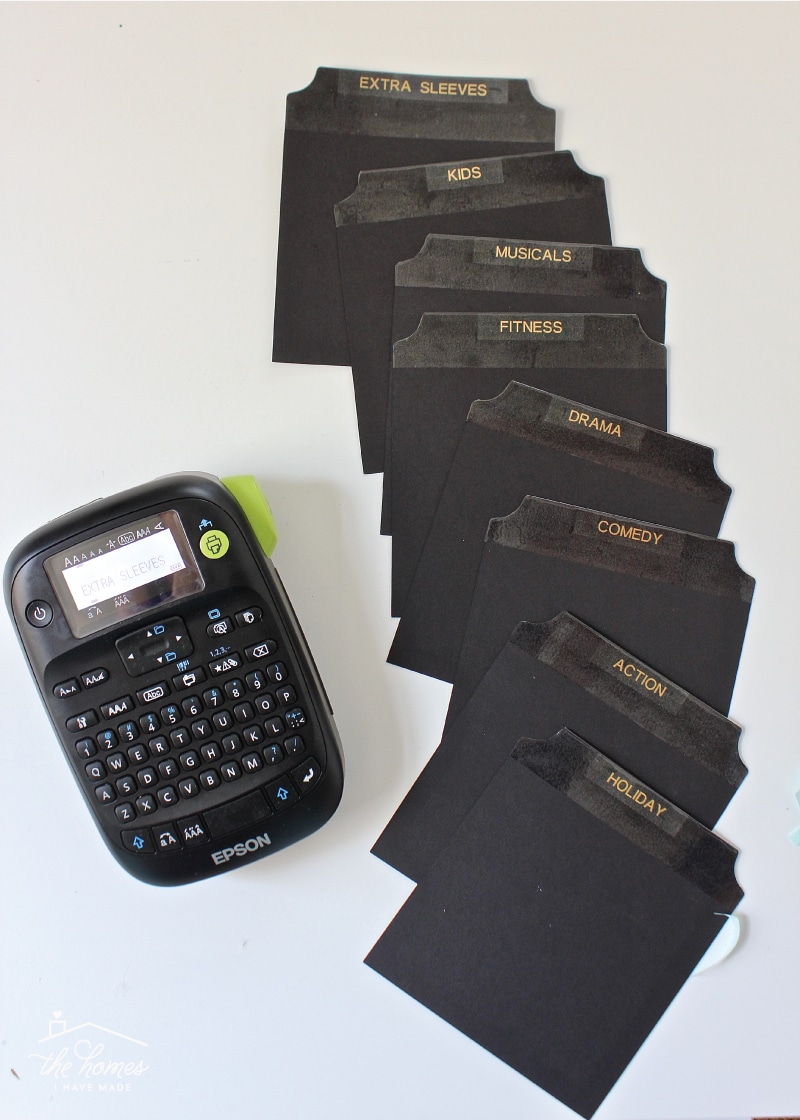
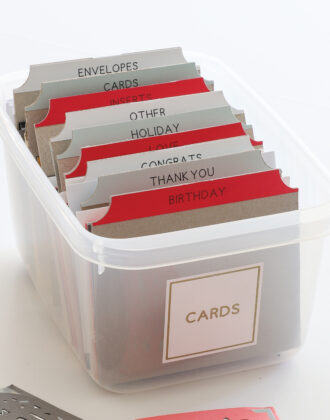
Label the Tabbed Dividers with a Label Maker
The last option, which is likely the easiest of all, is to use a label maker to generate labels for your tabs. This eliminates the need to fuss with Cricut Design Space or your machine and instead allows you to punch labels out and place them wherever you need them!
I personally like to use clear tape in my label maker to make them as inconspicuous as possible (show here: gold letters on clear tape)…
…but even if you have white tape in your label maker, you can still make the labels look really stylish by adding extra space on both sides of the text so they stretch the full tab (like a stripe!)

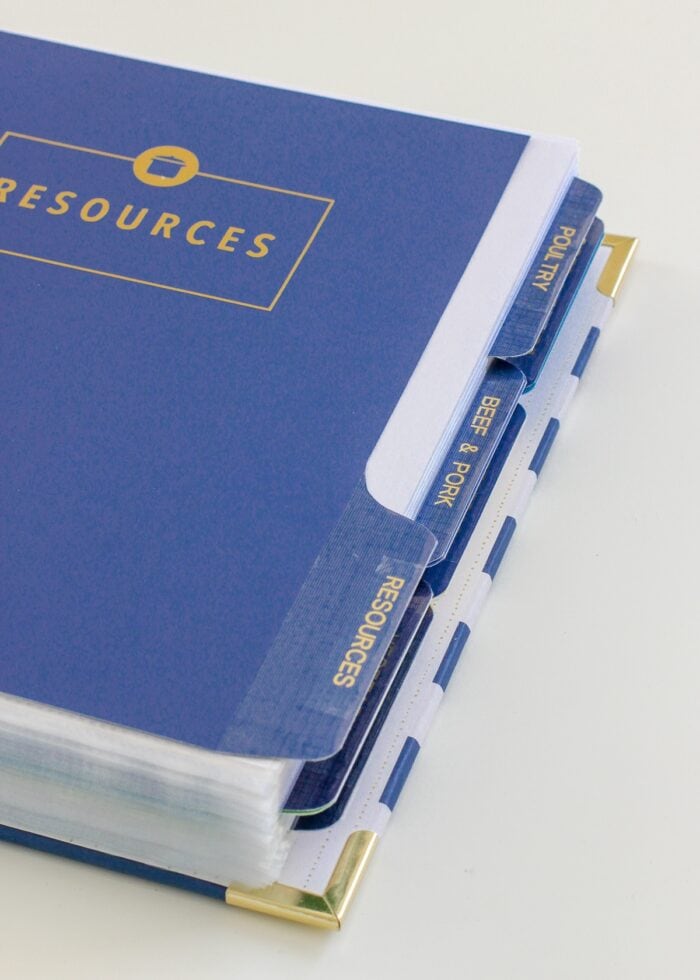
Reinforcing the Divider Tabs
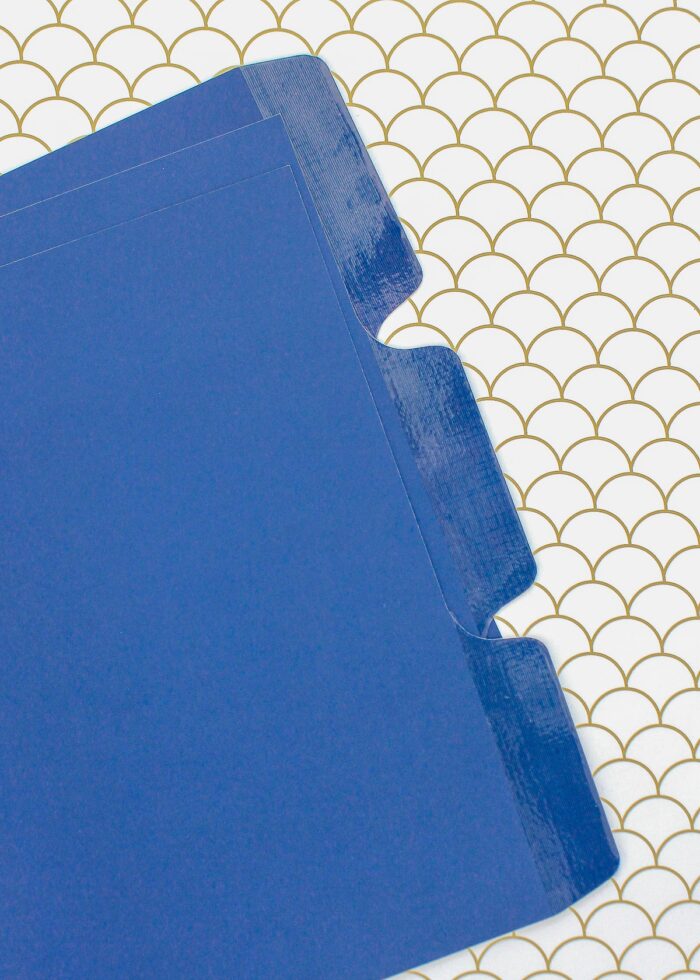
These tabbed binder dividers are nothing more than a simple sheet of cardstock. And although they will look great coming right off your Cricut machine, over time they can begin to wear down, rip, warp, or wrinkle. So to reinforce the binder divider tabs, I highly recommend covering them in clear packing tape.
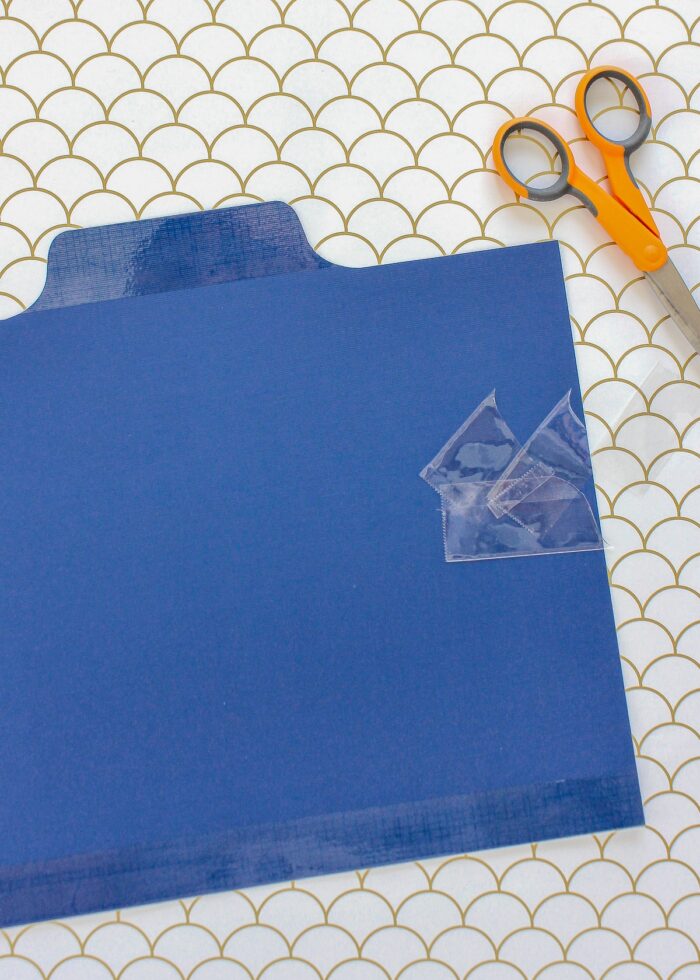
To do this, simply fold a piece of packing tape over the tab so that it stretches down both sides (front and back). Then use a small, sharp scissors to trim away the excess packing tape around the tab shape.
TIP! This quick step is essential in making long-lasting binder dividers – mine have never worn out thanks to the added tape!
TIP! Although you can do this “laminating” before OR after the labels are added, I recommend adding the tape AFTER the labels so they benefit from the added protection too!
Punching Holes in the DIY Binder Dividers
Although you can technically add holes to your binder dividers using Cricut Design Space, I find figuring out the precise hole placement isn’t nearly worth the time or effort. Instead, just grab a 3-hole punch and add them manually after the dividers are cut!
TIP! Investing in an adjustable hole punch means you can make dividers for any size binder or planner!
Before punching, I recommend taping the long edge of the paper to reinforce the holes (just like we did with the tabs). To do this, simply fold a length of clear packing tape over the long edge and trim off any excess along the top and bottom. Then, adjust your hole punch for whatever hole placement you need and punch right into the taped edge of the divider.
Now your DIY binder dividers are ready to be inserted into any notebook in order to create aaaaaall the organization!
Same Concept, Different Shape: Tabbed File Dividers
Finally, I wanted to quickly point out that this same design concept can also be used to sort and organize more than just binders! These tabbed dividers can be used in any filing system simply by changing up the sizes and eliminating the holes. I used the exact same process to create filing tabs for our DVD boxes, as well as my greeting card boxes.
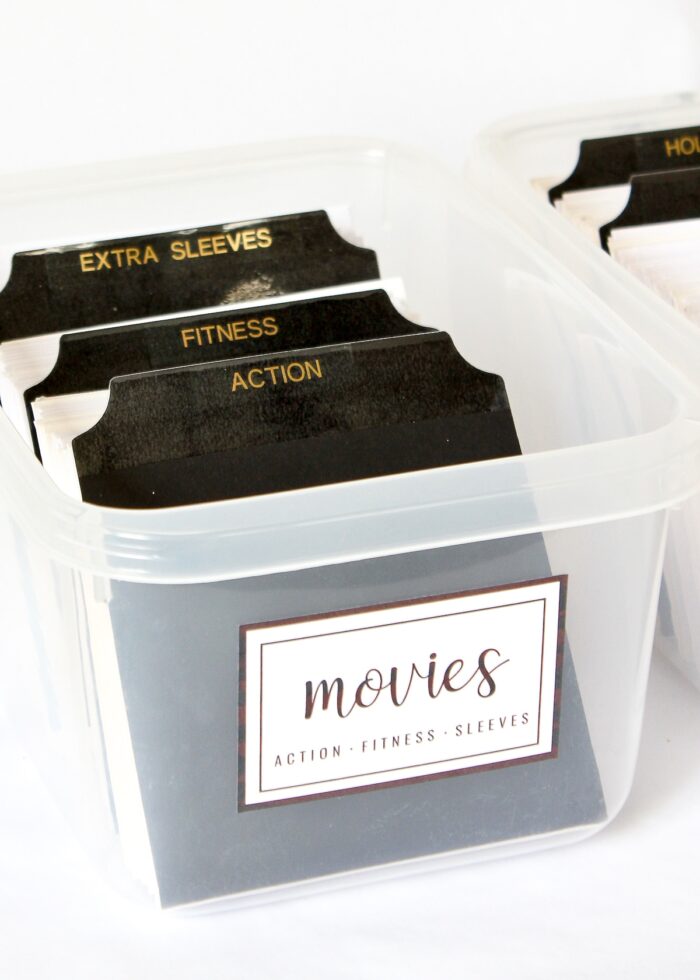
Instead of adding a tab shape to various spots along an 8.5×11″ rectangle, I added a single tab centered along the top of a 6×7″ rectangle (sized specifically for my plastic boxes). Since these dividers are smaller, I cut them out 4/page and finished them off with the same tape and labels.
I really like making my own coordinating tabbed dividers for all my binder organization. Sure…I could just grab a set of dividers at an office supply store or the Target Dollar Spot. But both this Cricut method and my printable versions take just a bit more time but better allow me to create the exact organization system I need.
If you’re assembling your own organizational binder (such as a compiling paperwork in a recipe binder, important documents binder, or even your Happy Planner), give this Cricut version a try! I think you’re going to love all the possibilities in designing your own custom dividers!
Megan

12 Comments on “How to Make DIY Binder Dividers on a Cricut Machine”
How did you get gold type on the blue recipe resources divider that has a box and says “resources”? Did you print all of that blue? It looks like blue cardstock though.
Hey Rebecca,
I cut those labels from vinyl on my Cricut and then put them directly onto the blue cardstock!
Thanks for stopping by!
Megan
Thank you! I just happened upon your website a few days ago and I’ve gone down a very deep rabbit hole! ;o I love to have things organized and usually don’t find too much web content that stretches me. Your diy options fit my budget and design needs…I find I’m pretty picky about how I want things to look so learning how to make things the way I want them is fantastic! Thank you for all of this great content. I am starting a recipe binder which led me to you from Pinterest and I’m currently deciding whether The Organization Toolbox is the right fit for me and if it is whether the 7-day option is better or lifetime. All this to say, I love your website and content and I thought I should tell you! 🙂 I live in Central California (Bakersfield) and I homeschool our four children. I’m looking forward to following you more!
I had the same question! Thanks for answering and asking. I will be making mine today. <3
This was very helpful! I am very new to cricut and have a question. I have followed your instructions to create 4-tab dividers, and they are all 4 in one design space project. How do I make sure they print as 4 separate pieces and not just layered on top of each other?
Hi Rachel!
So glad you found my tutorial helpful! Have you tried sending your project to cut yet (via the green “Make It” button)? When you do, you’ll see that Design Space automatically cuts each element on your canvas separately; you don’t need to have each element in it’s own file. You can even change the color of each divider by selecting it, then changing the color along the top toolbar.
If for some reason, they aren’t split into different dividers on your cut screen, let me know and we’ll figure it out!
Good luck!
Megan
Hi I realize this post was awhile ago but I started making dividers and I LOVE the second shape that you did, its teal like a triangle with a cutout. I cannot find this shape in cricut, do you know what you searched, or how I could find it? Thank you!
Hi Kayla!
So Cricut makes it super easy to figure out which images are included in each design. Interestedly, I found the file name direct from my project:
Label (M417313) | Close to My Heart
But it appears that it’s no longer available? It doesn’t come up, no matter how I search it, and that cartridge doesn’t even look to exist??
I am sorry I can’t be of more help here, but I would image the design space library has something similar!
Good luck!
Megan
Your article showed up only recently on my Pinterest feed, to my absolute delight! Thank you for such a simple idea. As do others, I have so many scrapbook supplies needing to be used for something clever. I had such fun choosing 12 different labels and created a year’s supply of monthly dividers for my planner. As I had film from my former life as childcare provider, each page was completely laminated. Now even regular paper, in addition to card stock weight, will be sturdy enough for years of use/abuse. Again, thank you!
For some reason my tab and rectangle are being cut apart, even after I weld them together. Any suggestions?
Thank you so much for sharing your Ideals on making dividers, sure will give this a try.
I want to make a file divider for all my cookie stencils by events. The file is measured 5.70″ X 7.70″. how would I make these dividers? The tab would be using the round corner square. Would like to have the Cricut pen write the title. Appreciate your feed back and suggestions.
Thank you
Dotti