DIY Sea Life Pop Art (Made From Fabric)
Back when we lived in in eastern North Carolina, sea- and beach-inspired décor was abundant in stores, boutiques, homes, hotels, restaurants, and more. And while the shabby chic, coastal décor isn’t exactly my style, I couldn’t help but be drawn to some classically illustrated sea creatures I found in a cool swatch of fabric. Eager to use the fabric in some way, I decided to cut it apart to create really fun but also super inexpensive artwork for our home! Let me show you the clever way these DIY Sea Life Pop Art pieces came together so you can adapt the technique for your own style!
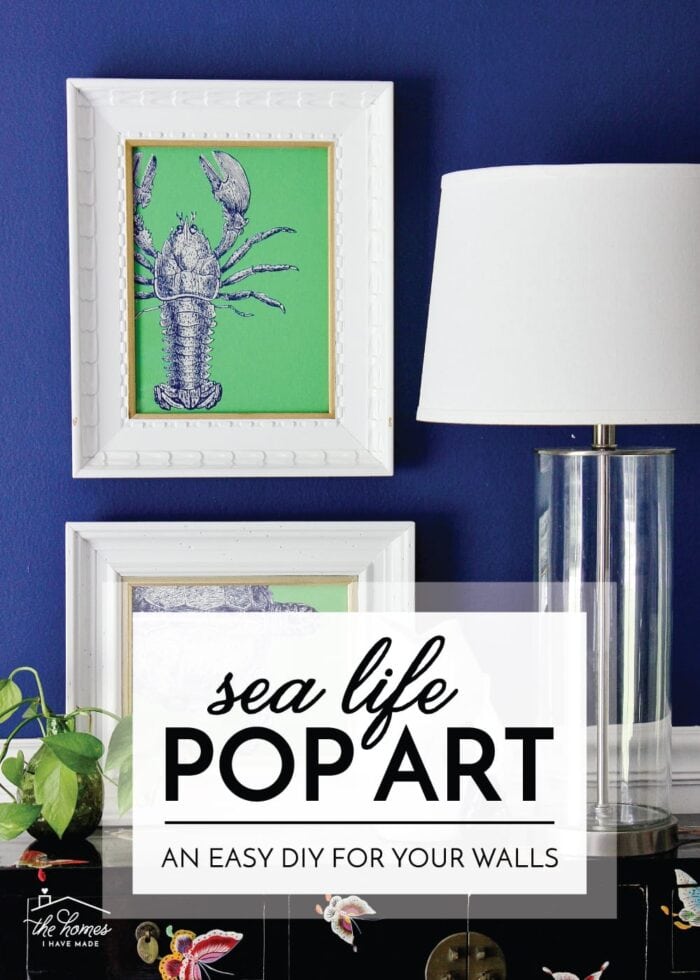
This project was dreamt up when I stumbled upon this amazing fabric at a boutique. It wasn’t a fabric I’d ever use in a “pervasive” way (e.g., curtains or pillows)…especially at a $20/yard price tag…but the unique printing style of the imagery gave me a different idea!
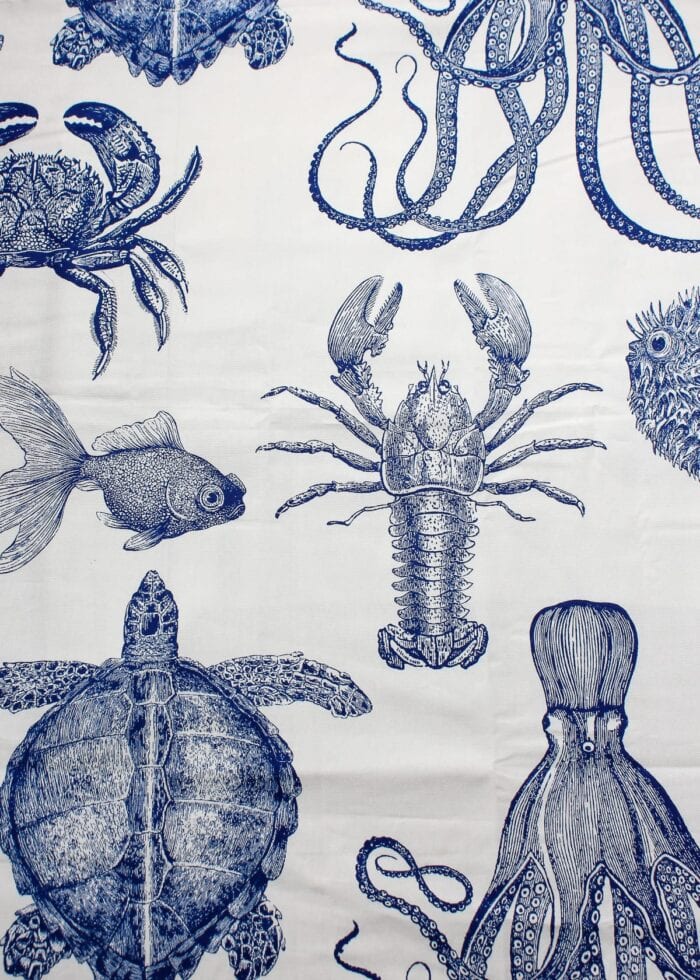
Thanks to the sea creatures’ clean lines and generous size, I knew they could be transformed into amazing wall art. Although these DIY Sea Life Pop Art require some patience, they really couldn’t be easier!
Supplies Needed
To make similar art for your walls, you will need:
- Solid cotton fabric or paper in the color of your choice
- Ultra-Strong Heat-n-Bond
- Images printed on fabric that are easily cut out with clean borders. You don’t have to use sea creatures…look for any imagery that resonates with you (e.g., puppies, unicorns, even flowers, medallions, or paisleys).
- Very sharp fine-point fabric scissors
- Frame(s)
- Iron
Step 1. Prep & Cut the Fabrics
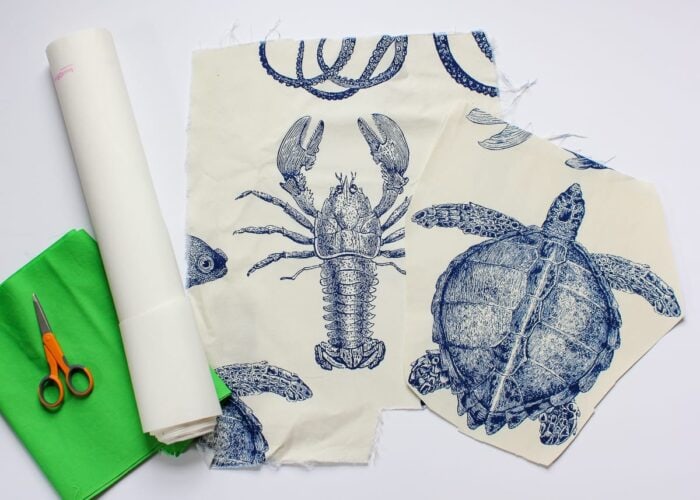
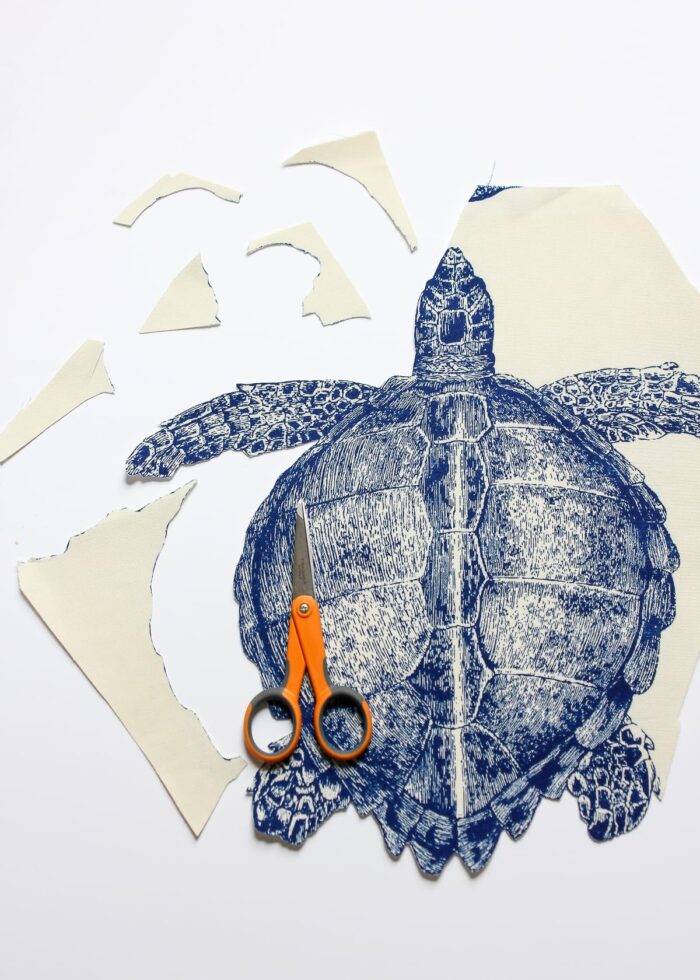
If needed, loosely trim out the parts of your fabric you want to transform into artwork. At this point, you don’t need to cut the designs out perfectly; just cut your larger fabric into smaller, workable pieces.
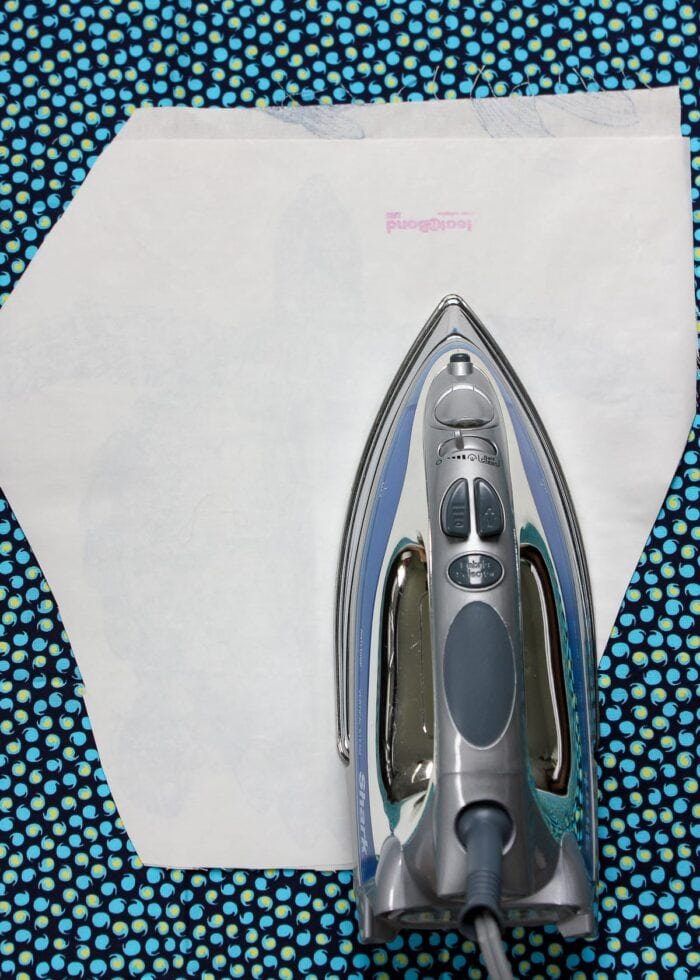
Next, iron a cut of Heat-n-Bond to the wrong side of your fabric image. Take care to ensure the entire image is completely covered in the bonding material. Let the fabric cool completely.
Using a very sharp fine-point scissors, carefully trim around the border of the image. The Heat-n-Bond will help keep the fabric sturdy and easier to cut, and the fine-point scissors will allow you to get really clean and close cuts all the way around the shape. This step, depending on the intricacy of your design, can take some time. Pop on some good music and just work slowly.
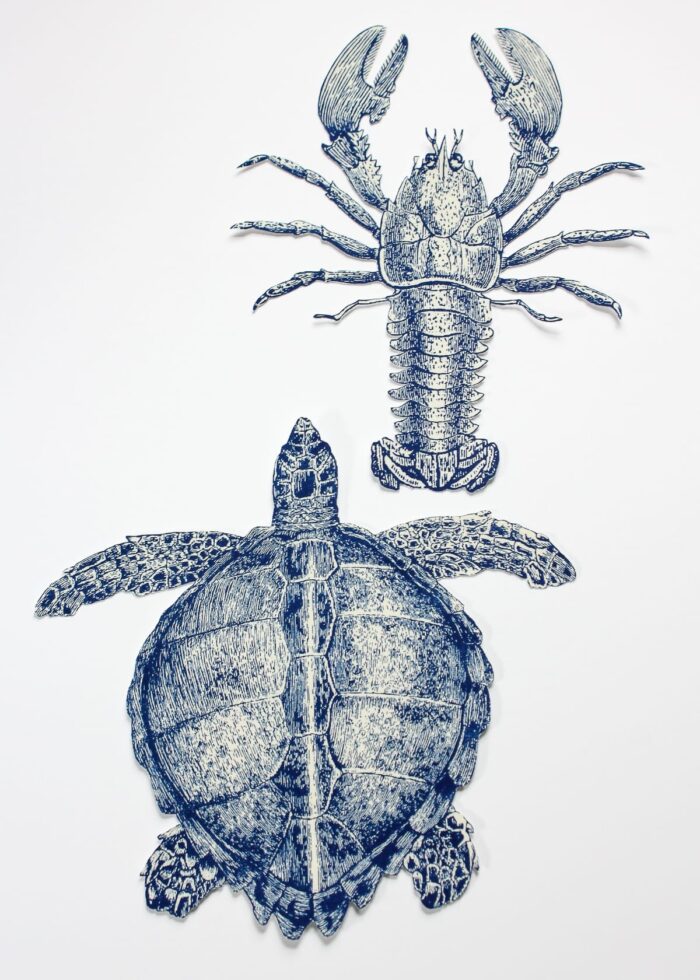
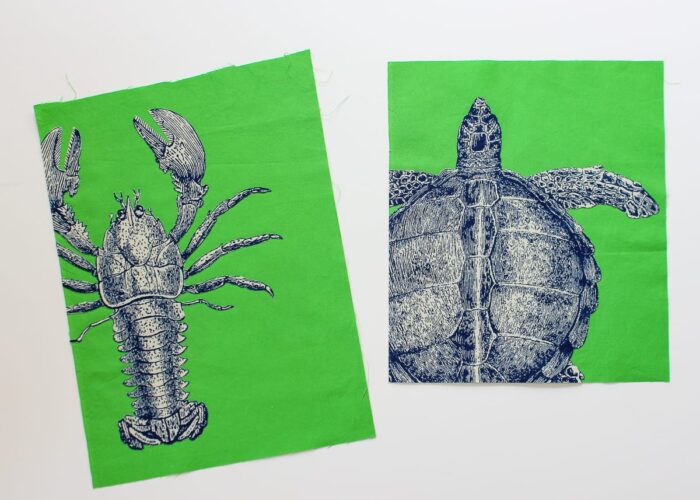
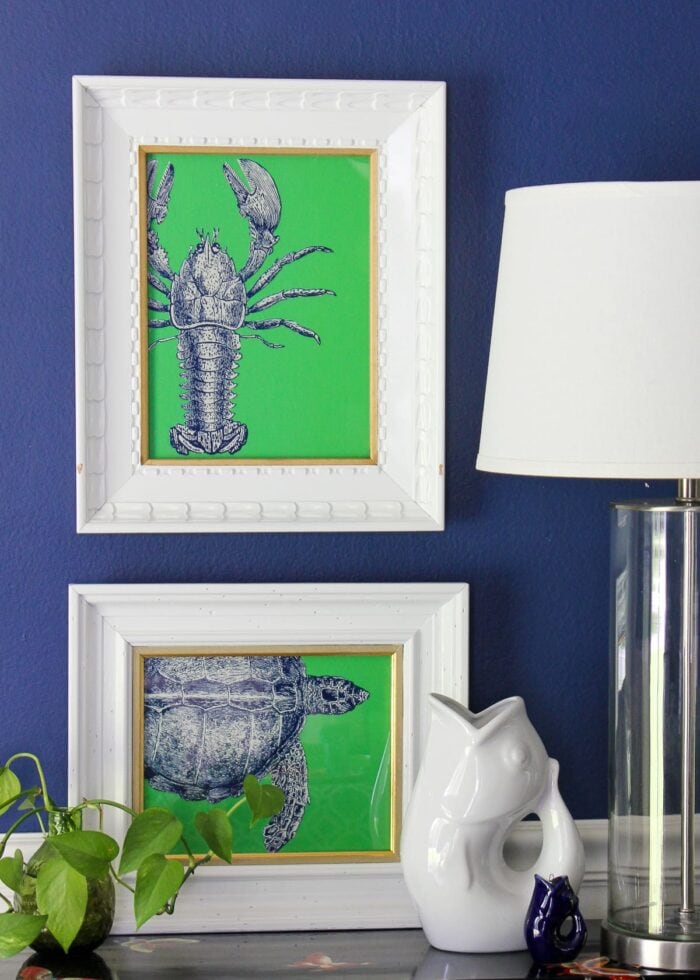
After some patience and careful cutting, here are my two sea creatures bonded and trimmed out.
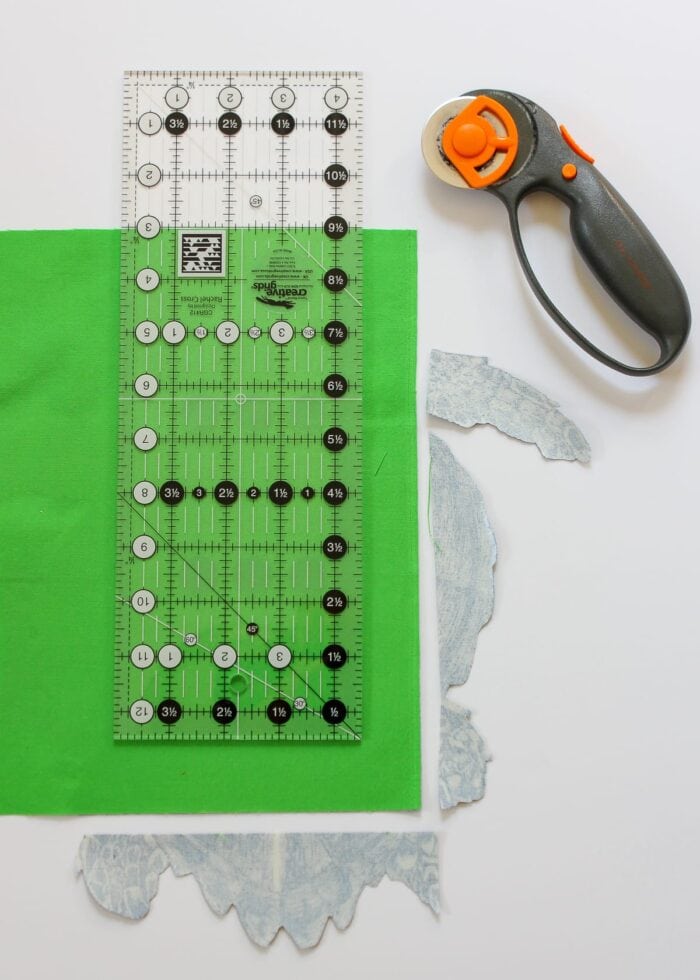
Next, trim down a piece of solid-color contrasting fabric that will fit inside the frame you will be using. I found it easiest to use the cardboard from the frame itself as a template, allowing for an extra inch or so on all sides.

Want to save this post?
Step 2. Assemble the Fabric Artwork
Peel off the paper backing of the Heat-n-Bond adhered to your fabric image and play with various layout options.
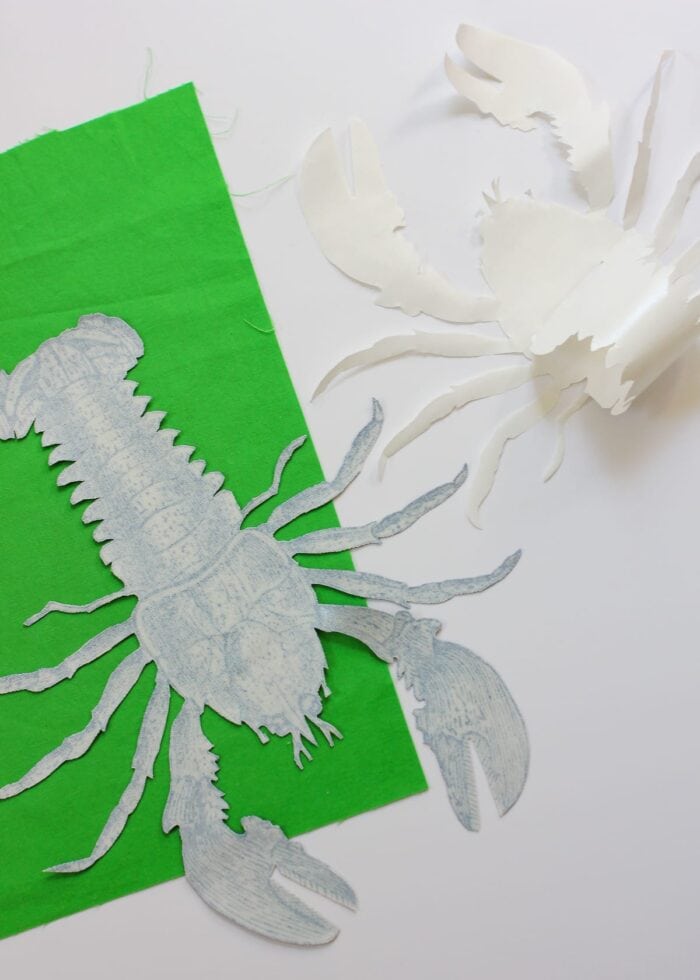
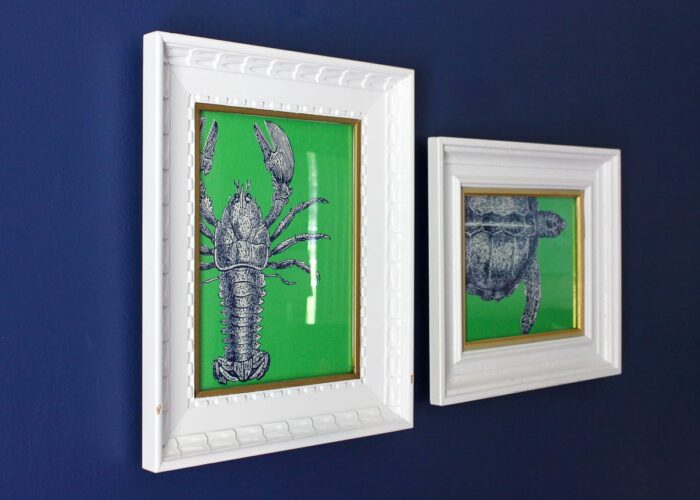
You may need to reference your frame’s size/shape to determine the best layout. I knew my frames couldn’t fit the entire shape, so I chose to offset the images on the fabric for a modern twist.
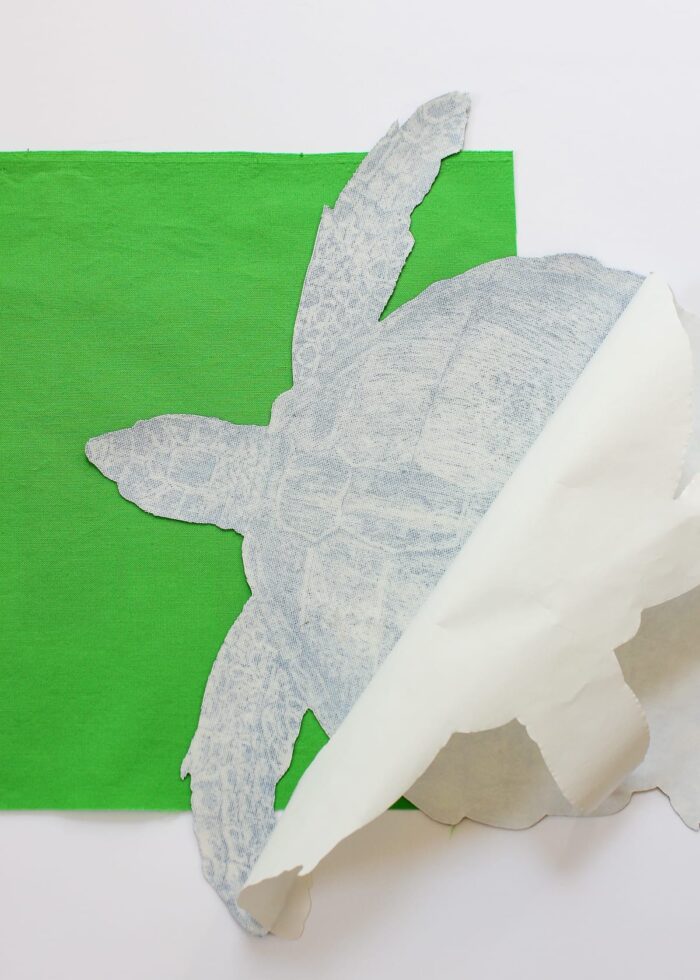
Once you’ve determined the best placement, iron the image onto the cotton solid with a hot iron, working carefully to ensure the entire image is fully bonded to the background.
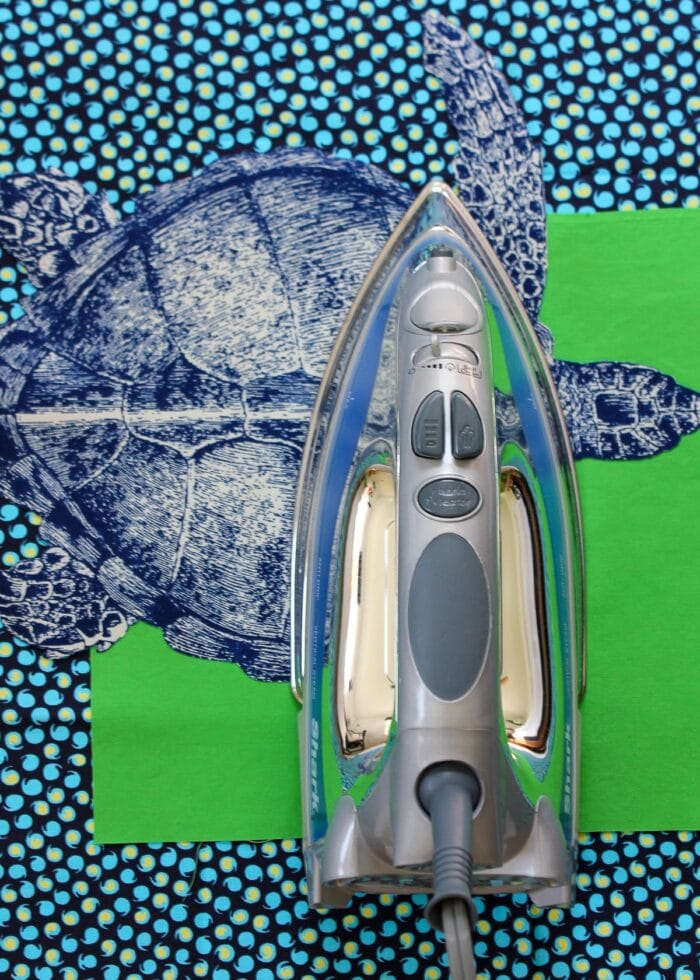
If you choose to offset your image, then use a rotary cutter and clear ruler to trim off the excess parts of the fabric image.
Repeat with additional images from the same fabric to create a set of coordinating artwork!
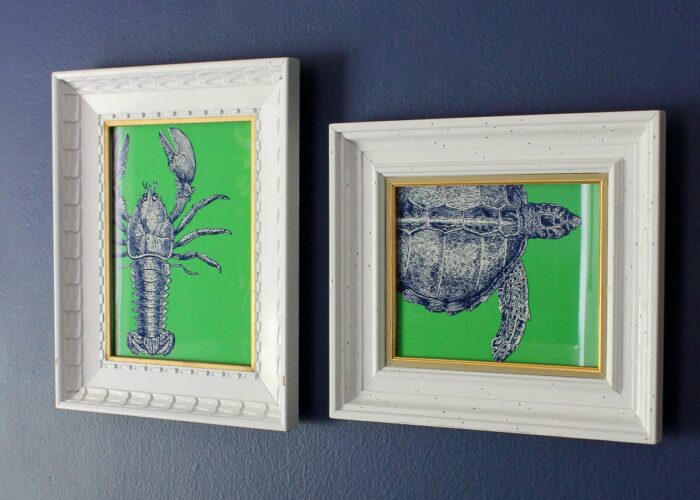
Step 3. Frame & Hang
Finally, load up your art into frames and hang them hung on the wall or place onto shelves for display!

Although the intricate fabric designs were a bit tedious to cut down, these DIY Sea Life Pop Art pieces really came together so easily! I LOVE finding inexpensive solutions for decorating our walls!
Keep in mind that even if sea creatures aren’t your thing, this same technique can be used on other similar fabric designs or even wallpaper. When considering options, look for those that have large isolated images with clean borders that will make for easy cutting. This is also a great technique for incorporating really pricey patterns into your home…since you only need a yard or swatch!
Just because a cool image might not be printed onto paper doesn’t mean it can’t become awesome and unique artwork for your home. Keep your eyes peeled for fabrics, wallpapers, scrapbook papers, wrapping paper, and even magazine pictures or book covers with cool pictures or designs. With some clever cutting and contrasting backgrounds, almost anything can be framed up to fill a blank spot on your wall!
Megan