DIY Pom-Pom Coverlet
My favorite part of moving into a new house is once everything is unpacked, settled, and I get to start on projects!! There’s always a few things I can’t wait to do (like the fireplace and built-ins) and knock those out quickly, but most ideas get put on a single big ol’ master to-do list. What’s nice about having all sorts of ideas at the ready is when I find the time or feel inspired, I pick one and knock it out. I’m in full project mode now, and it feels awesome to be checking things off the list right and left!
Today I’m sharing a project that was actually supposed to be done over a year ago. It was part of the original project list for Henry’s bedroom makeover last Spring…but I ultimately decided it wasn’t necessary at the time. Well, with his new bed arrangement in this house, the project seemed a bit more necessary so I found the time to tackle it. I’m loving this simple DIY so let’s get right to it!
All this time, both back in North Carolina and here, Henry has had a queen coverlet on his bed. His twin bed. In fact, both beds (his and our queen bed) had the same queen-sized coverlets on them. Originally, I planned to trim down the quilt to a twin size, but when his bed was up against a wall at the last house, I was able to tuck all the excess blanket between the bed and the wall and no one noticed!
Well, his bed now floats in the center of the room, and tucking all the excess quilt under his mattress each morning was a big ol’ pain. I spent way longer than I should trying to keep everything even and smooth and ultimately decided it was time to cut down the quilt!
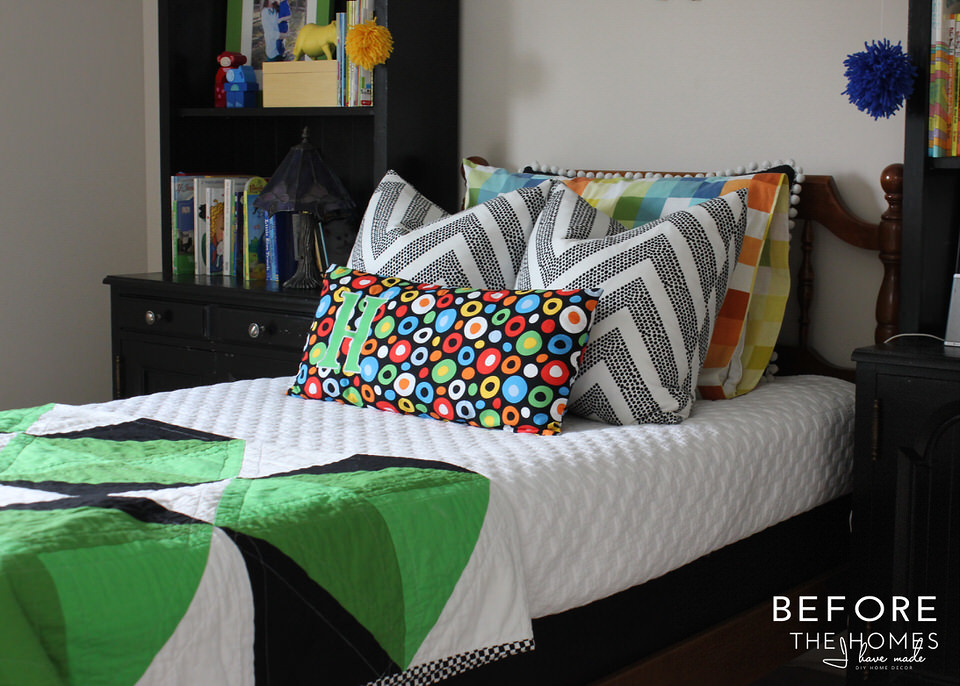
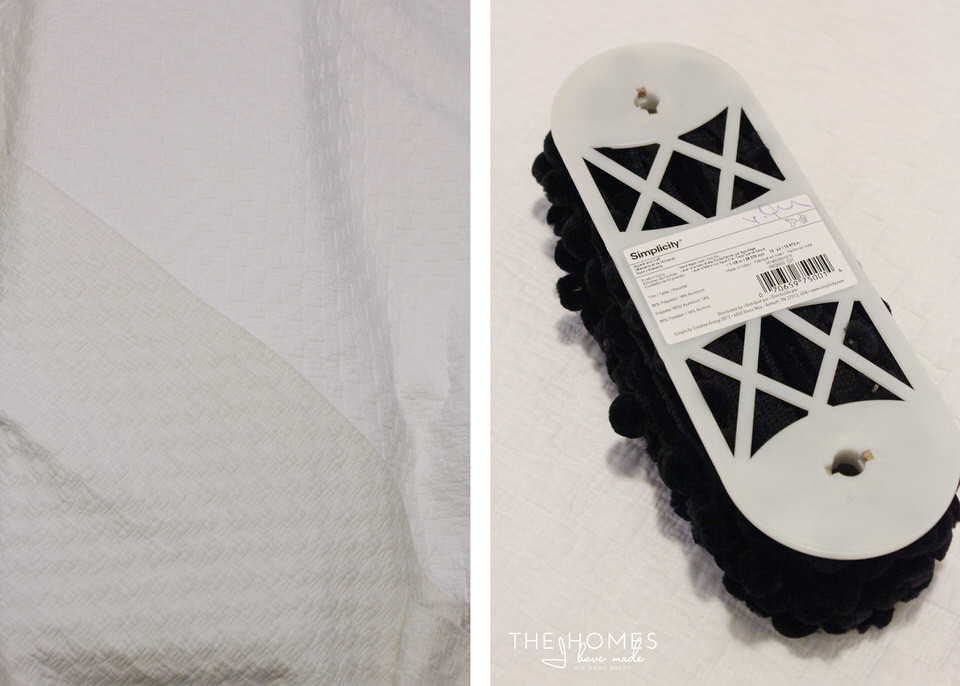
Henry’s quilt was much newer than the one we had on our bed, and our’s was starting to show some yellowing on the edges (eeww). So Henry’s bedspread went into the linen closet for guests, and ours’ became the perfect candidate for a re-fresh (details about what’s on our bed now coming soon!). I had bought 12 yards of black pom-pom trim early last year thinking I’d do this project, so it’s been sitting waiting all this time!
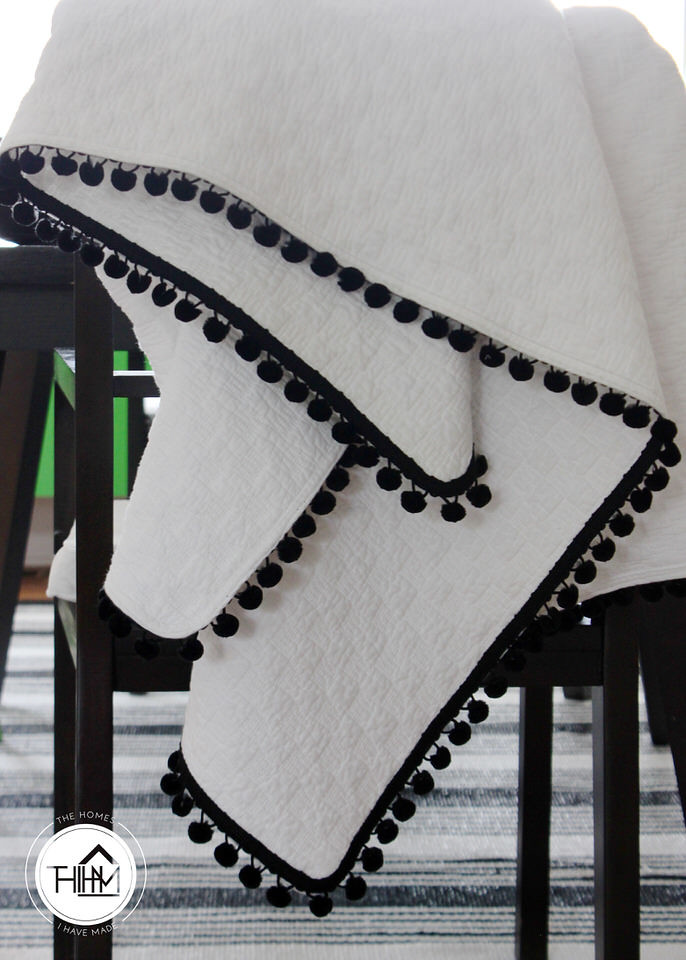
Instead of cutting the bedspread down to a traditional size, I just measured how long I wanted it to drape on the sides of Henry’s bed. The length was perfect, but I needed to cut off about 26″ from one side to make it just the right size. I simply measured and drew a line at the right measurement and with a friction pen (LOVE those things!). The quilt is so lightweight, I cut it down with just a scissors.
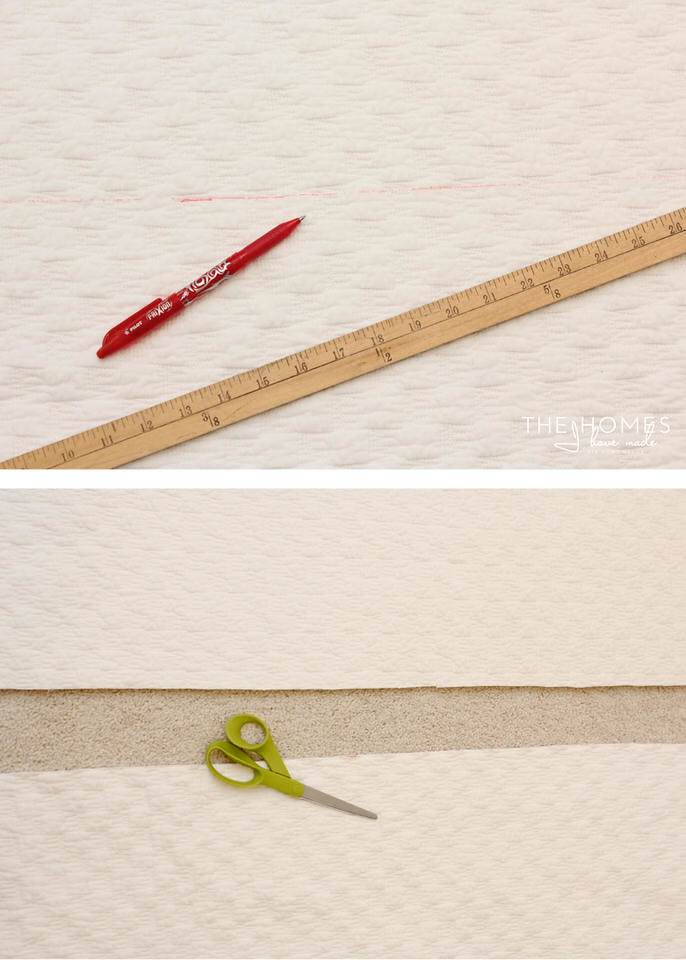
The edges of the quilt didn’t fray at all, but I wanted to finish the edge just a bit. Thanks to the batting, a traditional hem would be too bulky, and I was not in the mood to deal with bias tape. If I knew how to thread and work the fancy serger I have, I would have just serged the edge. I ultimately did a wide and tight zigzag stitch with my regular sewing machine around the cut edge, enough to finish it off and ensure it doesn’t fray over time.
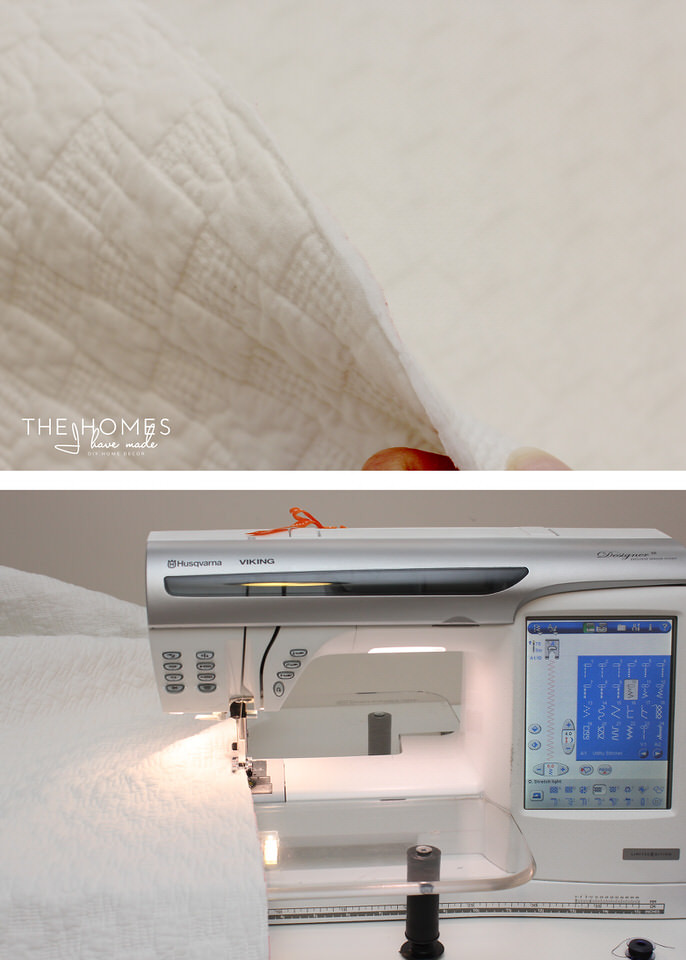
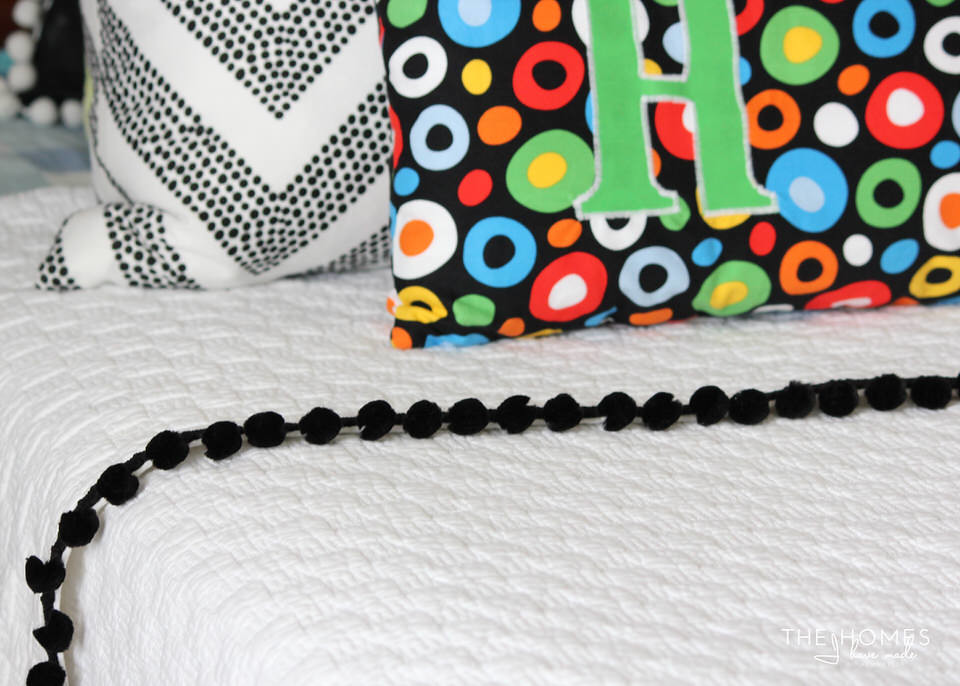
Pom-pom trim is the easiest, most generous type of trim to work with. To keep it nice and flush with the edge, I do pin at every pom-pom. I caught up on America’s Got Talent auditions while I pinned, and then attached the trim using the zipper foot on my machine. Friends, use the zipper foot when attaching pom-poms…it makes a world of difference!
Want to save this post?

And that’s it! While it took quite a bit of time to pin, the actual cutting and sewing part was simple and quick. In just an evening, I transformed an off-the-shelf coverlet (originally from Marshalls, I think!) into a charming accent for the little man’s room!
One thing I love about pom-poms, is that I think they look great both ways: showing the edge or hiding the edge. Since you don’t have to worry about hiding the edging, it really is a perfect way to adorn things like blankets and curtains!
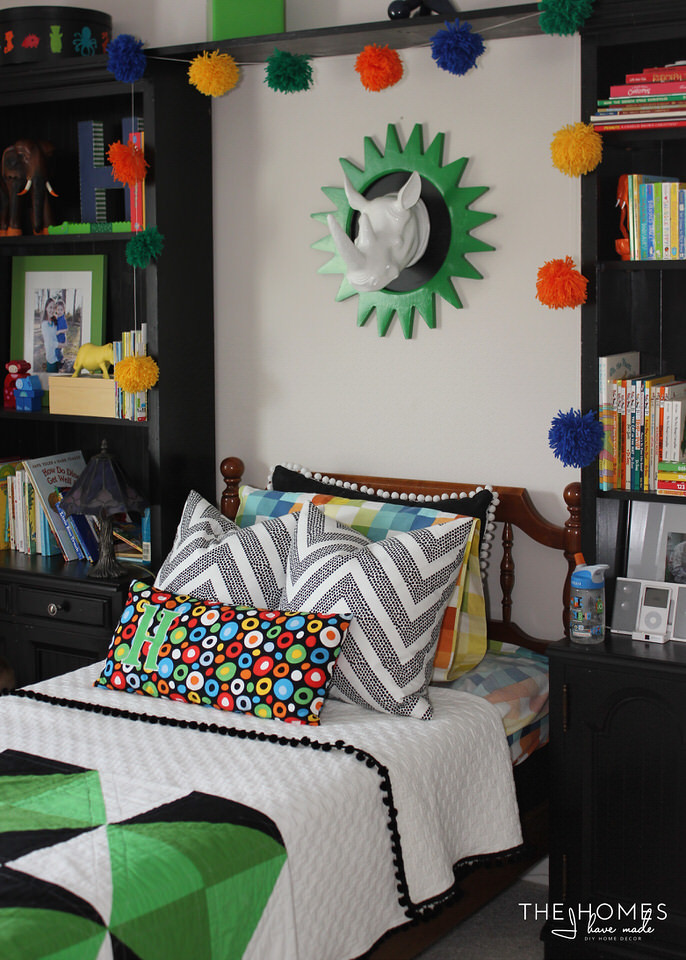
This is one of those “I wish I had done it sooner” projects. Not only is making Henry’s bed now a breeze, but man, do I love that pom-pom detail around the edges!
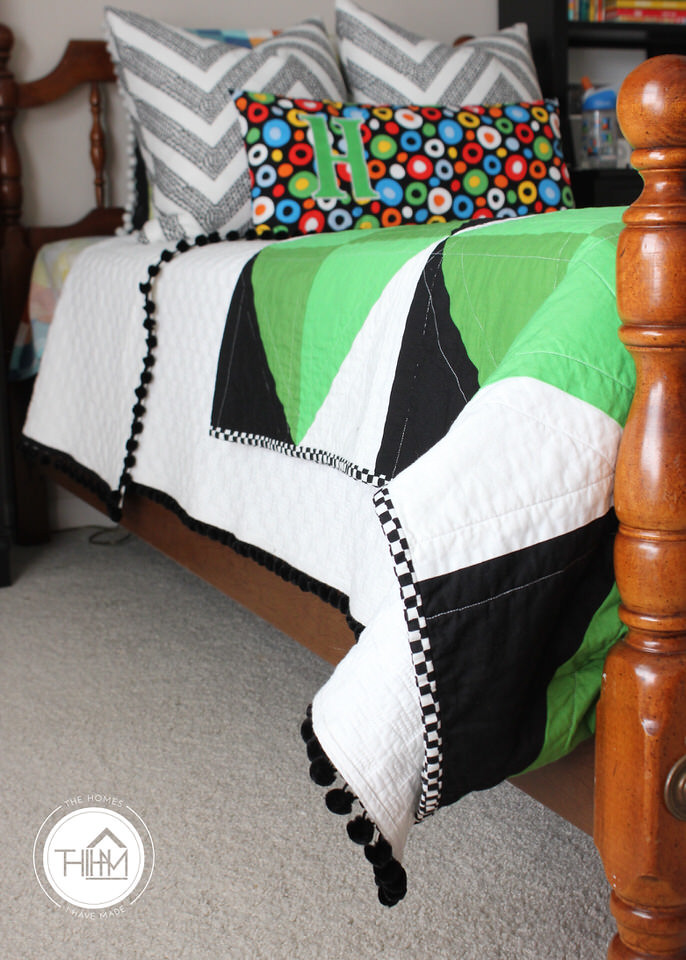
I love how the bedspread now nods to the sham and looks like an intentional set.
(Get the pillow sham tutorial here.)


Pom-pom accents for the home, be it pillows, curtains, bedding or even clothes, are quite trendy right now. Before shelling out the cash for pre-made items, consider adding pom-poms to something you already have! Pom-pom trim is inexpensive (this roll was only $10!!!) and really is SO simple to work with. Little details like these really help a room feel more complete!
I hope you all have a fantastic weekend. Next week, I’ll be showing you what I did with the rest of that coverlet as well as lots more fabric-related updates in the house! See you then!
Megan
4 Comments on “DIY Pom-Pom Coverlet”
I loved this! Everything about it–the pom-poms, the white, the green (especially the green!), the sham (especially with the H because our grandson's name is Henry), the 2 pillows, and the pillow with the white pom-poms. I'm on a really strong green kick right now, and this just is perfect.
I have been looking for one of these around the retail stores and most of them are so expensive!( even in the clearance section at TJMaxx for $50.00!) so this is a definite to do. Thank you for posting!!! It looks great on his bed.
Kadisha@ ChaoticClassiness.blogspot.com
Where do you buy your pompom trim? I love all of your projects!
Hi Courtney!
Thank you SO much, loving hearing you like what you see here! I needed that today 😉
I buy most of my “bulk” trim from Amazon!
http://www.amazon.com/Ball-Fringe-1-1-Wide-Yards-Black/dp/B003I2G5B0/ref=pd_sim_sbs_201_1?ie=UTF8&refRID=1NG43NKR9E09WS23T2TA
Hope that helps and have a good weekend!
Megan