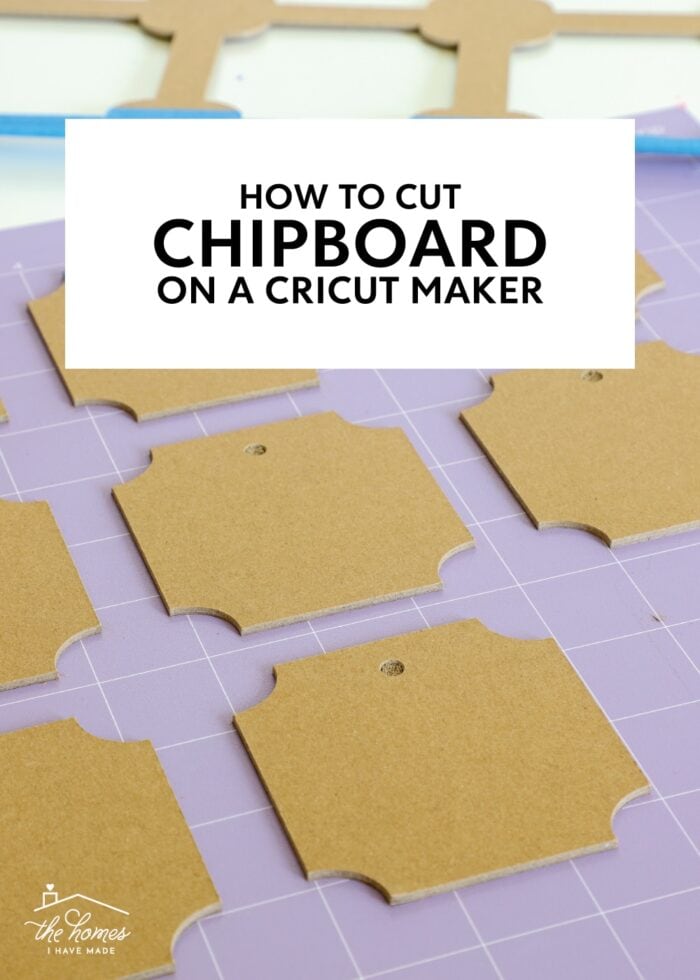
How to Cut Chipboard on a Cricut Maker
Both the Cricut Joy and Cricut Explore models are highly capable Cricut machines; but one of the main reasons to upgrade to a Cricut Maker is to be able to cut specialty materials such as fabric, wood, mat board, and chipboard. Chipboard has long been one of my favorite products for organizing and home decor projects because of its exceptionally sturdy weight. But since it can’t be easily cut with scissors, I always had to rely on whatever pre-made shapes and sheets I could find at the craft store. Now with the help of a Cricut Maker and Knife Blade however, you can cut chipboard into (almost!) any shape you can think of. Today, I want to show you how to cut chipboard on a Cricut Maker, and share some tips and tricks that can help your projects turn out just right!
What is Chipboard?
Chipboard is essentially really thick, sturdy, stiff cardboard. It doesn’t bend, crease, or warp easily; it can be decorated with paint, paper, vinyl, glitter, etc; and it is best used on projects where you want depth or structure (such as 3D crafts).
Cricut makes 1.5mm and 2.0mm chipboard in both solid brown and patterns. They are sold in packages of 5 sheets and are pre-sized and ready to go right into your Cricut Maker.
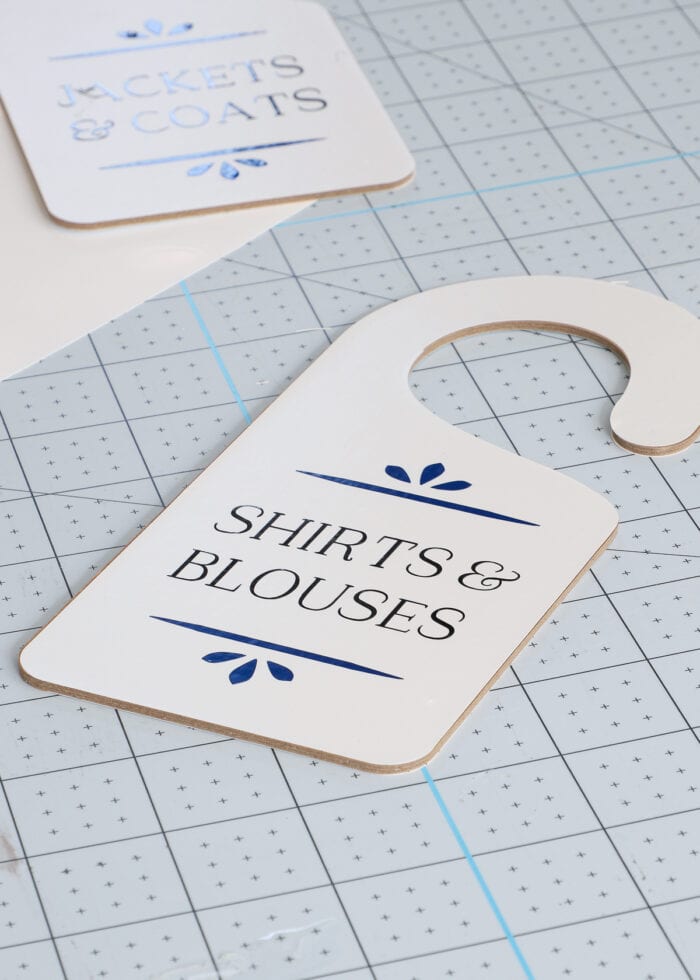
If you’re a crafter, you’ve likely seen an array of chipboard products in the craft store aisles such as tags, labels, signs, photo frames, book covers, cake toppers, and more. Until the Cricut Maker came along, we were pretty much restricted to whatever chipboard words or shapes we could find. Now, you can cut (pretty much) any shape, word, or design you desire!

Why Use Chipboard?
With so many different papers, cardboards, and mat boards now available, you might be wondering why you’d choose chipboard for your projects. In my experience, chipboard is the sturdiest material you can cut with a Cricut machine (yes, even sturdier than wood). Due to its thickness, chipboard won’t bend, warp, or wrinkle over time, which gives incredible weight, stability, and longevity to your projects. However, chipboard mostly comes in brown, so it usually needs to be “decorated” or covered in some way in order to look really pretty.

Supplies Needed
To cut chipboard with a Cricut Maker, here is what you need:
- Cricut Maker or Cricut Maker 3
- Cricut Knife Blade
- StrongGrip Cutting Mat (Purple Mat)
- Painter’s Tape or Masking Tape
- Cricut Chipboard – I prefer the 2.0mm thickness
Do You Have to Use a Cricut Maker to Cut Chipboard?
Yes. Only the Cricut Maker and Cricut Maker 3 can cut chipboard. These are the only two Cricut machines compatible with the Cricut Knife Blade and have the power to cut through this strong material. Neither the Cricut Joy nor Cricut Explore (any model) can be used to cut chipboard.
Designing for Chipboard
Avoid Intricate Designs
It’s important to understand that chipboard is made out of lots and lots of thin cardboard layers. And the way the Cricut Maker cuts through all these layers it to make pass after pass after pass along the exact same lines. On simple shapes, these multiple passes are no issue. But when cutting really thin, tight, or intricate designs, all the passes can pull the chipboard layers apart.
The photo below was taken after just 10 or so passes of some swirly, script words. The chipboard was not nearly cut all the way through, but you can easily see how the layers are already pulling apart.

After the 20ish passes required to cut through the chipboard, my word “vinyl” was practically in bits and totally unusable.

I share this example to highlight that when cutting designs out of chipboard, it’s important that they not be too detailed or have thin, intricate details. For the cleanest cuts, I recommend any element of your design be at least 0.25″ wide.
TIP! If you really want/need an intricate design cut from chipboard, I recommend cutting multiples of your design from thinner chipboard and layering them yourself with glue or adhesive.
11×11″ Size Limit
When cutting designs from pretty much any other medium, your size restrictions are 11.5 x 11.5″ (or 11.5 x 23.5″ on a 24″ long mat.) However, when cutting chipboard, your designs must be smaller than 11 x 11.” Whether you have a single image or group of smaller images, you must size/format them to be under 11″ in both height and width before the machine will allow you to proceed with the chipboard settings.
Prepping the Cricut Maker for Cutting Chipboard
While desinging for chipboard doesn’t involve any special techniques, the actual cutting requires some important modifications. Before you press the flashing “Go/Cricut” button, you must first make these important adjustments.
Check Your Layout
Again, when cutting chipboard, your design must fit within an 11 x 11″ square. Cricut Design Space will not automatically keep everything within 11″ for you; so on the first Cut Preview Screen, move items around as needed to ensure they fall well within the 11×11″ lines on the virtual mat.
TIP! When possible, spread your design out as much as possible while still staying within the 11×11″ boundary. Although this doesn’t quite conserve your material, the chipboard will hold together much better when small, thin borders and margins between elements are eliminated. Again, try to keep any “thin” areas (even between designs) greater than 0.25.”

Material Selection
Once you send your design to cut, select the exact material you will be using from the Custom Materials Menu. In the case of chipboard, be sure to choose the specific thickness of chipboard you’re using for your project, as the thickness will determine how many passes the machine will make in order to cut all the way through.
Once you select chipboard, notice that Cricut Design Space prompts you with some VERY specific instructions that you need to follow in order for your project to come out right.
Want to save this post?

Move the Star Wheels
First, Cricut Design Space will tell you to move the 4 white star wheels (on the machine’s roller bar) all the way to the right of the machine. Moving these wheels prevents grooves on your chipboard and helps the Knife Blade go as deep as necessary to cut through the thick chipboard. With these four wheels positioned to the right, you can now see why designs are limited to 11″ wide.
TIP! Cricut’s Chipboard comes pre-sized at 11 x 11″ so you don’t need to pre-cut it before loading it into your machine.

Secure Chipboard to a Strong-Grip Mat
Next, Cricut Design Space will instruct you to load your 11 x 11″ chipboard sheet onto a purple StrongGrip mat and secure it with masking tape or Painter’s tape along all four sides. Since your Cricut machine will be making many passes over the same cut lines (in order to cut through all the layers), your design can easily be ruined if the chipboard slips at all. Although the StrongGrip mat is quite sticky, securing your chipboard with tape will ensure it doesn’t budge a bit. The machine will cut right through the tape, so don’t worry and don’t skip this step!
TIP! I found that painter’s tape did a great job keeping my chipboard in place yet didn’t damage the chipboard surface as it was pulled away!

Insert Knife Blade Into Cricut Maker
Your last step before cutting out the design is to insert the Knife Blade into the Adaptive Tool System on your Cricut Maker.
NOTE: You should only cut chipboard with a Cricut Maker or Cricut Maker 3 using the Cricut Knife Blade. Using other machines or blades on such a thick material will likely produce unsatisfactory results and possibly even damage your machine.

Cutting Chipboard on the Cricut Maker
With your design set within the 11 x 11″ margins, the white star wheels moved, your chipboard secure to a StrongGrip mat, and the Knife Blade inserted into your machine, you are (finally!) ready to start your machine cutting by hitting the flashing Cricut/Go button (just as you would any other cut).
It’s Going to Take a While
Here is the most surprising thing about cutting chipboard. Although the Knife Blade is stronger than any other Cricut blade, it is only able to get through thick materials like chipboard by making many (MANY!) passes over the same cut lines. After the machine makes its initial cut, Cricut Design Space will estimate how many passes are required and how much time it will take to fully cut out your design. As you can see below, it took almost an hour (!!!) to cut out my 8 chipboard labels!

Check Before Unloading
After the machine completes its initial set of passes, Cricut Design Space will prompt you to check and see if your chipboard is cut all the way through or if it needs a few more passes. Without unloading your mat from the machine, check several different areas of your design to see if your design is cut all the way through.
To do this:
- Gently bend the mat back so the chipboard design slightly pops off, or
- Use a weeding tool to carefully pry a chipboard shape up and out.
If the design is cut through, you can unload your mat. If there are still some areas that need additional passes, you can have your machine cut more by pressing the Go/Cricut button again.

TIP! As the machine completes its first few passes (8-10 passes), it may appear your chipboard is fully cut through. Trust me when I say your Cricut knows better than you do! Do NOT unload your mat until your machine has done its first full round of passes (all 20, in my case). THEN check to see if the design is cut all the way through.
Once you are confident the chipboard is fully cut through, go ahead and unload your mat from the machine.

Removing Designs from the Mat
To keep the edges of your freshly cut chipboard designs pristine, I recommend peeling away the excess/surrounding chipboard first. To do so, simply peel off the painter’s tape and carefully pull up the chipboard area surrounding your design. From there, you can weed out any small details using weeding tools or tweezers and then pop your cuts right off the mat!

With your chipboard designs fully cut, you can decorate them with vinyl, paint, scrapbook paper, and other embellishments to complete your vision!

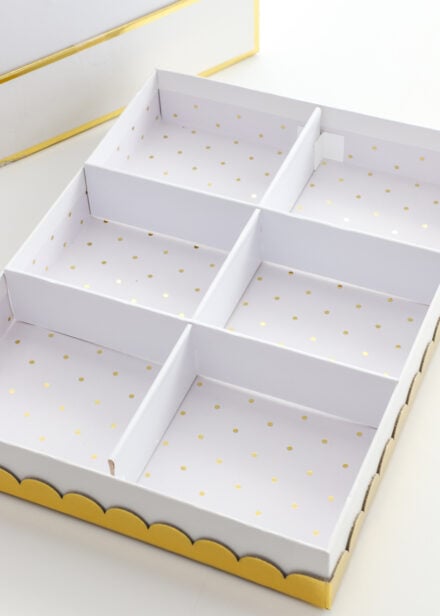
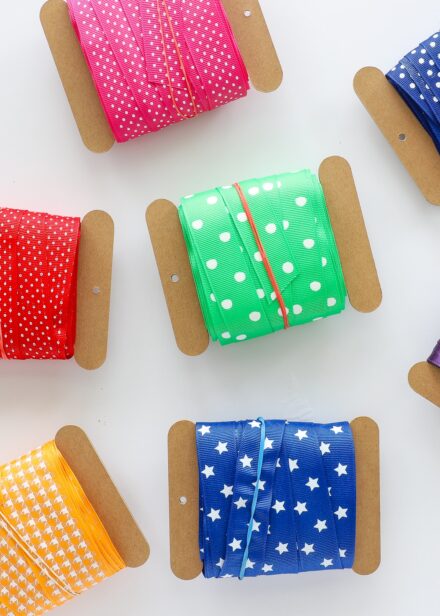
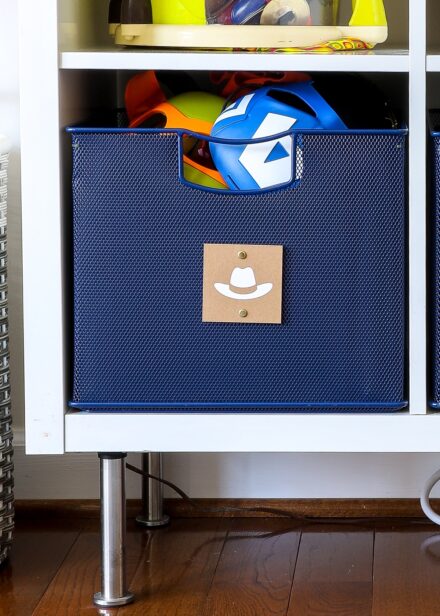
I love cutting chipboard with my Cricut Maker to make all sorts of things for my home, including labels (lots of labels!), bobbins, dividers, box organizers, and more! Although all the “extra” steps required for cutting chipboard may intimidate you at first, I do hope you give it a try. You will quickly get the hang of it, and the amazingly clean cuts you can get from chipboard will truly amaze you!
Megan


21 Comments on “How to Cut Chipboard on a Cricut Maker”
Thanks, Megan. Another great article. One thing you left out is that you have to use a computer, not an iPad, when using the knife blade, or you get an error that the blade wasn’t recognized. The explanation for this is that they don’t want to tie up your iPad for as long as the cut takes, which makes no sense to me. Why not let us decide if we want the iPad tied up or not?
Thanks for sharing, Chris!
I don’t use an iPad with my Cricut at all, so I wasn’t aware of that funny caveat! Does seem like a strange restriction, lol!
Have a great night!
Megan
Thanks for the wonderful tutorial! Now I just need to get one of these 🙂 You mentioned using your favorite fond…would you mind sharing what this font is? I love it!
Hi Michelle!
Yep – my latest font crush that I’m using on everything is Lilly Mae. You can download it for free here: https://fontbundles.net/free-fonts/lilly-mae
Hope that helps!
Megan
Hello! Thank you so much for sharing. Im new to Cricut so learning a lot. Im curious if applying a vinyl sheet over the board then cutting would help hold it together and eliminate cutting both. Im envisioning a patterned vinyl covering the entire finished cut.
Hi Loressa,
Thanks for writing! I think if your shape is pretty simple, then it might work. However, as I show in my post, because the machine has to make so many passes over each cut line to get through the chipboard, it may not produce the cleanest edge along the side of the vinyl. I anticipate it would eventually snag or tear. You can certainly try it, but I think I would probably cut the chipboard and vinyl separately and layer them by hand.
Good luck with your project!
Megan
Hi! I’m wondering how you set the cricut machine to make/ read the number of passes in order to cut through the chipboard. Is there a special setting for this? What I have been doing was duplicating layers of a certain cut line. For example, if I wanted the machine to score a line three times, I would duplicate the same line three times.
Hi Marizol,
In the case of chipboard, the Maker does it automatically. If you select “Chipboard” from the materials menu in Cricut Design Space, it will estimate the number of passes need to cut through it.
There is currently no way to set the number of passes via Design Space. Instead of duplicating things, as you are currently doing, you can always just re-cut/score your design before you unload. To do this: after your machine is done, the Unload button will flash. But instead of unloading your mat, just hit the Cricut button again (even if it’s not flashing) and your design will cut again in the exact same spot. It’s important that you do NOT unload the mat before hitting the Cut button to ensure your lines line up exactly.
Hope that helps!
Megan
Hi Marizol!
This is Megan again from The Homes I Have Made! I was poking around in Cricut Design Space today and discovered that you CAN manually set the number of passes the machine makes…for any material!
Here is how you do it:
On the Cut Screen, you will have the option to select materials (if you’re not on a Maker, set your machine dial to Custom)
Then select Browse All Materials (small green letters on top of menu)
Down at the bottom, in small green letters, it says Material Settings
From there, you can select any material and adjust the settings…to include how many passes the machine should make!
I’ve attached an image to help you!
Hope that answers what you’re looking for!
Megan
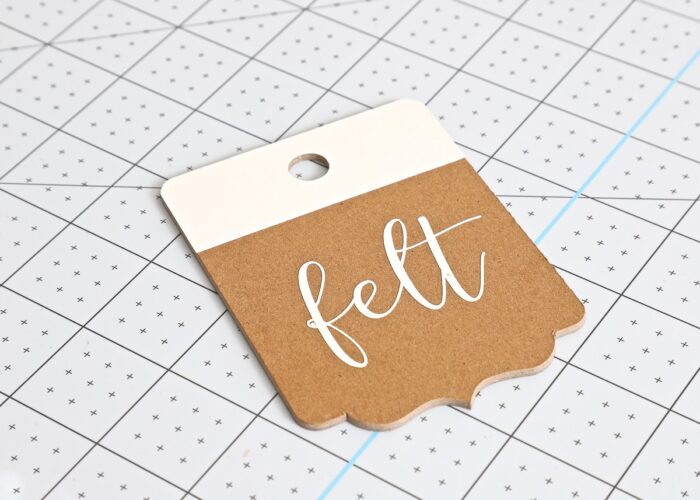
Hi! Thank you for such a great article! I love the shape of the label for the tablecloths label. Do u mind sharing where that is available? Thank you!! Anna
Hi Anna,
It’s called “Label” from the Creative Cards cartridge (M405D5). Note that I unlocked the proportions and re-sized it to be a square rather than a rectangle!
Hope that helps,Megan
Thanks for the article! I found that the painters tape did rip off the first layer of my Cricut chipboard, do you know if there are “sides” to the chipboard like front or back that I should be using for which side is up or down? Or perhaps it’s just not quality painters tape!
Thank you!
Emily
I need to make very intricate cuts! What thickness of chipboard should I use so I can layer and glue them as you said? You gave only 2 sizes that Cricut makes…..is it the thinner one or do I need to look elsewhere for an even thinner board? I hope you see this!!
Hi Judy!
Cricut’s “lighter” board is 1.5mm. You can certainly start with that and see how it cuts (I’ve actually never used it). If you’re still not getting really clean cuts, you can try some even lighter sheets from Amazon. A quick search shows 22 pnt and 50 pnt sheets, both of which will be thinner than Cricut’s 1.5.
Sorry I don’t have a better answer here for you, but for very intricate cuts, my gut says to go thinner and make more cuts to stack on top of each other.
Hope that helps a bit!
Megan
HI! Have you been able to figure out a way to get more intricate cuts? I’ve tried everything I can come up with and I cant seem to get it to work for me. I am attempting to do words in cursive..
Im in the process of making some christmas ornaments and am running into the same issues. Im thinking though, if you do more intricate designs mirrored, then just use the bottom as the “face” of the design, and the underside that gets cut up, is just going to be glued to something anyway. But we just got the cricut maker 3 and are experimenting still. we tried some offbrand balsawood first, and no matter how many times i had it do another pass, it would not cut all the way through, i used a thicker setting than the actual board as well. If this chip board doesnt work (as of writing this, it says 4 hours left!!) the on to something else thick and sturdy. Thanks for the article!
Hi Megan,
I’m just wondering how I covert my chipboard and what I can use ?
Hi there! Thanks for your wonderful tutorial! I did a trial run with my 2.0 mm chipboard. I only cut a circle. It cut all the way through my purple mat! I used the default setting. Why did cut all the way through my mat?
Do you directions for the white chipboard patern?
Love it. Thank You.
Thank you so much for this. I have some chipboard, but was scared to use it. Now I know more about how to cut it.