Super Easy DIY Party Centerpieces That Look Amazing
When Henry turned 1, almost 7 years ago, I spent a full month crafting in preparation for his birthday party. Sam, on the other hand, turned 1 over the holidays; and I spent a whopping few hours getting ready for his party. While the difference in time spent is much more about available hours than the desire to throw a cute, themed party; I have also learned over the years what is, and more so, what isn’t worth me spending time on. I am going to share with you my absolute essentials for easy-but-cute parties soon, but I first wanted to share this quick tutorial for my all-time favorite way to make DIY Party Centerpieces. By mixing and matching off-the-shelf supplies, colors, and themed-details, you’ll be able to whip up centerpieces for whatever party you’re throwing in just a matter of minutes (seriously!)!
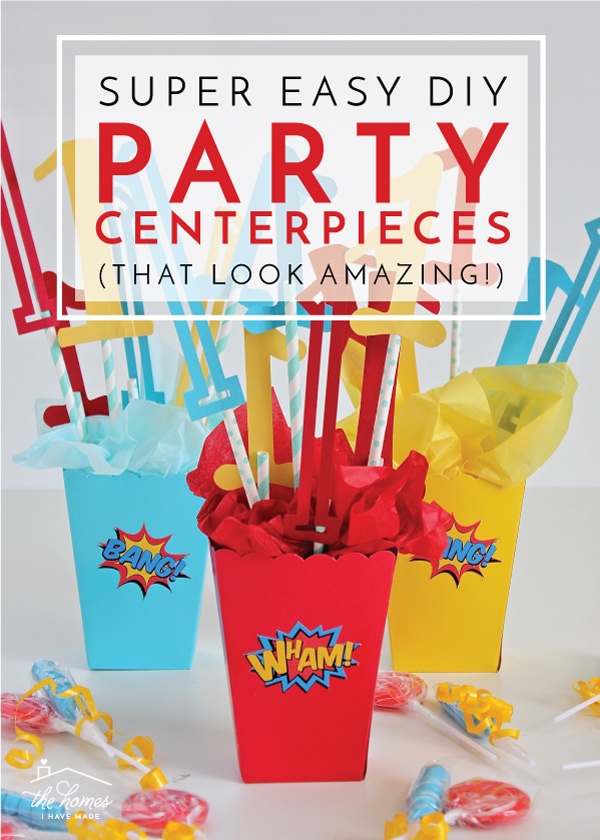
I’ve discovered that no matter the theme, no matter the party venue, no matter the budget, eye-catching centerpieces go a very loooong way in helping a party feel more festive, on theme, and decorated. You can customize them in so many different ways depending on your occasion; they are transportable so they can go to the park, the bowling alley, or your backyard; and they have major “wow factor.” In other words, if I don’t have time to make much for a party, I always make centerpieces. And when I say “party centerpieces,” don’t think floral arrangements, expensive supplies, or complicated techniques. In fact, I could break down my tried-and-true “formula” as follows:
I stumbled upon this combination a few years ago and have used it over and over and over again ever since because it’s easy and looks so good on a party table. Yes, all of these different centerpieces below look quite different, but they are that same basic “formula” I describe above!
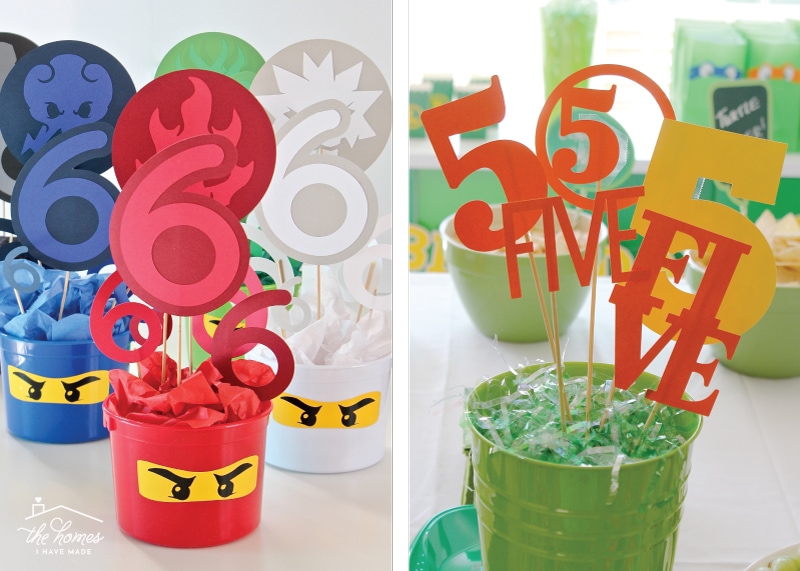

Ninjago | Ninja Turtles | Planes
I’ve now made these so many times, I’ve really perfected my system. Let me show you how easy these come together, as well as share ideas for how you could customize them for your own party!
Supplies Needed
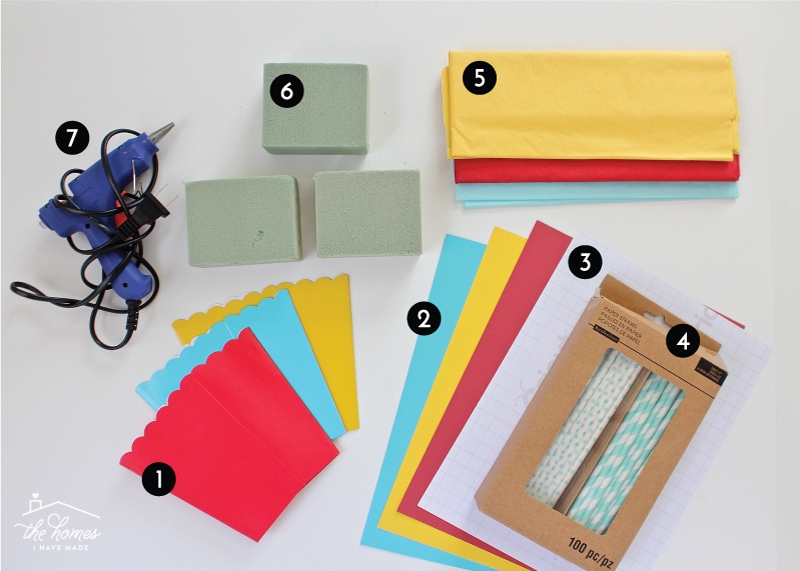
- Containers – You can use anything here! Plastic buckets, paper popcorn boxes, gift boxes, tin cans, large mason jars, sand buckets, plastic pitchers, seriously…anything! I recommend whatever you use be at least 6″ tall and they coordinate with your party color scheme.
- Colored Cardstock – In your party’s colors.
- Sticker Paper or other embellishments – Look for anything that you can dress up your containers with in order to help them better coordinate with your theme. Stickers, ribbon, fabric, and vinyl decals can all make great embellishments.
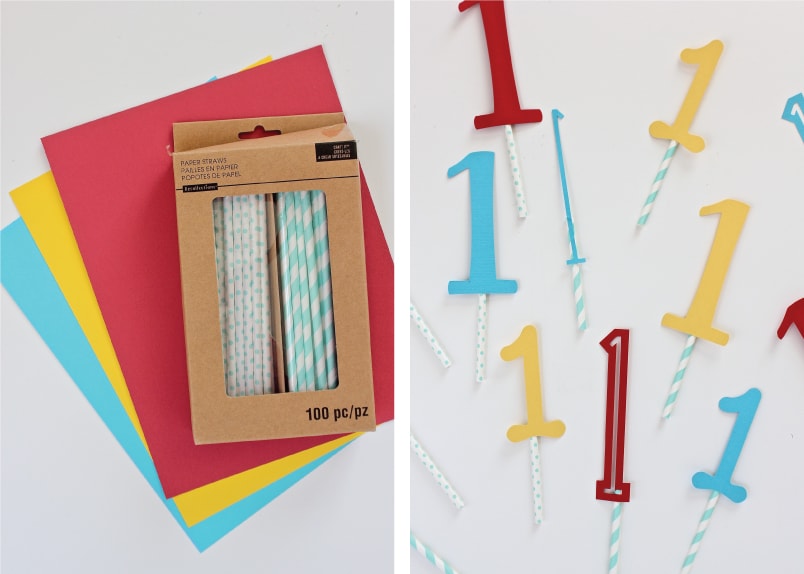
- Straws – I love using patterned straws for centerpieces because they add a fun pop of pattern. Wooden kabob skewers are a great alliterative I use all the time!
- Tissue paper – I find tissue paper is the quickest and easiest way to fill containers, but you can also use other things such as shredded paper filler.
- Styrofoam – You will be able to get the exact arrangement you want if you use styrofoam. My secret source? The Dollar Tree! Invest in a few blocks and then keep it for each party you throw!
- Hot glue and glue gun
Making the Centerpiece Bases
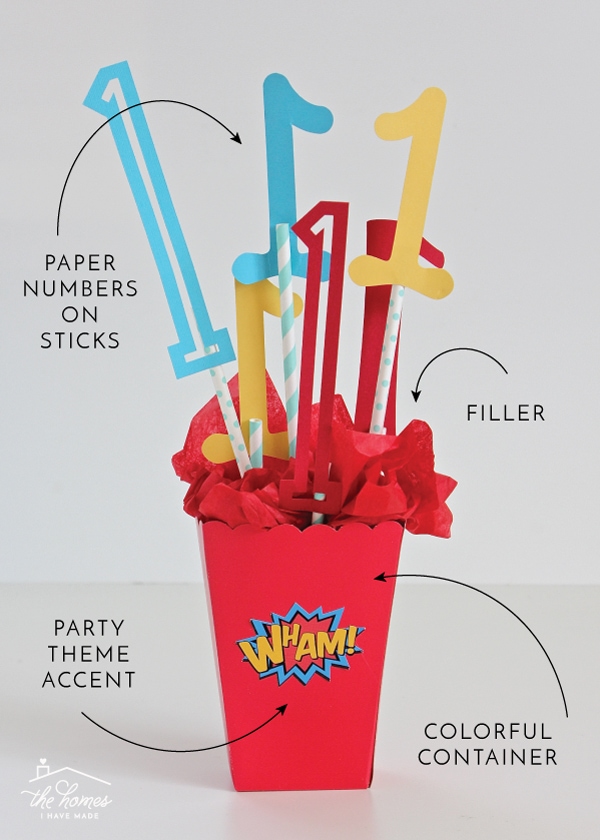
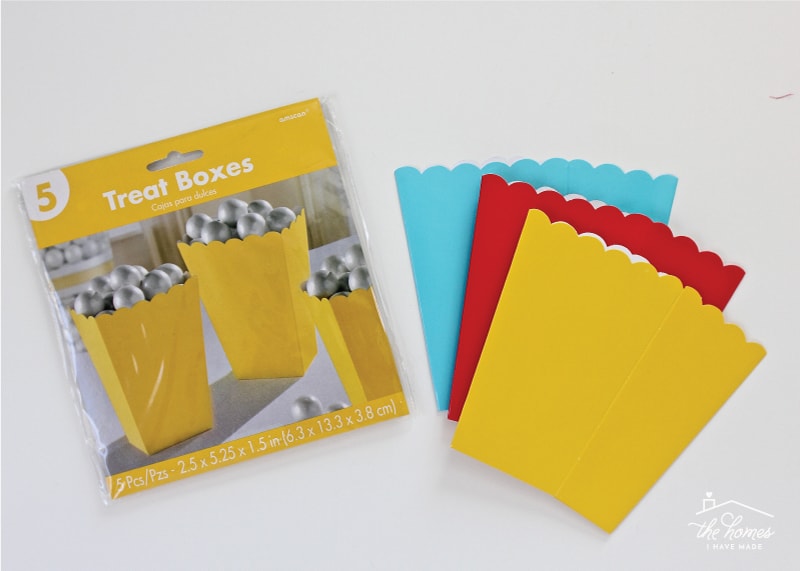
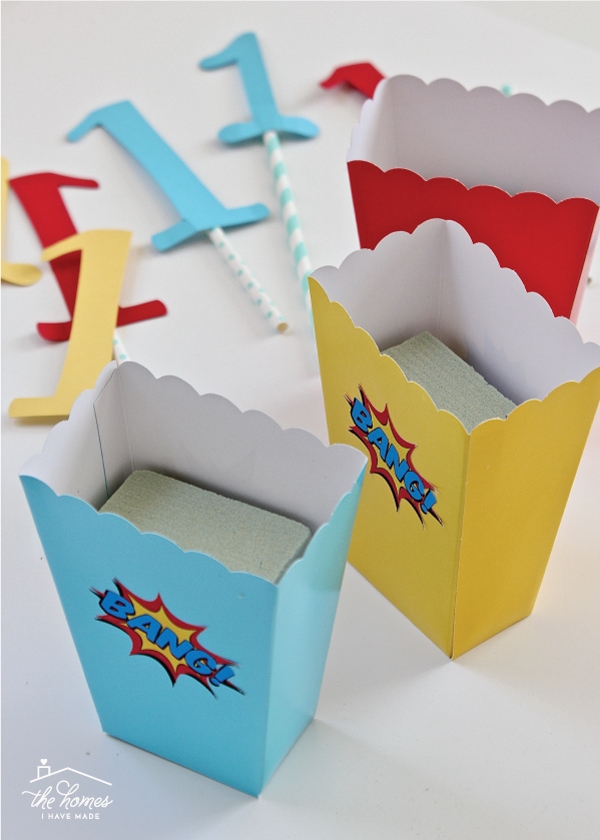
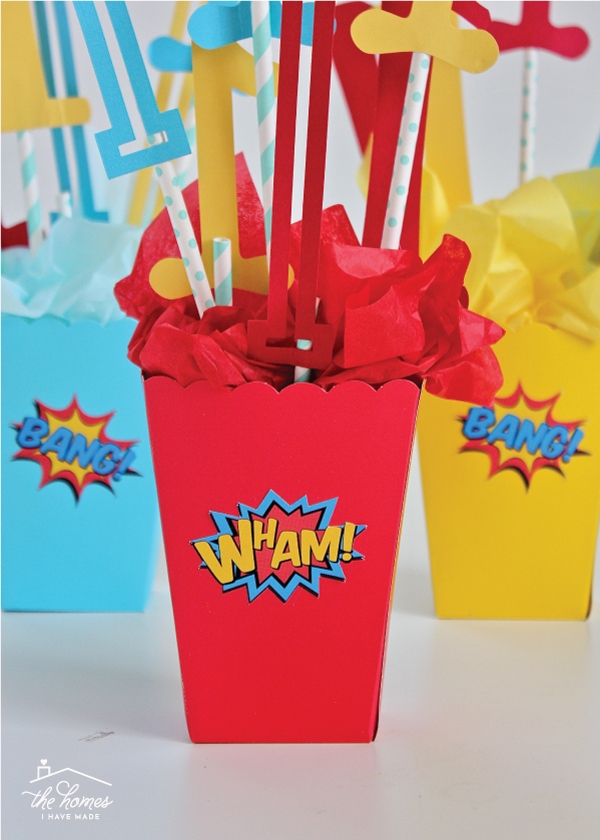
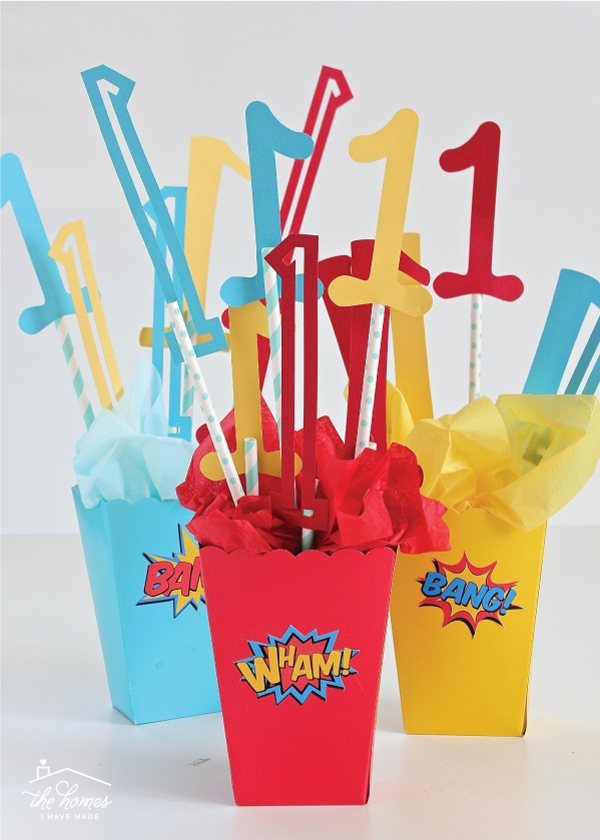
You will need something to be the foundation of your centerpiece and what you choose is completely dependent on what look you’re going for. When I’m hosting a party, my favorite places to look are Party City, Target Dollar Spot and the Dollar Tree. I recommend containers in your party’s color scheme, and ones that measure at around 6″ wide/tall. I’ve found that these treat boxes from Party City are a total steal! 5 boxes for $0.99, and they come in pretty much every color you can think of!
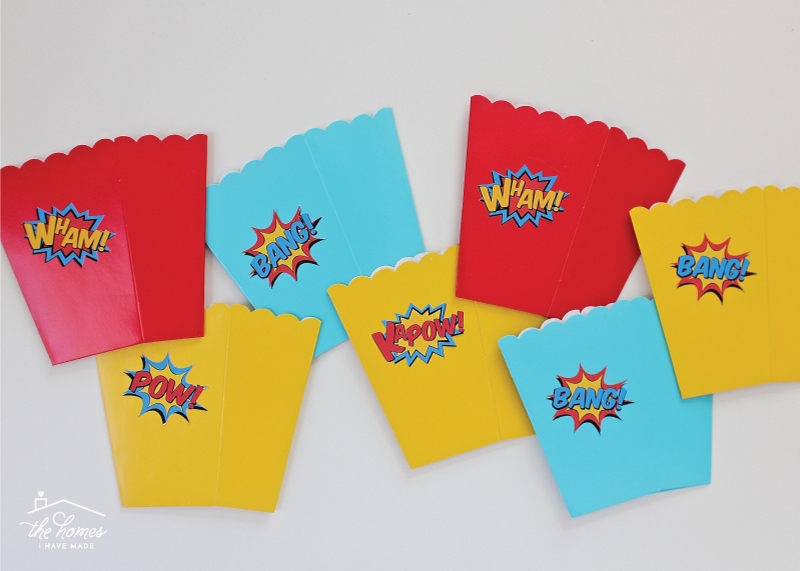
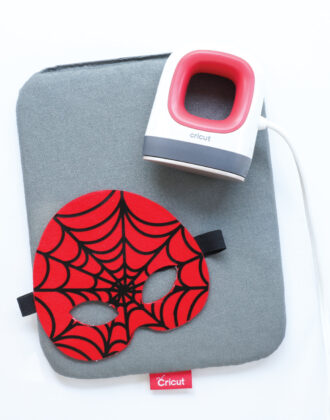
Once you have your base, consider adding something to it in order to customize it for your party. Peel-and-stick products are my favorite, such as stickers and vinyl decals, etc. This way, you can peel off anything you add and save your buckets for future parties! For Sam’s birthday party, we chose a Super Hero theme. Instead of trying to hunt down themed stickers, I just made my own using the Print-and-Cut feature on my Cricut Explore. (Although I just found these, and they would have been perfect!)
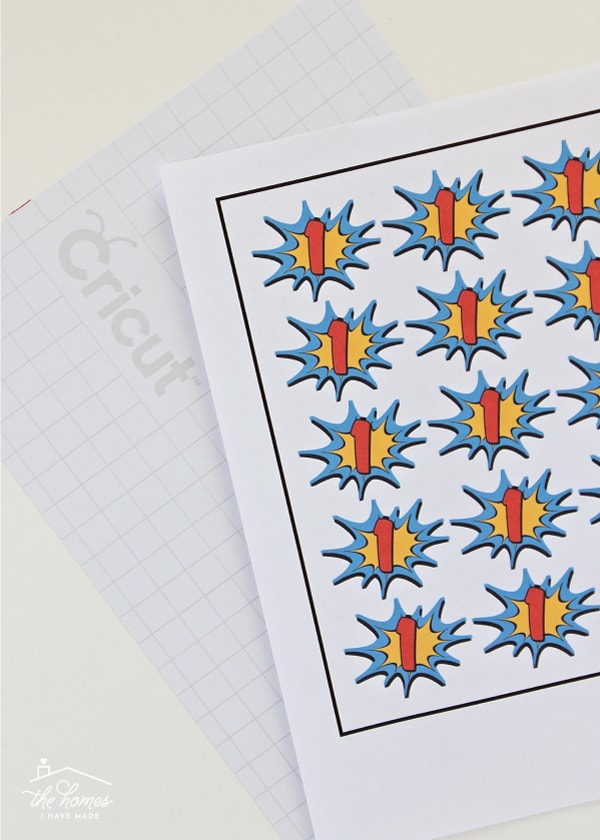
For anyone curious, I bought these graphics from Etsy and print/cut them onto Cricut sticker paper. Once I had my stickers, I just placed one on each side of the popcorn boxes.
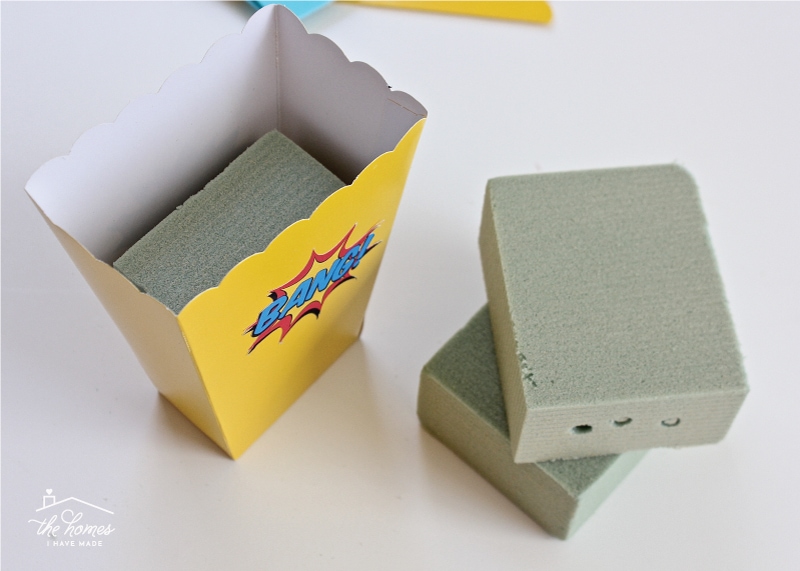
After lots of experimenting, I’ve determined that using styrofoam in your centerpieces is 100% worth it. It really allows you to arrange your display to your liking without decorations constantly shifting or falling.
Want to save this post?
Would you believe that these pre-cut blocks of styrofoam (4 blocks for $1) from The Dollar Tree were the PERFECT size to fit right into these treat boxes. Seriously! #iloveitwhenthathappens! No need to glue or secure them unless your styrofoam is significantly smaller than your container.
Making the Centerpiece Decorations
With your bases done, you can now create what will get stuck into the styrofoam. Again, I find numbers to be the best and easiest things to make. Just cut them out from colored cardstock and secure to patterned straws using a glue gun. Vary the fonts, sizes and colors to make a more interesting arrangement.
If you don’t have an e-cutter machine, you can buy pre-cut numbers and other shapes on Etsy. And, if you aren’t doing a birthday party, consider cutting out phrases such as “It’s a Boy,” “Good Luck,” “Congratulations,” “Grad,” “Class of XX”, etc. I feel like numbers and words are enough; but if you want, you can add also a cutout or printout (like our Ninjago centerpieces) of your party theme to take it up a notch.
Assembling Your Centerpieces
With your buckets decorated and your numbers cut and ready, it’s time to assemble your centerpieces. Watch carefully now… 😉
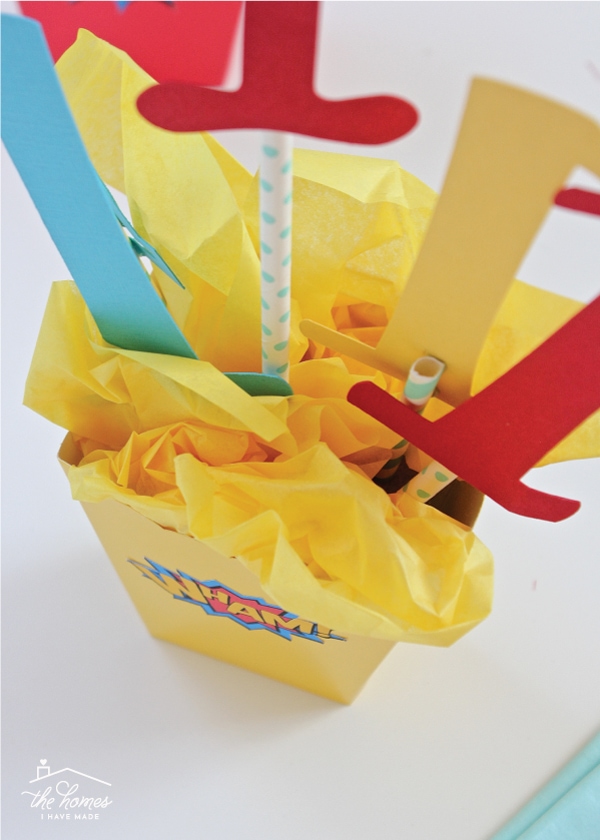
Stick the straws into the styrofoam, taking care to vary the heights and angles of all your decorations. I typically recommend one tall decoration in the middle and then shorter ones all the way around. Keep in mind that these will likely be seen from various angles, so rotate them frequently to get a balanced look.

Next, cut down a sheet of tissue paper into quarters (I find quarters are the most manageable for working in between straws)….
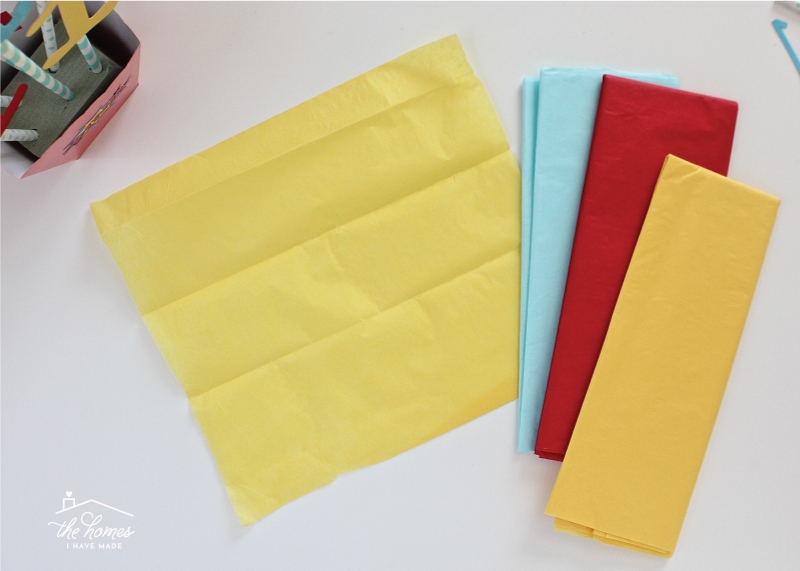
…and then loosely scrunch the tissue paper in and around the straws to cover the styrofoam and add some “fluff” to the base. I used two quarter sheets for each popcorn box.
I like to match the tissue paper or filler (shredded filler paper also works great) to the container itself…but you can certainly mix-and-match based on the look you are going for!
Finally…when possible, I like to add a balloon to the centerpieces (just tie one around one of the straws). This isn’t always possible based on wind, venue, etc, but they add some really great height and whimsy for a party.
Whether you are hosting a buffet or sit-down party or just like having some tables around for guests to sit at and mingle, adding centerpieces is a great “bang for your buck” decor item. I hope this post shows that they don’t have to be fancy or expensive or complicated. With all the fun papers, containers, and sticker-like products now available, you can surely adapt this idea for any part that you’re throwing!
I will show you everything else I made for Sam’s Super Hero first birthday party soon; in the meantime, I’ll see you back here on Friday with a fun furniture update that’s been long overdue!
Megan

2 Comments on “Super Easy DIY Party Centerpieces That Look Amazing”
Ahhh I love a good tried-and-true formula! My baby turns one next month; I might try this for his party! Now to settle on a theme…
I finally ordered a glue gun! Thanks for sharing the link, it was super easy to click over and buy. I know a glue gun is SO simple and basic, but I’ve never owned one before. For the past few months, I’ve been over-thinking my choice of glue gun, checking them out at JoAnns, and Target, Lo heat Hi heat, I got overwhelmed because I wanted to make a good choice, often leaving the store empty-handed. Thanks for the centerpiece tips too, I’m terrible at decorating, and I usually never even think of centerpieces, but now I know exactly how to do it, your method is easy to follow.