Labeling in the Linen Closet (with Printable Labels!)
Even though we are gearing up for another move in a few short months, there are still a few spots in this house that I want to work on and tweak for our remaining time here. One of these spots is our Linen Closet! In the first weeks of moving in, I loaded everything into this closet with the intentions that I would revisit it and get it in better working order within weeks. Well…here we are a few MONTHS later, and I am just now getting to it. Truth be told, the closet has been functioning pretty well for us so an organizational makeover didn’t really feel urgent. Still, every time I open the closet doors I get frustrated that I never took the time to re-sort and re-label baskets and identify some better solutions for a few disorderly things. Well, my friends! This is the week I’m tackling the linen closet; and while I’m not going to show you the closet today (come back here on Saturday for the reveal), I did want to share with you some new labels I made to get me motivated and help get everything in order!
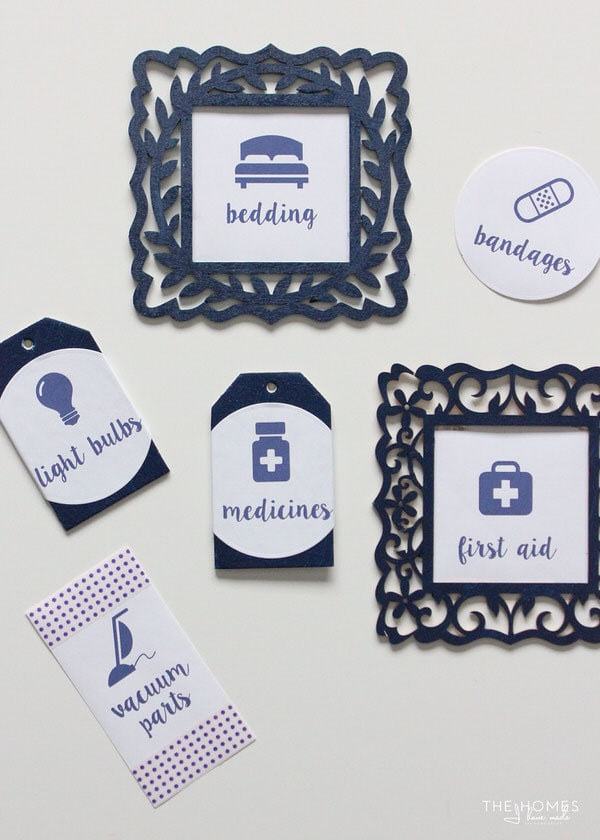
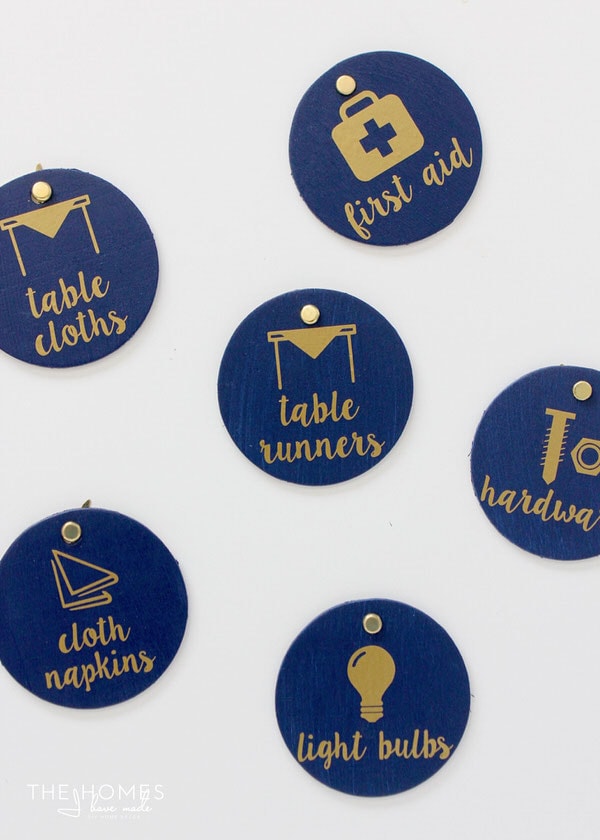
I made and shared some Linen Closet labels a few years back, but I was craving a fresh look and some more descriptive labels. So I spent some time this weekend coming up with 36 labels for (most of) the common things found in a linen closet, and I just love them!
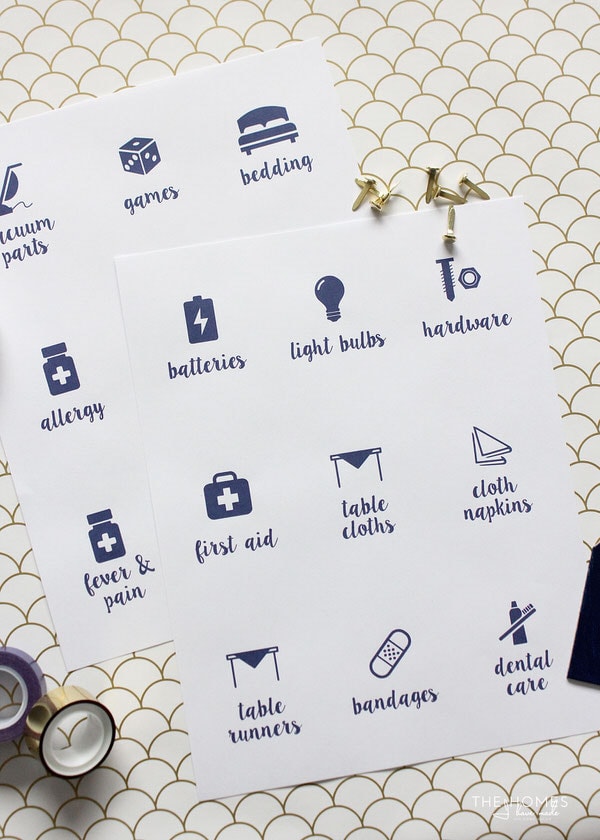
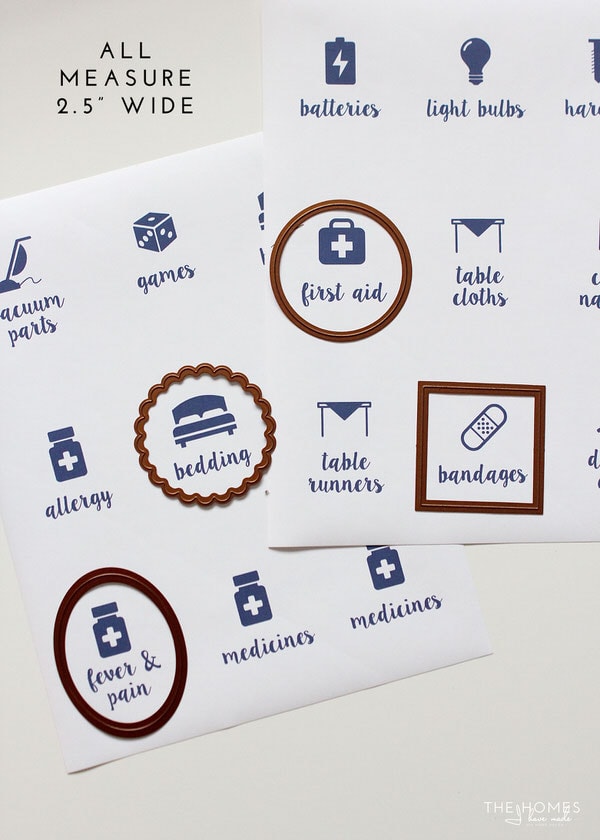
Here are the 36 different categories I came up with. Each label features a picture AND text…and is available in 5 different colors!
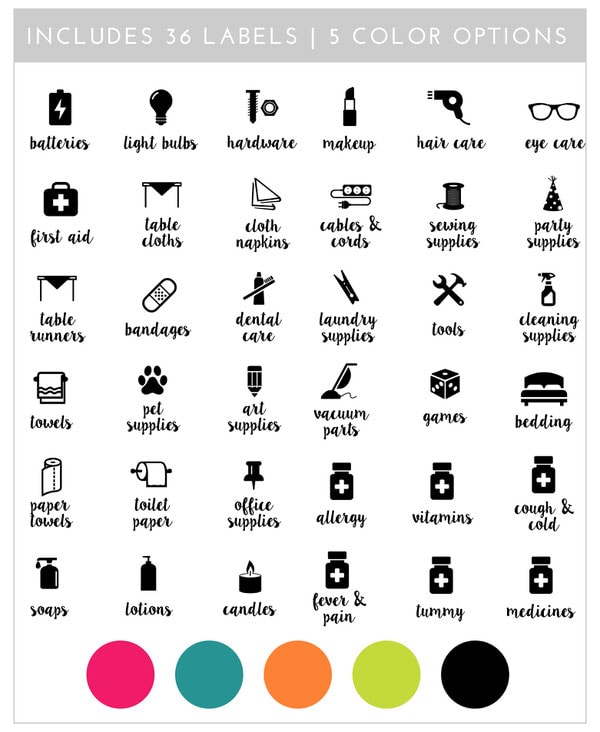
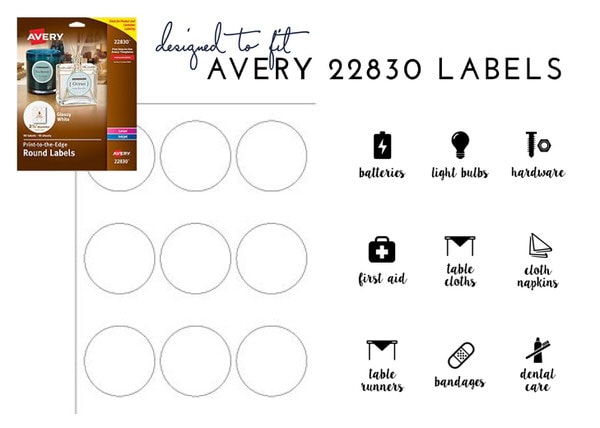
These labels are designed to fit onto 2.5″ round labels like the 22830 labels by Avery
Ultimate Flexibility
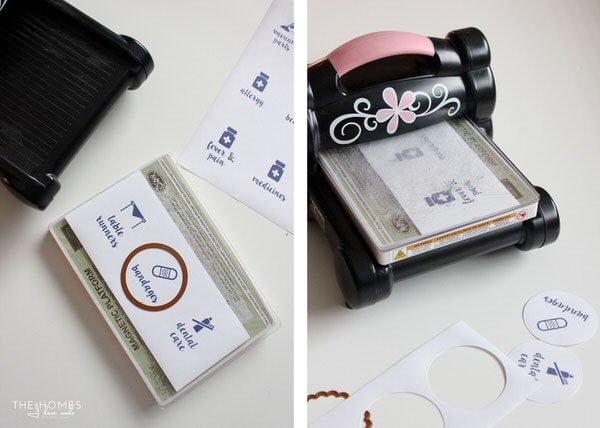
As I’ve been making all of these printables for you guys over the last few weeks, one of my main priorities has been to make you truly usable and valuable files. Why spend the time if no one can use them, right? I realize I can’t and won’t be able to get the right categories, font, color, style preference for everyone, but one thing I did do with these files was make them borderless so they can be cut down and used in a variety of ways! Using the Avery 22830 Labels
Cutting the Labels
Once you have the PDF file, simply select which set you want, choose those pages in the print menu, and print them at 100% scale. As I mentioned, the files have no borders around each label, allowing you to cut the labels down into any number of sizes and shapes that work for you! If you don’t own any fancy craft supplies, don’t fret. The easiest option is to use cookie cutters or create templates out of heavy paper and trace them around each label; then cut each out with a scissors. That said, my favorite way to get precise and quick cuts out of a sheet of labels is using dies with my Sizzix Big Shot
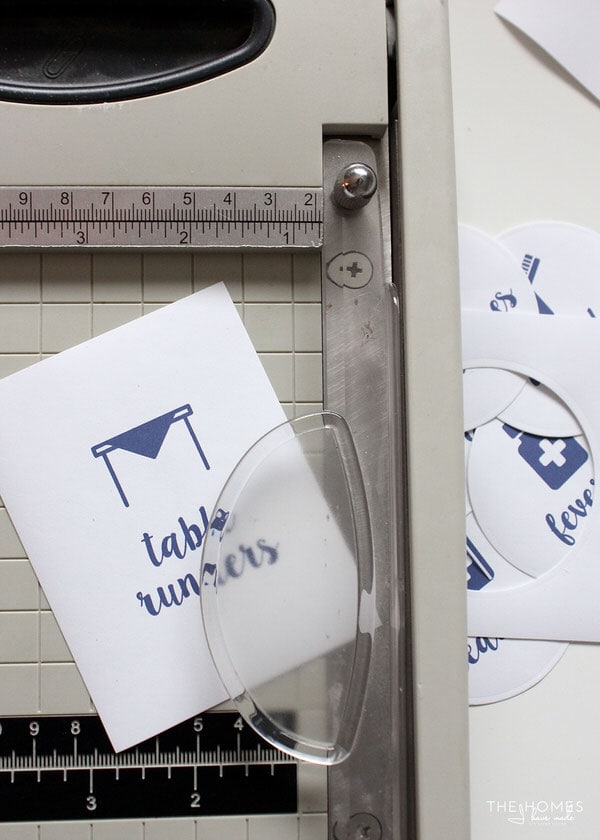
You’ll notice that quite a few shapes fit around these labels. And if you keep them to about 2.5″ wide, you can easily cut out all nine labels on a single sheet with equal borders/dimensions. To perfectly center the design on my cutout, I use a magnetic plate for my Sizzix Big Shot (#gamechanger). It holds the dies perfectly in place as it all goes through the press!
A paper trimmer (or scissors!) is another great way to trim these labels down.
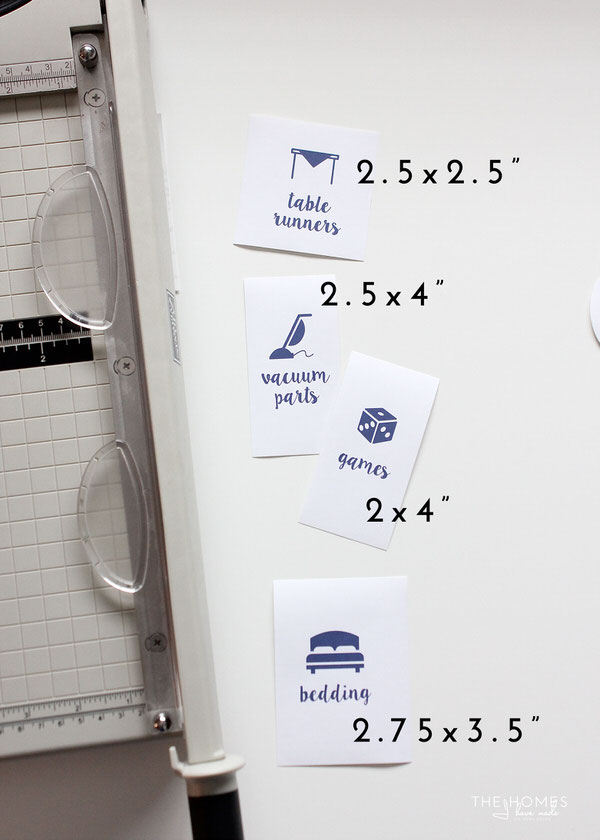
All of these sizes (below) can be achieved on a single sheet of labels. Just pick the measurement that works for you and trim each one to the same size! (Note in the image below: all the rectangles should be cut to 3.5″ tall! #ooops)
Fun Ways to Use the Labels
I have been on a labeling kick lately, and have been dreaming up all sorts of fun and creative ways to label bins and baskets. I’m going to be sharing a bunch of techniques in the coming weeks, including a few ideas for using these Linen Closet labels today!
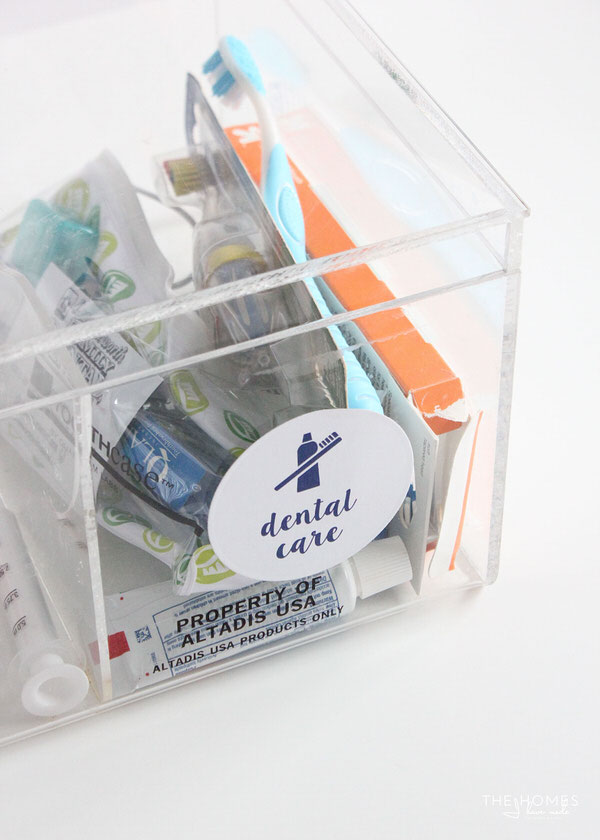
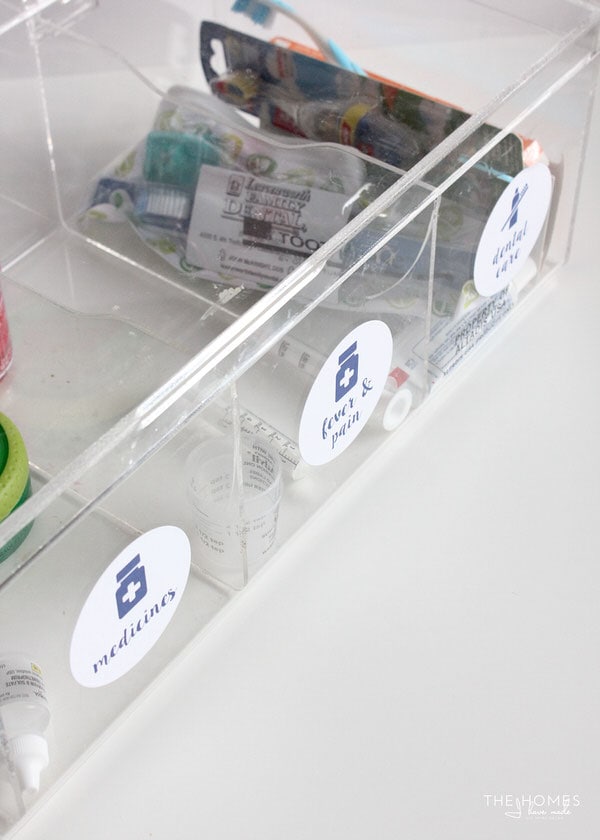
Peel-and-Stick
If you have hard, clean, solid surfaces on your organizers, using these labels as stickers is the quickest and easiest method for getting everything sorted and labeled correctly. Literally, just peel and stick it on the right spot!
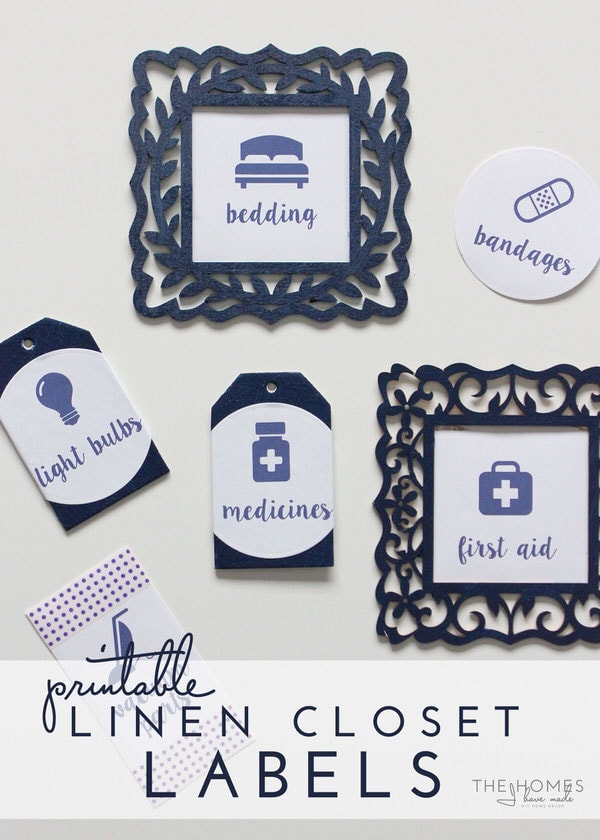
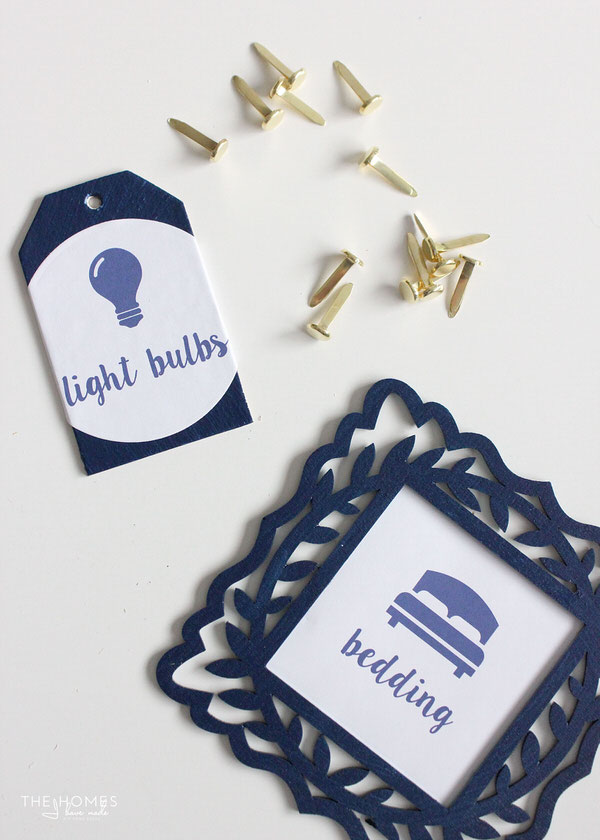
Tag Labels
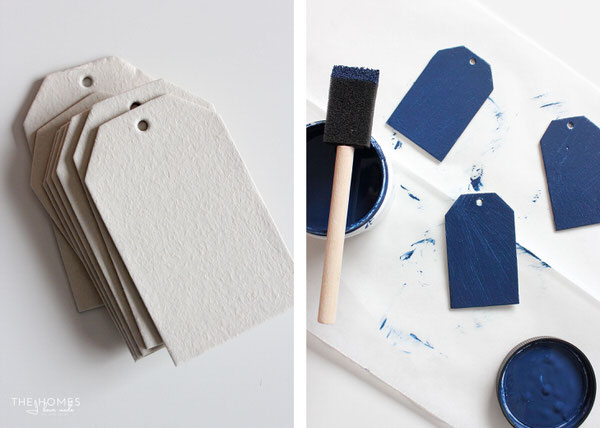
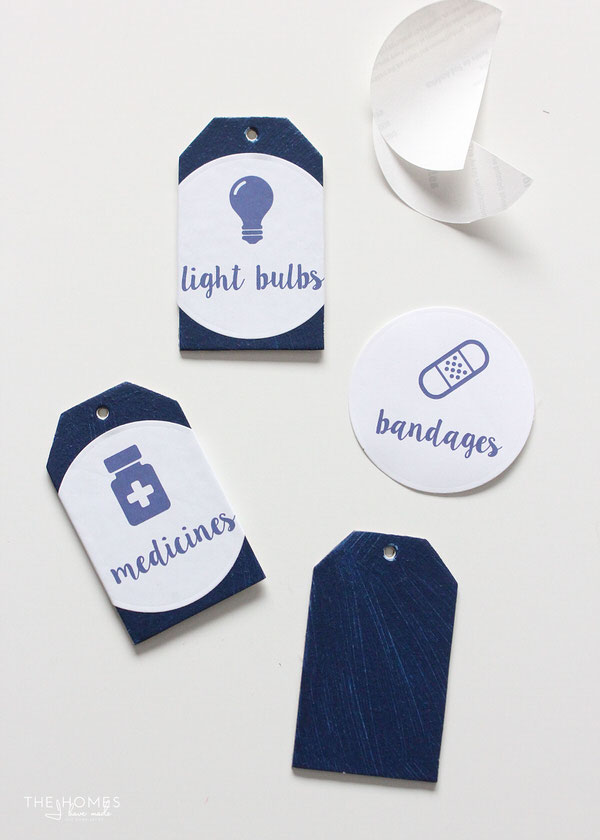
You can also apply these to any size and shape tag or sign to create fun and one-of-a-kind labels!
I found these chipboard tags at the Target Dollar Spot (#ofcourse). After giving them a quick coat of blue paint, I secured the sticker labels to the front of them and wrapped the extra paper to the back.
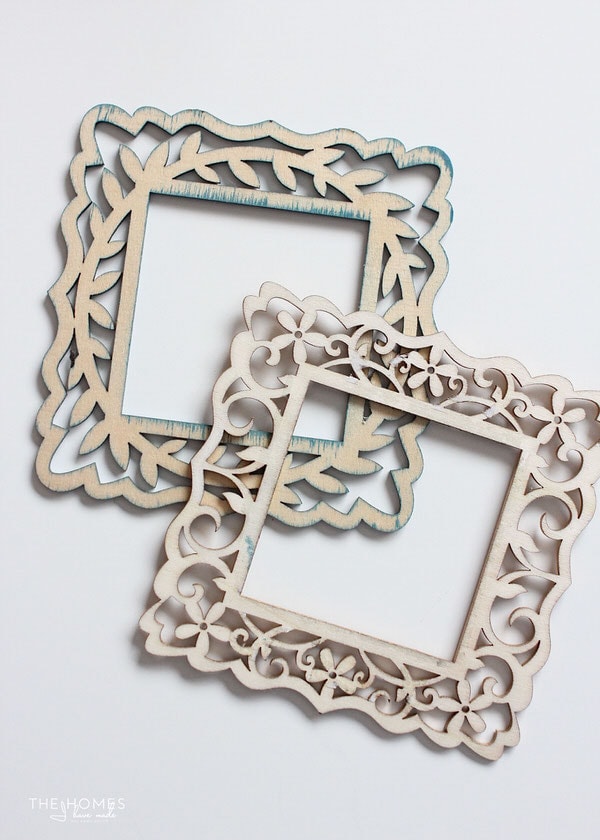
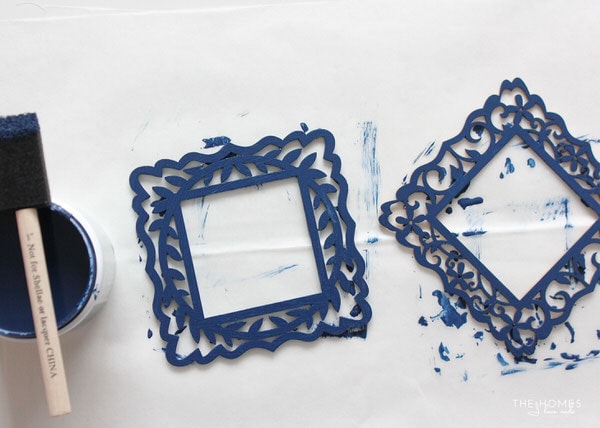
Frame Labels
Don’t feel like investing in sticker paper? You can still create super cute labels by just printing the images onto cardstock or photo paper and loading them into lightweight frames.
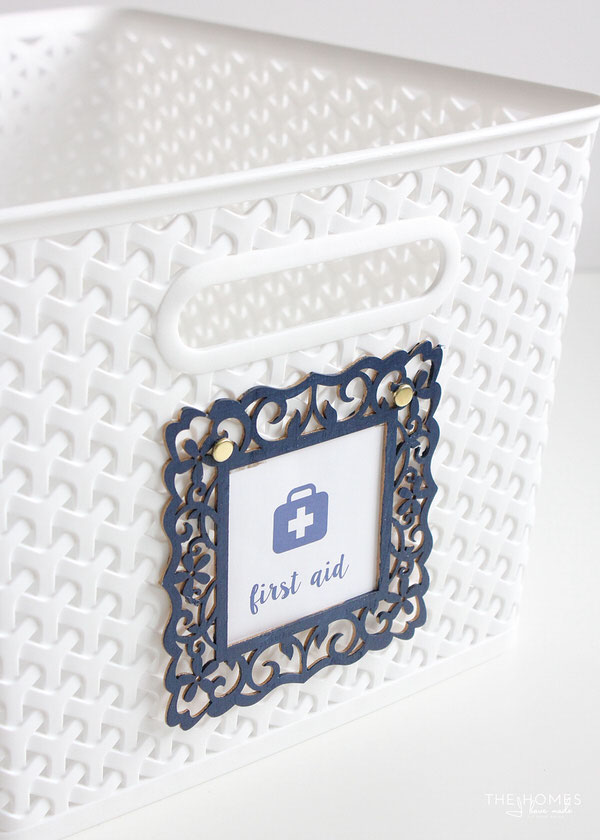
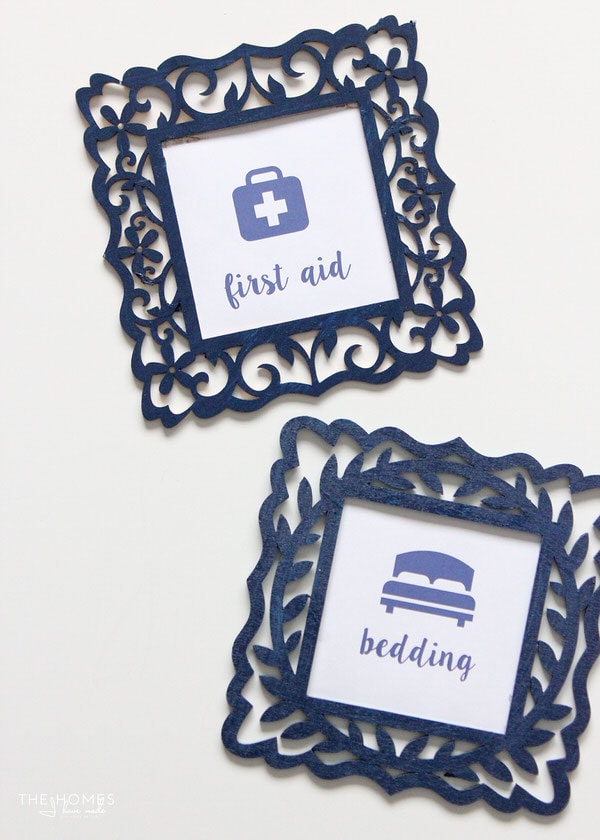
I started with these inexpensive die-cut wooden frames from Michaels…
After a quick coat of paint, I secured some cutout paper labels on the backside of the frames using plain ol’ adhesive!

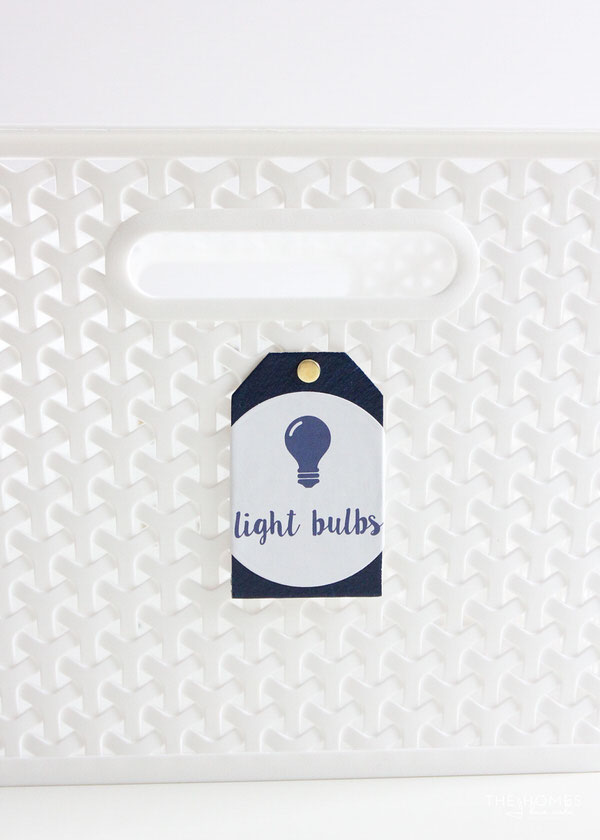
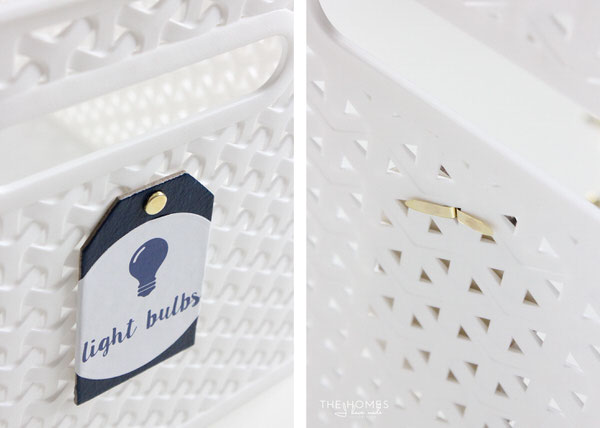
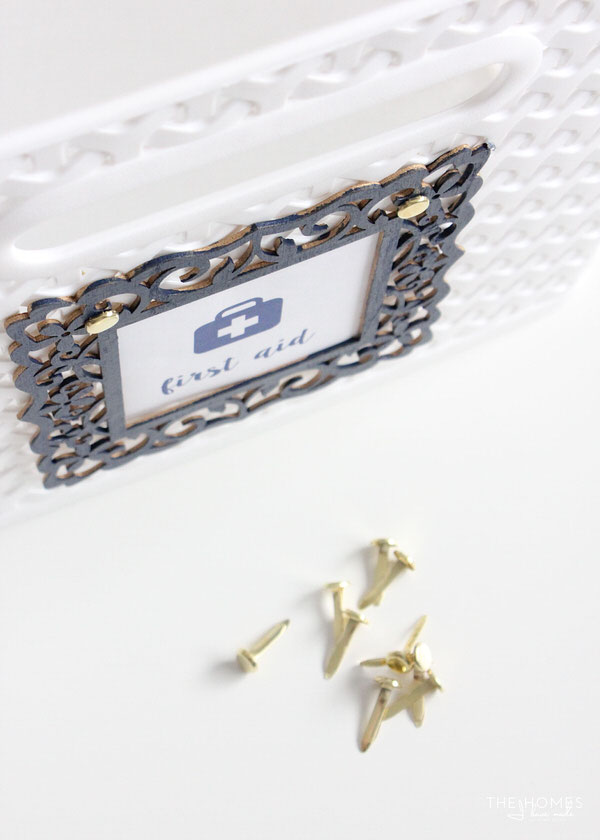
Securing tags to your bin or basket will largely depend on what it is made out of, if it has slats or handles, and what look you’re going for! In trying to come up with a fun yet sturdy way to attach labels to these Y-weave baskets from Target, it occurred to me that fasteners
Just pop the fasteners through your label, then through the basket holes, and open on the inside to secure it. I am so giddy over this idea, I can’t wait to use it all over the house!
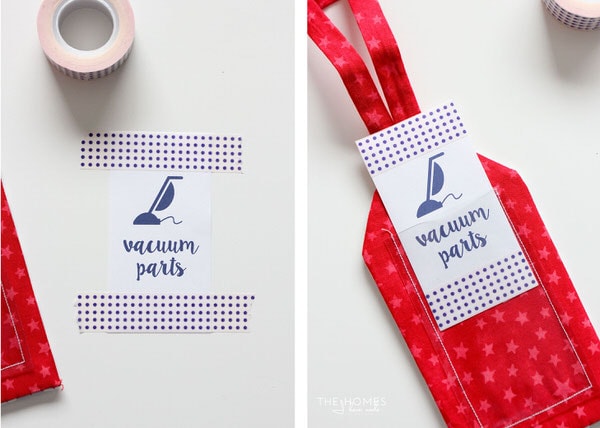
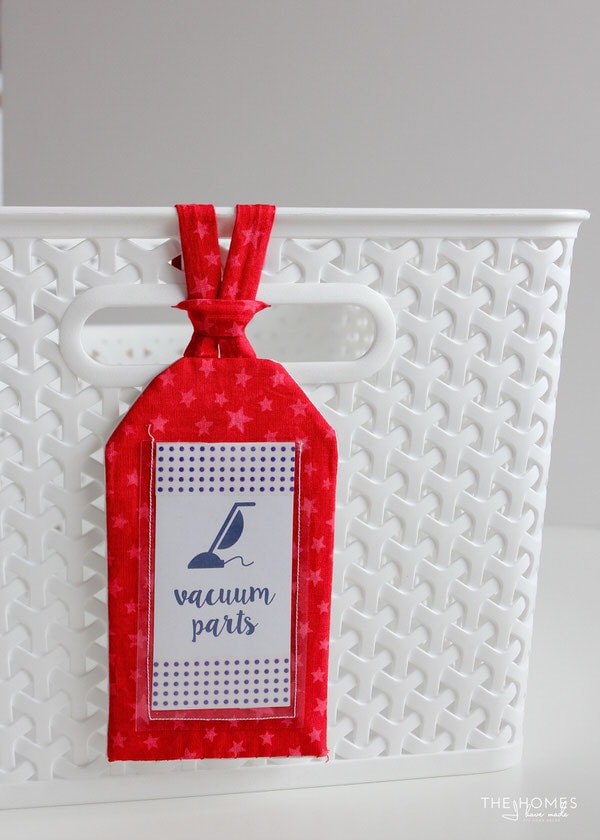
Luggage Tag Labels
Alright…my long-time readers will recognize these luggage tag labels in an instant. I made them years ago, and still keep them around since they are just so handy.
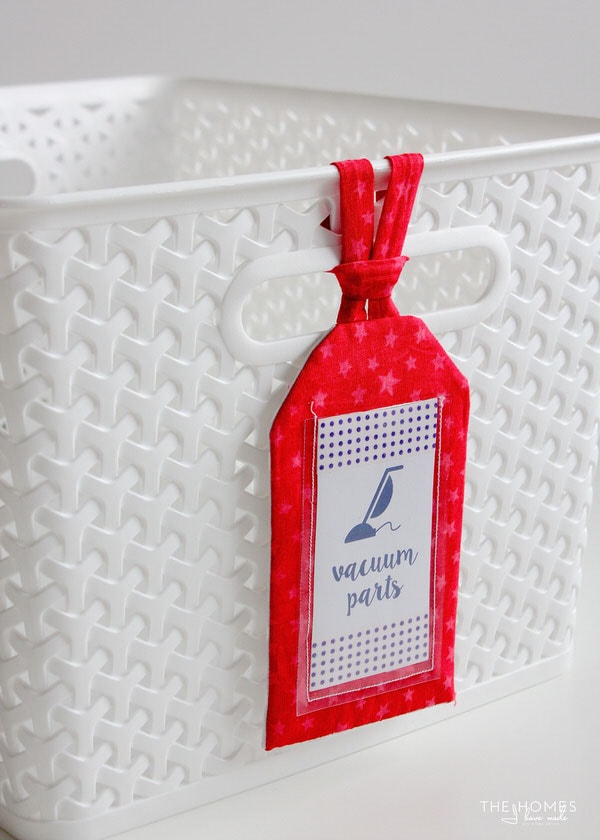
These printable labels even work in these luggage tags (get the tutorial HERE). I just dressed up the tags with a bit of washi tape before loading them into the clear vinyl pocket.
I am positively giddy over this set of labels and hope you guys are too! If you do use them, be sure to let me know how you put them to work and if they work out for you! Do you have any other clever ways to use them? Share in the comments below!
Get This Kit!
These Printable Linen Closet Labels are bundled together with a variety of other popular labeling downloads. Click HERE to learn more about this bundle or download it immediately by clicking below!

Have an All Access Pass to The Organization Toolbox? Login HERE to get this download!
P.S. If you would rather cut these exact same labels out of paper or vinyl using your e-cutter, I now have these Household files available as SVGs and PNGs too!
Megan

10 Comments on “Labeling in the Linen Closet (with Printable Labels!)”
I so need a linen closet! We bought an older house, and while I love the shape/design/layout the linen closet was in such bad shape. The built in pantry was as well. So they got torn out. The good thing about not having them is that I don’t keep a bunch of extra towels/sheets/junk around. Silver linings, right?
I do have everything in my laundry room cabinets, and I so need to organize them and label everything so my children can find it all! Thank you for making the labels for me…..now to get on the ball and print them and put them up!
Happy Sunday, Kristie!
I feel so lucky to have had linen closets in our last two houses. Before that, we never had one…and boy it really does help to have dedicated places to put things like towels and extra hygiene stuff. You are right though…with no place to store it…no clutter!
Even though it feels like our next move is around the corner, I am so glad I took the time to get ours in shape this week…such a difference!
Hope you’re having a great weekend!
Megan
Hi Megan
Thank you so much for having prepared all these labels for us to share. It would be funny to label my linen closet in English ! I have one I just put in order this summer even rolling some of the towels. The problem is the height between the shelves so it would be nice to put a name on the different things inside. Have a nice week. Michèle
Hi Michèle!
Yes, having English labels in your house would probably be a little funny…except that the pictures might be able to help you out 😉 Sorry I am not able to make prints that you would be able to use…but hopefully you can get some ideas for you to try in your own home!
Happy Sunday!
Megan
Hi Megan, you made me smile when you wrote that the pictures could help me ! 🙂 I do understand all the names written on the labels and all your posts in English, I do write my comments in English with no help at all. I do love English and I speak your language quite fluently. I suddenly realize that maybe you thought I translated everything which would be really tough ! 🙂 Have a nice Sunday, our is very stormy. Michèle
Wow those are great! I am TOTALLY jealous of your label making skills. What software or program do you use to make these?!
Love all of these ideas and the fastener idea is genius!
Lauren | Lovely Decor
xx
Hi Megan,
I am new to your blog as I just recently purchased a Cricut explore and am LOVING your blog helping me learn, so thank you!!
Wondering what font you used for these labels? I love it!
Thanks again for your very helpful information, I’ve been cruising your blog reading everything for over an hour now lol!
Hi Michelle!
Thank you so much for leaving such a nice comment! I am so glad you found me and are enjoying reading around the site!
The font you are referring to is called LilyBelle ad you can find it here: http://www.dafont.com/lillybelle.font
Have a great day!
Megan
These look great but on Pinterest it says they’re free but it looks like I have to purchase your toolkit. Did I misunderstand?
Thank you.
Hi Mary,
Thanks for your note, and I do apologize for the confusion. For many years, these labels were indeed free. Just this past April, I switched to a paid platform as the amount of variety of printable resources I was offering increased significantly. A paid membership is now required to access these (and many more) files.
I have tried to remove much of the “free” language from my site, but I cannot change old pins or links. I do apologize for the confusion!
Thanks,
Megan