Our Quantico Home | Mini Master Makeover
Hello hello! At long last (okay…it’s only been 3 weeks!), I finally have pictures of my “new” Master Bedroom.

Three weeks ago, I gave myself a challenge to makeover my Master Bedroom using only $150 and items I had on-hand. You may also recall that just when I decided to do this, we also found out that we are moving again in 4.short.months.
Since I suddenly had about a bazillion other things I should be doing rather than re-doing a bedroom we’re living in for so short a time, my makeover became much smaller in real life than it was in my head! And I was dreaming big, people! I was going to cover the wall behind our bed with this awesome green and black fabric, stencil a plain duvet cover, spray paint our wicker baskets and…the idea list went on and on and on. But it occurred to me that not only did I not have the time for so many projects…but since I’ve not picked out a color scheme (or even a direction) for our next home, a lot of this effort would potentially be going to waste!
Therefor, I decided THIS makeover, instead of being big, bold and beautiful, would instead be a “return to neutral.” Not only did this plan rid my bedroom of the orange and pink I was so sick of, but it provided me with a clean slate that will (hopefully) translate to a new color scheme in our next home. Maybe I should have called it a Master Bedroom Facelift, instead!
So without further ado…here are some before and after shots!
Want to save this post?


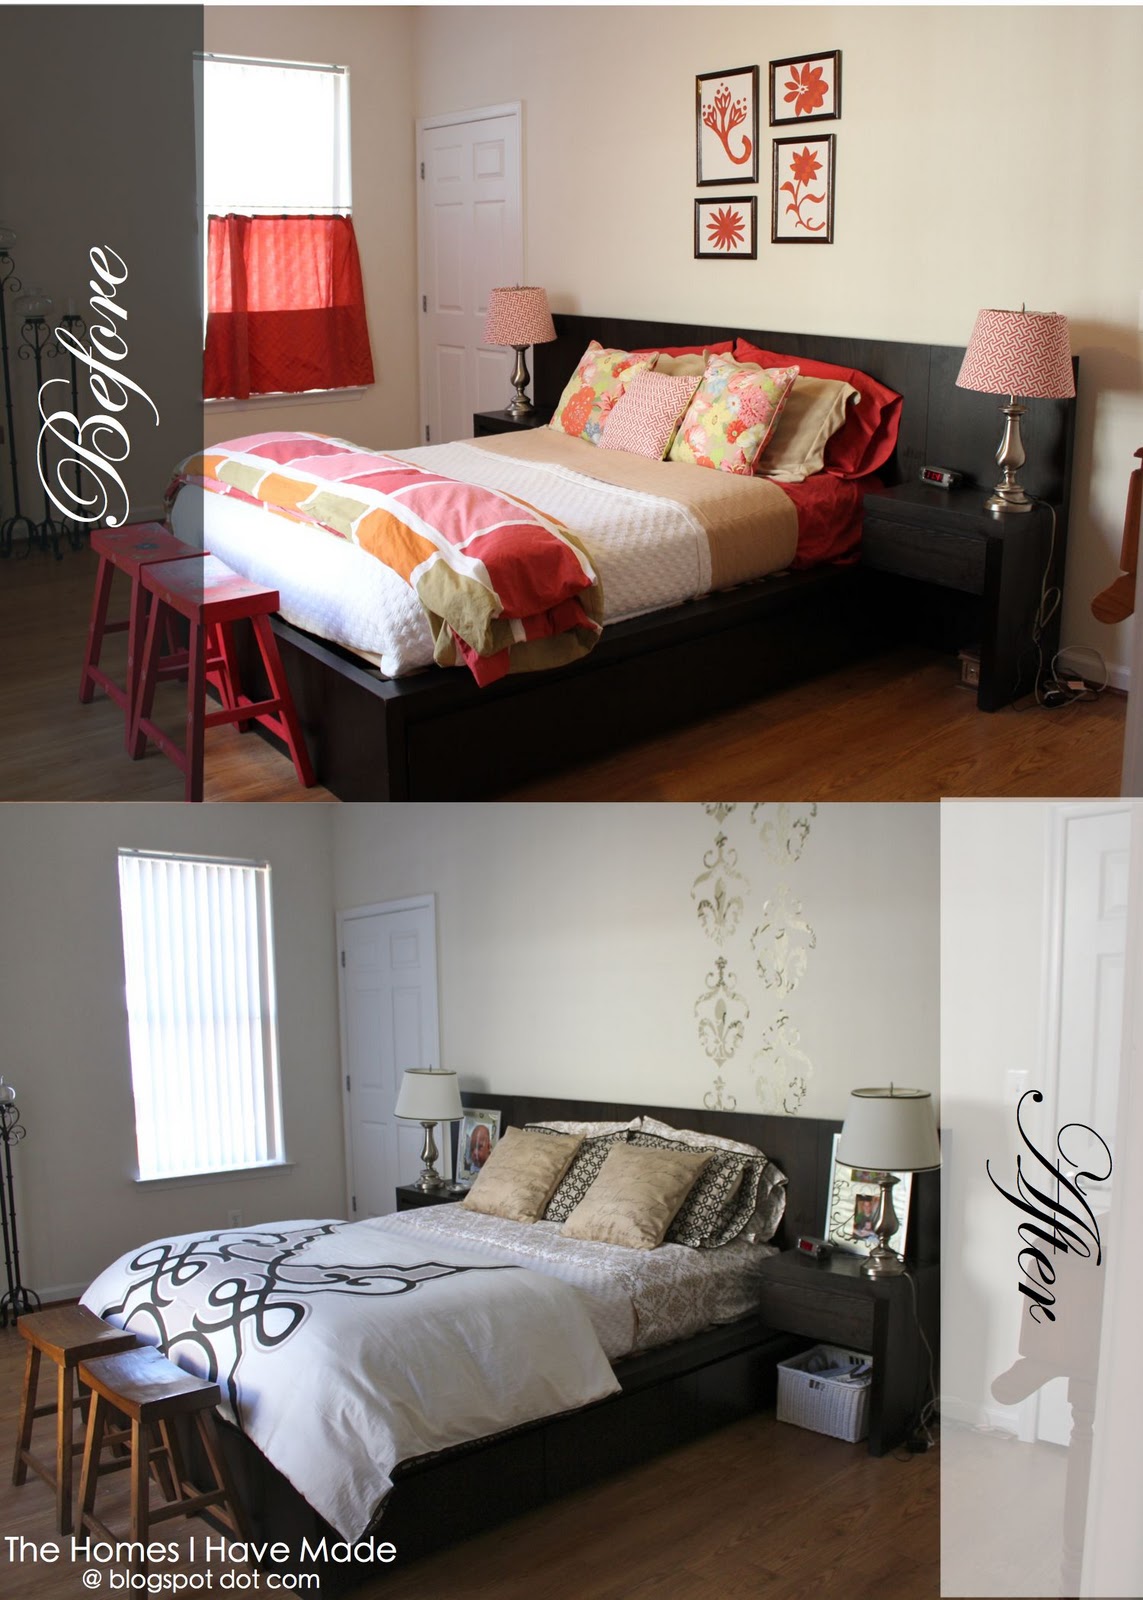
From just looking at these pictures, it almost looks like I just edited my photos to be a different color scheme – lol! Trust me – these changes are real! I simply kept all the basic elements the same and made some super easy (and pretty effective!) swaps.
So what about that $150 budget? How did I use it?

- (top left) new taupe suede curtains from IKEA (these are the same curtains that match the rest of my house)
- (top right) this dramatic duvet comforter and shams were on sale online at Target
- (bottom left) I picked out this Waverly fabric on the bolt but it was $35/yard..what luck to find a remnant 50% off by the cutting table…I love how the french script ties into the decal pattern on the wall!
- (bottom right) new damask sheets purchased from TJ Maxx

- (top left) I stripped off the pink fabric (held on with double stick tape) and added simple grosgrain ribbon to the lamp shades
- (top right) I used wallpaper I already had and made my own decals
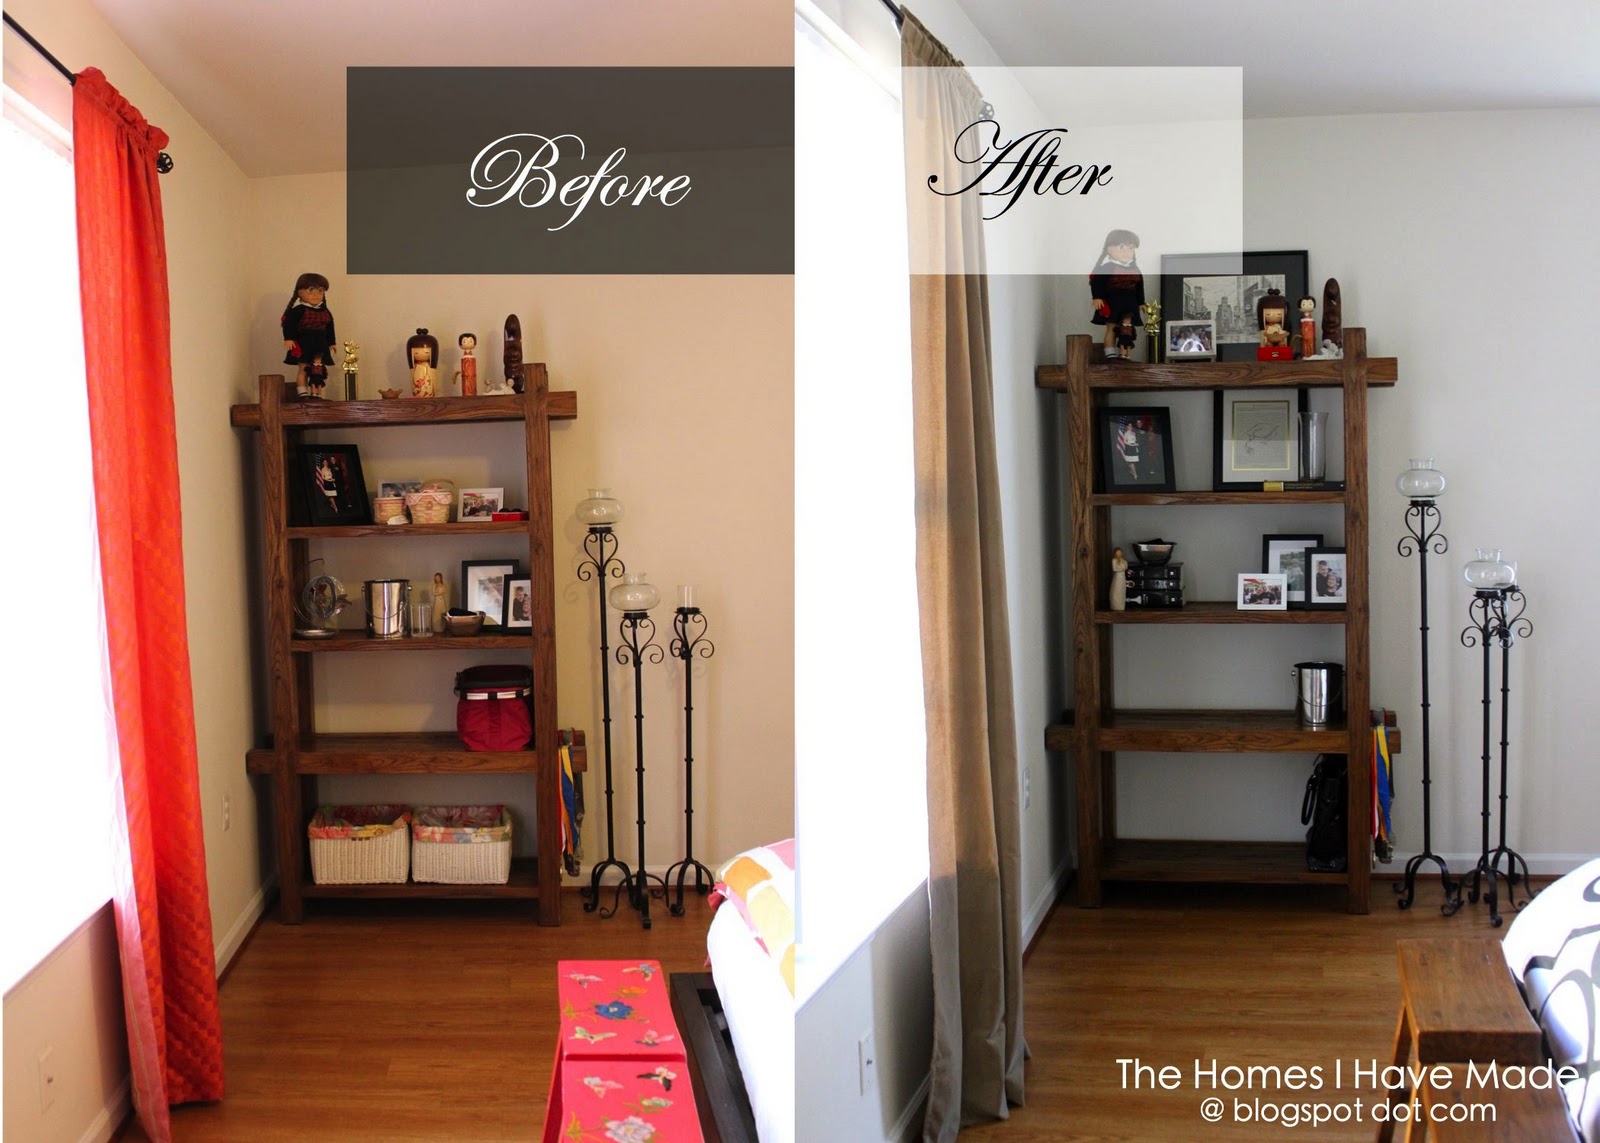
- (bottom left) I cleaned up my shelves, got rid of some items, and found some other items around the house that coordinated with the black/gold/white theme
- (bottom right) the frames were already matted with wallpaper and had the photos in them from a previous project I abandoned for the living room. They were a simple add to tie everything together!


Megan
3 Comments on “Our Quantico Home | Mini Master Makeover”
Very pretty! I'm amazed you even continued on with the redo with a move so soon in your future. Knowing me I would have put it off, telling myself I'd redo the bedroom in the new house.
Love the neutrals!
Visiting from Tatertots and Jello
I love the colors…makes the room look very grown up…def try and use it in your next home…
Hi Maggie!
Thanks for all the wonderful comments you left on my blog! I really appreciate you looking around and leaving some blog love!