How to Sew Half-Square Triangles
Even though everyone (likely) has Christmas on the brain right now, I wanted to pop in with my next Home Decor Sewing School tutorial! I’ve actually been blown away how popular these tutorials have been in recent months, and I am so excited to hear that I’ve motivated and encouraged some of you to actually tackle some simple sewing projects. I’ve said it each time, so I’ll just repeat it again: I’m not an expert sewer (by any stretch!); but over the years, I have learned and “mastered” some basic sewing techniques that allow me to not only make things for our own homes, but others’ as well! These are projects that people may look at and think “I could never do that.” But once you see how truly easy they are, hopefully you’ll be more inclined to give them a try. So far, we’ve covered how to sew piping, pillow shams, and boxed corners. Today, we are dipping our toe into quilting, and I am going to show you how to sew half-square triangles.
What Is a Half-Square Triangle?
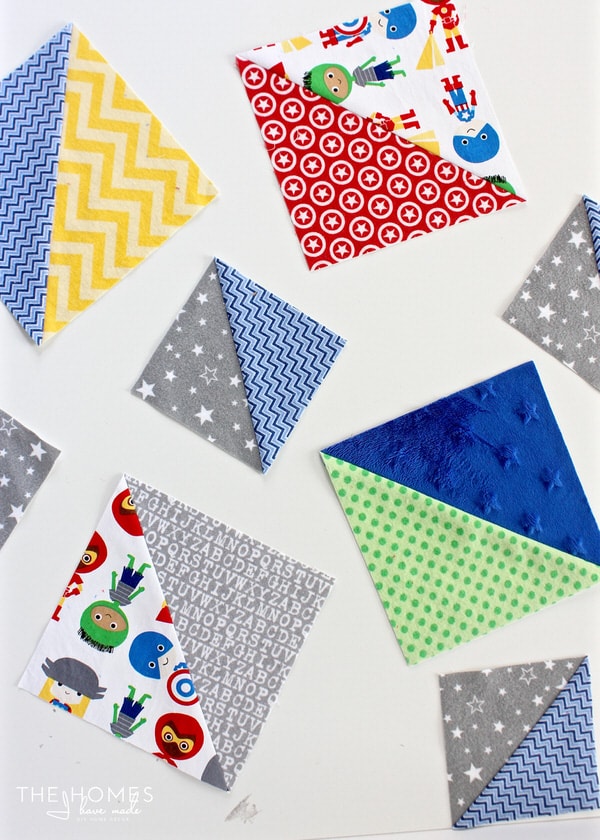
The “half-square triangle” or HST is a term you may or may not have heard before; but I guarantee you’ve seen them (even if you are just a casual quilt admirer). When put together into larger patterns, they can create some pretty spectacular effects; but in isolation, they are exactly as the title suggests: two triangles that come together to form a square.
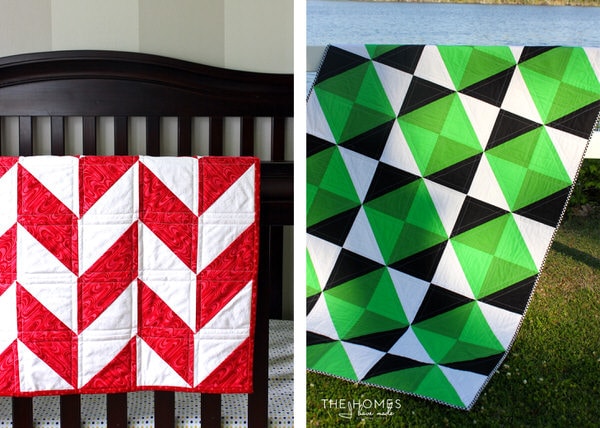
I love the HST for so many reasons. First and foremost, as you will soon see, they are so stinkin’ fast and easy to make! If you need to whip together an amazing quilt in short order, the HST is your very best friend. And second, they are the foundation to some of the most spectacular quilt patterns. The squares can be rotated and combined to create a variety of effects. In fact, I’ve used HSTs to make two very different quilts already shown here on the blog:
HERRINGBONE QUILT | WILD GREEN QUILT
Do you see the HSTs in the above quilts? Sometimes they can be tricky to pick out depending on how the colors are used and the optical illusion the fabrics create. The picture below might help:
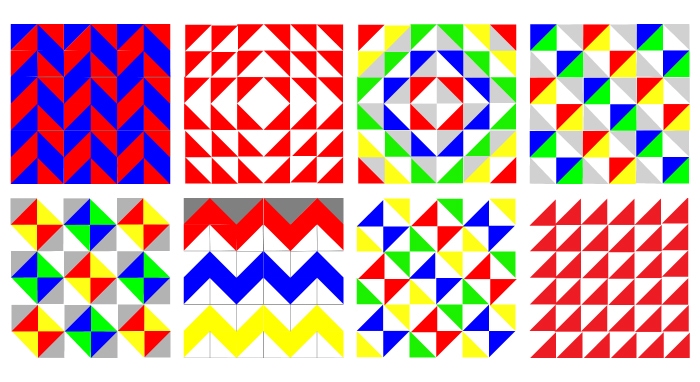
And these two are just the tip of the iceberg! The HST can be used in countless ways. Here are just some quick examples, but check out HERE for loads of ideas!
If you look at some quilts you love and focus in on the basic element, you might find they are indeed just HSTs put together in a really cool way!
What You Need
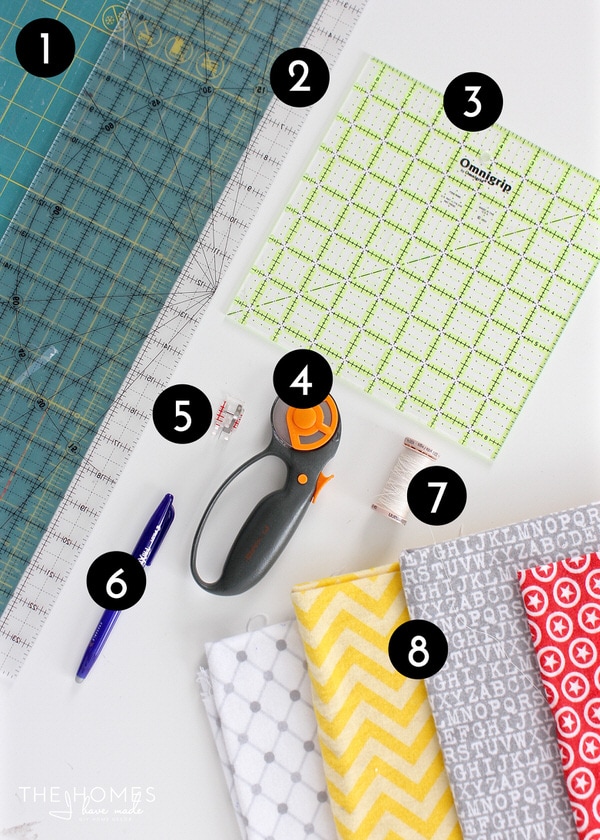
Hopefully, I now have you convinced that the HST is a quilt technique worth learning and mastering. Now I’m going to show you how easy they are to sew together! Here is what you need to sew HSTs:
*affiliate links used
- Self-healing cutting mat
- Cutting ruler
- Square ruler
(optional, but SO handy)
- Rotary cutter
- 1/4″ quilting foot for your sewing machine (optional, but SO handy)
- Fabric pen
- Thread
- Fabric
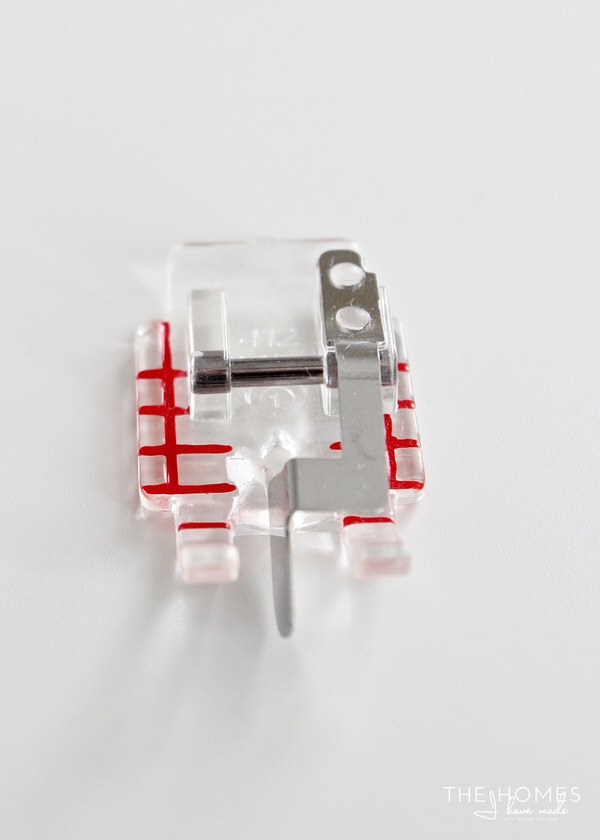
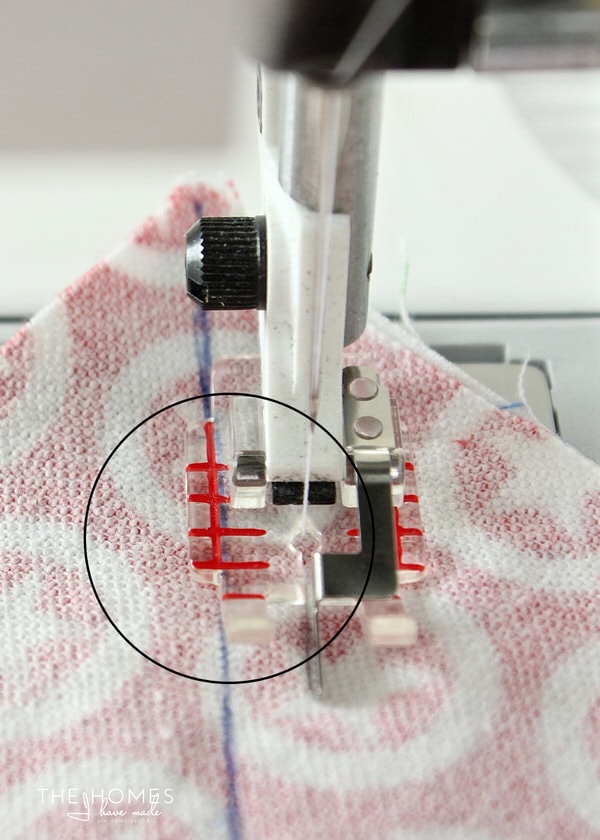
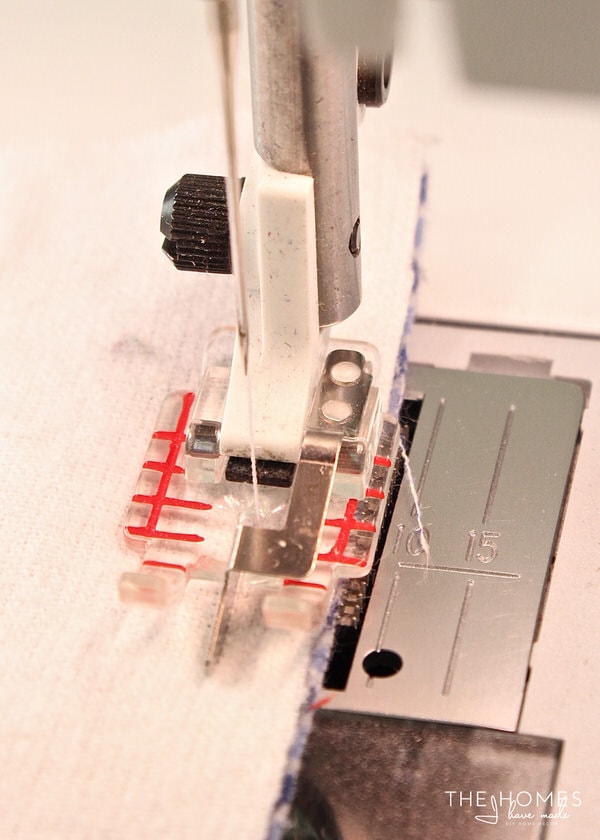
Just a quick note on #5, the 1/4″ quilting foot for your sewing machine. In quilting, a majority of seams are 1/4″. You can certainly sew these seams with a careful eye and a regular presser foot. However, once my Mom gave me the 1/4″ foot, I was amazed at how much easier it was to get consistent seams on my quilt blocks. Your’s may not look like this (each machine’s feet have a different look), but most (I think) will have a guide that is perfectly measured at 1/4″.
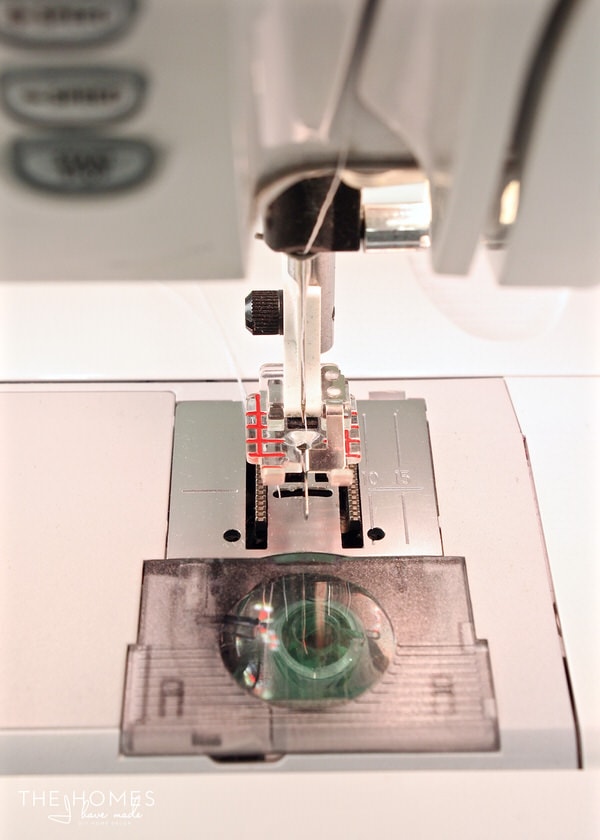
Here’s the foot on my machine. The red lines on either side of the guide are exactly 1/4″ out, meaning I can use this foot to sew on either side/direction! Check the manual to your specific sewing machine to learn more about your 1/4″ foot. They are usually just a couple dollars and are worth investing in!
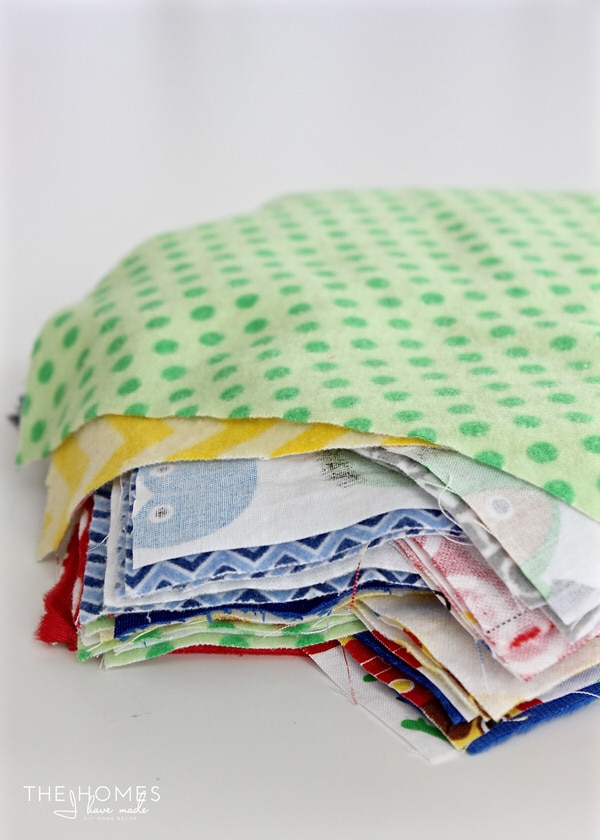
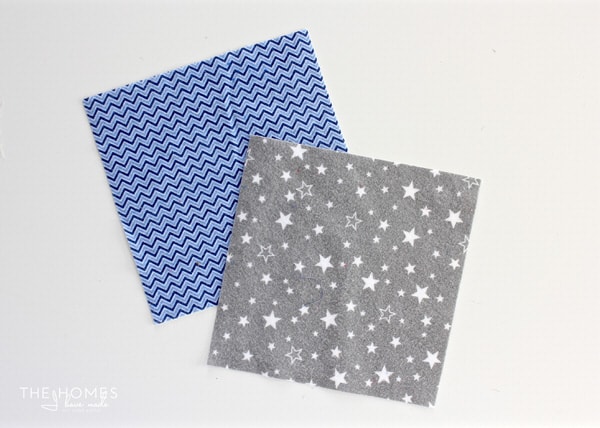
Before you can sew up the HSTs, you need to cut your fabric down into squares. What size squares you need to cut are outlined in the two different tutorials below. At this time, I am not going to go into the various patterns/effects you can create with different fabrics. You can use the images above to decide a pattern you like (or Google “Half-Square Triangle Quilt Patterns”) and figure out how to lay out your squares from there. Just note that each HST is made out of two different fabrics. So if you want a red and white finished HST, start with one red square and one white square.
TIP! I find it easiest to do all these steps (cut, then sew, then cut, then iron, etc) in batches, so take the time to cut down all your fabric(s) into squares before moving on.
The Half-Square Triangle – Method 1 (Yields 2 HSTs)
There are lots of different ways to make HSTs, but all of them are based on sewing squares together and cutting them apart in different ways. This first method sews two squares together to yield 2 identical HSTs. To help you determine what size to cut your starting squares, use this handy chart:
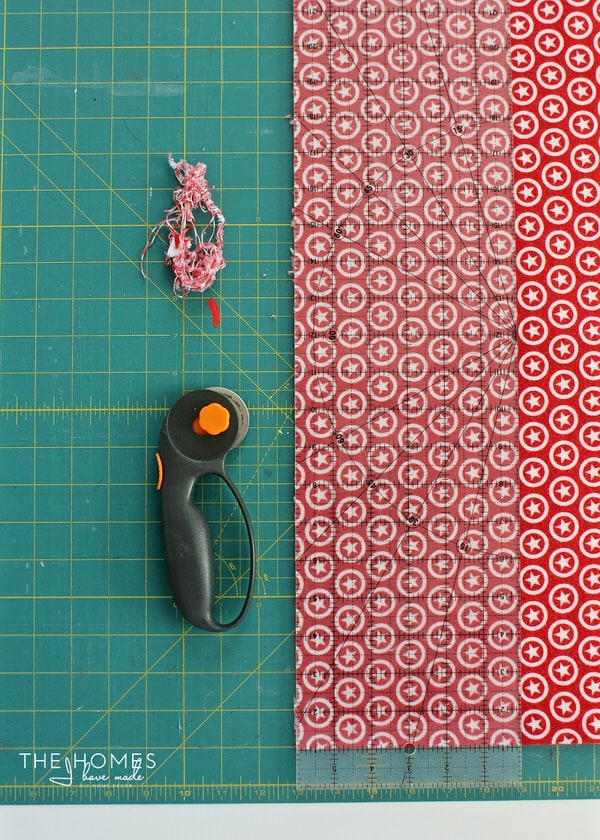
To get really precise measurements, I recommend using a rotary cutter, mat and ruler.
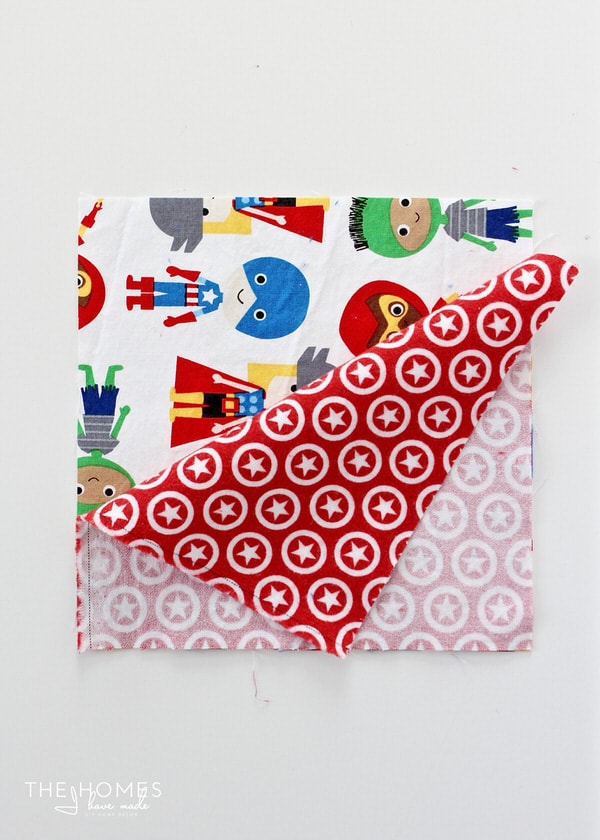
For one set of HSTs: start with two squares cut to the exact same size (mine were cut to 8″ for ease) and place them on your work surface with RIGHT sides facing each other.
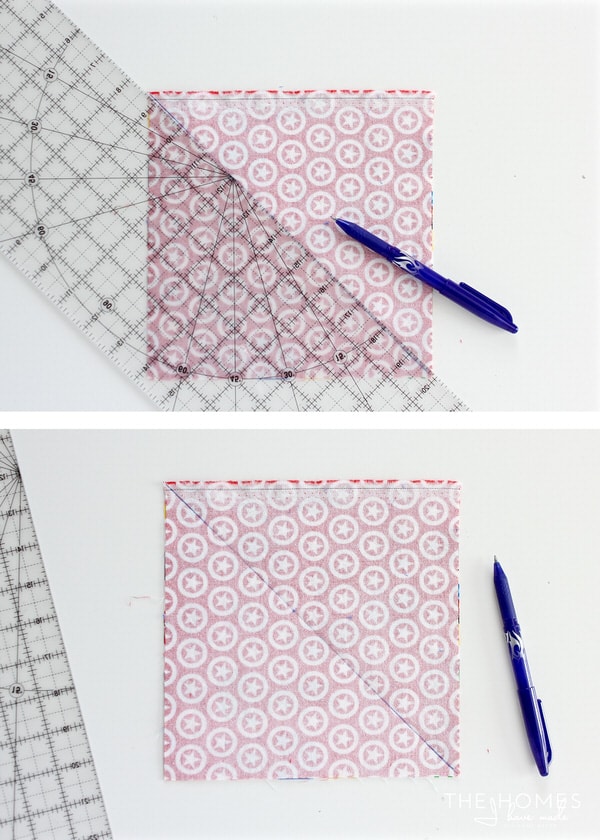
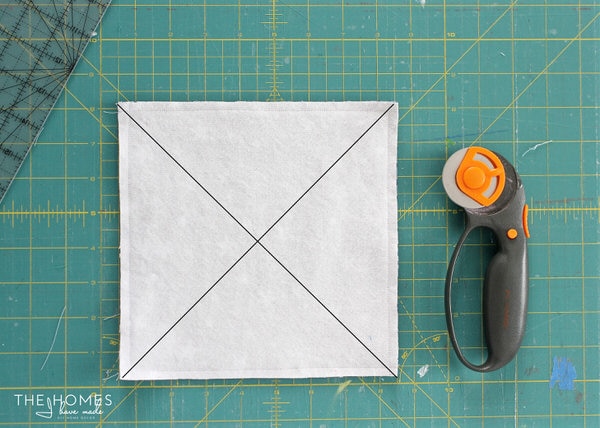
On the top square (which should have the WRONG side facing up), draw a line from one corner to the opposite corner using a fabric pen.
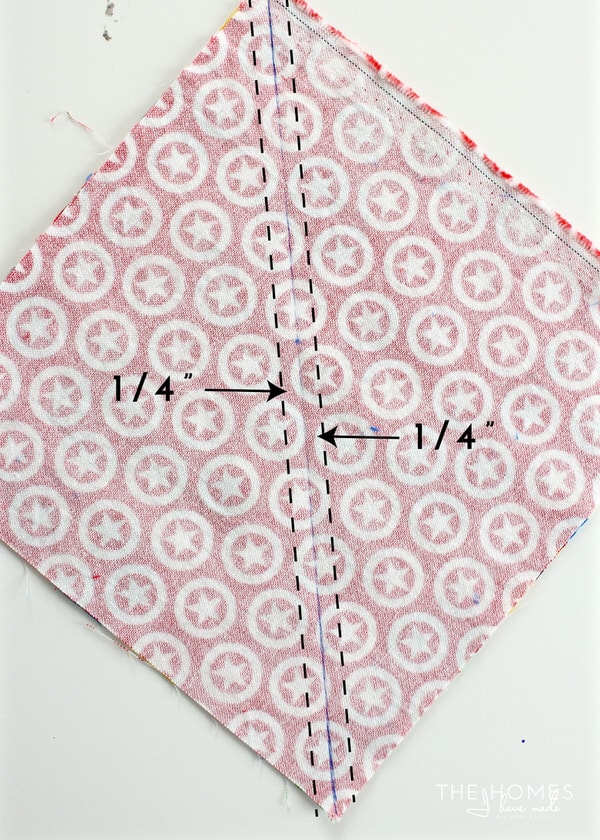
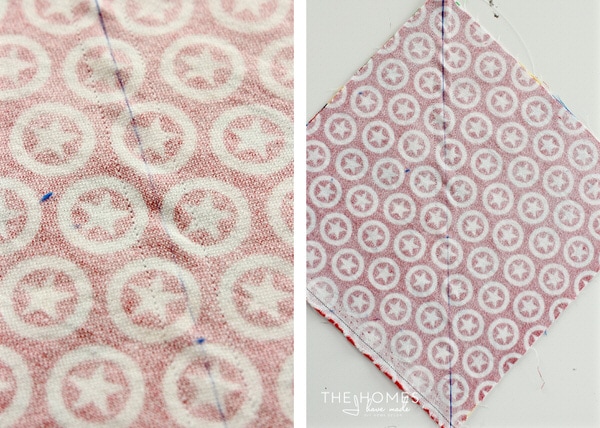
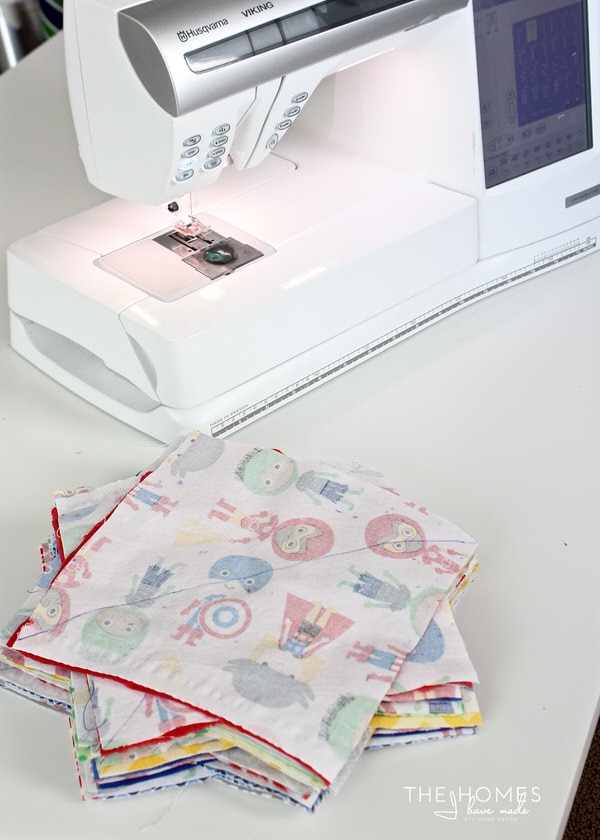
Next, sew a line 1/4″ away on BOTH sides of the line you just drew through both squares of fabric.
To do this, line up the guidelines on your 1/4″ foot with the pen line and stitch down the full diagonal of the squares.
If you look carefully at the images below, you will see a line of white stitching on BOTH sides of the drawn pen line.
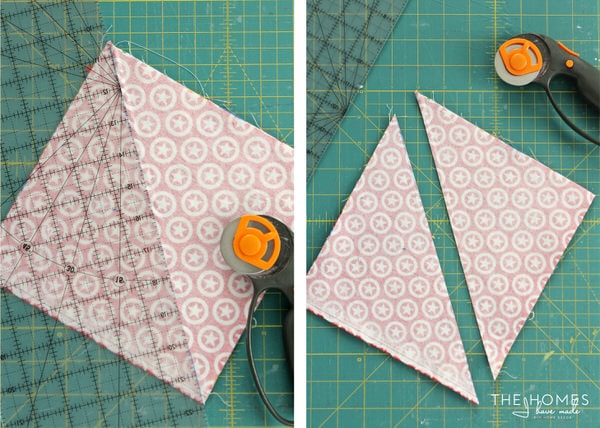
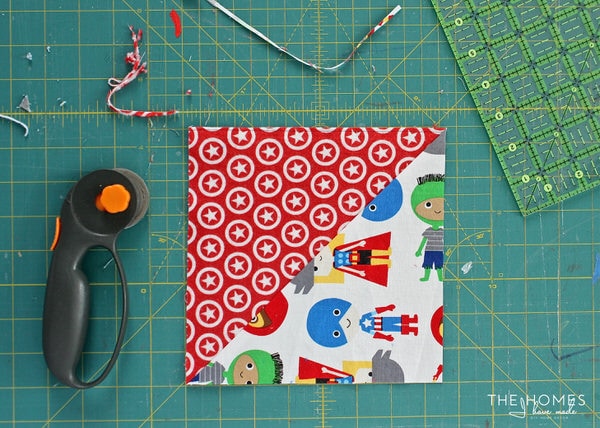
Next, use a ruler and rotary cutter to cut along that same pen line.
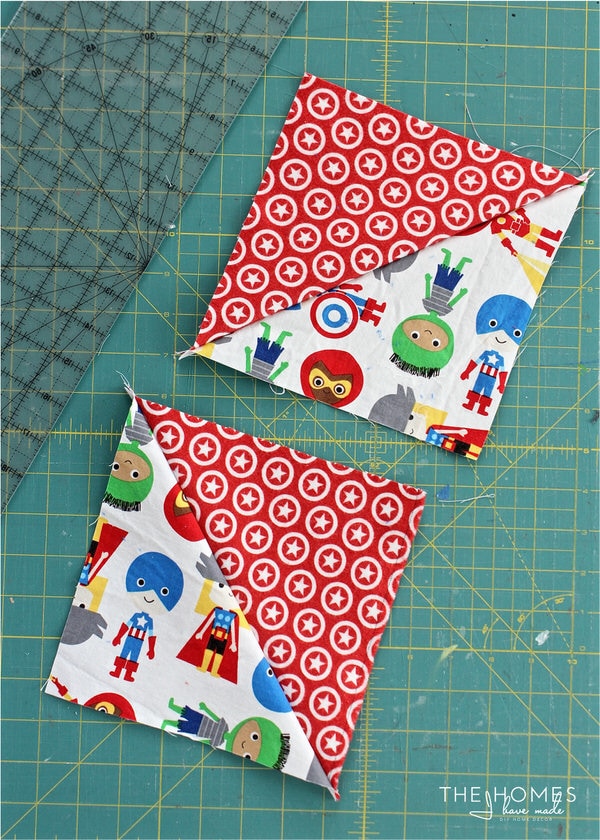
Once cut, you should be able to flip open the squares along the seams you sewed to reveal two HSTs…each made with half triangles of your two fabrics! Neat, huh?
The Half-Square Triangle – Method 2 (Yields 4 HSTs)
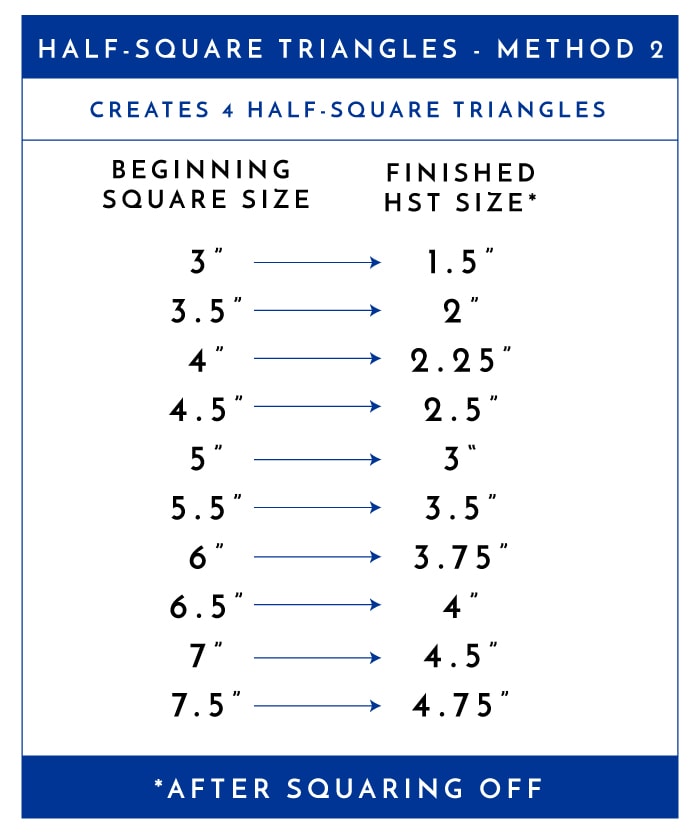
This next method also makes HSTs. But instead of creating 2 identical HSTs, it creates 4 identical HSTs…although the four are a bit smaller. Use the following chart as a general guide to determine your final square measurement using this method. (NOTE: This method doesn’t create “simple” sized HSTs; but once they are squared off, you can create the more “workable” sizes as shown.)
Like above, start by trimming down the fabric to your desired starting-sized squares. The squares used in this example are the same as above: 8″.
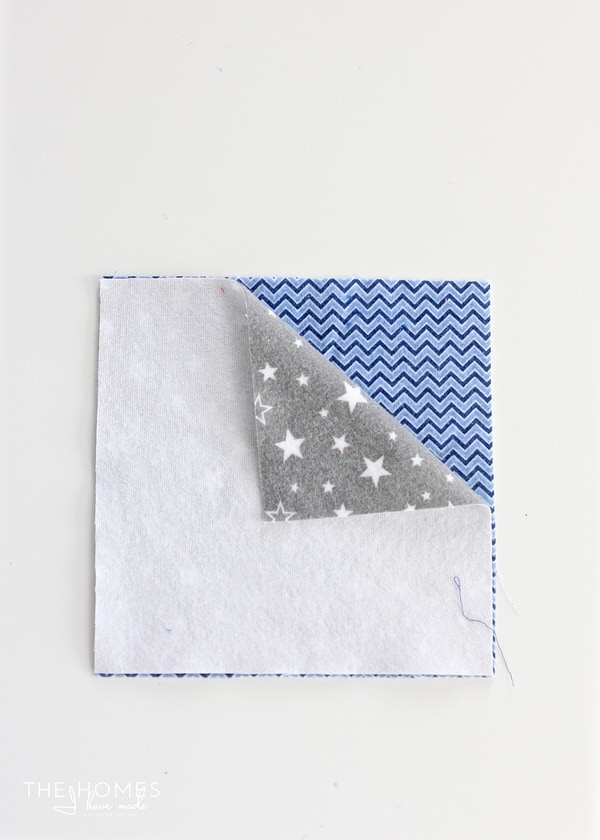
Also like before, place your squares right-sides-together…
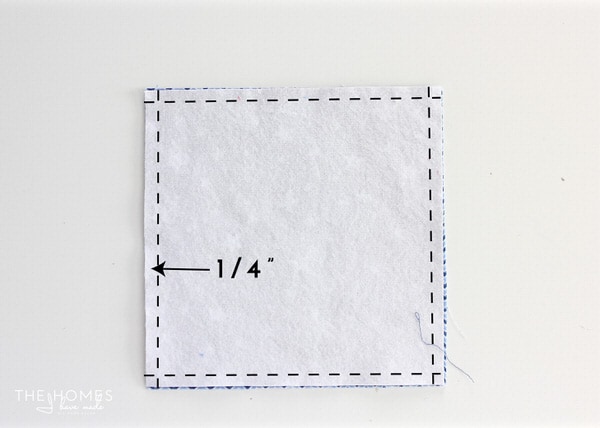
This time however, instead of sewing on diagonal, sew the two squares together along all 4 edges (again, using a 1/4″ seam allowance).
This time, I used the outside guide of my 1/4″ foot along the edge of the fabric to get the correct measurement.
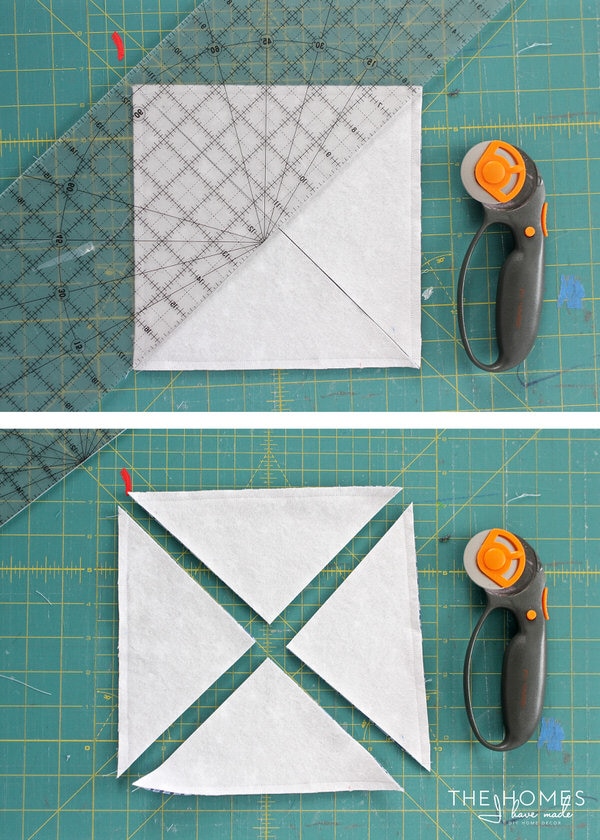
With all four edges sewn shut, you will cut along BOTH diagonals this time to create the HSTs.
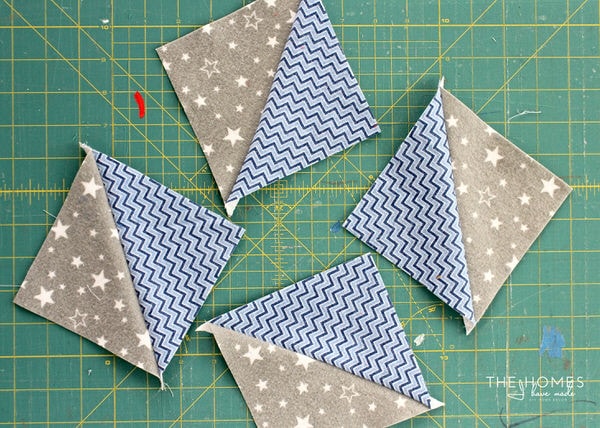
Just like before, once you flip each one open along the sewn seams, you will end up with four identical HSTs! How easy is that!
Pressing the Seams
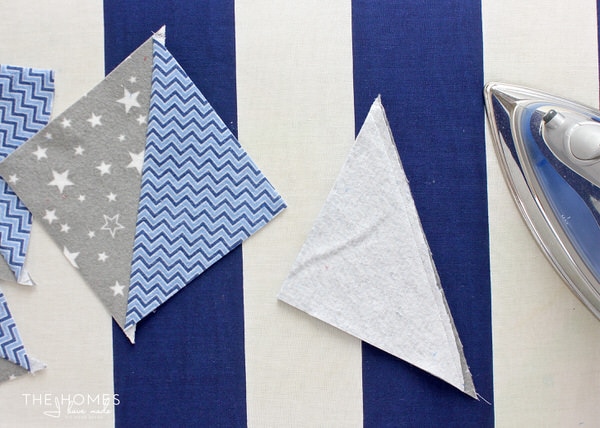
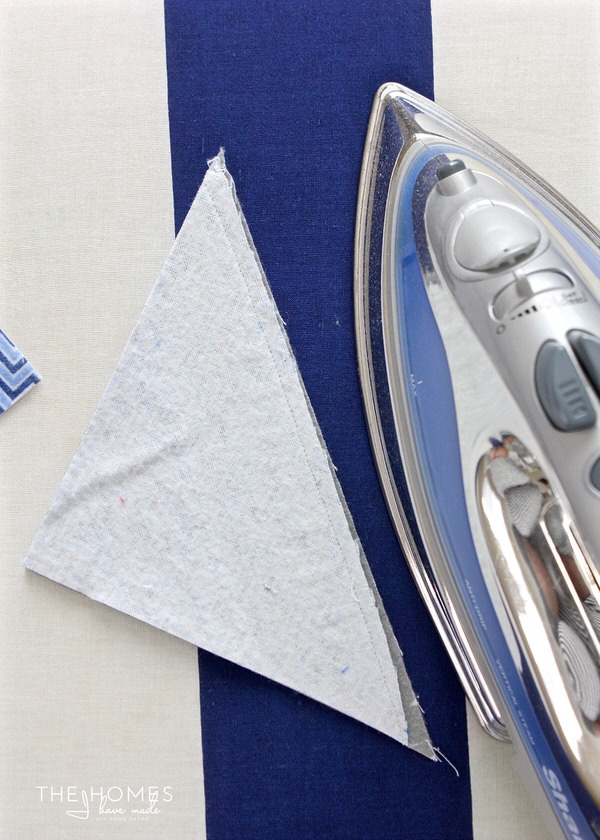
With your squares sewn and cut, there are still a few more steps you need to take before they can be assembled into a quilt. The first step is to press the seams to one side and press the whole HST flat.
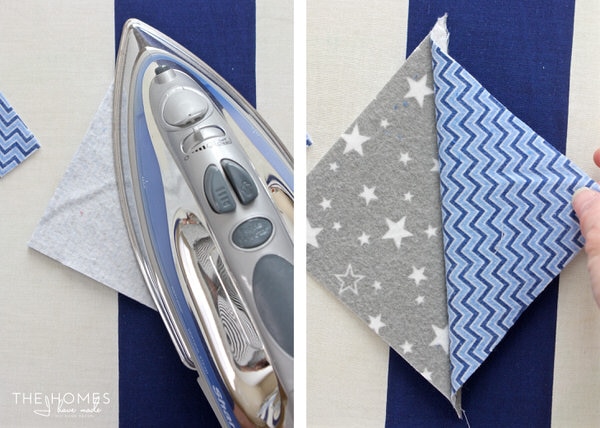
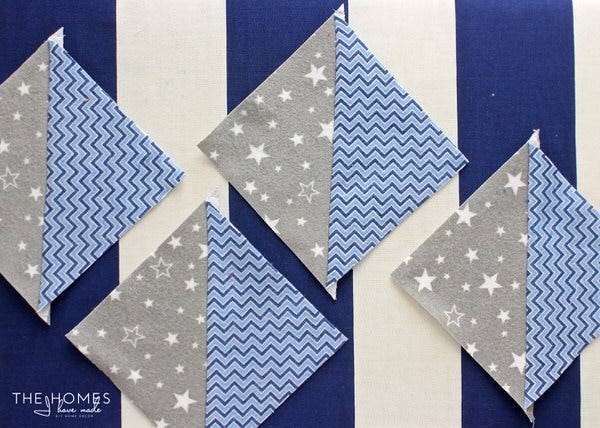
Start with your triangle pointing to the left. For each HST of the same patterns, make sure the same fabric is on top (so all the seams are pressed the same way). For these grey/blue squares, I started with the blue chevron on top every time.
First, iron the seam with the triangle shut (below left). This “sets” the seam, which essentially allows you to easily pull the top open (below right) while keeping the seam in place.
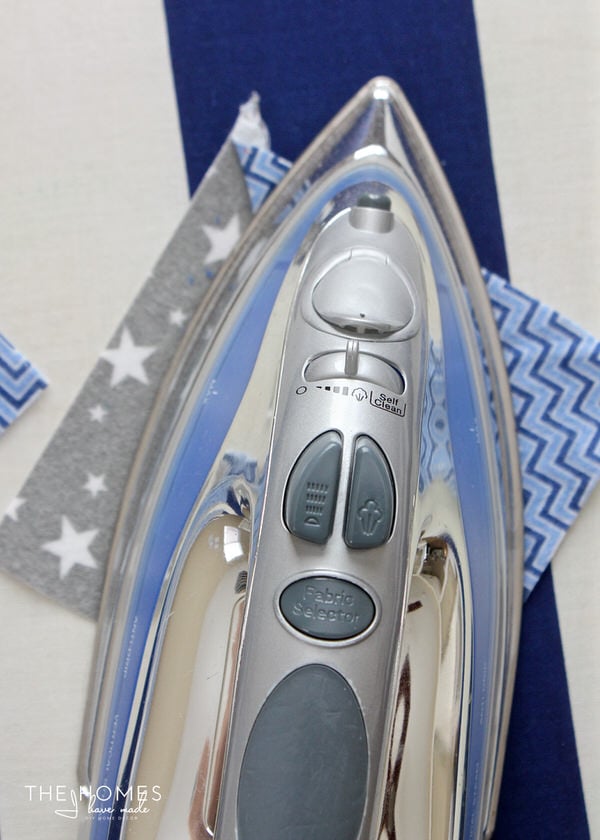
Once pulled open, iron the center seam flat.
Repeat for all the HSTs, ensuring your seams are all pointing the same direction.
Trimming Off Tails & Squaring Off
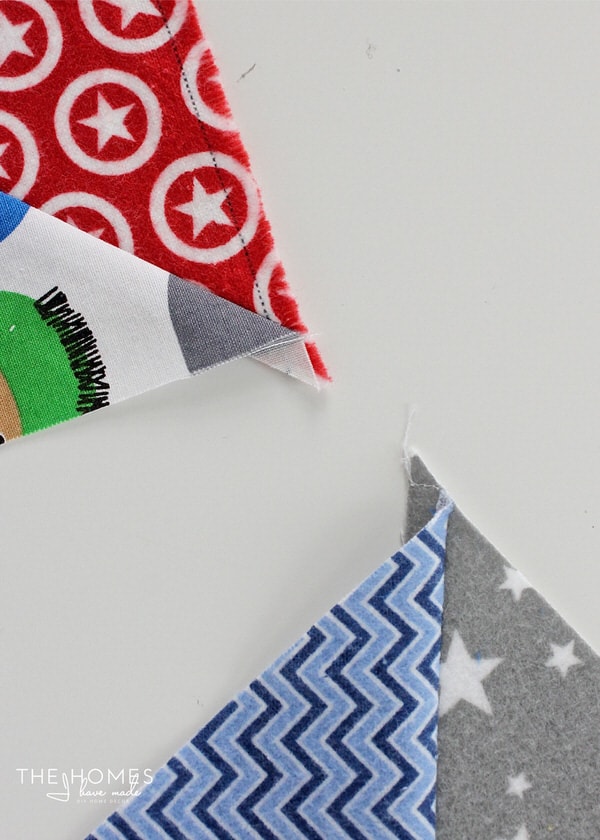
There is one final and very important step you need to take before the squares can be sewn into a quilt. If you look closely at each and every HST, they have little “tails” at the corners where they were sewn/cut. If these aren’t trimmed off, it makes for very tricky matching of seams AND bumps in your final quilt because of bulk. We need to trim those off!
You can certainly take a scissors and just trim them all off, but this is also a good opportunity to “square off” your HSTs. If your seams or cutting went wonky along the way, this is where you can compensate for it and make everything nice and square and identical from square to square.
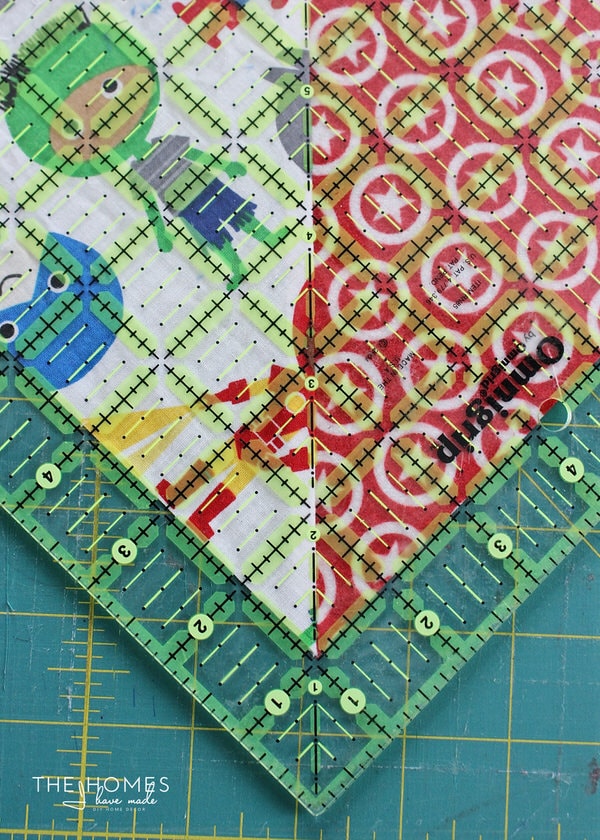
You don’t HAVE to use one, but having a square ruler makes this part so much easier. Simply line up the diagonal line on the ruler with the diagonal seam on your quilt block…
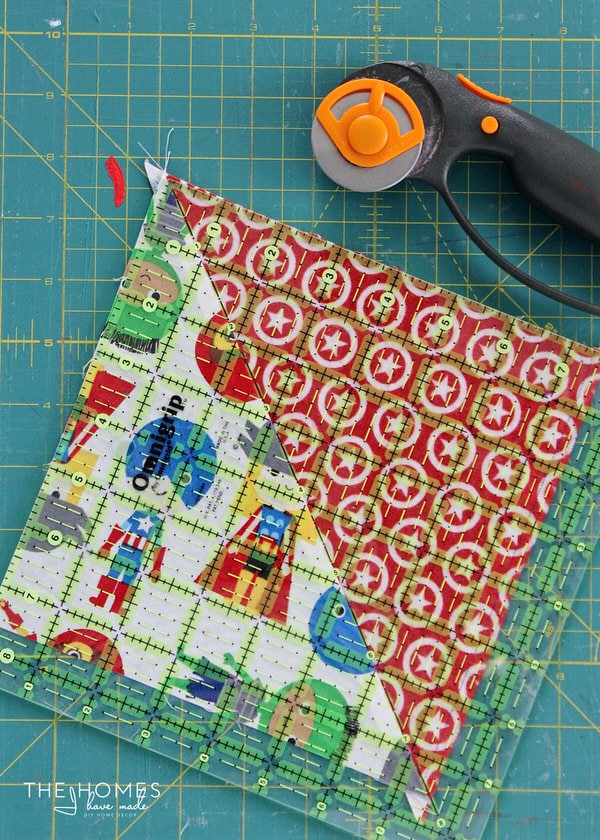
…and then use a rotary cutter to not only trim off the tails, but trim the entire square down to your “finished square” size.
See? No tails and a perfectly symmetrical 7.5″ square all ready to be assembled into a quilt!
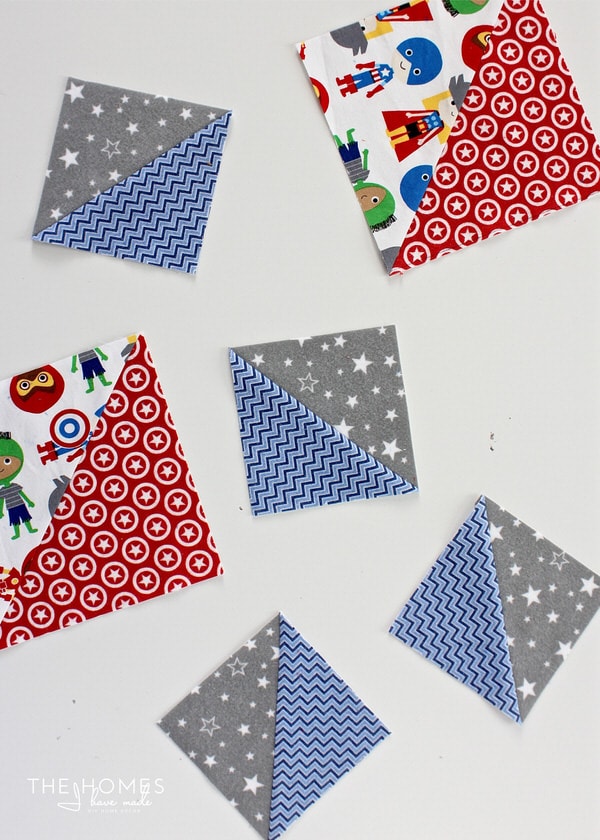
Here is a quick example of how the two methods differ a bit. Both the red/white and blue/grey started as 8″ squares. Method 1 yields 2 larger HSTs, while Method 2 yields 4 smaller squares.
Once you’ve tried and mastered this basic sewing concept, you’ll be whipping up HSTs (and ultimately quilt blocks!) in no time! These really do come together so fast. In fact, it took me less time than the John Denver and the Muppets Christmas album to sew together and cut down all these squares into HSTs!
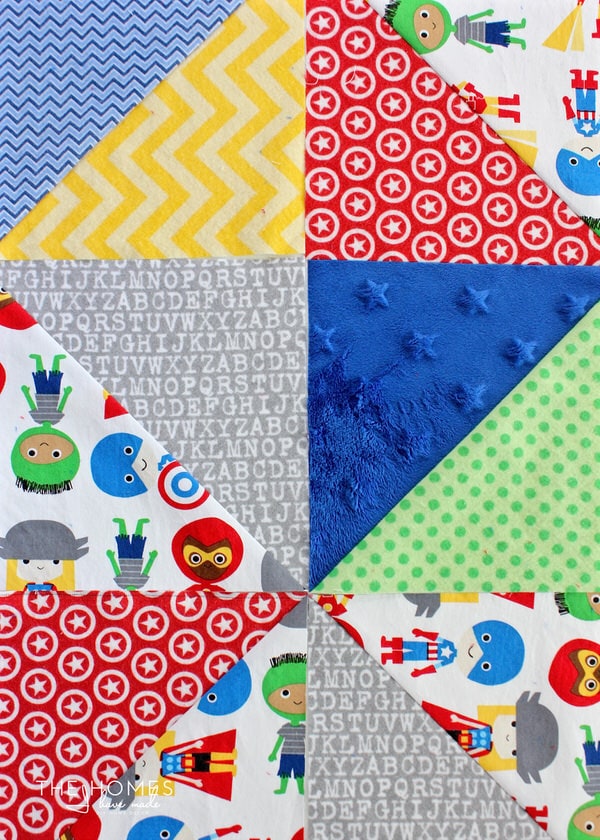
With your squares all sewn, cut, and ironed, you are ready to start assembling your quilt. But this tutorial is long enough, so I’m going cut it off here for now. I’ll be busy working away on Baby’s quilt over the next few weeks and will have the second half of this installment (“How to Assemble a Basic Quilt”) for you next month! For now, here is where I am headed!
What has become very easy and “second nature” to me is sometimes a bit tricky to explain in step-by-step instructions like this. If something is unclear, please let me know and I’ll help you as best I can. If you’ve always wanted to try sewing a quilt…this is a great place to start. Grab some fabric (don’t worry about colors or patterns) and cut it into some squares (don’t fret over the size) and just start whipping up some HSTs. By the time you’ve got it down, I’ll be back to show you how to put it together!
Home Decor Sewing School
I learned long ago that many home sewing projects are not complicated…most of them require basic measuring, ironing and sewing straight lines! And once you know basic techniques and how key items come together, the sky is the limit for decorating and customizing your home using fabric and your sewing machine! It is my hope with this series that you feel empowered to try these simple sewing projects and create a home you love too! Be sure to check out the other tutorials in this series by clicking on the picture below!
I have a long running list of other sewing tutorials that have been requested and I want to do. If there is something you’re dying to learn, be sure to let me know in the comments!
Hope your week is off to a great start. Later this week, I’ll be sharing a look at our simple yet festive indoor holiday decor! See you soon!
Megan





2 Comments on “How to Sew Half-Square Triangles”
Thank you for posting this. I have wanted to start quilting more than simple front back big pieces of fabric quilts. My goal is to someday enter one in a county fair. But I really have no basis in quilting. I grew up sewing apparel. But this explanation makes so much sense. And I have a stack of squares that someone else cut up, ready to use for a quilt. I cant wait to start, if only there wasn’t more time and less christmas rush! :). Thank you so much!
I am so glad you found this helpful! I remember you requesting some quilting tutorials a while back. If you can sew clothes, I am certain you can do this!!!
I’m with you on the time crunch before the holidays. There seams to be a ton of things I want to do when I should really be doing our shopping 😉
Have a great day!
Megan