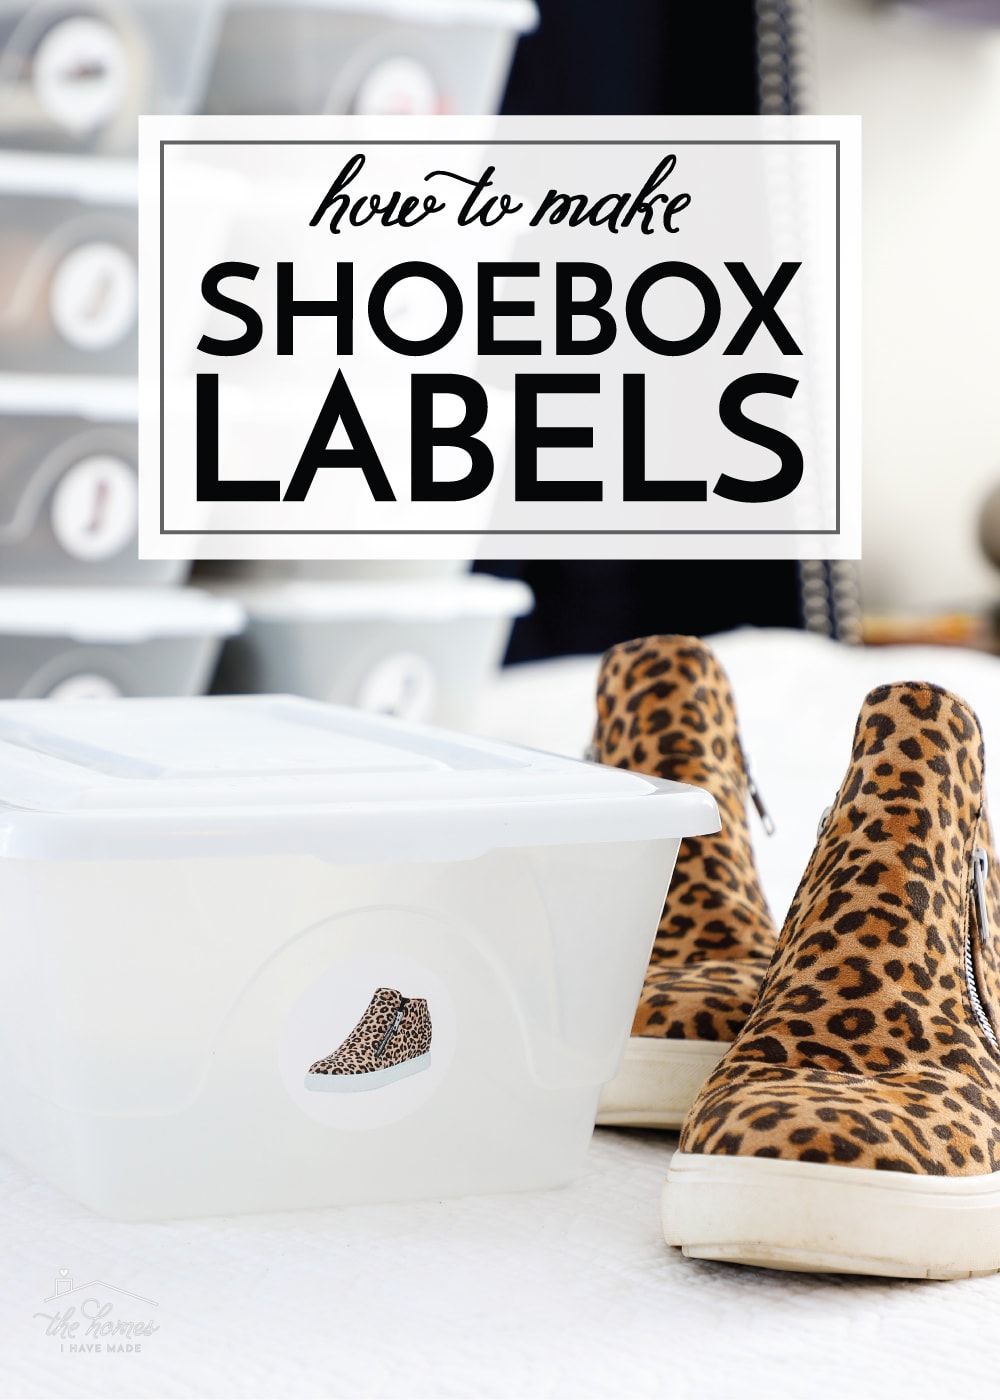
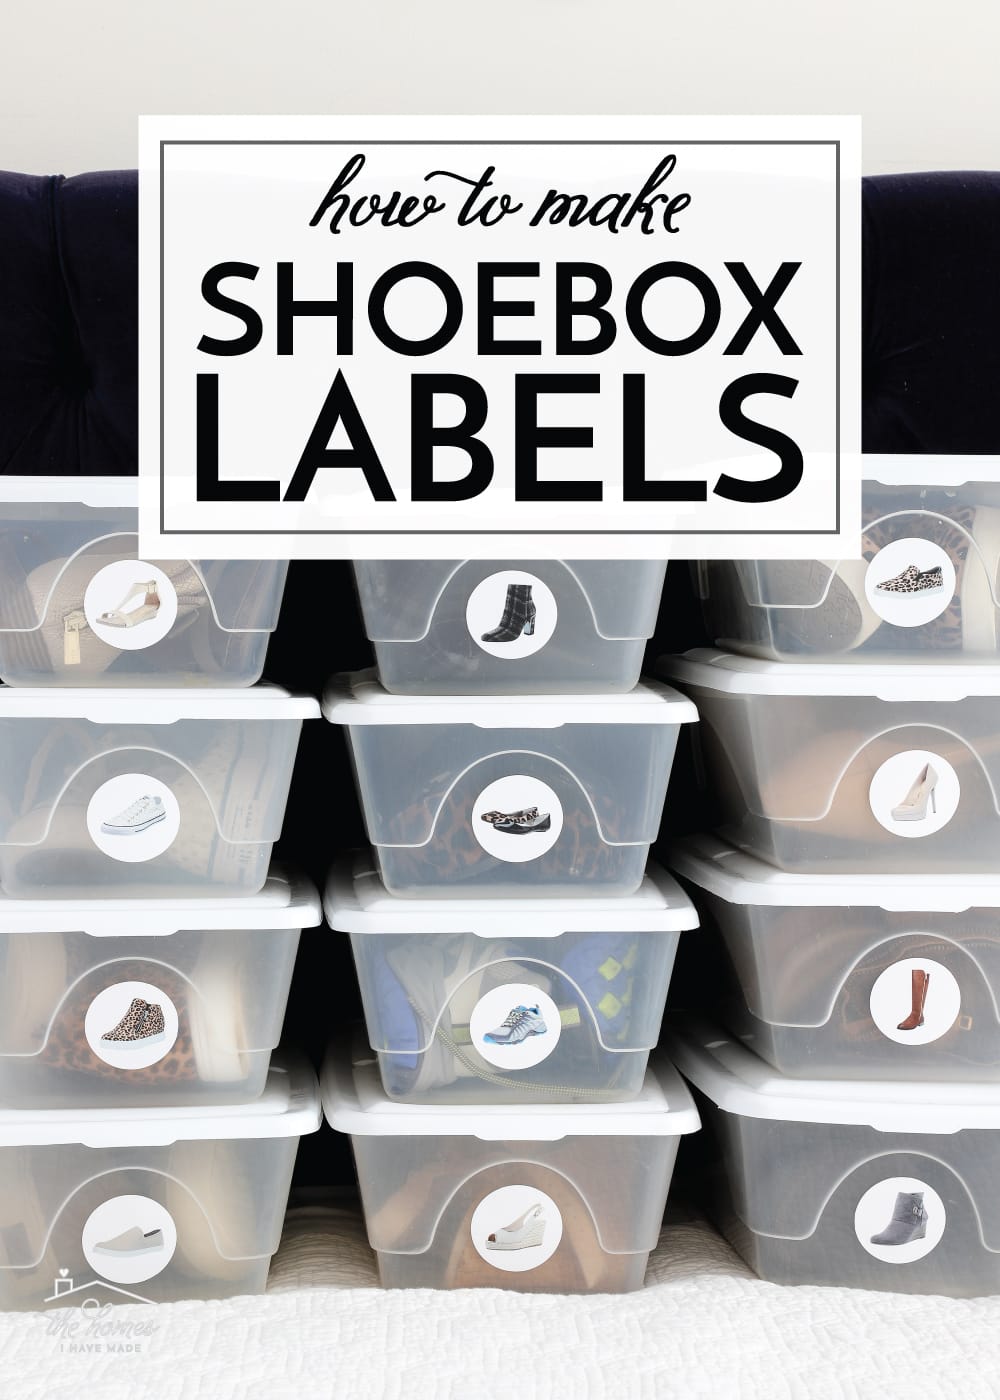
How to Make Shoebox Labels
In every house we live in, we have a different master closet situation to sort out. Since no two closets are alike, we are constantly identifying new and creative ways to organize our hanging items, folded items, and shoes. With floor space at a premium in our current master closet, my best option for storing my own shoes was in a set of plastic shoe boxes I’ve had for ages. But between a slight opaqueness to the boxes combined with the height of the shelf they sit on, I was having trouble easily identifying which shoes were where. So I whipped up some labels that are as helpful as they are cute, and it was such a quick and simple project! Today I want to show you how to make shoebox labels if you too are having trouble keeping your shoe collection sorted out!
Up until a few months ago, I primarily wore two pairs of shoes (tennis shoes and flip flops), despite having a bunch of options. So when I embarked on my recent capsule wardrobe experiment, I took the opportunity to not just buy some new “staple” shoes but also purge out the ones I never wear. The result is a collection of 16 pairs of shoes that should (by design) work the entire year, with a wide variety of outfits, for any occasion!
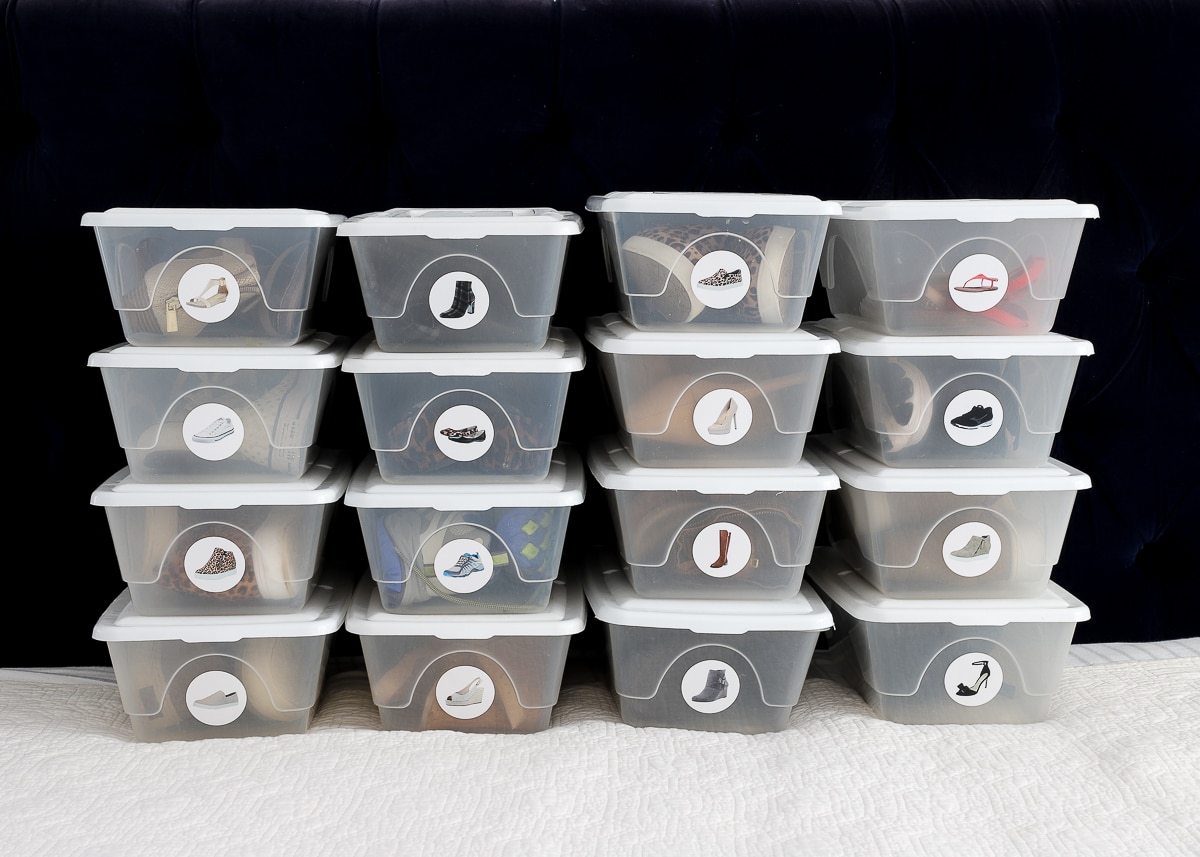
With no floor or wall space available, I decided to keep my shoes in clear plastic shoe boxes. (I’m fairly certain I bought them at the Dollar Tree ages ago, but these and these are pretty similar.) The new picture labels don’t just help me quickly identify which shoes are where (which was surprisingly challenging despite the “clear” boxes), but the presence of a label has also urged me to take the time, every time, to put my shoes away. (Remember: The primary purpose of labels is to identify where items belong, and their sheer presence is a great accountability tool for establishing new habits!)
In the case of shoebox labels, word descriptions weren’t quite ideal, so I went a step further and made picture labels to match the shoes inside. This may look really fancy and complicated, but it’s not! No matter your computer skill level, this is something you can do, I promise!
Supplies Needed
For this labeling project, you will need:
- Plastic Shoeboxes. You can find these for as cheap or as inexpensive as you desire. I’m pretty sure mine are from the Dollar Tree, but these and these are pretty similar.
- Printable Labels. I used Avery 22807 Labels. You can certainly pick any size and shape labels you like, but using pre-made labels and their matching computer template make this project a snap!
- Label Template: If you use Avery labels, you can find the matching Word templates on the Avery site. You can find the Avery 22807 template here.
- Computer and Printer. To edit and print the labels.
Getting Pictures for Your Shoebox Labels
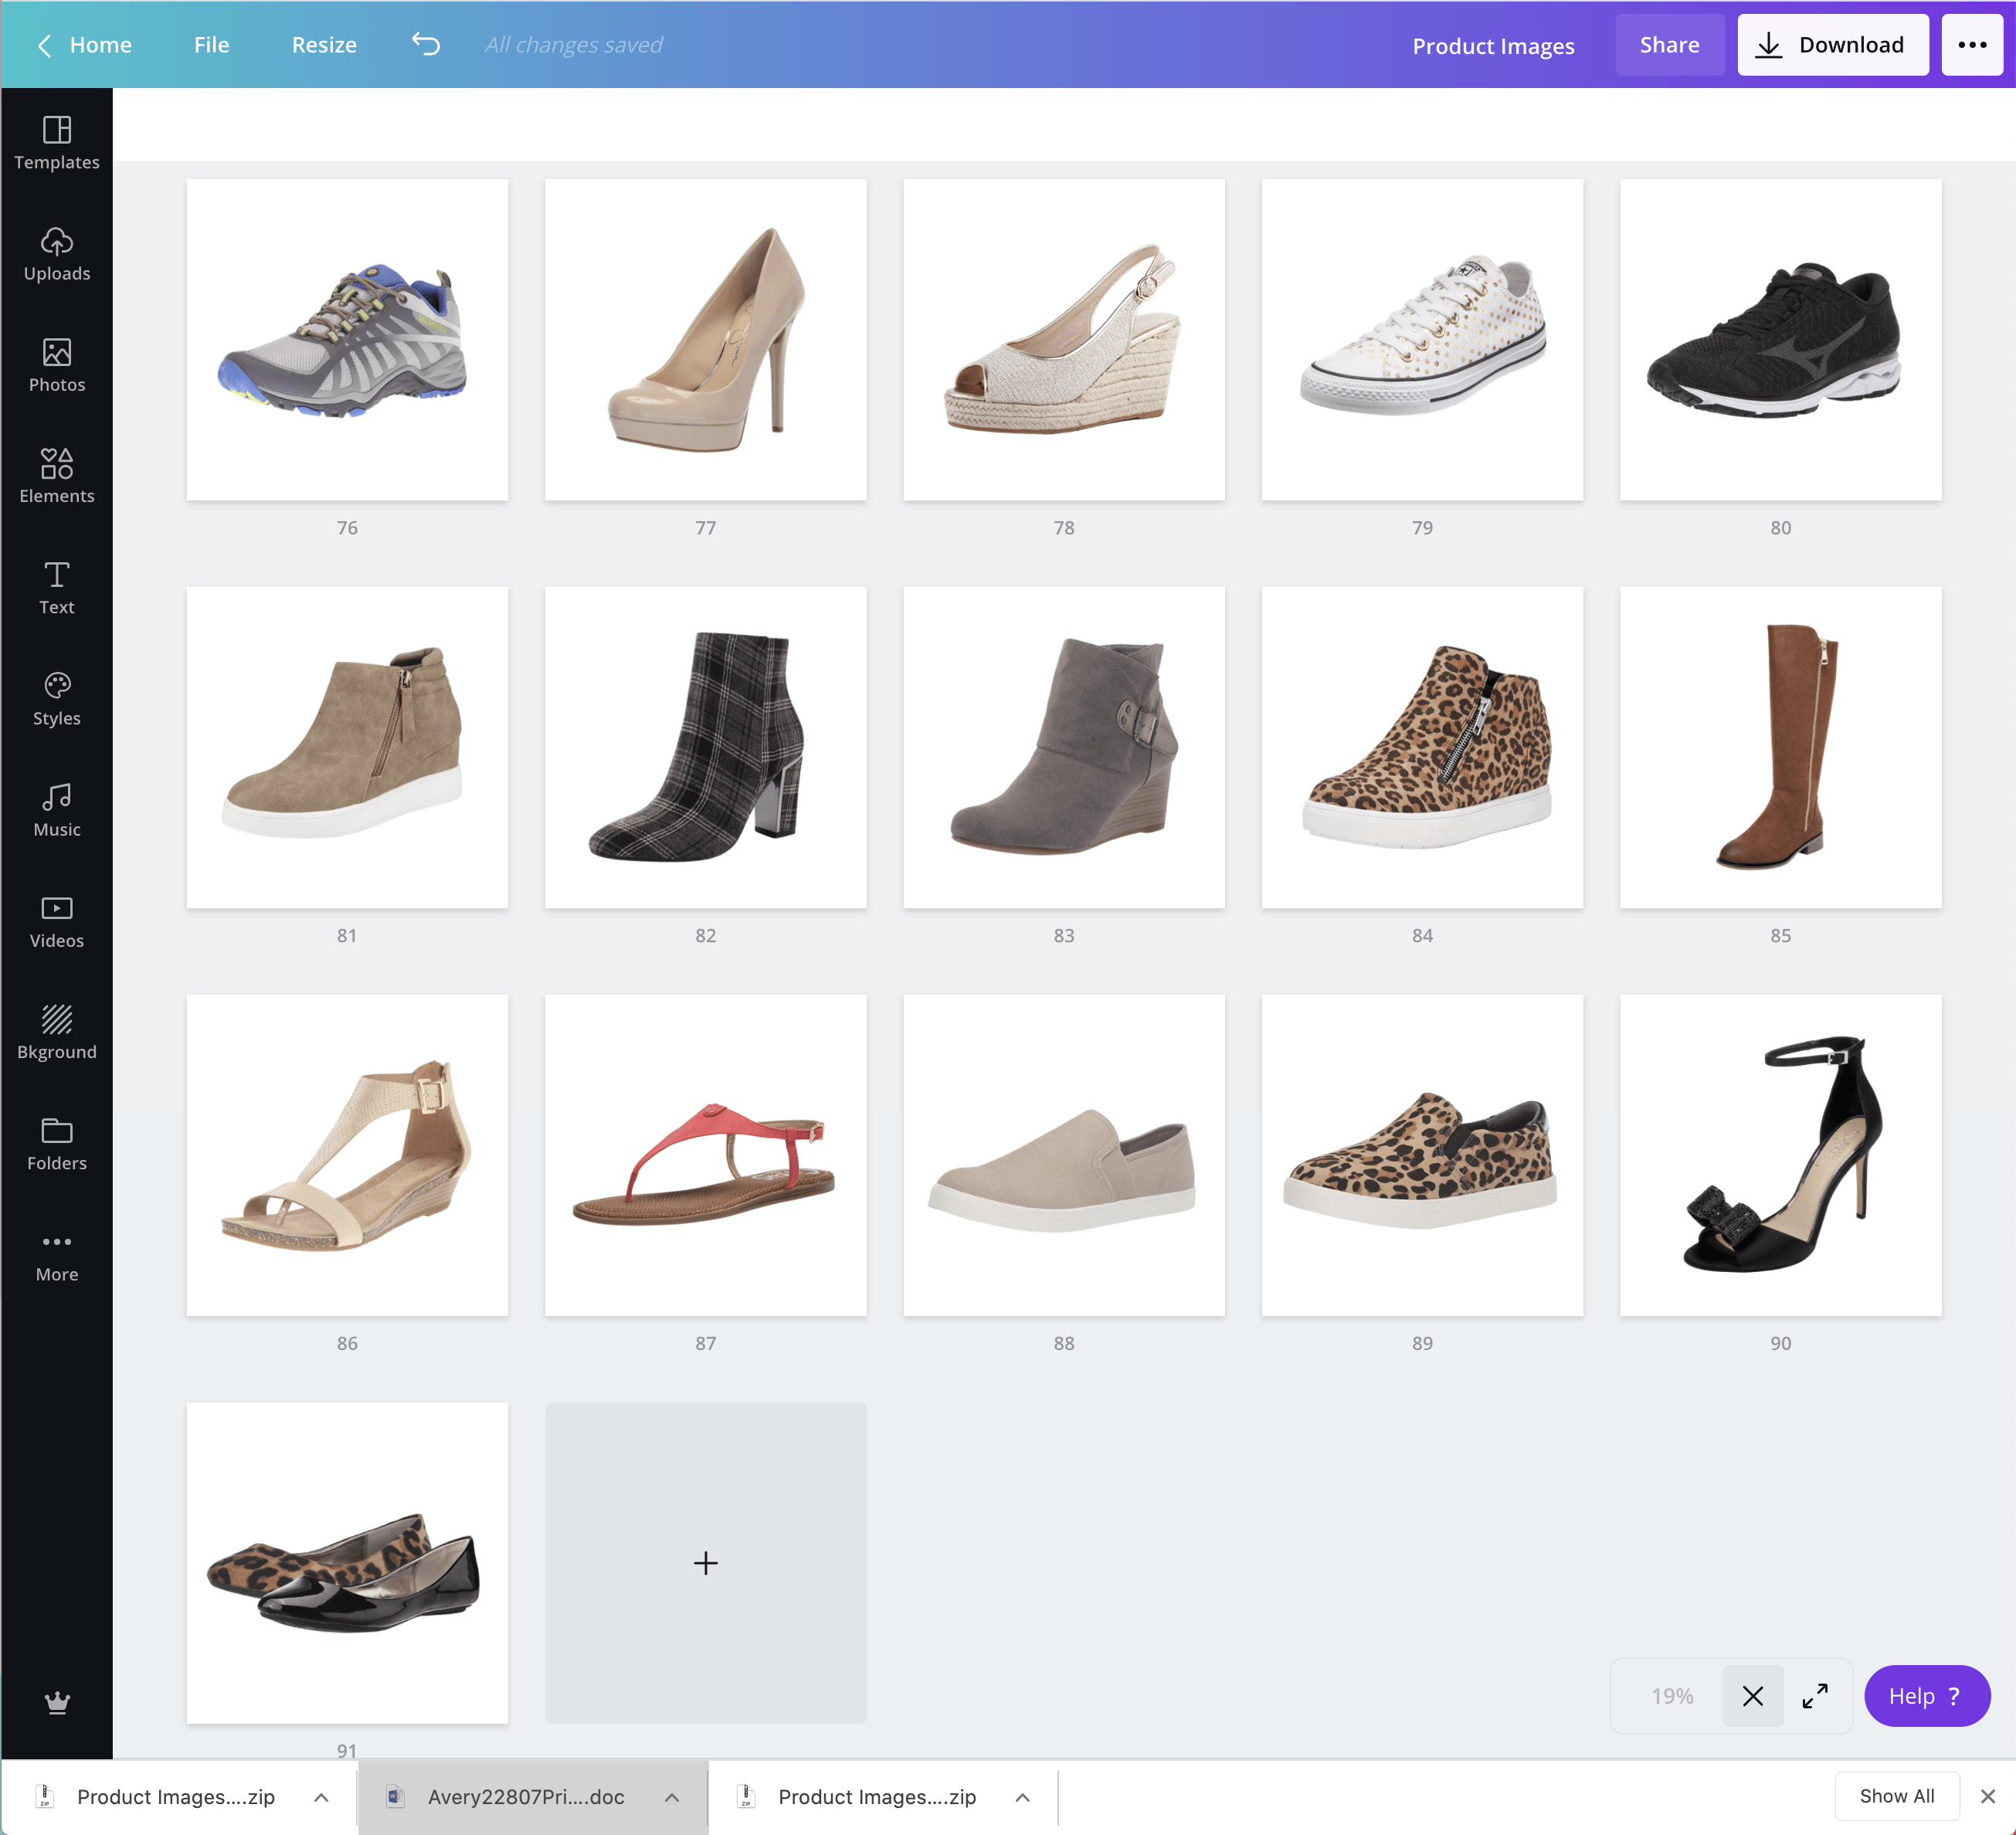
The first step in creating your shoebox labels is to identify all your shoes. You can do this by writing down a quick list or taking pictures of them with your phone.
Next, you will need to find digital pictures of your shoes. This is actually much easier than you might think thanks to Amazon and Google! Simply search the shoe’s brand with a brief description and see if you can find your exact shoes. Even with older shoes, there is a good chance you’ll be able to find pictures. If you can’t find your specific shoes, just find something similar that will help you mentally connect the label to what’s in the box. For example, I couldn’t find the exact black strappy sandals I have. So I Googled “Black Strappy Sandal With Bow” and found a picture that was pretty darn close.
Once you find a good image of your shoe(s), take a screenshot of each one using the following commands:
- Mac: Command+Shift+4 and then drag a square around whatever you want to capture. Images usually go to a pre-designated folder.
- Windows: Windows key+Shift+S and then drag a square around whatever you want to capture. The screenshot will be copied to the clipboard, which you can paste into another program.
When finding pictures of your shoes, keep these things in mind:
- Ideally, you want pictures on a white background. I noticed that Amazon’s listings almost always include the single shoe on a white background, so I suggest checking there for your shoe pictures first.
- Try to capture shoes in the same orientation. I used the “diagonal” layout, but many shoes were also available in profile and top views.
The red square below represents the screenshot I took of each shoe.

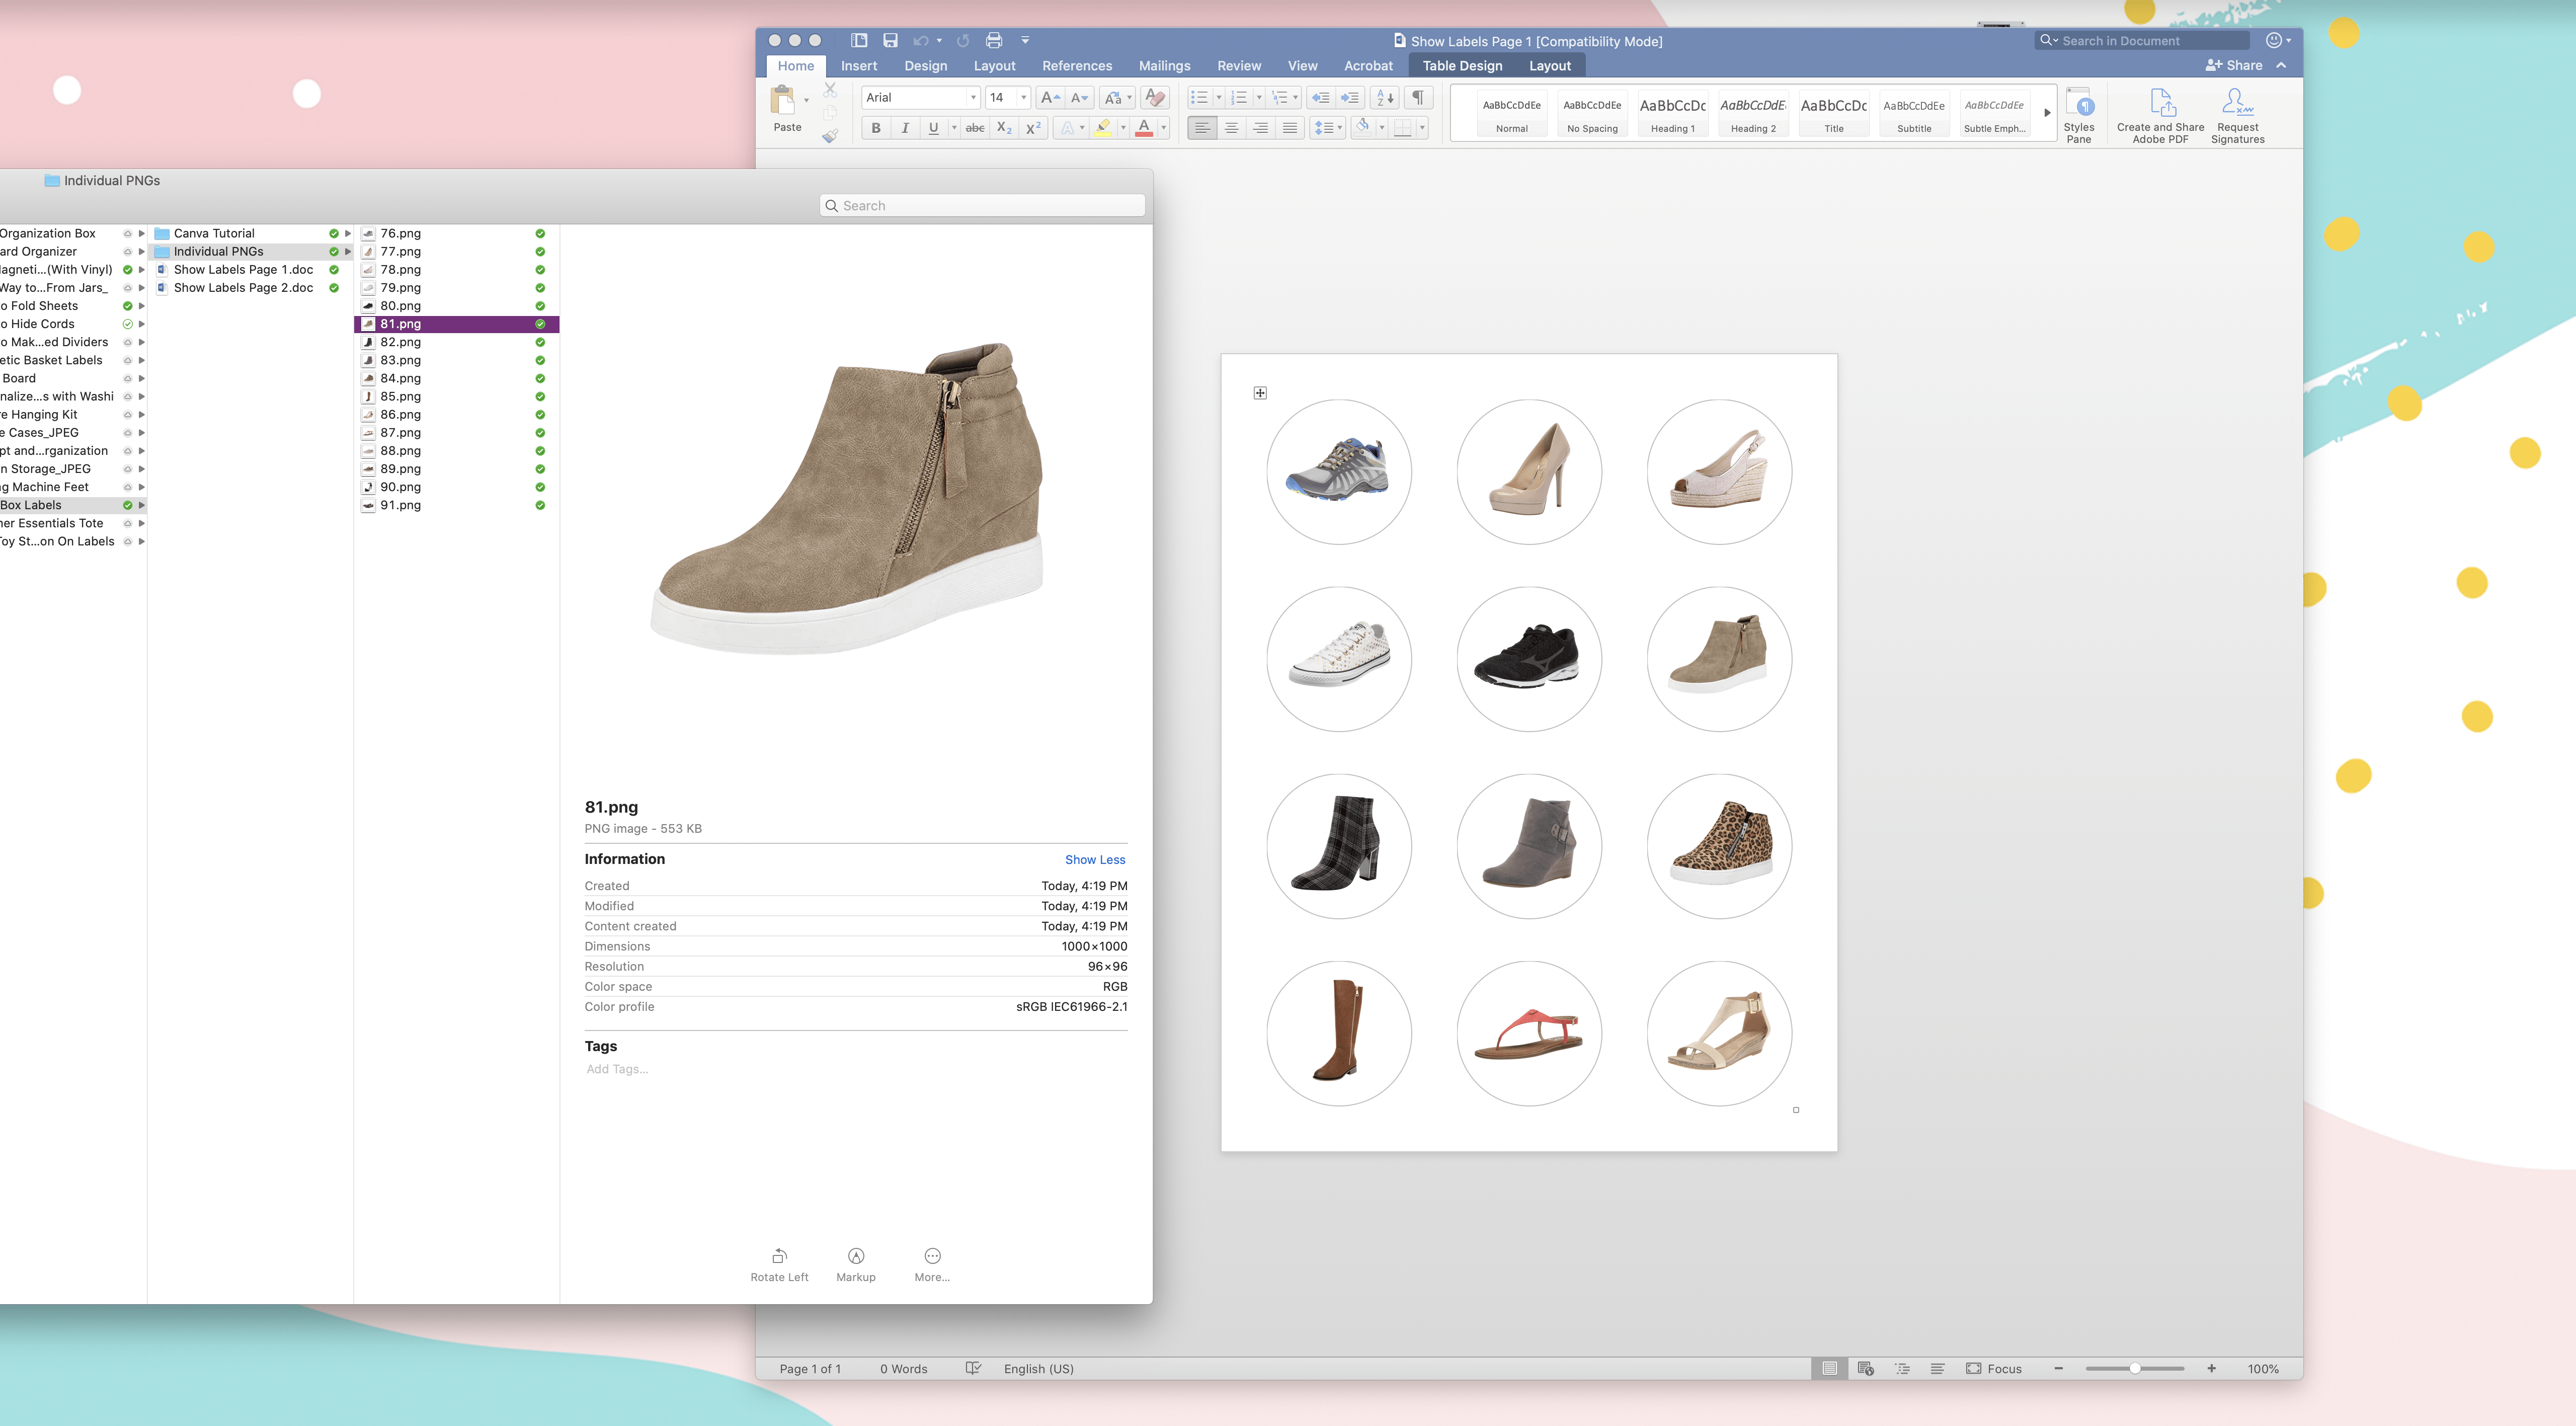
Editing Your Shoe Pictures
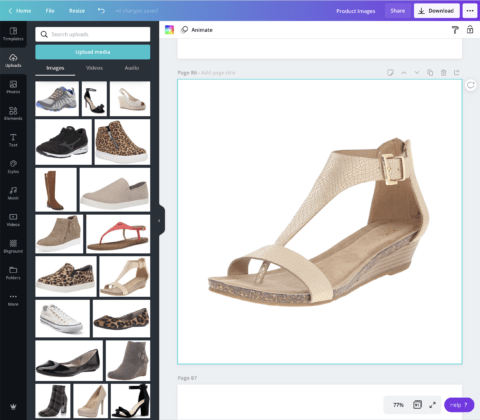
Your next step is to edit all the shoe pictures so they look clean and uniform. To do this, you have two easy options: Microsoft PowerPoint and Canva. Here are detailed instructions for using Microsoft PowerPoint for your images, but it actually follows the same steps I outline below for Canva:
- Create a new document in either Microsoft PowerPoint or Canva. Size the slides/pages to be a square.
- Below Left: Drag and drop all your shoe screenshots into Canva/PowerPoint, placing one shoe image on each slide/page.
- Below Right: Use the “Background Removal Tool” (available in both programs, but only in the Pro version of Canva) to erase the background of each shoe image (if necessary). Also, flip or rotate images so that each one faces the same way.
- Bottom: Size each shoe so that every one has a consistent margin of white space around it. If possible, view all the slides/pages at once so you can make sure everything looks uniform.
- Once happy with your sizing and layouts, “Download” or “Save As” each page as a separate PNG file.

Want to save this post?
Making the Shoebox Labels
With the shoe images cleaned up and exported as individual files, all you need to do is drag-and-drop them into a ready-made Avery template (if you’re using Avery labels, that is!).
- Find the template for your labels on Avery.com and download it to your computer.
- I recommend opening the file in Microsoft Word.
- Drag and drop each shoe image into the center of each individual label. If you’re not sure how to do this, it’s very similar to what I demonstrate HERE.
With each shoe image dropped into the labels, it’s time to print them out! Load your label paper into your printer according to its specifications, and print at 100% resolution. Once you peel away the excess paper backing, you’ll have shoebox labels ready to peel-and-stick directly onto your boxes.
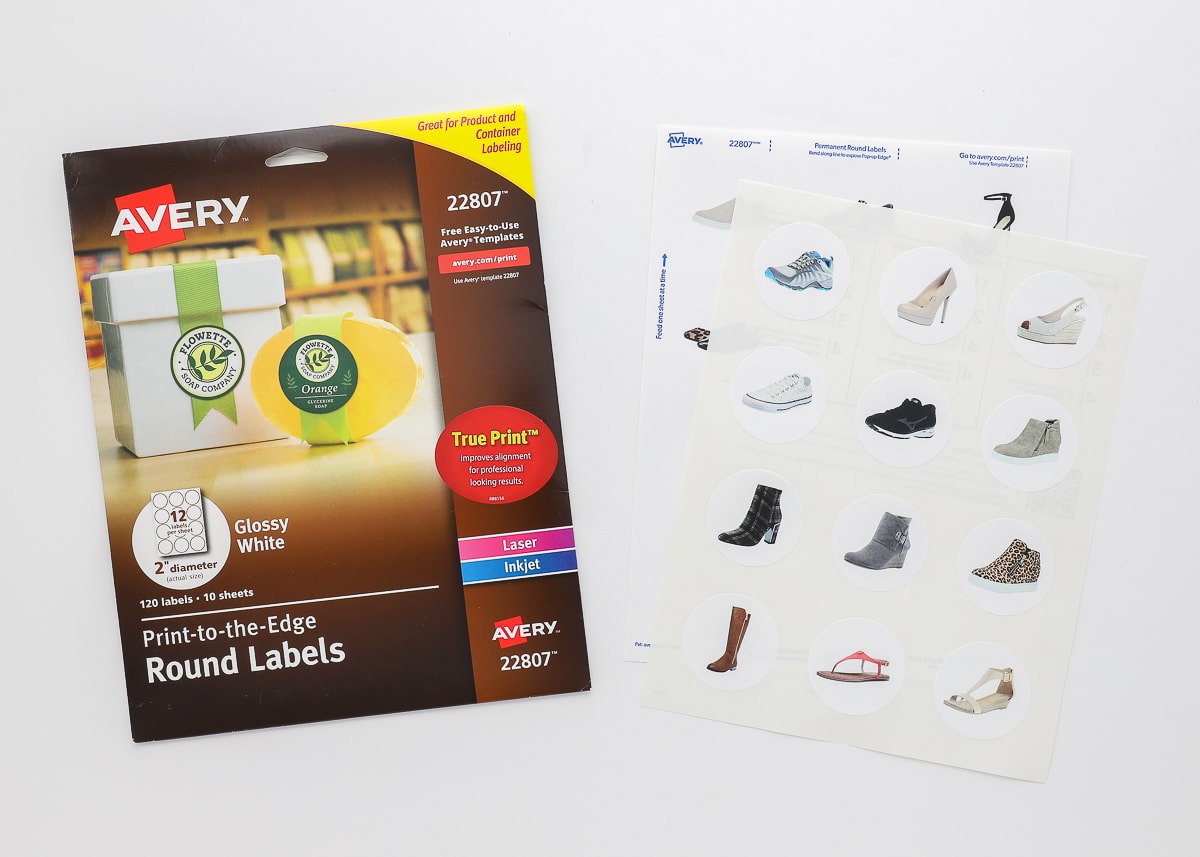
Avery 22807 2.5″ White Round Labels
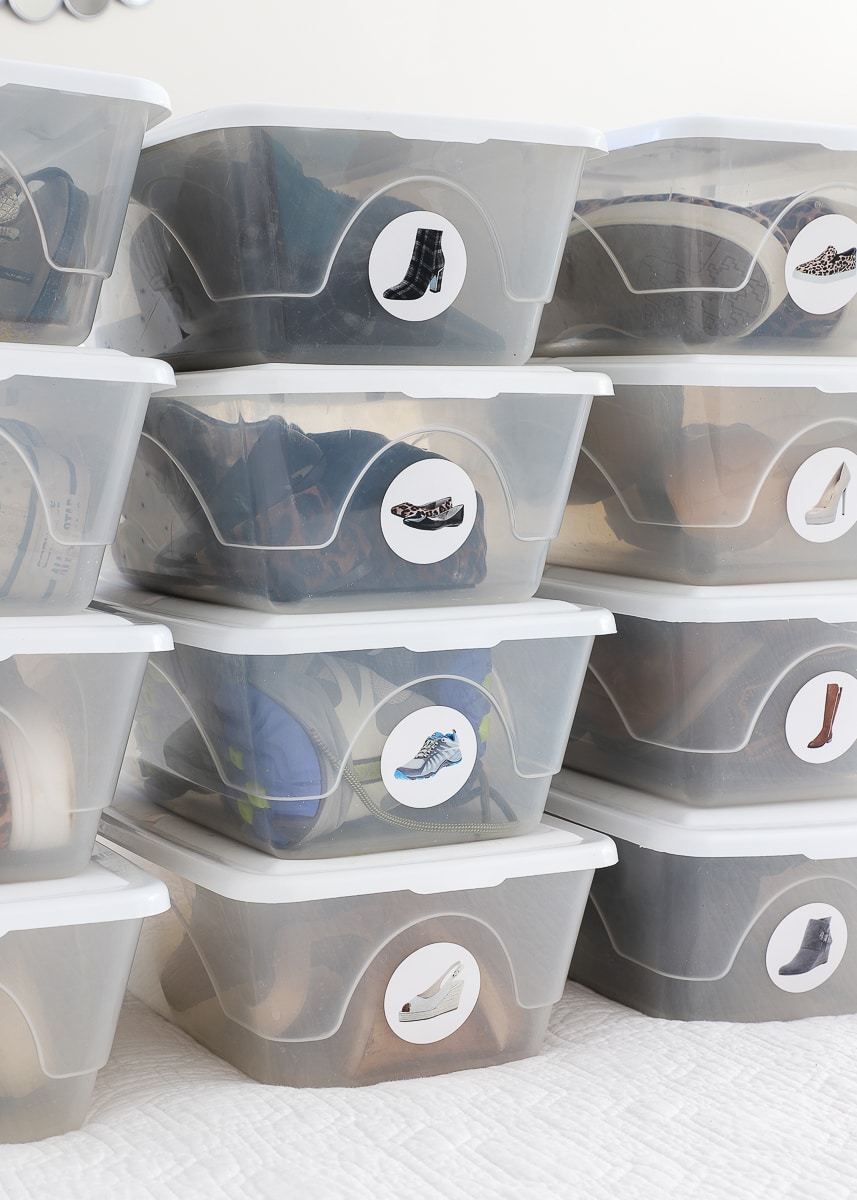
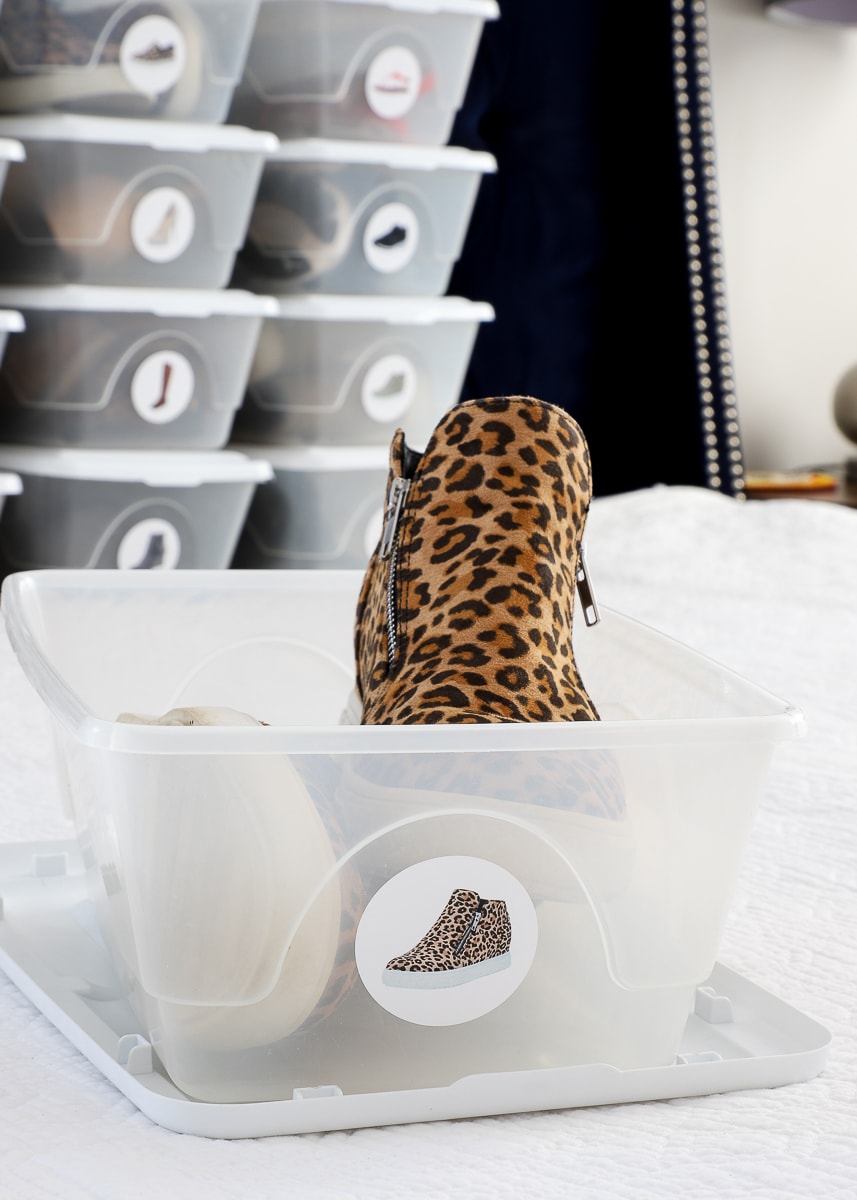
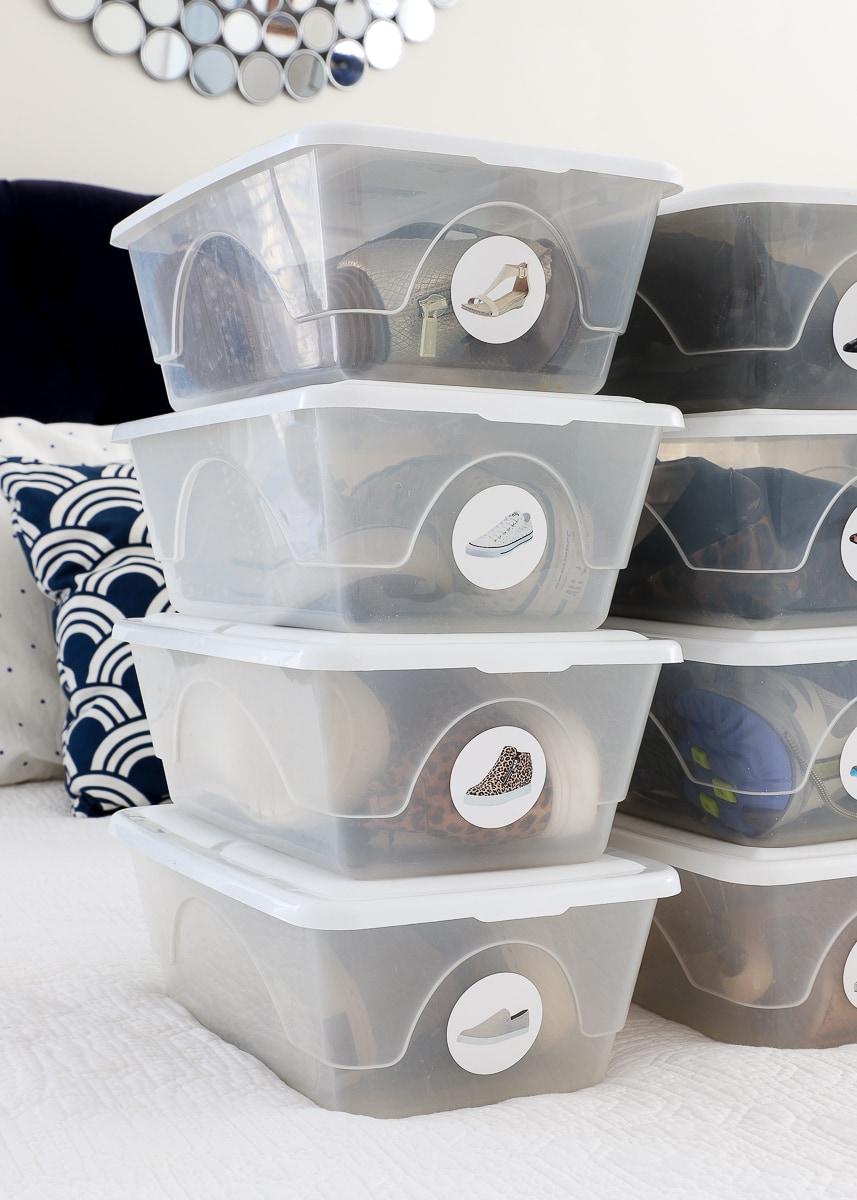
My shoeboxes have a half-circle indentation, so I just lined up each label in the middle of that shape…
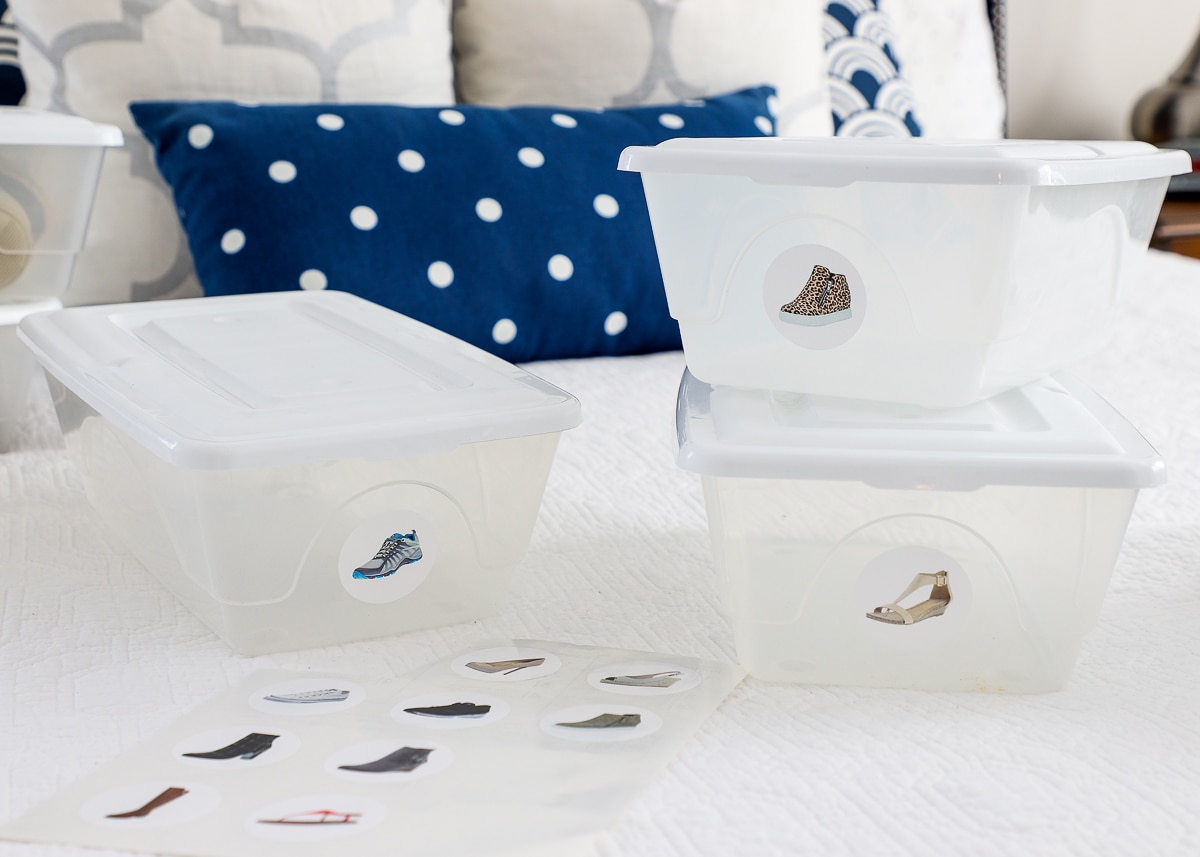
…and then loaded the corresponding shoes into the box.
In no time at all (seriously, it was super quick from start-to-finish!), all 16 shoeboxes had perfectly-matching picture labels affixed to the fronts. Now finding (and more importantly) putting away my shoes has never been easier!
NOTE: You might be wondering if all of my shoes fit comfortably into these shoeboxes. Yep! My soft knee-high boots are a smidge bulky, but I can still get the lid on. Otherwise, every other pair of heels, booties, flats, tennis shoes and wedges fit without any issue!
This quick little labeling project made me so happy and has made such a positive difference in how quickly and easily I get dressed each day. This is just the first of a few “clothes organization” projects I’ve taken on in recent weeks, and I’m excited to show you some other smart solutions I’ve come up with! Stay tuned!
Megan
3 Comments on “How to Make Shoebox Labels”
Oh man, those leopard booties are rad! I figured out several years ago that I could get away with flats at a wedding (if done properly) and have never looked back. I’m always on the lookout for shoes that look dressed up but are actually comfortable like sneakers. These fit the bill!
You inspired me to clean out and organize my closet using your shoe label idea.
Thank you! It makes me happy to be in my closet now.
Using the same backround, I snapped a picture of every right shoe. Sent the pictures to Sam’s to be printed and attached them with clear mailing tape to the clear cheapo shoeboxes. Not as spiffy as a label, but works great.