Getting It Right: A Train Table Makeover Story – Part II
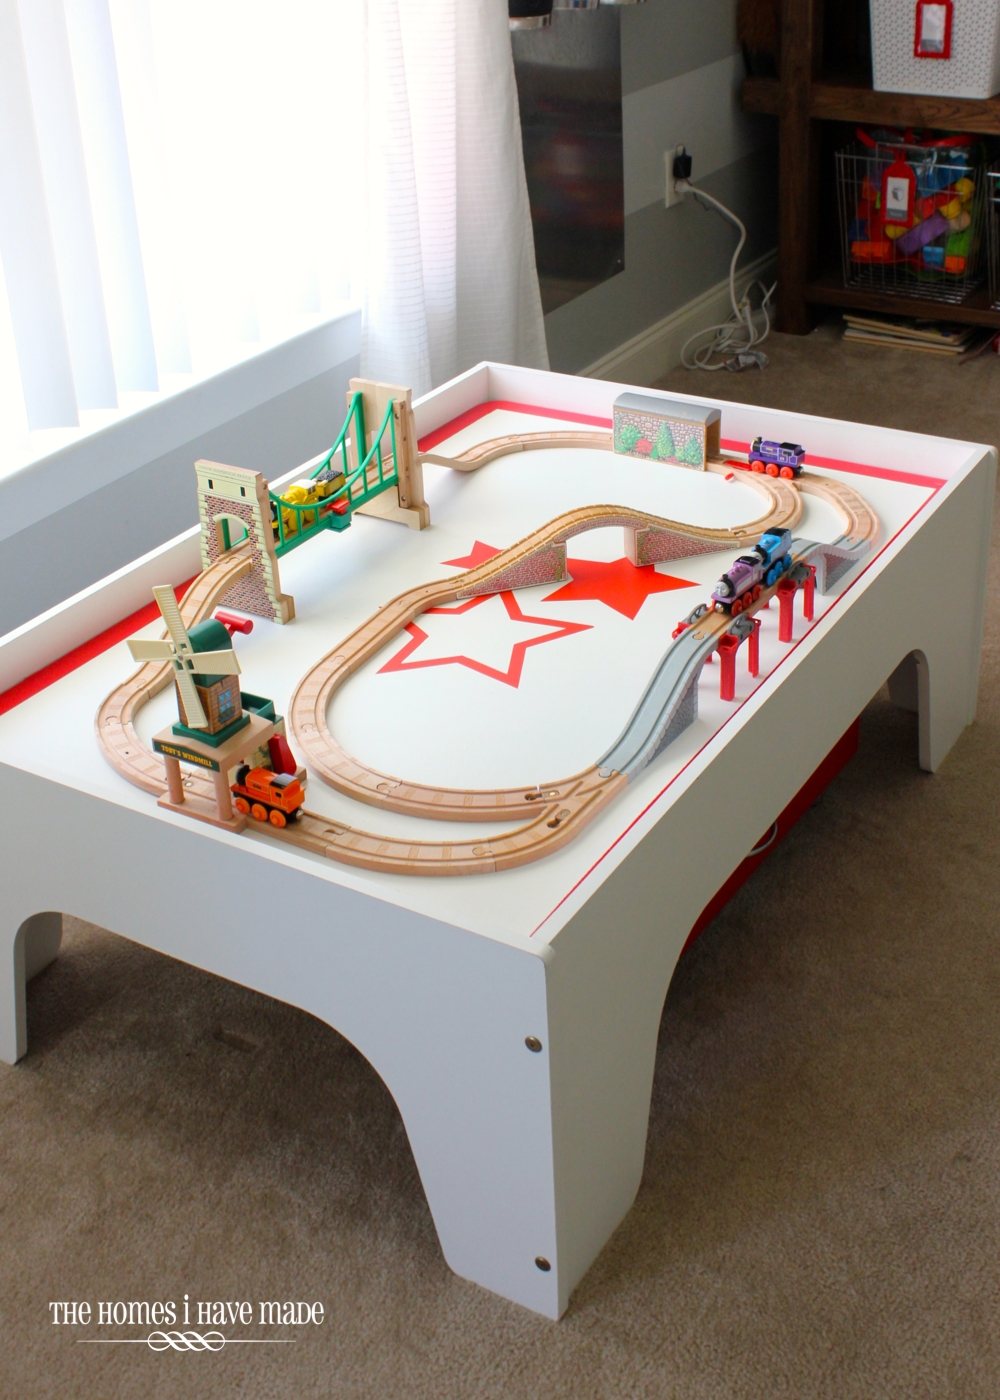
Last week, I started telling you about our struggles and triumphs in an effort to makeover a sad, used train table for our train-and-car-loving-almost-two-year-old, Henry! Our first attempt didn’t work out quite as planned (you can read Part I here), so this table was given a second makeover. I don’t love doing projects twice; but in this case, it had to be done. In the end, I am so glad I did it because this is where we are now:

Just a refresher of where I started:

Then, a pre-Christmas in-a-jiffy makeover got us here:
Not too bad, really. And on Christmas Eve, when the train table was placed under the tree, we proclaimed it done and checked the proverbial box off the proverbial (and seemingly never-ending, according to my husband!) “House Project List.” Then, our feisty, curious child started to pry up the screwed-down train track, and with it came bits and parts of the table’s surface. The track no longer laid flat, and there were now gashes in our “new” train table.

After a relatively quick second makeover, we ended up with a cleaner, fresher and longer-lasting design!

Let me show you what I did this time around!
When Henry pulled the track/screws out of the table, they left little wooden mounds all over the surface. A quick sanding made the table flat again. I then filled all the holes with wood filler, let dry, and sanded smooth one more time.

I then essentially repeated my original makeover process: 2 coats of primer, followed by two coats of white paint.

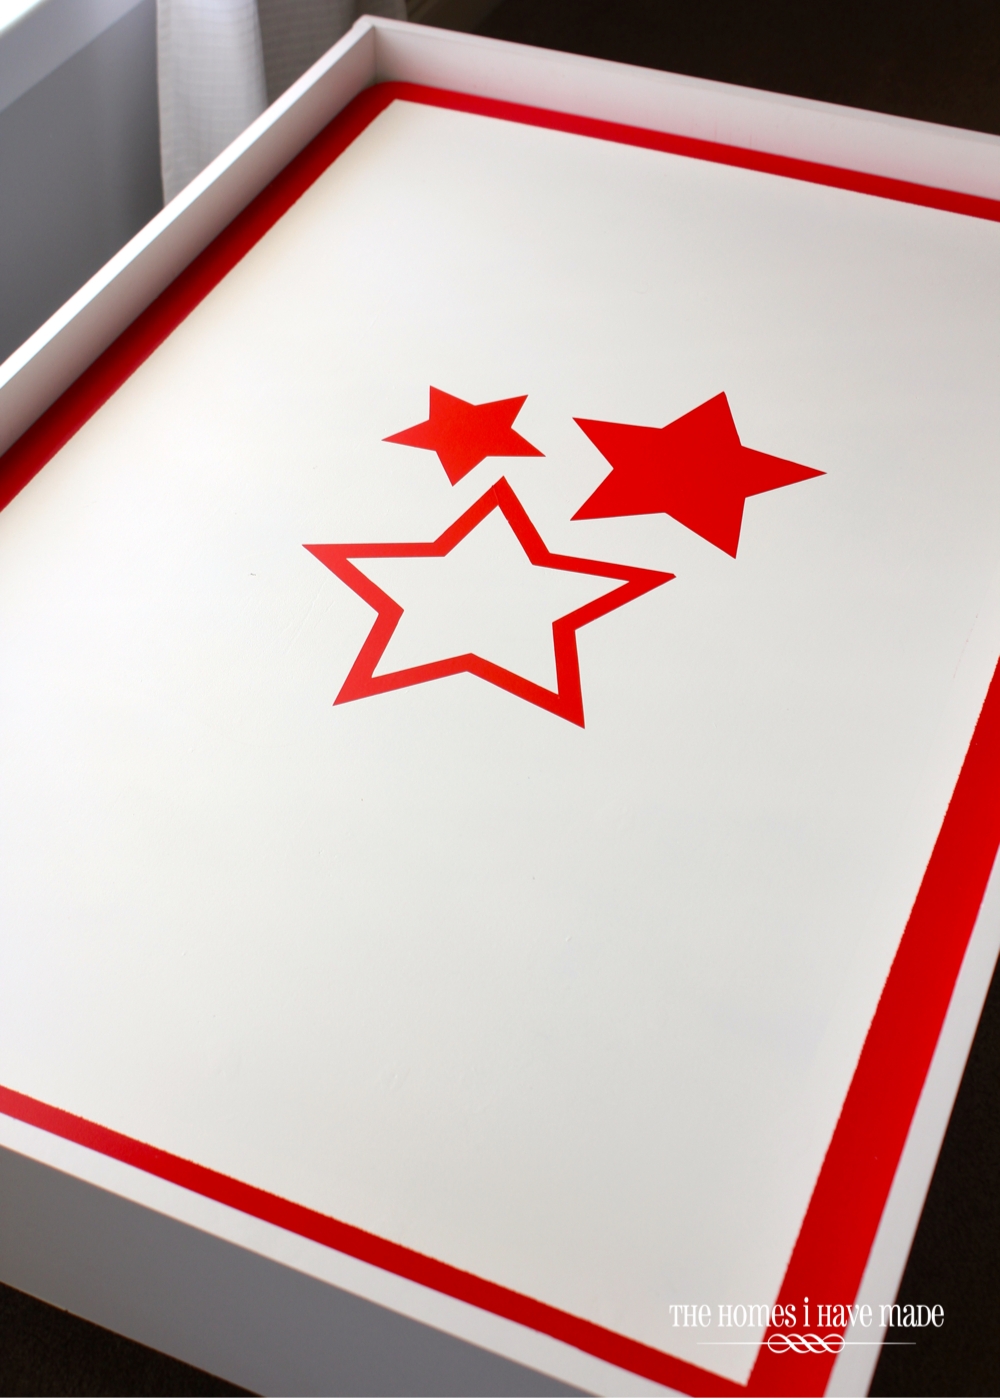
I then laid out a 1″ tape line all the way around the perimeter of the table, exactly as I did the first time. This time, however, instead of painting over the tape line, I just added a red boarder to the OUTSIDE of the blue tape.

Now I had a fresh pop of red around the very, very outside of the table-top. You might recall that last time, my border gave me too small a work surface for a good train layout. This time, I have a good extra two inches to play with in both directions – as long as my train track is situated inside the red border, the table can still be flipped. As a last-minute addition, I cut some red stars out of vinyl (using my cricut) and placed them in the center.

Not bad, huh?
Want to save this post?
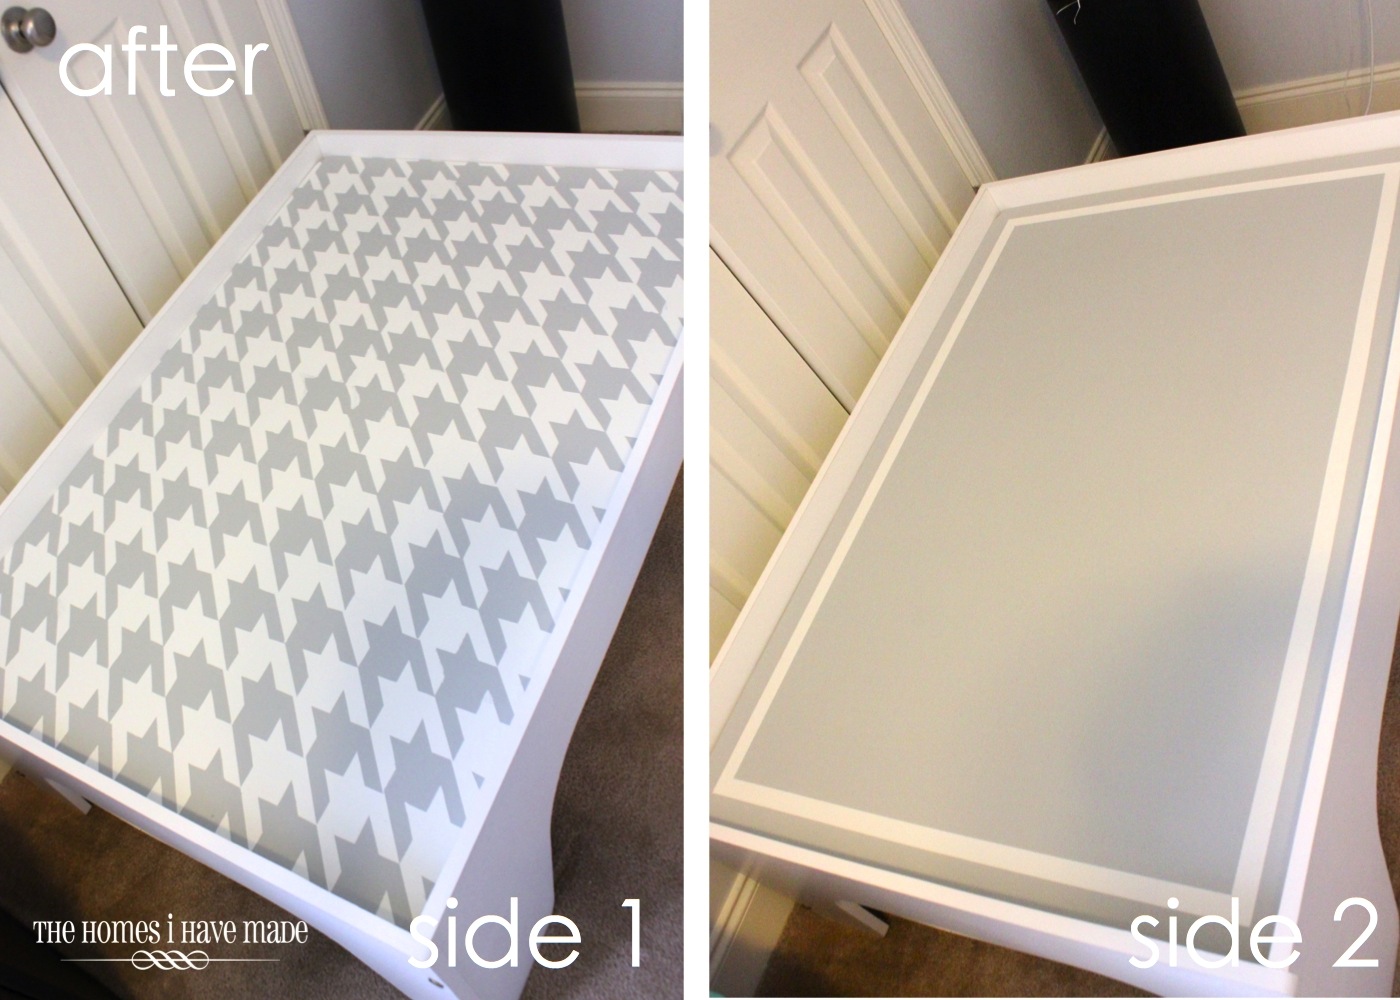
The other side of the table didn’t have any damage so it got to keep its fabulous houndstooth treatment!

So let’s have a look at that before and after now!

So what about the train layout situation? Well…I kind of wish I had a different answer than I do! I put together a really simple but somewhat interesting layout using some of our track and the larger elements (i.e., the windmill, the bridge, etc) that all fit nicely inside the red border. As soon as this layout was up, Henry started playing with it again (as I mentioned last week…after a few weeks of the old layout, he had stopped playing with his trains!).

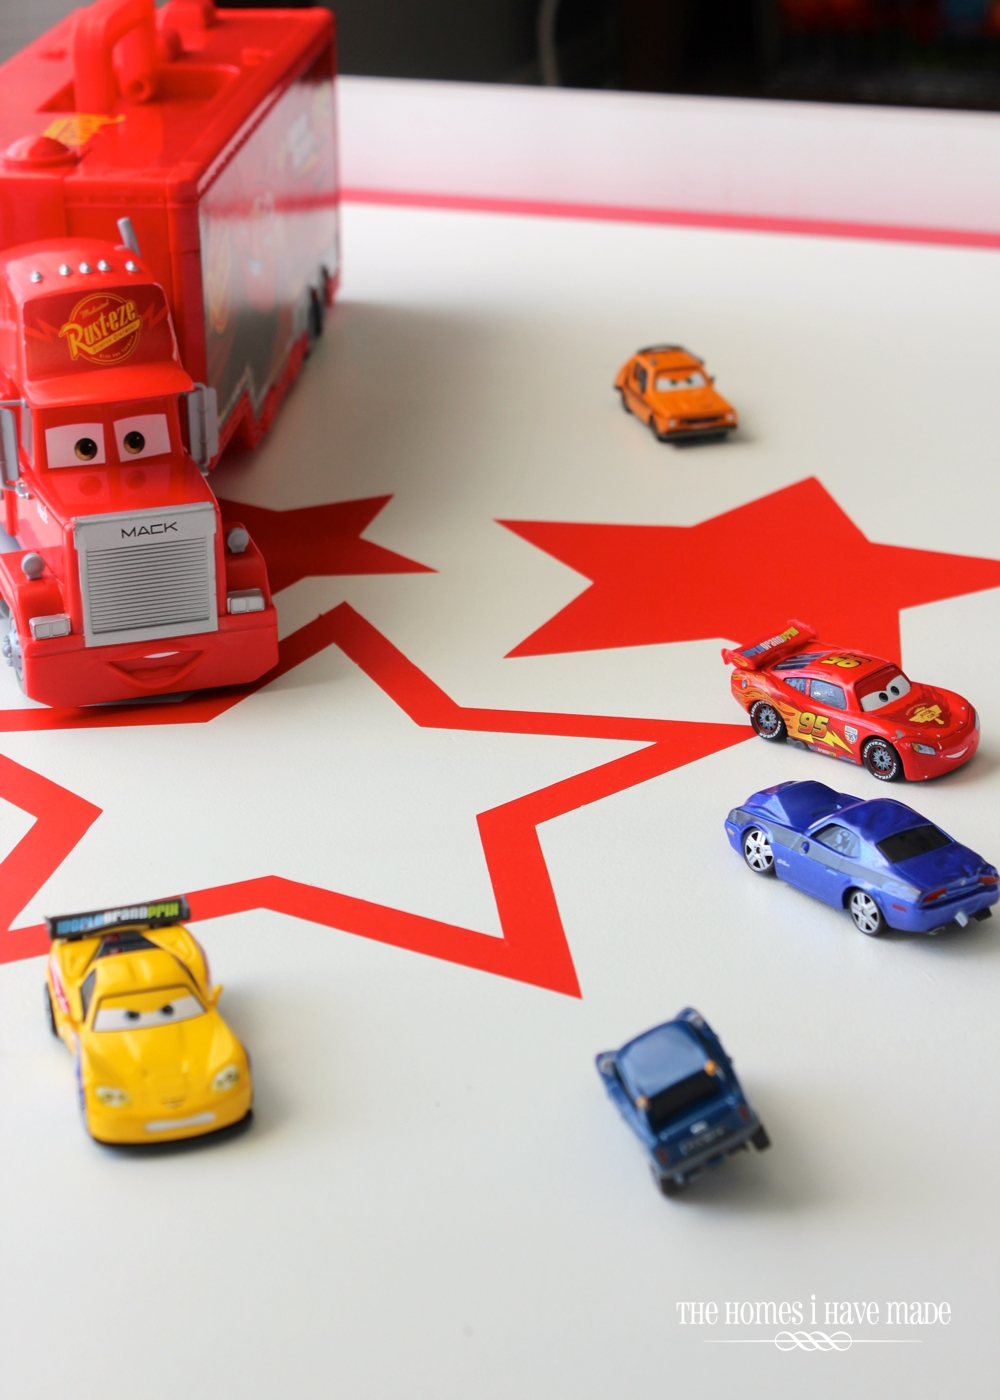
I was ready to glue down this simple layout on to the houndstooth side of the board when after a little while (a.very.little.while), Henry went back to playing with his new favs: Cars…on his teeny tiny chalkboard table. So the track was taken down, and these guys moved in…and boy do they race well on this stick surface (and they don’t fall off because of the edge!). We fondly call this the Cars’ skating rink 😉
For a week or so, Greg and I hemmed and hawed and hemmed and hawed if it was worth gluing any track down at all. I STILL LOVE the idea of having a layout glued down on the other side so we can flip back and forth as needed without having to build a new layout every time. Then why haven’t I done it yet? Because I actually think Henry gets bored with layouts. I know…I know…he’s two! But I genuinely think he likes having different paths to play with. Even when the track was up before, he was constantly reaching for new track to build new directions. Guess I have a creative, imaginative son (wonder how that happened ;)!!!
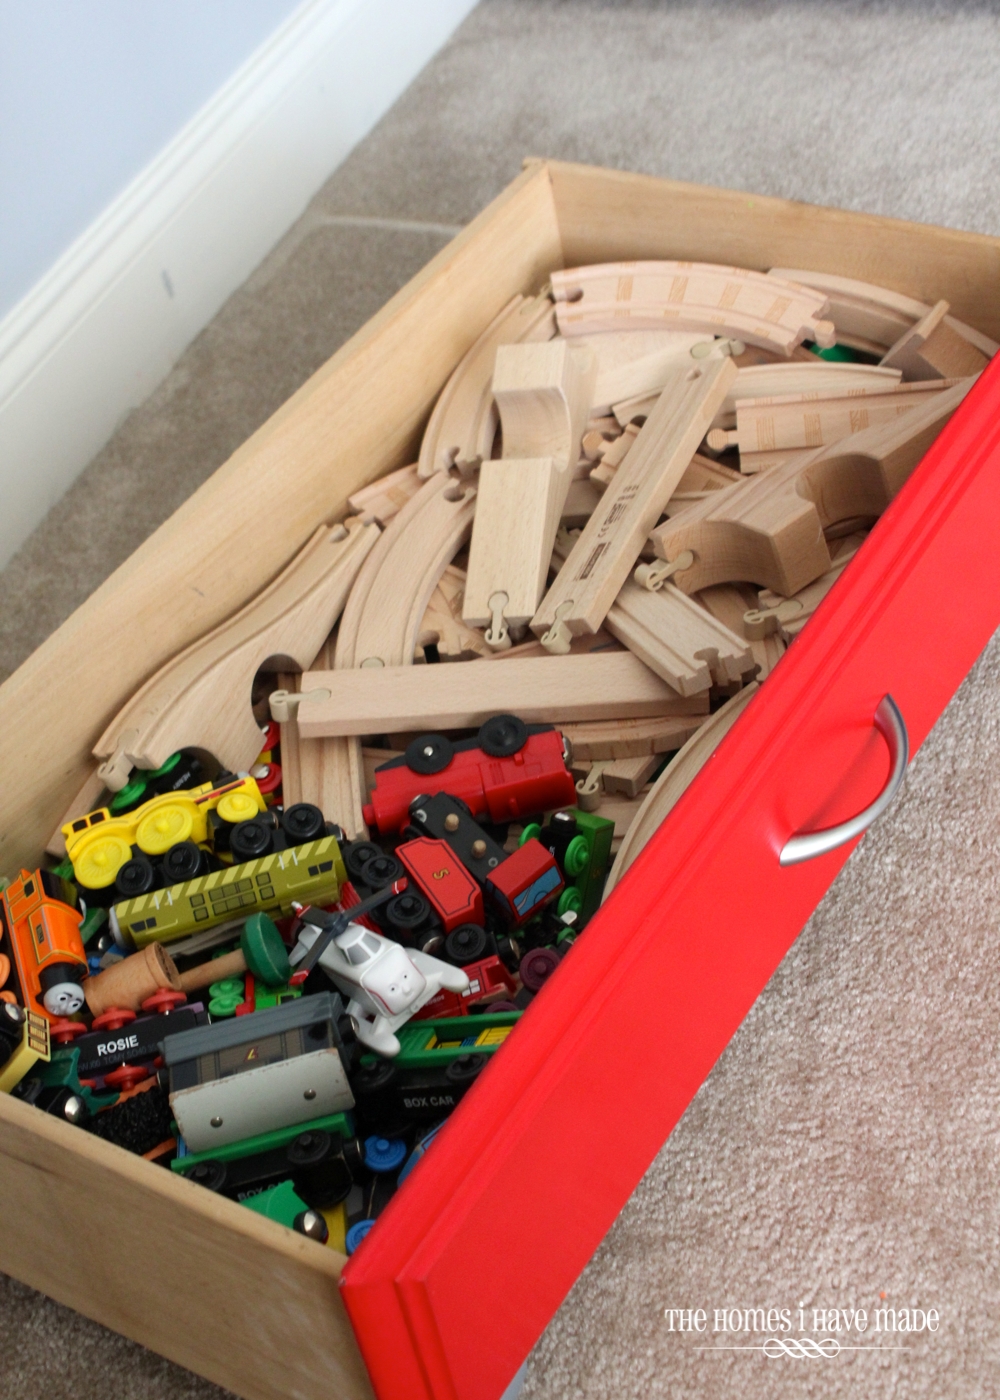
So…for now…there is no track glued down. We have two fabulous play sides that I can swap back and forth as I want (Henry certainly doesn’t notice or care!)…and all the track and trains are at the ready in a drawer under the table.
Truth be told, with no track glued down, we’ve played with the trains more in the last 2 weeks than we have in the whole month prior! So even though it’s not the “perfect project” solution for me, it’s the perfect PLAY solution for him – and that’s really what counts!
I am very glad that we have this play surface…for cars and trains now, for Legos and puzzles and coloring later. Sure we bought this to be a dedicated train table, but it didn’t quite work out that way. At least not right now. We’ve made it work for our little guy and our little house…for now. Train table or not, this makeover was still worth it!
Oh, and are you at all curious about that little red drawer holding all the trains and track? I’ll tell you all about it on Wednesday!

The “playroom” is THIS close to being done! We’ve done a few things here and there that I haven’t yet shared with you, and there are just a few little projects left to do before I can call it complete. Here’s a quick sneak peak of where we’re at!

I’m really hoping to have this space wrapped up here soon! Like I said, a few little projects to knock out,and it’s done. Here’s hoping I can pull it together this week!
Have a great start to your week! See you back here Wednesday to discuss that bright red drawer!
Megan
6 Comments on “Getting It Right: A Train Table Makeover Story – Part II”
That look fabulous! I love your playroom, the colour scheme is great!
Ok so I am commenting on all your posts now lol. I found this on Pinterest because I am staring at this huge train table that my son NEVER plays with. I need a place for his Imaginext toys and I thought maybe I could take the train tracks off that I have glued on there and remake it more like a back drop for his castles, pirate ships and other buildings. THanks for the tips this will help me with my make-over.
LOVE THIS! I am also redoing a train table as a last min. Christmas idea for my 3 year old. Do you have any suggestions on how to get stars like yours if I do not have a cricut? I guess I could see if I could hand paint them? Thanks so much for the idea! =)
I don't know if you reply to us in the comments section but I figured I'd try and ask you my question… Can you tell me the measurements of the train table (Height, Length, Width) and the inside measurements of the top of the train table? Thanks!!!
Hello! Our table measures:
18"h x 34"w x 49.5L
The inside board measures:
31.5"w x 47.5"L
Hope that helps!
Can you tell me what I would need to buy in order to re-do our train table? I would like to get rid of the painted on design (similar to the design yours originally came with) and paint it plain white. I have no tools- what will I need for this project (bare minimum)? Thank you!