Getting It Right: A Train Table Makeover Story – Part I
Hello!! I hope you all had a great weekend and are ready for a new week to begin! This week, I am going to be “revealing” a project that has been on-going in the works for several months now. In case you hadn’t picked up on it, it’s not quite my style to take a really long time, as in months, to finish a project. I’m more of a get-it-done before moving on kind-of-gal. This project though, has a story…and although the projects and ideas contained within this story may (ultimately) be pin-worthy and inspiring, I think the overall DIY process of trial-and-error here is a lot more valuable. In fact, I wasn’t sure I was even going to share this project with you. But lately, a few of you wonderful readers have emailed/commented/messaged me saying that you really enjoy seeing my thought process behind a space/project unfold. I hope you meant it because this week you are going to get to see several iterations of DIY ideas, executions, errors, fails, and ultimately a SCORE…all in an effort to make over and make useful a sad little train table for our little Thomas-loving Henry.

This story begins back in September. Yes, you read that right! My son, 18 months at the time, was falling head-over-heels in love with choo-choos (Thomas the Tank Engine, to be precise). If you are now or have ever been the parent of a toddler boy, then you likely know what I’m talking about! Hearing and seeing this, my big brother found us a pretty beaten up well-loved BRIO train table, as well as a good collection of track and trains on Craigslist for $50. While the trains and track came into the house to be played with right away, the table sat in the garage, waiting for a makeover in time for Santa Clause to bring it on Christmas morning.
Here’s what the board looked like when we first brought it home. Not only was the image peeling in places, but the previously glued down track had left its mark.
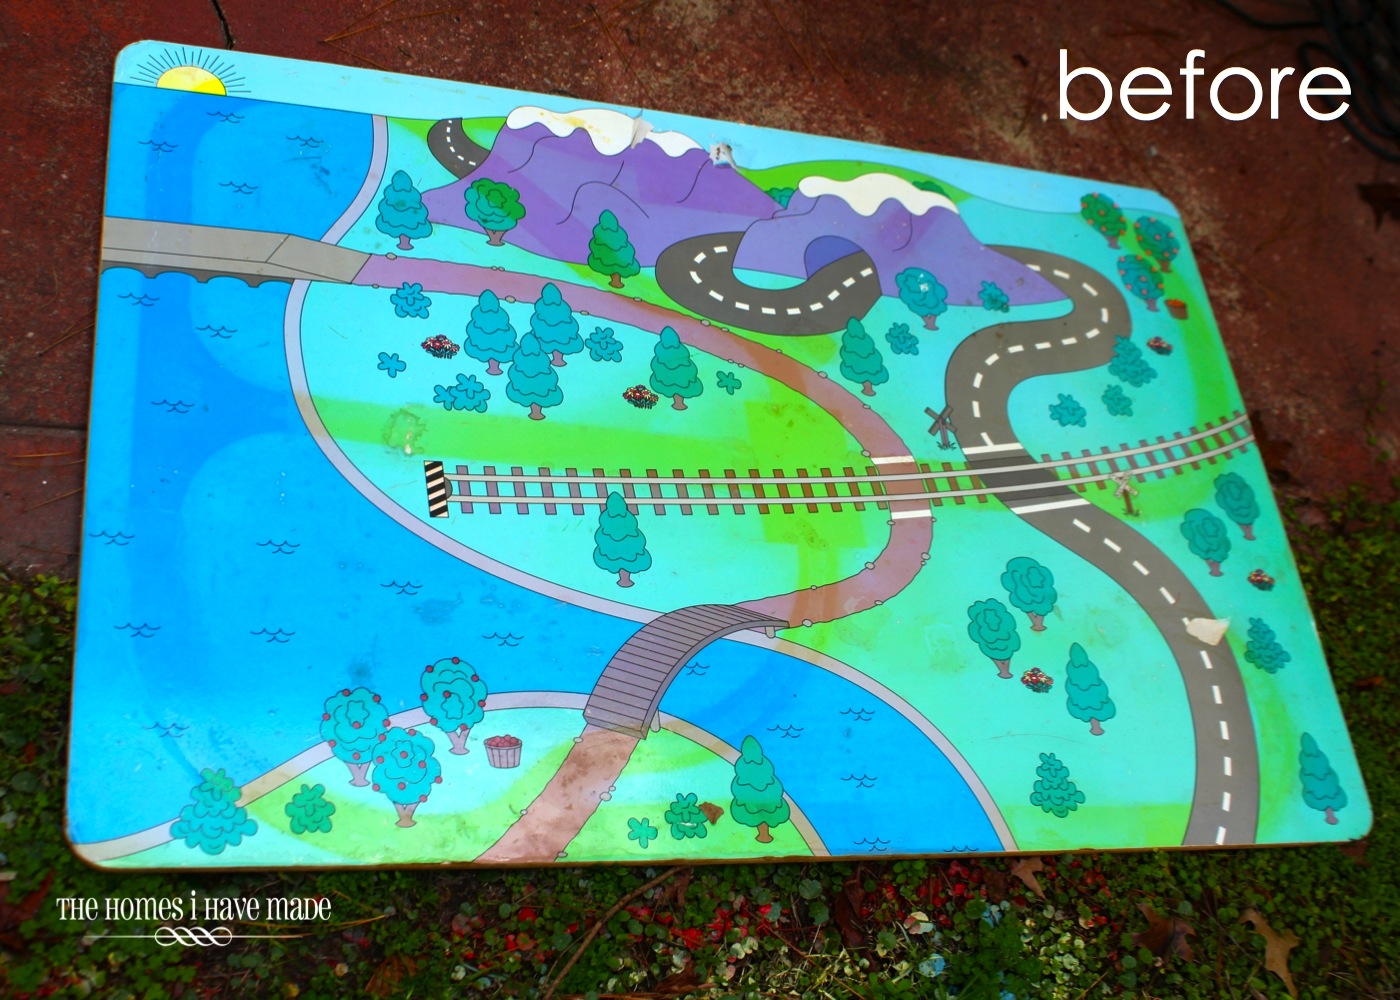
This wooden top sits on a frame inside the table, allowing it to be flipped over. The other side, not played with nearly as much, was in “like new” condition.

The wood was in good shape, but we really didn’t care for the images on either side. Instead of these scenes and colors, I was envisioning a much more clean and modern look to go in our playroom. About a week before Christmas (read: a little too late in the game), I got to work giving this table an update!
I thought sanding off the paper image would be easy-breezy. Boy, was I wrong. Sanding off the laminated paper image took quite a bit of time and effort, and produced a big ol’ mess. After about 5 hours of sanding (phew!), both sides were bare and ready for painting.

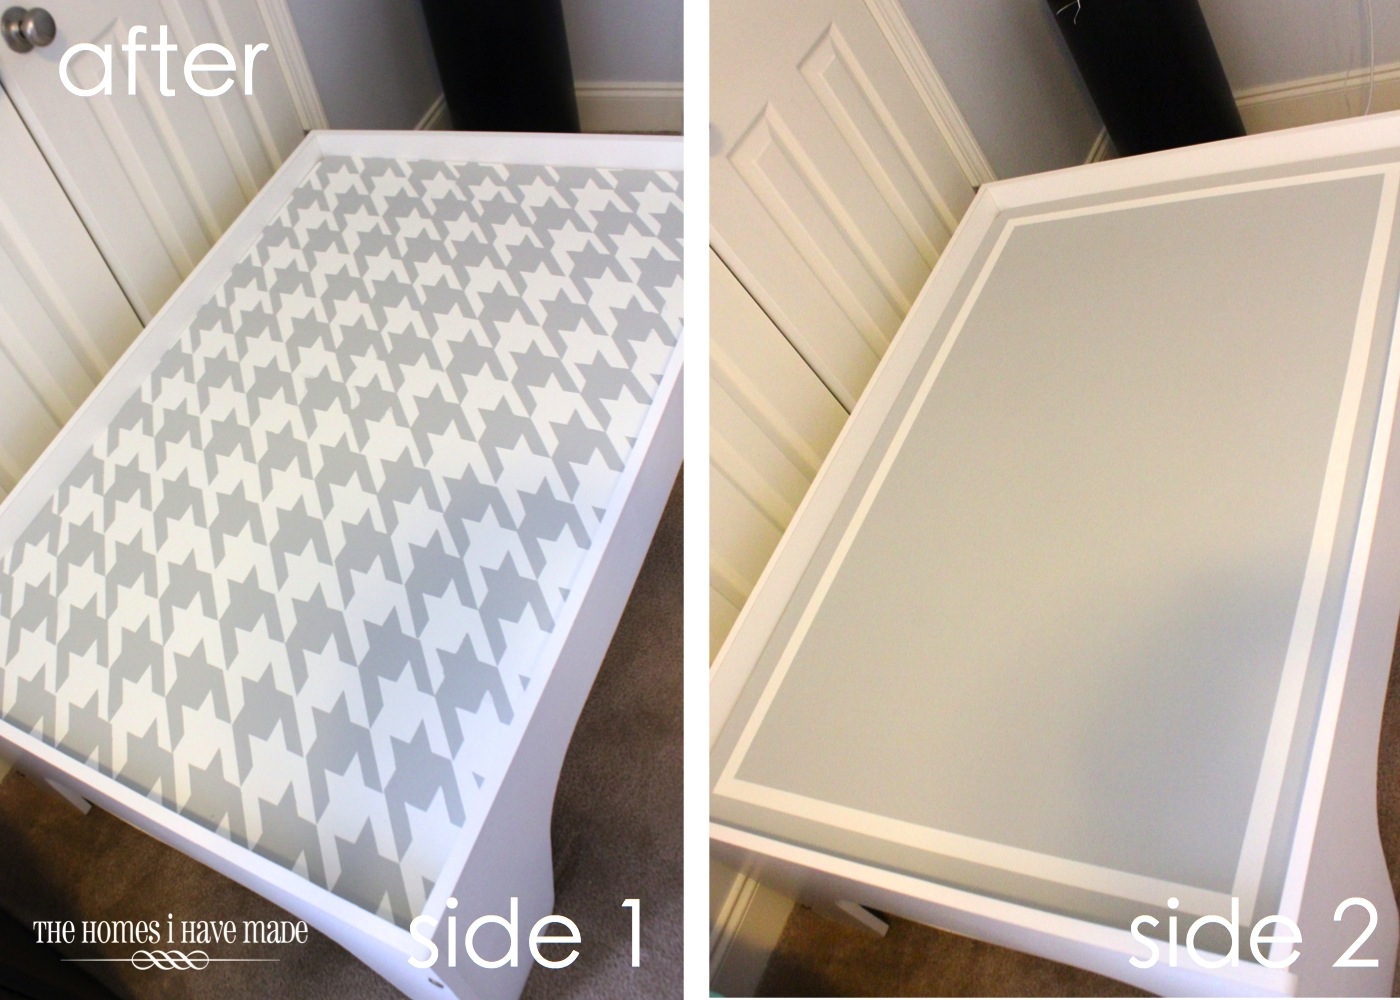
Both sides of the table were primed with Zinsser 123 Primer. On the first table side, I gave the top 2 coats of Sherwin Williams Albacore (leftover from our Dresser Makeover). I then taped out a border with 1″ blue painters’ tape and gave it 2 coats of Driftwood Grey (leftover from our living room stripes). The plan was for our train layout to be placed within this border, allowing the table to be flipped over when the trains were not in use.

On the flip side (ha!), I had in my head that I wanted to do a houndstooth treatment (I think inspired from all the neat houndstooth stenciling projects I’ve seen lately). Even though my sister cautioned that this side of the table would likely never see the light of day (because the trains would most likely always be in use), I couldn’t resist making the underside cute too. I really, really wanted to be able to flip this table top over.
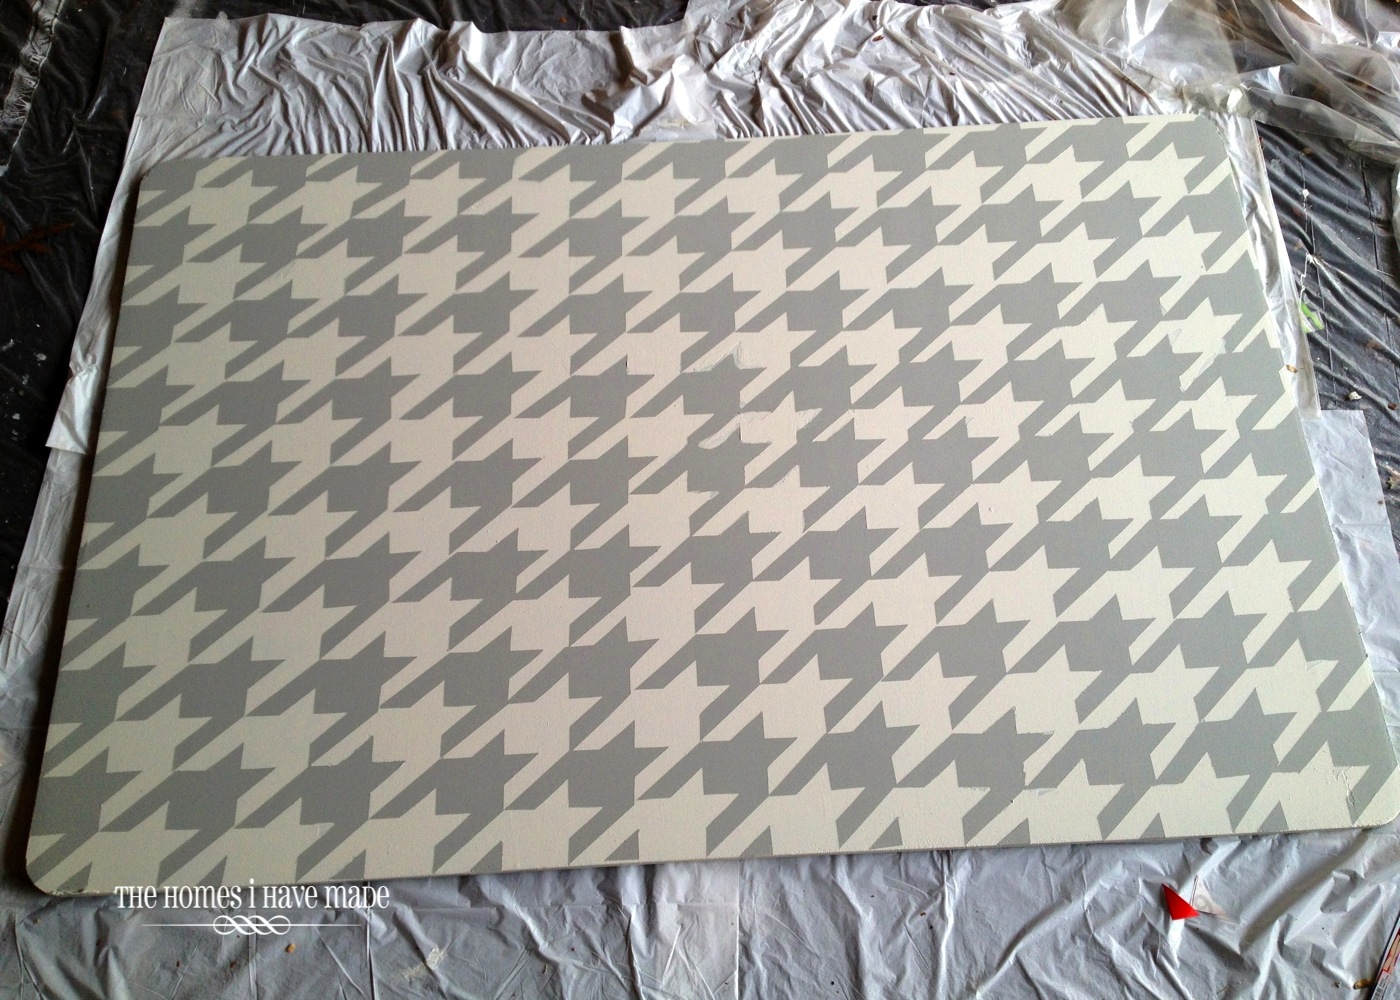
To achieve the houndstooth look, I first primed and painted the board with the Driftwood Grey. I then traced and cut out hundreds of the houndstooth image from vinyl with a scissors. (Yes, this is where a Silhouette machine would come in handy…Yes, this is for the underside of the table…Yes, this is all the week before Christmas! I’m telling ya, when I get an idea in my head, I can’t let it go!). I laid out my houndstooth cutouts, matching edges and corners, directly onto my wooden board.

I ran out of white vinyl and ended up having to use some of my red to finish off the rest of the pattern. Once I saw this, I immediately loved the look of the white, red, and grey houndstooth and kind of wished I had planned to do some sort of neat design with colors or vinyl. (Don’t worry, this idea is now stuck and you will likely see a colored houndstooth project here in the future!). For now, though, I had to proceed as planned.

I covered the whole board (vinyl and all) with 2 coats of Sherwin Williams Albacore. After pealing off all the vinyl decals, I was left with a pretty spectacular table top!
So…here are the two sides before I got to work…

And here are how my two paint surfaces turned out!
Want to save this post?
Two quick notes:
- We covered both sides of the table top with 2 coats of a matte-finish polyurethane, applied with a 4″ roller.
- We also had to re-do all the edges of the table frame itself. I am bummed I didn’t take any before pictures because the edging was in really, really rough shape. All we did was peal off the old edging and then apply white melamine edging (bought at Home Depot) with an iron. After it was cooled, we went back and trimmed it down to the right width with an edge trimmer. I was so skeptical this would work, but the final result was as though it was new!
The table received its final poly coat and was assembled two days before Christmas. Once it was put together, Greg and I set right to work designing a “super awesome” track layout!

We worked for a good while to come up with as many twists, turns, tunnels, bends, stretches and loops as we could fit. In the end, we had a fantastic layout (even had to go out on Christmas Eve to buy some more track) – but there was one big problem (at least in my eyes): the layout pushed out and beyond the neatly measured and painted white border. Not only was this border part of the design of the table, but by staying within that border, we would be able to flip the board over when we wanted a clear play surface.

Oh well – time was of the essence. It was Christmas Eve, we wanted this super track layout, and we wondered how often the table would get flipped anyway. We ignored the border, and screwed down the track using 1/2″ wood screws. The table was proclaimed “DONE,” and Santa and Mrs. Claus headed to bed. Here is the table under the Christmas tree, waiting for Christmas morning.

Needless to say, the table was a huge hit. Although all the toys got opened and admired that morning, the train table was the “Gift of the Year.” Look at that concentration!

So…where am I going with all of this? Seems like a happy ending with a smartly made-over train table that should have been posted on he blog months ago, right? Wrong:

Turns out 1/2″ wood screws are not long or strong enough to withstand a curious, feisty toddler. Although these two pictures are from weeks after Christmas, he actually started prying up the track on.Christmas.morning. Nothing like seeing all your hard work dismantled before your very eyes in a matter of minutes!
Now, you might be asking: “why did you screw the track down instead of glue it?” We had a ton of track that had been previously glued down and it was pretty worthless – none of it fit together quite right from the dried glue, and it was so frustrating not being able to flip the track over as needed. We did not want to ruin our way too expensive train tack with glue or rubber cement. We thought that by screwing the track down (like they do in the stores), the screws could come out and the track would still be usable once we were past the table phase.
Arg. Not only did it look messy (which just irked me like crazy), but the track no longer fit together nicely, making it difficult to play with. Now it was ugly, and not-so-usable.

After a few weeks of frustration, all the screws came out. But without the track nailed down, the design shifted, came apart, etc etc, revealing all those screw holes (photo below). To make matters even worse (hmmm – that sounds pretty dramatic, it wasn’t THAT dramatic, but still highly irritating), Henry had taken an interest in other toys – namely Cars – and we had no where to race them. We had this big, messy, somewhat useless table filled with train track that wasn’t getting used, and were racing the cars down the kitchen floor because there was no where else to play with them. See, told you I wanted to be able to flip that table!!

Two weeks ago, I said “enough was enough.” The truth is, our house is too small to fill it with things that aren’t being used, AND…I hate seeing something I’ve worked so hard on practically destroyed. This table sits right inside our front door and is seen by everyone and anyone who comes over. The train table needed ANOTHER makeover…both in function and style. I hate doing projects twice, but it had to be done.
Here is where we are at today 🙂

Come back on Wednesday for all the details how I gave this table ANOTHER makeover in order to make it useful to our son and our family. Until then, have a great start to your week!
Megan
12 Comments on “Getting It Right: A Train Table Makeover Story – Part I”
Megan, this turned out so adorable! Your little guy looks too cute playing with his trains. Amazing work as always! 😀
My oldest was in love with Thomas Train. I thought that my younger son would too. When he was about 18 mo I found a great used train table and brought it home. I think that trains have been played on that a total of 2 times. Currently it is filled with his catsle and all of this warriors. He's just not into trains but he love to play at that table.
Love it!!! It turned out great especially with the houndstooth. So fun!!!
What a great idea! The train table our kids got from Santa this year is so ugly and beat up already… I forsee a makeover in the not so distant future! Little boys and their toys 🙂
Our son destroyed my husband’s 2 hr job of putting it together after playing with it for only 45 min. My husband wanted to cry, lol! Where did you get those plastic screw brackets that fit in between the track links? I’ve been searching online everywhere! Any help is appreciated… thanks!
This comment cracked me up this week, Allison! Thank you so much for leaving it! Yes, our train table was quite the saga…and now it has been sold at our most recent garage sale and we build layouts on the floor! Live and learn, right?!?!
As far as the plastic links between the tracks, they are just part of the track pieces. Some of the junctions are wooden, and some are plastic – they are the Thomas the Tank brand track, so maybe that will help you out?
Good luck and hope you had a great weekend!
Megan
I’m about to do this very same project. Trying to figure out if I should use glue, nails, or screws, and what yep of paint to use. What did you end up doing?
one of my sons’ favorite things to do is actually *BUILD* the track! they get super proud of themselves for coming up with various designs and figuring out how the track goes together. thought that was all part of the fun..
Yes I was wondering the same thing…why nail everything down? I plan to let my son use his own imagination to build the tracks however he wants. However you do have some serious skills in home decor!
I’m about to do this same exact project but had a wood table top made to go on top of my daughters gray play table and the train is a fairy train set. We did this for my oldest son with a Thomas the Train set years ago and I loved having the tracks secured to the table. My husband used tiny nails. Honestly I don’t care if the train tracks get ruined this train set is all wood but was way cheaper than the Thomas train set. I won’t have his help this year and will only have about two hours this week to paint it then anbout 1.5 hours on Christmas Eve glue, nail, or screw the tracks in. Hat did you end up doing when you redid it, like glue, new screws, etc to secure it and I’m painting it like a village with a body of water, land, trees, etc what paint would you reccomend? Could I use a spray poly after painting? Any help please❤️ This is the train set below and I also got the expansion pack.
https://www.hammacher.com/product/75-piece-fairy-town-train-set?cm_cat=ProductSEM&cm_pla=AdWordsPLA&source=PRODSEM&gclid=Cj0KCQiA6dLgBRDoARIsAJgoM4v7Y6i4UFK18_FtxJx3g6YlzjXuKoqzVDJC8ALNbwXiC716K0G4kvQaAkLdEALw_wcB
ANYONE HAVE THE LINK TO THE MAKEOVER #2? I AM NOT SEEING IT. ❤️
Hi Elizabeth,
Thanks for your comments on this post. For your reference, here are the two corresponding posts for this project:
Part 1
Part 2
Also, for whatever it’s worth, I actually don’t recommend affixing the track at all. About 4 months after we made this train table, we noticed our son wasn’t playing with it because he got bored of the layout. We un-screwed all the track and kept it in a basket and built a fresh track every time he wanted to play. Now with my 2nd son, who is into Thomas big time, we are using the same approach…build it when we need it!
Hope that helps,
Megan