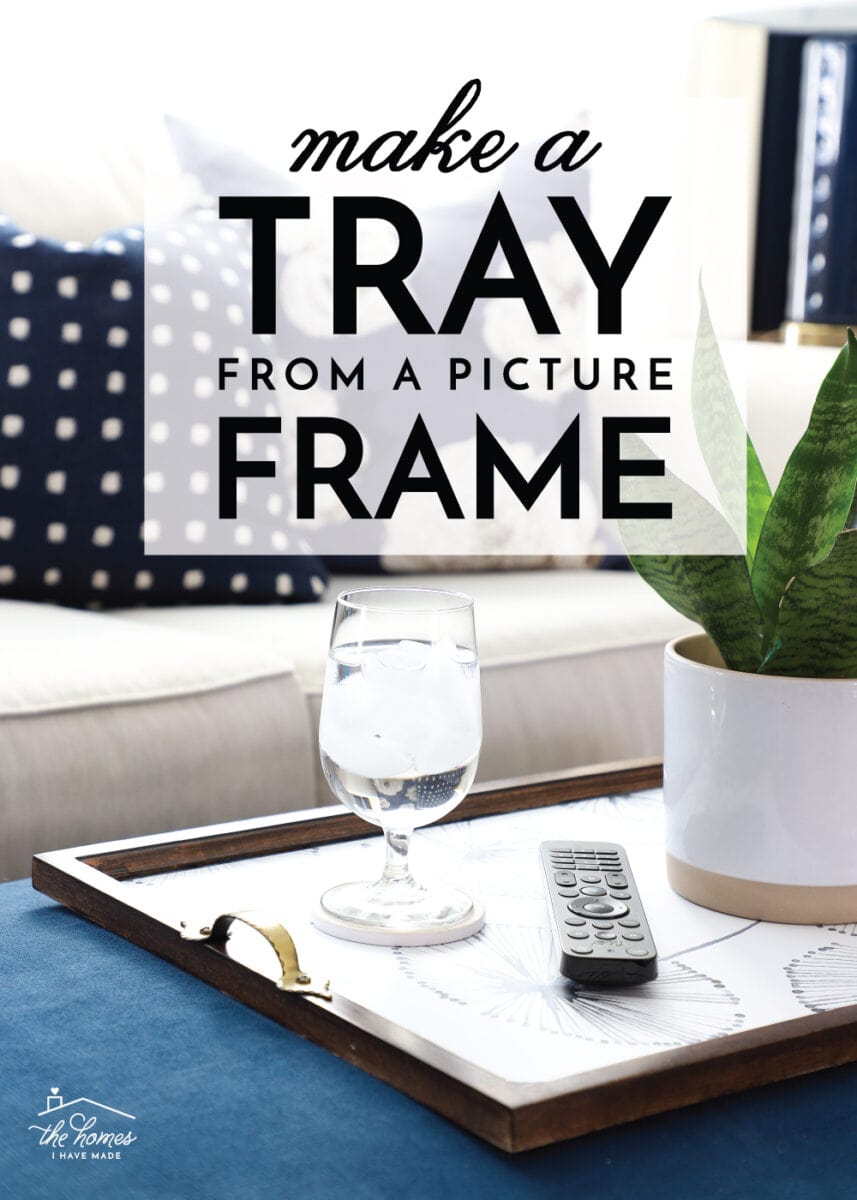
DIY Tray from a Picture Frame
A solid, neutral tray is always a good home decor accessory to keep on hand for decorating, entertaining, corralling, and more. And while many (many, many) styles can be found at your favorite home decor stores, have you ever tried making your own? Don’t worry! You don’t need to be handy with a saw and carpenter square for this project. In fact, with just a few supplies from the hardware store, you can make a DIY tray from a picture frame! This is a fun and simple 1-hour “up-cycling” project I know you guys are going to love!
I first made this tray in 2014 as a contribution to a site called My Daily Bubble (the site has since shut down, and I have been given permission to post the projects here). This tray remains one of my favorite DIYs of all time!
Supplies Needed
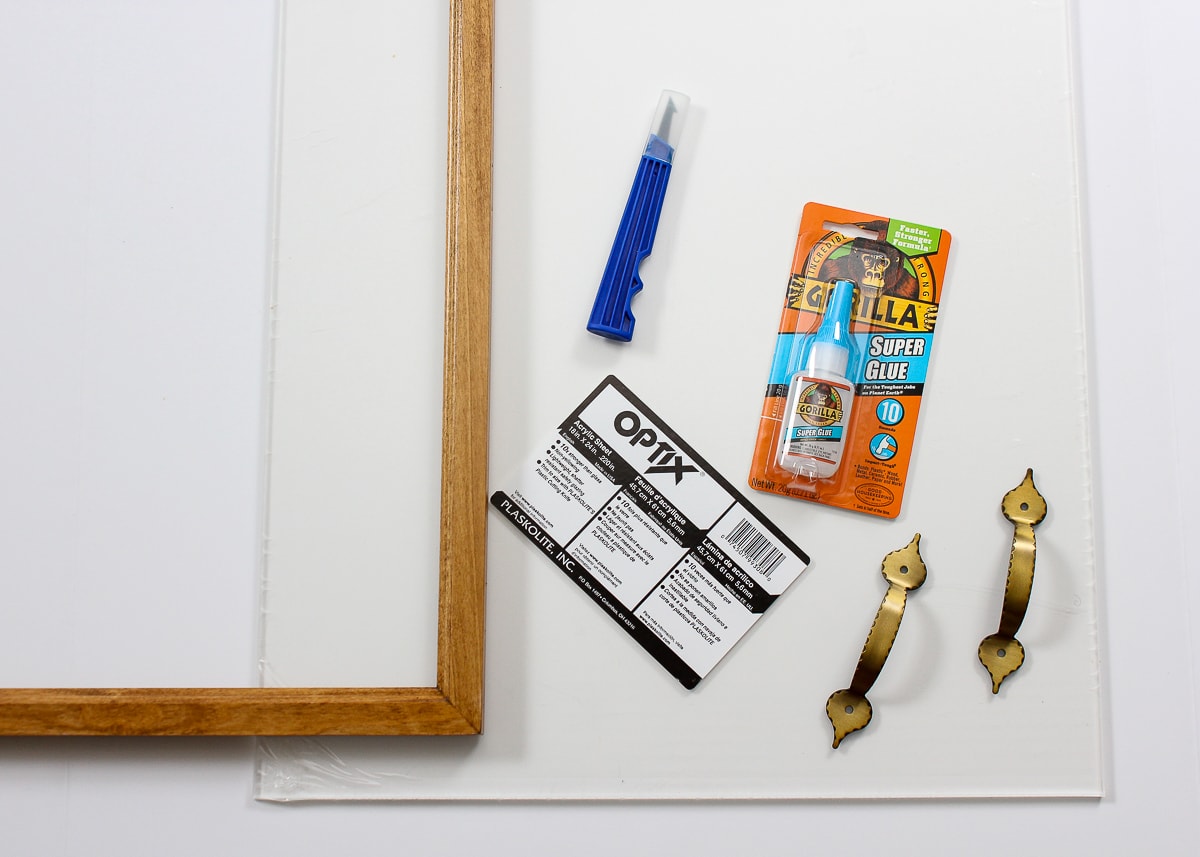
Here are the supplies you need for this tray project:
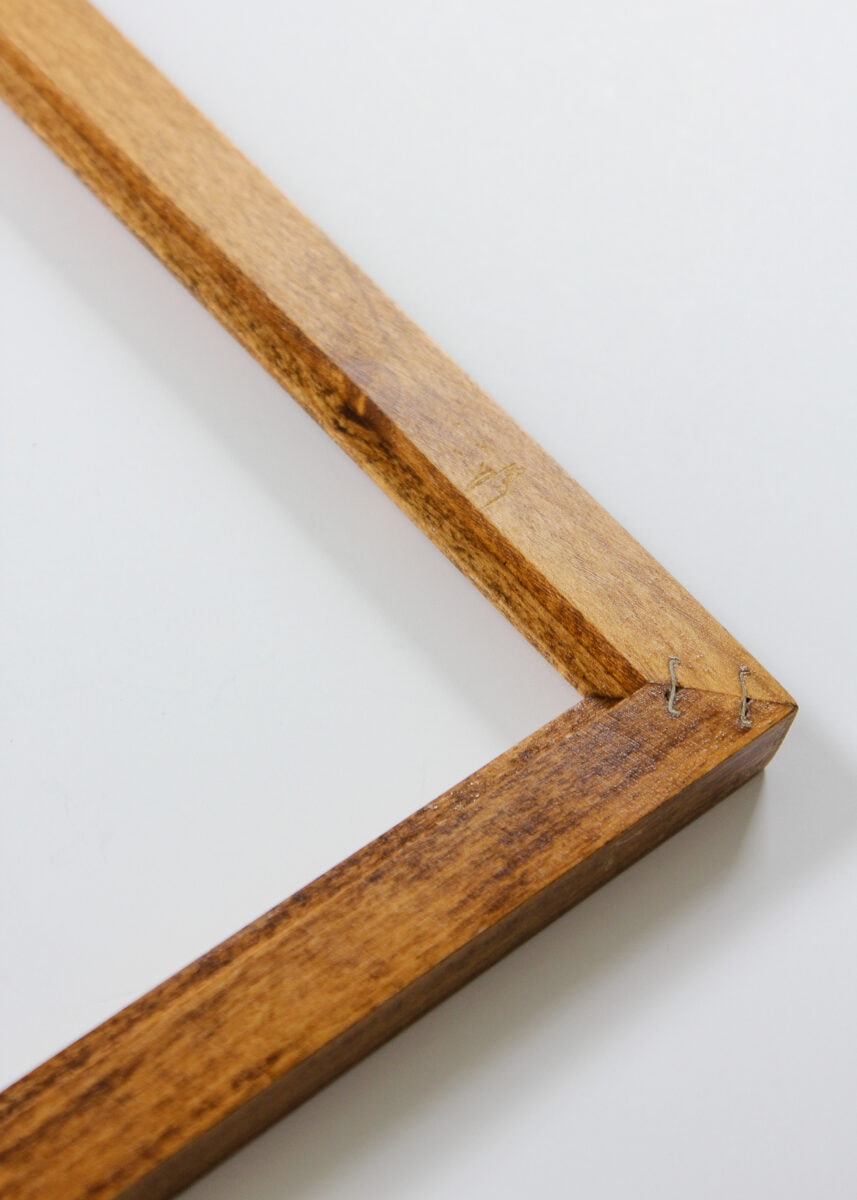
- A wood frame in your preferred color and size – My frame is actually an old cabinet door with the glass pane removed, but standard frames with a backing work as well!
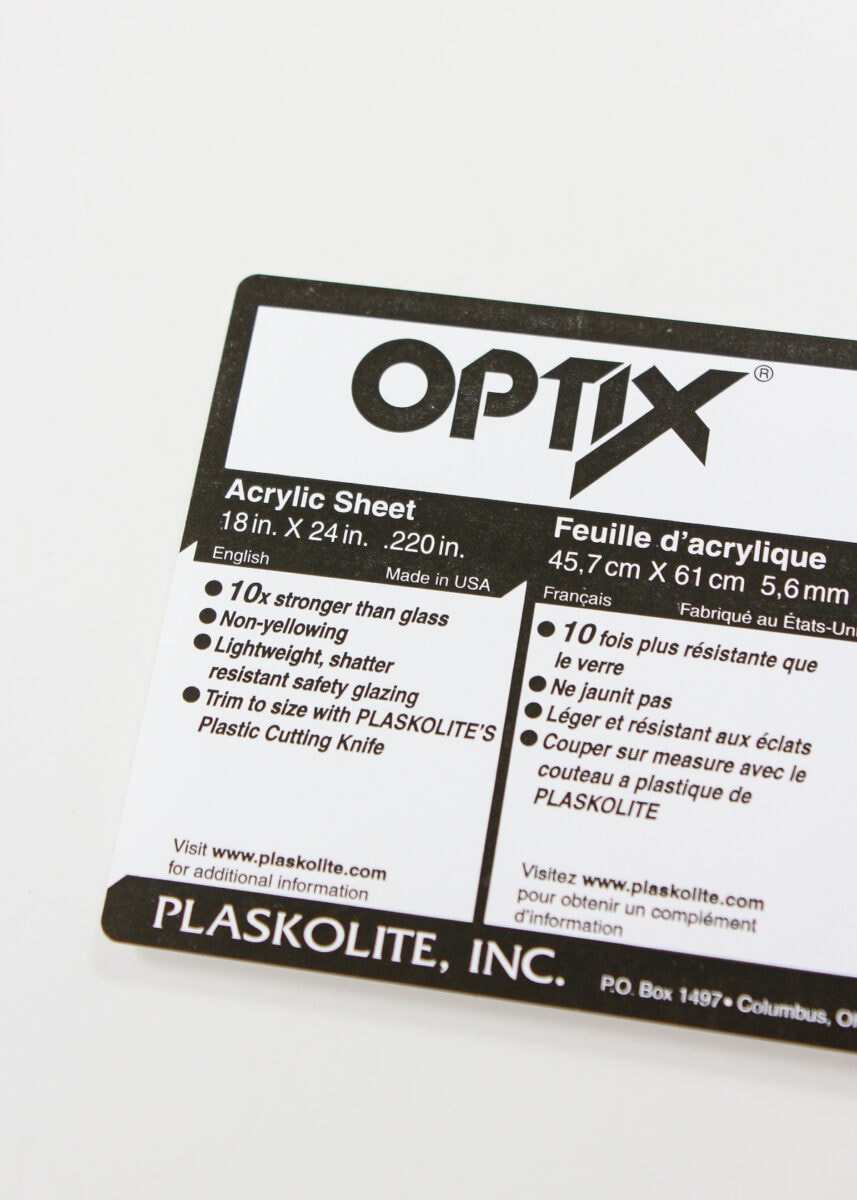
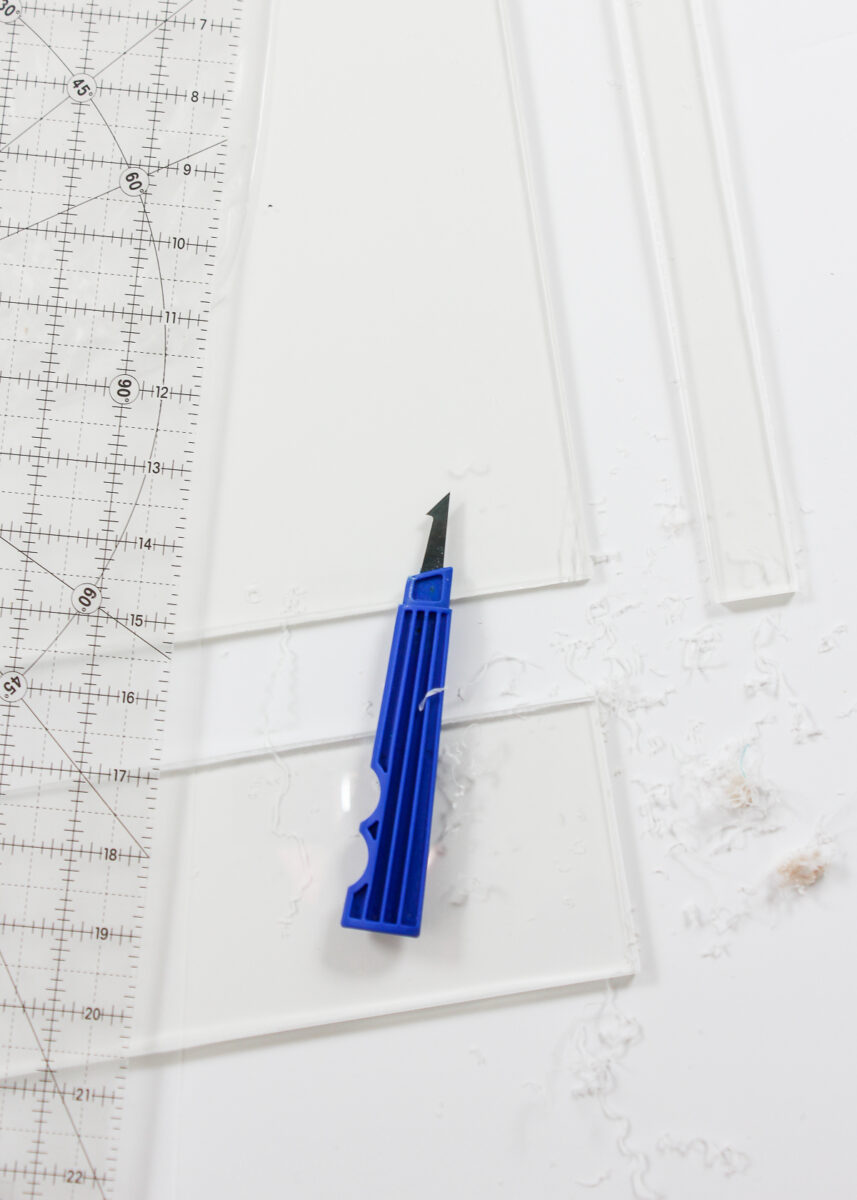
- Plexiglass/Acrylic Sheet (to replace the frame glass) – A lot of standard sizes are available at home improvement stores, but you can also buy a larger sheet and cut it down to fit your frame.
- Plexiglass Cutting Tool – This is only needed if you’re trimming down a plexiglass sheet yourself.
- Gorilla Glue Super Glue – This is my favorite super glue; it’s super tough but does NOT expand!
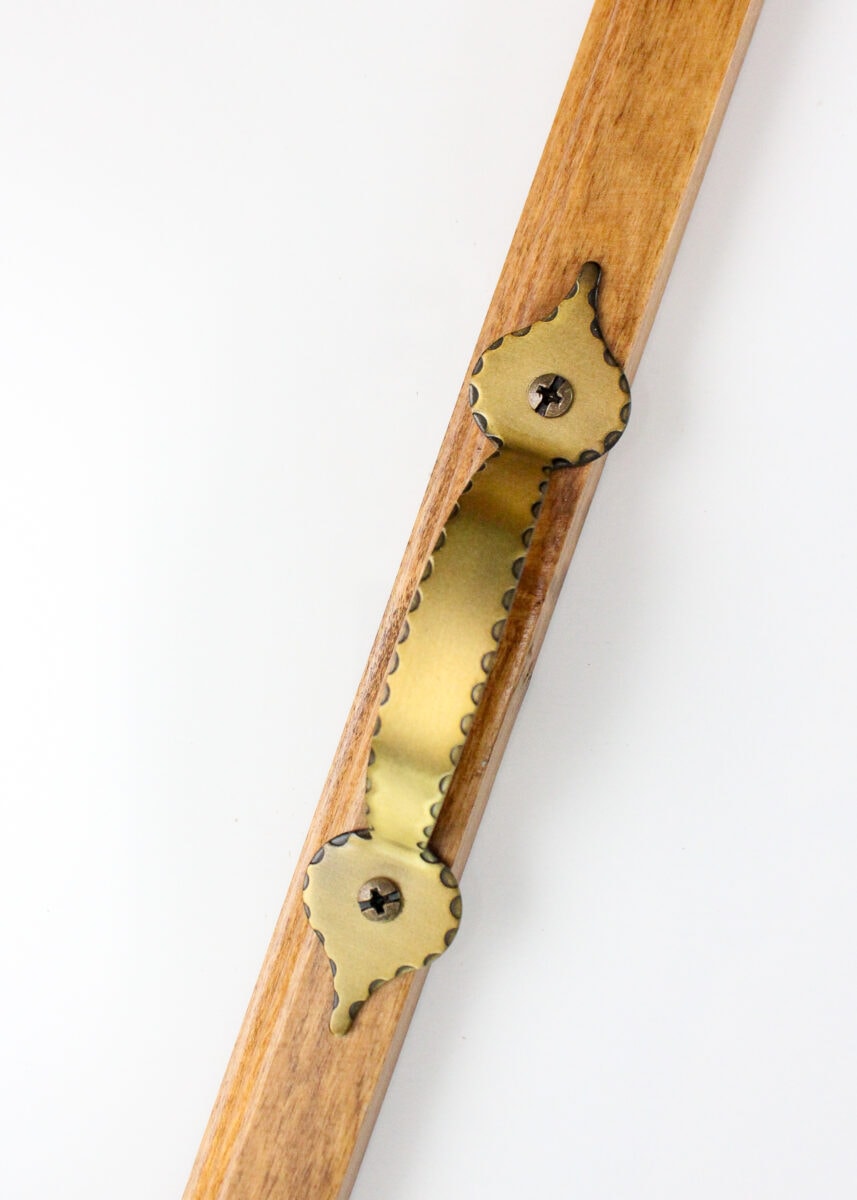
- 2 Furniture Handles – Ideally, you want ones that screw in from the top (rather than underneath), but either kind will work.
This DIY tray from a picture frame requires just 2 steps: swapping out the glass and adding a handle. Of course, I have a few decorative upgrades you can make too! Let’s get started…
Step 1: Swap the Glass for Plexiglass
To make a tray that is safer and more durable, I highly recommend swapping the glass in your frame for plexiglass (acrylic) to create a super-stable, non-breakable, non-bendable surface. I used a sheet of 0.22” thick plexiglass for two reasons: 1) it cannot bend at all; and 2) my frame didn’t have a backing, so I wanted the plexiglass flush with the frame along the back.
TIP! If you want to be able to use the backing that came with your frame, be sure to pick a plexiglass thickness that will still allow you to re-assemble and close up the frame when you’re finished.
Start by disassembling your frame. Then measure the internal dimensions of the under-side of the frame where the glass/plexiglass sits (or measure the piece of glass you just removed). Plexiglass isn’t super easy to cut (and can be a little pricey), so do yourself a favor and measure twice before cutting!

Once you have your measurements in hand, cut down the acrylic sheet with the cutting tool and ruler. Use these directions to help you.
With the plexiglass cut down to size, use Gorilla Glue Super Glue to secure it to the inside lip of the frame. Follow the glue’s instructions by placing a dot of glue every 1” or so.

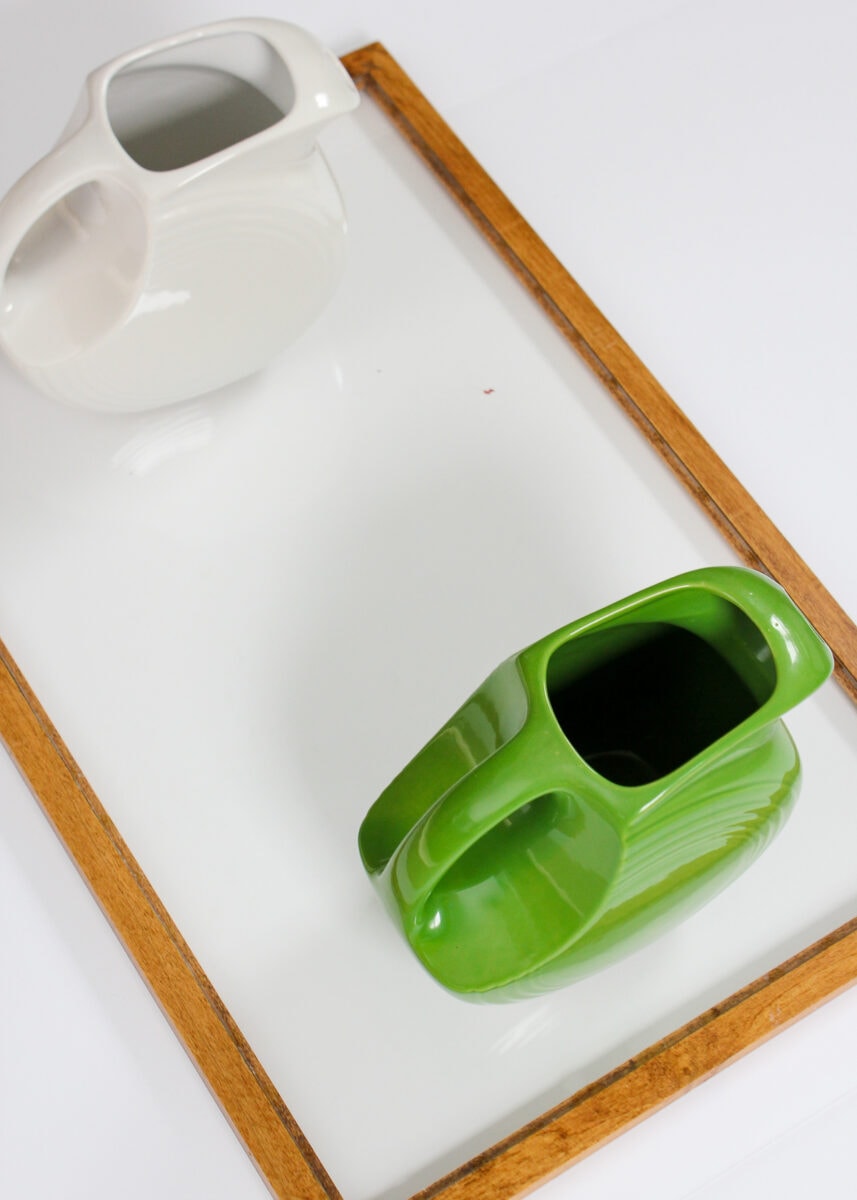
Firmly press the plexiglass into place for 30 seconds and then let it cure for 24 hours before handling. I placed some heavy pitchers on mine to provide some weight while it cured.
TIP! If you plan to put your frame backing back on, you don’t necessarily need to glue the plexiglass in place. However, if you want to create a clear try (like mine) or want the whole arrangement to be a bit more sturdy, I recommend the glueing step!
Want to save this post?
NOTE: I made this DIY tray back in 2014 and it is STILL going strong. This glue will hold the plexiglass into your frame…even without a backing. Just be sure to follow the application instructions.
Step 2: Add Handles
Once the plexiglass is fully cured into place, attach furniture pulls on the center of each short end of the frame using an electric screwdriver and the provided screws.
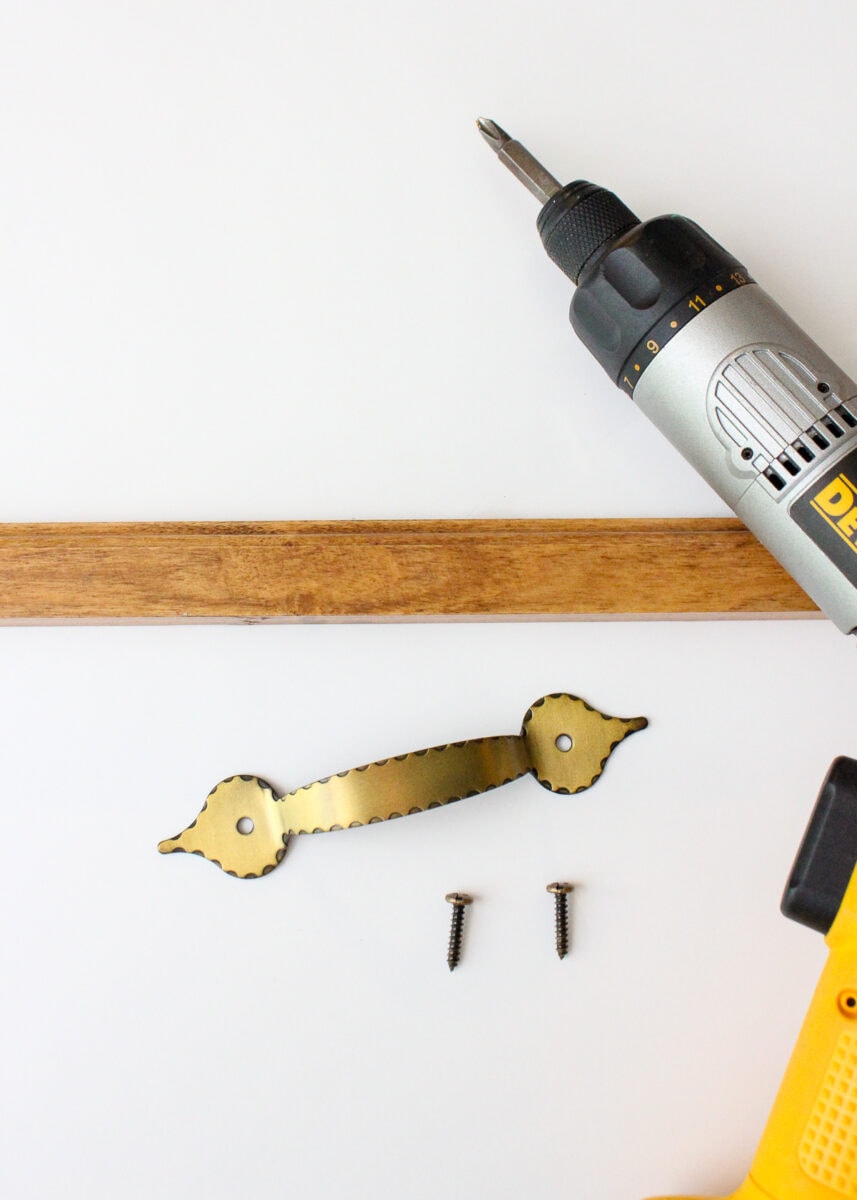
By using handles that screw in from the top, this step takes about 30 seconds. If you use handles that screw in from the bottom, you will need to drill out holes on the underside of your frame in order to countersink the hardware holes (so they won’t scratch up whatever surface you place your tray on).
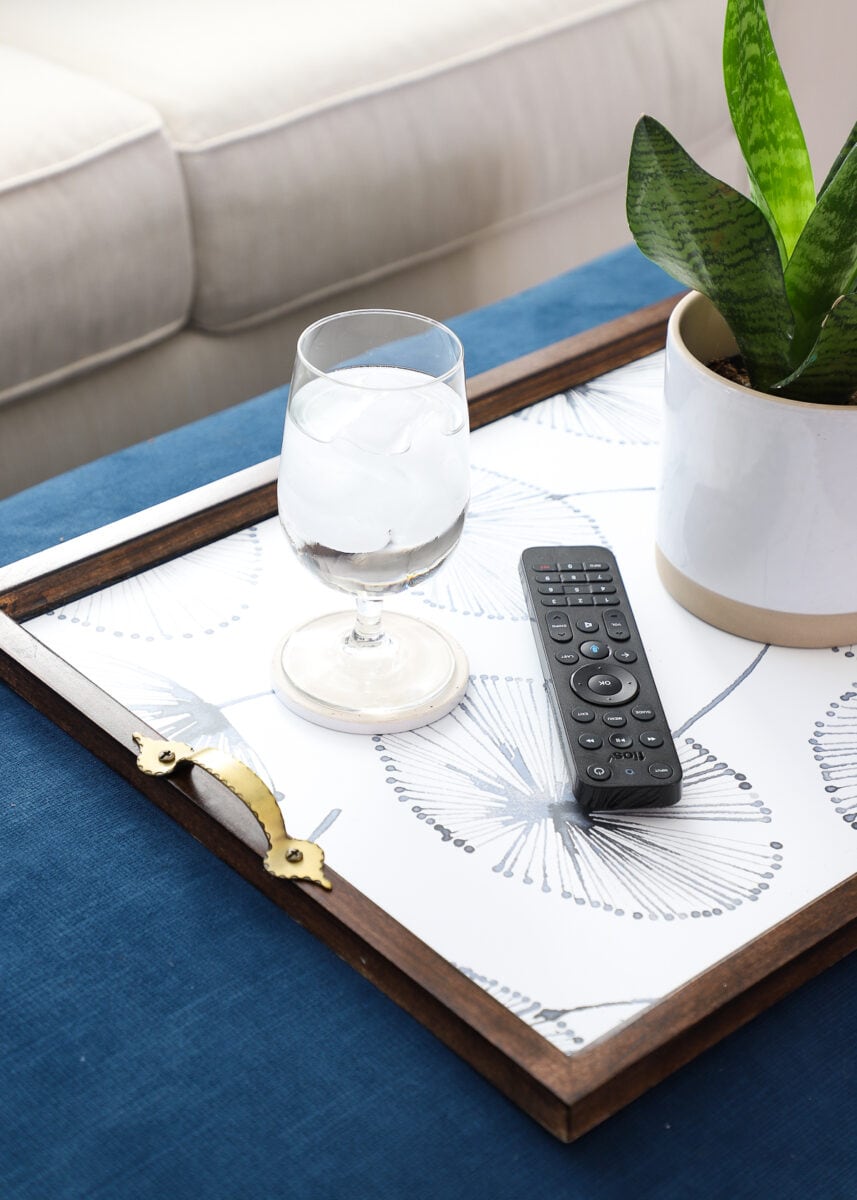
And that’s it! Clean up the acrylic with some spray cleaner, and you’re ready to get styling!
Adding a Pop of Color or Pattern to the Tray
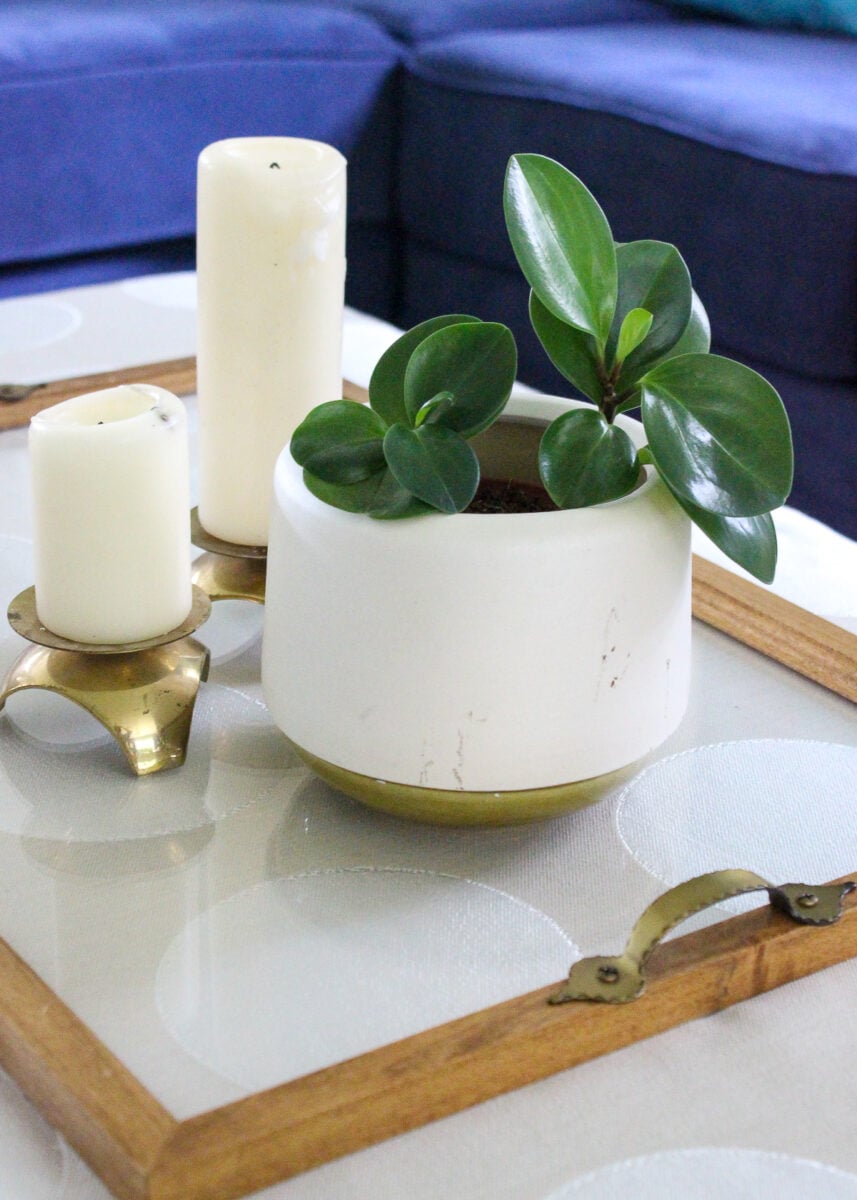
I love the modern and clean look of the acrylic, and I’ve found the clear surface allows the tray to match/blend onto a wide variety of surfaces all over the home.
But there are also some fun things you can do to add a pop of color or pattern to the base of your tray. One idea is to use a sheet of stained, painted, or stenciled wood instead of the acrylic sheet. By using wood, you can paint over it and give the tray a new look whenever you want!
TIP! If you do use wood, you can likely use a staple gun to secure the sheet instead of super glue.
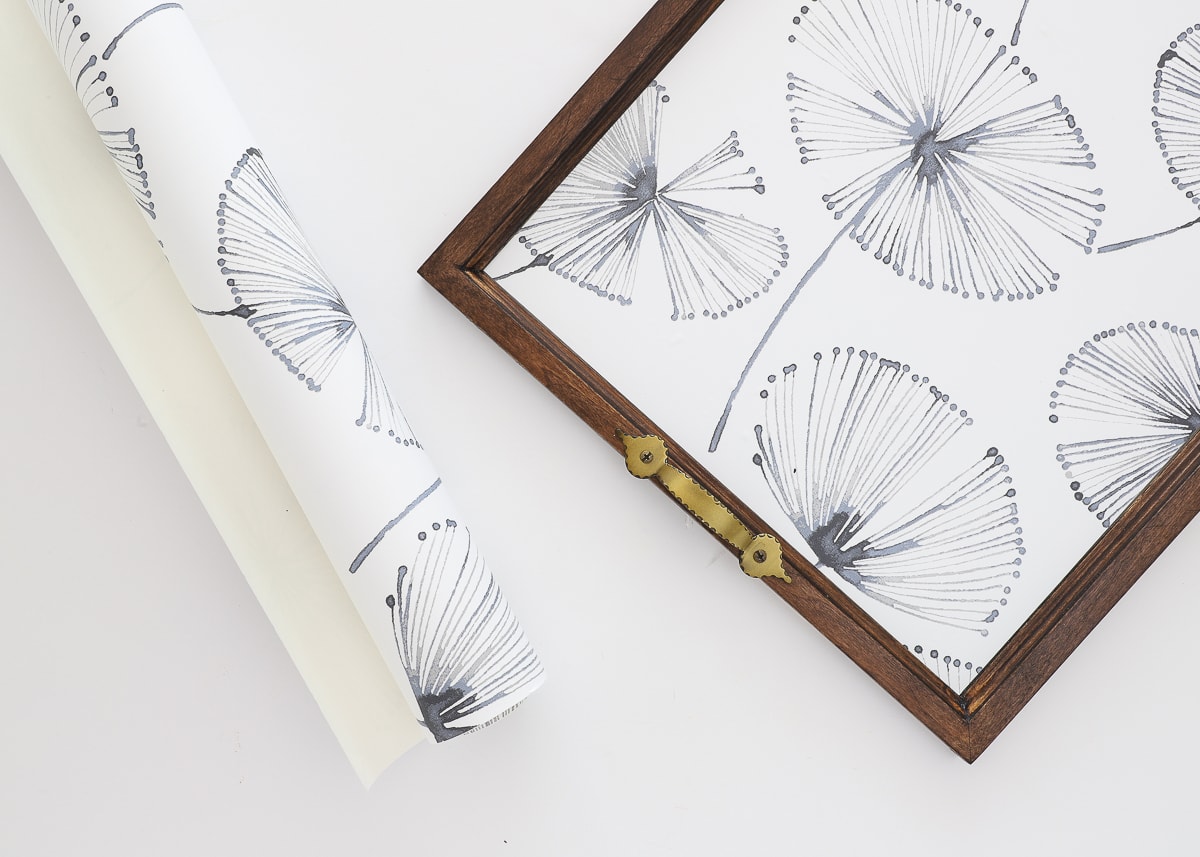
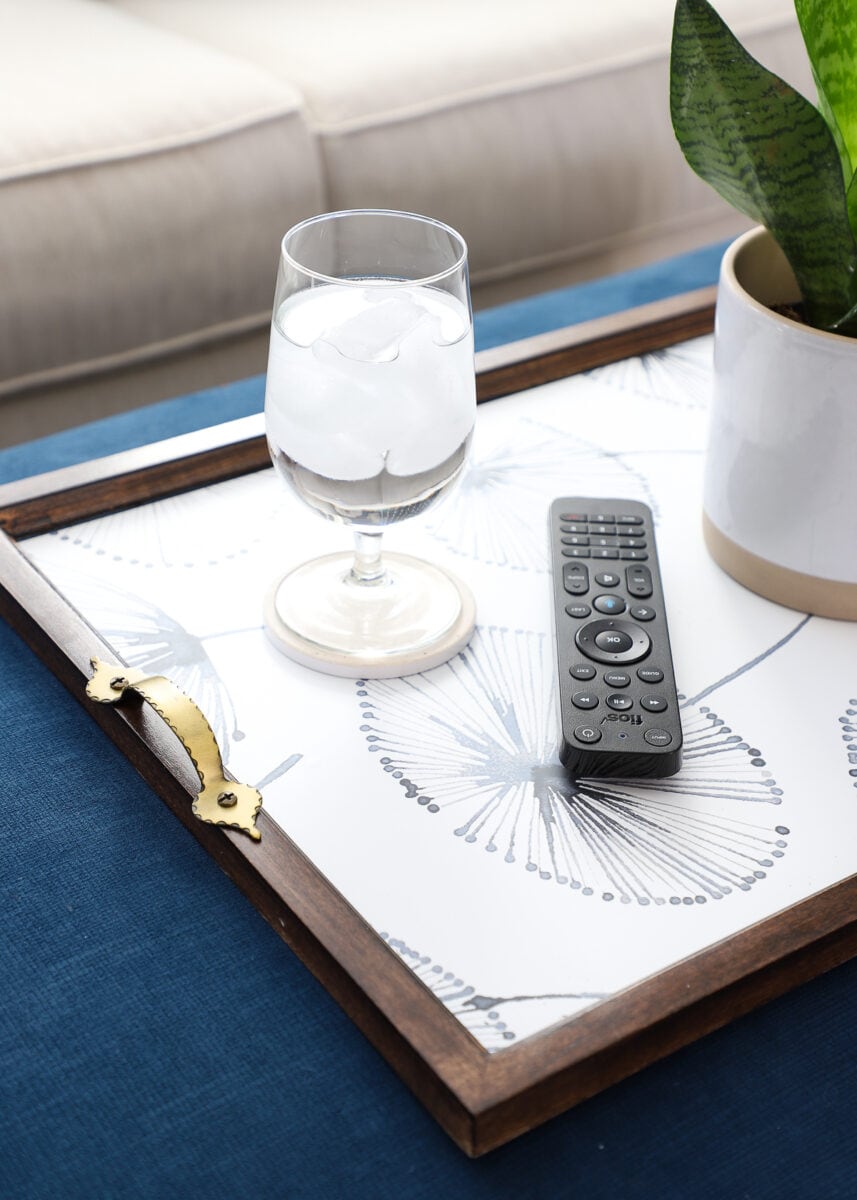
My favorite way to change up the look of the tray though is to use patterned papers such as wrapping paper, wallpaper, and contact paper.
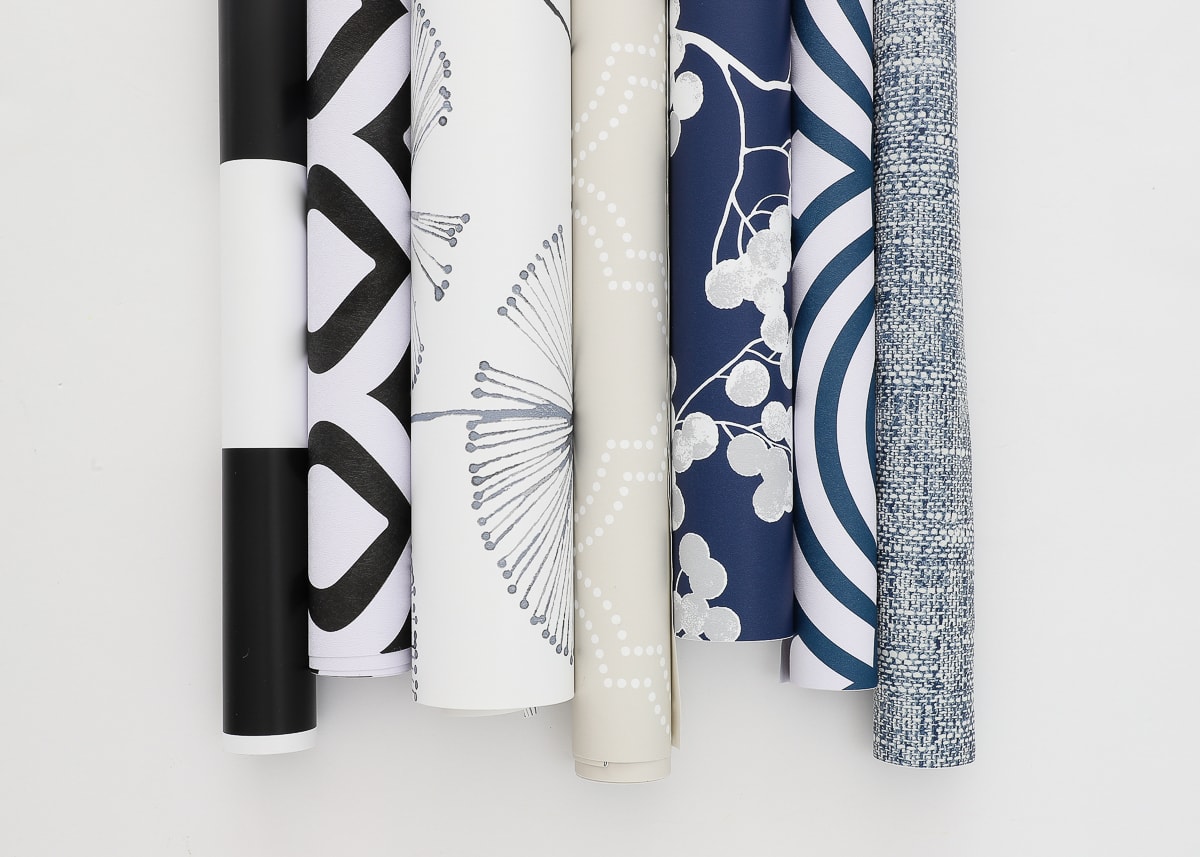
Black-and-White Stripes | Black-and-White Trellis | Navy-and-White Flowers | Cream Trellis | Navy Blossoms | Navy-and-White Scallops | Navy Poplin
If you use a traditional-style frame (with a backing), you can lay any paper under the surface, close it up, and then swap it for any season or holiday.
If your tray doesn’t have a backing (like mine), using peel-and-stick paper on top of the acrylic surface is still a quick and changeable makeover option!
NuWallpaper Aya Peel & Stick Wallpaper
NOTE: You’re not seeing things…yes, my tray is now a different color from when I first made it years ago. I’m getting ready to re-stain our family room side tables, and I used this tray as a test project. The darker stain is a much better match for our home now anyway!

I made this DIY tray from a picture frame, somewhat on a whim, 6+ years ago. To this day, it’s still one of my favorite accessories to use around the house for photos, entertaining, and styling. If you have a large, sturdy, decorative frame that you love but just have no place for on your walls, consider this kind of makeover. With the addition of some great furniture pulls and fun papers, you can breath new life and function into it for years to come!
Megan