5 Ways to Modernize Dated Furniture
On Wednesday, I showed you my latest furniture transformation – thanks so much to all of you that left the nicest comments on that post. I knew you’d all love our new dresser as much as we do, and your sweet comments totally made my day. As I said, the transformation of the Big Beauty, as well as her Little Sister, were done side-by-side months ago, and I’ve been anxiously waiting to show you exactly how I pulled these modern makeovers off! Let’s take a look at how you can modernize dated furniture!
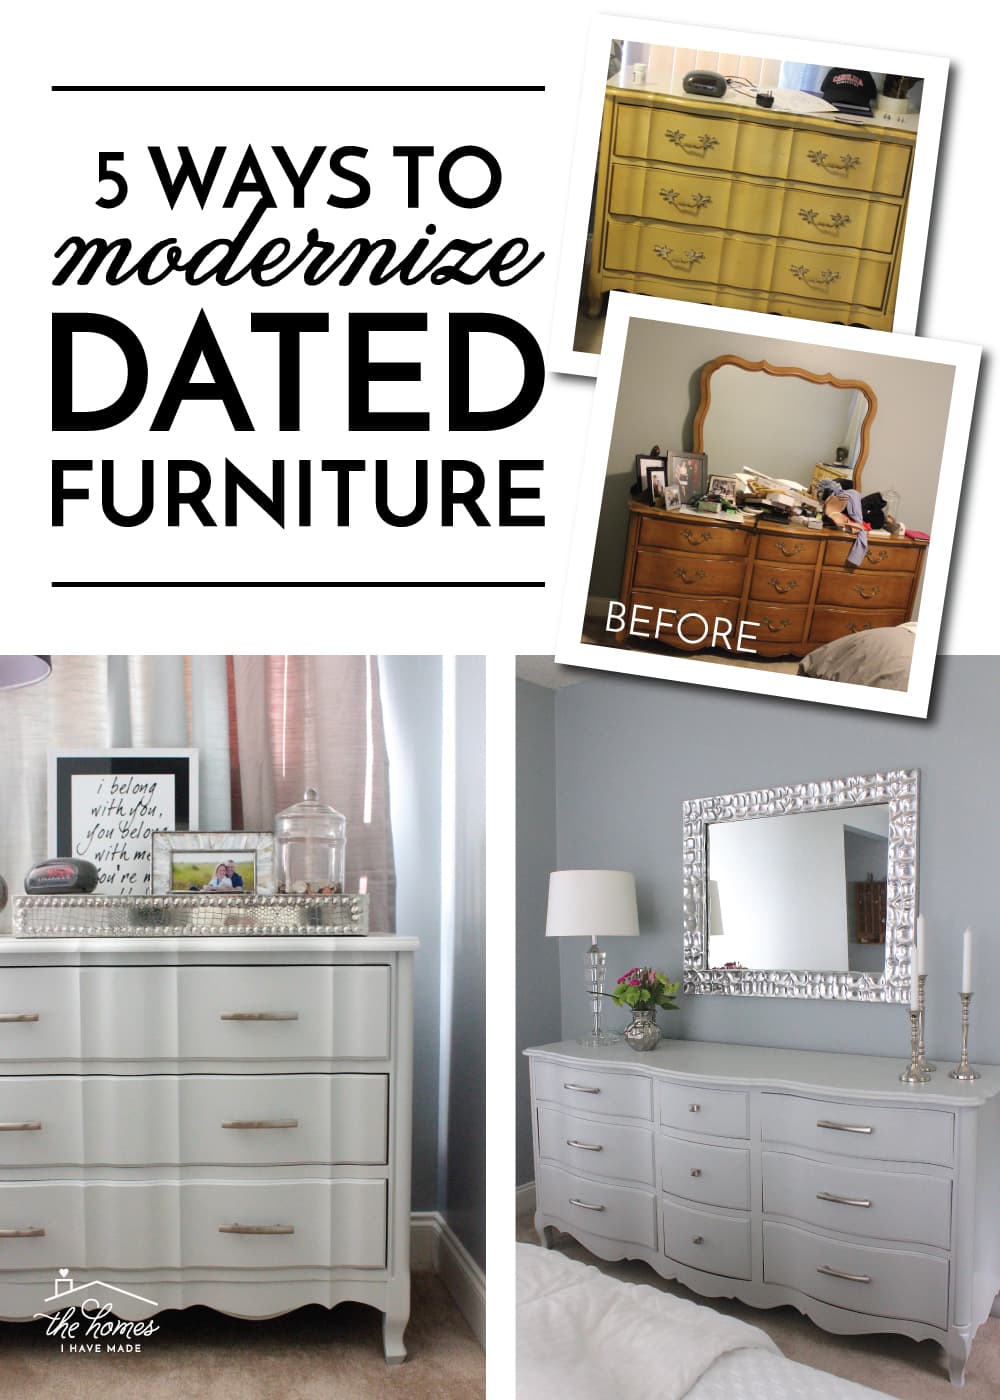
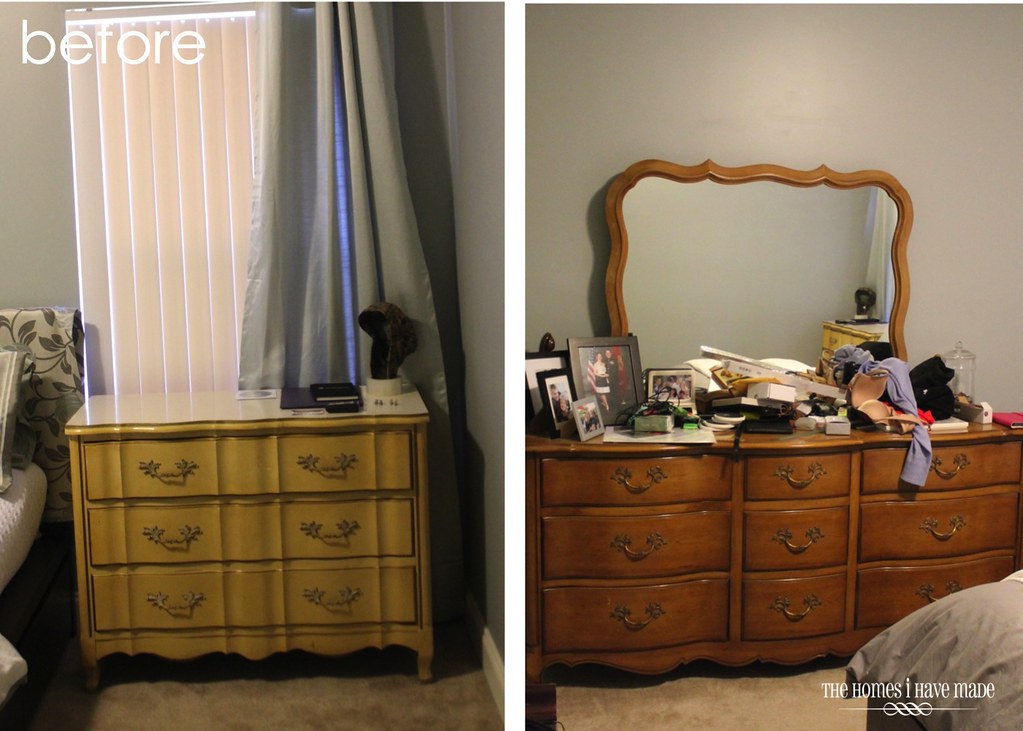
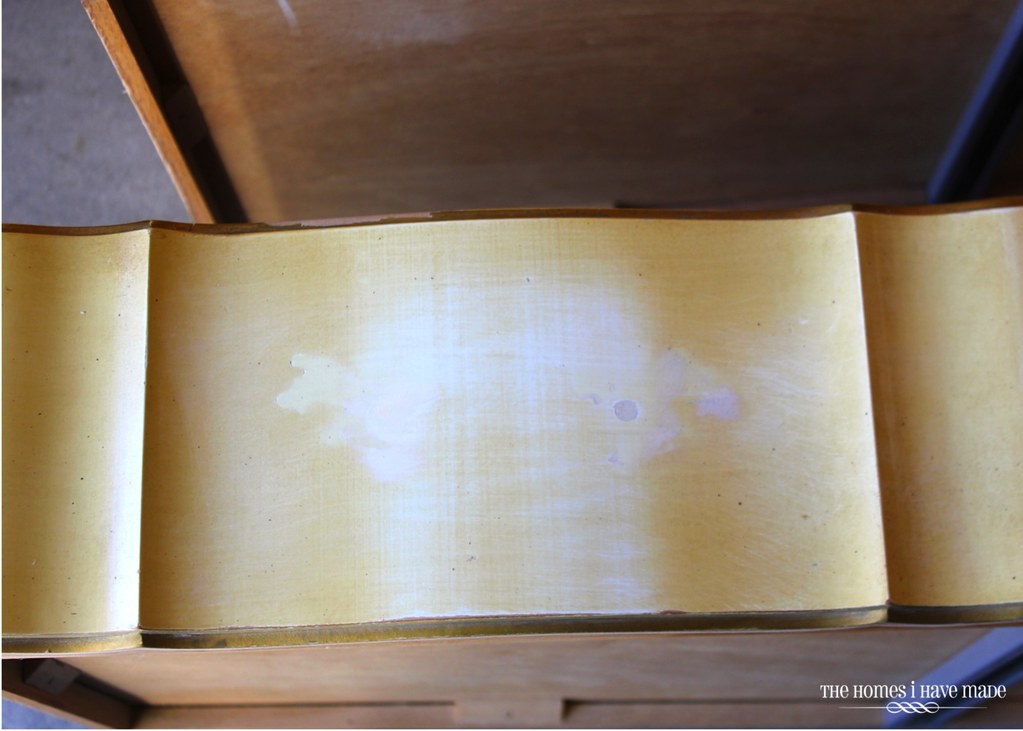
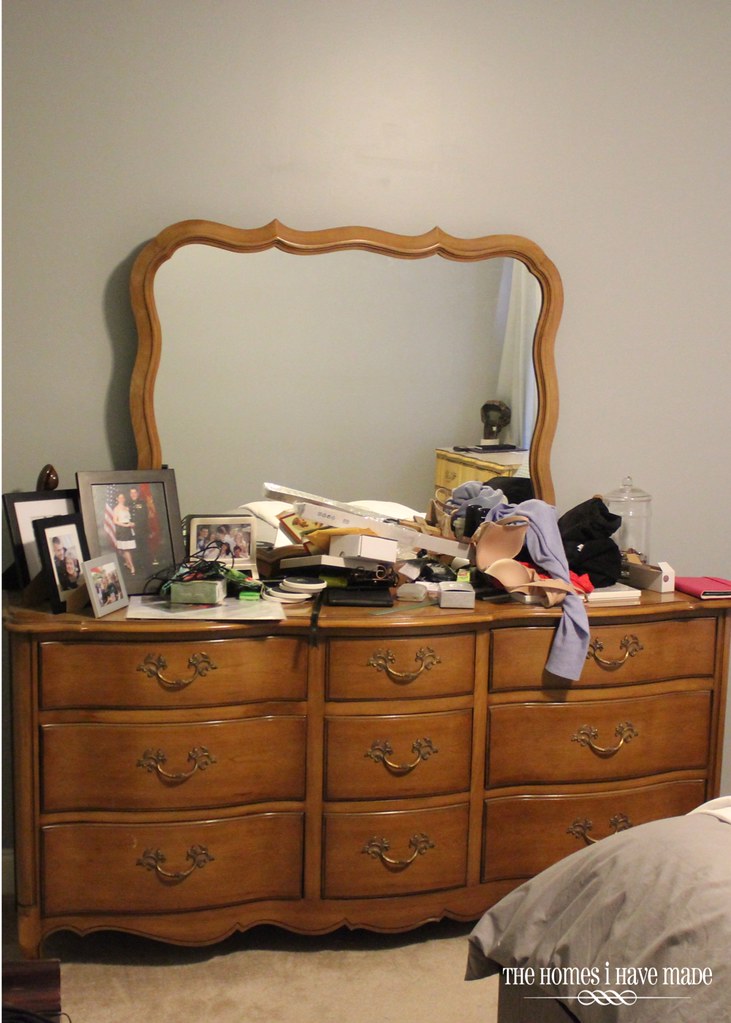
The alternate title for this post could also be “How to Coordinate Your Mis-Matched Furniture!” These are the two pieces we bought for our bedroom upon moving into our new house. We bought the bigger French Provincial (below right) from a local upscale consignment shop for $300; the ugly little yellow one was $100. I liked that they both had that French provincial design without being too matchy-matchy. Even though both pieces were in good condition and were reasonably priced, they needed a big ol’ overhaul before they would work well in our house!
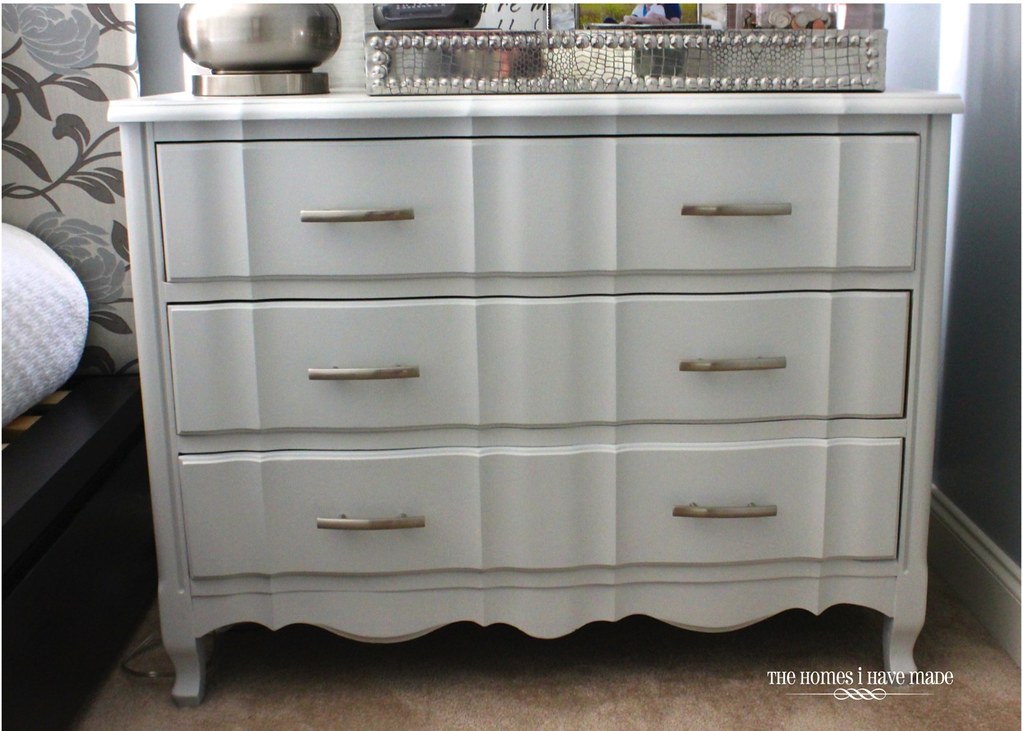
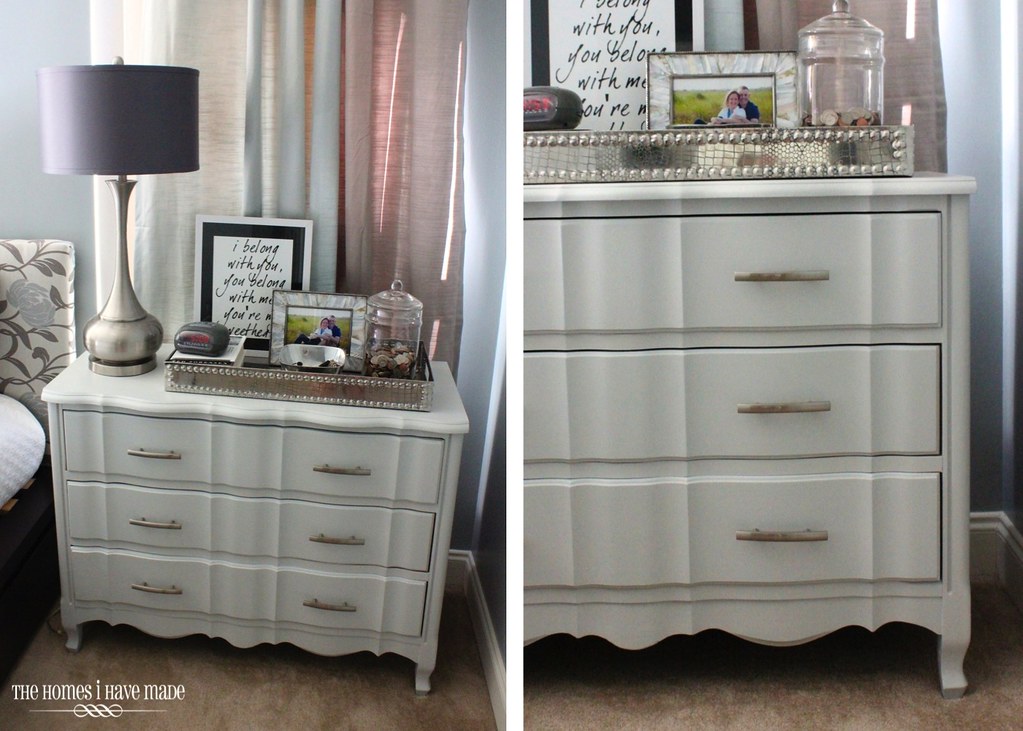
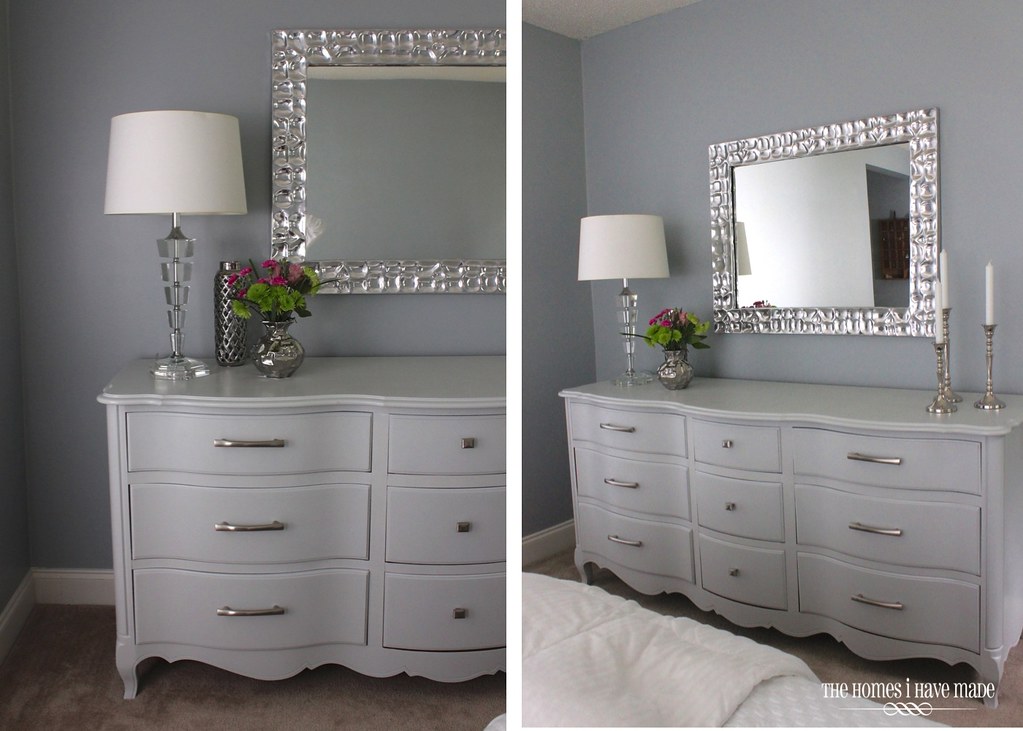
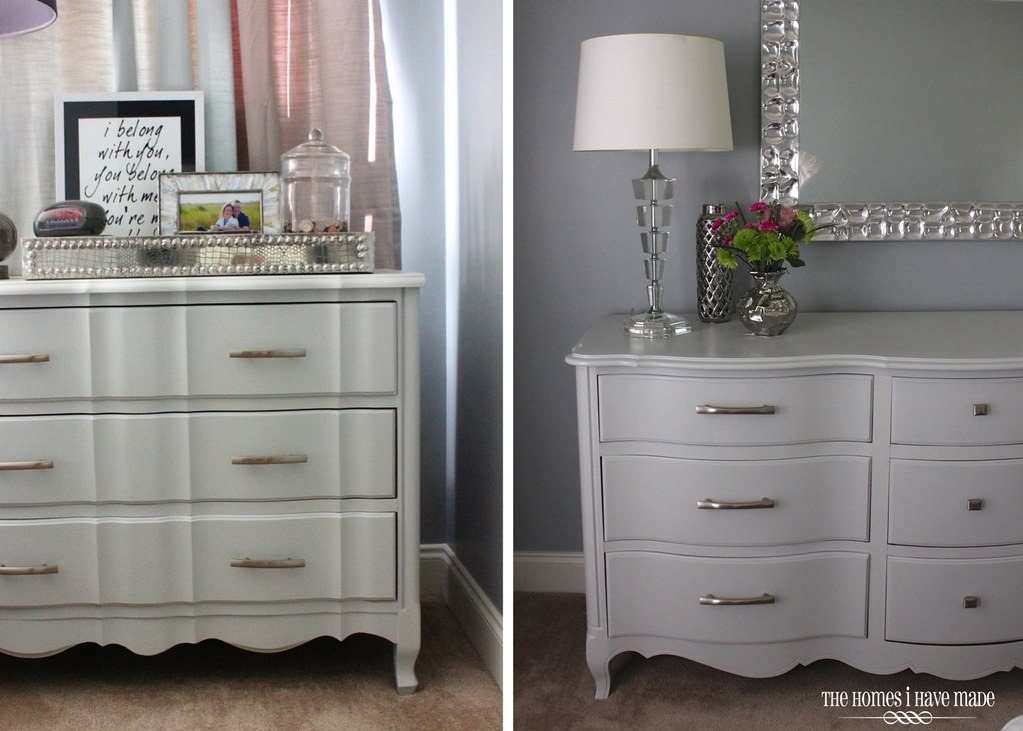
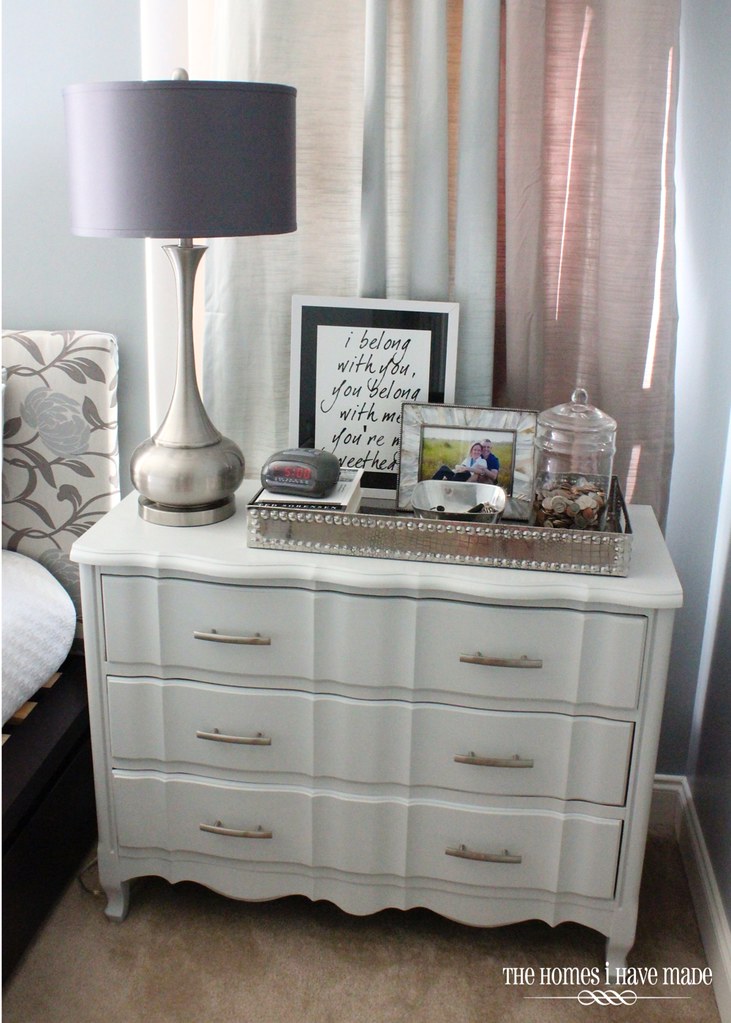
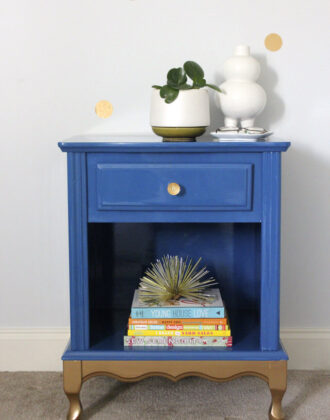
It’s been a while since you saw her, so I just wanted to recap. Here’s how the Little Sister dresser turned out: sharp, classy, and perfectly suited as a side table.
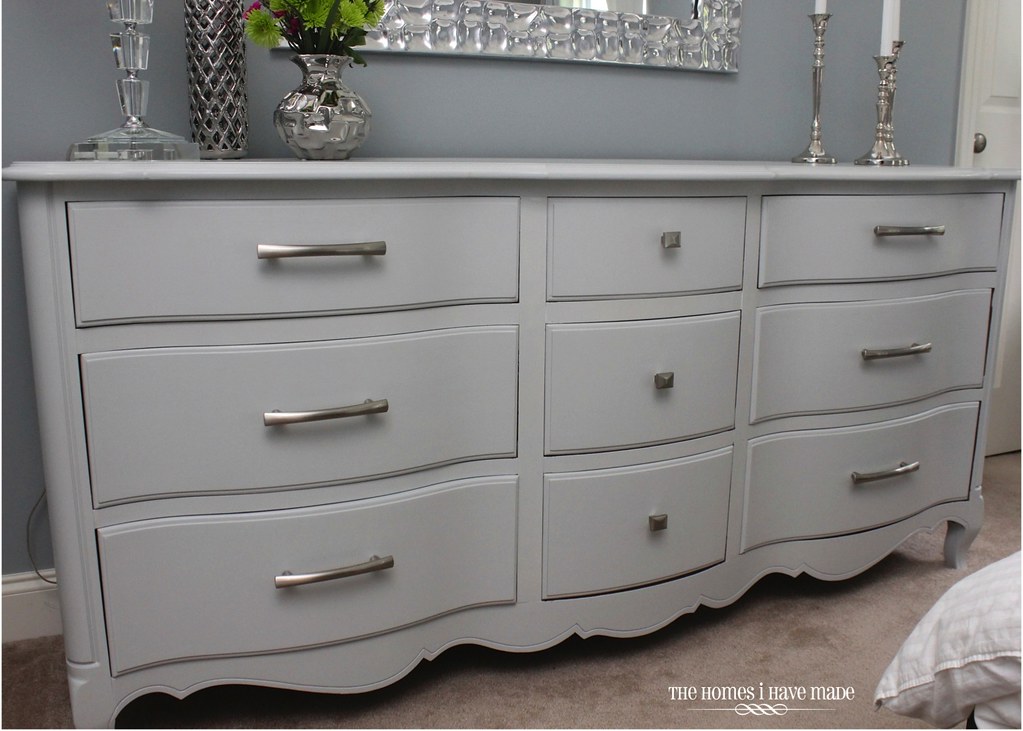
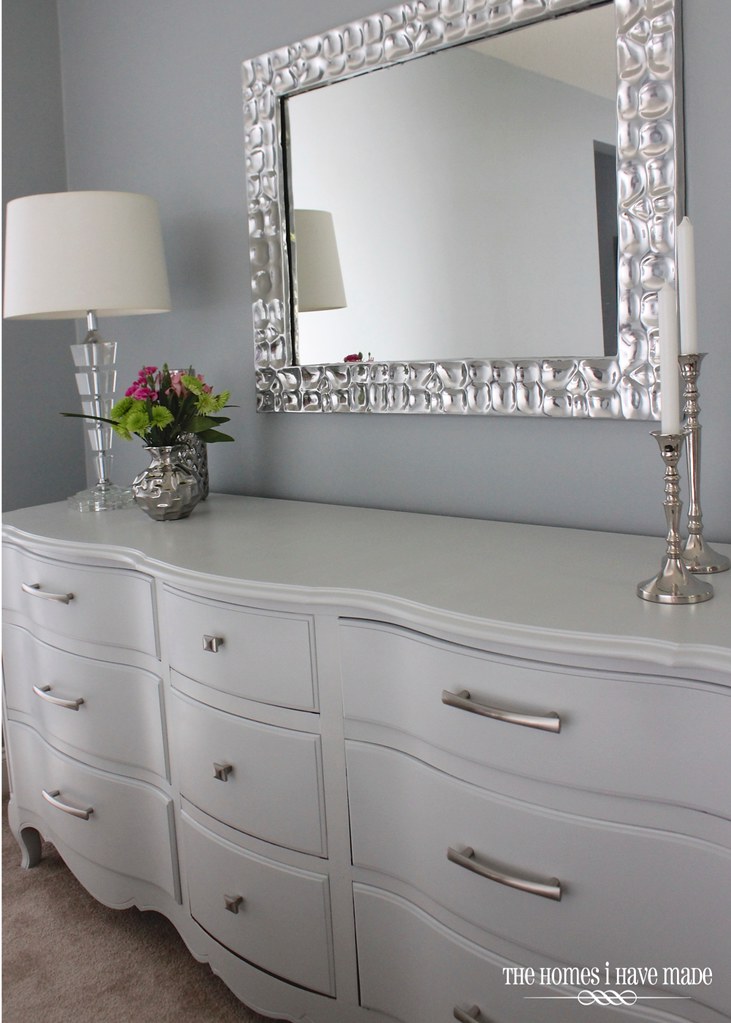
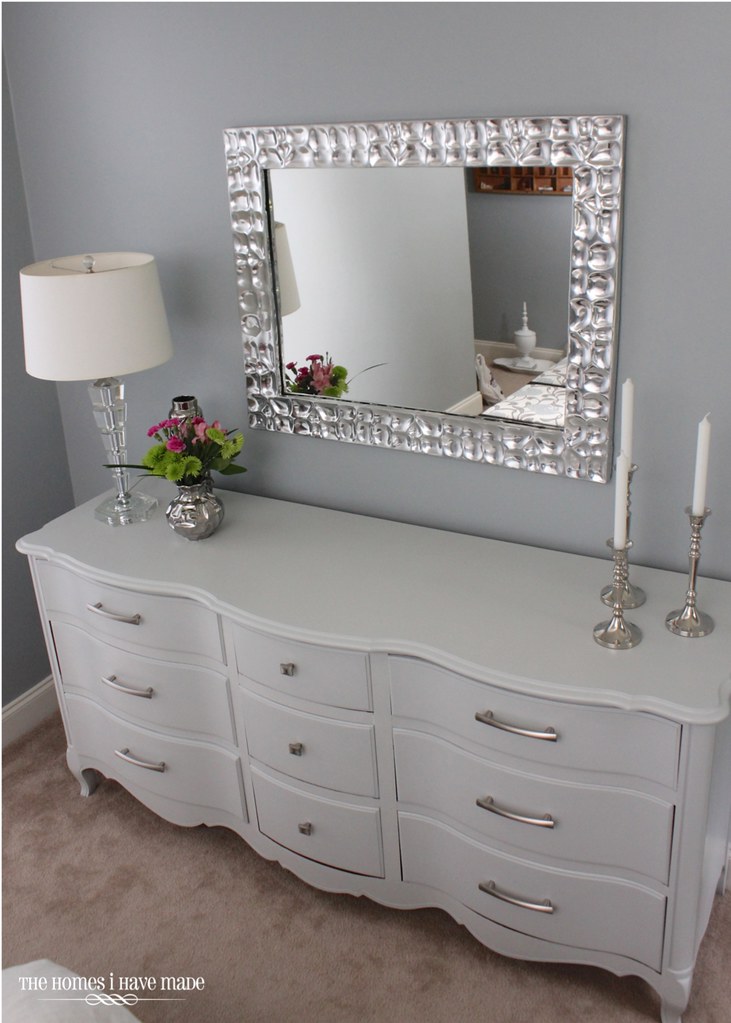
Her Big Sister just made her debut here on the blog this week, and she is probably the best furniture transformation I have pulled off to date!
Supplies Needed
- Paint (Unfortunately, I don’t have a specific paint color to reference; I used a mix of some grey and white paint I had on hand)
- Sanding block
- Wood filler
- Oil-based primer
- 4″ foam roller
- Tack cloth
- Floetrol
- Clear Soft Wax
- Polyurethane topcoat
- Shelf liner
- Hardware: smaller handles used on Little Sister, bigger handles & small square knobs used on Big Beauty
Instead of giving you a basic step-by-step tutorial on how I painted these two, I thought I would instead show you the main five components I changed up to bring these dated and sad pieces into our house’s modern design!
1. Paint It Light & Bright
This one is probably a no brainer, but it’s also the one element that has the single greatest impact: paint. And not just any color paint, but light and bright, cool and crisp grey. I was so tempted to go white on these pieces (because they would forever match everything), but the grey just felt so much more chic and modern to me. The white had the potential of feeling a bit too country.
Here’s my basic process:
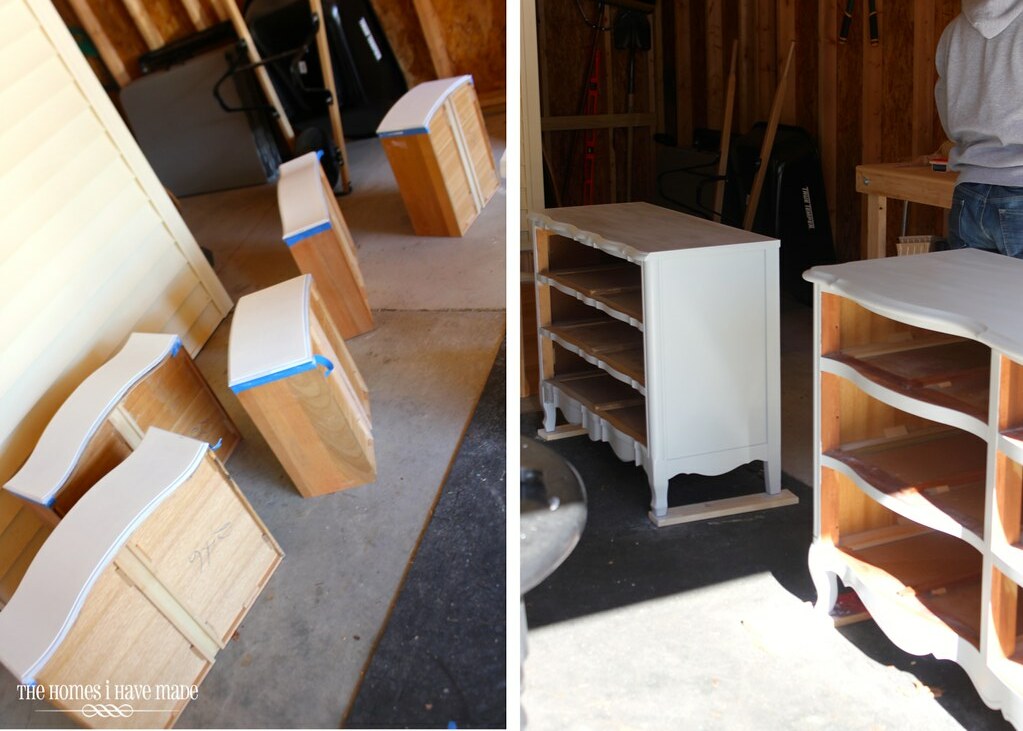
- I didn’t bother sanding these dressers, but I did fill all cracks and dents, as well as all the hardware holes, with wood filler.
- Both dresser frames, as well as all the drawers, received two coats of oil-based Zinsser primer, rolled on with a 4″ foam roller on the large flat surfaces, and brushed on in the smaller areas. I gave each piece a light sanding after each coat and wiped it clean with a tack cloth.
- I then mixed equal parts white and grey paint (both leftover from previous projects) and gave all the painted surfaces two clean coats of paint. (Pssst – not pictured, I mixed Floetrol into my paint to eliminate brush strokes).
- After the dressers were fully dry, I used Clear Soft Wax (with the brush) to apply two light coats on all the dresser surfaces (and buffed in between).
- After the pieces were moved into the room, I noticed the top surfaces were not as durable as I hoped. So that we could put things down on the dressers without worrying about chipping or scratching, I gave the top surfaces of each piece two light coats of Polyurethane topcoat satin finish using a foam roller.
Although it seemed like a ton of work to do both at the same time, it was completely worth it to prime and paint everything at once, as well as clean brushes and trays, etc all at once!
2. Add New Hardware
As I mentioned above, before I set to work on priming and painting the drawers, I removed the hardware and filled every last hole with wood filler and sanded them smooth. I hadn’t yet picked out the new hardware when I started the makeover process, and I didn’t want to restrict my choices based on where my holes were. It was easiest just to fill them, leaving me to choose any hardware I wanted.
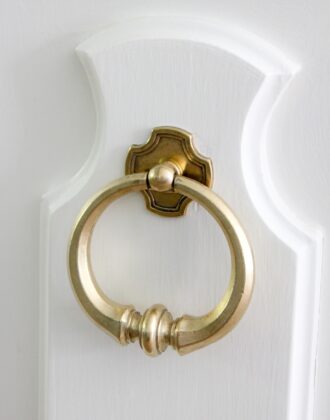
I didn’t do a ton of hardware research or shopping because I found exactly what I was looking for at Lowes. I selected some smaller handles for the Little Sister because two handles were going on each drawer. Big Beauty got bigger handles for the larger drawers and small square knobs for the smaller middle drawers. I loved that all the hardware coordinated without being the same on every single drawer!
While new hardware can be pricey (especially when you need 15 pulls!), next to paint, it makes the most dramatic difference in a country-to-chic makeover. The new hardware totally completed these dressers and were worth every penny!
3. Mix Up the Mirror
If you’re looking to do a dresser update and aren’t quite ready to do a full-on makeover, try switching out the mirror. Chances are, your dresser came with a matching mirror that attaches to the back. Ours’ was no exception.
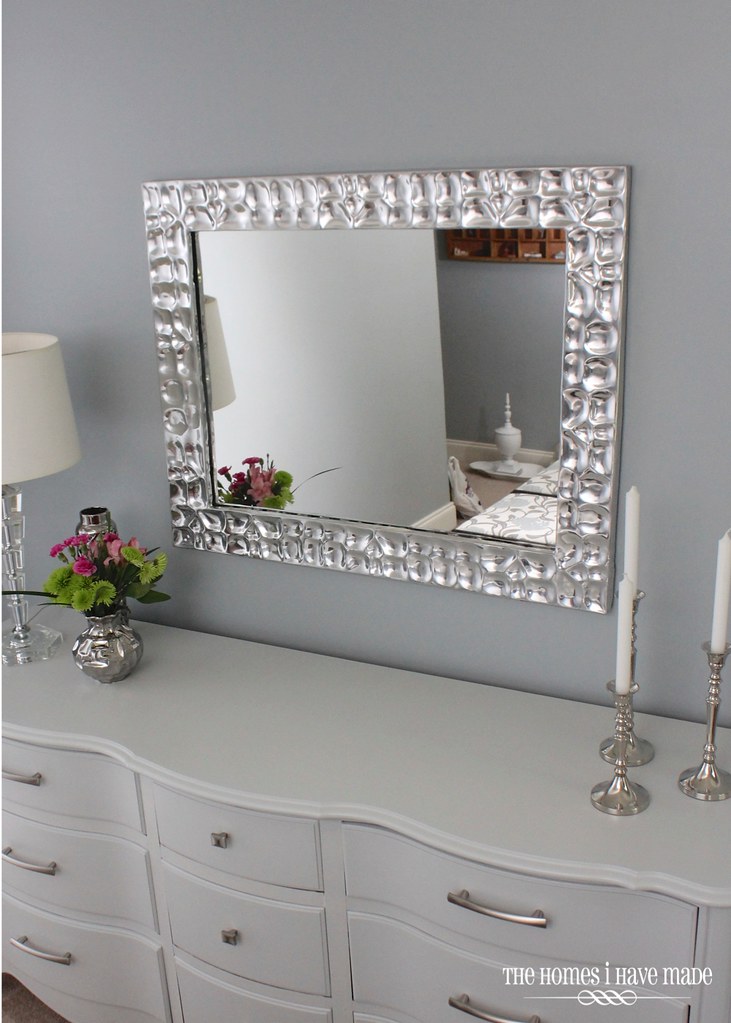
The second we bought the dresser, I knew the mirror was coming off (it went to a great new home in a friend’s house!). Although it took a while to find a mirror in the right size with the right amount of glam; once we did, our transformation was complete. Having a different mirror above your dresser gives that “collected over time” and eclectic feel. This mirror was found at HomeGoods for $120.
4. Styling Can Change Everything
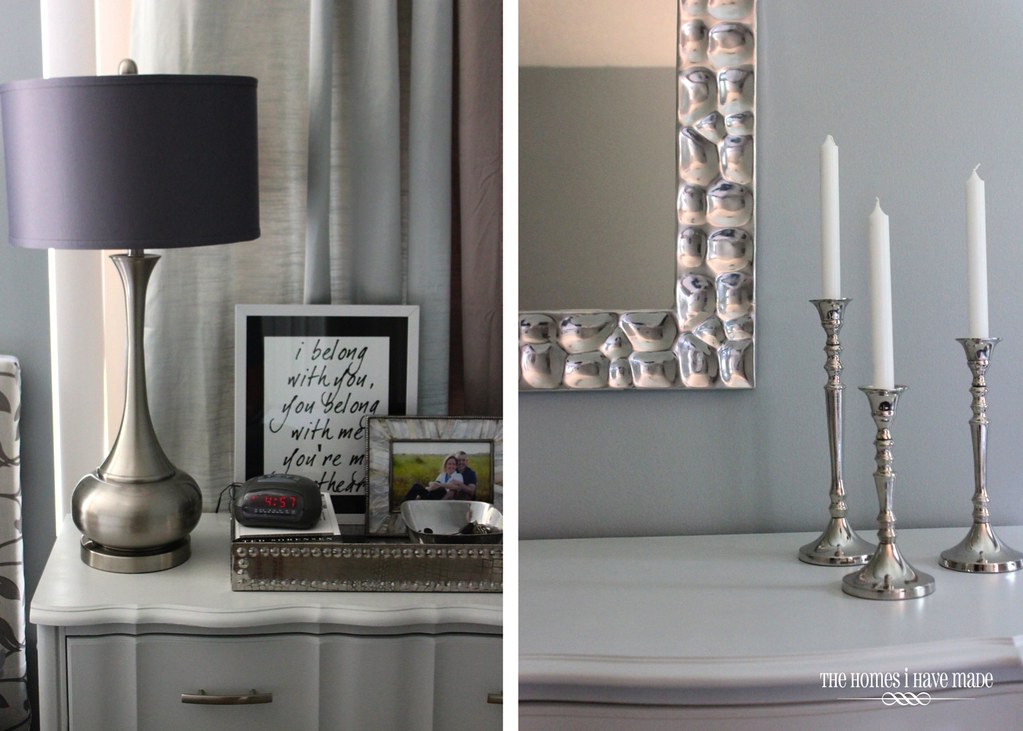
Another way I modernized these pieces was not only what I did TO the surfaces, but what I put ON that surfaces (i.e., accessories). Clean lines, metallic finishes, and no clutter worked wonders in making these pieces feel fresh and hip!
5. Add Graphic Details
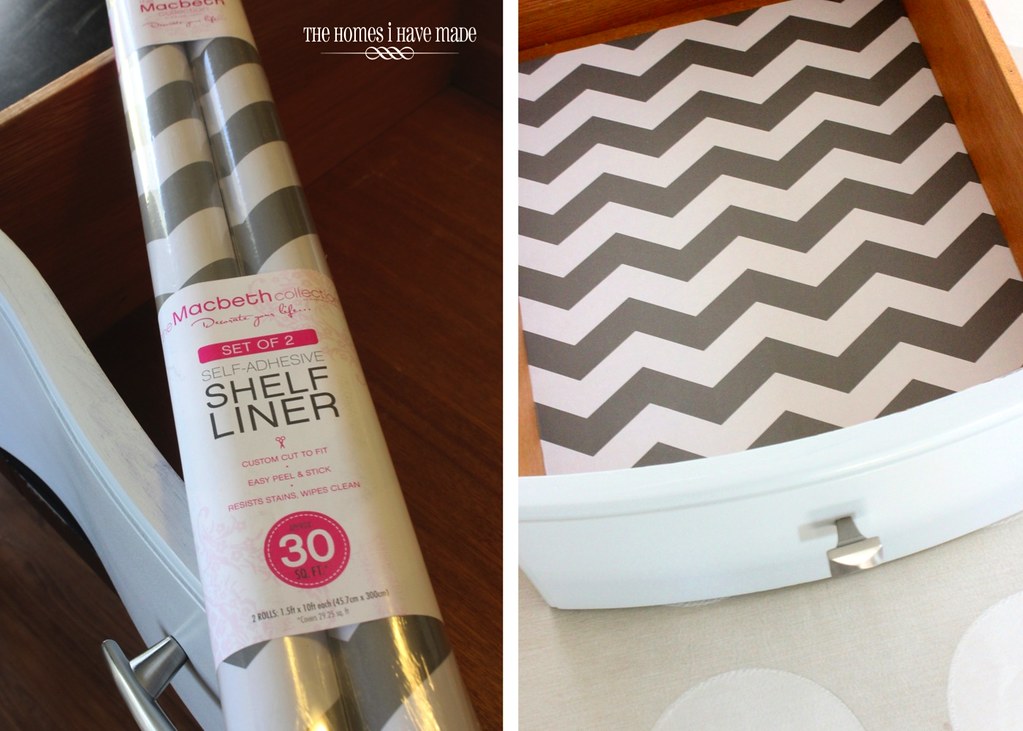
Last but not least, I added some graphic details to really drive home that modern feel. Some grey and white chevron shelf liner gives a nice graphic pop every time we open the drawers.
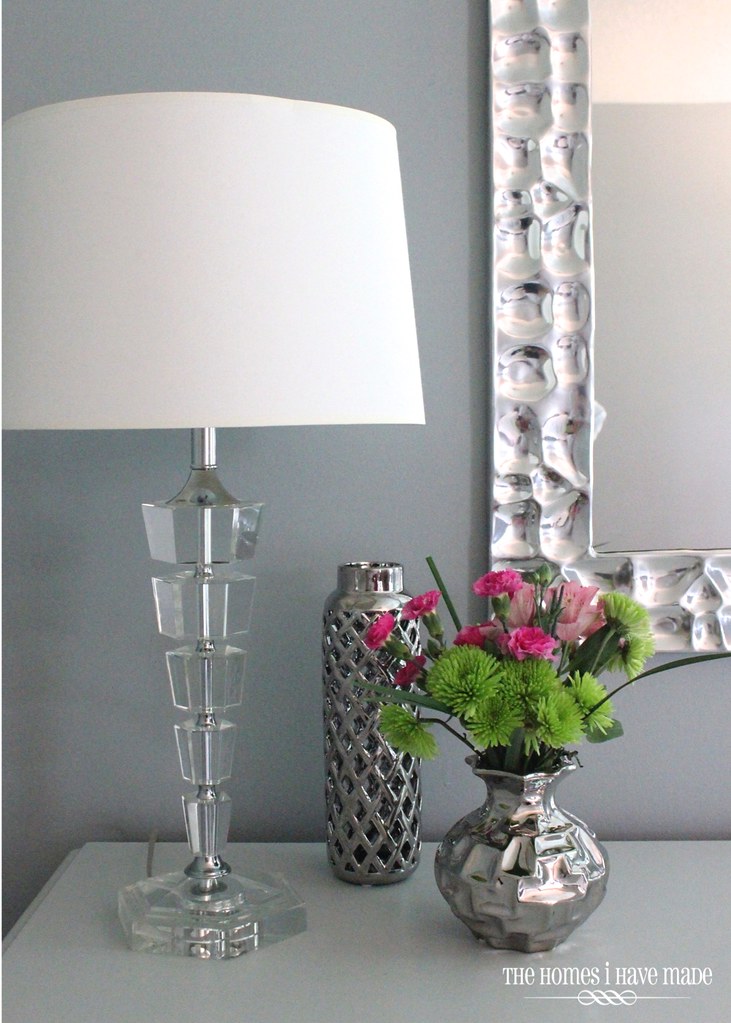
A glass lamp and geometric vases help bring some edge to the classic lines of the French furniture.
All in all, the transformation of these two dressers from dated and discarded to charming and chic has been one of the most gratifying furniture projects I’ve done yet. They were a big undertaking (I think they took me two weeks to complete) and seemingly took forever to put the finishing touches on (accessories, etc); but I can guarantee they will be in our home for a long time to come!
Megan



39 Comments on “5 Ways to Modernize Dated Furniture”
Ok I am total love with this room and what you did with the dressers. I have the solid dark wood ones that belonged to my mom and my daughter when they were alive and I have been wanting to do something with them but have refused because they were my mothers and daughters. However, I think that they would approve of this type of makeover. Thank you for sharing.
Also question? Did you make the headboard by chance? If so do you have the tutorial on that?
Both of those dressers look amazing but I love love love the Big Sister. And that mirror??? FABULOUS! Even though that look (the moderny, chic, glam) isn't really my style – I'm honestly in love!
Runt
[email protected]
http://www.runtspickins.wordpress.com
I read your article and get very important information in addition if you have any query about information technology
office furniture installation company Chicago
Hey Megan, your work on the furniture is impressive and i believe no one will be able to generate the same effect. It's good that you've added all the pictures and material of use. Thanks for sharing a great post. I was looking for some great idea that I can use with old furniture to make it look better and new. You just can't throw old furniture as a waste, I believe making some changes will help and will make it look better.
Beautiful – I have a dresser just like your big one – it was my mother's and I've had it since 1977! One of these days i'm gonna paint it! pinky swear! Thanks for the info!
Thanks for the tips! super helpful! I love your style and how adventurous you are in your make-overs
Furniture sale in Dubai | Buy furniture online Dubai
I love your work.What paint I must buy use,because we don’t get that paint in South Africa Capetown.thanks
You used oil based primer Zinsser, but do you use a latex or oil based top coat with the Sherwin Williams/Maetha Stewart paint mix?
Thanks for your comment!
I used the oil-based primer and then latex paint for the grey (Sherwin Williams/Martha Stewart combo) and then for the final protective topcoat, I used a water-based polyurethane. Although you’re not technically “supposed” to layer latex over oil, it hasn’t been an issue in any of the furniture I’ve done!
Hope that helps!
Megan
Brilliant work. Website smacks of design driven thinking, too!
What is the paint color used on the walls on the room?
Hi Amber!
Thanks so much for your comment! The paint color see in this post is Martha Stewart’s Winter’s Day. I don’t think Home Depot carries the paint chips anymore, but you should be able to ask for it!
Good luck!
Megan
I have a little sister dresser, but I wanted to paint it black or a steel gray for my son. Do you have suggestions of colors?
Hi Lisa,
Thank you so much for writing. Unfortunately, I’ve only painted one thing (a set of bookcases) dark and used just plain black, so I don’t really have any great suggestions for you! I’d run by the hardware store and pick up a bunch of paint chips and bring them home to see which ones you like best – or even get a few little test pots and see how you like the different colors on your dresser. I think the little one would look amazing dark!
Good luck and thanks for commenting!
Megan
These are beautiful transformations! Would love to hire you!!!
Thank you so much, Laureen! These were definitely fun and fulfilling to do. I can’t seem to carve out the time for a furniture makeover these days…but seeing these pieces of mine sure make me want to!
Thanks for comment and have a great night!
Megan
Where did you find that beautiful tray? Beautiful work❤
Thank you so much, and I am so sorry it’s taken me this long to get back to you! The tray was a HomeGoods find…every now and then I still see similar items, so keep your eyes out!
Thanks!
Megan
I love the paint color on the walls!! Do you know what paint brand and color that is?
Thank you!
Meagan
Hi Meagan!
Thank you so much for your comment. The wall color is Winter’s Day by Martha Stewart. The Martha Stewart Paint Line is no longer in the paint section at Home Depot, but you can still request the color. I loved that color so much (we’ve since moved); it had the perfect balance of blue and grey!
Hope that helps!
Megan
Thanks for 5 great tips to remodernize my furniture. Good job on the site!
I’m going to do my first every DIY dresser makeover! This post was extremely helpful! Do you know the hardware brand/style that you used? My dresser is very similar to yours. Thank you in advance!
Hi Jane!
I am so glad you are inspired to makeover your dresser! Careful, painting furniture can get addicting 😉
All the pulls I used on this dresser were from Lowes. You can see the full tutorial here: https://thehomesihavemade.com/2013/10/a-modern-french-provincia/
Hope that helps!
Megan
Truly lovely! It makes me tired to contemplate all the work that went into these pieces but you couldn’t hope for better results. WELL DONE!
Thank you so much, Jan! Yes, both pieces were quite a bit of work, but they were so worth it! The response to these makeovers has been so kind and generous….glad the online world loves them as much as we do!
Hope you had a great weekend!
Megan
Your room is so serene! It is very spa-hotel like (what I imagine a spa hotel to be like, ha!) but better because it has the personal touches that make it warm and serene all at once. I think my favorite accent is the rectangular mirror with dimples. It is glamorous and so pretty, and I love everything you added!
Thank you so much for leaving such a nice comment, Sunshine!
I loved this room so much and hated to take it apart when we had to move last year. I’m still struggling to regain that “serene” look in our current home…getting there!
Thanks for stopping by!
Megan
I have a question. I love the way these turned out. Do u remember how much floetrol u used or the ratio. I never know if people just follow the instructions or if they add more. When trying to paint black on chairs I had it didn’t do much. Fortunately they were just folding chairs that I was testing on before the big job. Still not happy with my job so looking for more options. I actually love the grey and I’m thinking a satin grey may yield a smoother result. Thanks
I just came across this post on my ventures trying to decide what color to paint my bedroom furniture. I love what you have done and I see by the date I am a little late to the party. So, I was wondering if you kept the old hardware that you removed? I have a lingerie chest that matches your pieces & love the hardware. I have been looking for that harware to replace what is currently on my other pieces. If you do still have it would you be willing to sell it?
I purchased what looks like the same hardware at 99 cent knobs site. I haven’t taken one in, but looks like $3.89 at local home store.
This is invaluable information, thanks so much for this blog
Love the look of these dressers. Job well done! I just finished painting a desk using Annie Sloan paint and clear wax, and I think I will follow your lead and use Minwax poly in satin for the desktop.
I just discovered you today and look forward to learning much more from your blog!
Wow! I love how you revamped every piece! You just have the taste! I’ll try to refurnishing my outdated cabinets and dresses. Just Wow!
I know it’s been a few years but I’m curious how well the paint has lasted since you didn’t sand it. I’m really tempted (lazy) to try not sanding first but have heard of horror stories where the paint chipped off almost immediately.
Hi Joanne,
Thanks for writing! Honestly, these pieces are holding up great, as are the other pieces in our home that I painted without sanding. Yes, there are a few tiny chips, but nothing that is noticeable, especially since we’ve moved them across country…twice!
Considering that my factory-finished painted chairs also have chips, I am not sure if you can ever fully get away from chips or scratches on painted furniture, but all in all, I wouldn’t hesitate to paint another piece of furniture without sanding!
Hope that helps!
Megan
Pingback: Introduction - The Architects Diary
I’m amazed at how well those sleek modern drawer pulls work on those French provincial dressers. It must be the “curve” they have in common. I would never have thought to put them together but that is a cool new look!
So beautiful furniture pieces… Thanks for sharing this post.
You go girl!! Totally impressed.