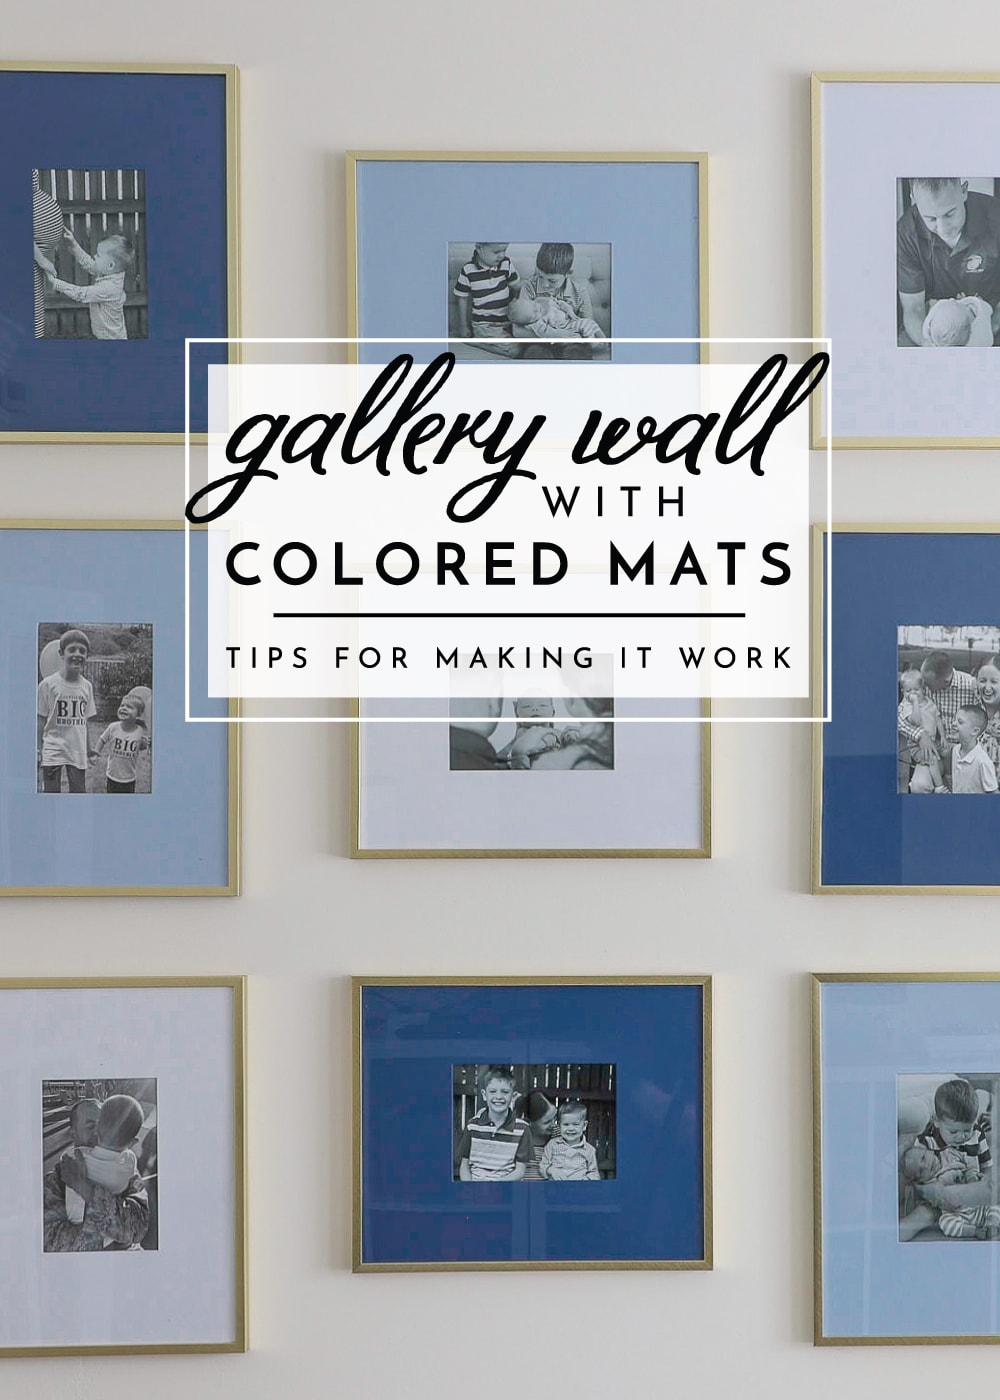
Gallery Wall with Colored Mats – Tips for Making It Work!
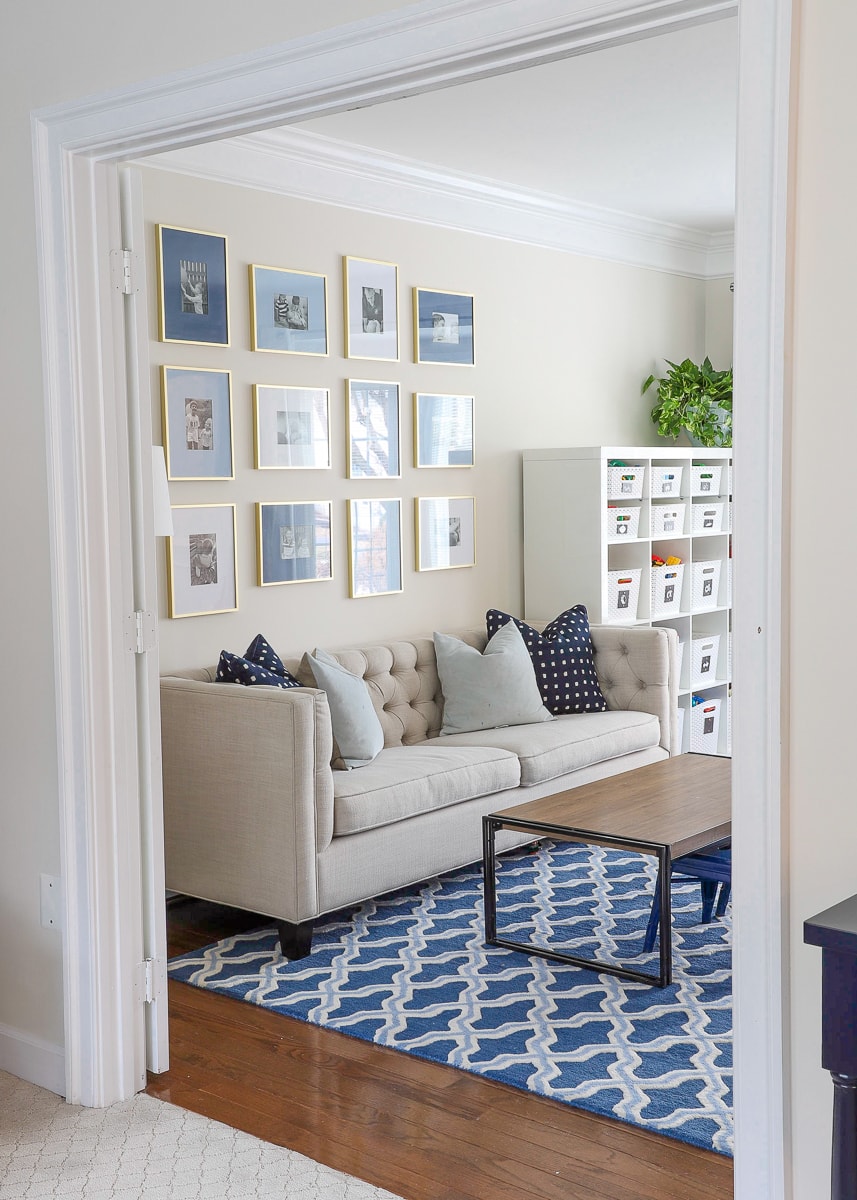
I am so excited to share one of my absolute favorite views in our new home today…and it’s of our playroom wall! A bit random, I know! I love this view so much because not only did this space come together really easily, but the combination of textures, patterns, and colors is exactly what I want for this home. And while I’m simply ga-ga over the rug I picked for this room, it’s really the gallery wall with colored mats right above the couch that truly “makes” the space. Let me show you this little corner of our home, and share some easy tips for pulling off a similar display!
Show & Tell: Our Gallery Wall
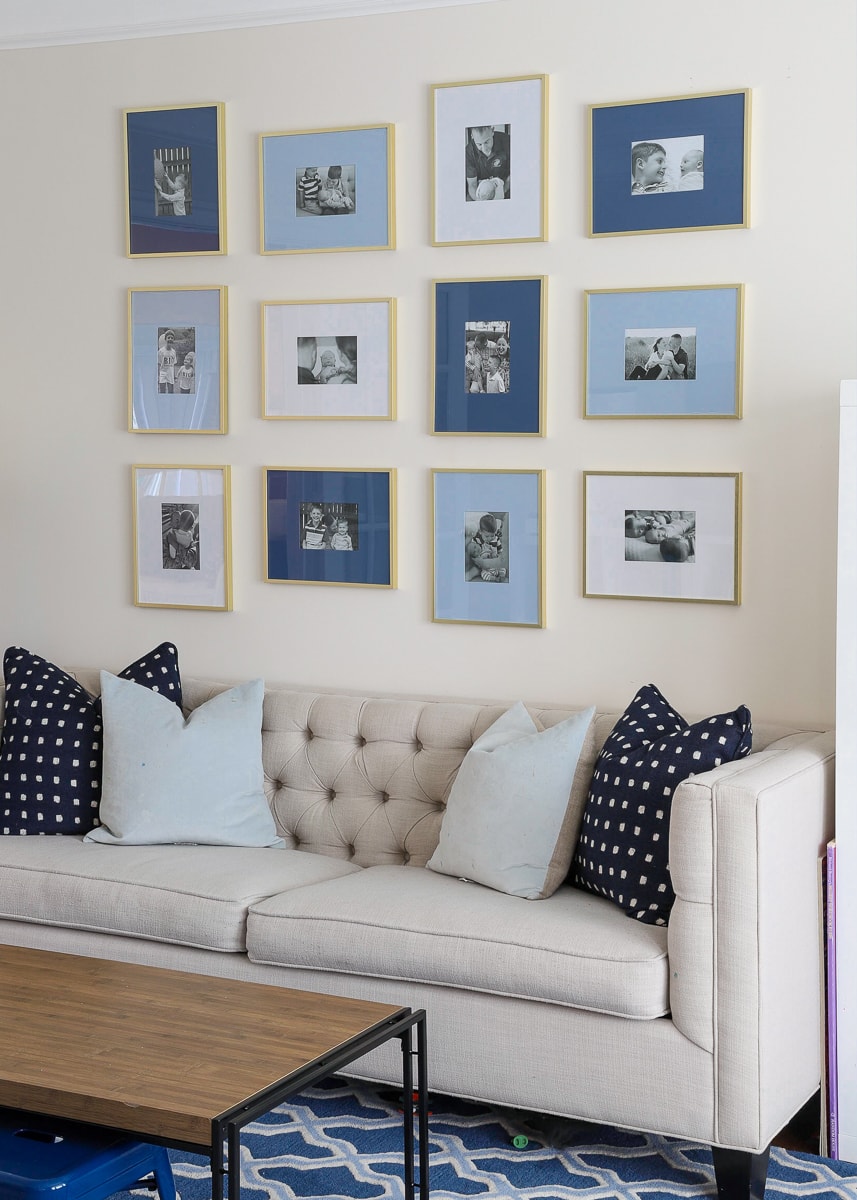
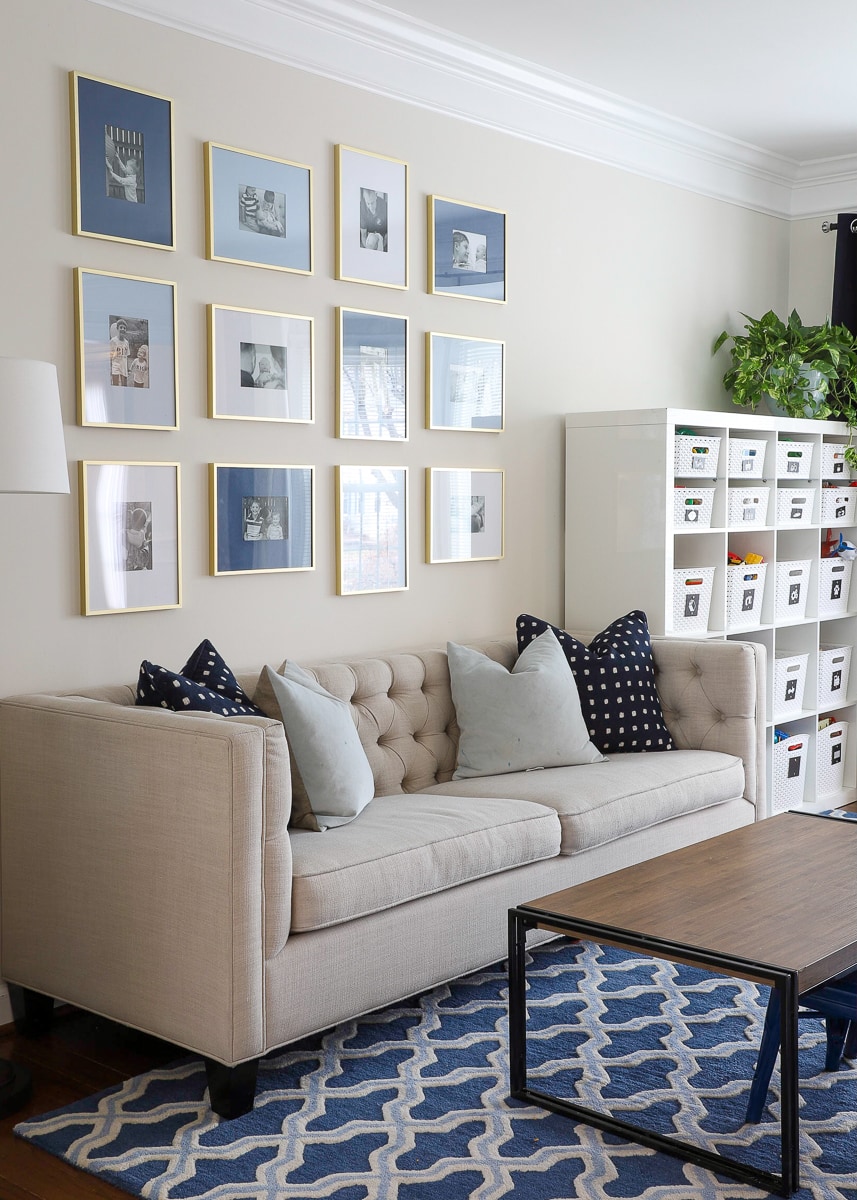
When I call this my favorite view in our home, I really mean it. Our family room and playroom are connected through a set of French doors that are usually open. My “spot” in the family room is on the love seat that is positioned in just a way that I can stare, with big ol’ heart eyes, directly into this room. Here’s my vantage from my favorite chill spot on the couch:
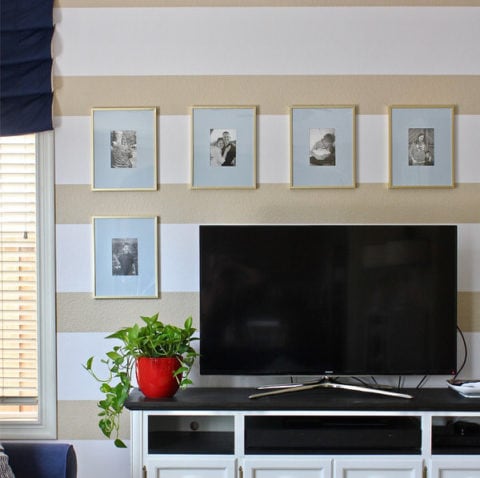
Good right? But let’s zoom in on the playroom a bit!

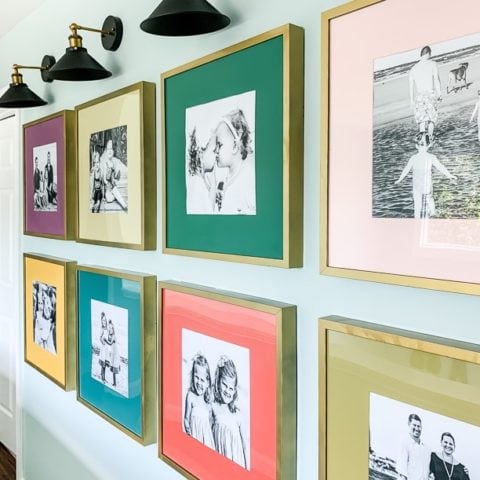
Yes…this is our playroom. But since it’s literally right inside our front door and is connected to our family room where we spend all our time, it was important to me that the space not be just cozy and functional but also cohesive and easy on the eyes.
Although we painted the boys’ bedrooms in this house, we are actually really happy with the neutral wall color throughout the downstairs (shocking, I know!). Since we weren’t going to paint, I went with a strong pattern on the floor with this rug (which is actually on super clearance right now!!!).
Sidenote: You guys know how much I struggle with finding the right rug, but I literally could not love this rug more. In my gut I knew it was the right rug for our home. But I hemmed and hawed over it and almost didn’t get it because it cost more than I usually spend on rugs (it wasn’t on clearance like it is now). But Greg suggested that buying really cheap rugs might be why I am always so disappointed, so we went for it. This rug is thick, plush and the colors couldn’t be more perfect for our space. And the trellis design is just enough for this pattern-loving girl without overrunning the room!
With so much pattern going on the floor, I didn’t want to go too crazy on the walls but the big open space above the couch begged for for something. None of our large art pieces were right for the space, but I will admit the “clutter” of gallery wall sometimes stresses me out.
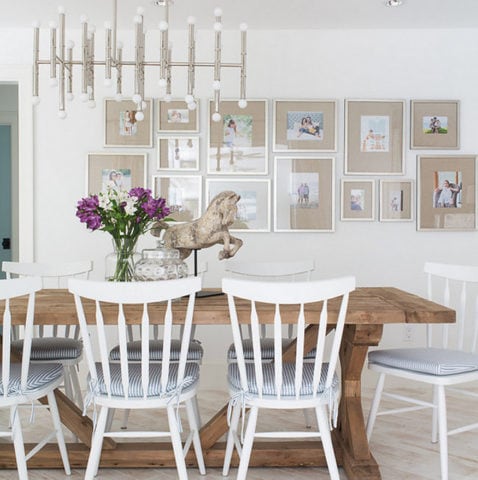
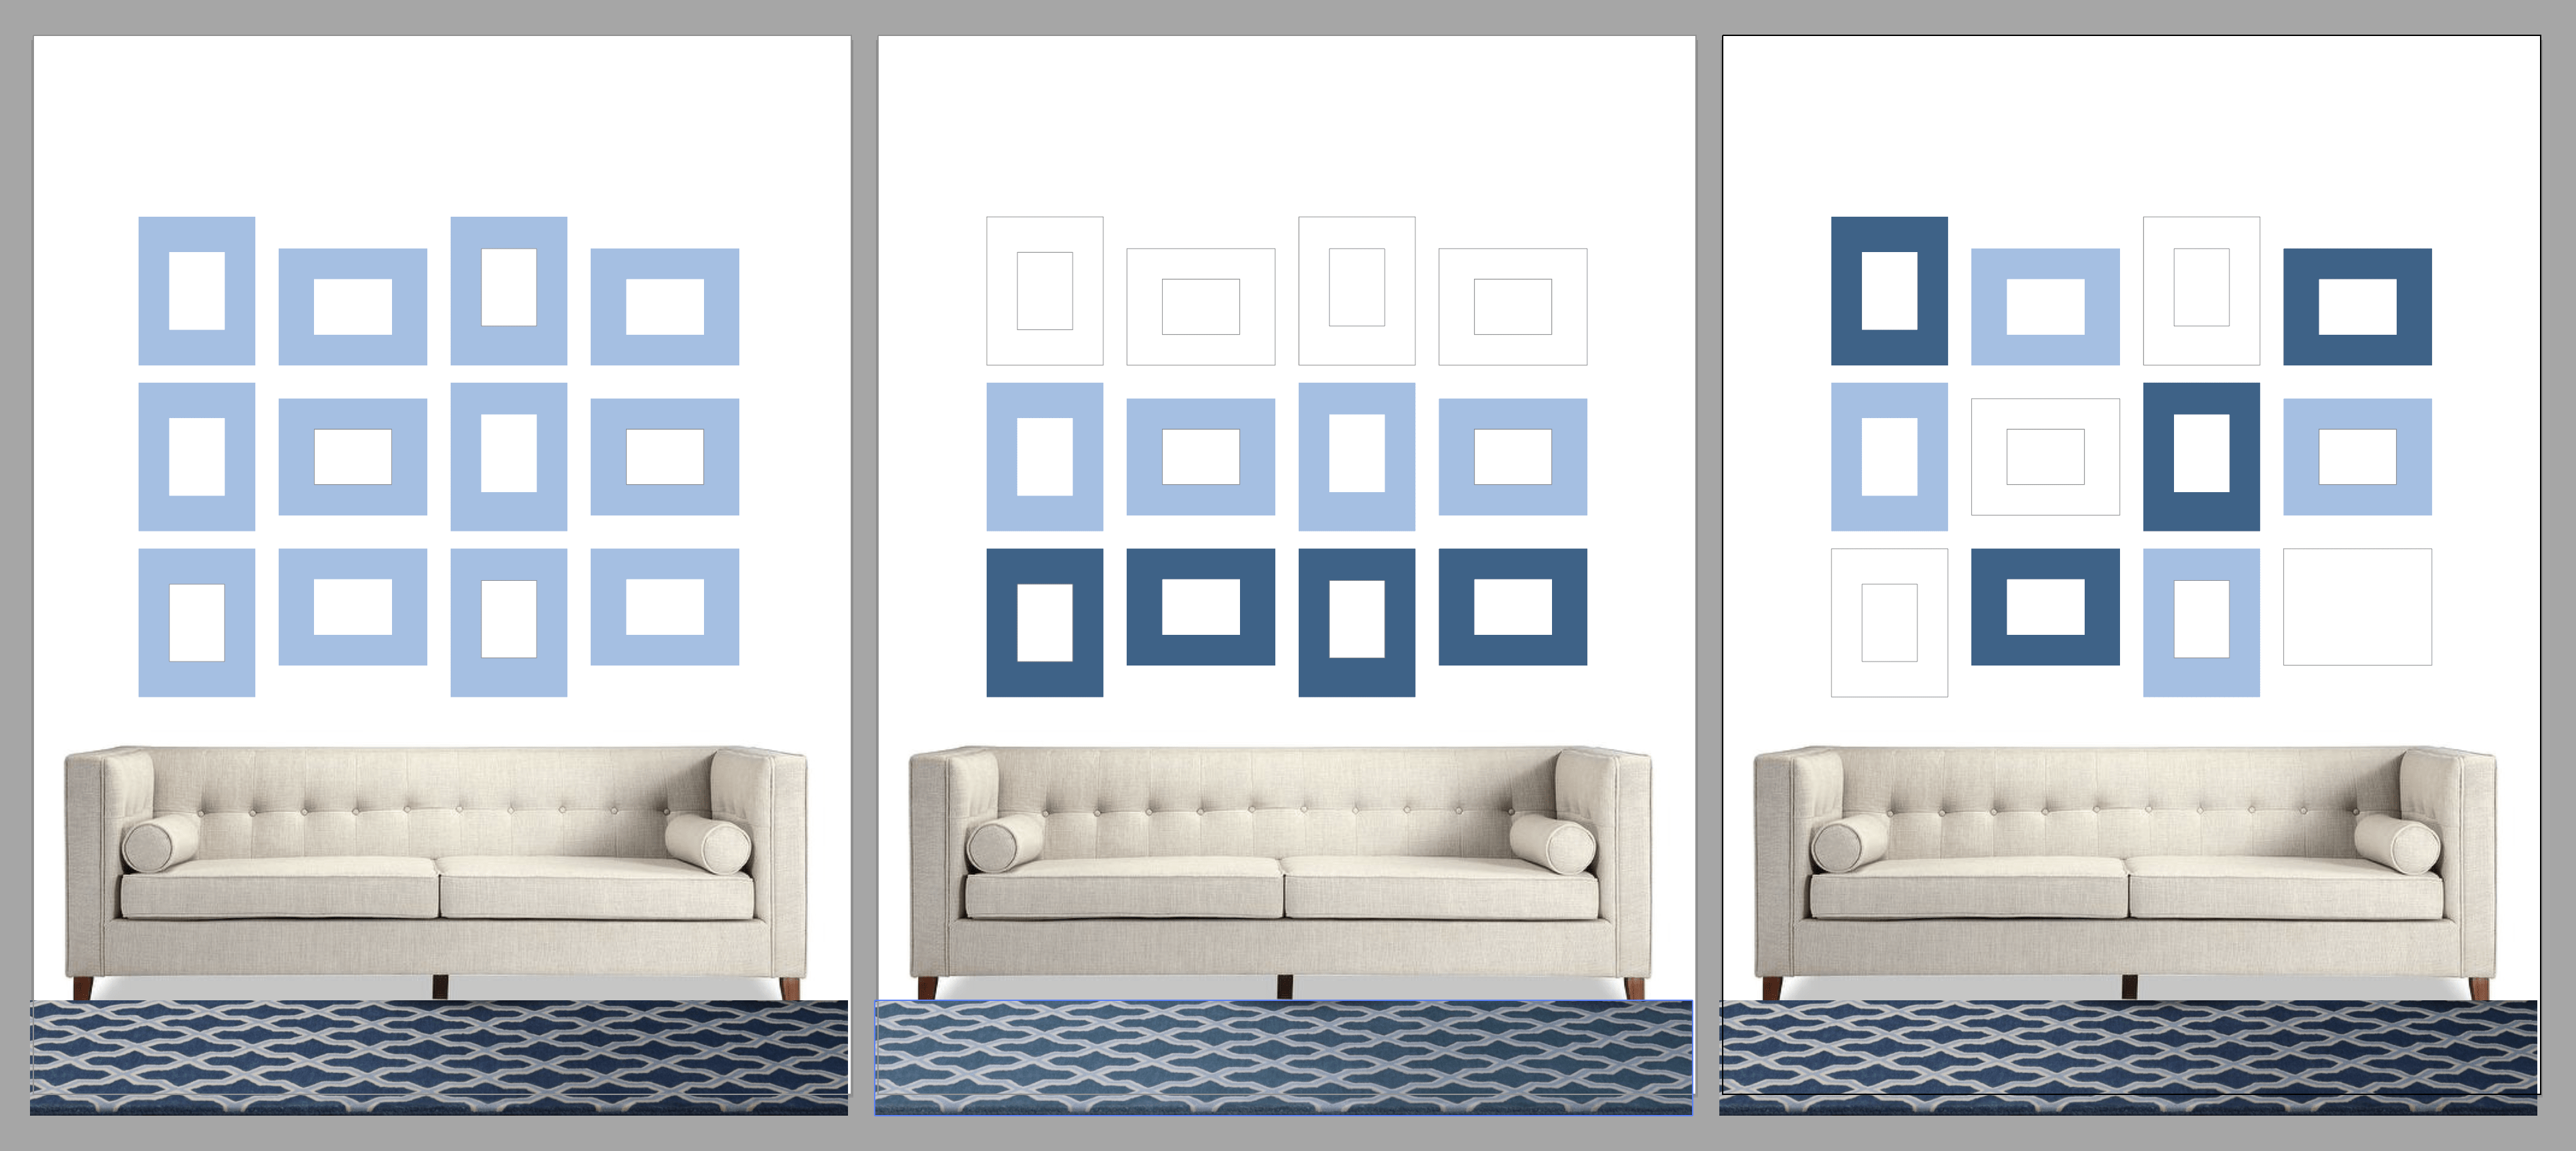
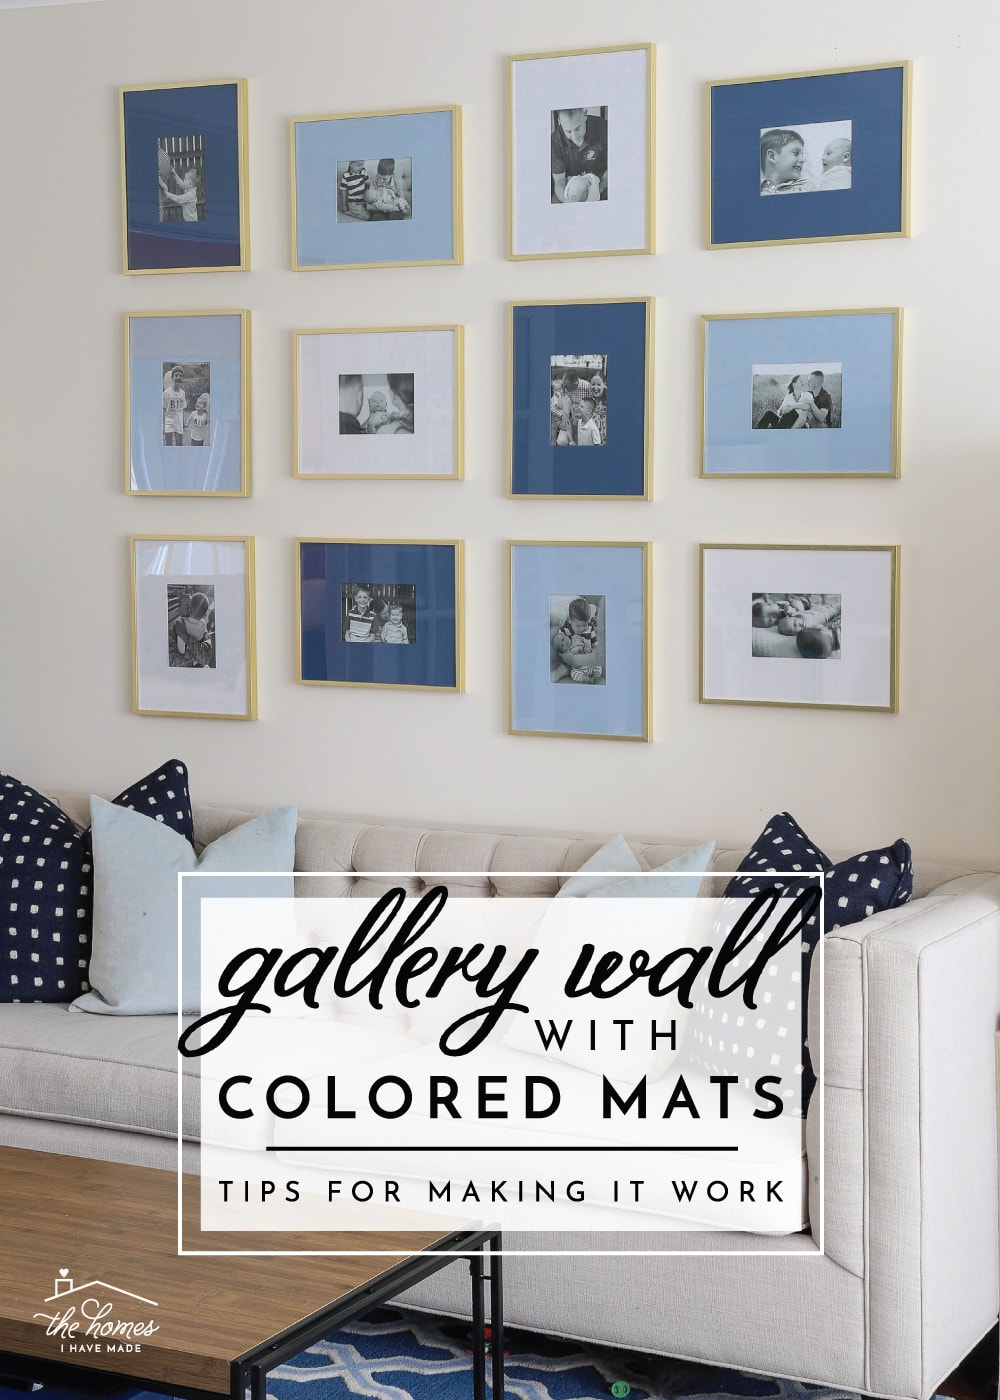
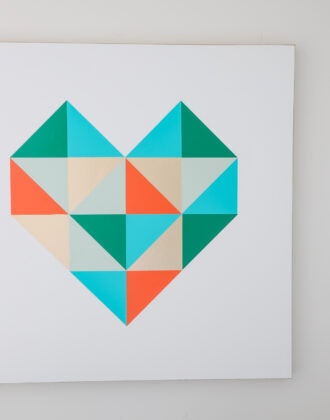
Then I, yet again, came across this image on my all-time favorites pin board, and started considering colored mats for our collection of gold frames. I had a hunch colored mats would give just enough personality to the space without making it feel cluttered and messy.
Want to save this post?
Even with the paint in hand and all the frames disassembled, I almost chickened out and kept the mats white out of fear of it being just too much visually with the rug. But knowing I could always shift back to white mats, I decided to go for it.
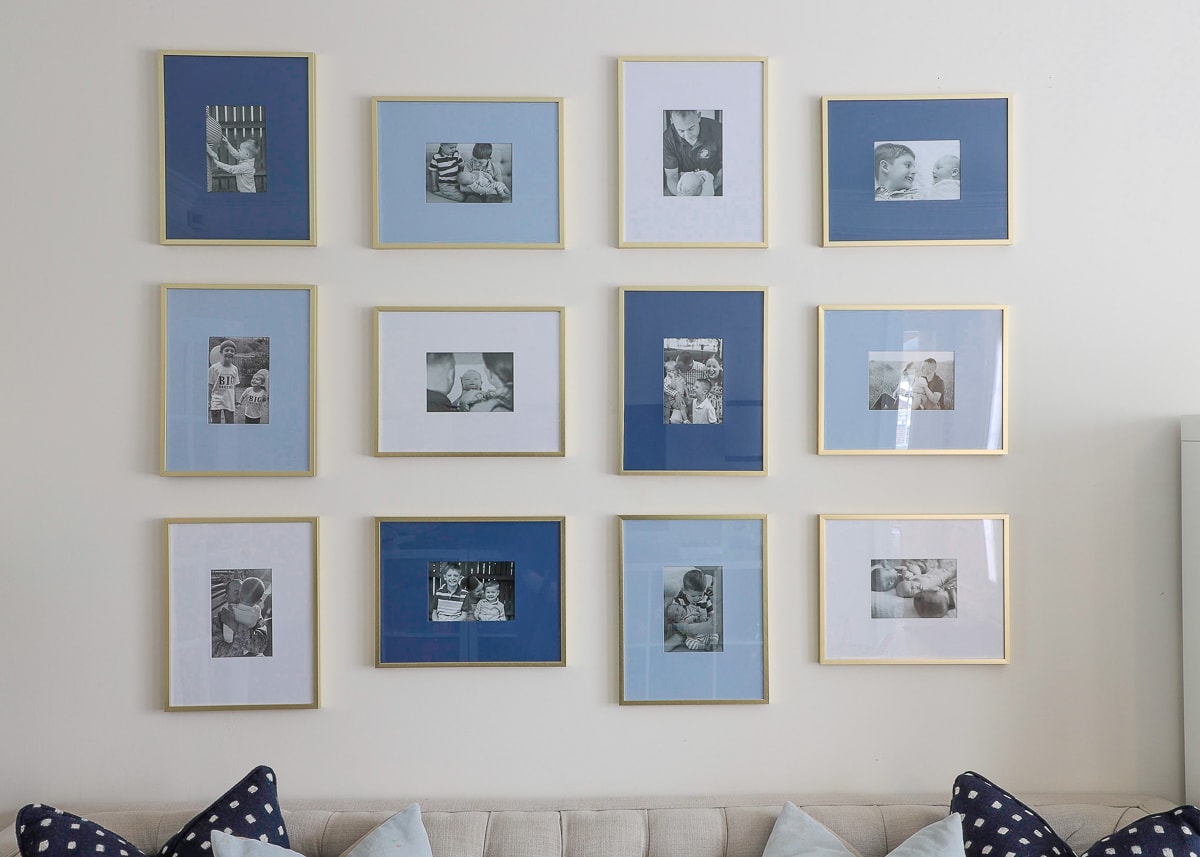
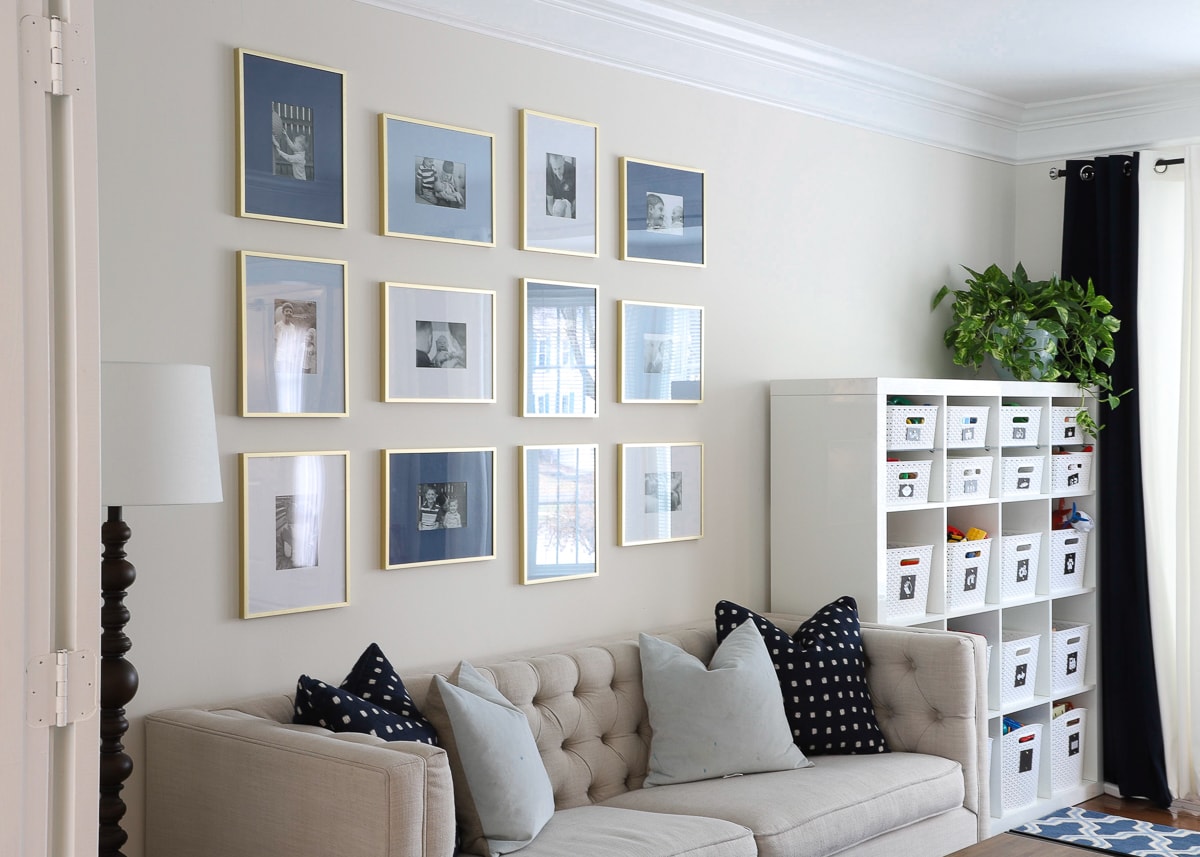
I am SOOO glad I did because I love the results so much. Not only do the frames off-set the rug on the floor incredibly well, but the mats bring just enough color to the really light and bland walls.
I wanted to highlight this project in its own post for a few reasons:
- Even I underestimated how much life and personality the colored mats would bring to the room. I’ve now added this idea to my arsenal of options for brightening and coloring a room without paint or wallpaper!
- It can be a little tricky to keep colored mats looking chic and not junky, so let me share some tips for making a gallery wall with colored mats work!
Tips for Making Colored Mats Work


1 | 2 | 3 | 4 | 5 | 6 | 7 | 8 | 9
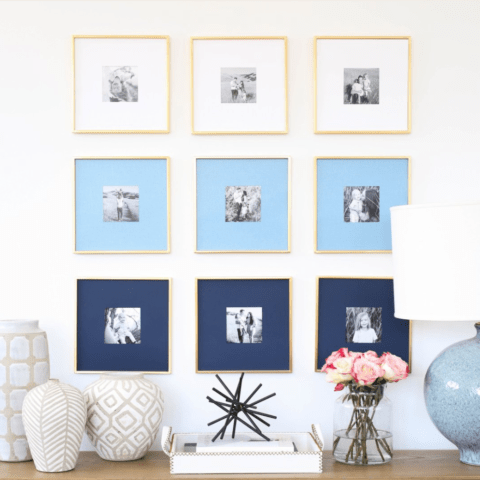
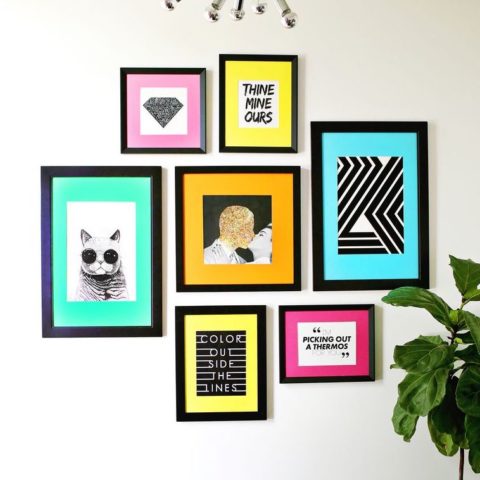
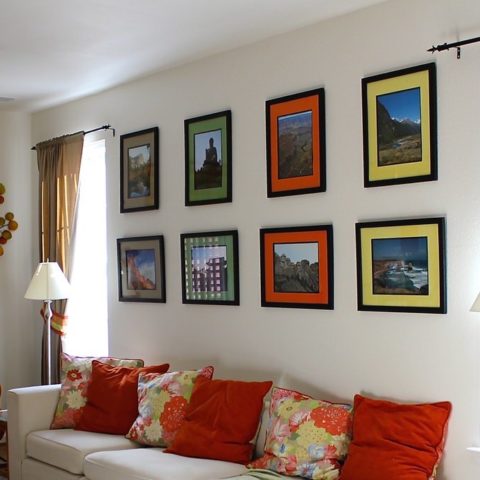
What I have listed here is not a formula necessarily, but more guidelines and suggestions to consider if you want to try creating a gallery wall with colored mats. You’ll see that the example pictures I’ve included above don’t follow all these rules, so mix and match the concepts until you find a look that works for you!
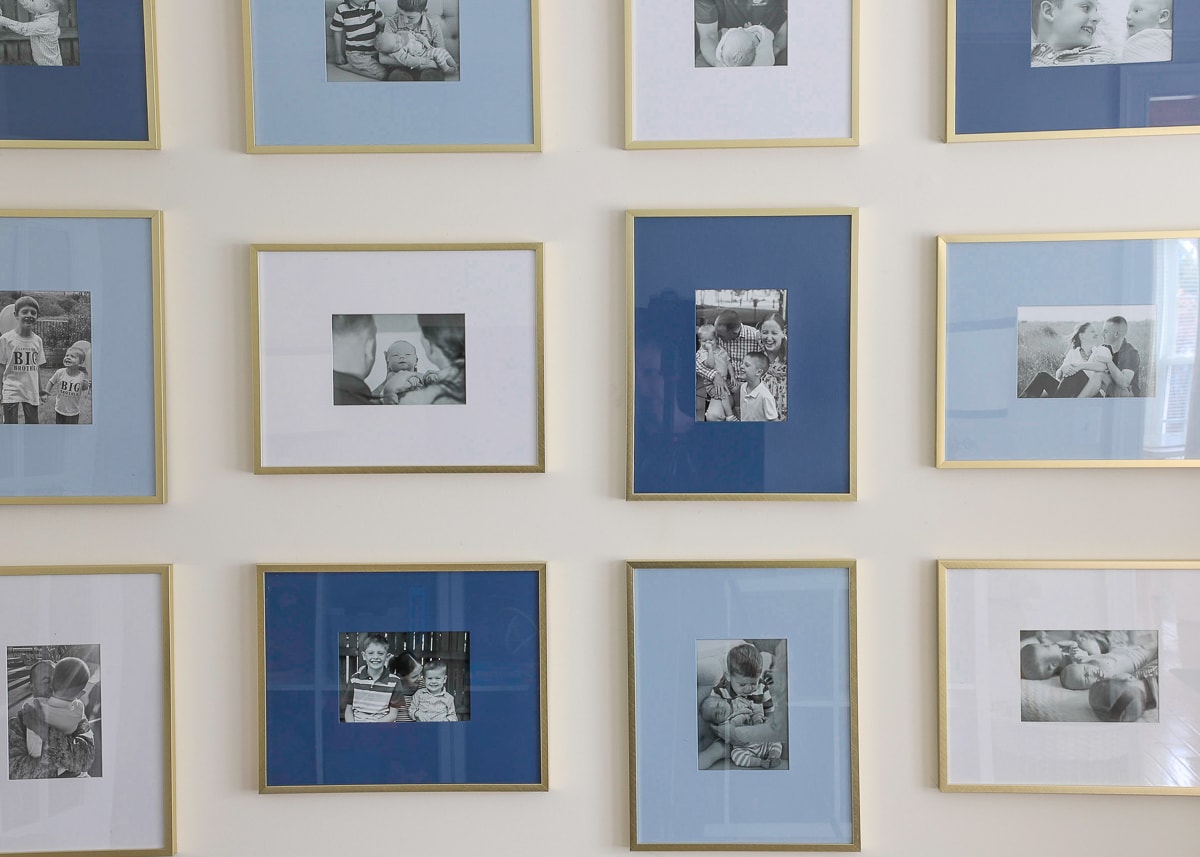
- Make one thing consistent – Whether it’s the frame size, the frame color, the mat width, or the mat opening, it really doesn’t matter. But by keeping some consistency across your entire gallery wall, the whole display won’t feel as busy.
- Stick to a limited color palette – The more colors you use, the busier it will get so try to stick to 2-4 colors. Don’t know what colors to use? Refer to other elements in the room (rug, throw pillows, furniture) or even the pictures themselves!
- Or just use one color – Using all one color for your mats will not only add some color to your space but will absolutely keep it more streamlined.
- Offset with white – Keeping 1/3 of my mats white helped the whole arrangement from being too much, so consider coloring just a few mats as a quick project.
- Use black-and-white photos – I have used colored mats with colored photos in the past, but I personally think the whole arrangement looks more stylish when you pair colored mats with black-and-white photographs.
- Play with the arrangement – I was originally going to hang all my frames vertically but it wasn’t filling up the wall just right. Then I was going to hang all the whites in a row, all the light blues in a row, etc, but it didn’t look right either. Continually experimenting with the arrangement helped me land on the “juuuust right” display.
- Display on a neutral wall – This one definitely isn’t a hard and fast rule because it all depends on which colors you chose for your mats and your wall, but in general, a light wall with colored mats will keep your display from becoming too muddy.
- Experiment virtually – Too nervous to give it a try? I always play with ideas virtually before I go for it. Below is an examples of the various arrangements I considered…and you can learn how I do this virtual mockup here.
How to Color Your Mats
Alright, so if you think a gallery wall with colored mats is the right call for your space, you might be thinking…”but Megan, custom mats are expensive!” Yes. They sure can be, so here is what I suggest you do to keep this a really budget-friendly project!
- Paint the mats that came with the frames – This is what I did. I just used leftover paint samples I had on hand and gave each mat 2 coats of paint. If/when I want to change the colors, I can just paint over them again!
- Order stock mats and then paint them – In doing this project, I couldn’t find a mat for one of my frames. In attempting to replace it, I discovered that Amazon sells bulk white mats in a variety of sizes and shapes. If you don’t want to paint your current mats or your frames didn’t come with mats, these affordable sets are an awesome option.
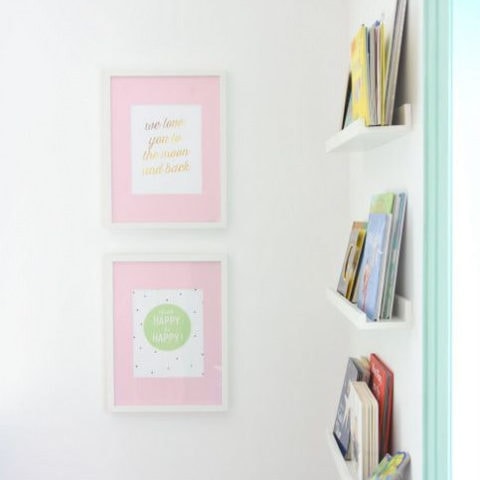
- Use paper instead – One of my frames uses cardstock (that I then painted to match) instead of a mat…can you tell which one? I can when I look really closely, but in day-to-day life, I sure don’t notice. Making mats out of colored paper really couldn’t be easier (here’s a great tutorial). You can use basic cardstock for small frames or purchase large art paper from most craft stores. For a few dollars, you can usually get any color you can imagine in sheets around 18×22”
If you’ve been struggling to liven up a really neutral room or you have a gallery wall that has fallen flat, I suggest giving colored mats a try. Not only is it an easy and budget-friendly update, but it can be completely un-done if you really don’t like the results! Although I’ve used this trick in the past, I was still nervous I wouldn’t like it this time around. But just going for it allowed me to create one of my favorite home spots ever! Have you ever tried colored mats in your home?
Megan
7 Comments on “Gallery Wall with Colored Mats – Tips for Making It Work!”
Hi! I love your gallery wall and was wondering where you bought your frames and what size they are. Thank you!
Elisa
Thank so much, Elisa!
I bought these frames (with the 5×7 mats) from Target!
Hope that helps!Megan
The gallery wall looks great and, with the rug, makes the room. Building a virtual gallery wall to try out placement of the colored mats is a great idea and not only helped you to decide placement but illustrates for your readers just how valuable a tool this was — it really shows that the placement you ended up with is the best. Can you tell us what program you used and how you did it?? I’d love some additional information.
Hi Elle!
I personally use Adobe Illustrator. However, long before I learned that software, I would use PowerPoint, which works surprisingly well!
I have a full tutorial here: https://thehomesihavemade.com/2017/05/how-to-create-a-design-board/
Hope that helps!
Megan
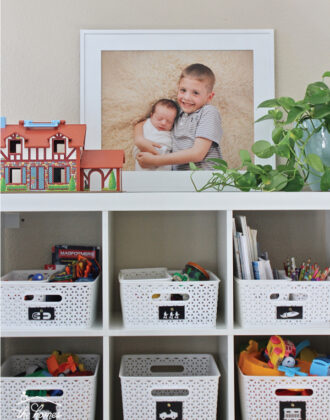
Hi! I noticed that the top part of your cube organizers has some “half” cube brackets? Is this a diy project? Or did you buy it as is? I love that solution to take advantage of the full cube space for little toys
Great eye, Cindy!
I was actually going to highlight this update in an upcoming post! To answer your question now though, IKEA (finally!!!) released shelves that you can install into the IKEA Kallax shelves to split them in half (and take better advantage of the vertical height!). You can see them here: https://www.ikea.com/us/en/p/kallax-glass-shelf-70423765/
They work awesome and are really affordable. my only complaint is that they are glass which is why we kept them only to the high shelves!
Hope that helps!Megan
This post is just what I was looking for. I decided I wanted to use colored mats…and I want them to be a color that is not widely available. You answered all my foundational questions to the point where I feel like I can get started! Thanks for sharing.