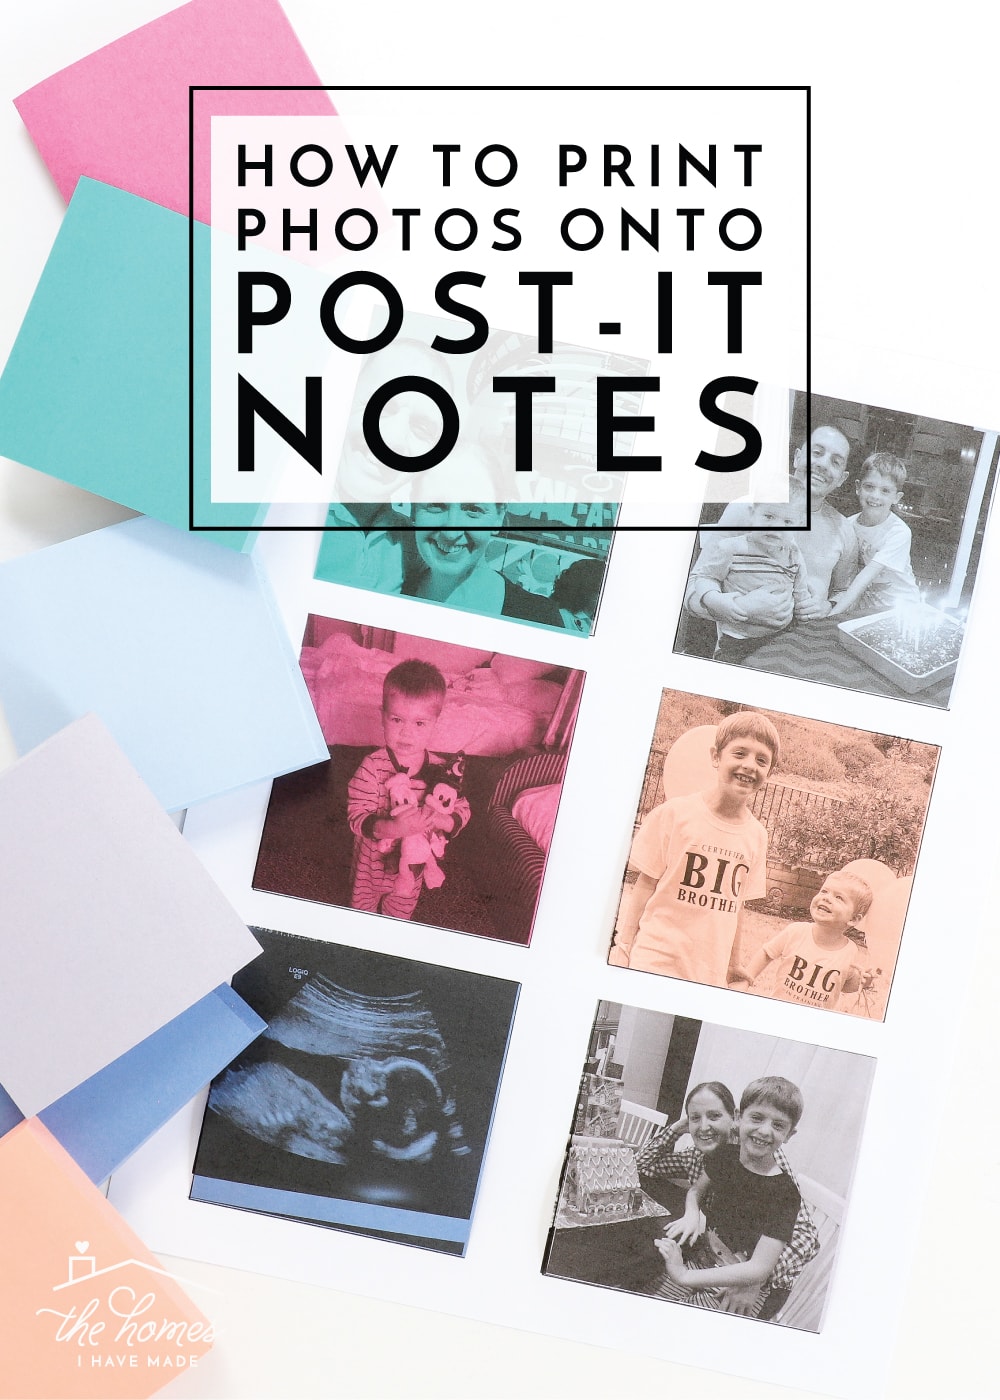
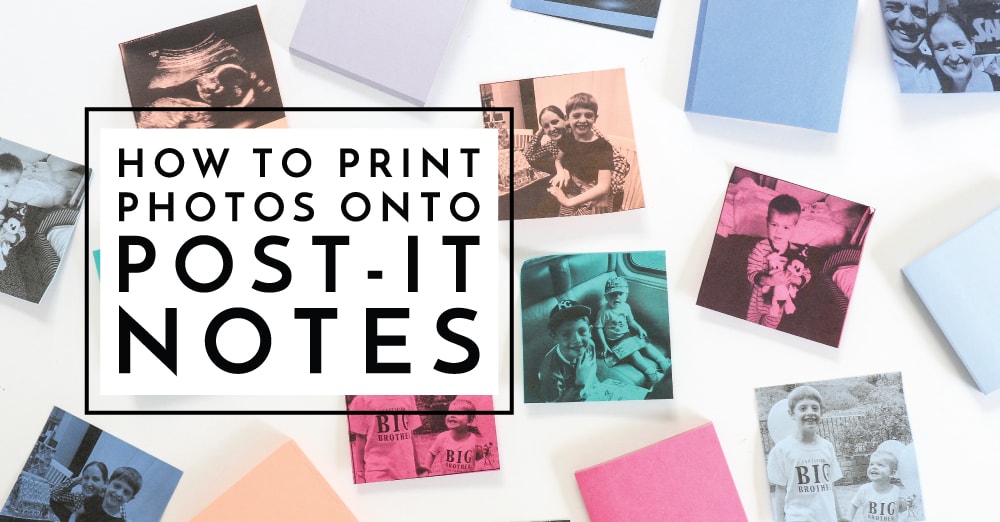
How to Print Photos Onto Post-It Notes
Today’s project definitely goes into the “Good to Know” category! It’s a tiny bit random and something you may never ever do, but it sure can be handy to know and is SO addicting once you get started. What’s best is that this project is an incredibly easy way to get photos off your phone and on display using nothing other than your home printer and a few stacks of brightly colored Post-It Notes. I was convinced this print job was going to be complicated and tedious yet it was anything but (and I have a super cranky printer!). Plus, the results are brightly-colored, stick-up photos that are as fun and artistic as they are simple and disposable! Let me show you how to print photos onto Post-It Notes so you can give it a try too!
This project was somewhat of an accidental rabbit hole. I went to print out some photos for the DIY Magnetic Polaroid Frames I shared last week, and discovered I was pretty low on photo paper. When I realized my photos were sized to 3″ squares to fit my frames, I was reminded of all those pins/posts I had seen about printing directly onto Post-It Notes (which I had a ton of sitting in my drawer!) Although I could find checklists and motivational phrases printed onto Post-It Notes, I couldn’t find any evidence that the same technique would work with photos. So I decided to give it a try, and the results that came out of my printer had me instantly hooked and eager to share!
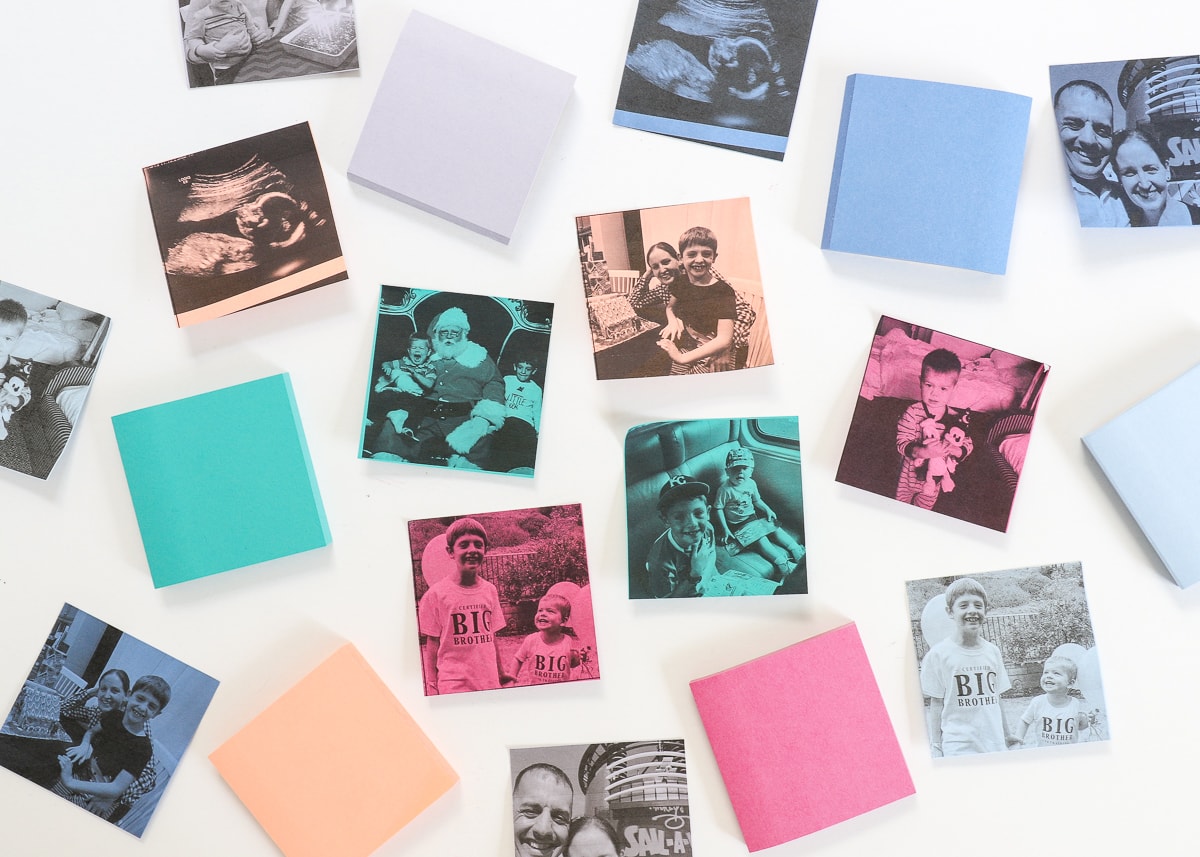
The photo quality was surprisingly good (for a quick, easy, disposable print job!) and I LOVED how the colored paper gave the pictures this really cool, artistic, Andy Warhol-like effect. Although I love this project for the ease (just print them out and stick them wherever you want them…no magnetic surface required!), this same technique could be used to make really cool collages with dozens of photos loaded into 1 frame! The possibilities are endless!
Like I said, I thought this project would be tedious and complicated, especially since our printer is horrible. But I had these formatted within minutes and they printed out perfectly the first time, so let me walk you through it!
Supplies Needed
- Brightly-colored Post It Notes in the color(s) of your choice
- Home printer loaded with black ink
- Access to either Microsoft PowerPoint, Adobe Illustrator, Canva or other photo editing/layout program
Step 1 – Find Your Photos
The first step is to figure out which photos you want to print. The easiest way to do this is to go through your camera roll and “heart” any good contenders. Since Post-It Notes are squares, be sure you pick pictures that can crop down to a 1:1 proportion pretty nicely.
Step 2 – Transfer Your Photos to Your Computer
Next, you need to get your photos from your phone to your computer so you can play with them a bit. If you use a Cloud-based service, that’s likely the easiest way (I use Dropbox across all our devices, so I just uploaded them that way). If not, simply email them to yourself and download the photos to your computer!
Step 3 – Create a Template
Before you can go any further, you need to create a template. This template will not only help you crop your photos, but will also ensure your photos end up printed directly onto the Post-It Notes themselves. Although you can find “Printable Post-It Note Templates” all over Pinterest, I actually suggest you just make your own (so you can drop your photos right in without having to fuss with another program or another person’s template!)
To make a template, open up a program such as Adobe Illustrator or Microsoft PowerPoint. I realize PowerPoint might not be an obvious choice for this kind of project, but it actually allows you to VERY easily create shapes and crop photos (and most of us already have it on our computers!). Once you have a program selected/opened, here is how to make a template:
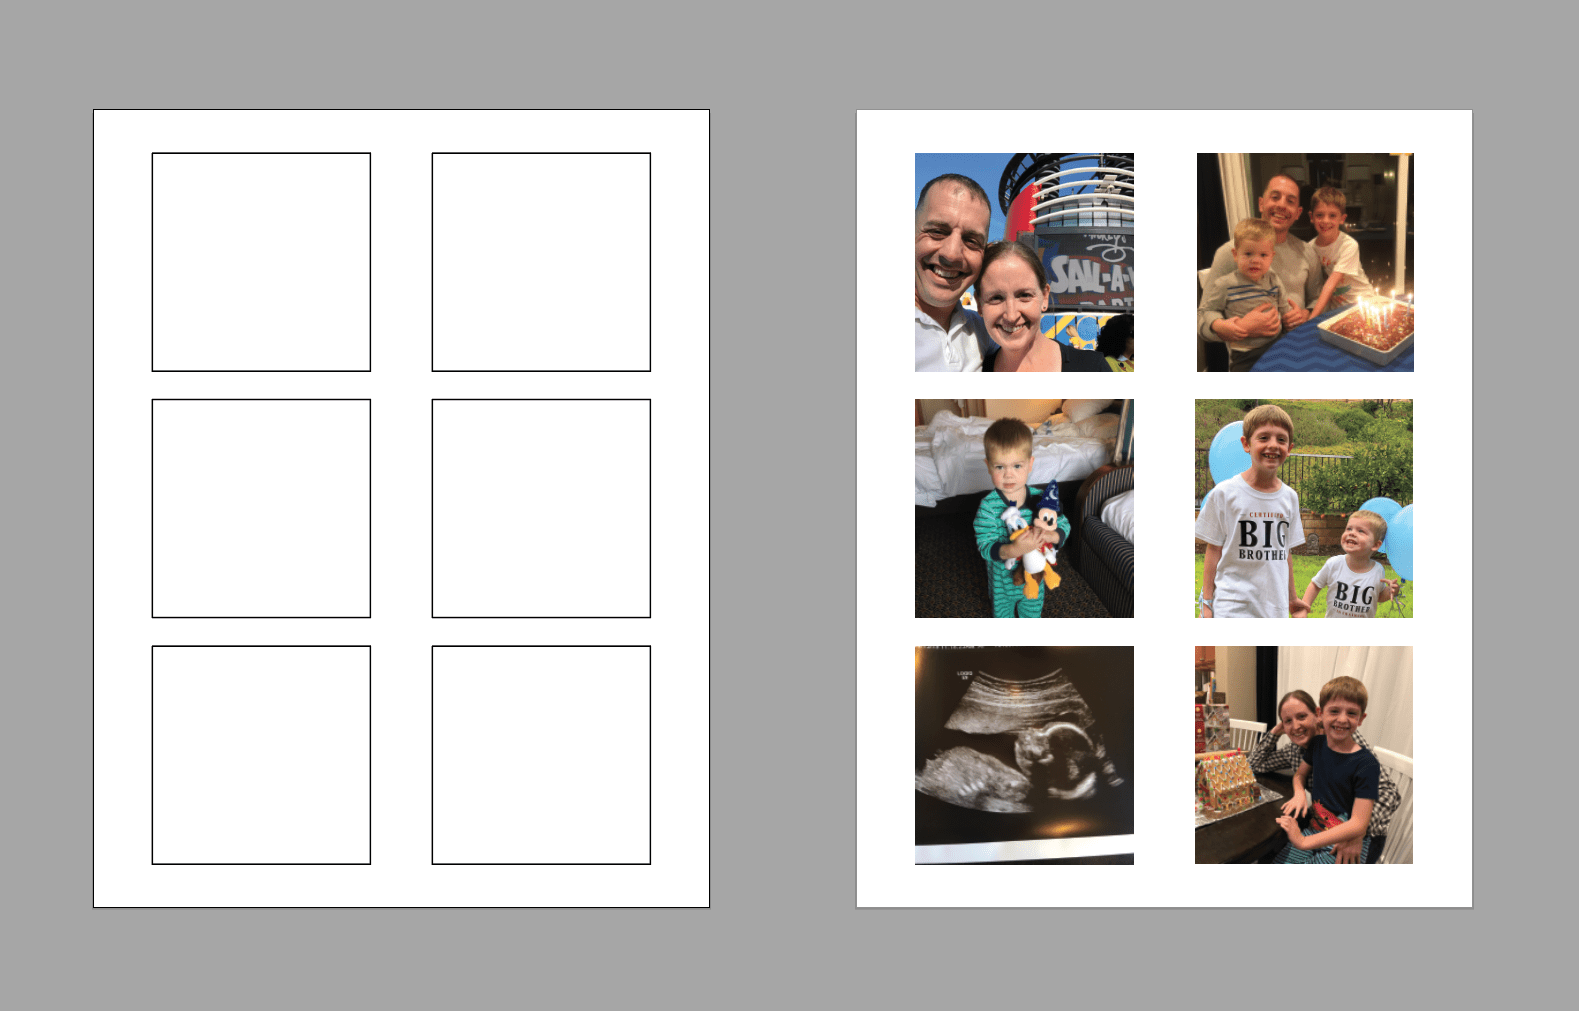
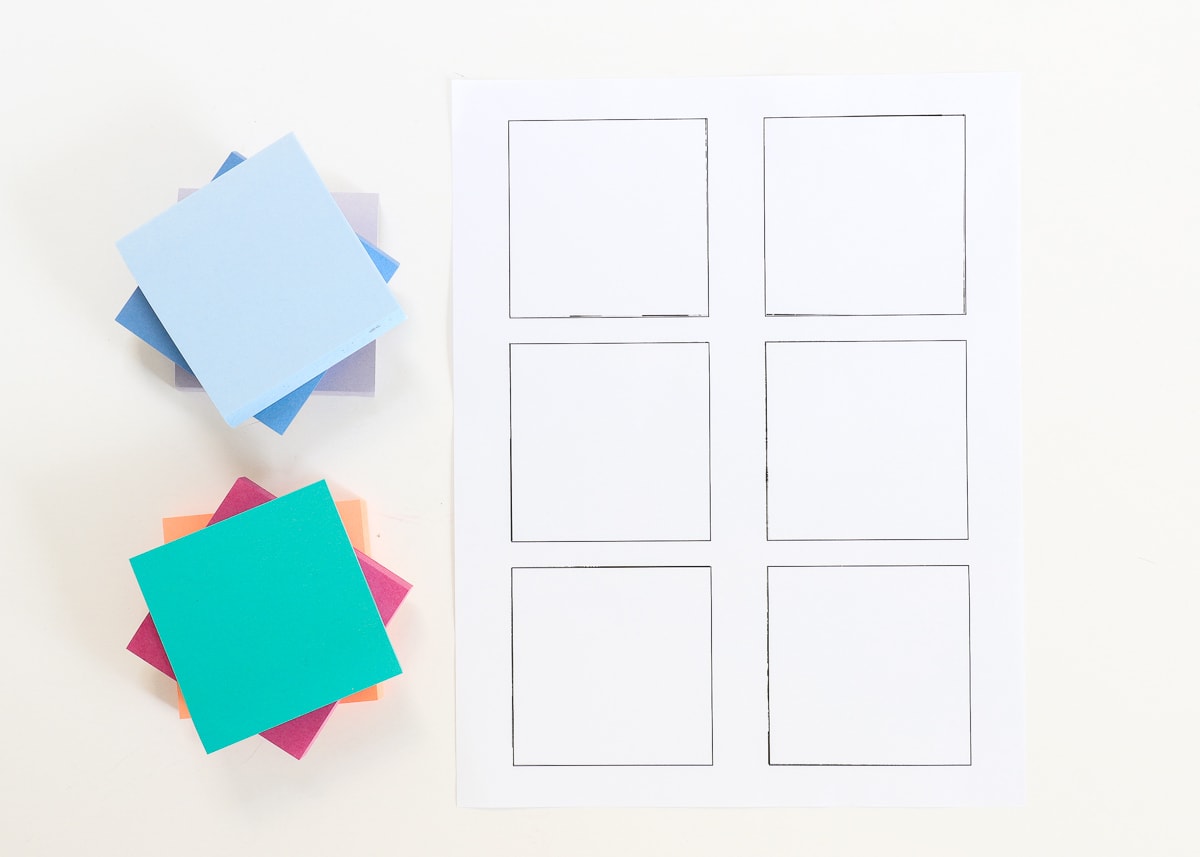
- Use the Settings options to create artboards/slides that are 8.5×11″ in a Portrait orientation.
- Next, place a Square shape onto your artboard/slide and size it to 3″.
- Copy and paste the square 5 times to create a total of 6 3″ squares.
- Space out the squares until they are in a grid pattern. Note: You don’t need to go crazy over spacing here. If you can get them all lined up great, but you really don’t need them perfectly spread out…just make sure no two squares are overlapping!
- Duplicate your artboards/slides a few times so that have a few pages with the exact same 6-square template on them.
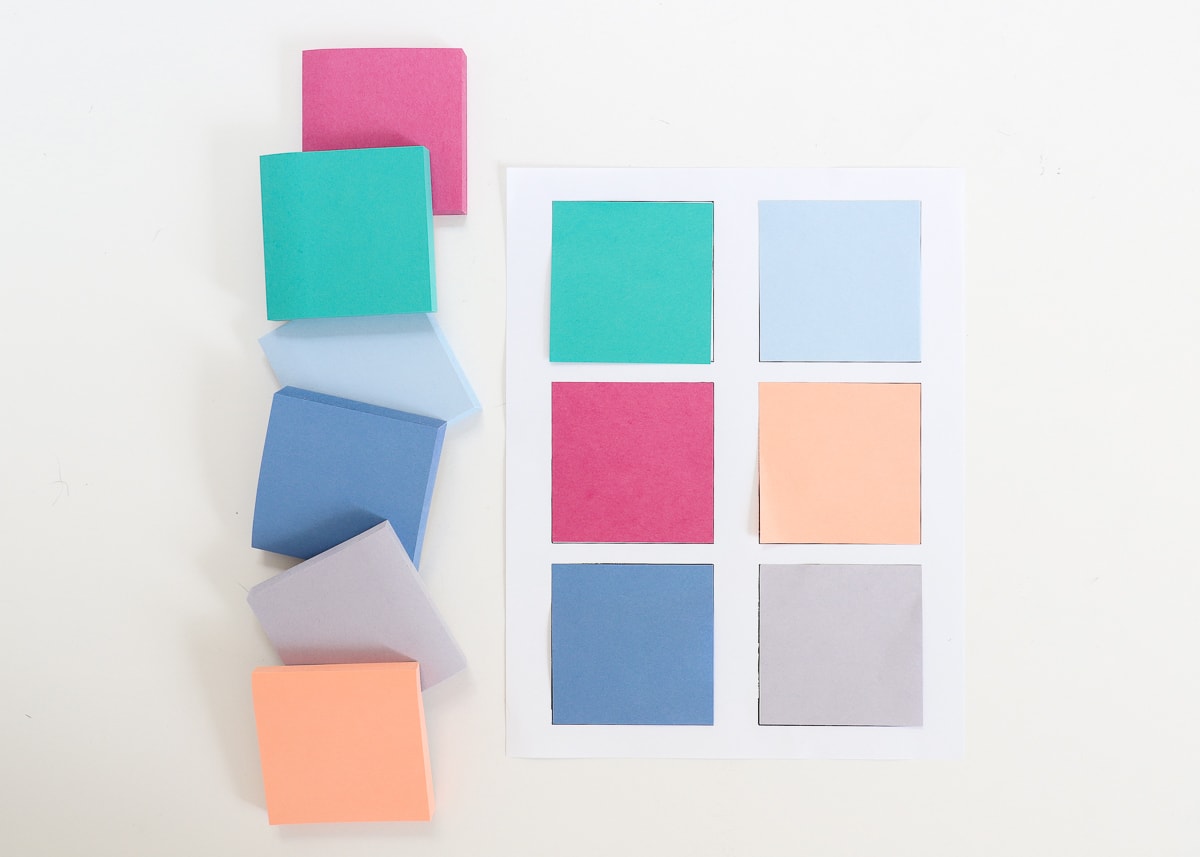
Step 4 – Crop Your Photos
You now need to get the photos you selected/moved onto your computer to fit into those 3″ squares. Depending on what program you are working in, here is how easiest to do that:
Want to save this post?
- Illustrator
- Drop all the photos onto your artboard.
- Manually size each photo to 3″ wide or tall (depending on original orientation) and send them all to “back.”
- Center a photo behind each square and use the Cropping Tool (Command K) to crop the photo into a square.
- Repeat with the other 5 photos.
- PowerPoint
- Drop one photo on your PowerPoint slide
- With the image selected, select the Crop tool from the top toolbar.
- Use the square template you created in the last step to help you Crop the photo down to a 3″ square.
- Move the photo to cover one of the squares on the template.
- Repeat with the other 5 photos until you have 6 photos covering the 6-square template.
- On Your Phone – I should mention that if you don’t understand how to use the Cropping tools in these programs, you can always crop your photos into 1:1 squares on your phone BEFORE you transfer them to your computer. I’m pretty sure every photo app has an edit tool already built in and 1:1 is a common cropping size. If you chose to crop on your phone, you can then just drop your square photos onto one of your pre-templated artboards/slides and place them accordingly.
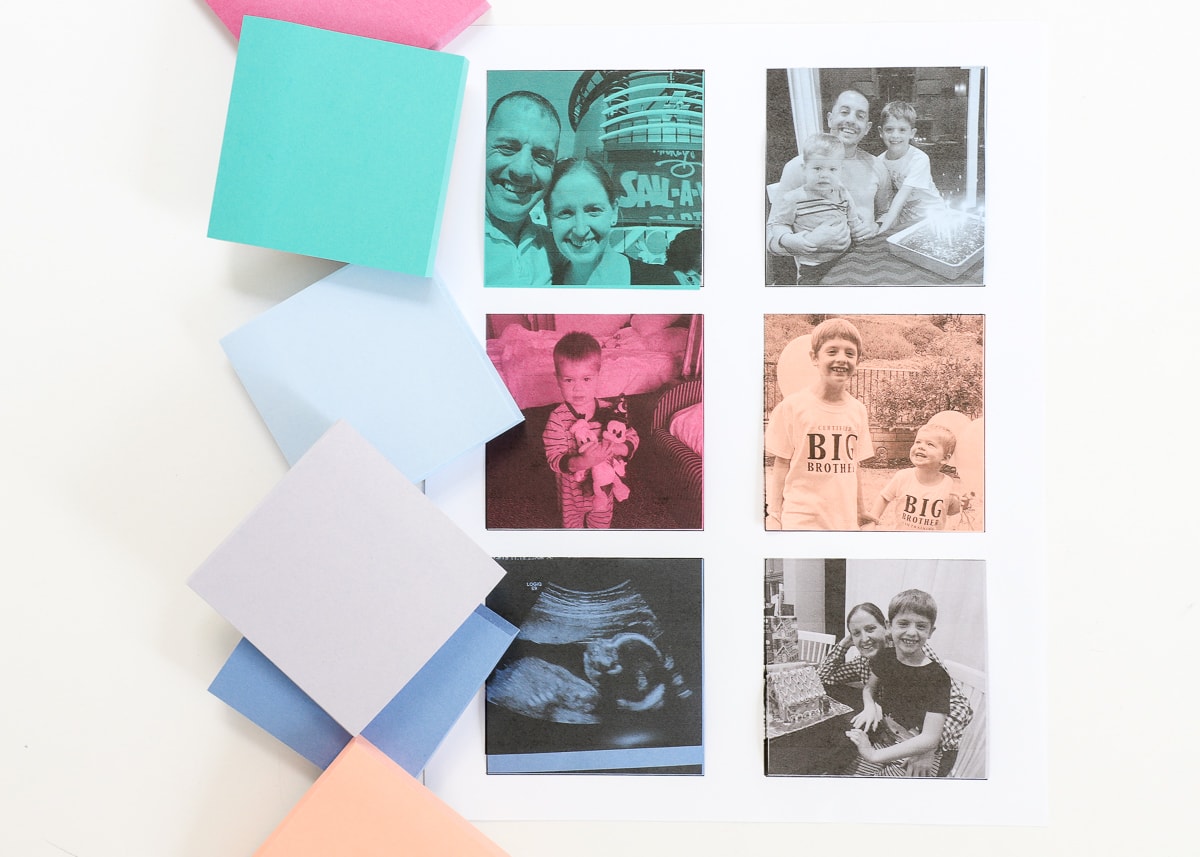
When you are done cropping and placing your photos, it should resemble the graphic below. If you have lots of photos, keep duplicating the template onto new artboards/slides until you have all your photos templated and ready for printing!
NOTE: Notice (below) how I left one artboard with the template ONLY…no pictures. I recommend you do this for 2 reasons: 1) You can use the blank template for printing purposes (next step); and 2) You can easily duplicate it to create more templates without having to re-create it every time!
The most important thing is that your photos are formatted/cropped/placed EXACTLY LIKE THE TEMPLATE in order to get them to print correctly!
Step 5 – Print a Blank Template
To get the photos onto the Post-It Notes, you are essentially going to run a template through your printer over and over again. To start the process, print out your blank template onto printer paper.
Step 6 – Load Blank Post-It Notes onto the Template
Next, select the colors of Post-It Notes you want to use, and load them on top of the squares printed on your blank template. Try your best to get them perfectly lined up, and I do recommend placing the adhesive strip of the notes oriented to the top of the page (so the notes feed in sticky-side first and don’t get jammed in your printer).
Step 7 – Feed Template+Post-It Notes Through Printer
Now comes the fun part! First, determine how paper feeds into your printer for printing. For example, my paper feeds up and over, so any side I want printed directly onto needs to be loaded into the printer facing down. Once you figure out how to load your paper, place your Template+Post-In Notes into your printer so the photos will be directly printed onto the template/notes. Next, select the artboard/slide of your formatted photos and send it to print. In your Print Options, be sure to select “Black and White” before printing.
TIP! If you are given the option, I found “Greyscale” produced slightly better photos than “Black and White,” but you can play with it to see which you like better!
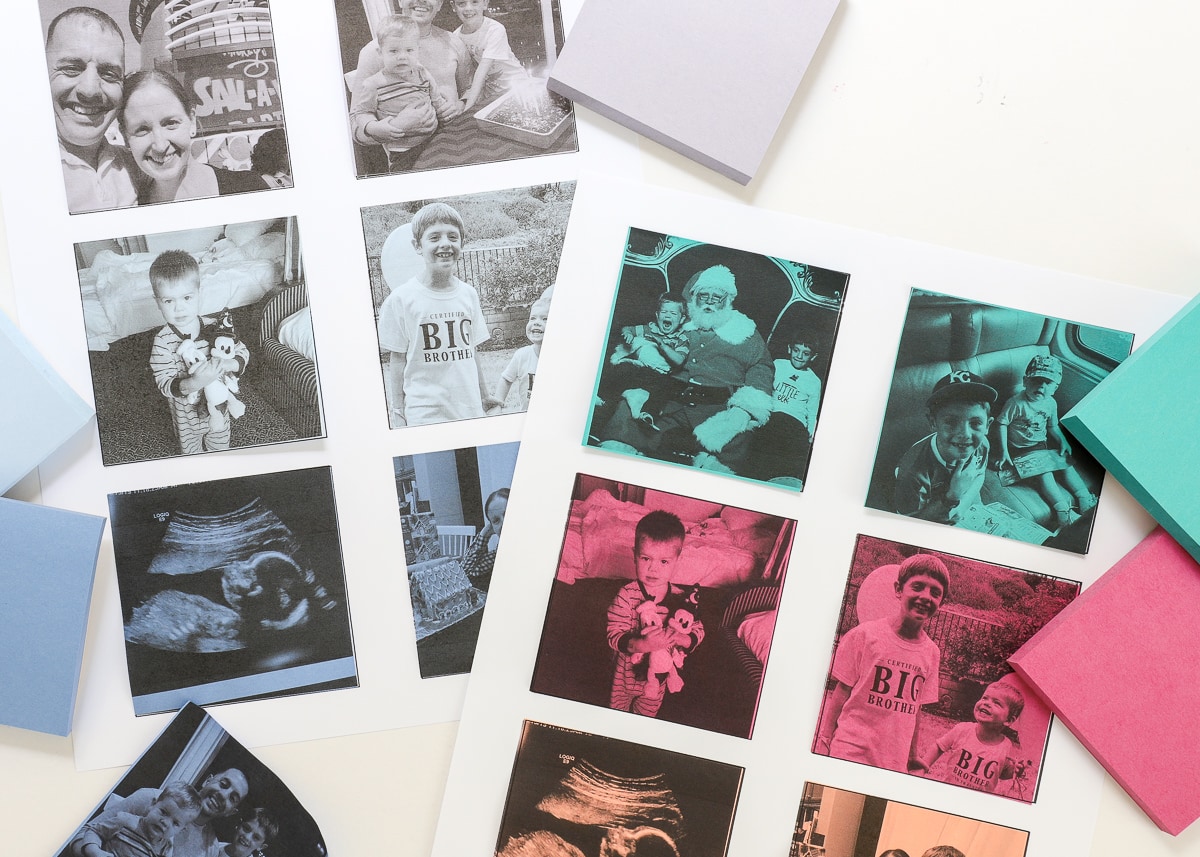
Your printer should print your formatted photos directly onto the Post-It-Notes and spit out a sheet that looks something like this:
You can then simply peel off the Post-It Note photos, re-load blank Post-It Notes onto your same template, and keep printing until you have an array of photos to stick up wherever you want them! (And if you want a fun way to frame them out, be sure to check out my magnetic frame tutorial here)
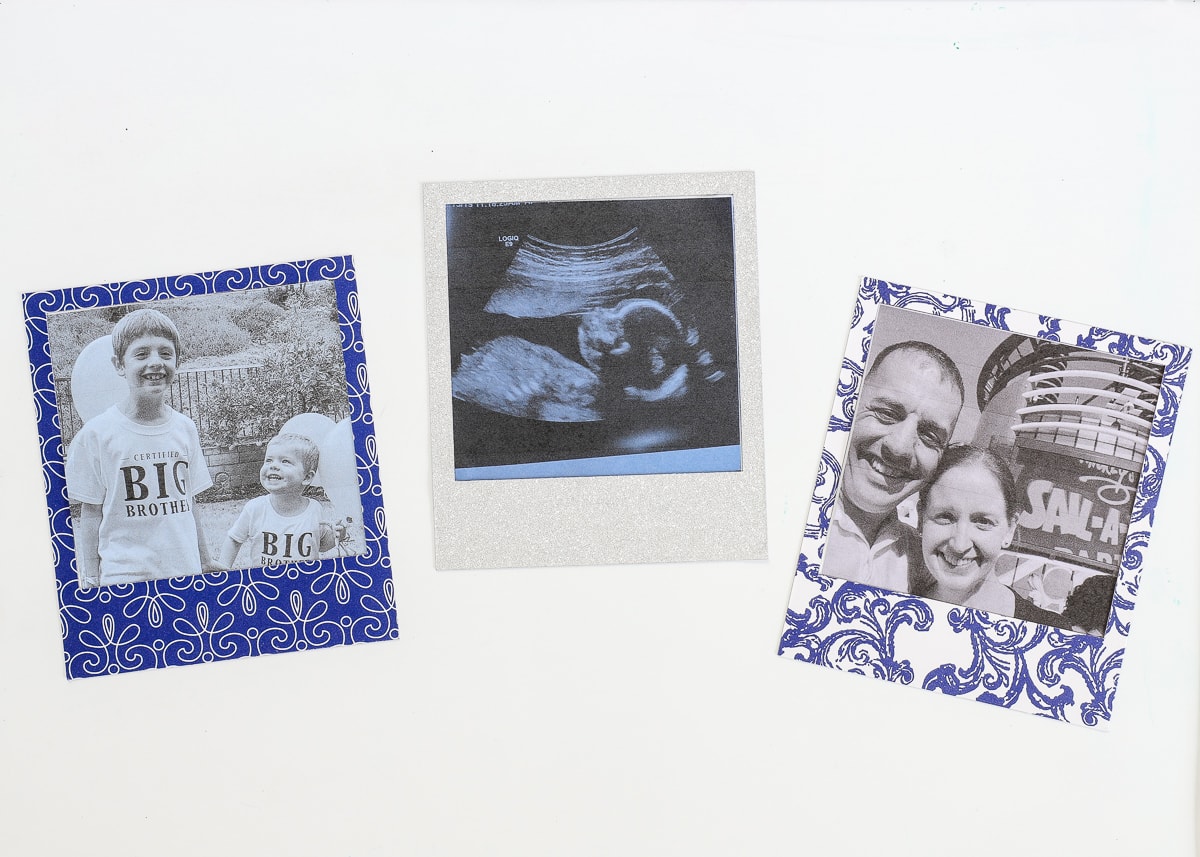
I just love how easy it is to get these super cool looking photos. No, they aren’t high quality prints. But their ease and edginess make them such a fun option…whether you want to create interesting collages (which I totally want to try!) or you just want to stick them up on the refrigerator! No matter why or where you use them, just proceed with caution…they are suuuuper addictive to print and play with! You’ve been warned 😉
Megan
3 Comments on “How to Print Photos Onto Post-It Notes”
I just did a page of one picture of my grandson and made a cute little stack of post-its for my sons very first Father’s Day. He will be pleasantly surprised to find a randomly placed picture post-it as he uses the little stack.
Thanks so much! Too cute!!
Lea
So doing this! Thanks for breaking it down so easily.
Thank you so much for this “How to”! I needed something that was different and this turned out to be the answer. Very easy to follow instructions. Well done you!