How to Hang Wrapping Paper as Wallpaper
Hello friends! I hope you all had a fantastic weekend. Ours’ went by in a blink of an eye…we’re just trying to cram too much fun AND work into the weekends, and Monday rolls around way too quickly. But I’m kicking off the week with the much-anticipated tutorial on how I hung the flamingo wrapping paper as wallpaper in our laundry room, which is a pretty great way to start a Monday, don’t you think?! Let’s dive right in!
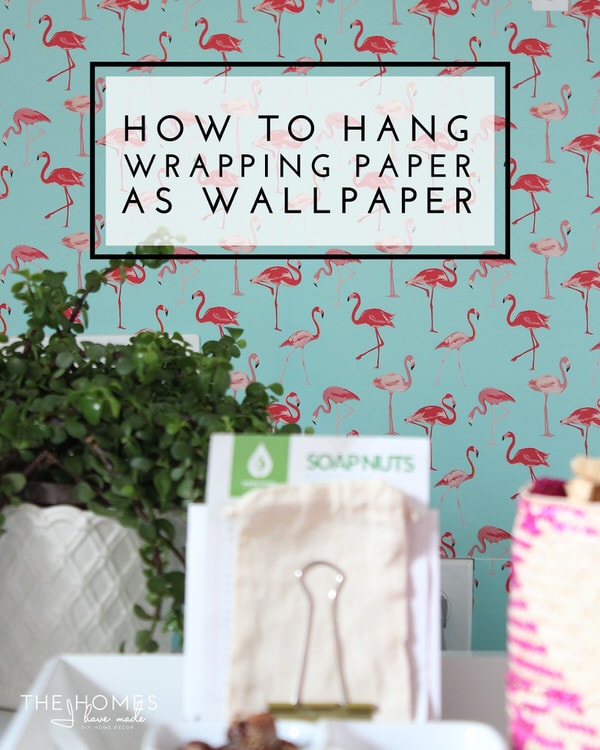
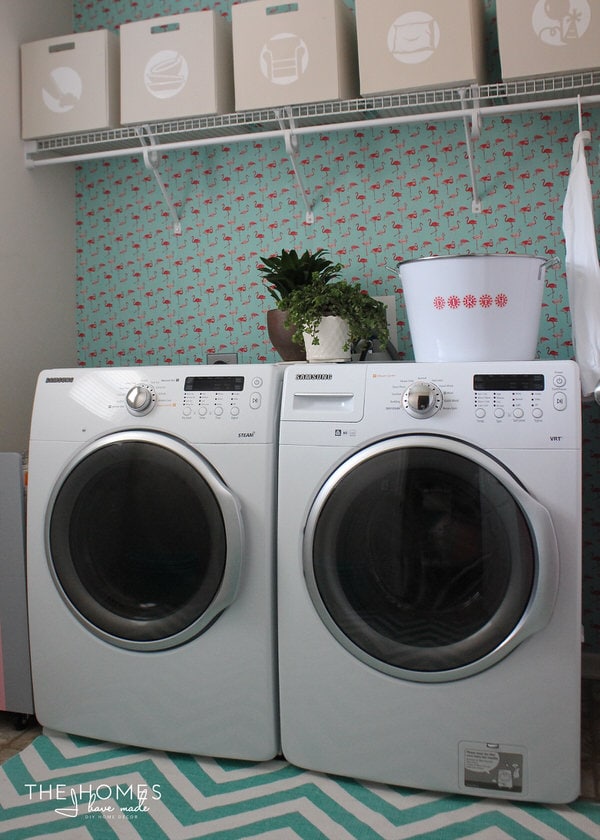
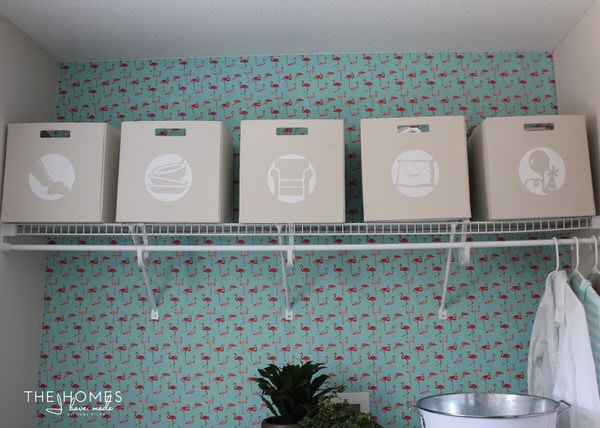
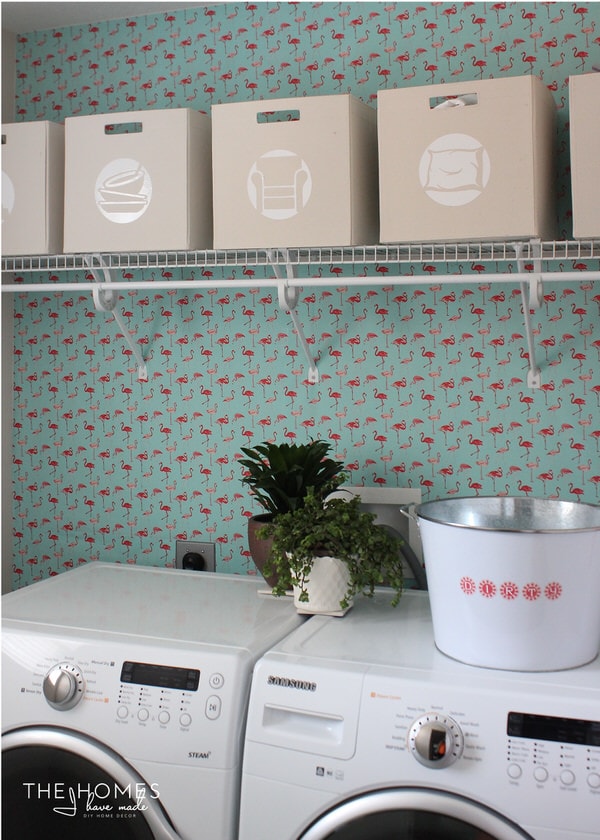
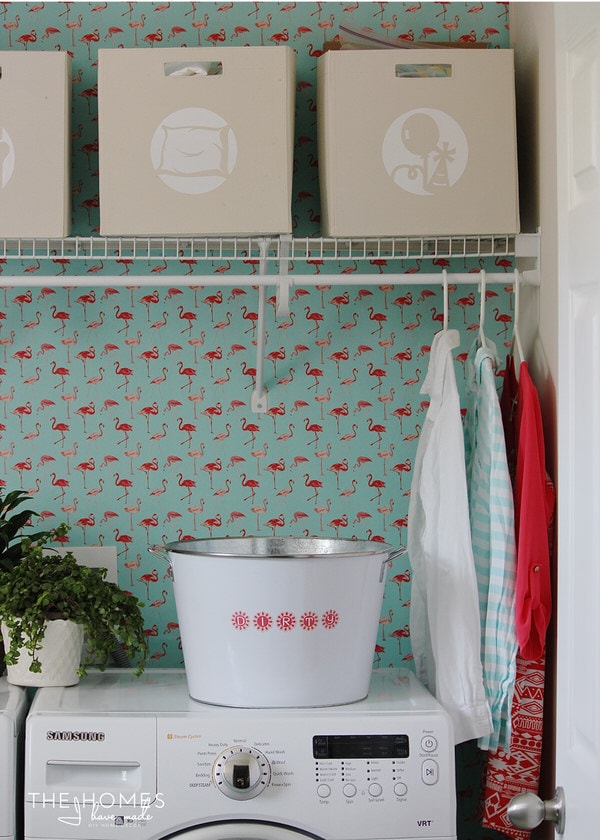
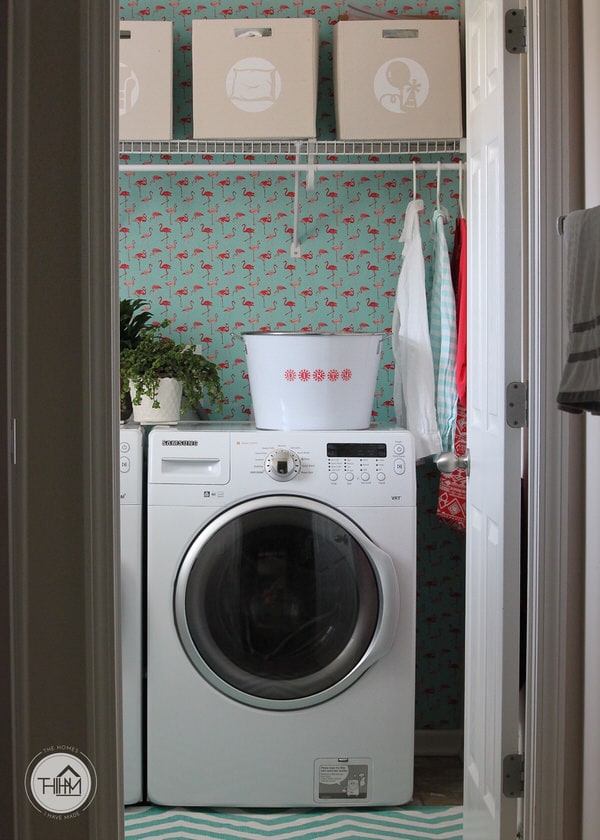
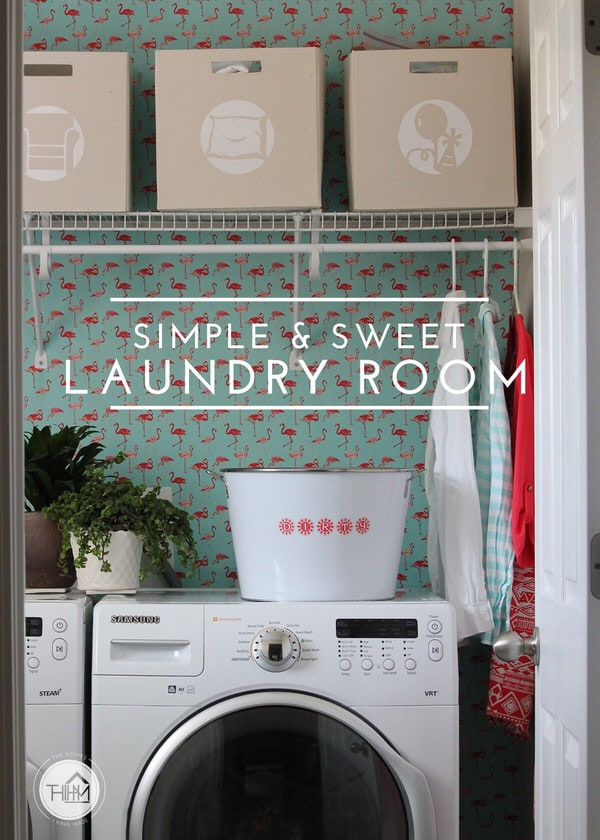
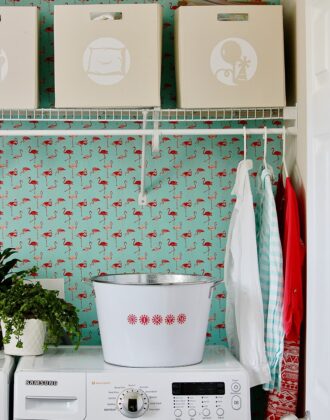
Last week, I showed you guys my quick and easy laundry room updates, and I was so excited to hear read that you guys love the flamingos on the wall as much as I do! It was a relatively easy $10 project that certainly provides the major wow-factor in the room. It was a huge whim, but it totally paid off. As a result, this room is just the cheeriest, happiest place to be!
Hanging wrapping paper on the wall isn’t exactly new around the blog-o-sphere or here on THIHM. In our last home, I papered our front hall/toy closet with a preppy green and white stripe. Like pretty drawer liner, paper on the back wall of the closet just adds an extra pop of fun and color to an otherwise boring space!

Like I’ve mentioned here and there, the laundry room was never intended to receive a makeover. But when I stumbled upon the flamingo wrapping paper at TJMaxx, my mind instantly started racing on where I could put it. My husband’s not a huge fan of pink, so the laundry room was one of the most logical locations. And since the room sits somewhat out of the way, I thought it would be an awesome and fun backdrop to such a tiny and tucked back room.
I am going to show you a general tutorial for how I hung the wrapping paper on the wall and then share some tips and tricks I’ve learned from several wrapping paper projects. Keep in mind there are tons of ways you can do this, and you may need to adjust for your specific space/layout/wall features. Here’s a general list of things you will need:
- Wrapping paper
- Scissors and/or rotary cutter (highly recommended) and cutting mat
- Long ruler
- Level
- Attaching supply of your choice: thumbtacks, double-stick tape, regular Scotch tape, staple gun
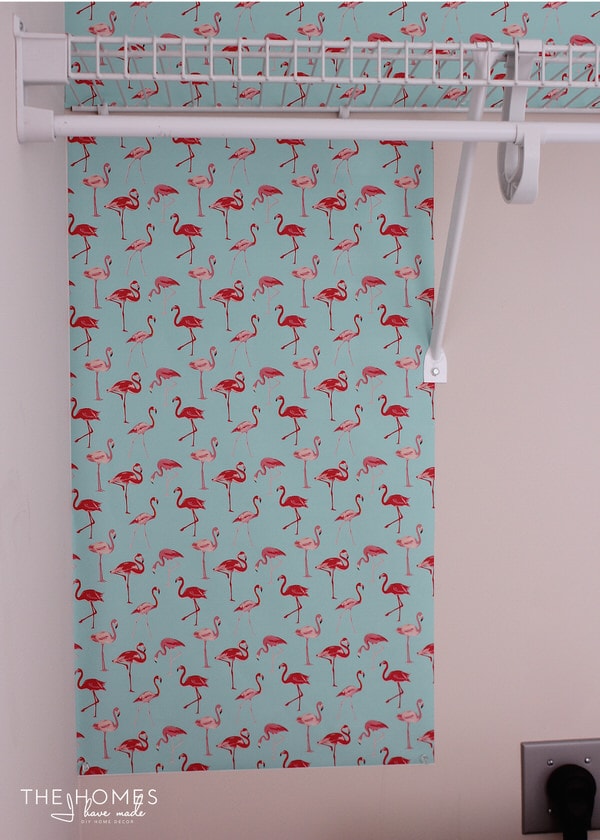
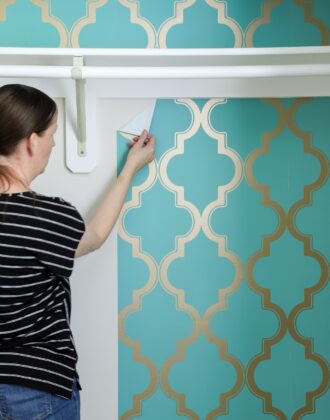
This paper job was made tricky by two situations 1) our laundry machines were already installed and too heavy to move and 2) the shelf was already affixed to the wall with anchors, so removing it to put up the paper (like I did in our last house) was out of the question. That said, I recommend starting with as much of a blank wall as you can. Remove any shelves, hooks, switch plates, etc before getting started.
Next, look at your wrapping paper and decide how it should be hung. Some patterns can be hung either direction (and hanging vertically is much easier!), but these flamingos had to be installed horizontally if I wanted them right side up…which I did. I started by measuring the width of the back wall and the height from the ceiling and then trimming down the paper with a long ruler and rotary cutter. My original plan was to use thumbtacks in all the corners (a plan I had to abandon later on, I’ll tell you why). I was able to successfully use thumbtacks to hold the paper in place above the shelf. If you have a plain, flat wall, this is definitely a great option.
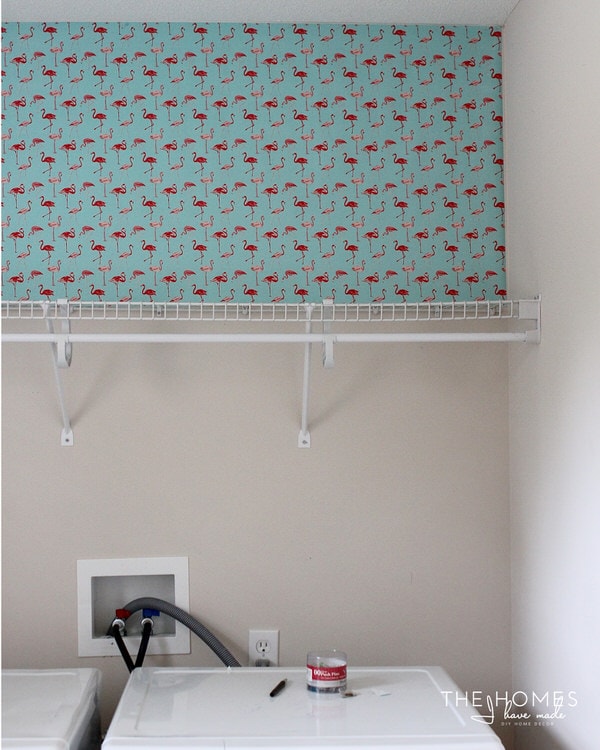
The problems came in as I started to move below the shelf. As I mentioned, in our last house, I was able to unscrew these brackets, place the paper and then screw the brackets back in. These, unfortunately, were attached with anchors, and I had no intention of making even more work for us come move out time, so the brackets had to stay in place.
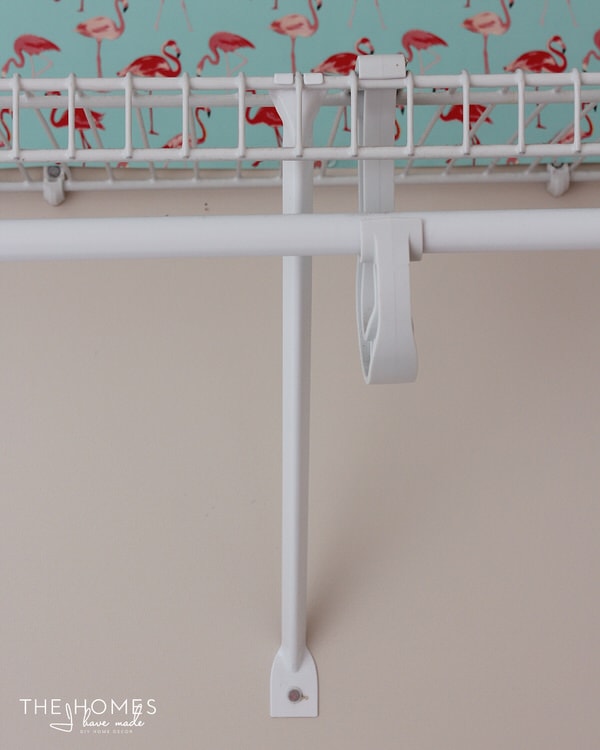
After a lot of trial and error (and almost giving up!) trying to fit the paper around the brackets, I ultimately made a template out of cardstock to match the bracket dimensions, shape, and size.

Want to save this post?
Then with careful measuring and cutting, I was able to cut widths of paper to accommodate the brackets. Here is where using thumbtacks got tricky. Because I was going to have more seams than I originally thought (I was hoping I could do one long stretch of paper across the wall like I did above the shelf), I would have to put a lot of tacks in the wall AND have some billowing seams. Then as I started to work my way around some outlets, my cuts got more and more complicated and tacks would have just been ridiculous. So I switched…to plain old Scotch tape! In all honesty, it was partly out of desperation. I was already so committed to the look and I just needed a way to hold all the paper seams together…
But as I stepped back and looked at it all come together, I was pleasantly surprised that not only could you not see the tape, but thanks to a lot of careful cutting and pattern matching, you really can’t tell see that instead of large cuts of paper, there are lots of smaller sections. All together, it looks clean and uniform! Phew!
In the end, this paper is stabilized/anchored to the wall on the far outsides with thumbtacks and then pieced together and taped directly to the wall in the center with Scotch tape. While the paper is not flush with the wall like a traditional wallpaper installation, its “bubbles” are hardly noticeable both in pictures and in real life!
Between the closet in our last house and this space here, I’ve learned a good bit about wallpapering with wrapping paper. Here are few things to consider if you want to try this project:
- Buy more wrapping paper than you think you’ll need. You can always return extra rolls, but matching patterns and mis-measuring can use up precious paper quicker than you realize!
- Marshalls/TJMaxx/HomeGoods has some of the NICEST paper for these kinds of projects. Their papers are usually nice and thick and have great colors and patterns. I do find that if the paper is really glossy, the seams, wrinkles and bubbles are more noticeable. I think partly why the seams are so well concealed in the laundry room is that the paper is “stone paper” which has a smooth, satin finish.
- Admittedly, double-stick tape is the easiest for installation (that’s what I used in our closet), but out of everything we had to “repair” and fix in our last house before moving out, removing all the double-stick tape from the closet was one of the worst. It’s not easy to peel up from walls, so proceed with double-stick tape with caution.
- When selecting a space to wallpaper, I highly recommend a back of a closet, a feature wall, or a small wall that people won’t get up close to or see from different angles. As I mentioned above, the paper does not lay flat to the wall, so in certain lights or angles, the imperfections and waviness of the paper might be more noticeable.
- Work carefully. Compared to thicker wallpapers that I’ve worked with, wrapping paper is quite delicate and it wrinkles and tears easily. Work carefully, don’t tug at it too hard, and ask a friend for help if you can!
- Go for it! Wrapping paper is easy to find, relatively easy to install and super inexpensive. This paper will likely go right into the trash when we move out, but for a $10 investment, it is providing just the right amount of color and pattern we need in this space for the time we are here!
Before I go, here’s a quick, funny little story about this project. Greg is usually my voice of reason when it comes to projects and our home. As most of you know, I will try just about anything and act very quickly on my whims…but I very much count on Greg to step in when I’m headed in the wrong direction…and step in he usually does. I had just finished above the shelf and one stretch of paper below the shelf when he got home from work. I was feeling defeated by the whole ‘cut around each bracket situation’ and was pretty much ready to throw in the towel. I decided to get his opinion before tearing it all down, sure that he’d strongly object to pink flamingos all over the laundry room. When he walked in, he had such a genuinely pleasant reaction (say what??) and after we talked through the challenges and options, he strongly encouraged me to keep going. If you can believe it, my Marine husband is the reason we have these awesome pink flamingoes in our laundry room! What can I say, the man has good taste 😉
If you’re new around here or just catching up, I am sharing a renter-friendly wall project every month while we live in this home for a year. You can find my other temporary wall ideas HERE! And if you missed the full laundry room reveal…click on the image below!
I hope your week gets off to a great start! This post marks the end of laundry chat for a while. On Wednesday, I’m planning on giving you a glimpse into what we’ve accomplished outside! See you then!
Megan
25 Comments on “How to Hang Wrapping Paper as Wallpaper”
Hi Megan, nice to hear you spent a nice week-end !
These flamingoes are so sweet and such a nice wall for a boring chore as laundry surely helps you feeeling happy in the room. Loooking at them we could nearly imagine us in their funny nuptial parade !
I have no laundry room, not a lot of people have them in their houses in France, we put our washing machine in the bathroom or the kitchen or wherever you manage, for us it’s in the garage so you can easily imagine it’s not a funny place and cold during winter time.
Your idea of wrapping paper if I can find one as nice and sturdy as this one could be used in our coat and shoes closet in the hall which is part an under the stairs closet. The back wall is hidden by coats on a rod but the two walls on each side are ugly so maybe it could be nice to color them a bit ! Have a nice Tuesday !
Hey Michele!!!
I love hearing about your different living arrangements in France! Please continue to share 🙂 Also, the wrapping paper on the sides of the closet is an awesome idea…great way to make it more fun to hang up coats, don’t you think??
Hope you’re having a great weekend!
Megan
Wrapping Paper as wallpaper?!? Brilliant! This is absolutely amazing! I can’t wait to try this out.
Hey Crystal!
Thanks so much! I’m such a sucker for all the great wrapping paper patterns out there, so I find this (and putting it inside drawers!) is such a great way to use it around my house! Heaven forbid I actually wrap some presents with it 😉
Hope you’re having a great weekend!
Megan
Thanks Megan’s husband & Megan! What a great project and if I find amazing wrapping paper like this, I must try this out! This is by far my favourite reveal 🙂 (although I really like all your reveals)
Lauren Baxter | Lovely Decor
xx
I just love that everyone is loving this little space…to think I was never planning on doing it at all 😉
I just searched for how to hang wrapping paper on walls and your post came up. I love it! Funny your story sounds like me and my husband. I always do stuff on a whim and he usually ends up liking it and coming to my rescue. I have one question:You said you used tape and that double stick tape is hard to get off. So how did you tape it down exactly? Is it just one sided scotch tape that you tape one side on the wall, and the other piece on top of the first piece?
Thanks so much for sharing, going to pour over your blog now for more ideas:-) We just bought a new home and I love decorating it! I just started blogging a short time ago mainly for family.
I thought of doing this after I had bought some wrapping paper from TJ Max and was impressed yet irritated at how thick it was. lol My question is; how does it hold up over time?
Hi Dawn!
We only had it up for about a year before we moved; but in a low-traffic area like the laundry room, it was perfectly fine! I would not put it anywhere water will splash (our laundry room didn’t have a sink). I’ve used it in the backs of closets with no issue either!
Hope that helps,
Megan
This looks so beautiful, and it’s such a creative use of resources! Anytime I look into temporary rental ideas (with a no-holes, no-paint lease), it’s always very expensive. Temporary wallpaper in Australia (not sure about elsewhere) can run from $100-$1000 per roll. Ten dollars for a nice paper is so much more nicer on the wallet.
I have one suggestion, gained from prowling the internet- where the lines of double sided tape will go, put down painter’s tape directly onto the wall, and then the double sided tape over the top. Painter’s tape is low cost, a lot less likely do damage to walls (plaster/drywall/painted), and you’ll still get a secure fixative. Plus, no risk of holes that your overly-strict landlord might get mad about.
Hi Sylph!
Thank you so much for this comment. I am thrilled to hear you found this post helpful. Yes – temporary wallpaper is often a budget-breaker…especially for something that is advertised to be “temporary.” Wrapping paper is a great alternative (especially for lower traffic areas). I have never thought about your tip using painter’s tape and I must say that’s pretty brilliant! Thanks for sharing – I will certainly be giving that a try!
Thanks and take care!
Megan
Pingback: Liner Paper For Walls 2016 | Wall Paper Ideas
Hello, Megan,
I’m here with a question. I want to decorate my bedroom and I decided to get a bedroom wall mural. What manufactures would you recommend? There’s so many of them that I can’t decide. 🙁 However, so far my favorite ones are https://www.decoshaker.com/wall-murals/bedroom these. Do know this shop? Are they good? I want to get the best quality product and I’m afraid to buy something that is not worth such money. Please, can you recommend more mural makers? The most original ones. Thank you so, so much! Kisses.
Hi Liucy,
Unfortunately, I have no experience with wall murals at all. There are a few companies I have heard of, but I have no experience with any of them so can’t recommend one way or another. They are a big investment (in both time and money) though, so I recommend you look for reviews before committing.
Good luck!
Megan
I saw a tutorial where they stuck blue painters tape to the wall, then stuck the double sided tape to that. easy peeling off when you are ready to remove!
Stumbled upon your genius comment! Thank you for the tip!
Pingback: DIY Ways To Reuse And Recycle Christmas Cards
Pingback: Classroom Design Challenge: Planning Your Classroom Setup and Decor
Pingback: cine craft: Criadas y Señoras - mlcestudio
Absolutely BRILLIANT!! Megan, you saved me a lot of headache (and $$$!) for my small focal wall project! I’ve been doing research on ways to save money on wallpaper, for a small wall for Hubby’s home office project. Needless to say, there is no such thing as “inexpensive wallpaper”, even for a small wall! Stumbled upon your cute website in desperation and light bulbs started going off all over my head! Even though the design and color of wrapping paper I wanted cost me $55 for an 8’x4′ wall, it’s still wayyyyyyyyyyy better than the $400 for peel and stick wallpaper!! Thank you thank you! ❤
Pingback: 11 Leftover Wrapping Paper Projects that are not Christmas Ornaments - Spinster Simone
Pingback: DIY Ways to Use Christmas Cards and Wrapping Paper After the Holiday Season | Awareness
The idea is a game changer,infact i worked it out going thru different kinds of paper.Hand made paper worked wonderful on one wall,being patternless helped a lot,for other walls gift wrap paper looked fabulous,just imagine a paper that cost $/sq ft came down to 3 cents/sq ft !.
So glad it worked out for you! Thanks for sharing your experience!
Megan
It’s just brilliant! Question, have you ever tried pasting wrapping paper to a wall like you would wallpaper? Many years ago I did the paper bag rumpled up to make a textured wall, painted over it and dry brushed. Many, many, many years later it has been painted over at least 3 times and still looks great. Wondering if… wrapping paper would, could be done similar, just less rumples?
Anyway, thank you for the great advice.