A Raspberry Sherbet Tween Bedroom Makeover!
Well, after weeks months of talking about it (and leaking some sneak peaks here and there)…I am FINALLY ready to reveal my niece’s bedroom makeover!

This room transformation has been so much fun to work on…it is packed with so many neat ideas, storage solutions, DIY projects, and lots and lots of saturated color! Today, I am going to give you the full tour, which means tons of pictures. But don’t worry, I have several posts in the coming weeks that will detail every last bit of this room, including a few tutorials and a resource guide!
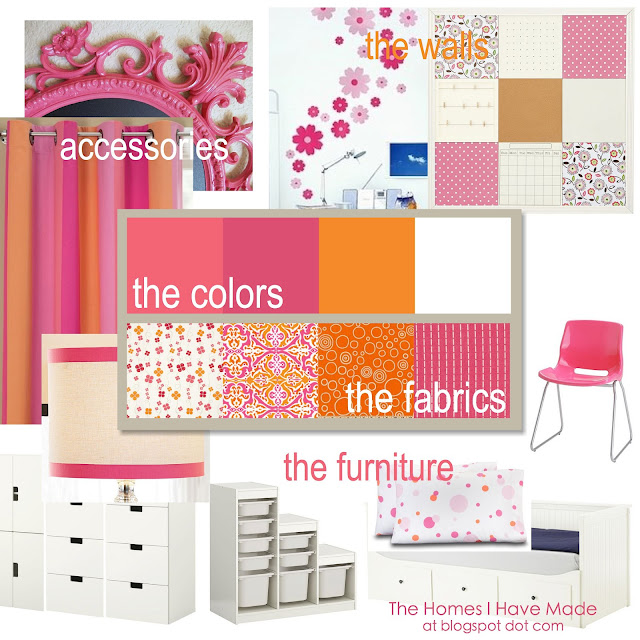
You may (or may not) remember, but we started here with these two inspiration boards:

and
Here’s where we ended up!
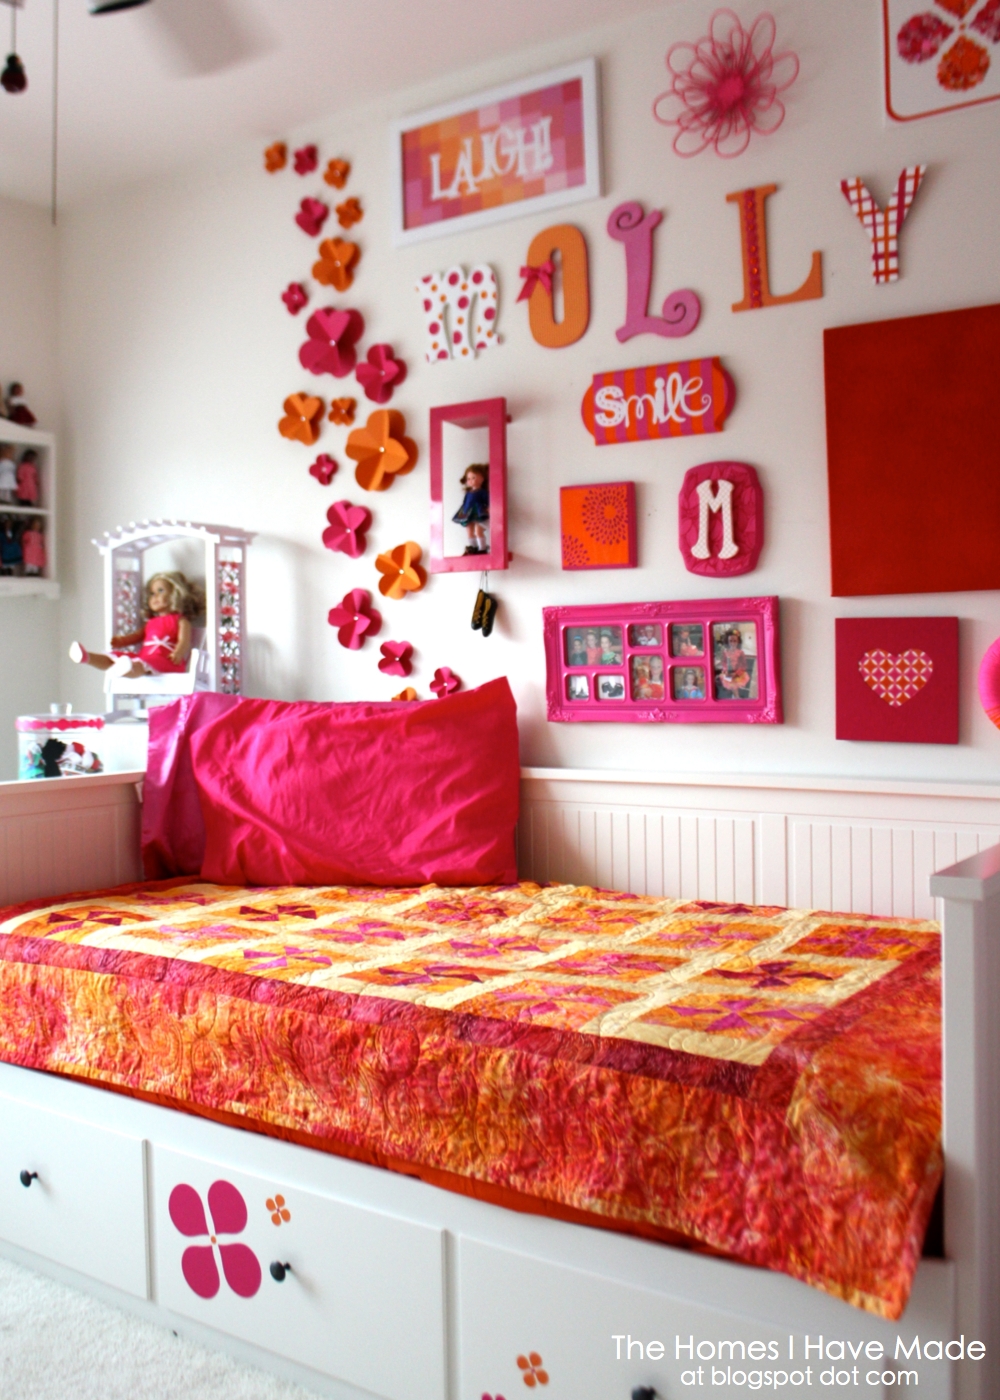
As you walk into the room, the new daybed/trundle bed is centered on the opposite wall. The wild and wonderful pinwheel quilt was contributed to the room by Gramma!

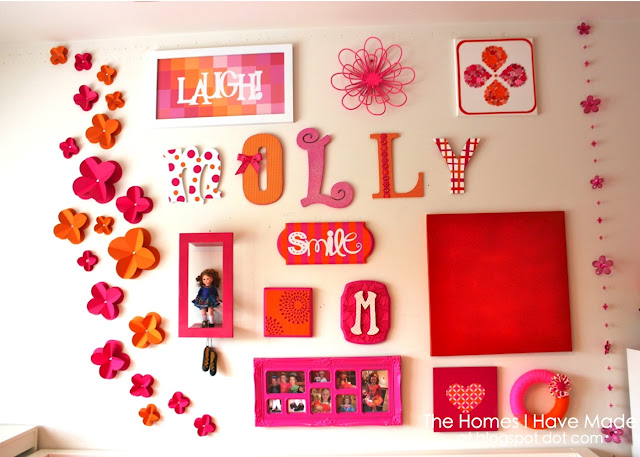
Above the bed is the adorable gallery wall. We had so much fun thinking up all sorts of projects to fill this space! You might recognize those 3D flowers that I featured over at Positively Splendid – you can read the full tutorial here!

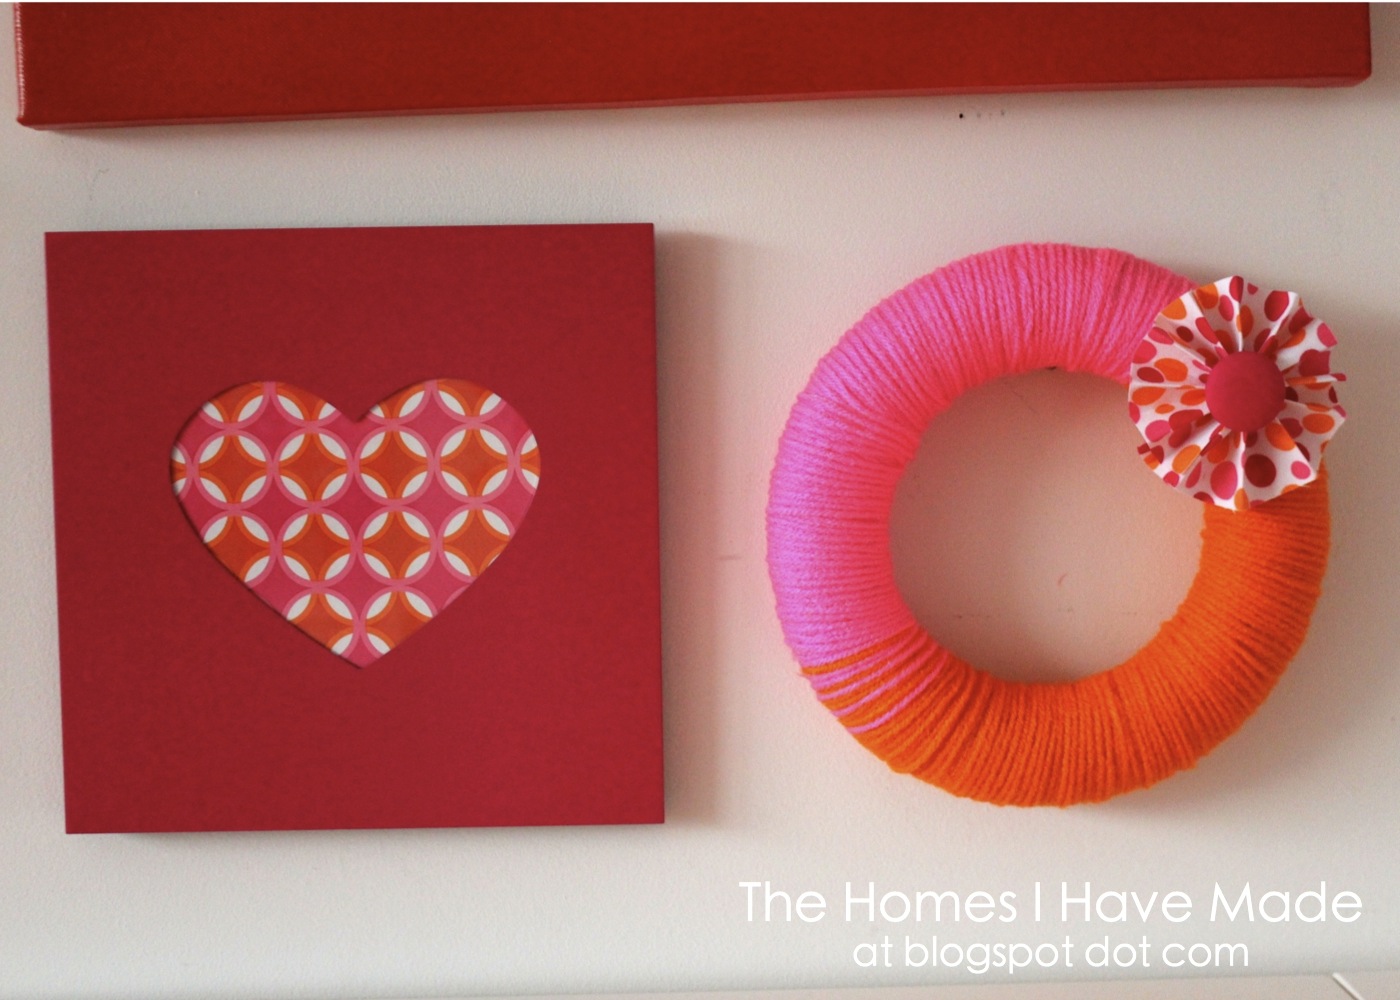
(Below left) A pink heart-shaped picture frame (from Hobby Lobby) is filled with geometric wrapping paper (from Target). So simple yet one of my favorite features on the wall!
(Below right) A small Styrofoam wreath (from Michaels) is wrapped half in orange yarn and half in pink yarn (from my sister’s basement 😉 A fabric medallion was made out of matching fabric using this tutorial!
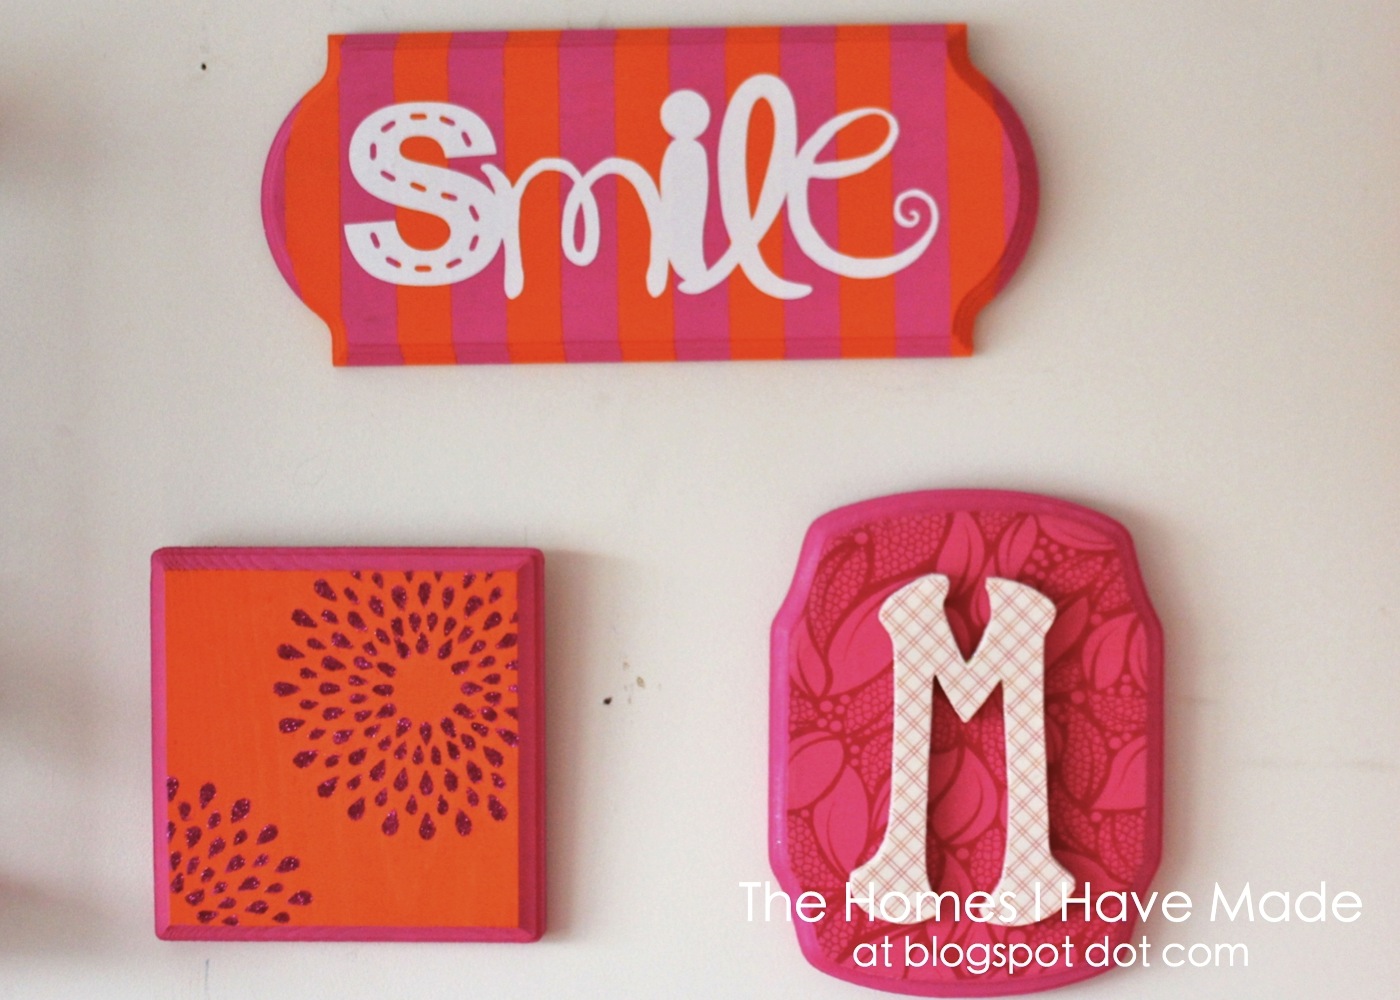
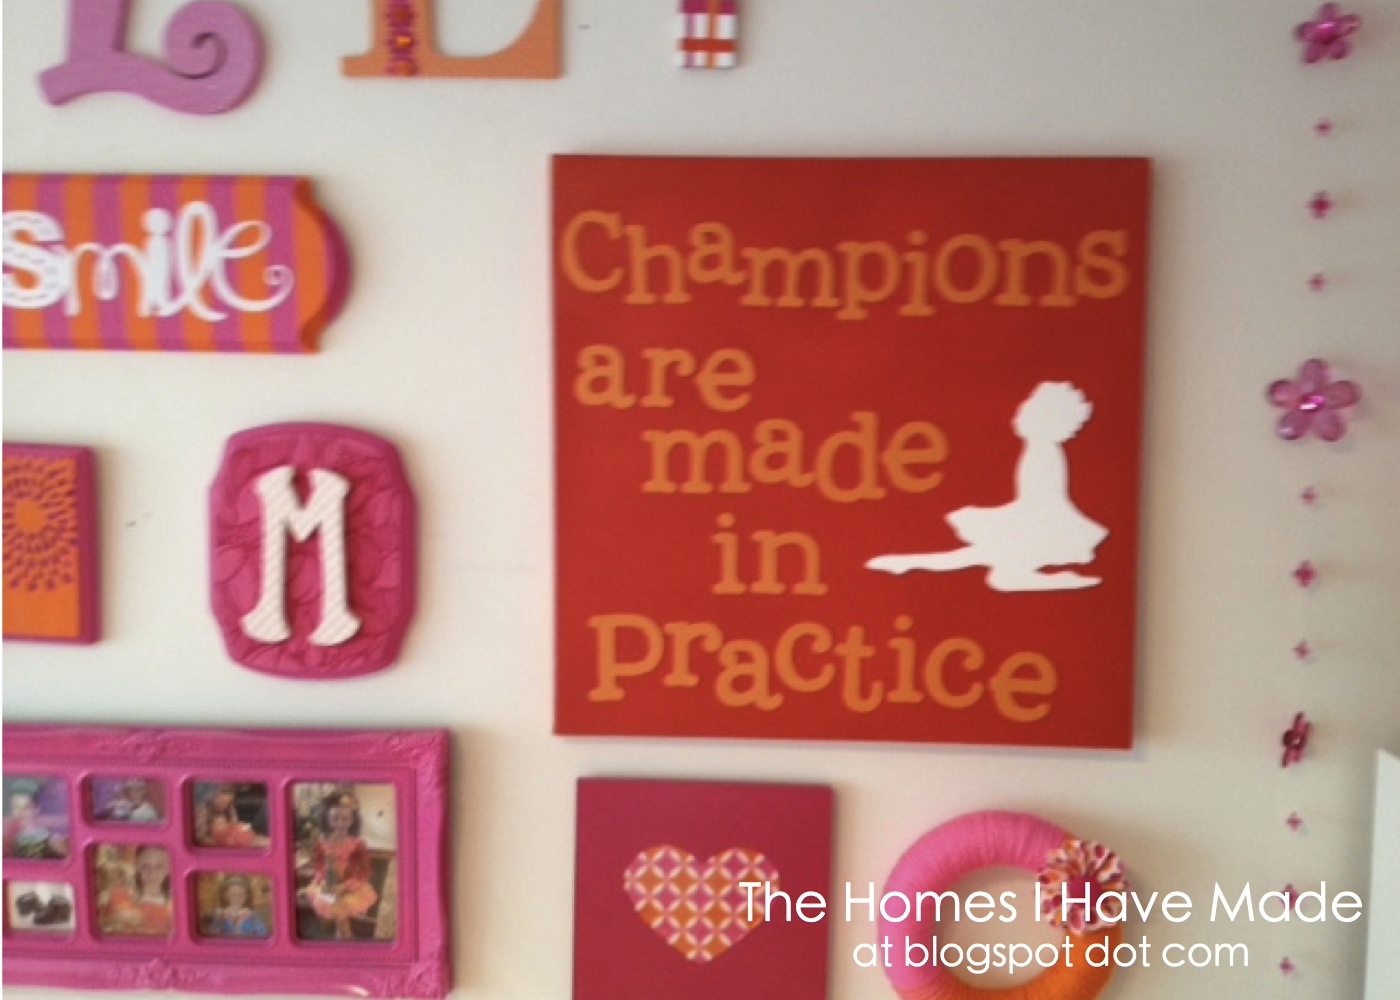
(below) Three wooden plaques (from Michaels) were given three individual treatments using paint, glitter, fabric, vinyl and scrapbook paper! I have tutorials on how to make each one – they’ll be up next week for you!
Each letter to spell out my niece’s name was given a different treatment as well!
(below) The “M” was already white when we bought it (from Hobby Lobby). My sister cut varying-sized circles out of pink and orange vinyl with her Cricut and put them right on!

(below) The “O” was brown cardboard to start (not sure where we picked this one up). We first painted the edges with pink craft paint. Then traced the “O” onto coordinating fabric and attached it with spray adhesive! The pink bow was simply tied right on!

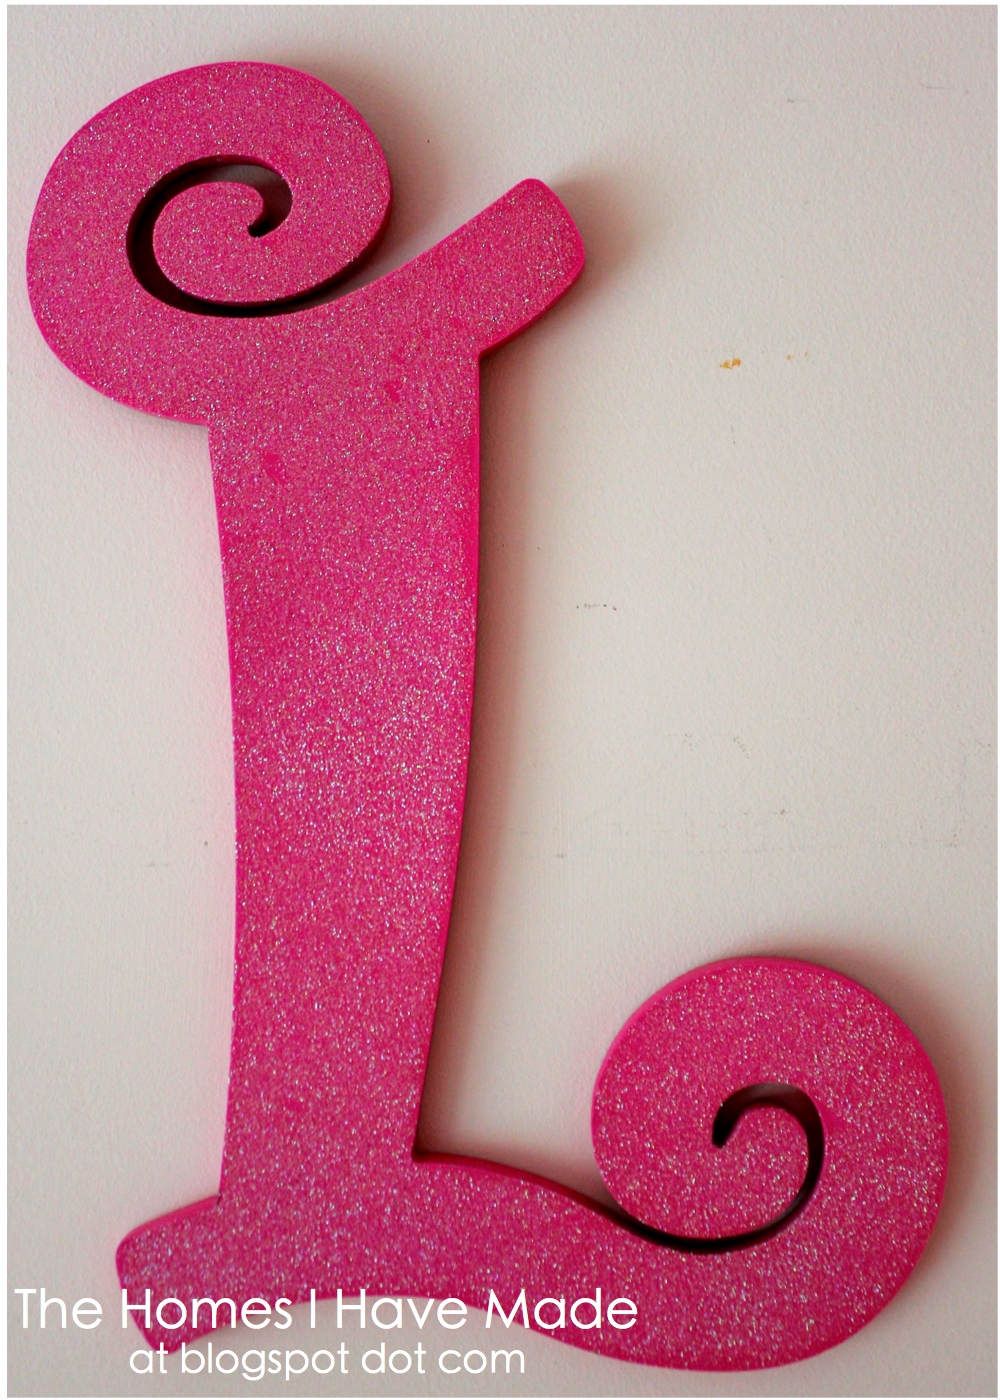
(below) This “L” was purchased and put up as is! Hey, don’t mess with a good thing, right?!?
(below) But this “L” needed fixing up! The brown cardboard letter’s edges (not sure where we picked this one up either) were painted with pink acrylic paint, same as the “O.” We then traced the “L” onto orange polka-dot scrapbook paper and attached with craft glue. The felt flower trim (from Michaels) and orange buttons added much needed bling down the center!

(below) Lastly, the “Y” was painted white; and then similarly to the “M,” we cut strips of pink and orange vinyl (using a paper cutter) and overlaid them in a plaid pattern!

(below) I was super excited to finally get to try my hand at some paint chip art for this room as well! (Although I felt very criminal walking out of Lowe’s with a handful of paint chips!) Using a variety of pinks and oranges, I laid the paint chips out first (to decide my pattern) and then glued them to a piece of cardboard cut to fit my frame. The “LAUGH” was cut out of white card stock using the Cricut, and was glued right on top! This is another one of my favorites!

(below) This was another project my sister and I were anxious to try: button art on a canvas! We used our flower template that we used throughout the whole room to place the buttons. Once everything was in place and we determined we had enough buttons, my sister went back and glued them all down one-by-one! Such neat texture, don’t you think?!? The “fame”is cut from vinyl. Note – we had a tough time getting the vinyl to stick to the canvas, so we ended up gluing it!

(below) Finally, the last element we finished up was this orange canvas! (You might even notice that in some pictures it’s not quite done..shhh…. 😉 We spray painted a large canvas bright orange. My sister then cut this phrase and Irish dancer out of vinyl and glued down all the pieces! Such a great motivational reminder to my “Champion” niece!!
There are a few other little elements on this wall that we didn’t make, but I can tell you where we found them!
(top row center) 3D wire flower – Hobby Lobby
(far right) Plastic Flower Garland – Hobby Lobby
(third row left) 3D Doll Shelf – Hobby Lobby
(bottom center) Pink picture frame – Hobby Lobby
And last but not least, we made the 3D wall flowers down the left side…get the full tutorial here!
One of the goals of this room transformation was to give my niece lots and lots of storage. To the left of her bed, is a 3 step storage shelf (baskets tuck into the left side of it and hold shoes, magazines, and stuffed animals)…and it also doubles as a bedside table!

To the right of the bed is a mini “vanity.” The cabinet beneath stores American Girl clothes, while the top storage cubbies hold combs, brushes, clips, claws, jewlery and everything else a 10-year-old needs!
Want to save this post?

To give my niece the space to actually get in to her closet, we removed the doors and added this flower curtain. The grommets (rather than hooks or a rod pocket) allow for the curtain to be easily opened and closed.

Behind the door is a coat rack and necklace holder to keep these things accessible but also off the floor.

On the opposite wall, we quadrupled my niece’s original storage and made a show-stopping display to brighten her room! Three IKEA wall units were assembled and stood up side by side. A wooden plank lays across the top of all three units to give it a built-in look! A festive pennant banner brings a huge dose of color while hiding the edge of the wood board!
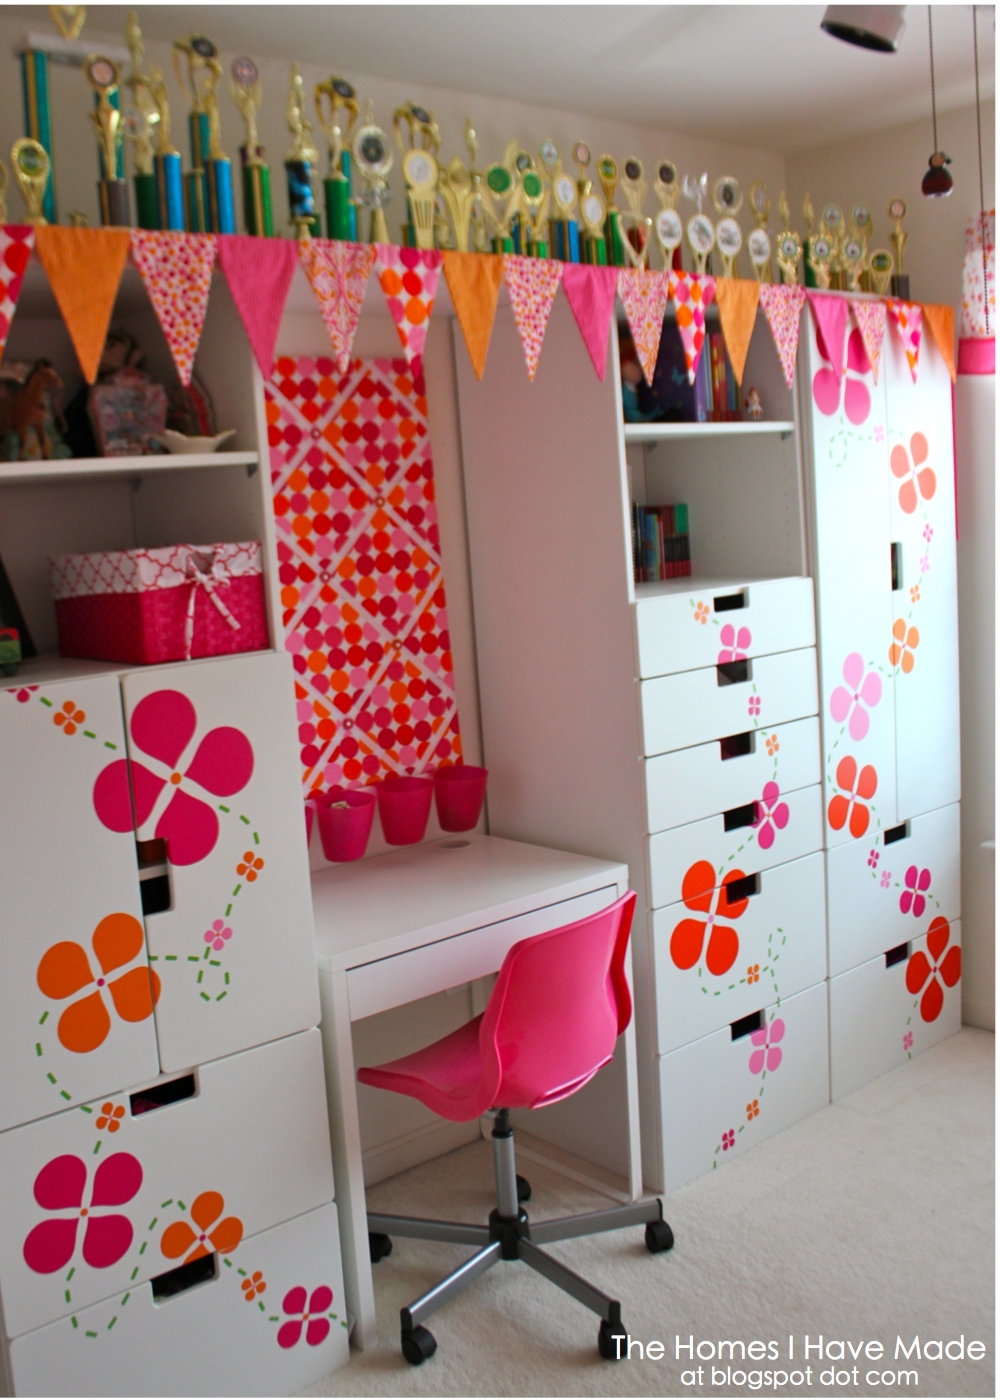
We had no intentions of painting this room, so we were faced with the challenge of adding color through other methods! Using the theme fabric (in the curtains) as inspiration, we MADE (yes, we made every last one!) these vinyl decals to adorn the drawer fronts! These vinyl flowers absolutely brought the room to life – and I have a full tutorial to show you how we did it!

Tucked in between two of the wall units is a small IKEA desk and hot pink chair! Big enough to do homework, but small enough that it can’t be overrun with clutter!
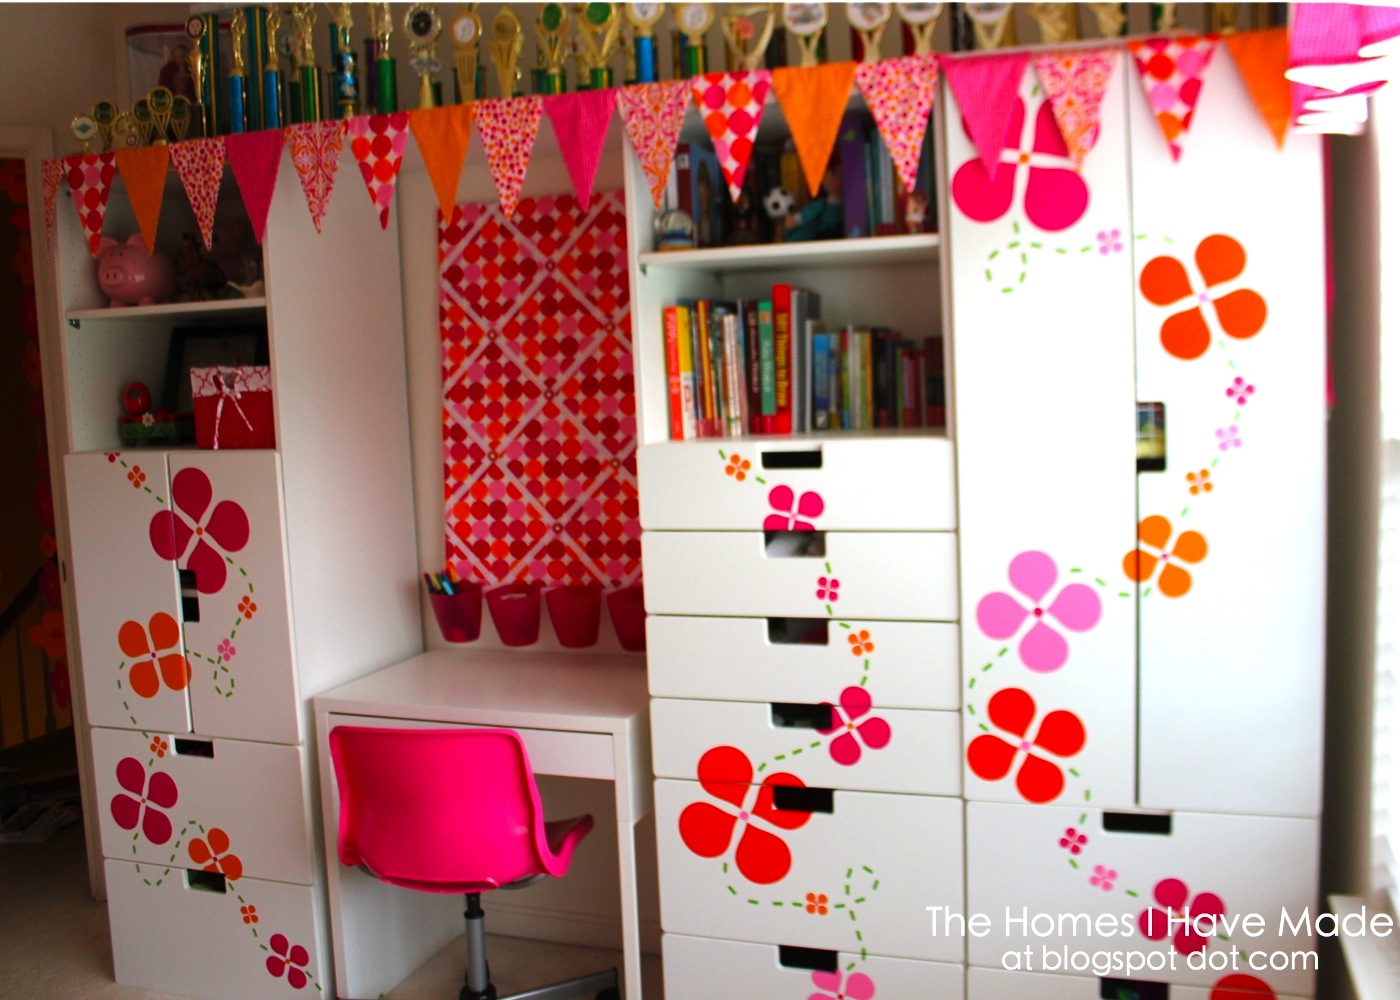
In front of the desk, we used a picture ledge to lean an extra large memo board. The ribbons allow things to be tucked right in, but it’s made with a cork board, so loose papers can be pinned right up too! (I have a tutorial for this one too!).
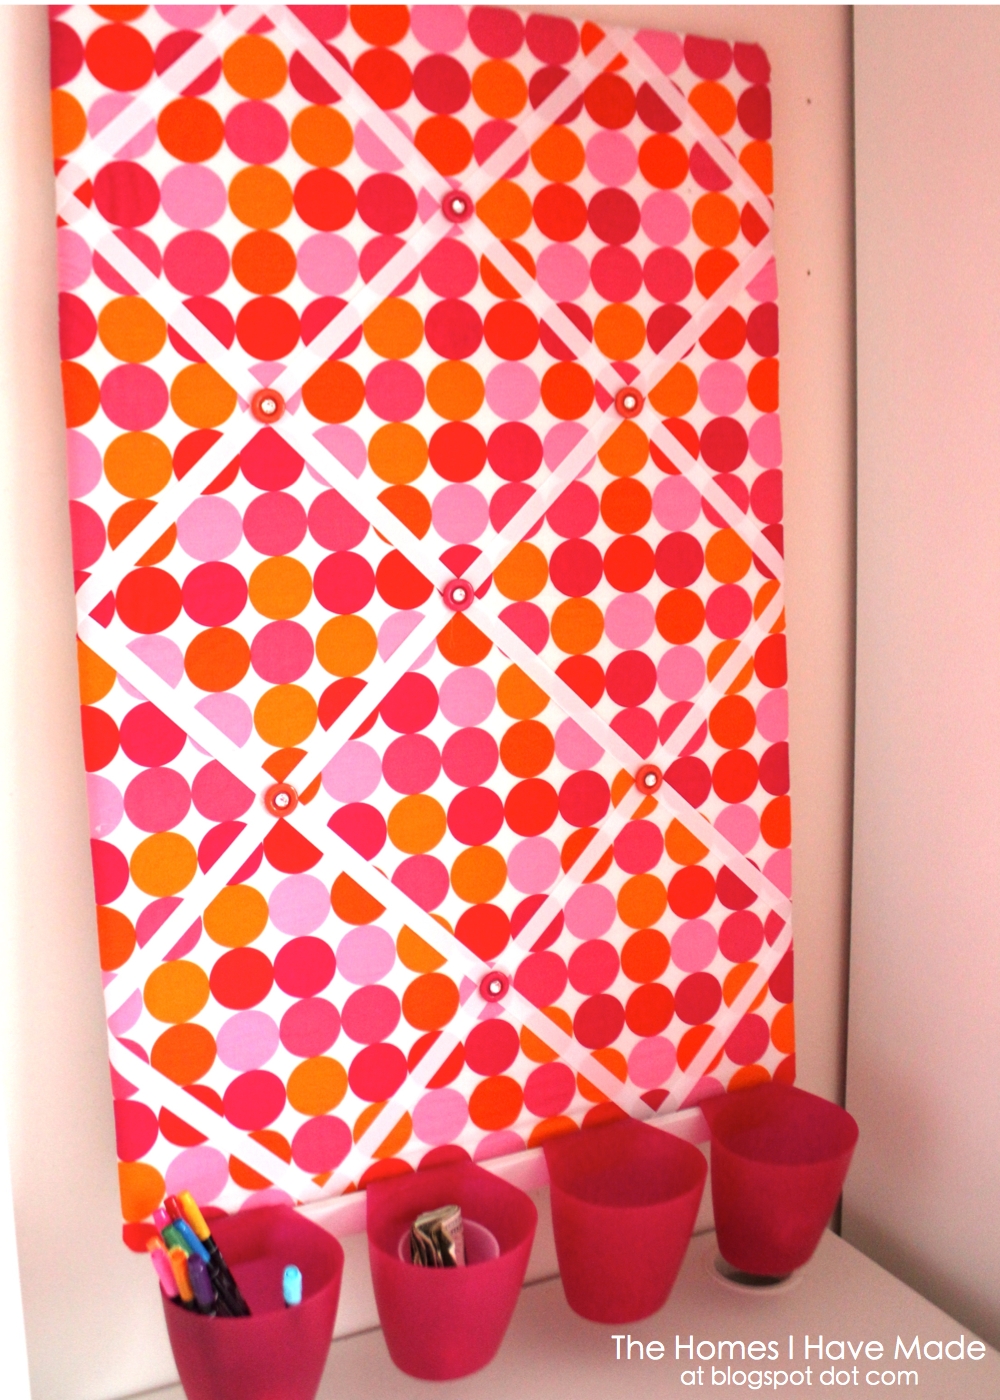
To store other odds and ends, these cups hook right onto the front of the picture ledge! No nails or drilling required – SCORE!

Lastly, we swapped out the ladybugs that hung in her door for matching flowers. These are card stock flowers just hung together with little link rings!

As it’s been quite a while since I showed you the original before and progress shots of the room, I thought it would be fun to see where we started!
View from the door:

and now…

View of the closet:
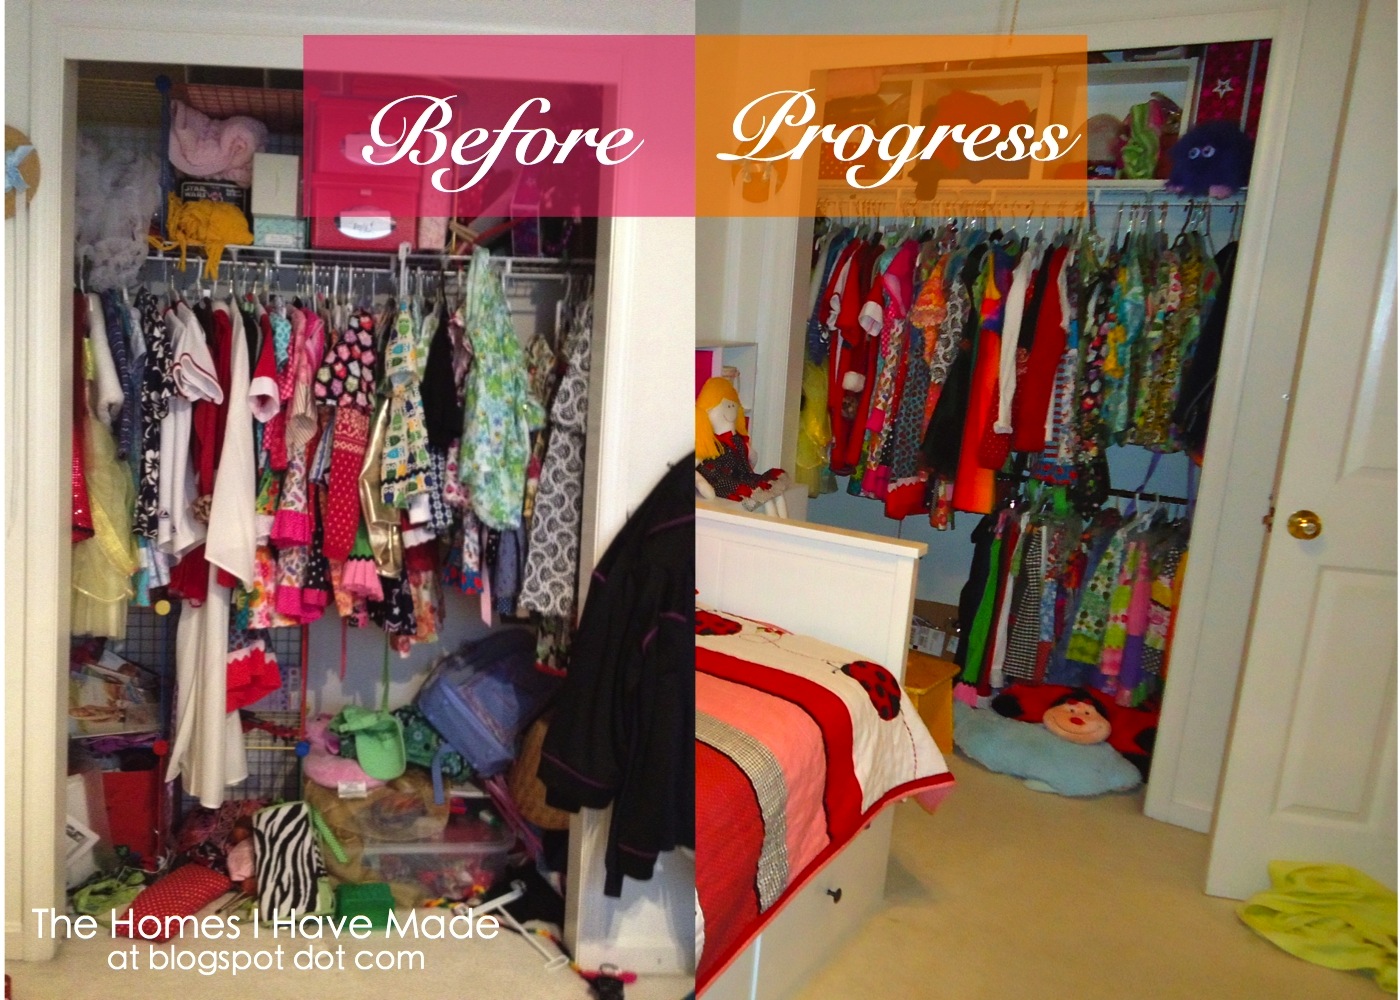
and now…

View of the left-side wall:

and now…

Phew! That’s a lot of color! Hope you enjoyed the tour and saw some goodies that spark your fancy! Come back later this week, I’m going to give you an up-close look at everything on that gallery wall!
See You Soon!
Megan
Megan
16 Comments on “A Raspberry Sherbet Tween Bedroom Makeover!”
How beautiful! I'm sure she must love the work you did for her!
It turned out gorgeous!! Love the bright colors!
This is so fun!!! Thanks for sharing it with us. Your niece must be so happy!
What a lucky little girl to have such a great aunt!!! This room is gorgeous! I love the colors and all the little touches you added to make this special!
The room looks great! Did the bed also come from IKEA?
cyndy dimpls
Hi Cyndy! Yes, the bed is IKEA too! Here's the link!
http://www.ikea.com/us/en/catalog/products/30080316/
hey love d work i have the same chair from ikea looks good if you put a small flat cushion on it
What a fun bedroom! I love all the great bright colors together, so cute and fun!
Oh wow!! I'm in love with this room!!!want to decorate my daughters room like this!
your newest follower!!!
Natasha xx
Wow!! What a fun and cheerful transformation! I love that gallery wall and the memo board. Who wouldn't want to do homework in a hot pink chair? 🙂
SUPER CUTE! Crossing my fingers you'll share at my party! Saturdays at Seven!
XO, Aimee
My 8yo daughter loves this room, but wants me to "make it blue"… so I'm bookmarking this page + the posts that go with it as guides in my quest remake my little girls' space into something she can grow into + enjoy into her tweens. We have lots of time, so can attack a project once a month for the next 5 years, lolz!
Any advice for where to start? I'm thinking BED, as she is about to outgrow her adorable small-frame Ikea kid's bed. I guess bed linens would be a great place to determine a color+pattern scheme, right?
This is AMAZING!!! I love everything about this room 🙂
Sorry to have to ask, but what components fro IKea were used to make up what looks like a built in unit around her little desk? I've never really explored Ikea since we don't have one close by and I'm having a little trouble tracking down what all was used. Thanks much!
Absolutely beautiful! I'm so glad I stumbled upon your page!!
Is she still liking the room? or has it changed again?