Organize Your Cords (using an ornament box!)

Remember back when I showed you our ugly/scary home office? One thing I didn’t show in that little photo tour was the ugly/scary closet tin that ugly/scary office. And on the floor of that ugly/scary closet, sat a HUGE ugly/scary pile knotty mess of electronic cords!
You see…when we first moved into the house, I didn’t have the energy to tackle the cords. Not only untangling them, but figuring out what all they went to, totally stressed me out! I kept telling myself that those cords were a good project while I watched TV. Well…months later, I can tell you that I’ve watched full seasons of Glee, Grey’s, and Downton Abbey, and that mess of cords NEVER got touched!
Then, a little while back, Jen over at Iheartorganizing had a similar cord story and featured her solution to the never-ending cord problem:

I was totally inspired to tackle my cords, and off I set to do it…of course, putting my own twist on the project!
Let me show you what I did!
My mind must work in a very, very bizarre way, because as soon as I saw Jen’s boxes, I knew immediately what I wanted to use to organize my cords: a Snapware Christmas ornament box! Not only did it have little cubbies for each of my cords, but it also had three layers that all snapped together! (Now…finding one of these babies long after the holiday season was over was near impossible! As luck would have it, my sister had an un-used one in her basement! Score!)
1. Here’s what I used:
- Snapware Christmas ornament organizer
- Adhesive shelf liner – (I bought this awesome shelf liner at HomeGoods, have you seen all the great patterns? Stay tuned – I bought a bunch of it and have lots of project ideas for it!)
- Cords (not pictured)
- Cricut machine (not pictured)

2. Before covering my cardboard inserts, I laid them out on the shelf liner to determine how best to use the adhesive paper. I determined one width of paper would allow me to cover two dividers. All 18 dividers took me one entire roll of liner!

3. To cover each divider, I simply cut a length of my paper, and cut that in half again (so I ended up with half of what is shown above). I then wrapped the paper over the tops and edges like I was wrapping a present, and then snipped away the paper for the inlets.
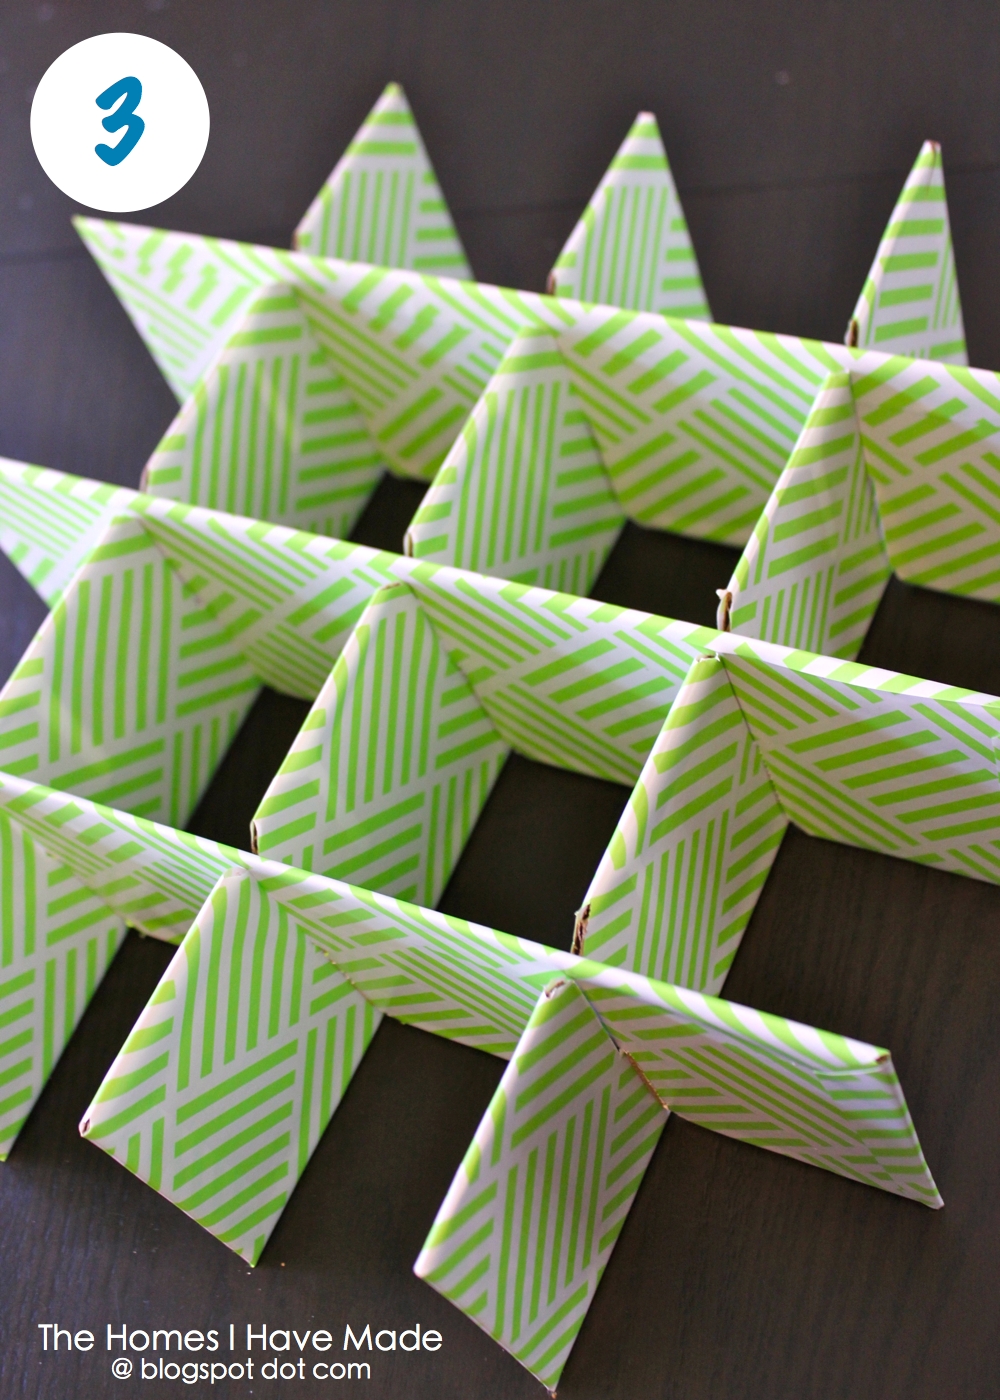
The nice smooth paper allowed everything to be put back together quite nicely. And the paper added a fun flare beyond the plain brown cardboard!
Want to save this post?

4. Next, I had to sort, organize, and wrap-up my cords. This was a team effort between my nephew (who needed service hours..he did the untangling), my husband (he did the identifying), and myself (I did the pretty-ifying). Once we determined what the cords were and if they need to be kept (we had a lot of cords to old cell phones/cameras, etc), we then loosely wrapped each cord and secured with a rubber band. I then load them into my box! Like Jen, we placed our most-used cords on the top tier.

5. Next, I made labels for each cord cubby. I used some blank address labels that I had on hand and printed the names of each cord with my computer/printer.

6. Load up the entire box, and snap together! I was excited to see that I had a whole layer and a half free for more cords to come (room to grow!) (Note – you might have some cords that are too big for their cubby. Fortunately, the dividers bend pretty easily, making two small cubbies into one larger one! This was perfect when I needed a bit more room!)

7. Despite the bendable dividers, we still had some really big electrical items that were in no way going to fit in my little cubbies. I bought an extra big plastic bin for these larger cords, power boxes, etc!

8. The last thing I did was label my boxes! Using some more of the shelf liner, I cut labels for each box using my cricut!
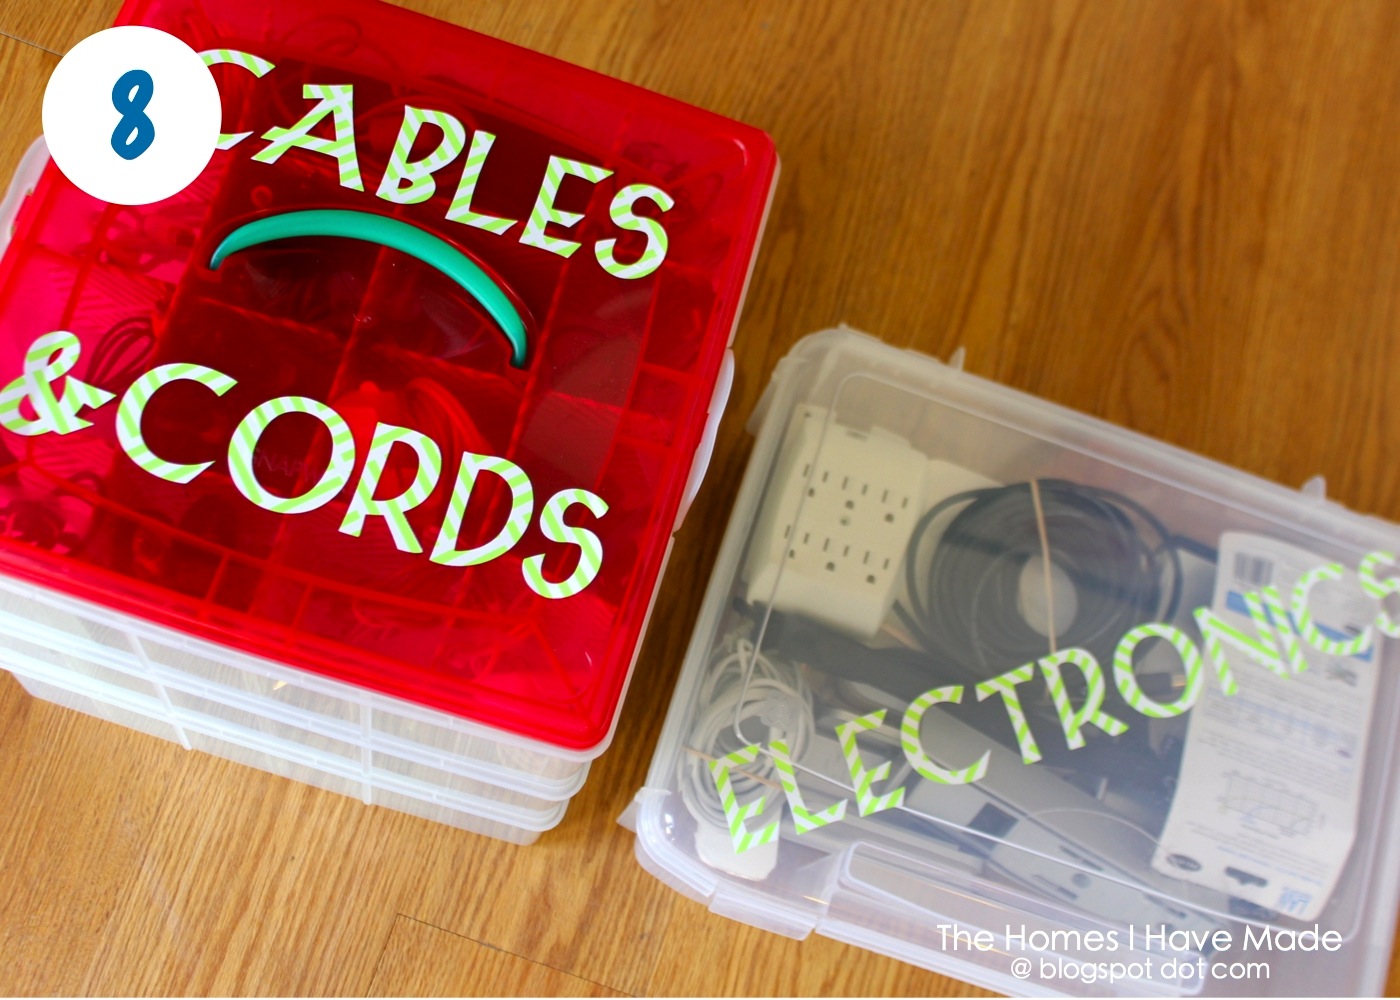
Now, all my cords and other electronics are all in the same place! Phew! And that ugly/scary mess of cables is gone! It’s amazing how something so stupid can be so stressful – now I know exactly where to find a specific charger or cord!
My nice/pretty boxes are now are all tucked away…back into the ugly/scary closet 🙂 One thing at a time people, one thing at a time!
See You Soon!
Megan
Megan
15 Comments on “Organize Your Cords (using an ornament box!)”
Great idea Megan! Love the cute paper. Wish there was a Home Goods by me.
What a great idea to use an ornament box and pretty it up!
Very cute idea! Love it! Thanks for sharing!
Oh my goodness it turned out SO good! Love love love it! And so very organized! Thanks so much for sharing!
xoxo,
Jen
Great Idea!!! I need to do something like this. My cords have gotten messed up again! Thanks for sharing.
I love this! Organizing makes me happy and so does this! I will have to try it. 🙂
Pingback: Pinterest Weekly Round Up - Electronic Organization - Organize 365
Pingback: 13 Ways To Organize All Those Cords - Fullact Trending Stories With The Laugh Mixture
Pingback: Christmas Storage Hacks | Make Clean Up Simpler This Year
Meagan,
This is the perfect idea. I need this ASAP!
Pingback: 3 Storage Box Ideas - Homiku.com
Pingback: 3 Storage Box Ideas - Homiku.com - Home Design and Decor
Pingback: 13 Ways To Organize All Those Cords - Baby Candy Land
Pingback: 10 Colorful Storage Box Ideas - rengusuk.com
Hi Megan! What an idea! Do you have a template for the dividers which I can use to cut my own from cardboard? The shops here in Sweden don’t sell it separatley. I need to buy the whole ornament bag with the dividers. Cheers!