How to Hardwire a Vintage Lamp
Happy Monday, friends! Did you have a good weekend? We spent a fantastic weekend visiting and relaxing with family. We made it back just in time to watch the Super Bowl and prep for the week ahead. It was a good one, but it sure went by way too quickly!
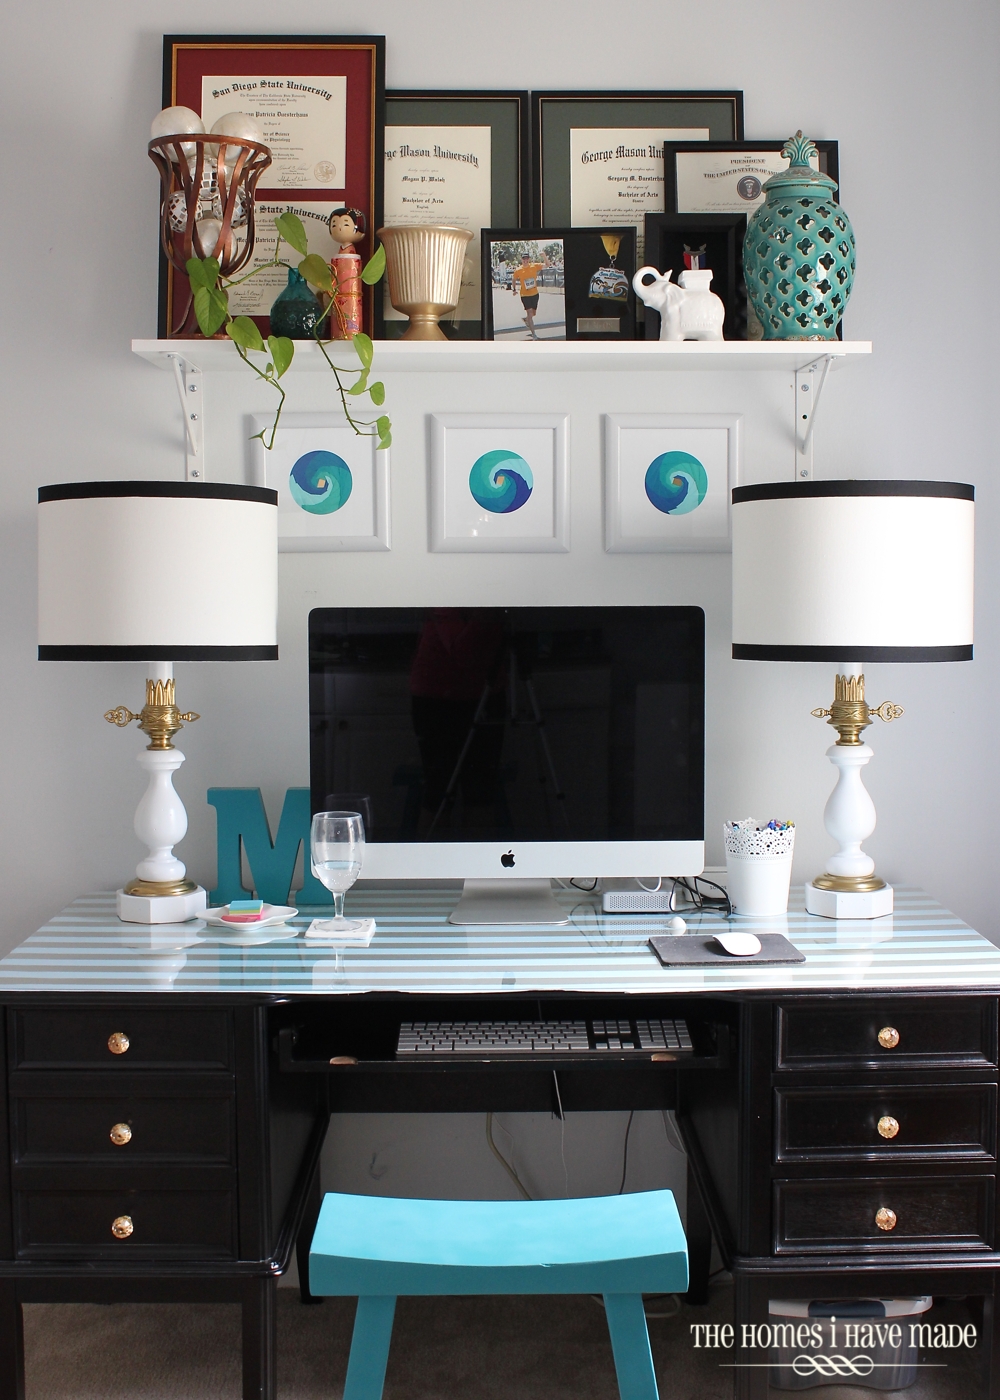
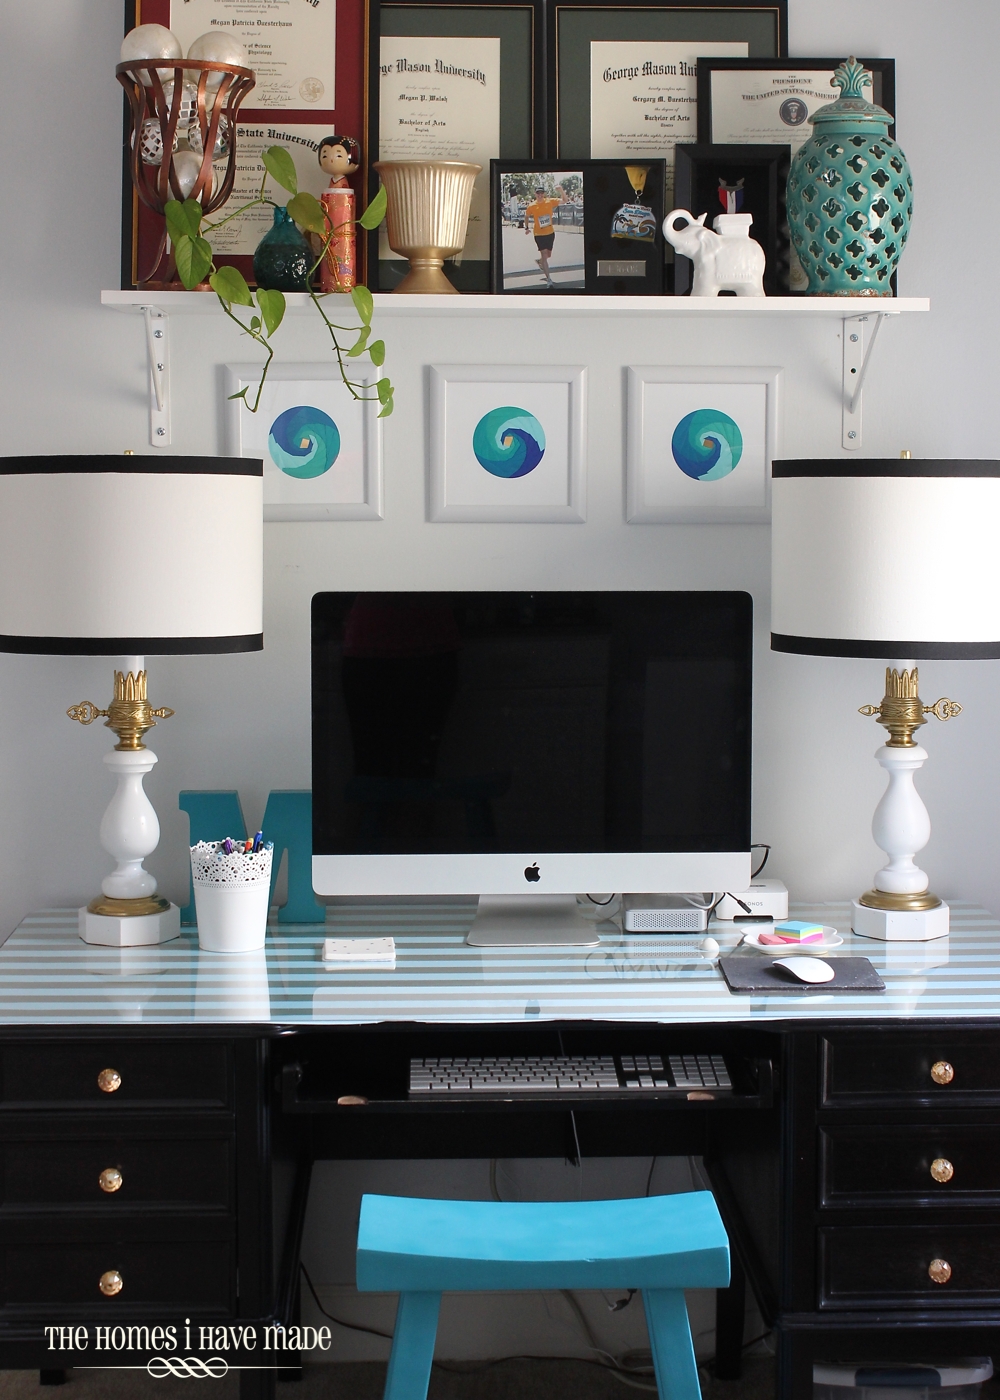
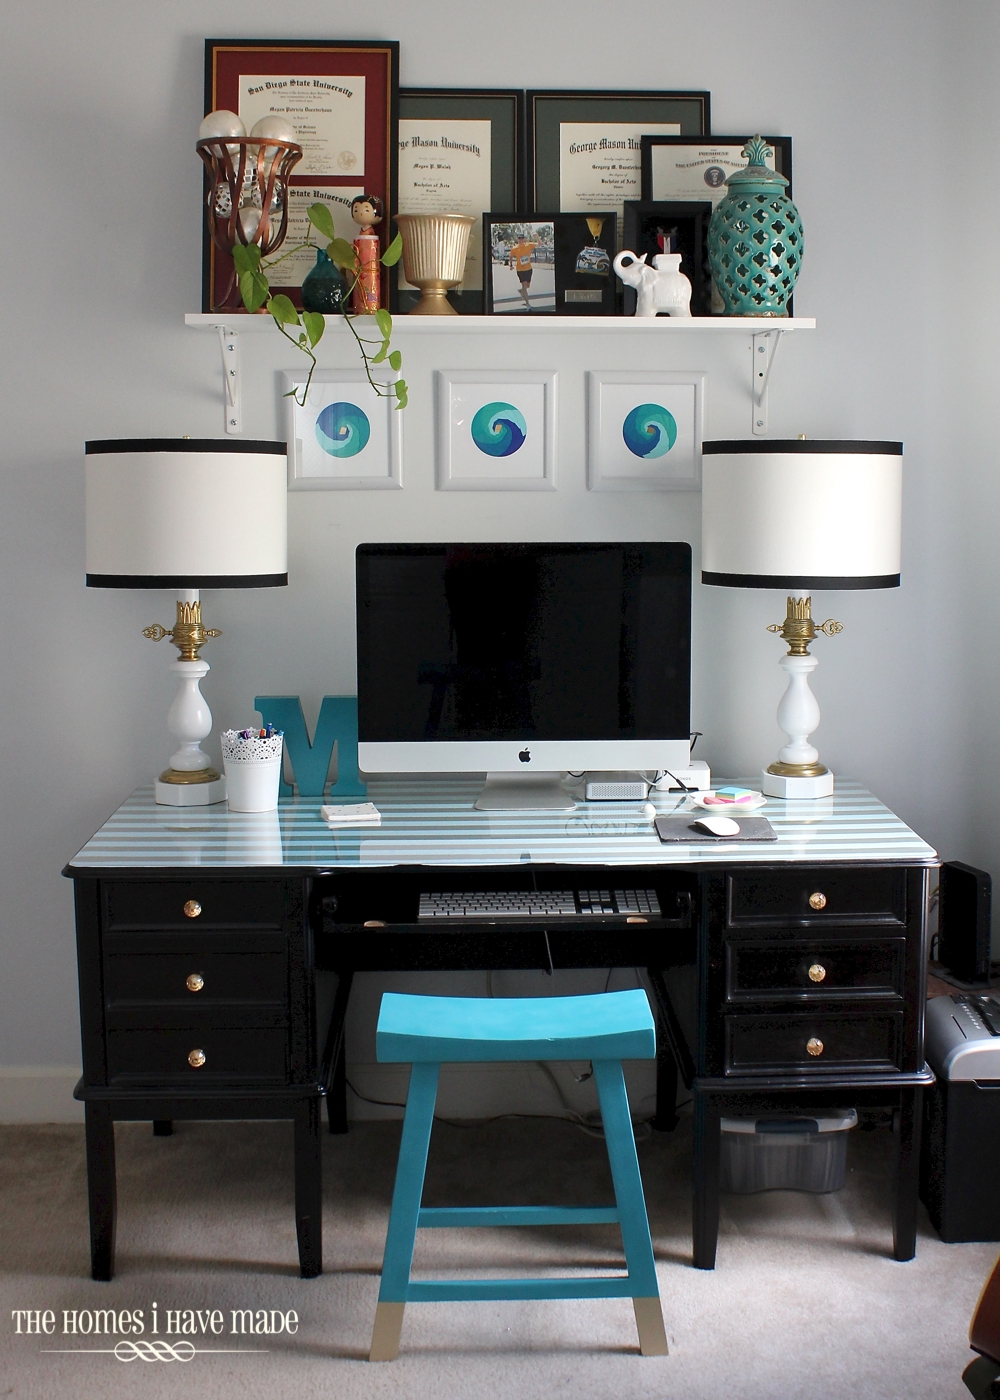
I’m excited to kick off this week with a quick little makeover on another one of the “treasures” from my parents’ basement! (You can see more “treasure” makeovers here!) Let me show you this little spot in our home office, do you notice something new/different?
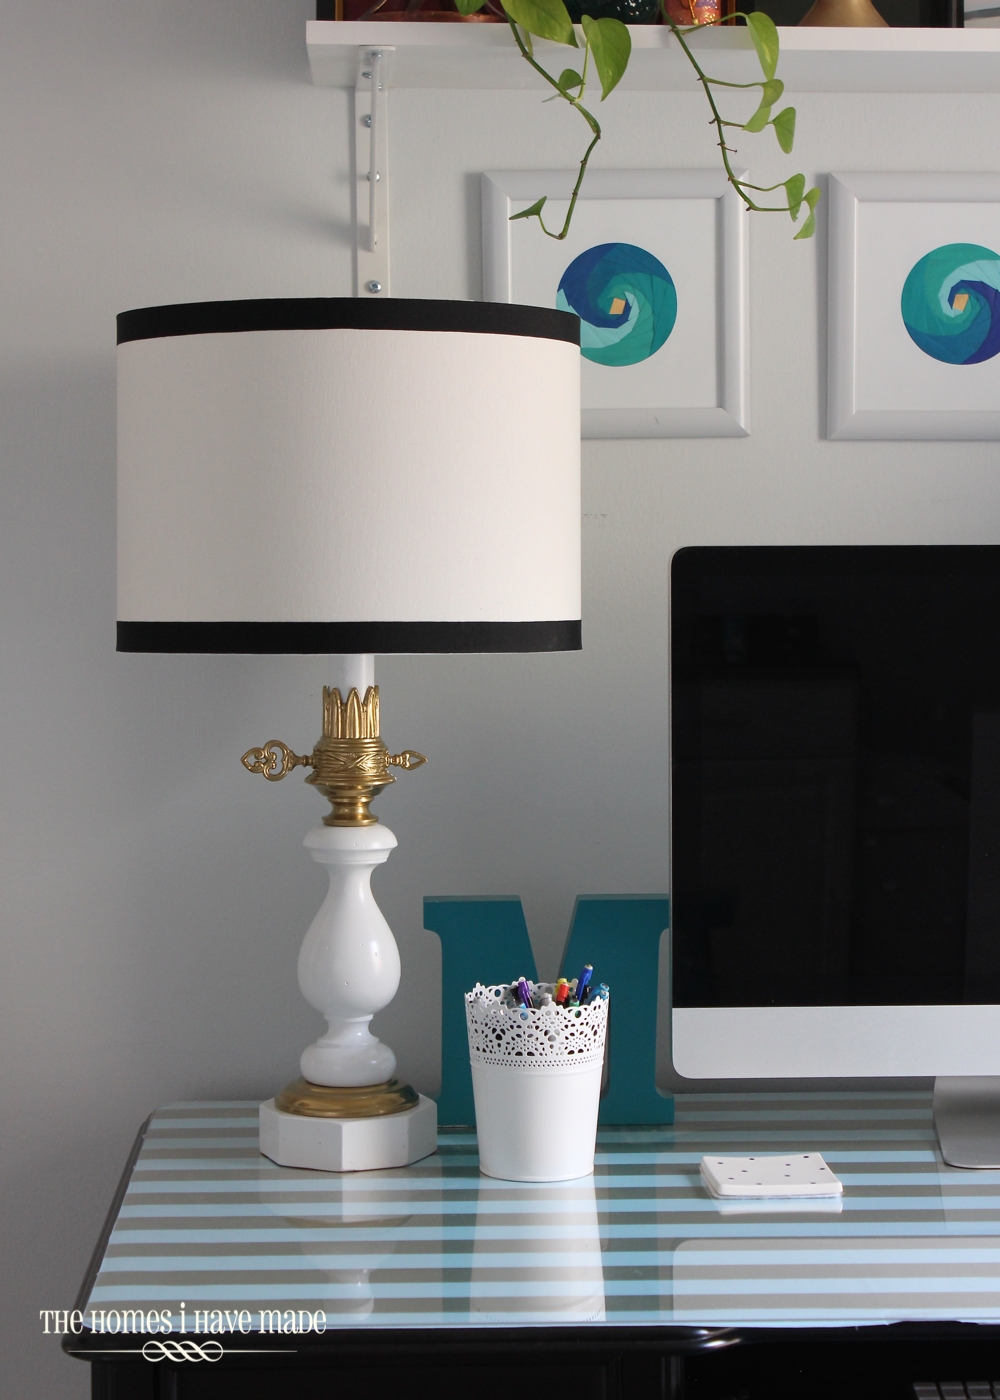
Yep – we have some cool yet funky, “new” vintage lamps on our office desk. Admittedly, they’re a little weird and a tad ornate for my taste, but they’ve completely grown on me over the last week and I sorta love them! The white and brass bases paired with ultra-preppy shades just make me smile, and their size is actually perfect on this monster of a desk!
What’s more fun about these lamps – besides their paint-and-polish makeover – is that I completely disassembled and reassembled these vintage lamps all by myself! Sure, I’ve made over lamps in the past, but I have never had to complete take them apart and then re-wire them back together again. I LOVE projects that teach me something new, so I really felt accomplished with this one.
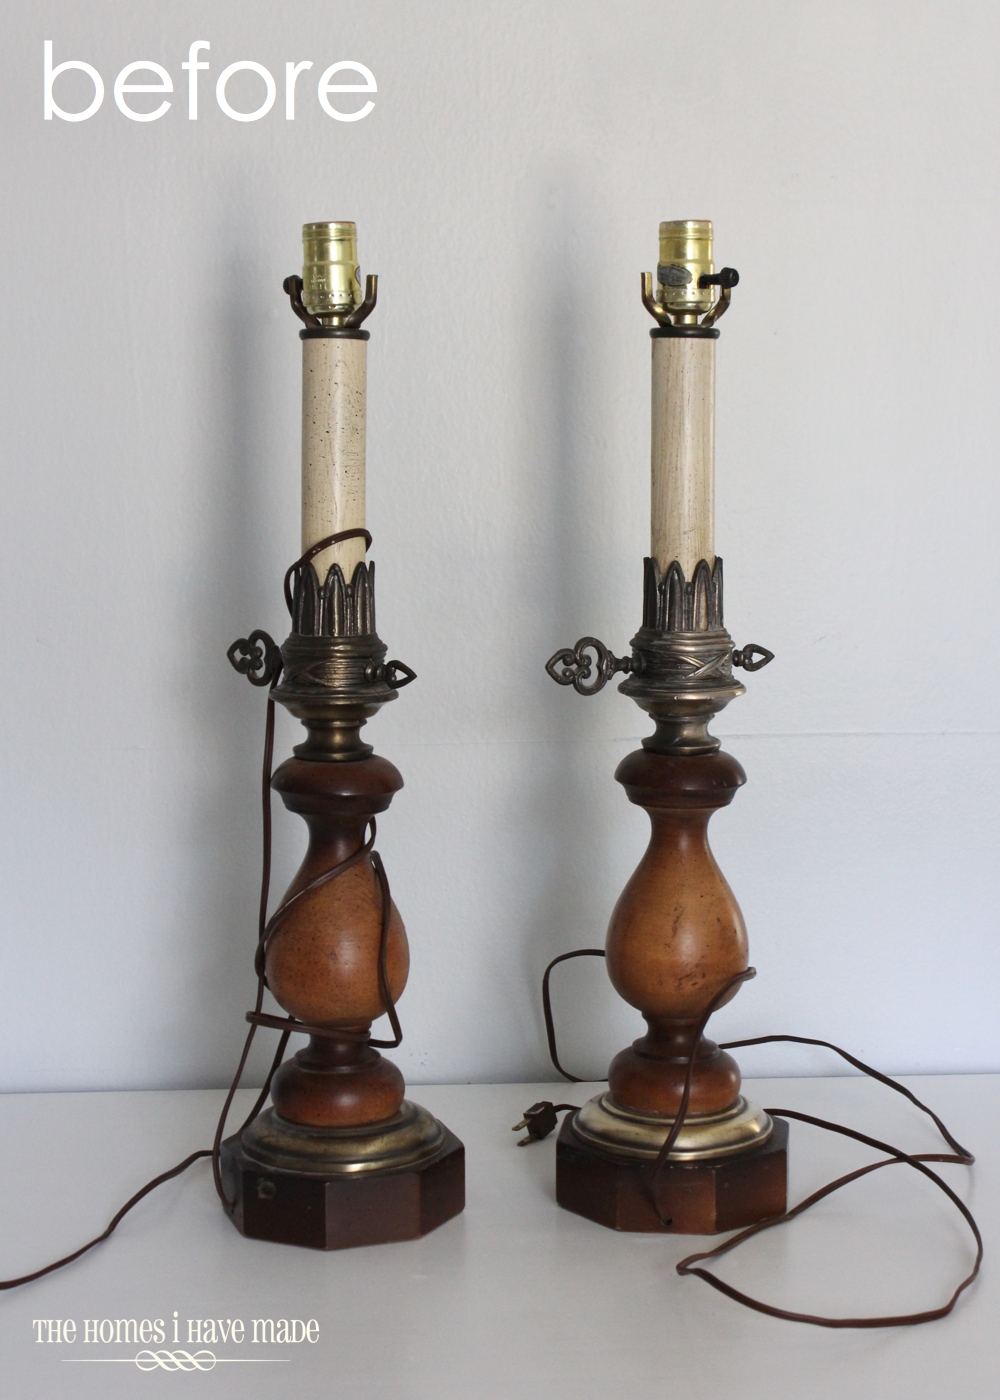
I acquired these lamps during the great clean out and purge of my parents’ house. My Dad ended up with more pairs of lamps than he needed in his new place. Instead of hauling them off to Goodwill, I brought them home, super excited to give them a makeover. They were pretty “vintage” and all sorts of ugly, but the brass and wood combo intrigued me. I’m pretty sure my husband gave me at least a dozen “really, we are taking these home?” looks!
(Note – do not paint, polish or disassemble any lamp that is plugged in or switched on. Before working with a lamp, be sure it is turned off and un-plugged from an electrical source!)
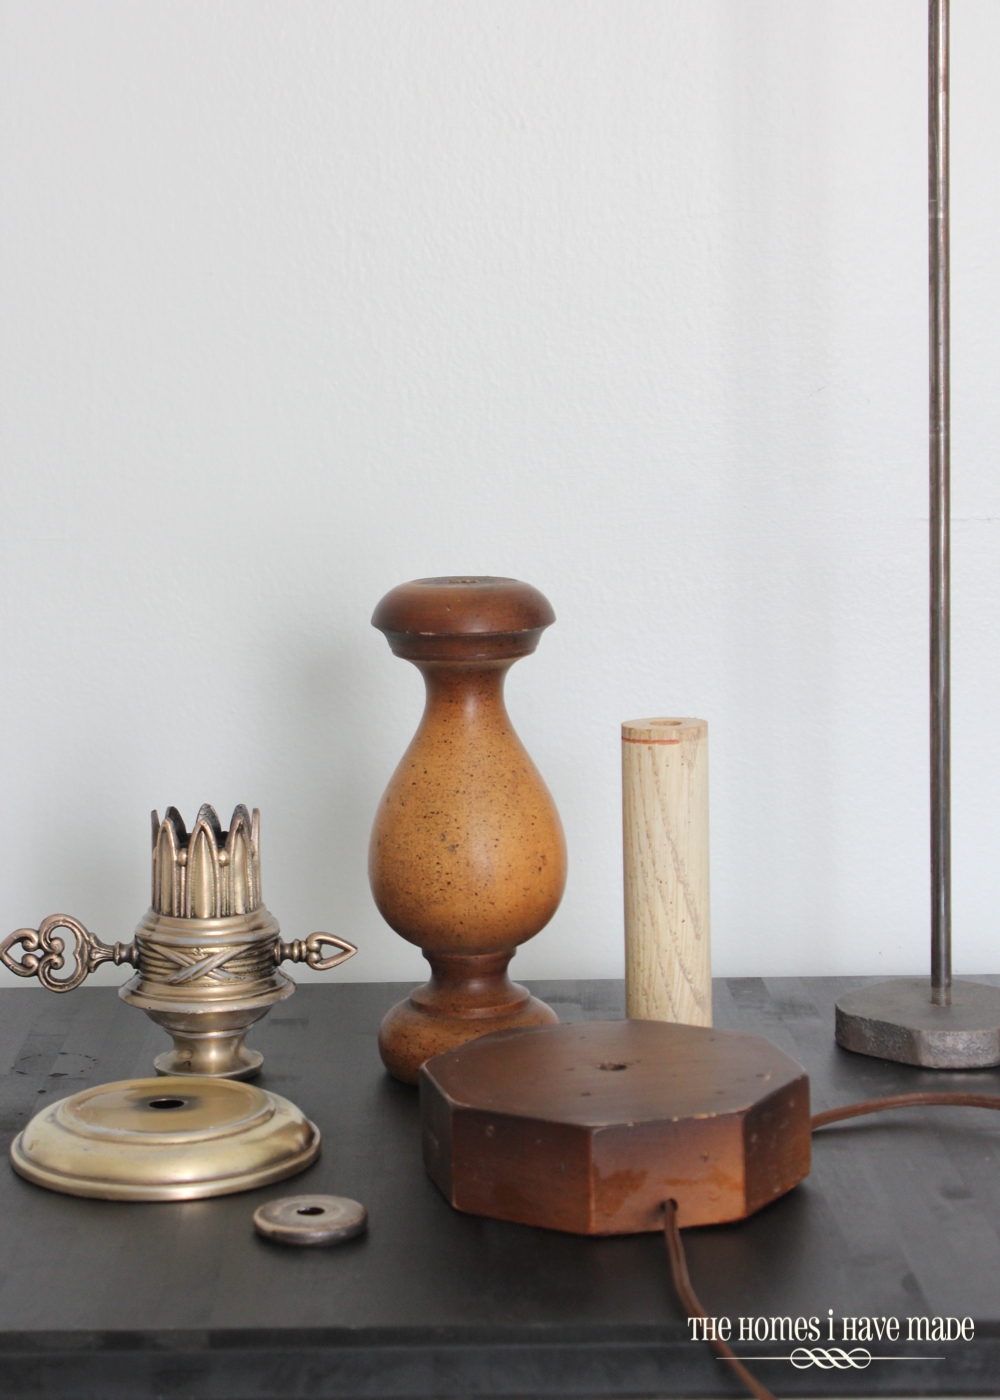
Originally, I was going to paint the lamps via my usual route of taping off sections and spraying. However, after examining them for a bit, I realized that every section of the lamp was separate and could (relatively easily) come part, making the painting step much easier (if I could figure out how to remove the socket portion of the lamp!). After Goggling around for a bit, I found Mandi’s lamp tutorial easy to understand, so I gave the disassembly a go. It was actually pretty easy and I ended up with my lamp in all its individual parts! (I’m super sorry, but I forgot to snap pictures of the disassembly part – this was one of those, figure it out as you go-type processes! Check out Mandi’s tutorial or you can follow this tutorial in reverse, which should help you successfully disassemble your lamp).
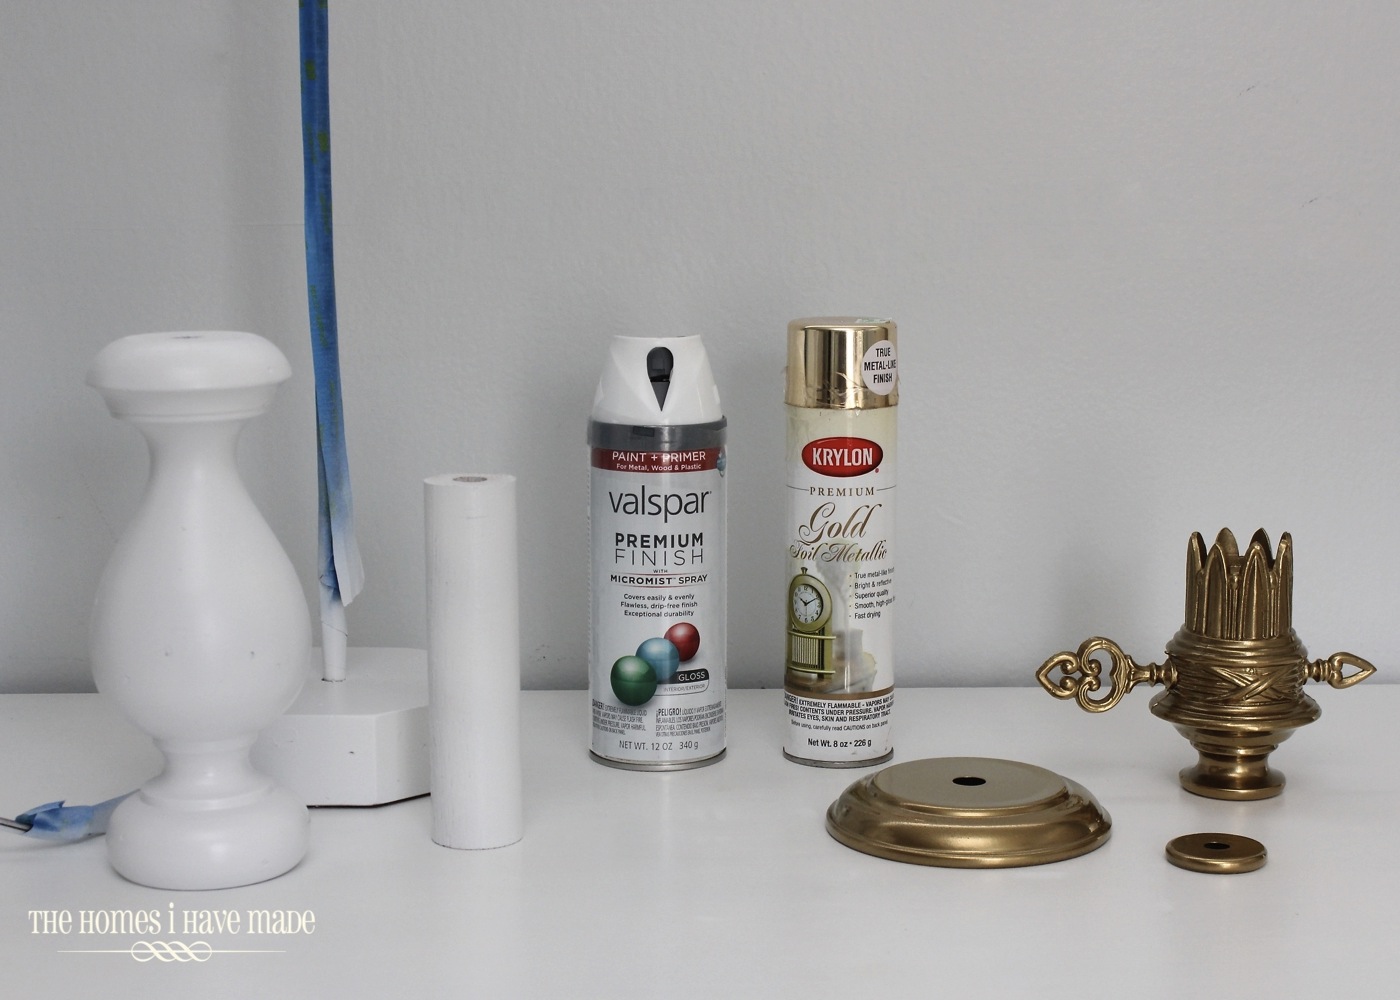
My plan was to polish the three brass pieces with Bar Keeper’s Friend and paint the rest. Even with just using a soft, old toothbrush, I discovered that these pieces weren’t brass after all (you can see the silver sections peeking out behind the varnish). Boo.
I was somewhat hooked on my brass+white plan so I decided to give a new-to-me gold spray paint a try and see how it looked! Lo and behold, I love the clean, shiny, gold metallic look this Krylon Premium Gold Foil Metallic spray paint gave the metal pieces. All the remaining wood sections were primed with Zinsser 123 Spray Primer and then given several light coats of Valspar White spray paint in high gloss.
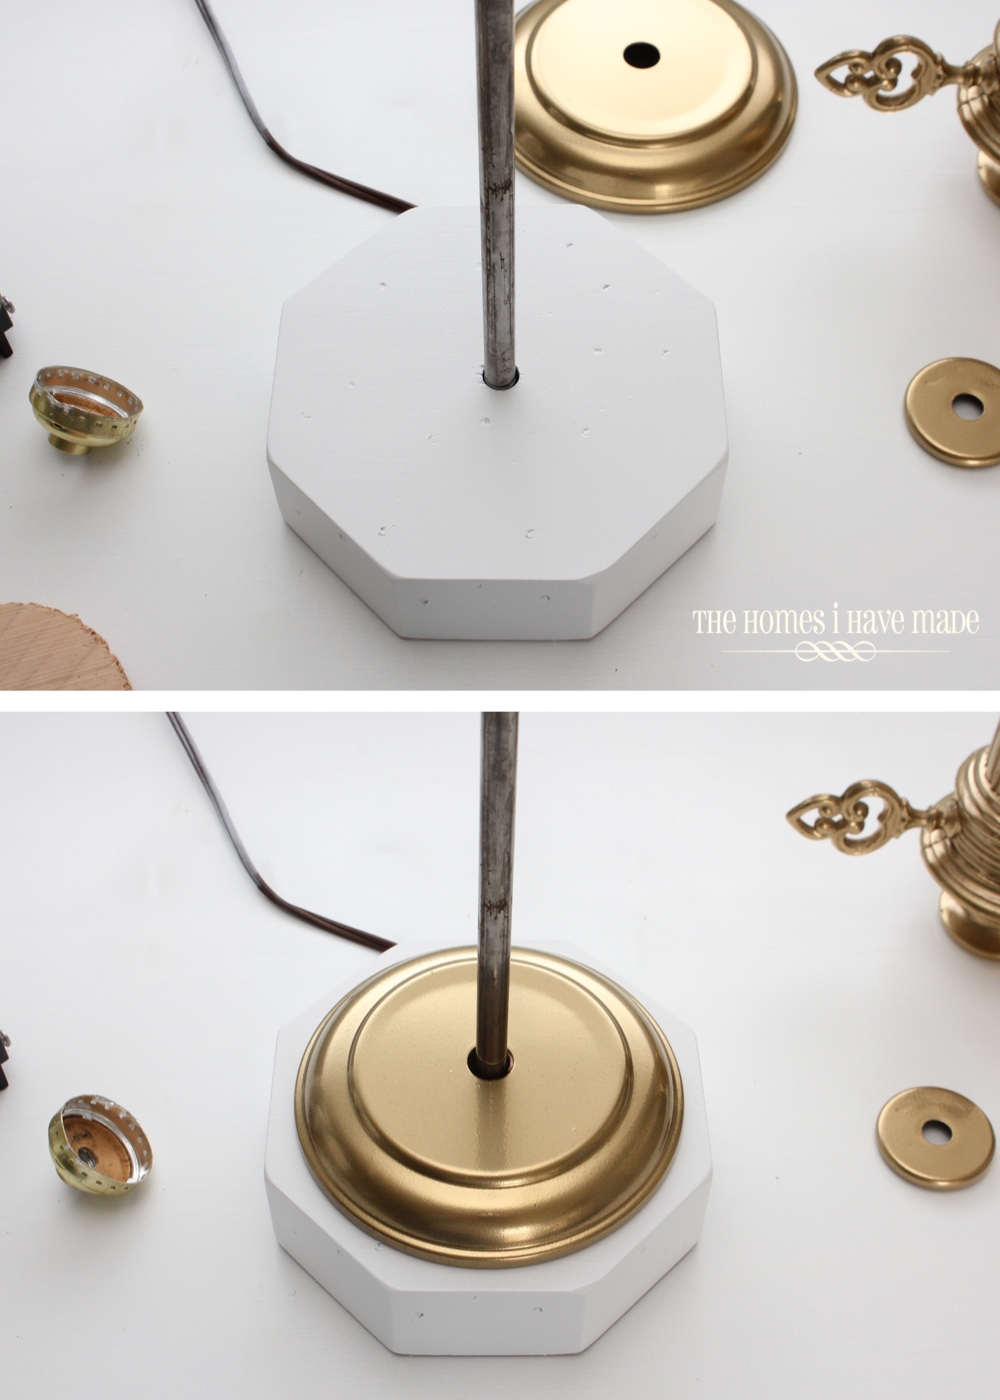
Once my lamp pieces were painted and fully cured (about 24 hours later), it was time to reassemble the lamps and see if I could get them working again! (I remembered to snap photos this time!). I started with my white base, and then layered the pieces back onto the metal rod, just as they were taken off.
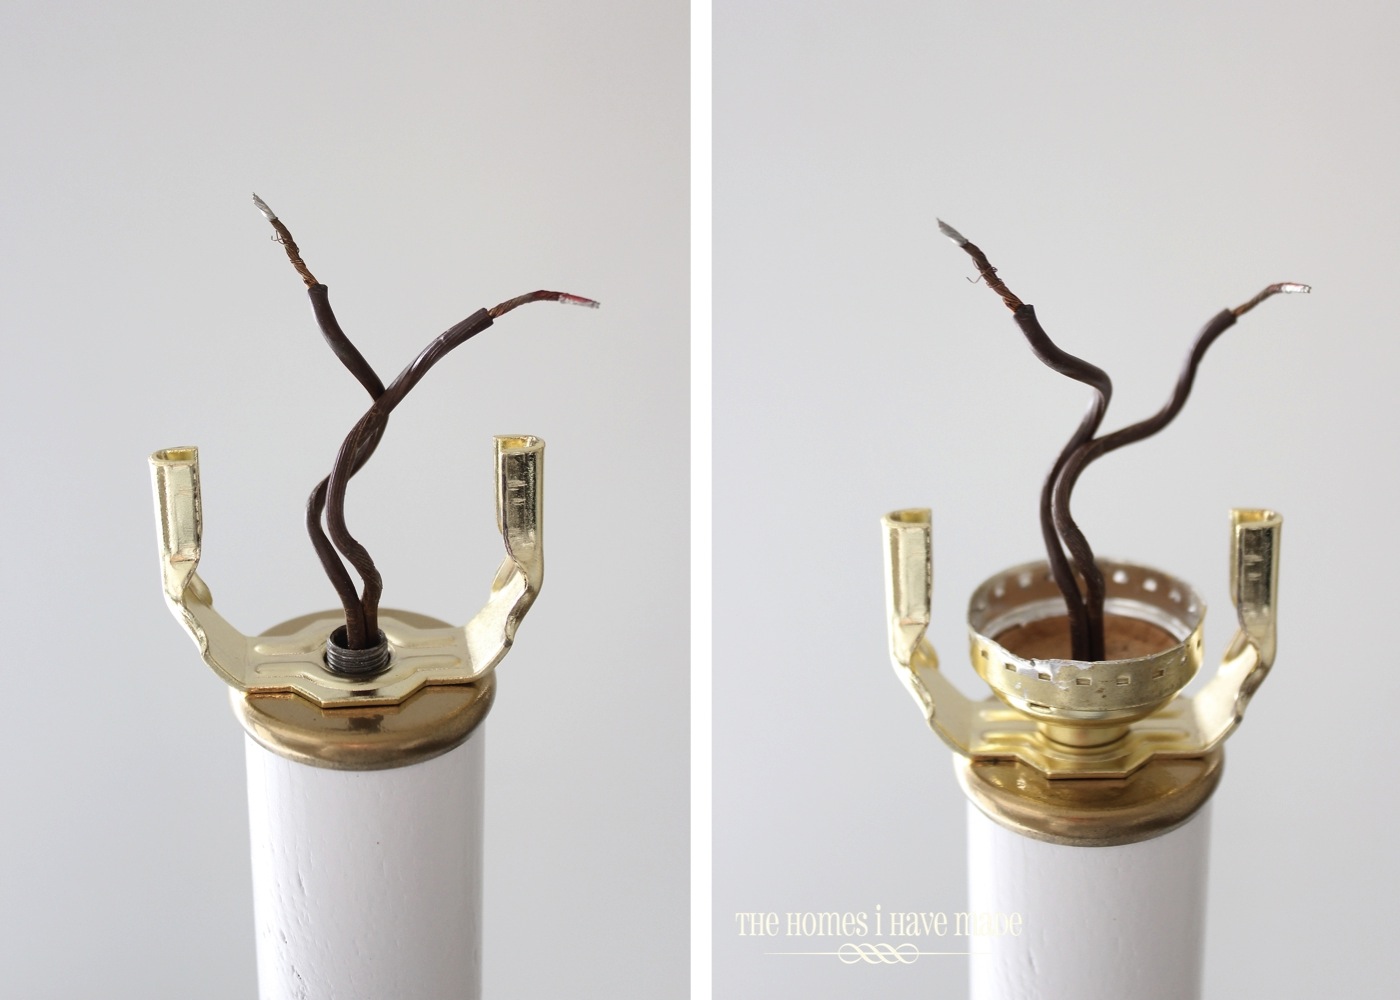
The longer, skinnier parts of the lamp were more difficult to thread onto the rod with the loose wires on top, so I taped the two wires together with painters tape and continued stacking the components onto the lamp base.
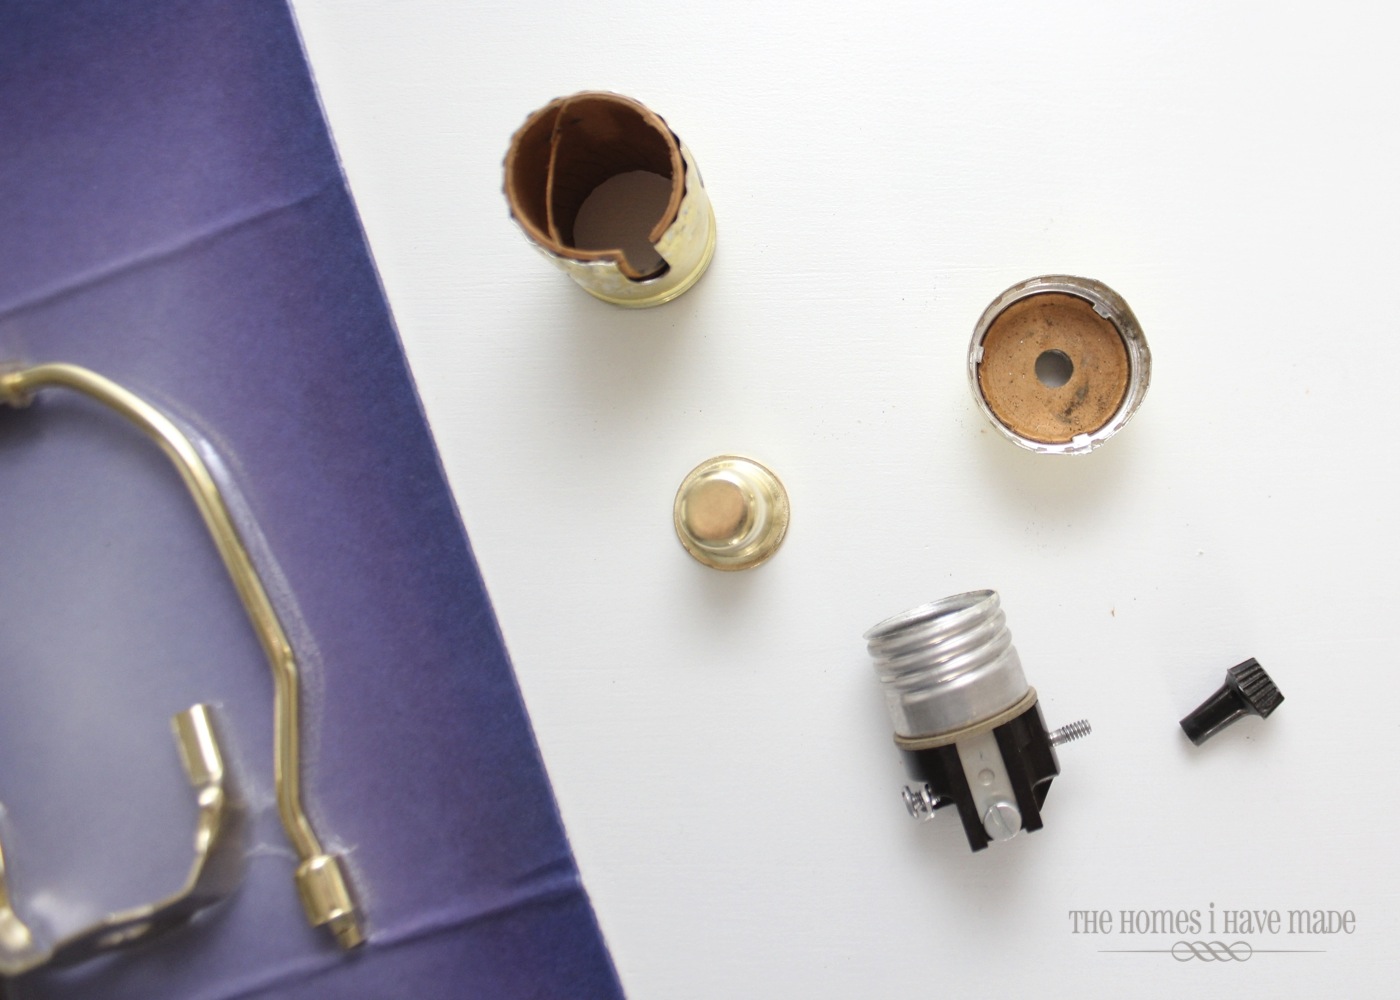
With the lamp base fully stacked, it was time to reassemble the socket portion of the lamp. I also had to add new harps and finials since the lamps didn’t have finials or the right size harps for my new shades.
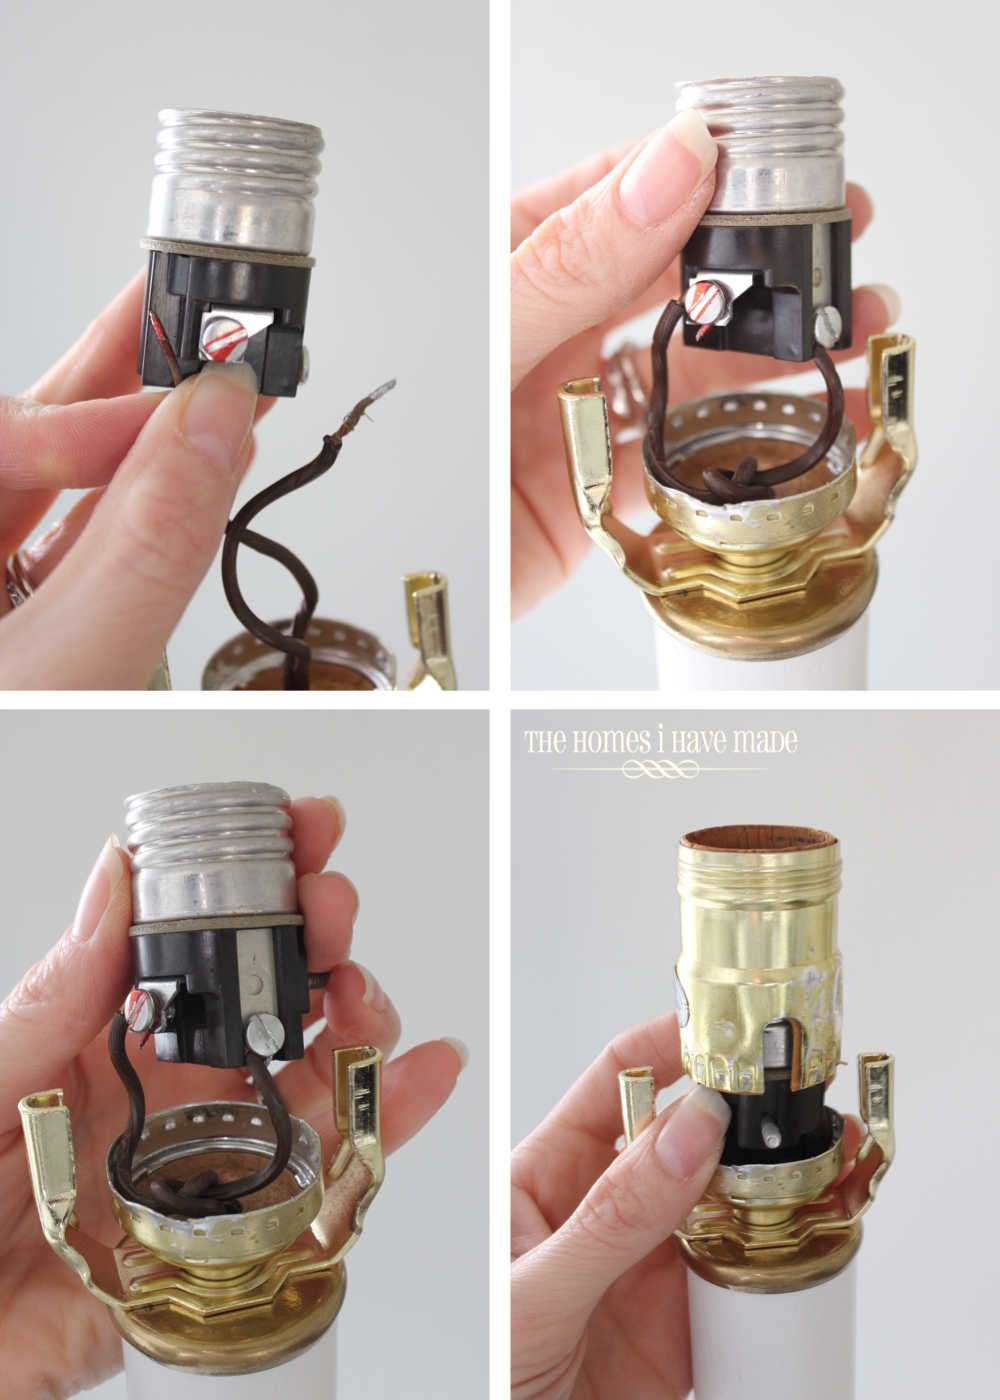
I started by putting on the new harp base (bottom left) and then twisted on the base of the bulb socket by stringing the wires through and twisting it tight (bottom right). Twisting on the bottom of the socket ensured that all of the lamp pieces were now cinched together tightly and wouldn’t rotate or wiggle.
When I disassembled the lamp sockets, I used a red Sharpe to denote which wire was attached to which screw (below, top left). To re-wire the lamp, you simply just wrap the wires around the screws on the sides of the socket and tighten the screws down to hold the wires in place. I first attached the red wire to the red screw (below, top right), then attached the other wire to the other screw, tightening everything down with a flathead screwdriver (below, bottom left). Next, push the entire socket, with the wires below it, down into the base of the socket, and place the socket “cap” over the entire unit (below, bottom right).
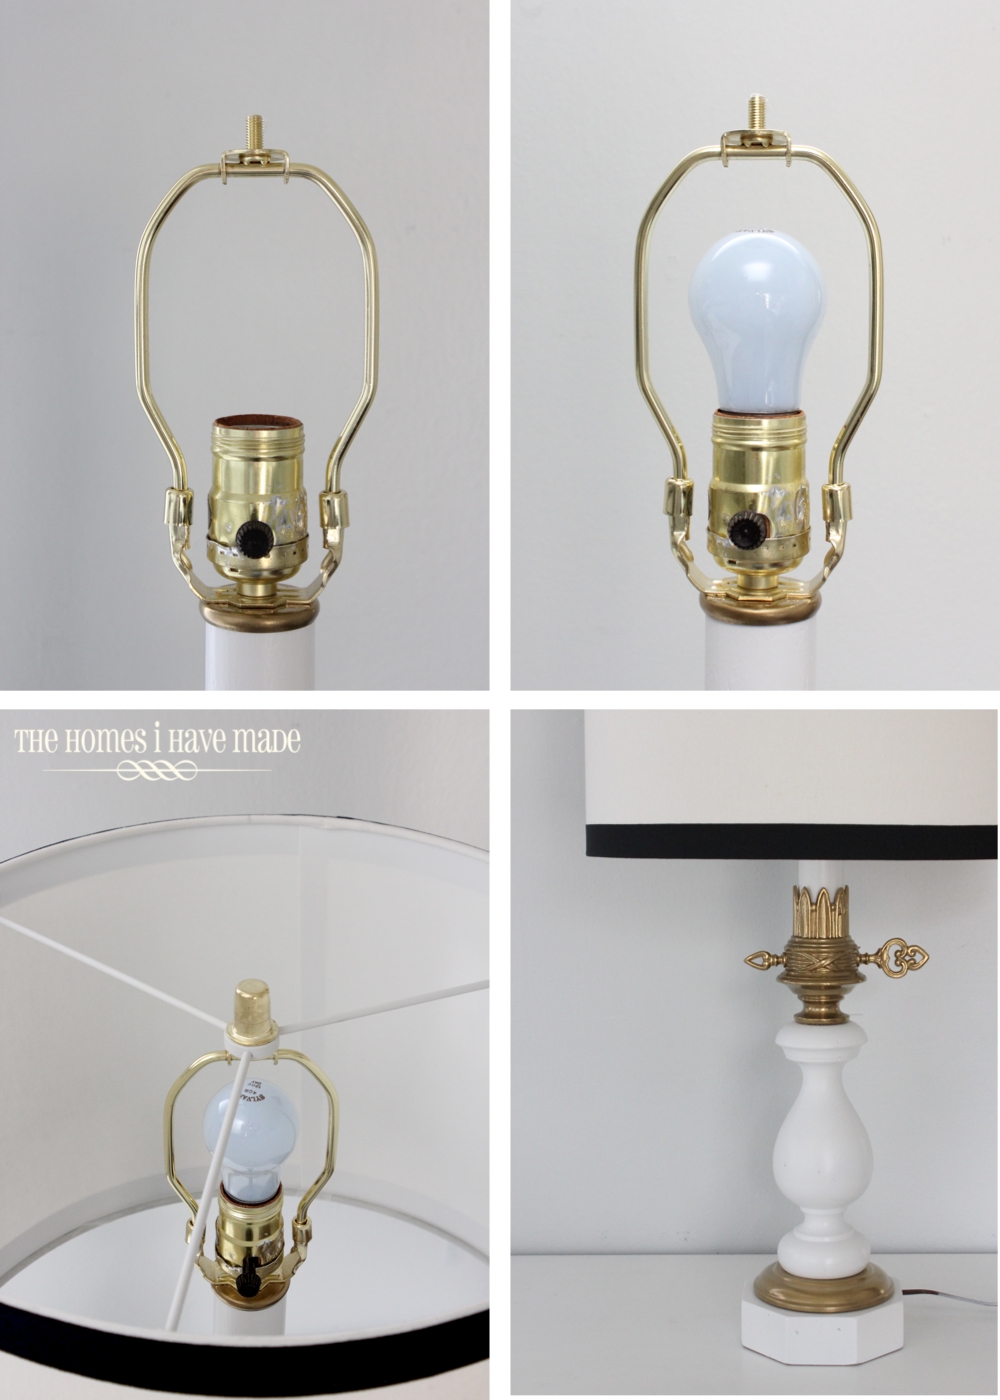
Twist the switch back onto the exposed screw and place the harp into the harp holder (below, top left). Before adding your shade, this is a good time to put in a lightbulb, plug in the lamp, and test to see if your lamp works. I’m a bit of a ninny and was worried I would electrocute myself, so I plugged the lamp into an outlet that is operated by a wall switch. I was super excited when I flipped on the switch and the lamp lit right up!
The final step is to attach the shade and finial to the top of the lamp and level/straighten it out!
Admittedly, when I first finished the lamps, I wasn’t quite sure on how they turned out. That middle “brass” section just seemed a bit too ornate for the ultra-modern shades (or my style). However, the more I looked at them, the more I liked them. I think they are just fun and funky. I love how big they are, and those shades (from PBTeen!) add such a delicious preppy pop to the space!
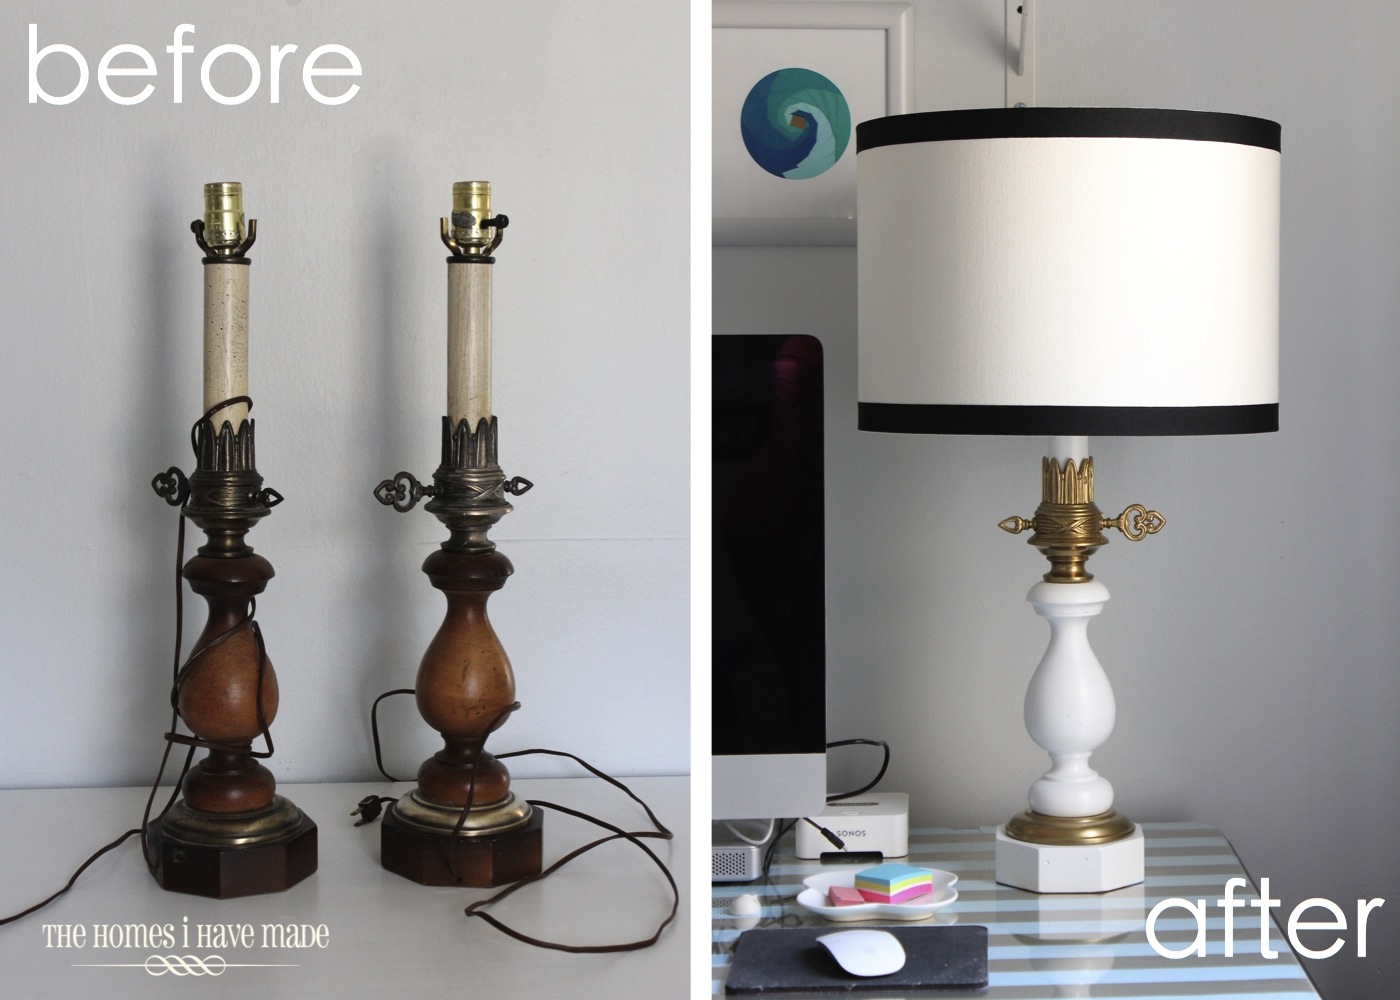
And because I love a good before and after, here’s how they started and how they look now:
I love the symmetry and big bold statement they make on our desk. They feel very grown-up but playful at the same time! I also think they would look fantastic on an entryway console table or dining room server (neither of which we have 😉
Disassembly and reassembly each took about 30 minutes (for both lamps), so not including paint-dry time, these didn’t take very long at all. However, this wasn’t the cheapest of makeover projects. The lamps themselves were free, but I had to buy the paint, harps, finials and shades, which all together came in at about $70/lamp. Still, I completely taught myself how to wire a lamp (which is a pretty handy skill to have!), and we now have super unique lighting for our office space!
So, tell me what you think! Have you ever taken a lamp completely apart and successfully reassembled it? It’s a pretty great feeling when it actually turns on. Would you have left off that middle brass piece on these lamps? Painted them differently? I’d love to hear how you would have given these lamps a new look!
With the calendar flipping to February, I suddenly have Valentine’s Day on the brain. You too? Come back Wednesday for a quick round-up of some of my favorite Valentine’s projects – both old and new 🙂 See you then!
Megan








4 Comments on “How to Hardwire a Vintage Lamp”
I built a lamp in grade school woodshop once. It wasn't anywhere near as pretty as what you've done, but it worked. Nice job! The base kind of reminds me of a gas or kerosene lamp. I like it!
I like. They turned out well.
Home makeover is a great way start our year that's why it is very important to keep a plan in doing so. Hanging shelves and wall shelves can serve double-duty as a piece of decor and also have functional furniture purposes. Cascading floating shelves down the wall of a stairwell or on an empty wall are easy on the eyes and can also be used to display photographs and collectibles. Smaller shelving units serve as valuable space savers in a small office or bedroom.
I also love the symmetry of those lamps on your desk. They’re very pretty and match it so well! I have a lamp that I have had for a while, but it’s so old and outdated that I’ve been thinking of throwing it away. Maybe I should just paint them and fix them up like you did!