Labeled Clip Magnets – a DIY Tutorial
Happy Friday, Friends! Boy, this week was a doozy for me – lots of projects and lots of deadlines but I got everything done and in on time – phew! I for one am excited to see the calendar flip to Friday. I am ready for a weekend away from the computer and my glue gun 😉 Before I sign off for the week though, I wanted to share a quick and simple tutorial for making some super useful and adorable clip magnets!
First things first – did any of you happen to see my very exciting feature over on I Heart Organizing yesterday? I’ve had to sit on my hands for a few weeks not to scream it from the roof tops, but the lovely and talented Jen has taken me on as one of her contributors this year. I am so humbled and honored to be a part of this amazing team, as Jen’s blog is among my absolute favorites. For my first project, I am sharing a tutorial for making these awesome magnetic memo boards. I am so over-the-moon with how this project turned out, so be sure to pop over to Jen’s blog for the full how-to here!

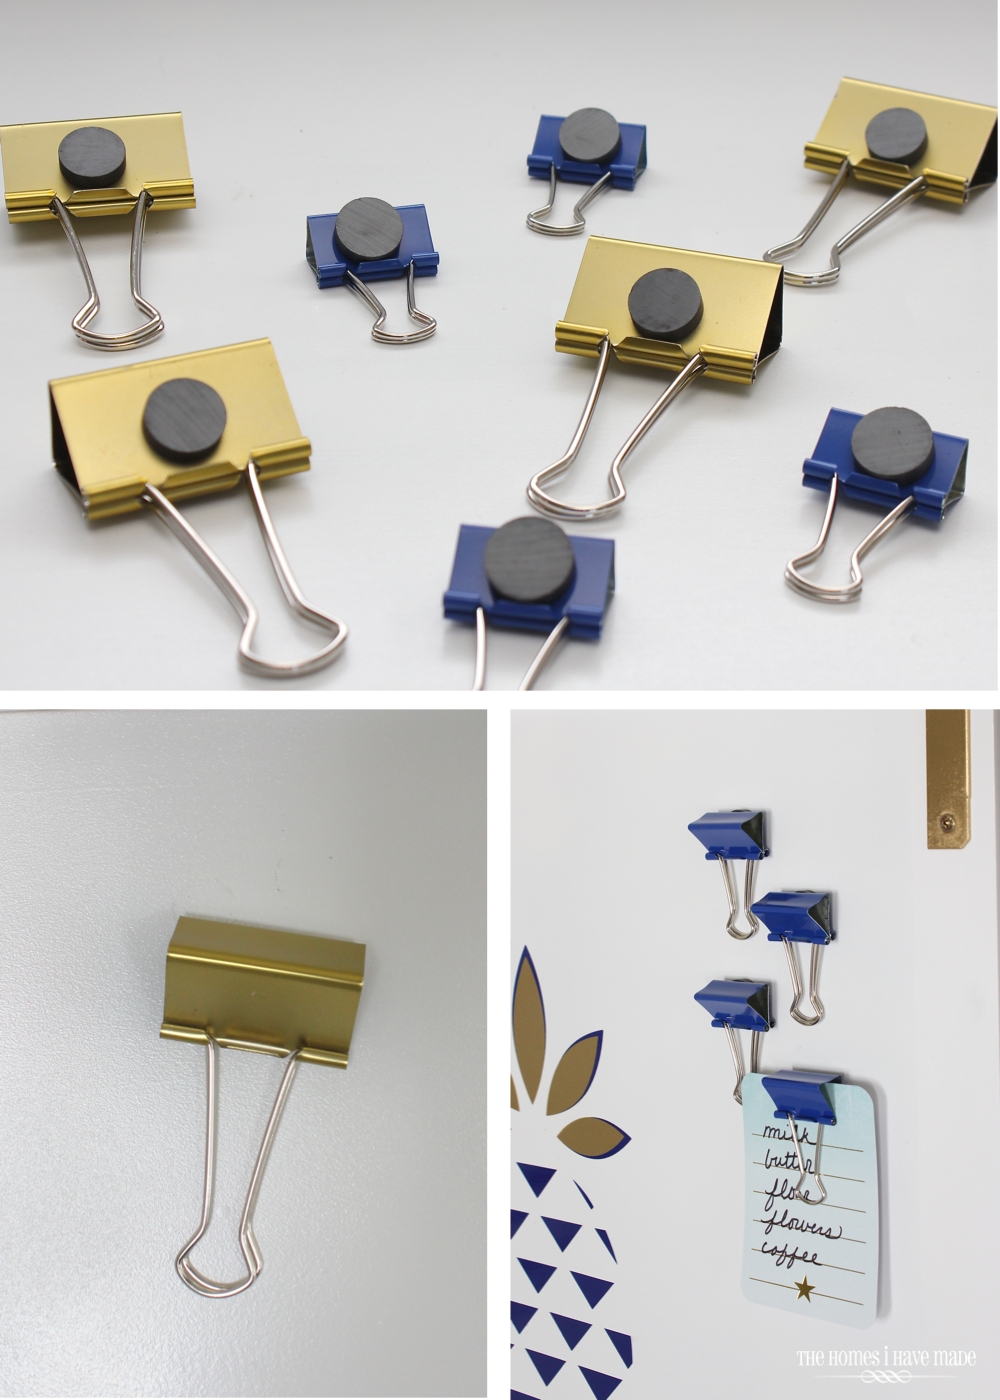
As part of this tutorial, I chat a bit about how we are a pin-it-up family. After trying various systems to corral paperwork and keep important things handy, I’ve finally realized and accepted that magnetic boards (or pin boards) are the way we keep organized. I even share this oh-so-simple and super adorable binder clip system that we are now using on these new memo boards.
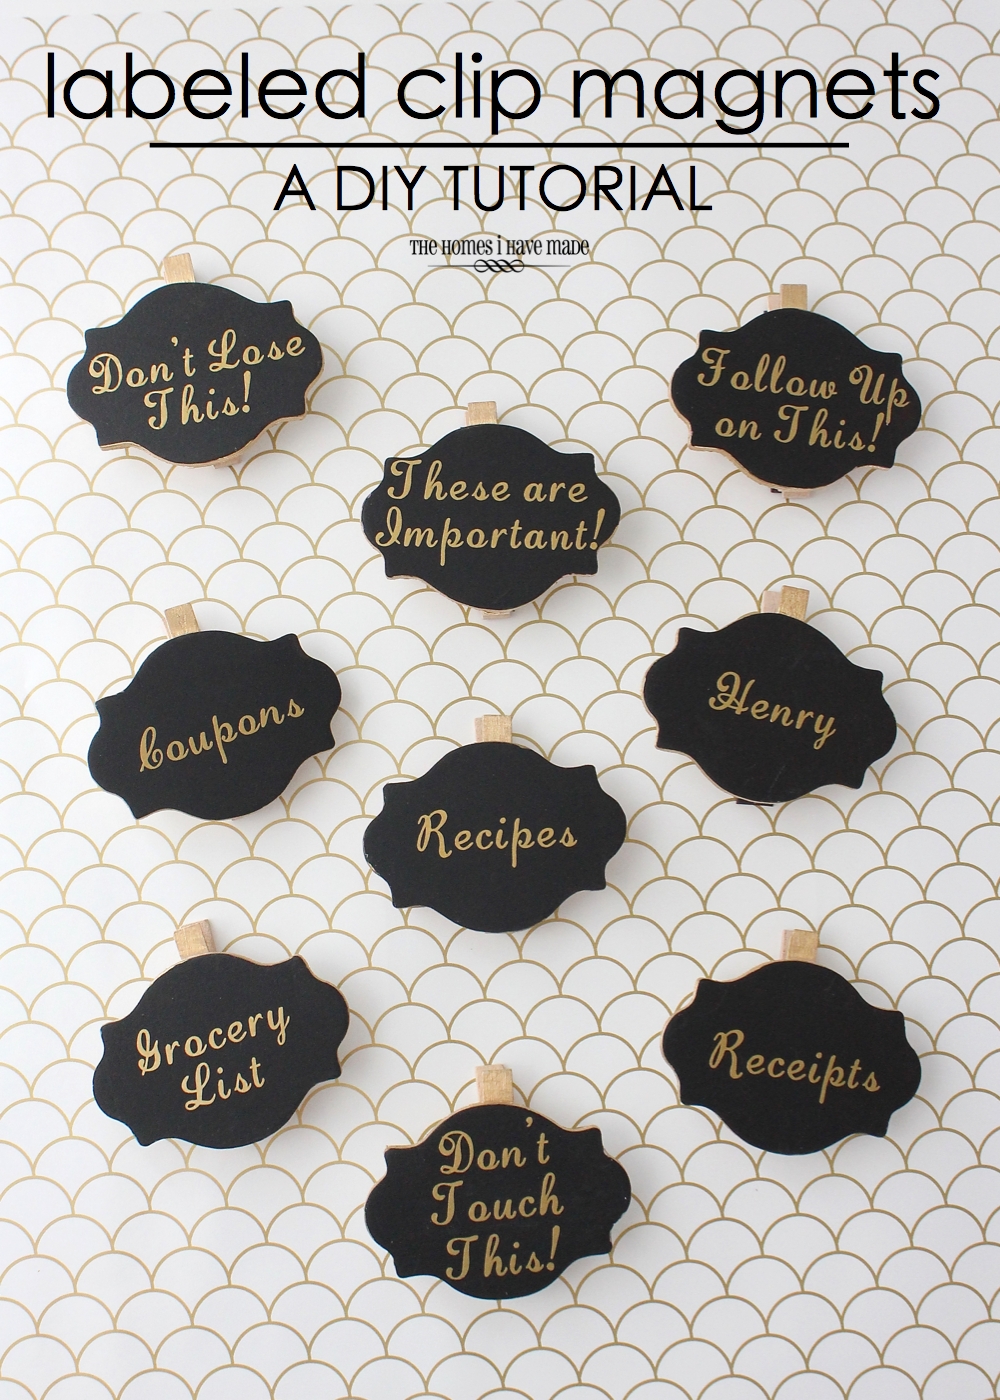
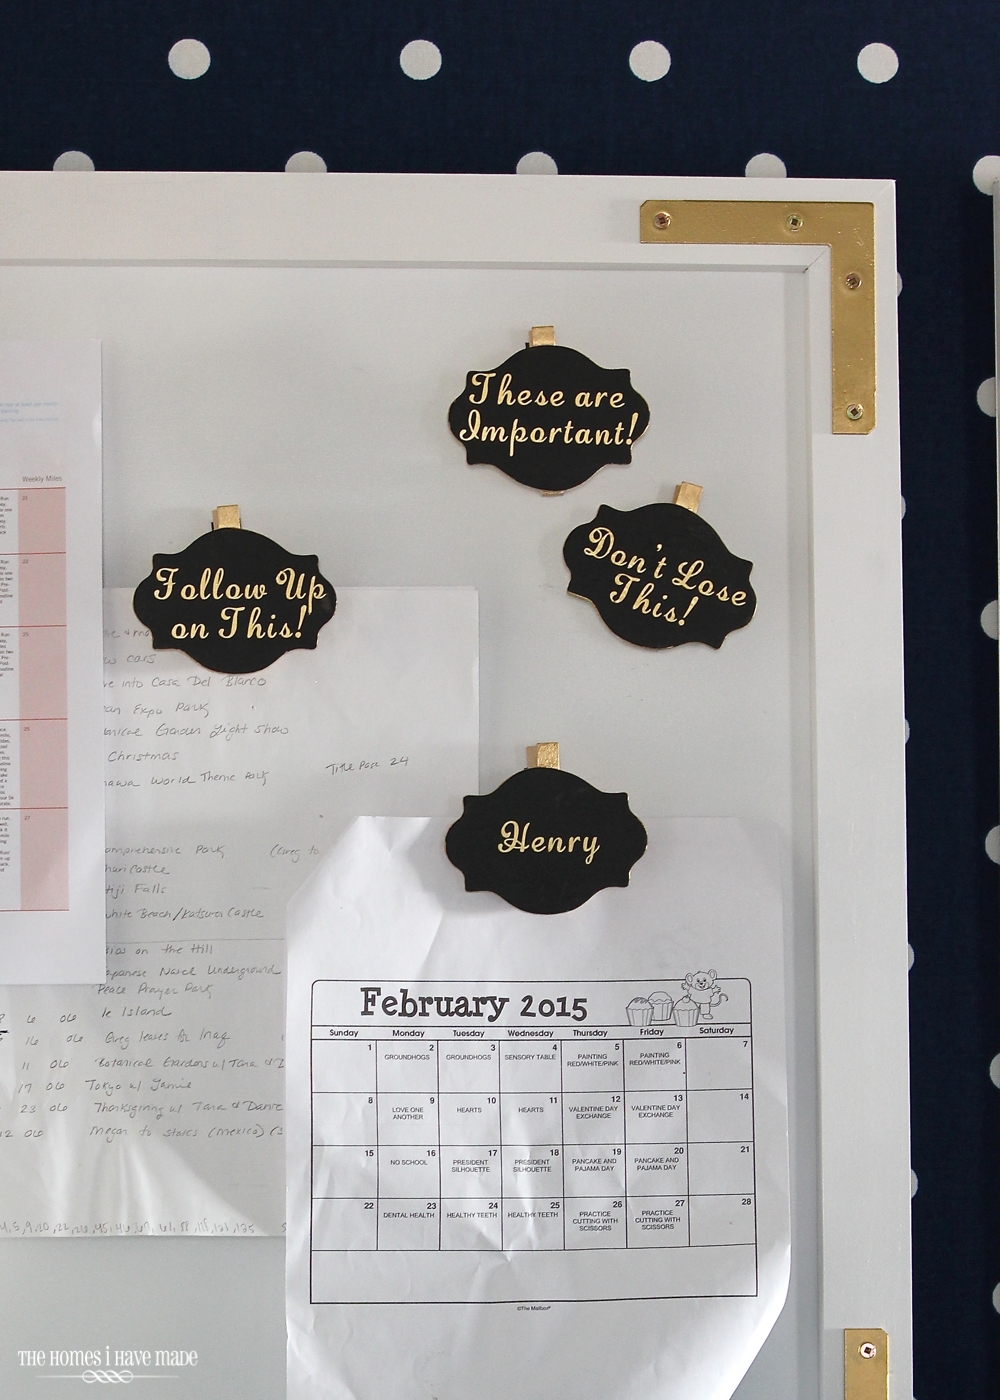
Before I discovered how well the binder clips (above) worked and looked, however, I had another labeled clip project up my sleeve: labeled chalkboard-style clips. While they didn’t quite turn out to be the look I wanted for my memo boards (the styles conflicted a bit too much!), they are just too cute not to share. These labeled clips can have a variety of uses all over the home…so while I’m not using them on my memo board now, I’ve found other uses for them already!
Here’s what you need to make a set of labeled clip magnets:
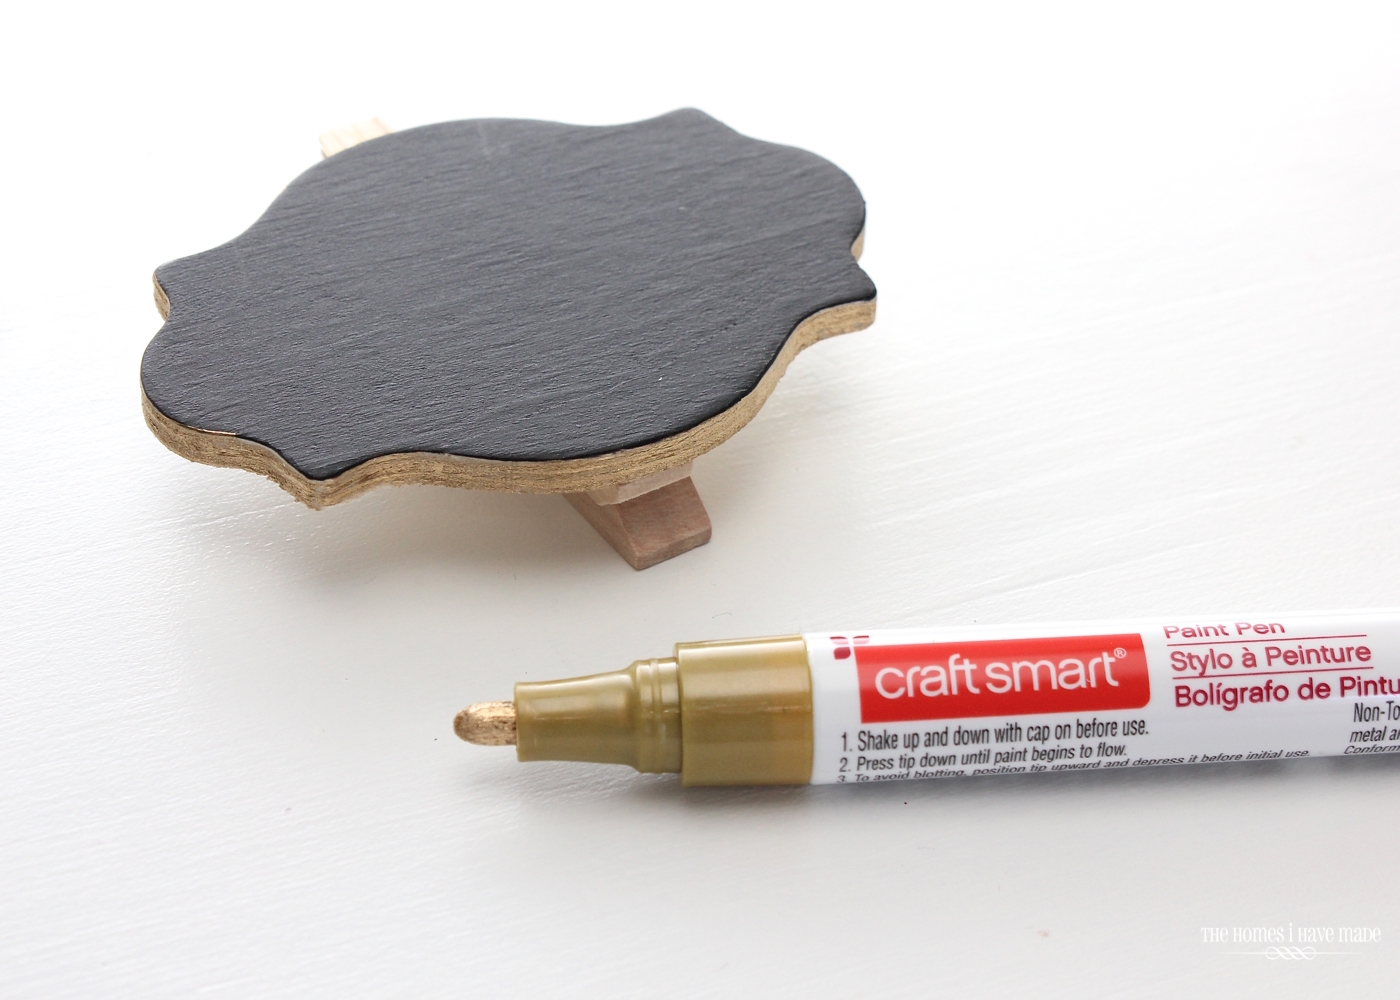
- Clips with chalkboard labels pre-attached (I found these at Michaels; a 2-pack cost $1.50)
- Gold Vinyl (or color vinyl of your choice)
- Gold paint pen (or color pen of your choice)
- Magnetic tape
- Super glue
- Tools: Die-cut machine
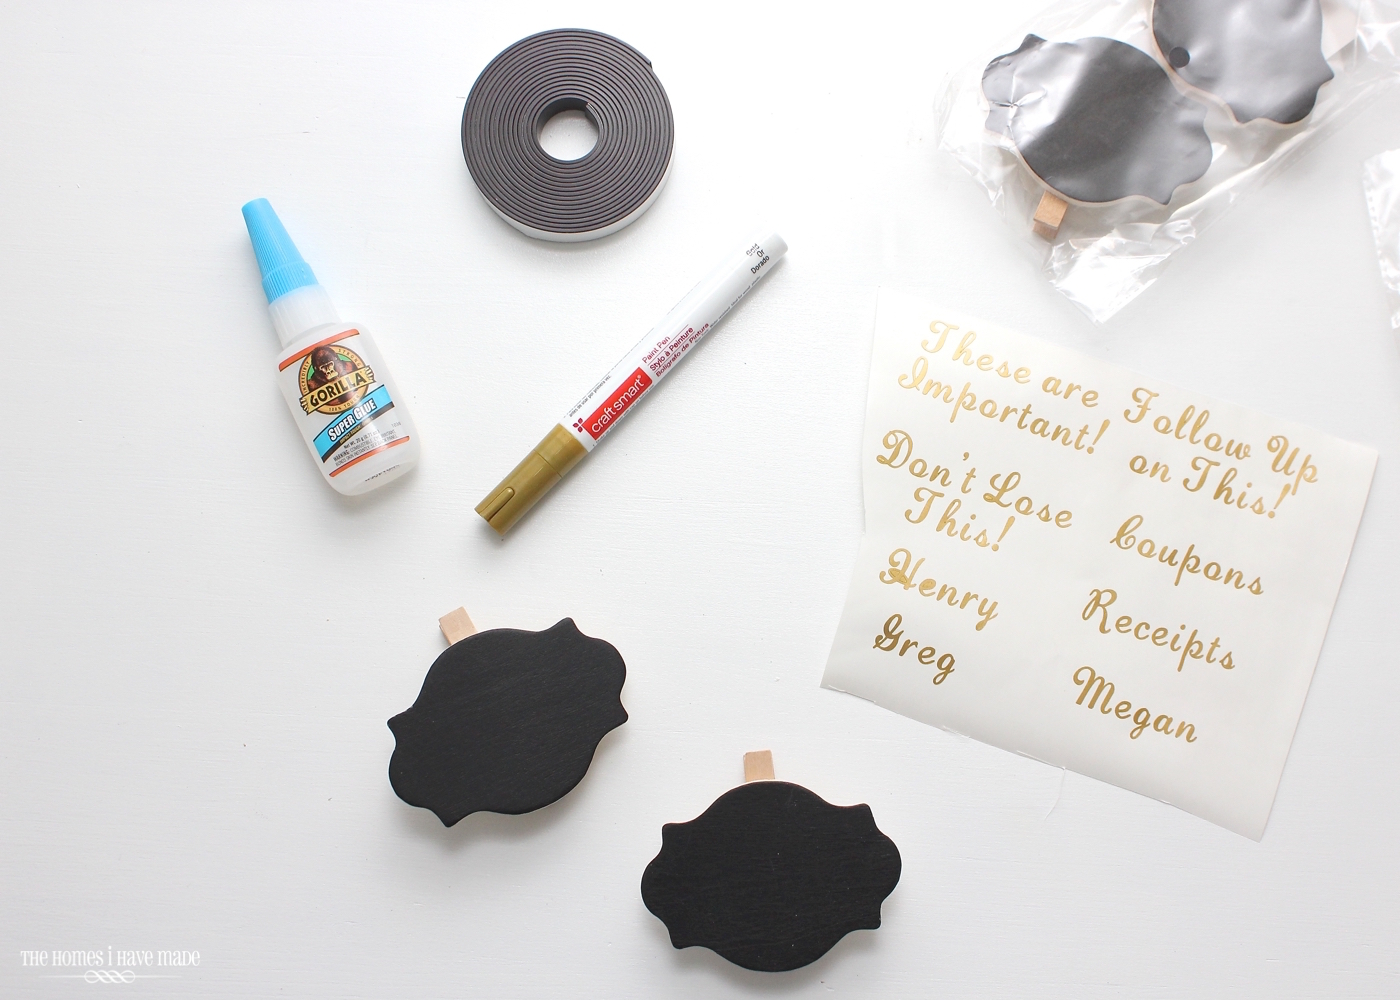
Start by coloring the raw edges of the wooden label with the paint pen. There’s no need to tape or mask here, just take your time. Also color the exposed portion of the clip at the top.
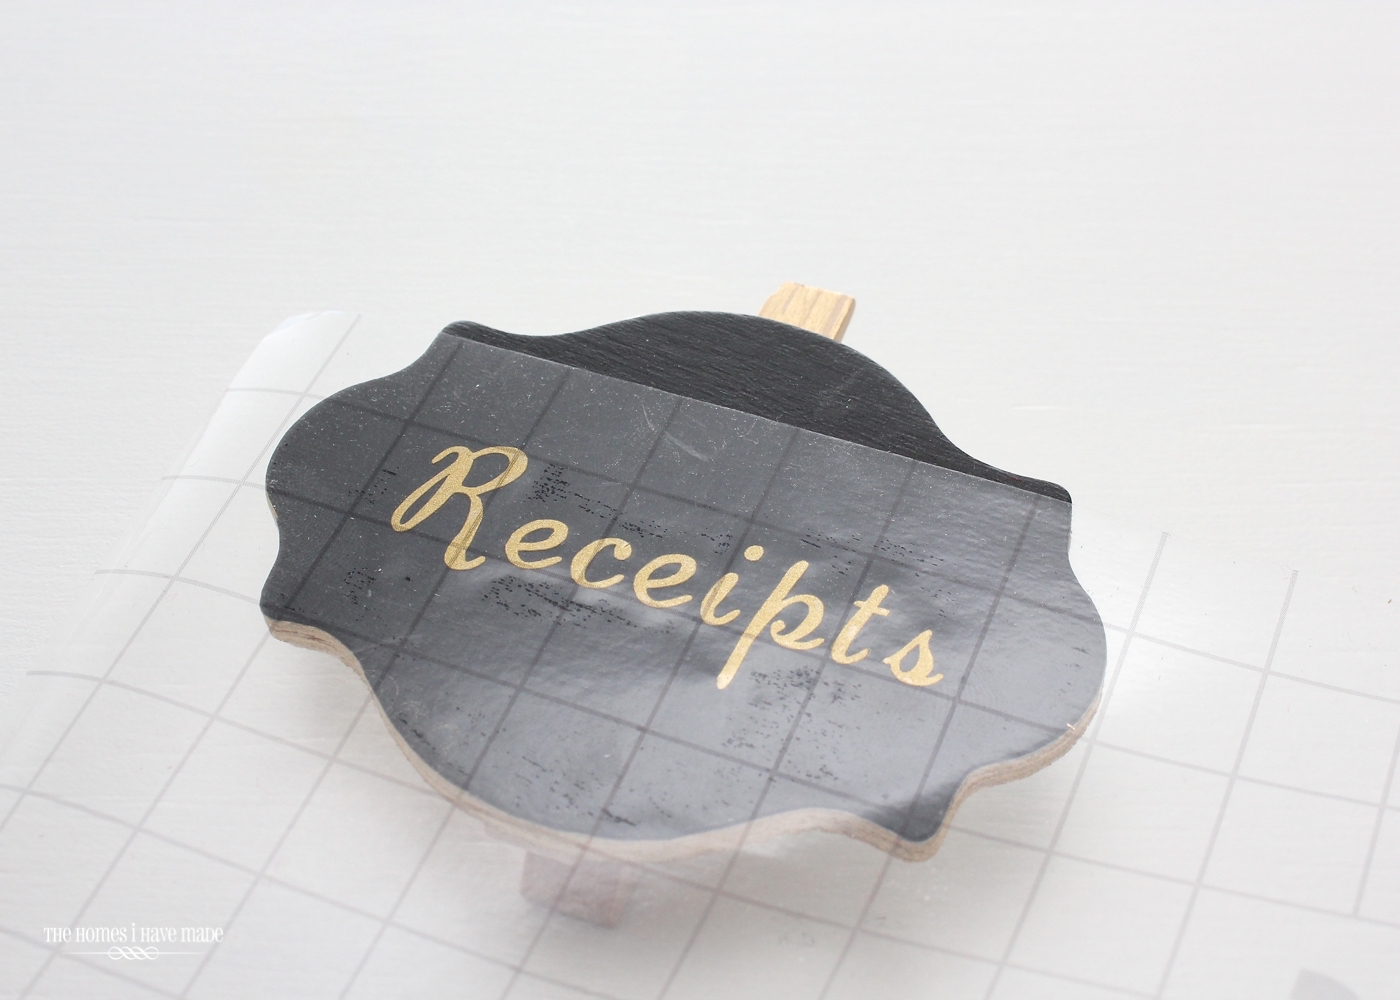
Cut your desired label names from vinyl using a die-cut machine (I used my Cricut Exlore), and transfer the letters to the chalkboard labels using clear transfer tape (By the way: clear transfer tape is WONDERFUL! If you do a lot of vinyl placement and layering, I strongly suggest this clear transfer tape from Cricut. It makes lining up images so easy! #notsponsored). If you don’t have a die-cut machine, you can also use letter stickers here instead!
Want to save this post?
Cut lengths of magnetic tape to fit the clip along the back and super glue it in place.
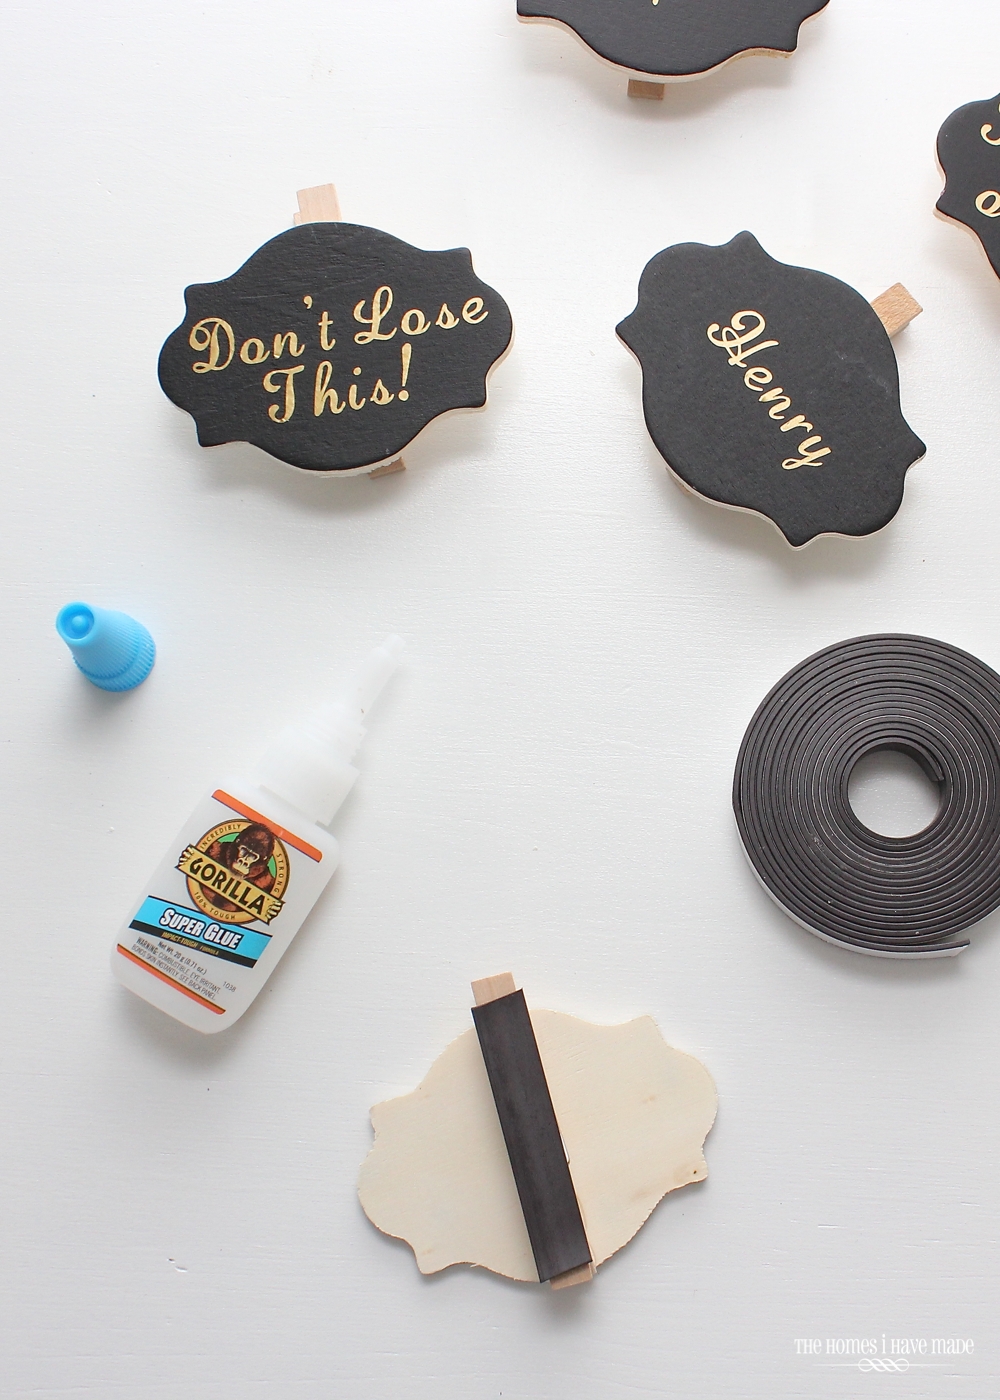
Repeat to make as many magnetic clips as you need or want! I couldn’t help but make a few with some cheeky phrases. The “Don’t Touch This” (bottom right) was made specifically for my husband. In my effort to constantly pick-up around the house, I tend to move his stuff and then he can’t find it. I made him this clip to use so he has a way to let me know to keep my hands off of his paperwork!
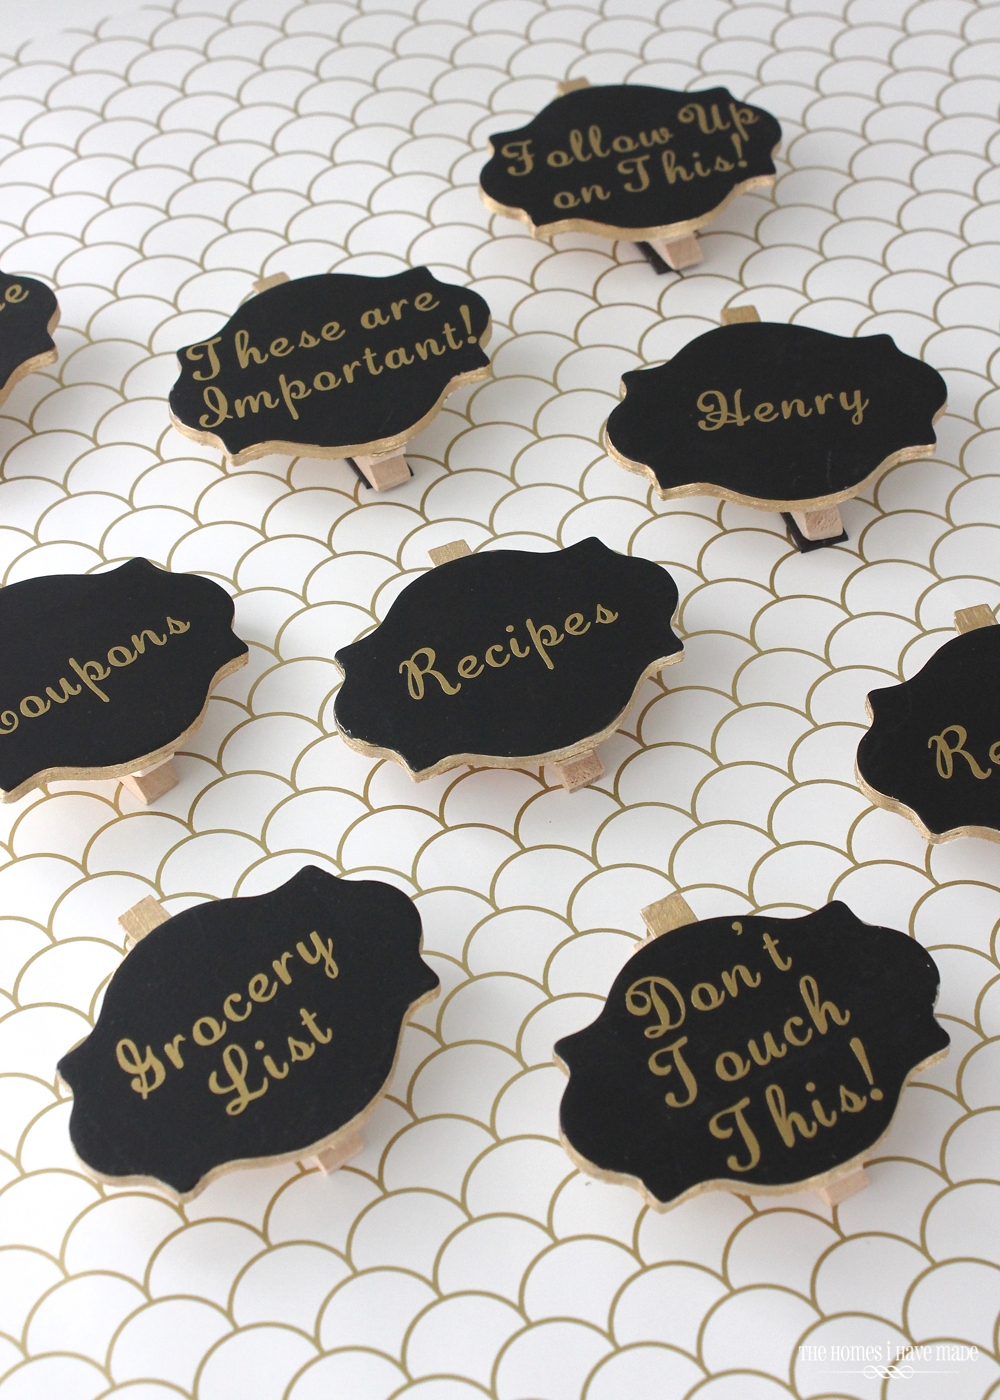
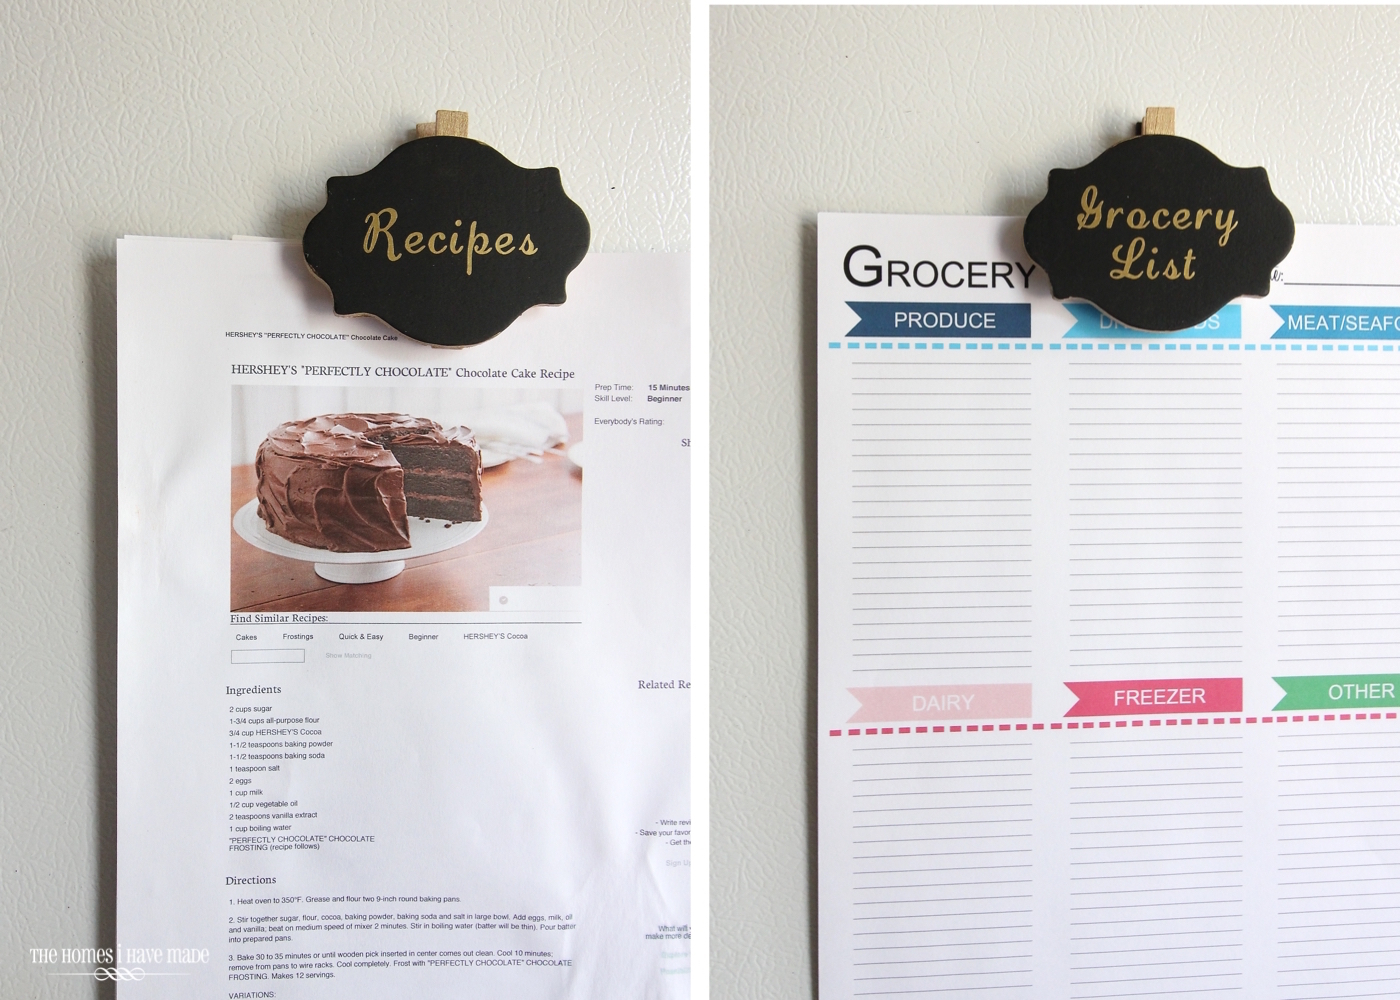
These labels are super fun – I ultimately didn’t use them on my magnetic memo boards because they felt a bit big and traditional for the modern and preppy aesthetic I was aiming for. Still, I’ve moved them around the house a bit and found they are perfect for hanging up recipes (yet to be filed) and our current running grocery list on the refrigerator door in the kitchen!
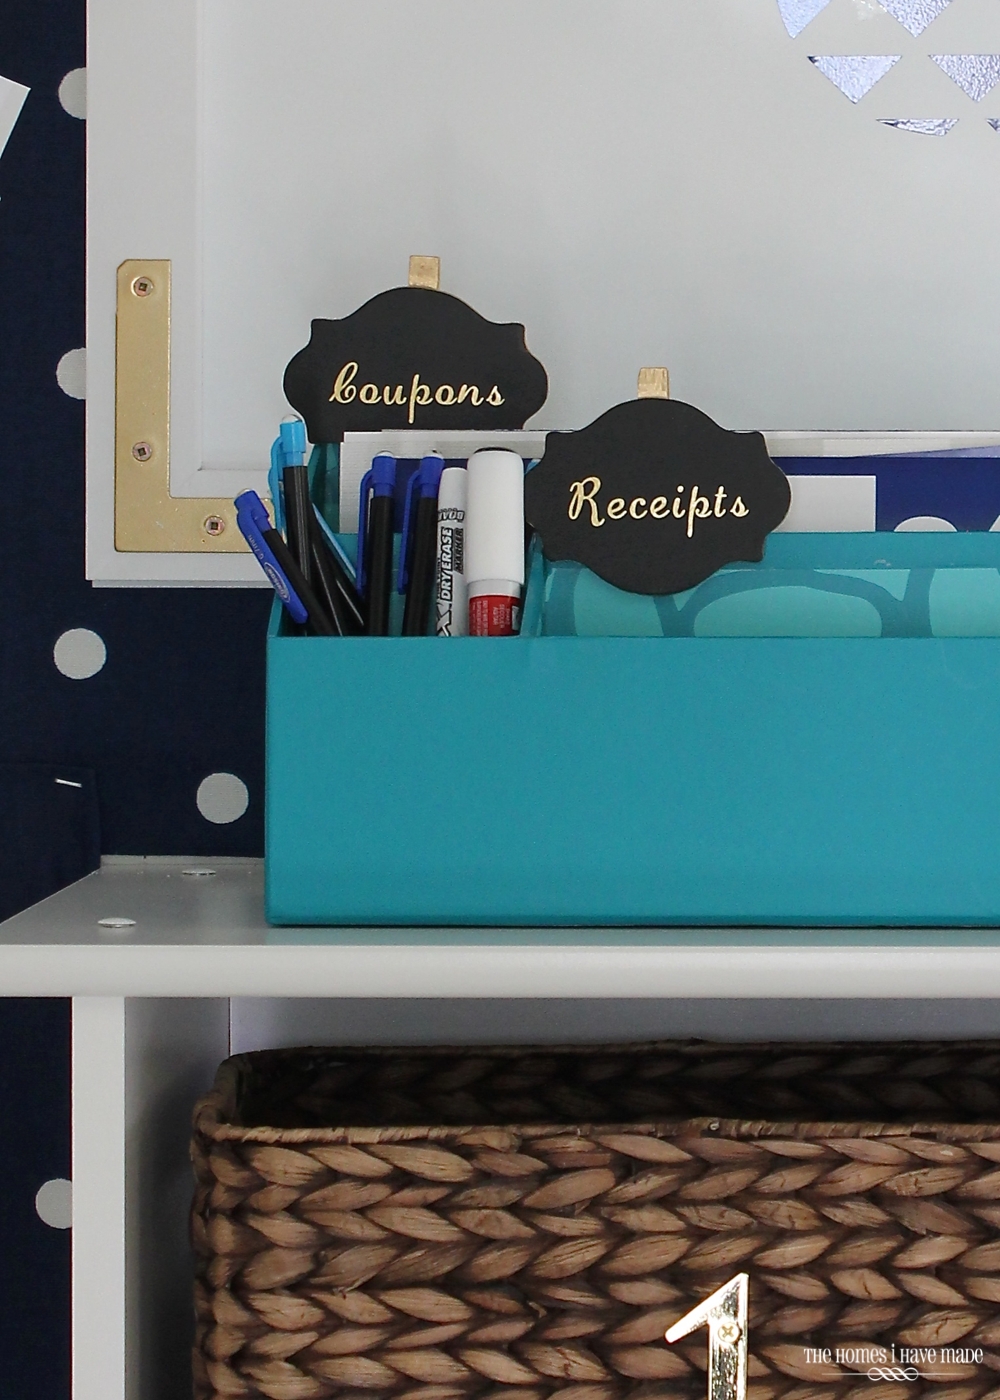
I also clipped them onto the little box that holds our coupons and receipts!
While the vinyl lettering is a bit more permanent than using a chalkboard pen, it’s pretty easy to peel the letters off and replace the wording as I need to. I’ve just found that I don’t like my handwriting on labels, so I’d rather go through the minor trouble of cutting letters out than look at my scratchy handwriting! #callmecrazy
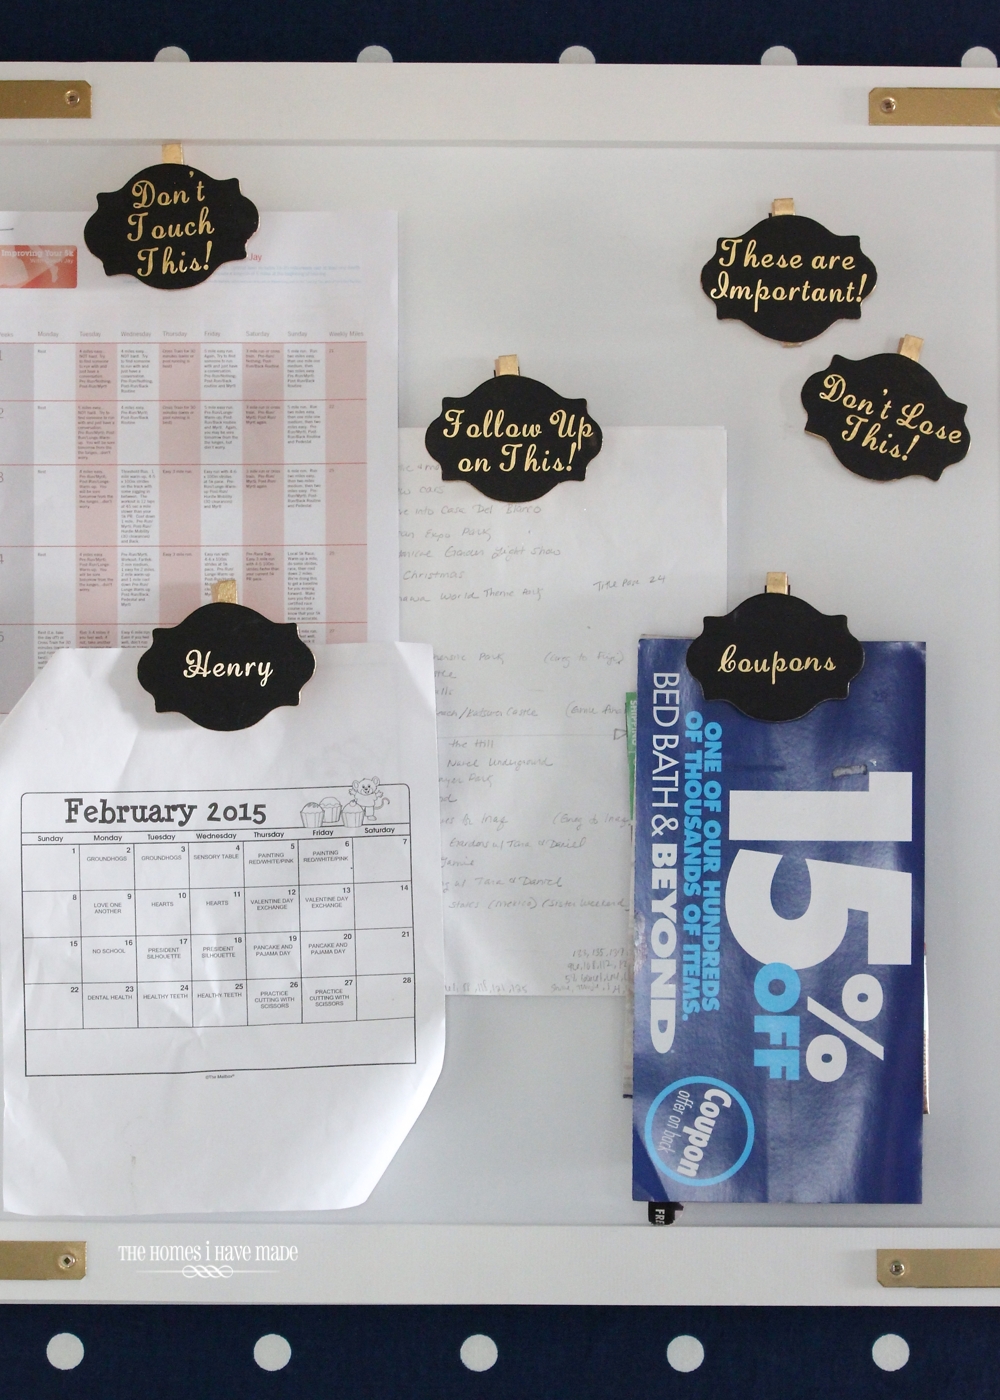
I had everything on hand but the clips themselves, so all together, this project cost me about $15 and an hour to make. These clip magnets could really be used in a variety of ways throughout the home: sports schedules, kid’s paperwork/artwork, important reminders, shopping lists and more!
Thanks to a few features all over the web this week, I have lots of new followers joining me here, so a big welcome to everyone who is new!!! I hope you love what you see and stick around as I have lots of great ideas to share in the coming weeks and months. A big hug goes out to all of you who have left awesome and kind comments on this week’s posts – taking the time to weigh in means the world to me, so thank you!
Coming up next week: a few more Valentine crafts, another kitchen organization project, and some furniture re-vamping ideas! See you then!

Megan
5 Comments on “Labeled Clip Magnets – a DIY Tutorial”
I love them! These clips are really adorable! So simple, unusual and beautiful ^_^
Yay! I saw you roll by on IHO yesterday in my feed and was so excited to see you've landed a regular contributor spot – CONGRATS! I also found it super meta/Inception-esque that your first official post there was a revamp of the guest post I saw forever ago that brought me *here* – lol. Way to go full circle. ;p
These are fabulous!! I love the style and lettering and that memo board area is fantastic! Thanks for sharing 🙂 Can't wait to see more projects!
Lauren
http://www.lbdesigns1.wordpress.com
xx
Saw your post on I Heart Organizing — that is awesome & CONGRATS!!! 🙂 I don't blame you for being excited, Jen's blog is one of my faves too!
– Lora
Beautiful blog! I am loving the ideas you have and will be trying a lot of them at my home. I'm so excited to have found you on IHeartOrganizing.
Valerie