See-Through Purse Pouches
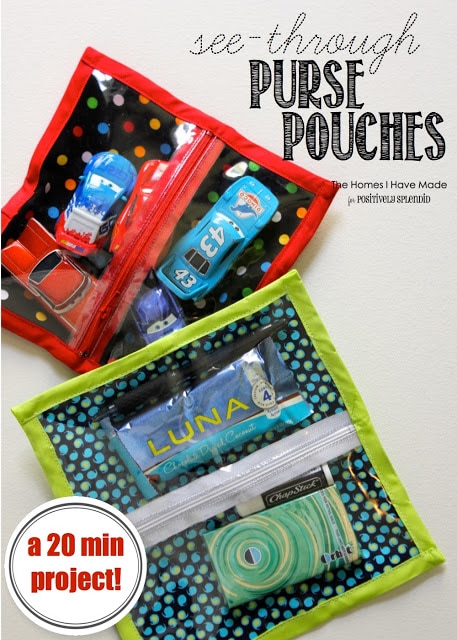
This is a really fun, quick, and easy sewing project! Don’t let the zipper and the bias tape in these cute little purse pouches scare you away – I promise, these are easier than you think. Plus, they come together in a jiffy; are great for using up scraps and extra notions you might have laying around the house; AND can be used in all sorts of ways to keep your purse, diaper bag, backpack (or anything!) tidy and organized!
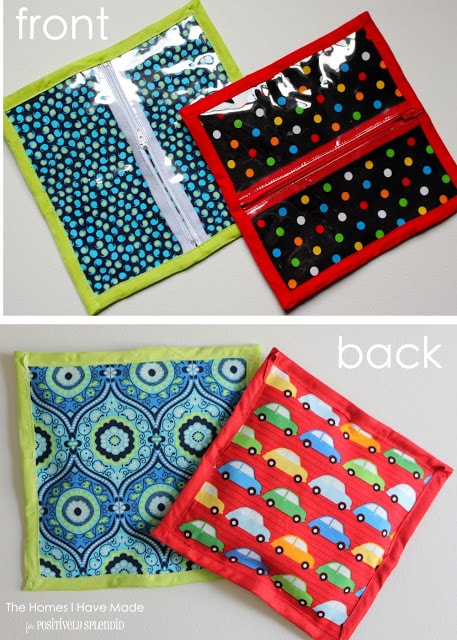
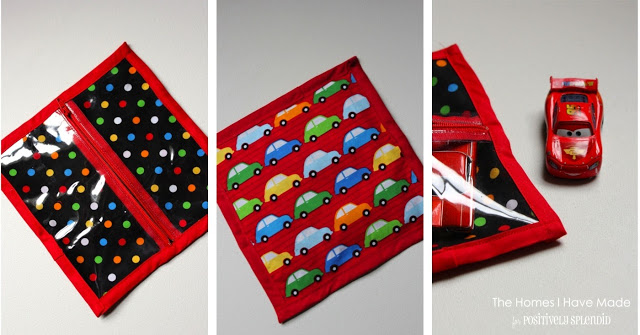
In addition to the clear vinyl front and zipper access (making it super easy to see and grab what’s inside!), my favorite part of these little pouches is that you can use two coordinating fabrics on the front and back to give them an extra dose of cuteness!
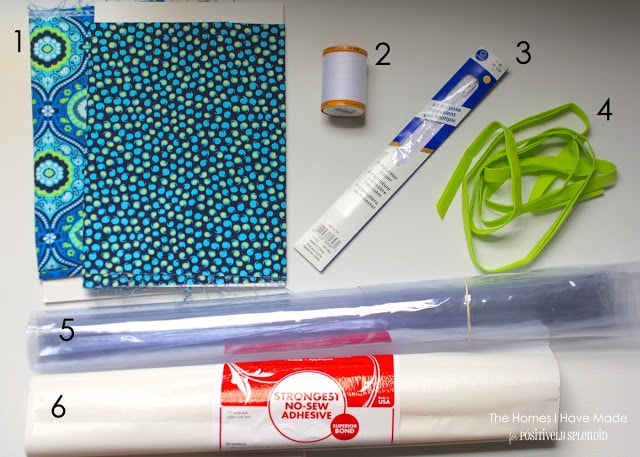
Here’s what you need to whip up your own pouches!
To make one:
- 1 or 2 coordinating fabric prints, enough to cut two 9″ squares (one from each print if you choose two fabrics)
- Coordinating thread (and a sewing machine, not pictured)
- A 7″ zipper
- Color coordinated double fold bias tape
- Clear vinyl, any gauge will do
- Heat-n-bond
(Also not pictured, scissors, rotary cutter, cutting mat, and ruler.)
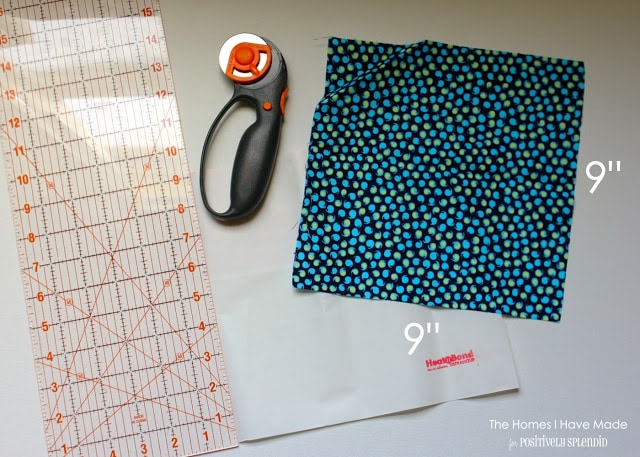
Start by cutting ONE of your prints down to a 9″x9″ square. Do the same with your Heat’n’Bond. Don’t bother measuring/cutting your second fabric, we’ll get to it in the next step!
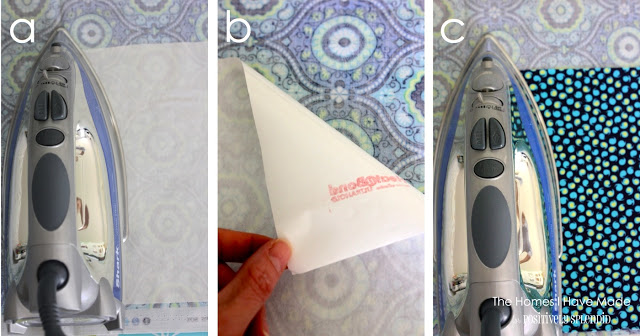
Next, you’re going fuse your two fabrics together using the Heat’n’Bond.
- a) Iron your Heat’n’Bond (paper side up) onto the WRONG side of your other fabric.
- b) Remove the paper backing from the Heat’n’Bond.
- c) Iron your 9″ square of coordinating fabric (RIGHT side UP) onto the area that has the Heat’n’Bond.
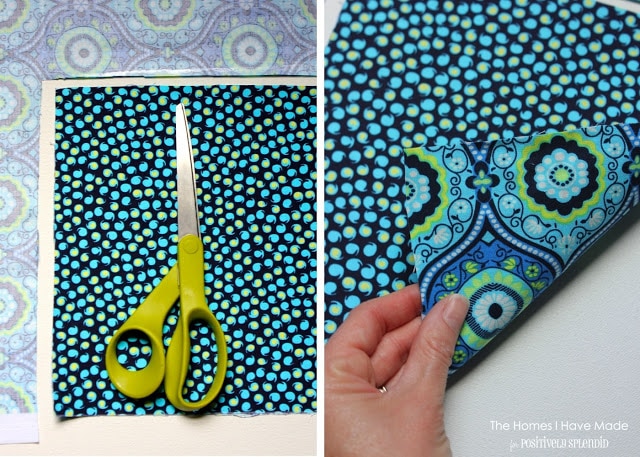
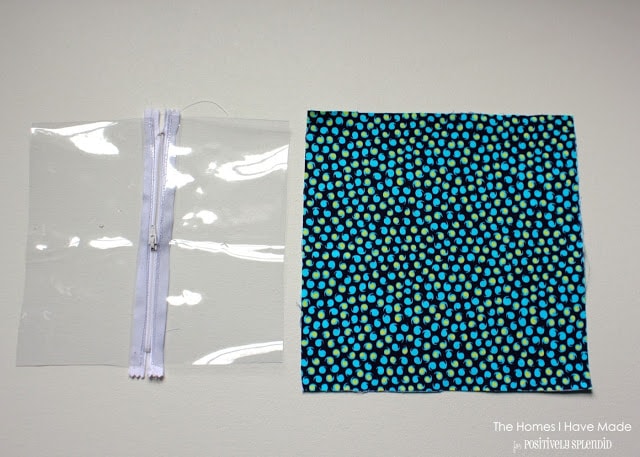
With your two fabrics secured, wrong sides together, cut out the 9″ square with a scissors, using the top square as your guide (bottom left). When you’re done with this step, you should have a 9″ square with patterned fabrics facing out on both sides (bottom right)! Set this square aside.
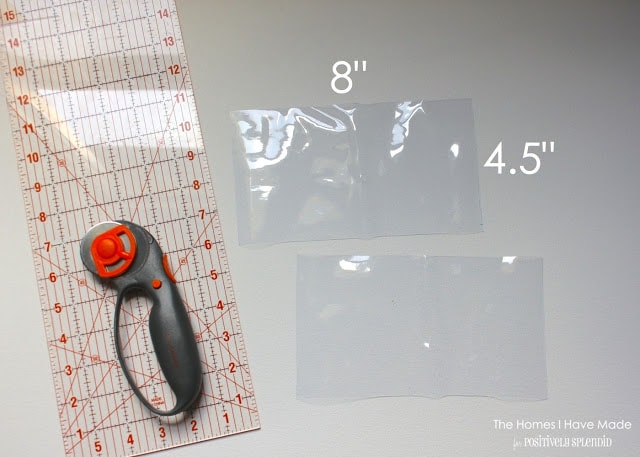
Next, cut the vinyl into two rectangles, each measuring 4.5″x8″.
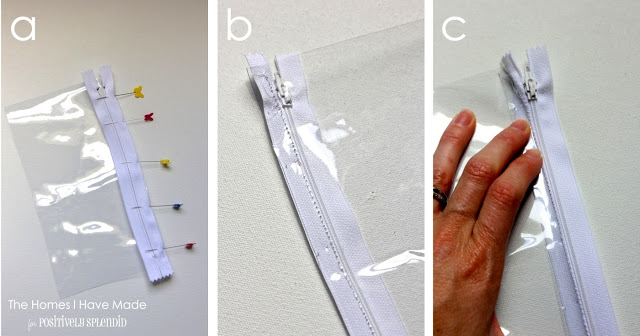
Now it’s time to install the zipper. Don’t panic – this is going to be a lot easier than you think!
- a) Pin the zipper (FACE DOWN) onto one edge of the vinyl (keep thinking: wrong sides together).
- b) Using a zipper foot, sew the vinyl to the zipper as close to the zipper teeth as you can get.
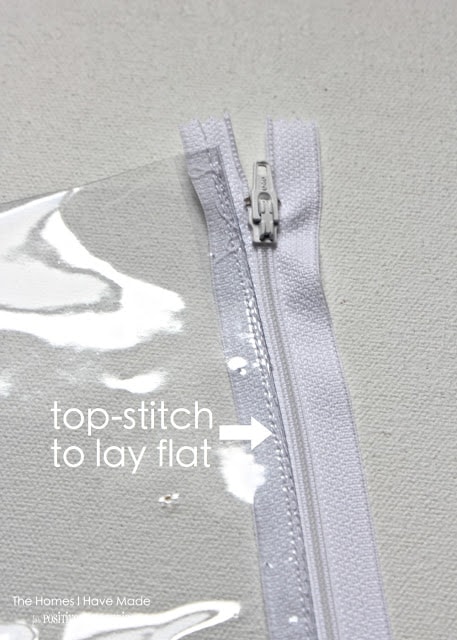
- c) Flip the zipper right-side-up and fold/bend the vinyl open, just like you would with a fabric seam.
Next, to help the vinyl/zipper lay flat, top stitch back down the length of the zipper (still using your zipper foot), right next to (or on top of) your original line of stitching.
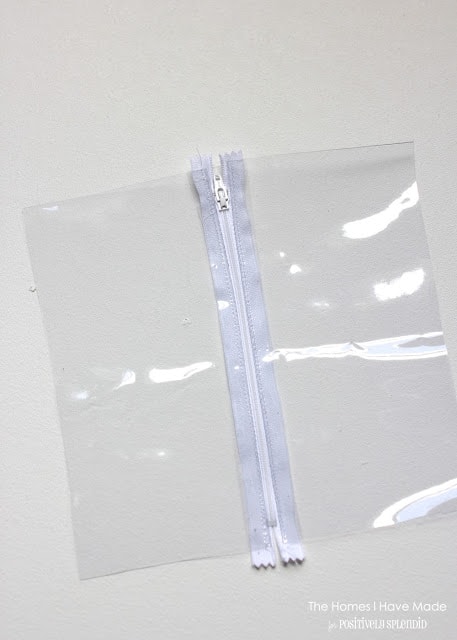
Repeat the exact same steps on the other side of the zipper with the other vinyl rectangle. When you are done, it should look like this:
Now it’s time to bring your two squares together!
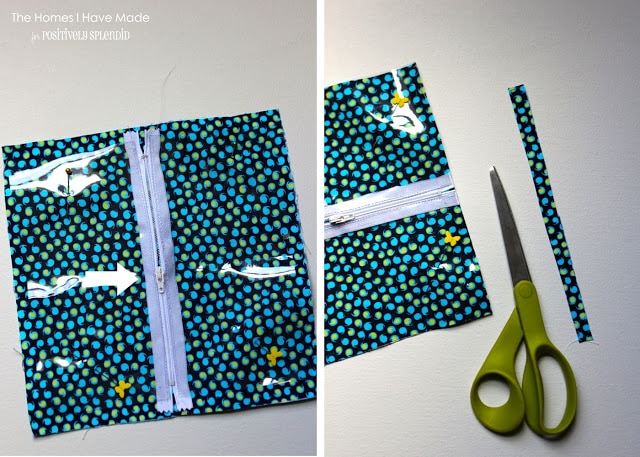
Decide which fabric you want to face up (as in, through the vinyl window) and place it facing you on your work surface. Next, center your zipper/vinyl square onto the fabric square RIGHT SIDE UP (as in, the zipper pull should be out facing you). Pin the two squares together to hold everything in place (bottom left). Using a scissors, trim the excess fabric around the vinyl square to ensure you have matching edges all the way around.
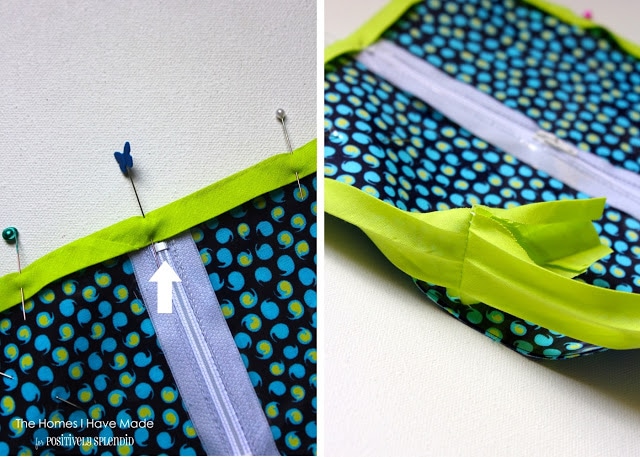
Since vinyl is too bulky to sew/flip right-side-out/press, as you would a normal seam with fabric, we are going to sew the two squares together and finish the edges all in one step using bias tape. Simply pin your bias tape all the way around the square, with the edges of the square tucked all the way up inside the fold of the tape. If you used my same measurements, the bias tape should come right down to the zipper stops (bottom left). When you get back to the beginning, you can sew your bias tape together the fancy way (bottom right) or just fold your ends under and sew one on top of the other.
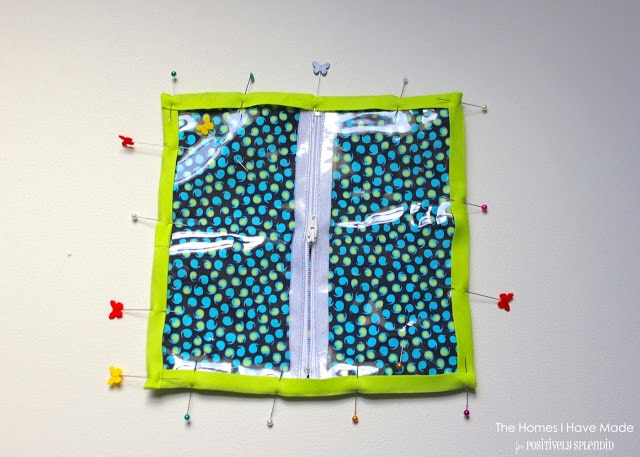
Here’s the pouch with the bias tape pined down all the way around, ready for sewing. To keep my corners clean, I folded the bias tape at 90 degree angles instead of easing it around the bends (which would result in a more circular shape in the end). I found this quicker, easier, and cleaner, but to each his/her own 🙂 You could also miter your corners if you have the patience!
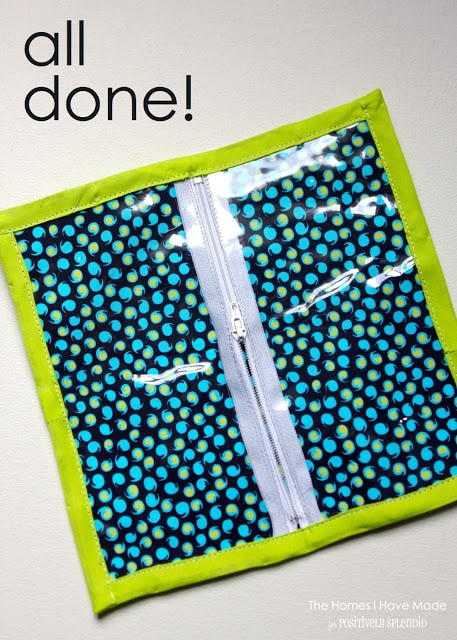
With a slow and steady stitch, machine sew all the way around the square at the very edge of your bias tape. Once you make it all the way around, you’re all done! No flipping, no pressing…
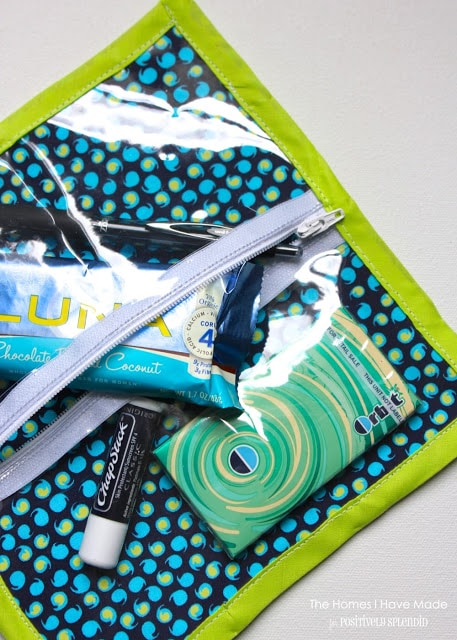
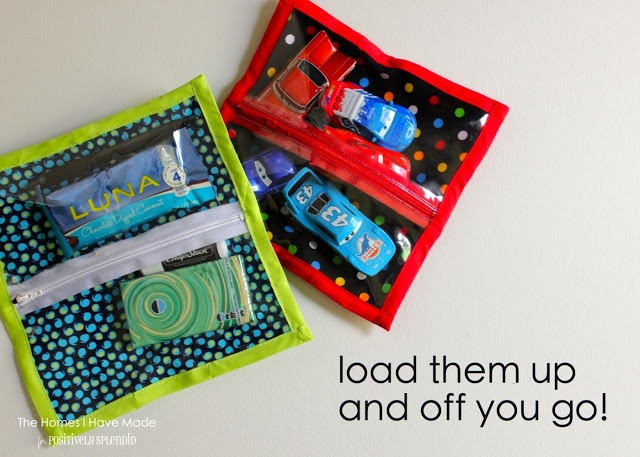
…just un-zip and fill the pouch with all those things that fall to the bottom or your purse/diaper bag, in my case: snacks, gum, a pen, and Chapstick!
Other items I am constantly fishing out of my purse are cars for my Cars-loving two-year-old. We can’t go anywhere without one (or five!). To keep them corralled and at the ready, I made a special pouch to hold Lightening McQueen and his friends!
I’m kind of addicted to making these, as I can now think of a million uses for them. And what a fun way to use up some of my fat quarters and notion leftovers from other projects! Most of all, I love that they are a fun and cute way to keep my purse organized–no more digging around for a piece of gum or whatever else I may need at a moment’s notice!
Later this week, I’ll show you the cutest backpack EVER (well, at least in my opinion!) that I made to go with these purse pouches! Until then, have a great Labor Day!!!
Megan




8 Comments on “See-Through Purse Pouches”
ooh- how fun! I'm thinking of variations and the possibilities. I'm a brand new sewer- so zippers, vinyl and bias tape do sound a little scary- but maybe I'll give it a try. Thanks for the great tutorial!
Such a cute idea!
I love this! It would eliminate all of the searching through my bags everyday!
Having trouble with stitching of vinyl. Top thread simply pulls off the surface…any suggestions? Tension change?
I am sorry you're having trouble. I would start with your thread tension, but another thought my be your needles. I used a standard needle, but a heavy-duty needle might make the holes too big and allow the thread to pull right out. I would practice on a some scrap vinyl until you get it all working just right. Good luck!
@ "Anonymous: try putting tissue paper or wax paper on top of vinyl so it doesn't slip around as much. Then simply tear off paper after sewing.
Gorgeous little bags and your instructions are spot on Megan—keep up the good work
Megan
I cannot say enough about how great you are with directions. As a teacher I have found that one needs as many details as you can give. You have coined that phrase. I appreciate how much you have done and continue doing for others. I wish you the best in your future projects!!