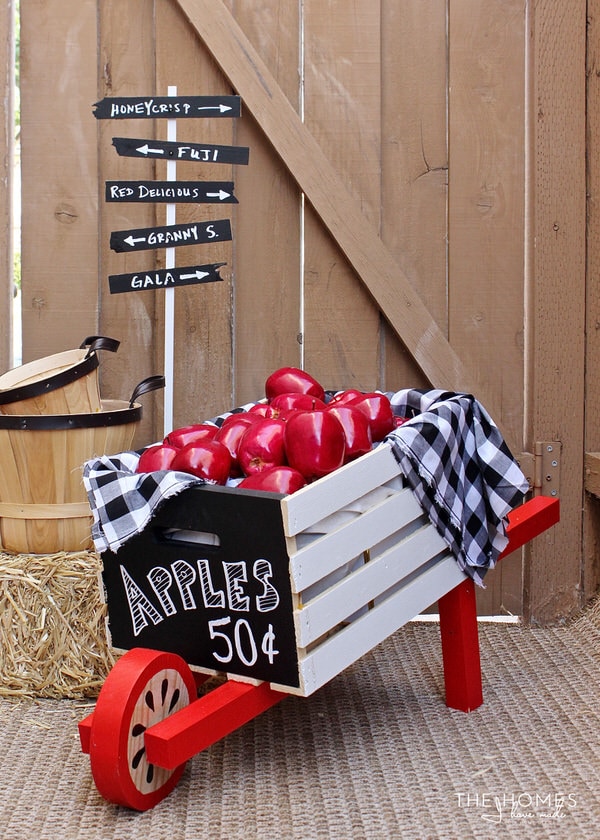
Rustic Wheelbarrow Turned Charming Apple Cart
Happy (almost!) Fall, all! I am so excited to be participating in the latest round of the The Home Depot’s #DIHWorkshop with 24 other amazing bloggers. As I shared with you last week, we were challenged to take their basic Rustic Wheelbarrow plan and give it our own unique spin to fit our homes, personalities, and styles! As most of you know, Fall things and the color orange don’t exactly fit into our home, so I transformed my wheelbarrow into a charming apple cart complete with chalkboard details. I couldn’t be more thrilled with how it turned out and can’t wait to share how you can make one too. Read on for the full tutorial and loads more inspiration from other great bloggers!
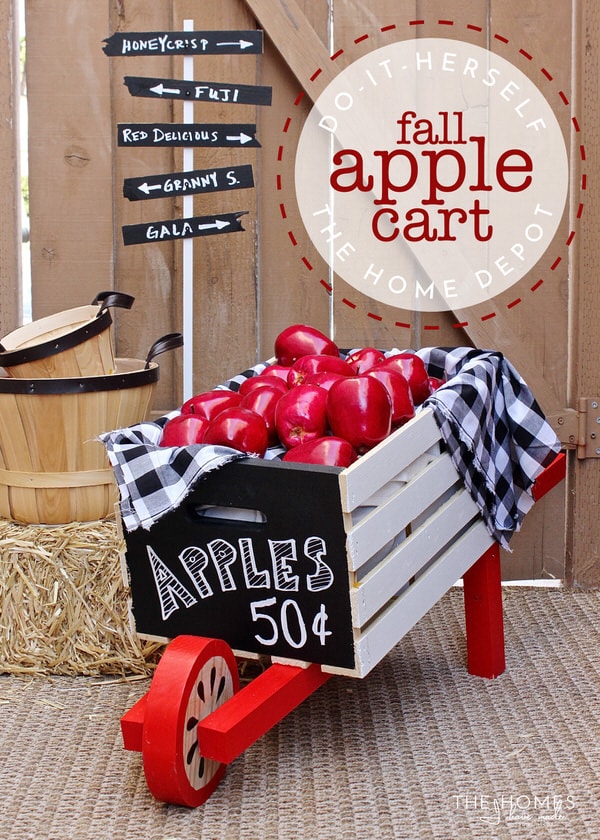
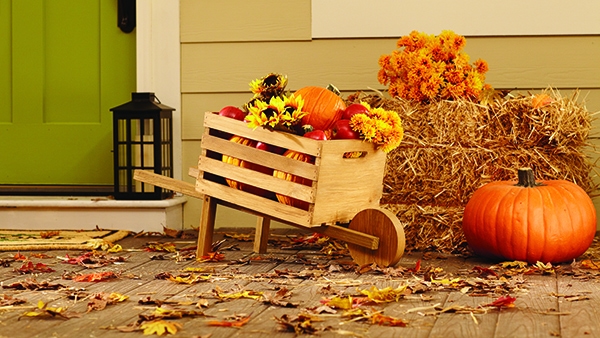
As a quick refresher, here is the original inspiration photo from The Home Depot. The wheelbarrow itself is such a fun Fall accessory, but you better bet the plain wood structure certainly left me craving some color and whimsy.
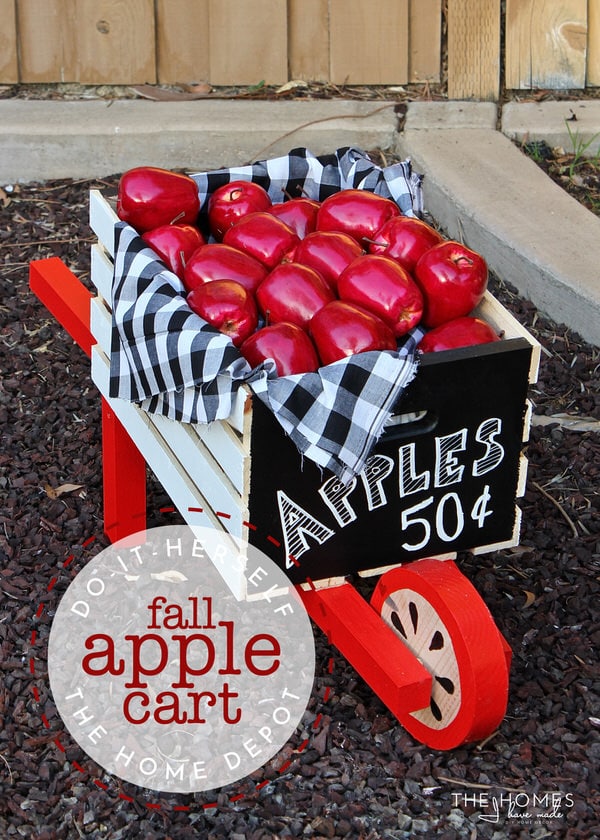
Thanks to a simple yet impactful paint treatment (along with a few seasonal accessories), my cart is now an adorable little apple cart that will be fun to play and accessorize with all season long.
Beyond for Fall, however, it can also be used for other holidays: fill it with apples for Fall, ornaments for Christmas, and fresh flowers for Spring! Swap out the words on the chalkboard surface to fit whatever season you are decorating for and you have a fun, easy, and unique way to decorate your porch, patio, or home for any occasion!
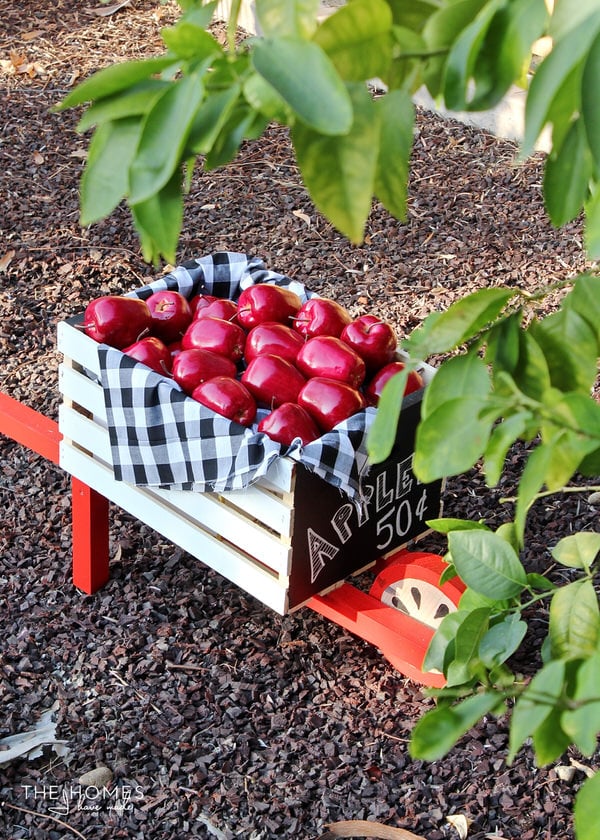
(You better bet this photo shoot sure made this East Coast girl homesick for crisp air, flannel, and Fall apple picking!)
Now here’s the fun part! I’m going to show you how to build this wheelbarrow, complete with the apple cart details, from start to finish. BUT…did you know that you can go to your own local The Home Depot and build it alongside savvy experts as part of their #DIHWorkshop?
All The Home Depot locations offer workshops for do-it-yourselfers of all ages and experience levels – yes, even those of you who have never handled a power tool! There are three types of Workshops offered: Do-It-Yourself (DIY), Do-It-Herself (DIH) and Kids…and at all three, you can learn how to build décor projects, make easy home repairs, and operate tools through demonstrations and step-by-step instructions!
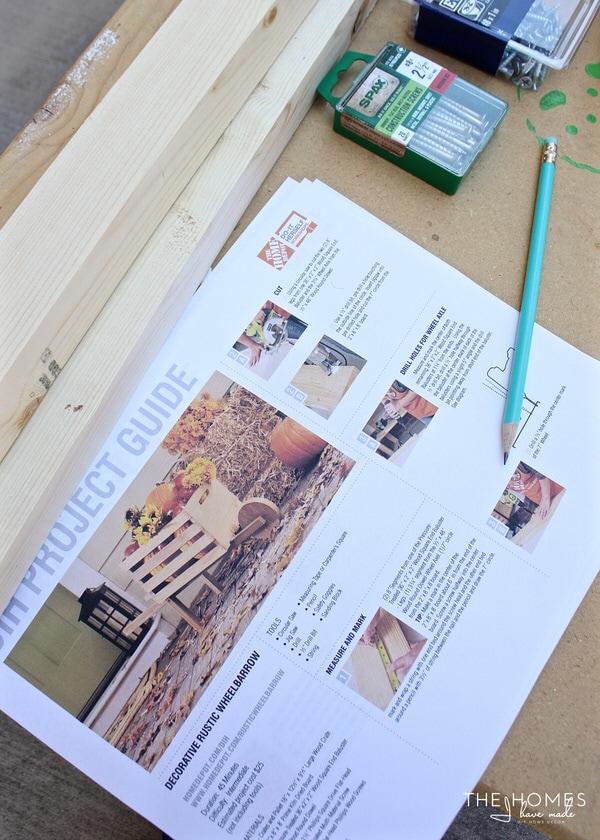
If you’re ready to build your own, here is what you need:
SUPPLIES FOR WHEELBARROW
- (1) Large Wood Crate (18″ x 12.5″ x 9.5″)
- (1) 2″ x 8″ x 8′ Prime Kiln Dried Board
- (3) Pressure-Treated 36″ x 2″ x 2″ Wood Square End Balusters
- (1) 1/2″ x 48″ Wood Round Dowel
- (1) Box #8 x 2.5″ Flat-Head Multi-Material Screws
- (1) Pack #8 x 1″ Flat-Head Wood Screws
TOOLS
- Circular saw
- Jig saw
- Drill with 1/2″ drill bit
- String
- Measuring tape
- Pencil
- Safety goggles
- Sanding block
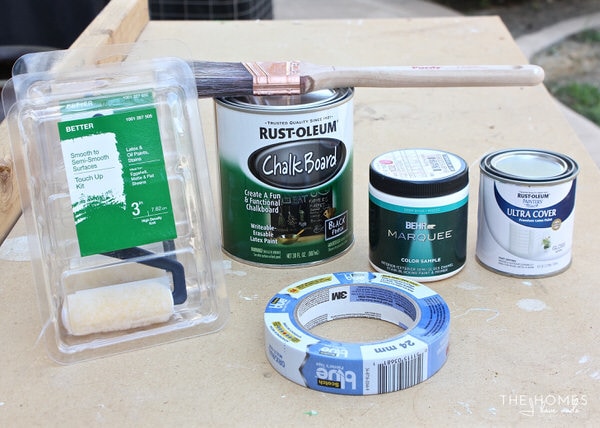
SUPPLIES FOR APPLE CART DETAILS
- (1) 8 oz can of Rust-Oleum White High Gloss Paint
- (1) sample pot of red paint (used here Behr Marquee Flirt Alert)
- (1) can Rust-Oleum Chalk Board Paint
- (1) White Chalk Ink marker
- Painters tape
- Small rollers
- Paint brush
How to Make the Rustic Wheelbarrow
Start by using a string and pencil to draw a 7″ circle on the 2″ x 8″ x 8′ board. Use a drill outfitted with a 1/2″ bit to create a hole right along your pencil line. Then insert a jig saw into the hole to carefully cut out the circle shape along your line. Look at me and baby cutting away!
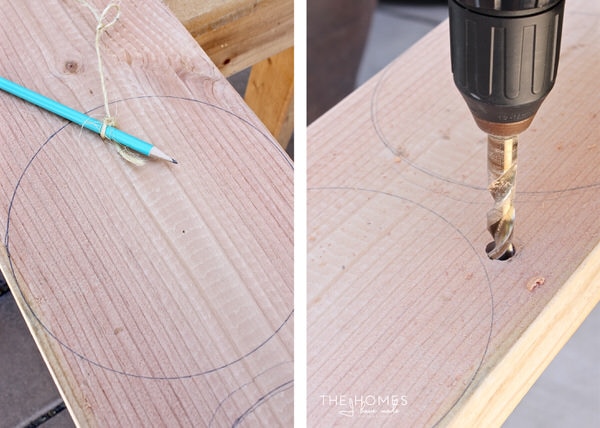
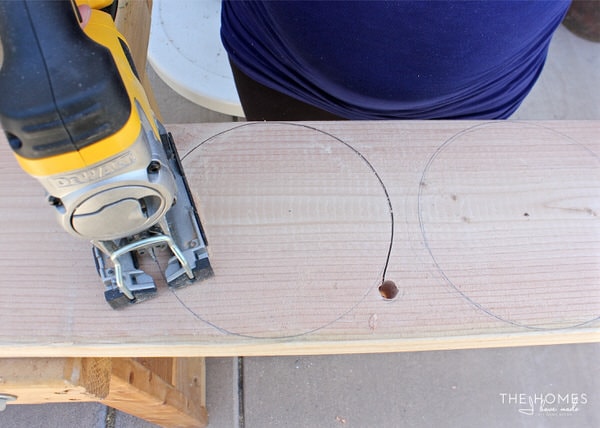
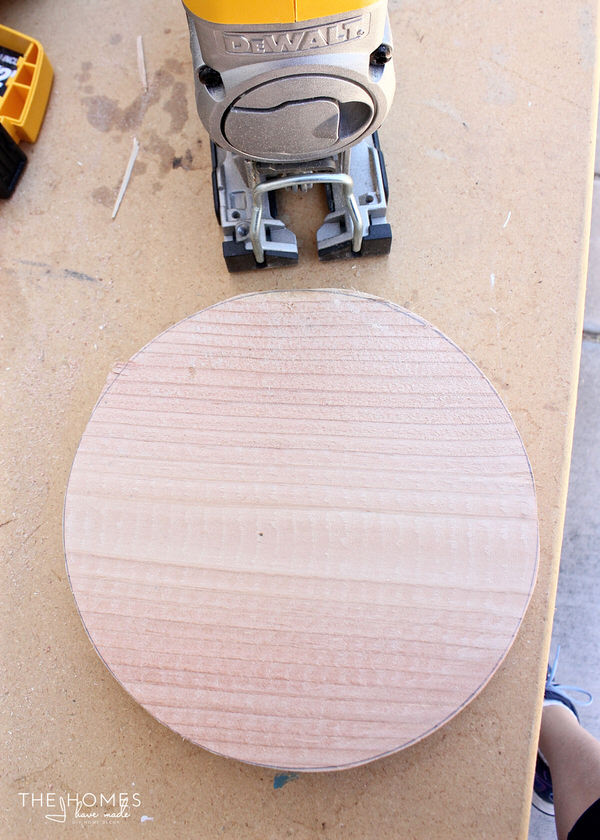
We did a pretty good job, huh? Our circle certainly wasn’t perfect, so I used a power sander to smooth out the rough edges and clean up the shape a bit!
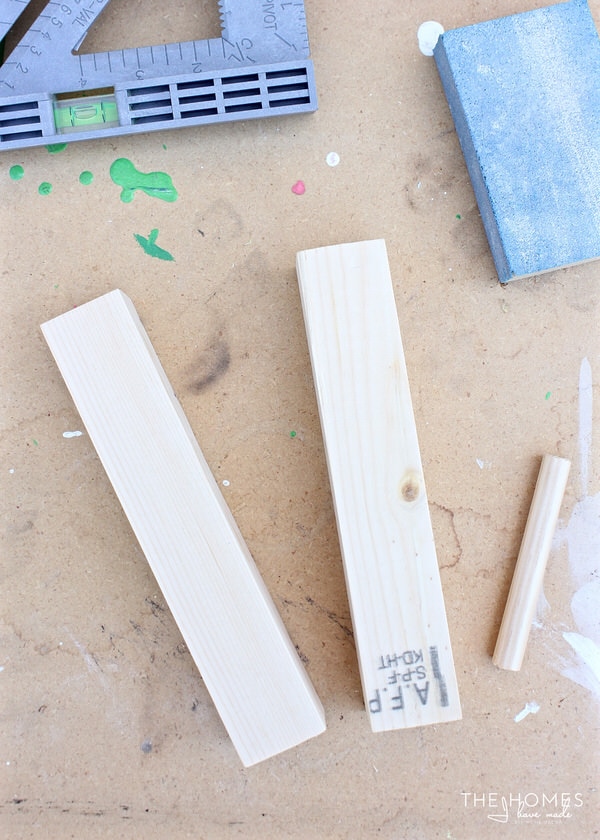
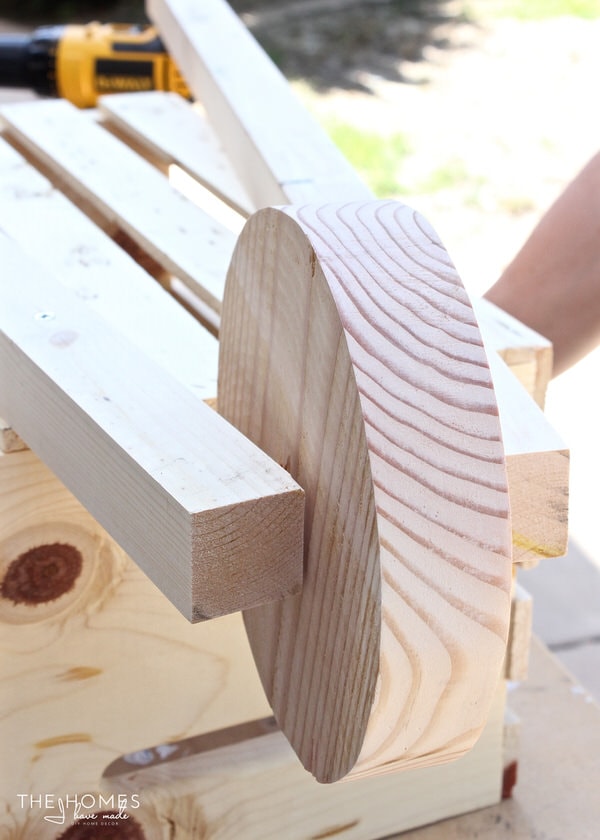
Next, take one of the 36″ x 2″ x 2″ Wood Square End Balusters and trim it down into two 8″ segments. Also trim off 3.75″ from the 1/2″ x 48″ wood dowel dowel and discard the rest. Both cuts here were made using a circular saw.
This next step was the trickiest part for us, and where we certainly could have used guidance from the experts at The Home Depot! Using a 1/2″ drill bit, drill a hole into each of the remaining 36″ x 2″ x 2″ Square End Balusters. The holes should be made 1.25″ from one end, at a slight 5 degree angle, pointing away from the short end of the baluster. Don’t freak out…it’s not hard…just practice on some scrap wood to get a feel for the depth and angle first!

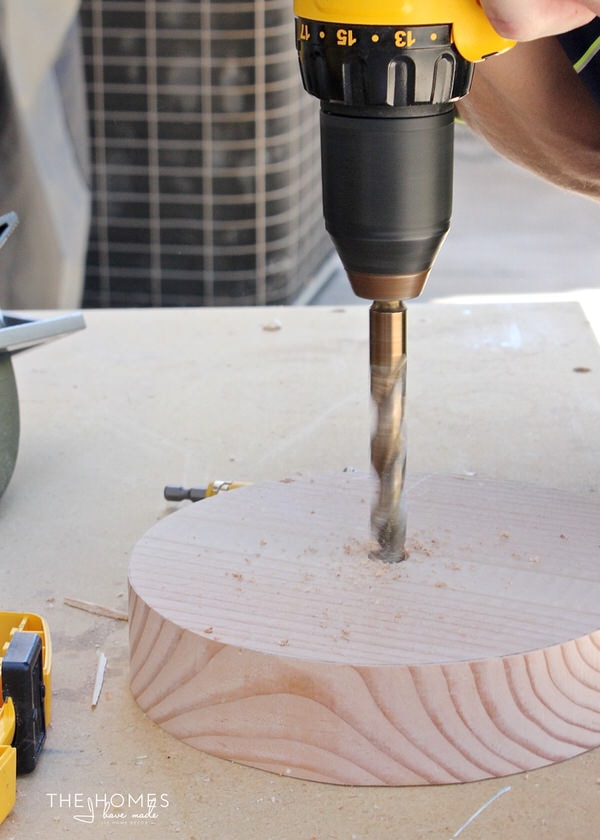
While the 1/2″ drill bit is still on your drill, drill a 1/2″ hole all the way through the center of the wood circle. This step will certainly require some muscle, and I may have had to bring in Greg to help 😉
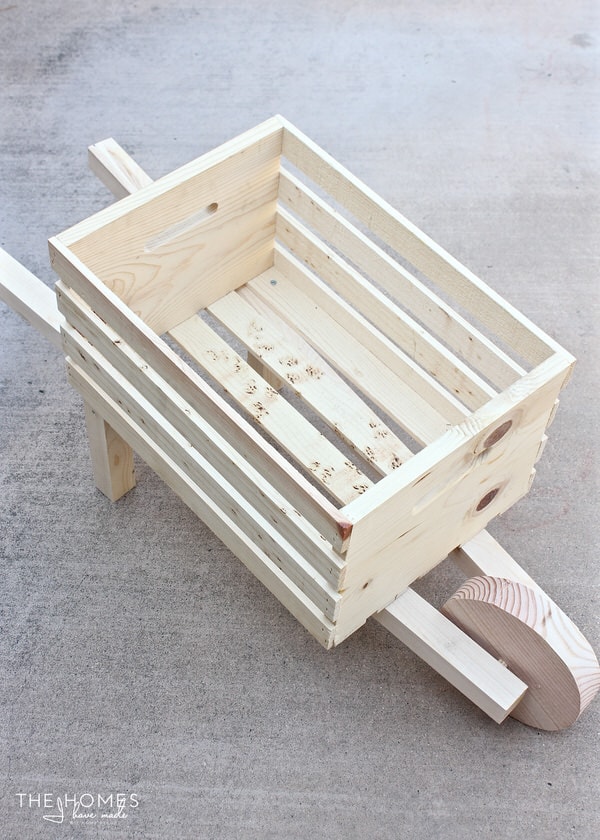
All of your pieces are now cut and drilled so all you have to do is assemble the wheelbarrow!
Start by flipping over the wood crate over. Using 2.5″ screws on each end, secure one of the 36″ balusters to the base of the crate. The end with the hole should be positioned over the second slat, while the other end should be centered over the outside two slates (so that the entire baluster runs on diagonal down the crate). The baluster should hang over the front end about 6″ and the back end about 12″…make sure the drilled hole is facing inward.
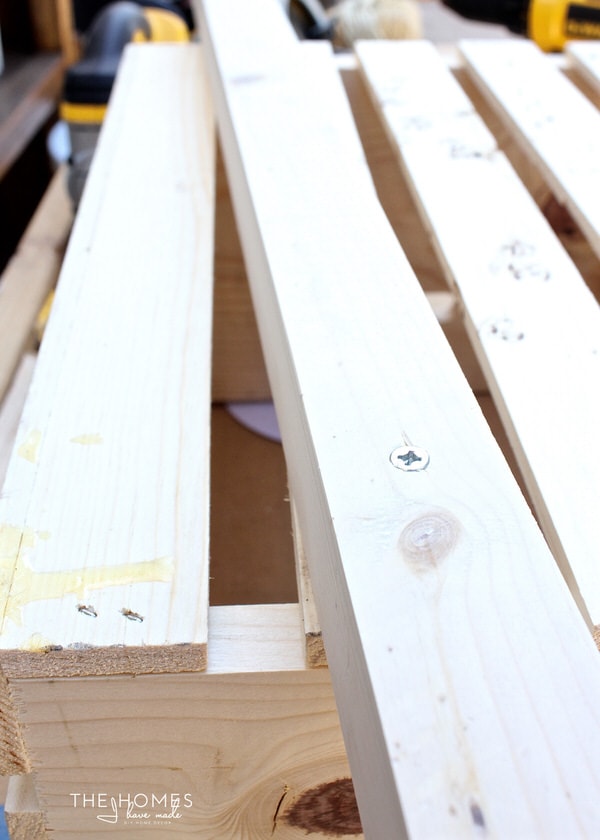
Slide the 3.75″ wooden dowel through the center of the 7″ circle wheel and then insert the dowel into the hole on the end of the baluster. Place the remaining 36″ baluster onto the wheel axel, and secure it into place the same as you did on the other side: front end over the second slate, back end centered between the outside two slats, 2.5″ screws on each end to hold it in place.
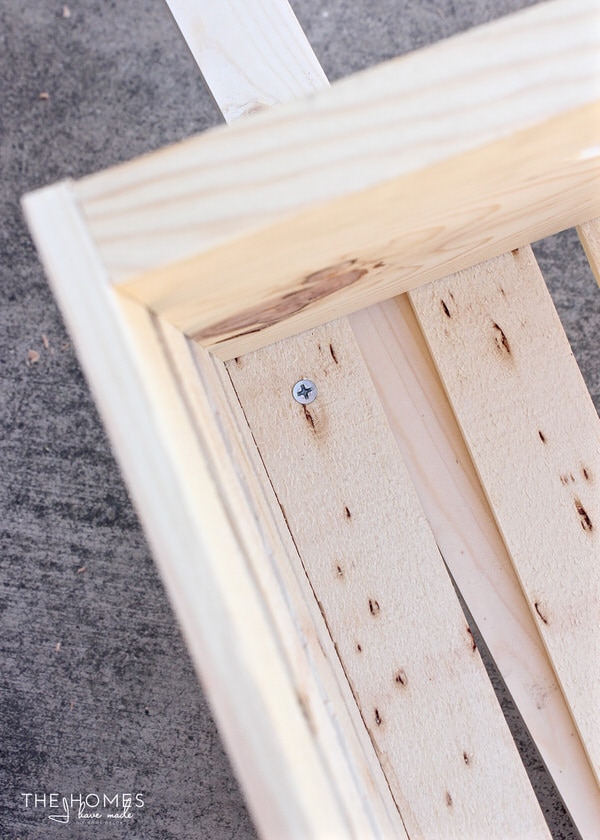
The final step is to attach the legs. Using the 1″ wood screws, attach each of the 8″ legs to the back corners of the crate from the inside.
And in just about an hour (seriously!!!!), you will have a charming little rustic wheelbarrow ready for decorating and personalizing!
Turning the Rustic Wheelbarrow into an Apple Cart
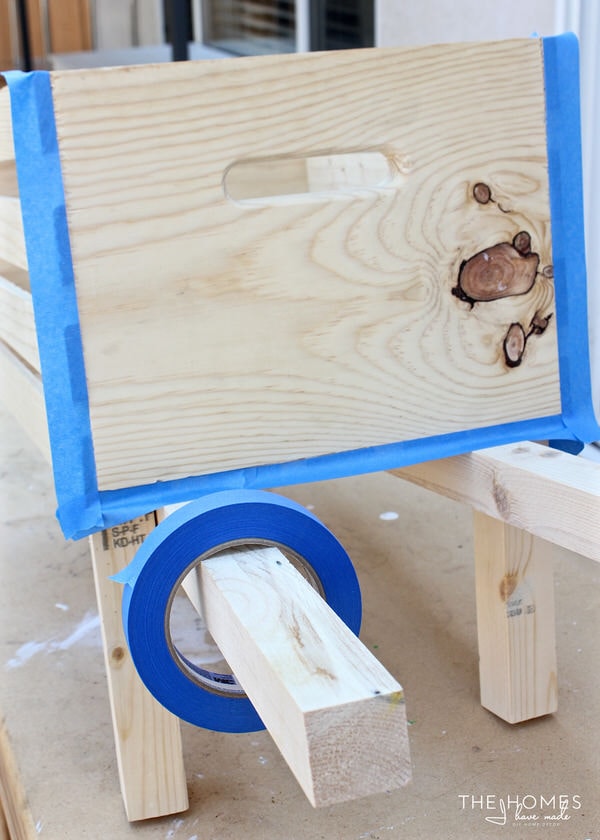
As listed above, you need just a few jars of paint and some painting supplies to transform the rustic wheelbarrow into an apple cart. I used White High Gloss and Chalk Board paints (both by Rust-Oleum) and a sample of Behr Flirt Alert paint in semi gloss for my cart (see direct product links above). Some painters tape and disposable 3″ rollers made this paint job super quick and easy!
Want to save this post?
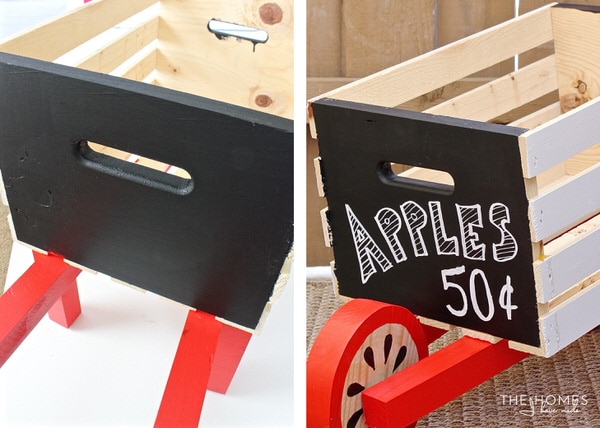
Because this project has a rustic flare to it, you don’t need to be pristine in your paint lines, but I did find taping out just the ends of each side of the crate was helpful in keeping the right colors on the right surfaces. Using a brush or roller, start by applying the chalkboard paint to each end of the crate. After about 30 minutes (depending on your climate), the paint should be dry enough to touch (but not yet re-coat) to proceed with the other colors.
I love using these disposable trays and rollers for projects like this because I can just toss them when I’m done. I loaded up two trays with my white and red paints…
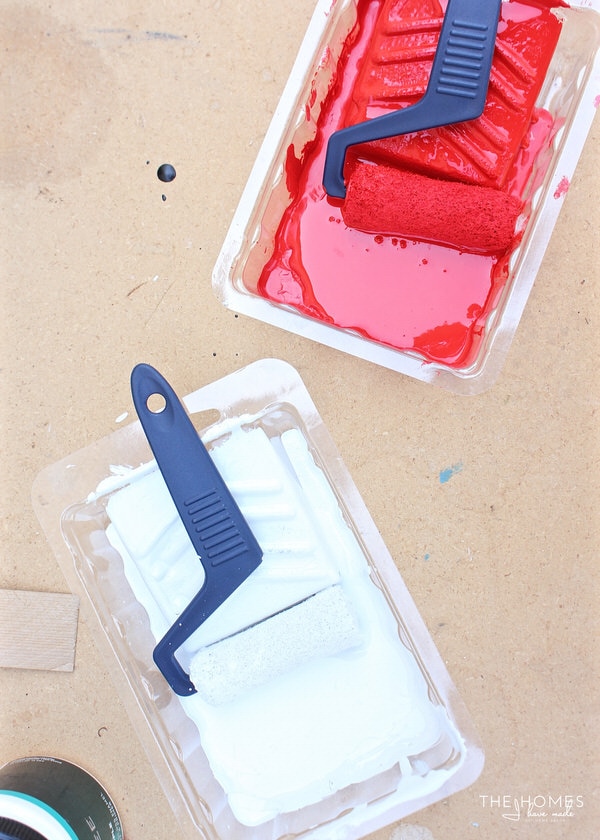
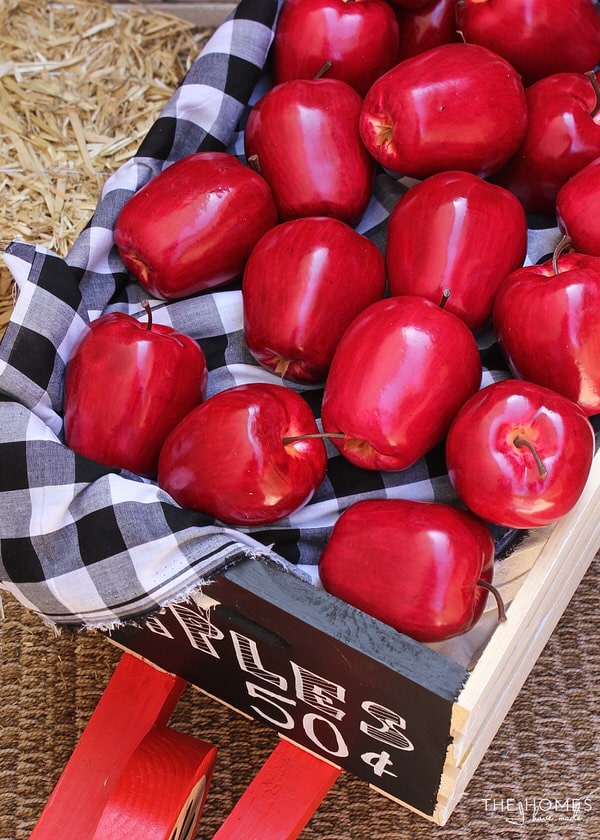
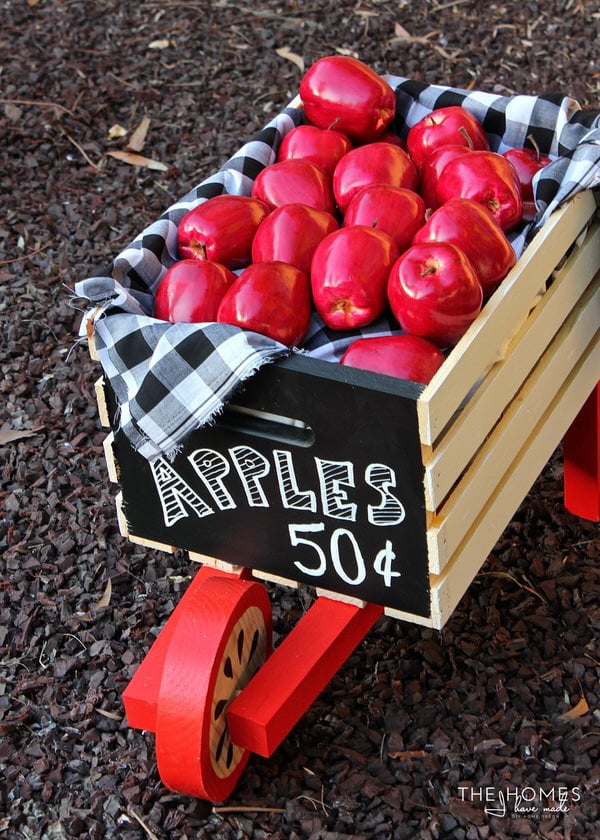
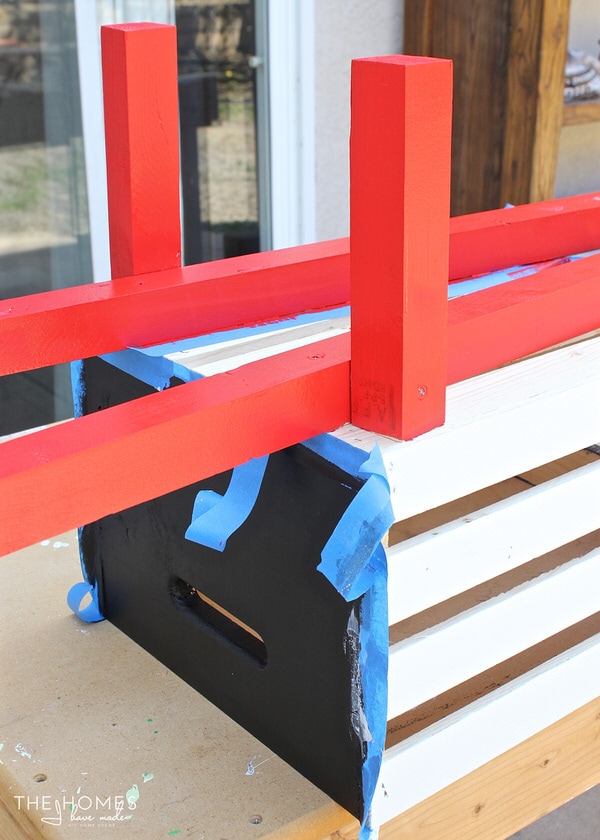
…and carefully painted the rest of the wheelbarrow. White paint was used on the slatted sides of the crate (just the outside), while the bright red was used on the legs, handles, and wheel. To avoid having to tape all the edges for the red details, I just slid scrap paper underneath the wood balusters and painted to the edges where necessary: quick and easy!
For the wheel, start by by painting the outside wheel surface with a roller and more red paint.

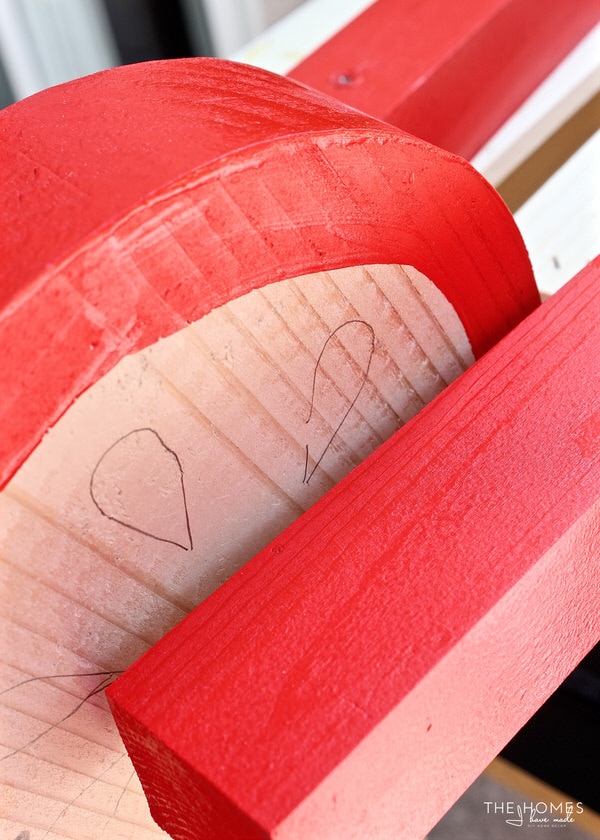
Then go back with a small detail brush to add a 0.75″ red board on the wheel surfaces too. Once dry, use a pencil to draw little seed shapes on the wheel sides, spinning the wheel as you go. Again, using the detail brush, go back with more Chalk Board paint and fill in the seeds.
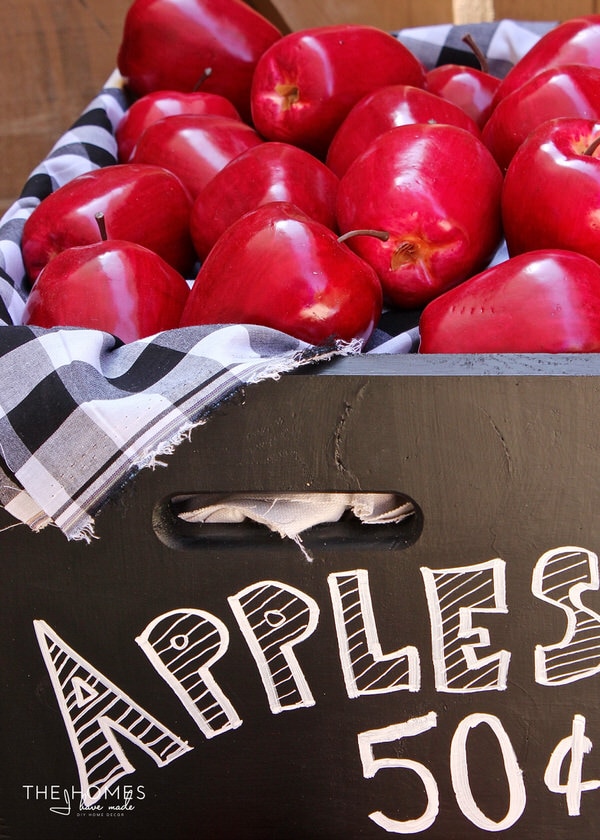
Finally, remove the tape and allow the crate to dry thoroughly. Then, use a Chalk Ink Marker to add decorations, words and other fun details to the writable surfaces. If you’re worried about your ability to write fancy letters, play around on scrap paper first and then just go for it. It’s a chalkboard after all, so you can easily wipe away any mistakes with a wet cloth! (I may have had to try 4 or 5 times to get that one little ‘Apple’ phrase right!)
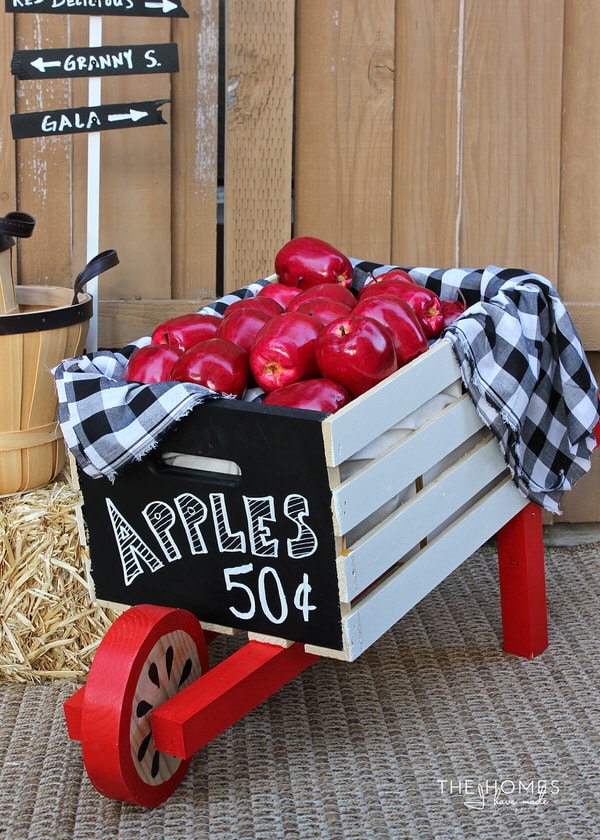
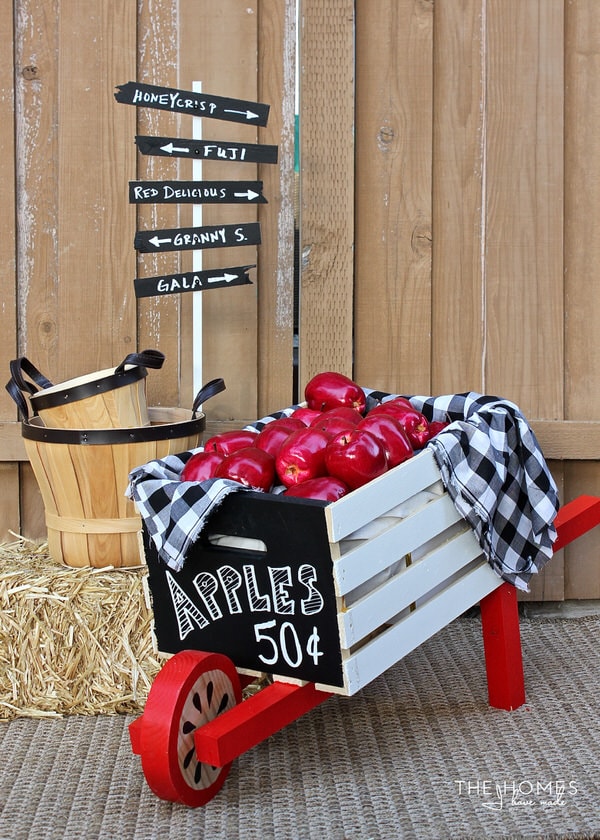
Like I said…a simple paint treatment and the Rustic Wheelbarrow is given an entirely new life as an Apple Cart!
Not only do I think this would be a really fun accessory for a Fall party (think of it filled with apples on a buffet table!), but it would make such a festive statement at your entryway! With a few orchard-themed accessories, you can really create a whole display!
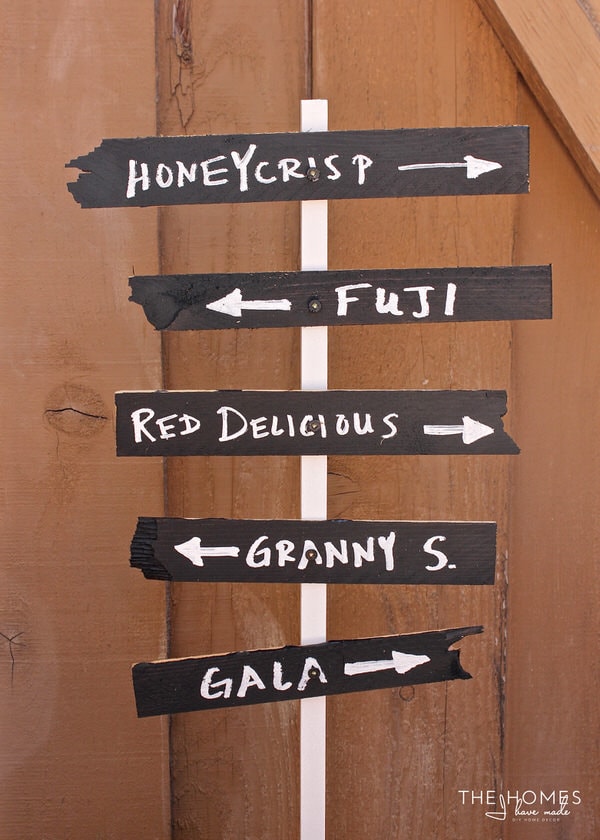
How to Make a Simple Orchard Sign
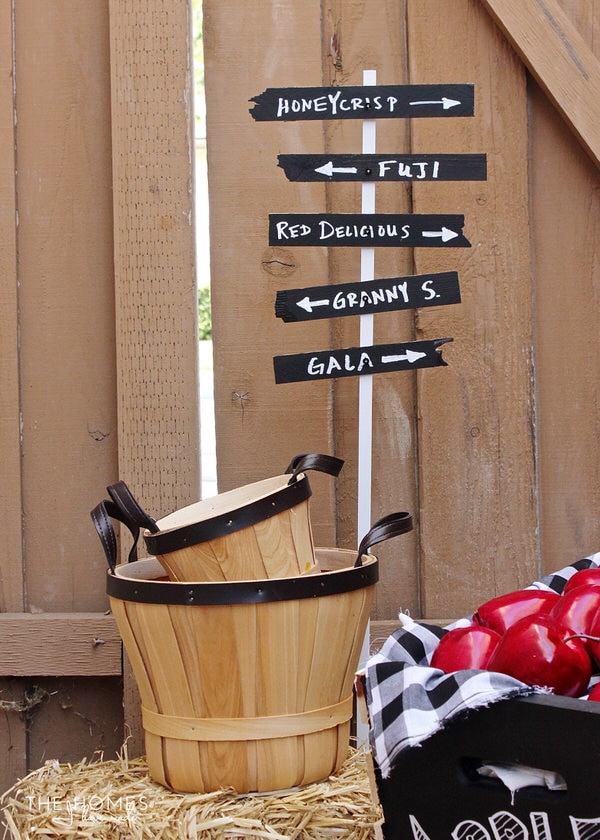
The little chalkboard orchard sign was a spur-of-the-moment decision but really completed this whole festive display! It also took me about 10 minutes using things I already had on hand. Something like this would look darling in potted plants or apple barrels too, so give it a try!
SUPPLIES
- (3ish) wood shims
- (1) 36″ square wood dowel
- (1) pack of 0.75″ wood screws
- (1) 8 oz can of Rust-Oleum White High Gloss Paint
- (1) can Rust-Oleum Chalk Board Paint
- (1) White Chalk Ink marker
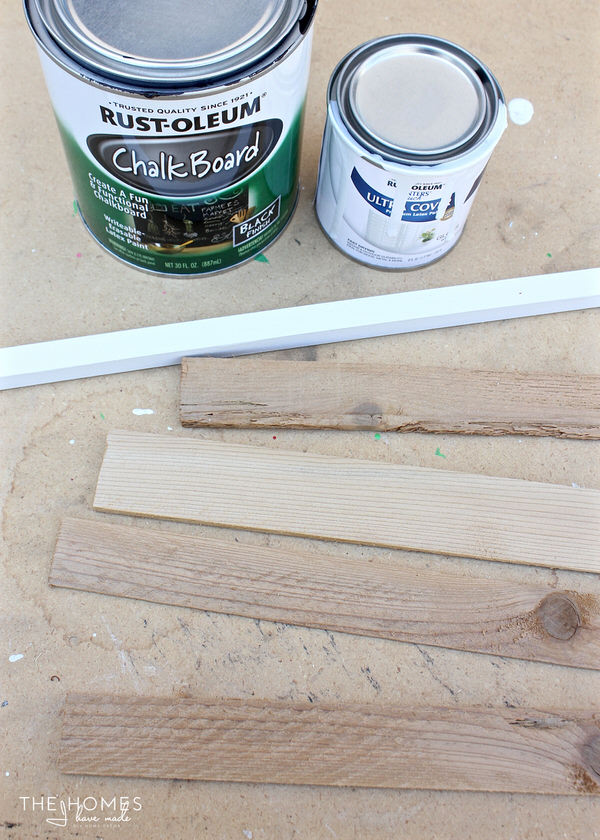
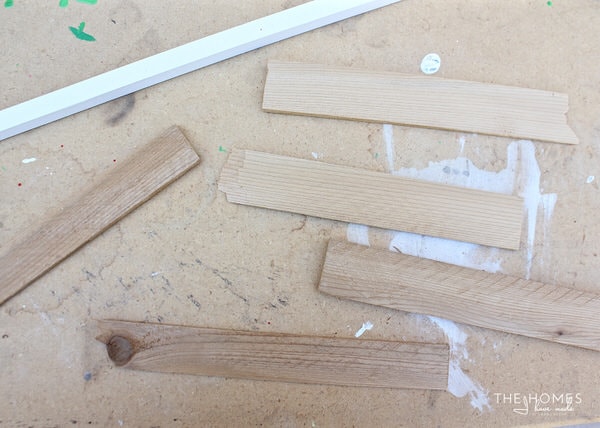
Start by painting the wood dowel white (if desired). While that dries, break the wood shims in half. The rugged breaks in the wood really add to the charm, so don’t worry about making perfect or clean breaks!
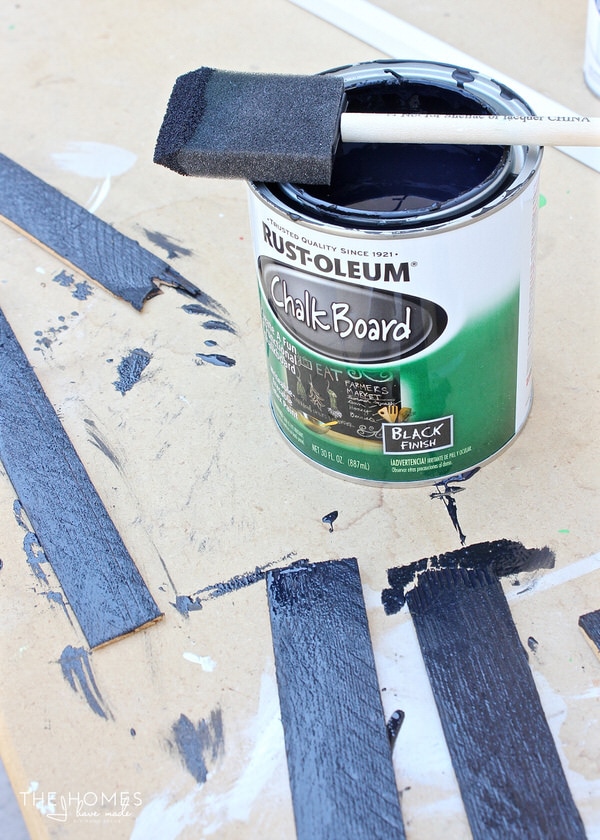
Give each wood shim a coat (or two, if necessary) of Chalk Board paint and allow to dry.
Once dry, use a Chalk Ink marker to write down some names of your favorite apple types…and don’t forget to add alternating arrows if desired!
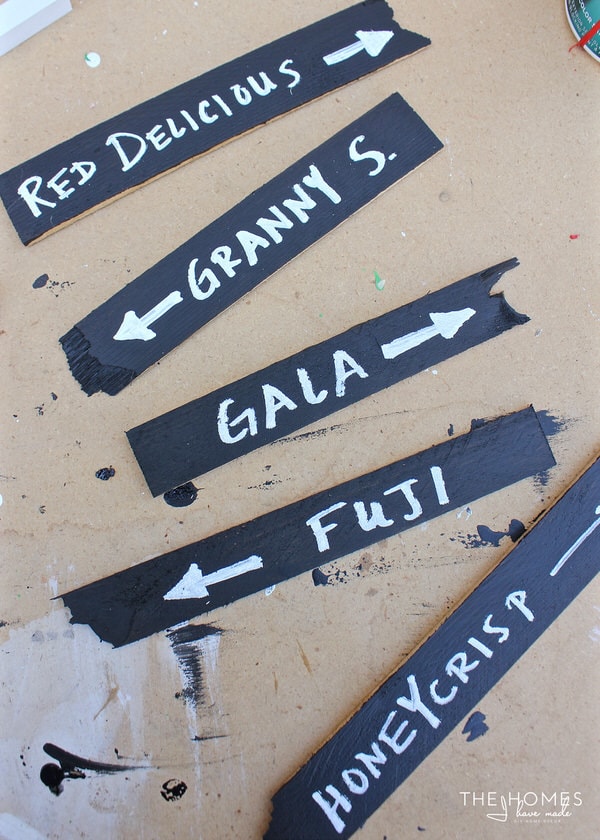
Use 3/4″ wood screws to attach the wood shims to one flat side of the wooden dowel. If desired, use a black marker or more paint to hide obvious screws.
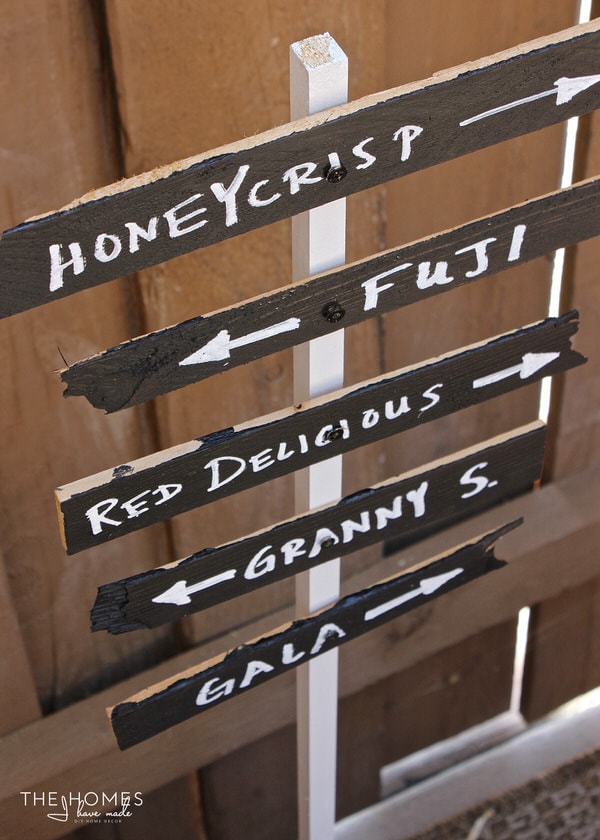
Stick the sign into any pot or display to complete your apple orchard theme!
This was SUCH a fun project to work on, you guys! Not only did it help get me in the mood for Fall (which is good since we don’t really get Fall here in Southern California!) but it certainly woke up my creative juices! This project was completed in a day and was the perfect way to ease me back into DIYs after a long summer of moving and baby exhaustion! Not only am I ready for Fall, but I am (finally!) feeling ready to take on some more ambitious DIY projects again! Phew!
I hope you guys love this project and are feeling inspired to try your hand at building, DIYing, and Fall decorating soon! I’d love to hear what you think of this project, and hope you will take the time to check out all the other great projects shared by these awesome bloggers! And lastly, don’t forget to register for your local workshop to build your own Rustic Wheelbarrow too!
I’ll see you guys back here on Wednesday (I think!!!) with that chore chart project and printable I promised last week! See you then!
The Home Depot partnered with me for this post and project, compensating me for materials and my time. Please remember that I only work with brands and products I fully support and that make sense for my home, my family, and this blog. All opinions are 100% my own!
Megan
14 Comments on “Rustic Wheelbarrow Turned Charming Apple Cart”
That apple wheel is too cute! What a great idea!
Stop it, that apple front wheel is too cute! The whole piece looks awesome, love your take on it!
The most adorable apple cart ever! I love your painted wheel detail and the wood shim signs! Thank you for joining me in this fun virtual party, Megan! xo
This is adorable! Love how you painted the wheel!
oh…how cute is your apple cart! I am hosting a farmers market birthday party and this would be perfect!
Well, the entire wheelbarrow and display are adorable! But, that painted wheel is just too CUTE! Love it all.
Meghan, your wheelbarrow gets Best of Show!
So cute and versatile.
Thank you so much, Penny! This was definitely a fun project to work on! Glad you enjoyed it 🙂
Megan
This is so cute! I love your apple touches, especially on the wheel!
So cute Megan! Love the red, white and black colors you used and the apple details on your wheel.
This turned out so cute!
Adorable. Seriously thinking right now how to sweet talk my hubby to do this.
I love your version of the wooden crate wheelbarrow! I looked for a workshop within driveable distance but couldn’t find any listed for this week. But if think I can figure things out from your tutorial… you did a great job btw!
I just discovered your blog, you are so talented! Thanks for the great step by step directions and adorable project.