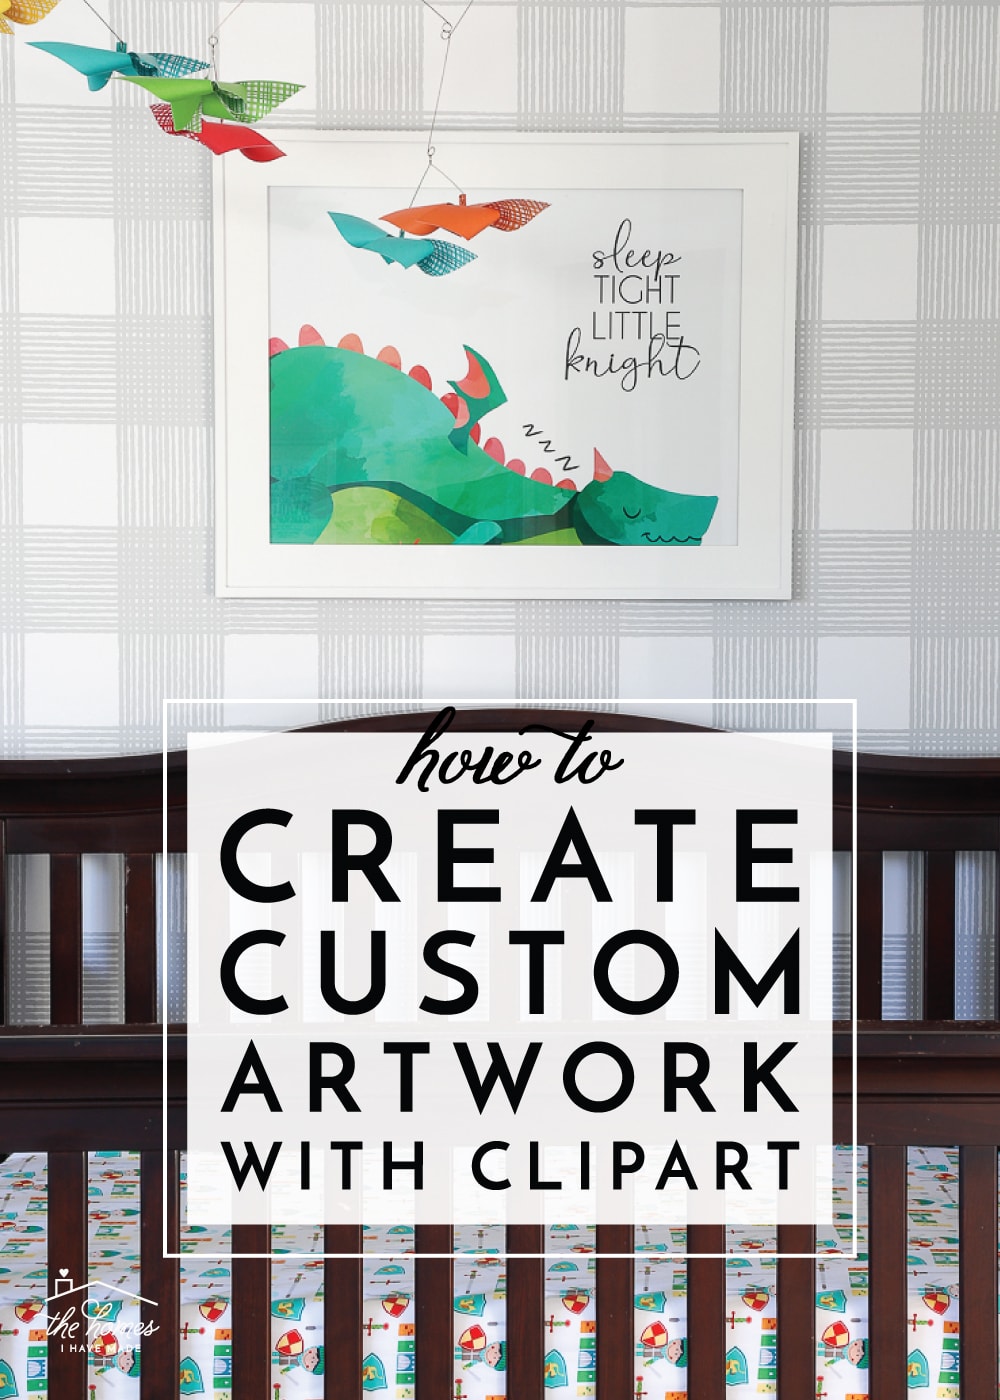
How to Make Custom Artwork With Clipart
Phew! It’s been quite the week – did you see my big announcement over on Instagram?!? I’m going to start chatting all about the new Circuit Joy next week, but today I want to (finally!) share the creative way I made artwork for Jack’s nursery. When I first decided on the Knight theme for his room, I assumed I’d be able to find cute artwork like I did for Sam’s Superhero nursery. But after an extensive search on all my usual sites (Etsy, Amazon, World Market, Minted, Society 6), I just couldn’t find anything that 1) I loved, and 2) matched his room quite right. Then I had an “a ha” moment and started looking at inexpensive clipart instead, realizing quickly that I could make my own! Let me show you how easy it is to create custom artwork with clipart!
When I first shared Jack’s nursery design plan last year, so many of you weighed in that you loved the art selections…both the dragon and the knight prints I found on Etsy:
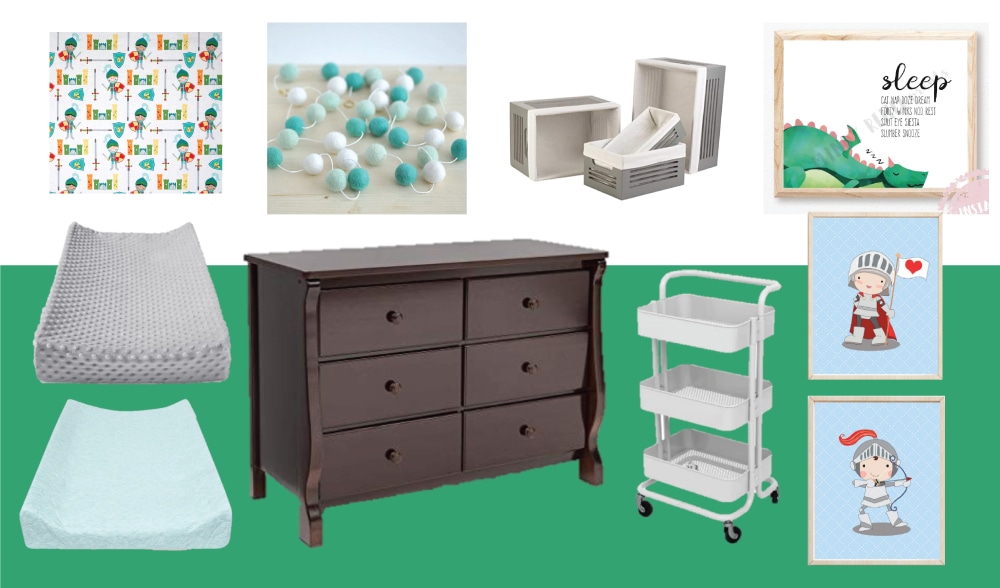
When I chose them, I (wrongly) assumed I’d be able to make some customizations to the prints, as most artists are happy to accommodate text and color changes. In the case of both the dragon and the knights, the Etsy sellers informed me they couldn’t make any color changes since they were made using pre-made clipart images. This means they didn’t draw/create the images themselves and were therefor unable to adjust the colors. Instead, they had purchased the pre-done designs and turned them into art prints.
Lightbulb!
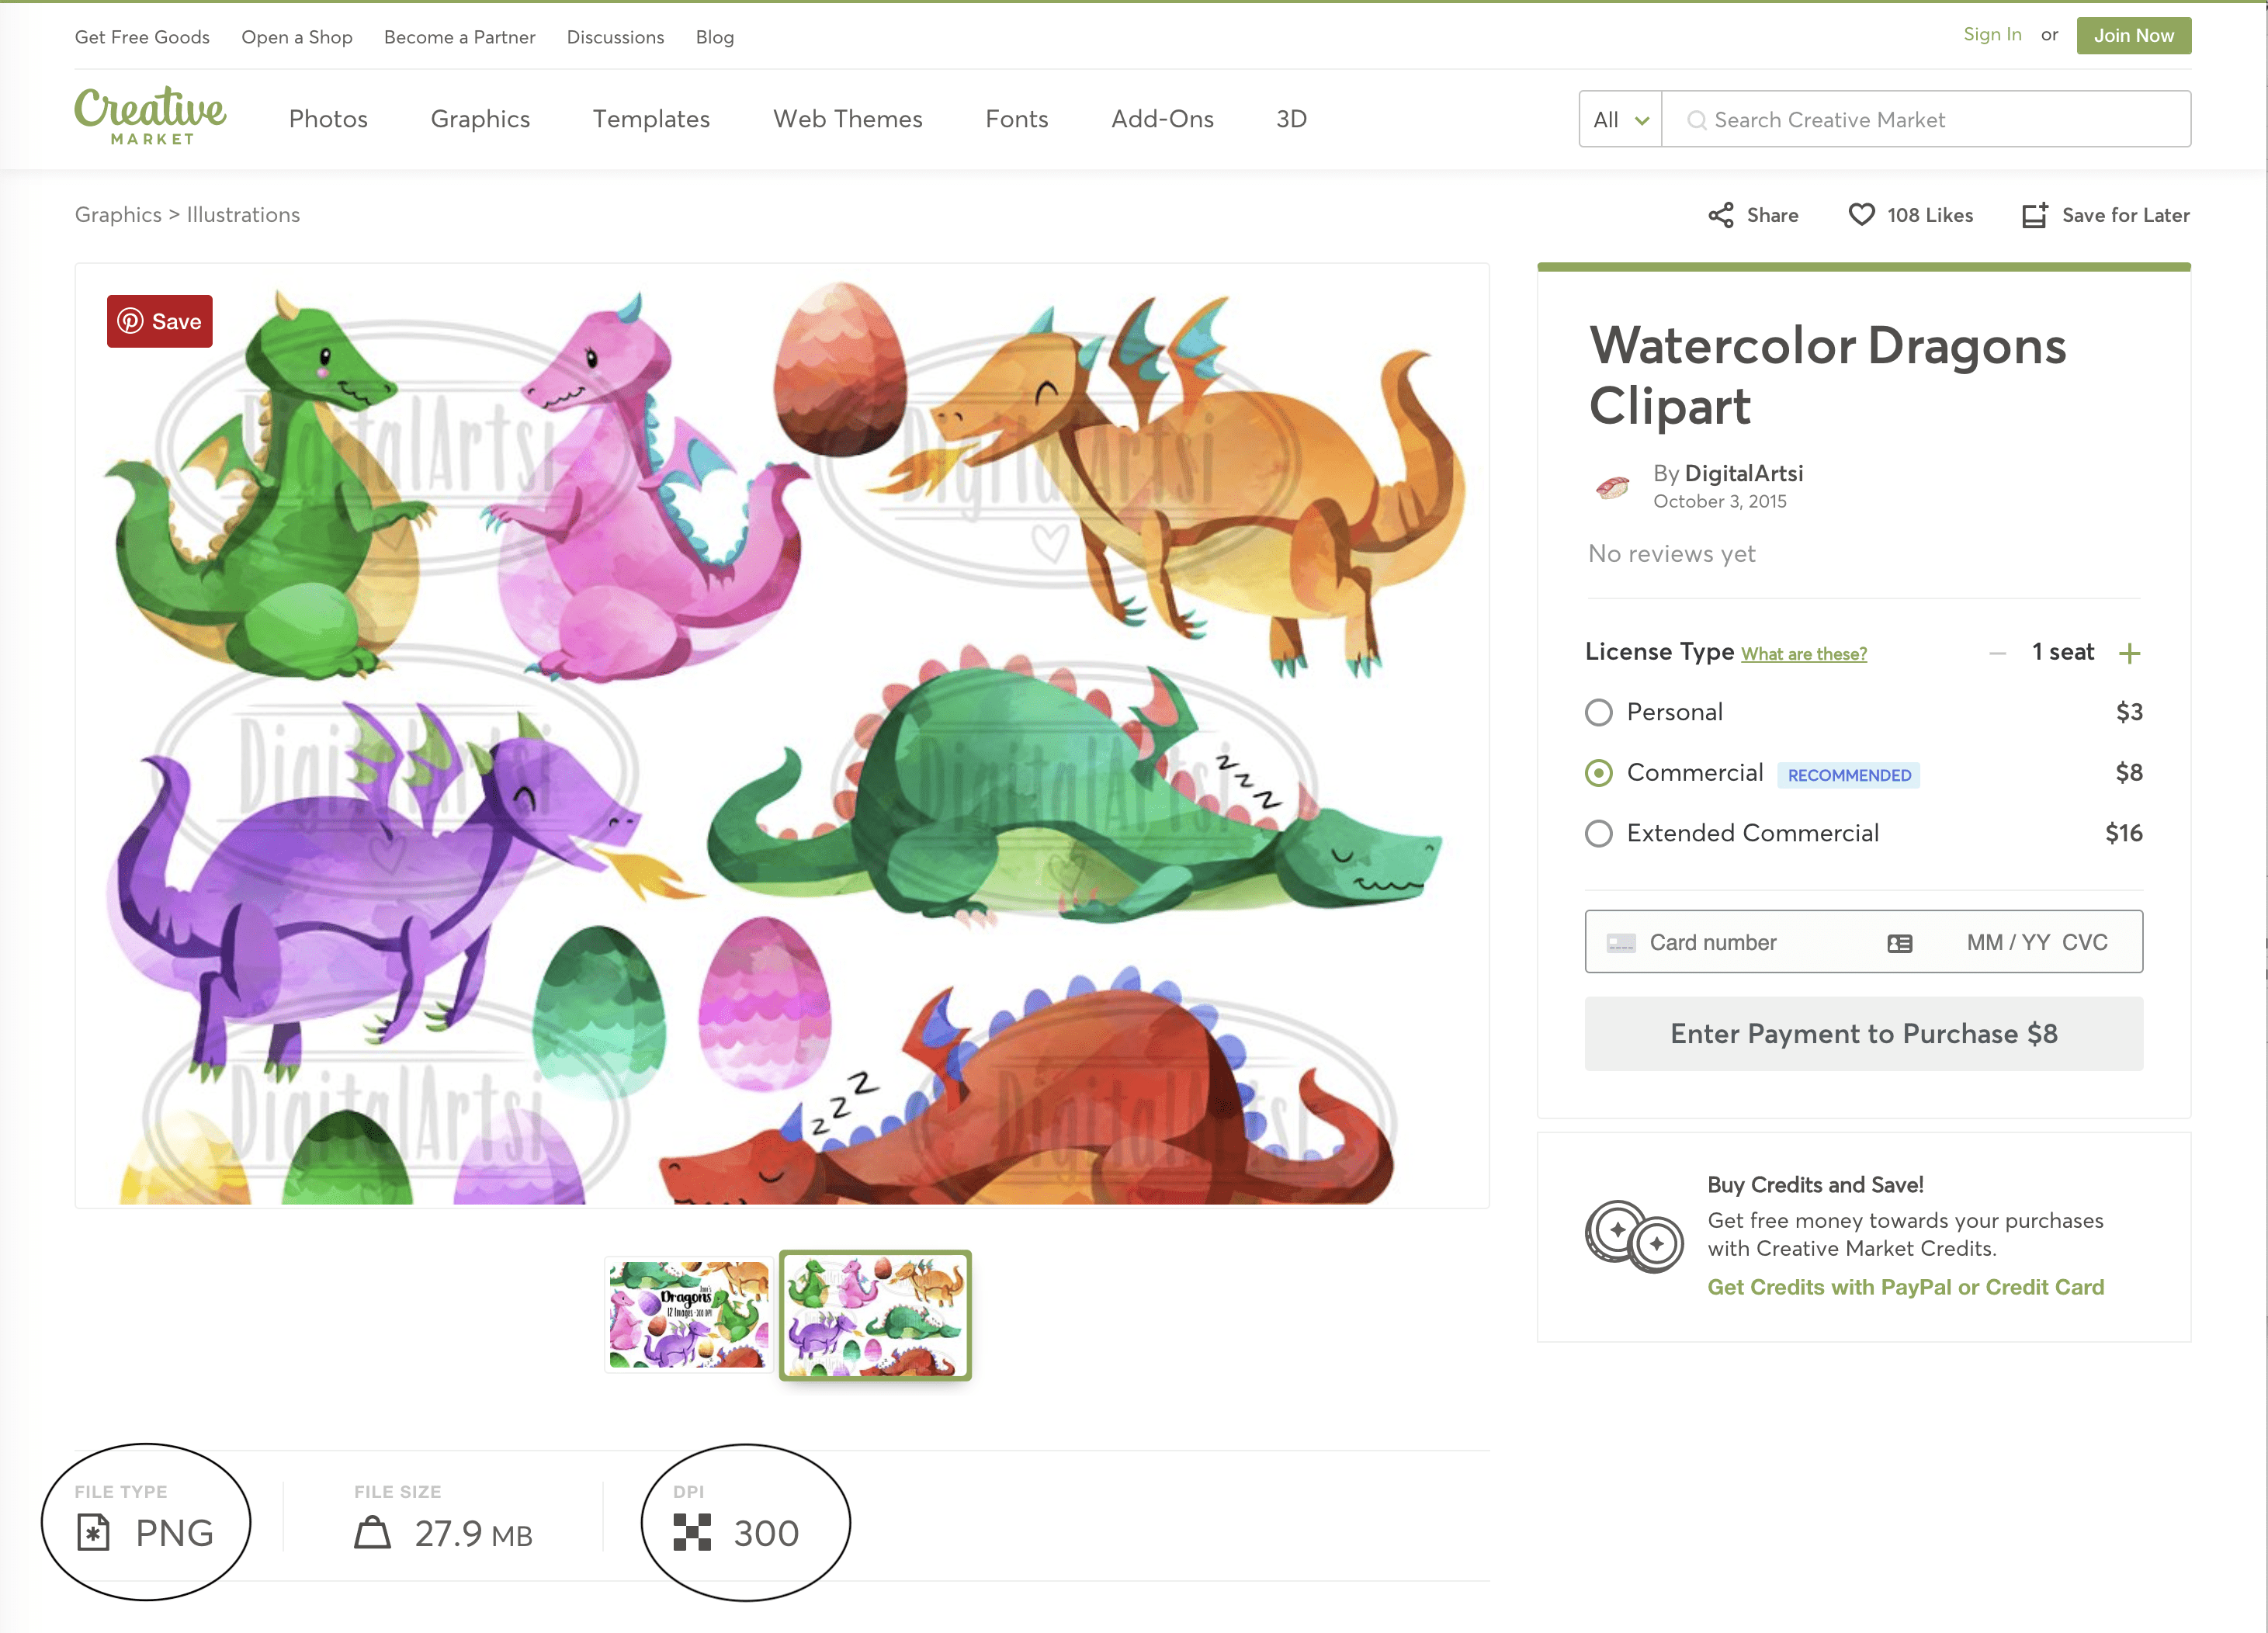
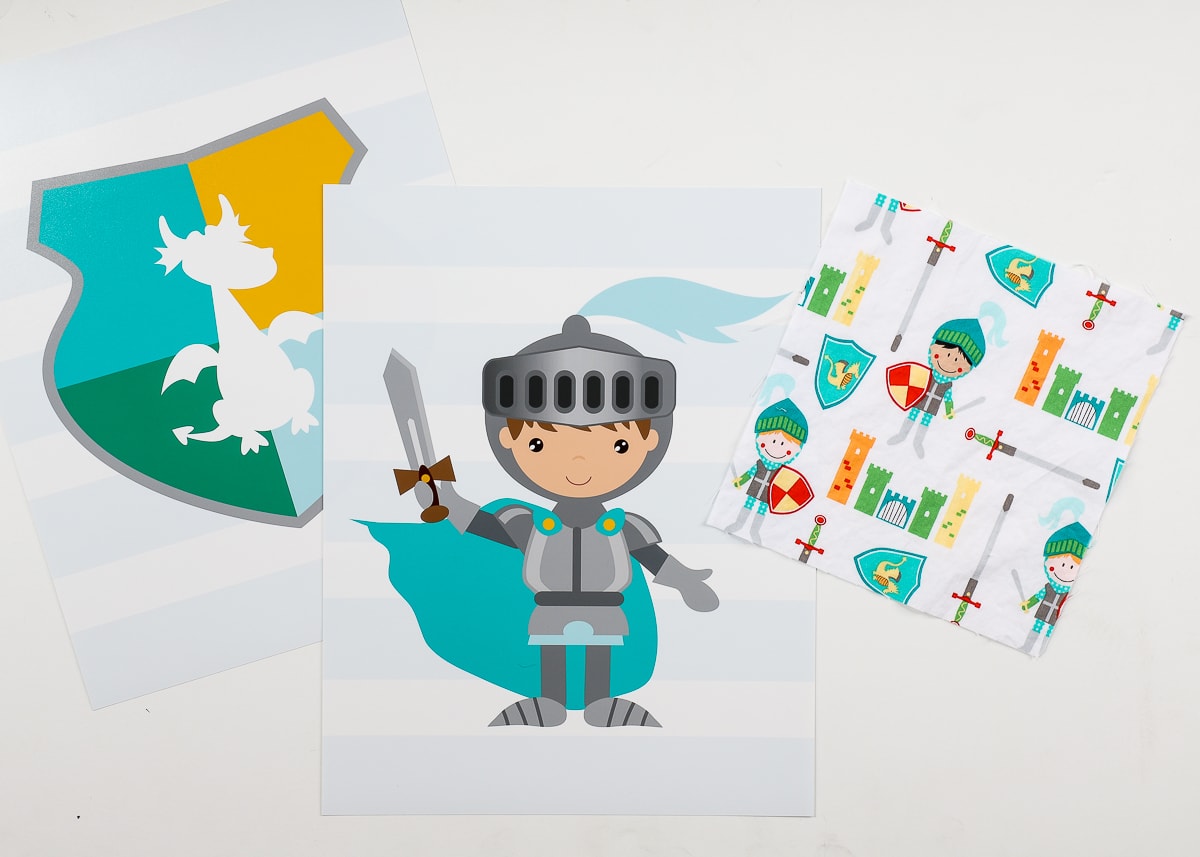
It didn’t take me long to find the dragon clipart for just $3 on Creative Market. Being PNG images (meaning they have a clear background) and 300 dpi (dots per inch), I knew they’d easily translate nicely to printed art.
Finding Knight clipart I loved was much trickier. I was able to find the images used by some of the Etsy sellers (as seen in my design board above), but they were still only available in the red color scheme, which didn’t quite match my design plan. Then every Knight set I found either wasn’t “nursery” enough or were the wrong colors. I was about to give up hope when I noticed this Etsy seller included the EPS files with the completed PNG and JPEG clipart. This meant I could open the original design files in Adobe Illustrator and change the colors to anything I wished!
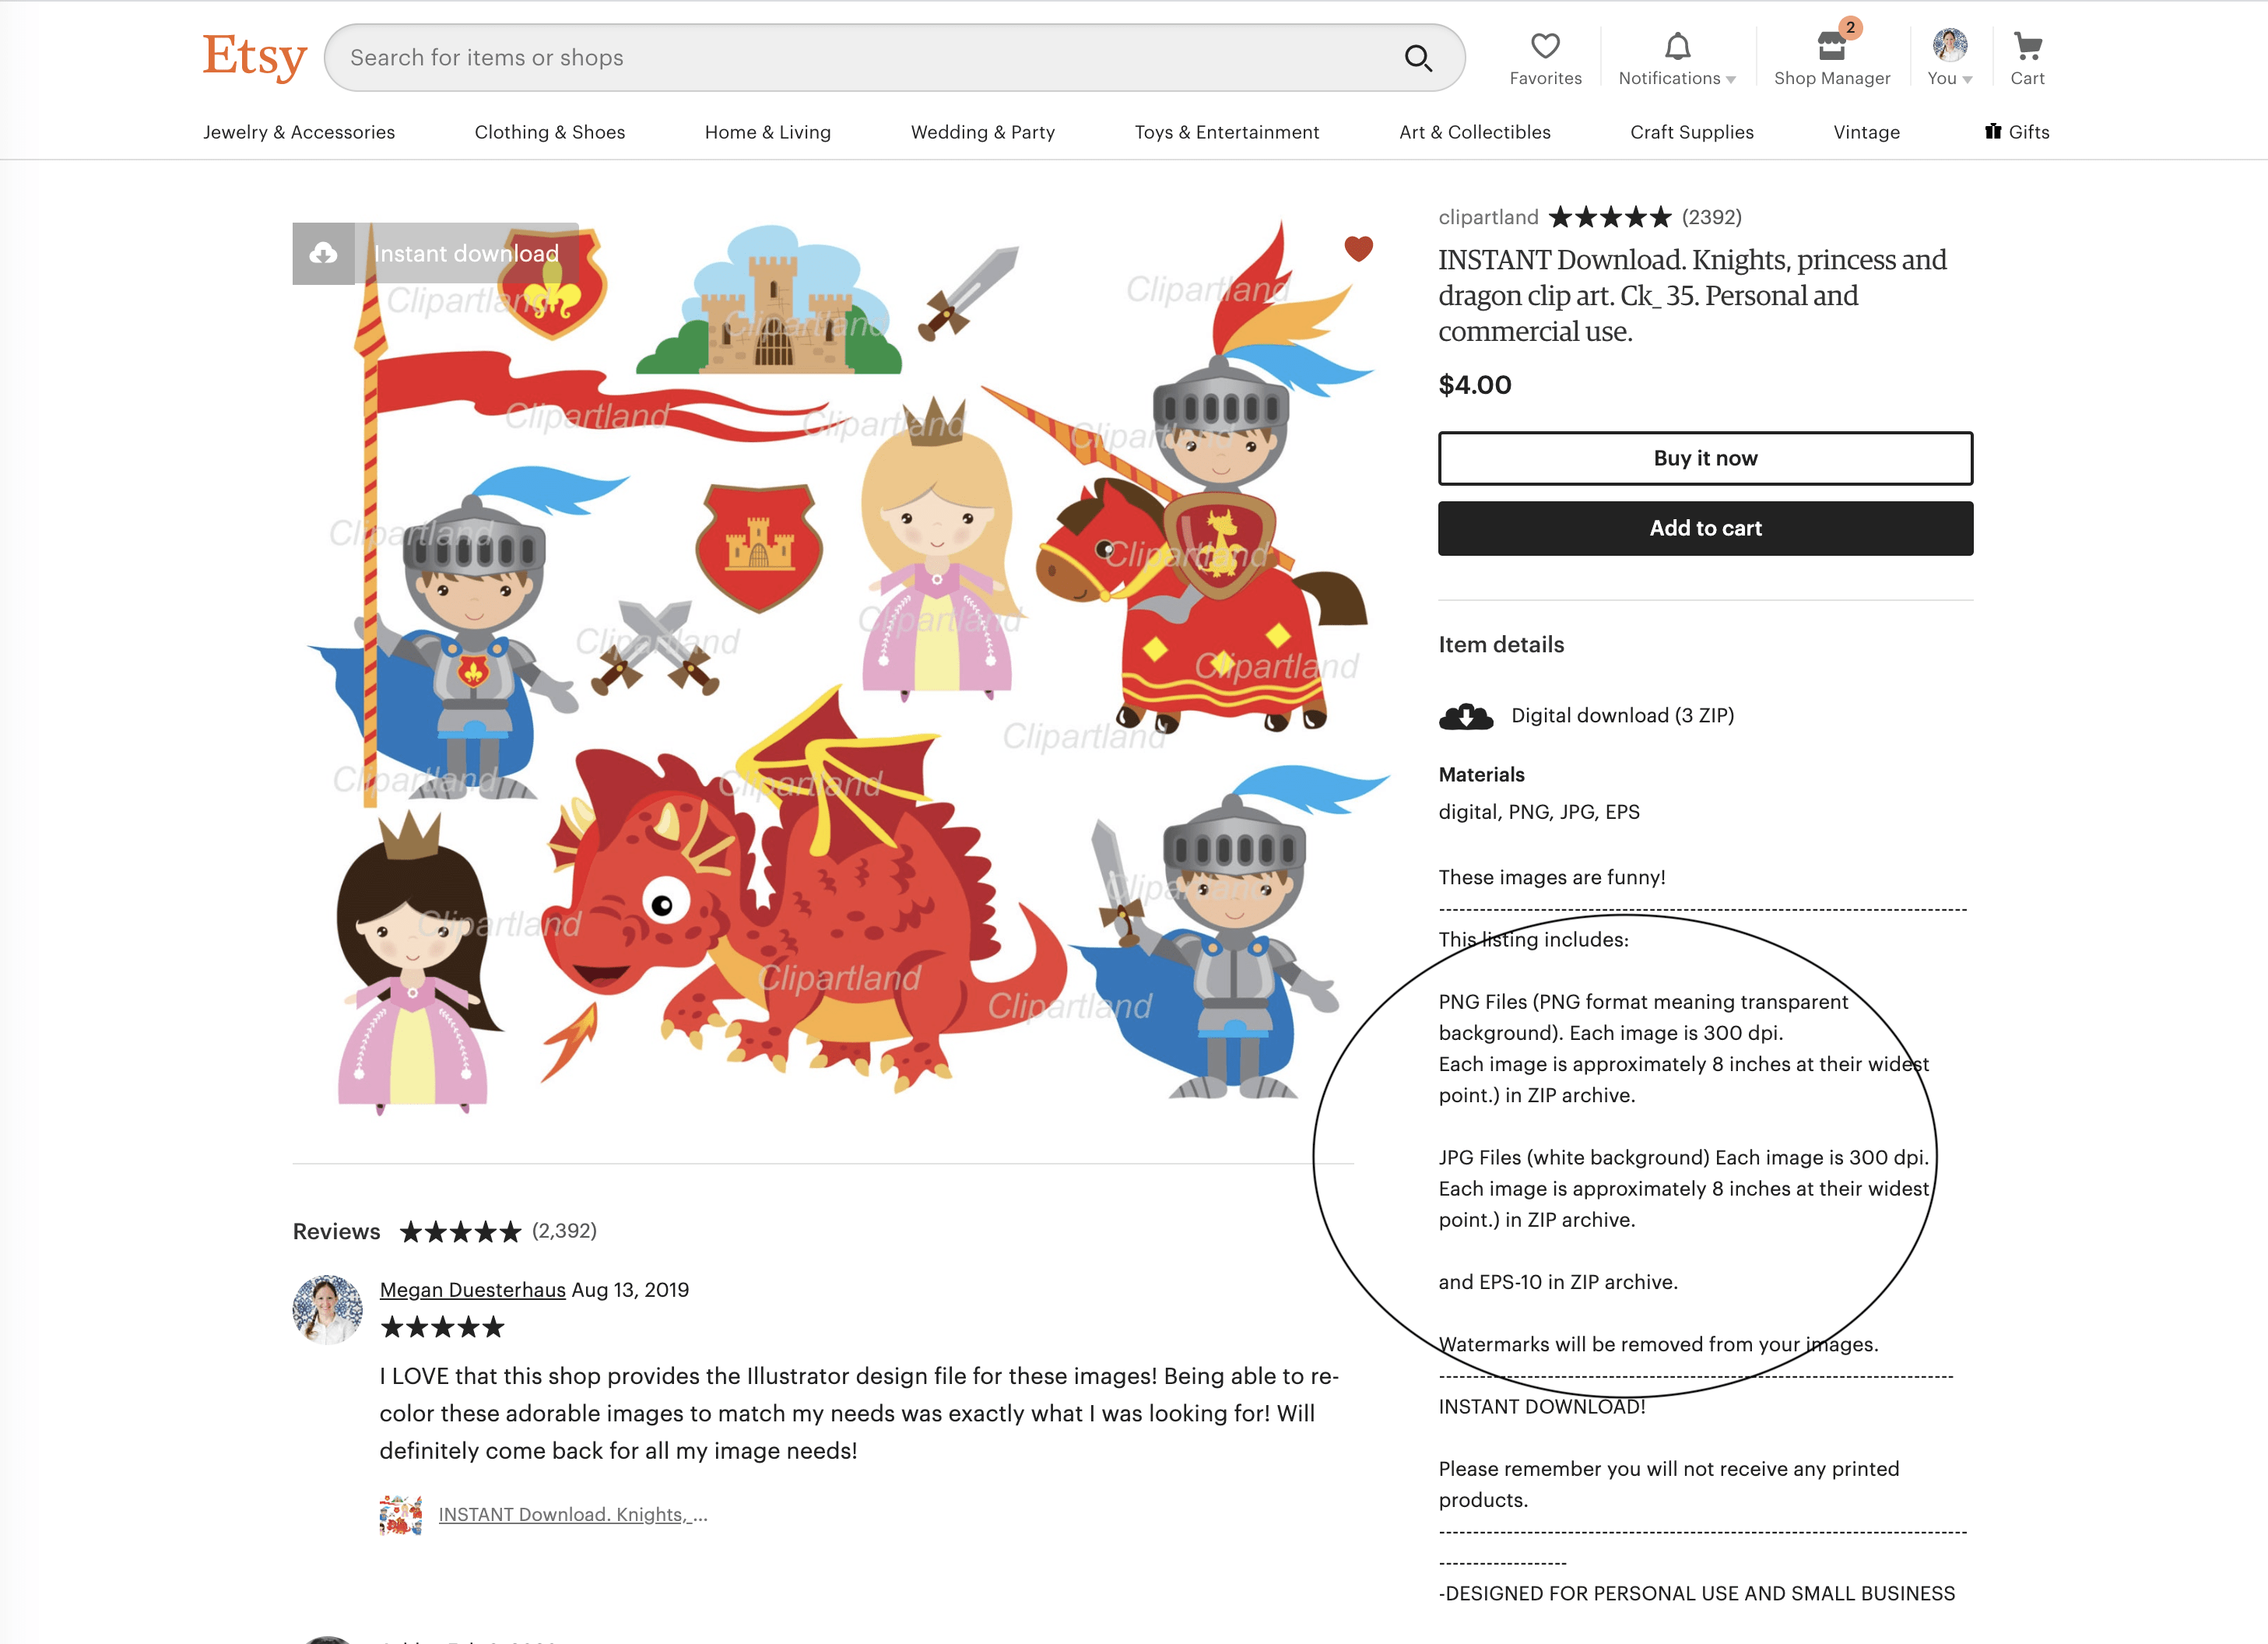
For just $4, I bought the set that featured Knights in various outfits. After playing with the colors in Adobe Illustrator and formatting the clipart into my own 11×14″ layouts, I was able to export print quality files and have them printed for just a few dollars via Mpix.
Between the inexpensive clipart and printing them via an online service, I not only got prints that were just right for our space, but ended up spending less too!
Okay – so before I show you exactly how to do this, two quick notes!
NOTE 1: I realize most people don’t have access to nor know how to use Adobe Illustrator. You CAN still use this approach for custom artwork. I found that most Etsy clipart designers were happy to accommodate custom color requests (provided they were selling their own designs). If you find some clipart you love but in the wrong colors, simply request if they can make some color changes for you for free or for a few extra dollars!
NOTE 2: I am not sharing this tutorial with the intention of undercutting Etsy sellers and artists. I LOVE buying my art from small biz owners and creatives, and have done so many times in the past. I only went this route because I genuinely couldn’t find anything I loved and am sharing this tutorial because I thought this was a clever and useful trick for creating budget-friendly custom art!
How to Make Custom Art With Clipart
The first thing you need to do is find clipart that will work for your space. I recommend searching Etsy, Creative Market, and Design Bundles. Again, colors can often be changed (by you or requesting changes from the artist), but the main thing you need to look for are:
- PNG files (meaning they have a transparent background)
- 300 dpi (meaning they have good resolution for print)
Once you have your clipart images purchased and downloaded, you need to identify a program that will allow you to turn them into art prints. Again, I used Adobe Illustrator, but I am well aware that most people don’t use this program. As such, I recommend using free programs such as Canva, PicMonkey, or wait for it….PowerPoint.
I know, right? This isn’t the first time I’ve turned to PowerPower for graphic design-like work and that’s because it allows you to very easily work with images, shapes and text. If you don’t know where else to start, start with PowerPoint, and this tutorial will walk you through it! That said, if you’re comfortable in other programs, the ideas and concepts I share below can be easily adapted and applied!
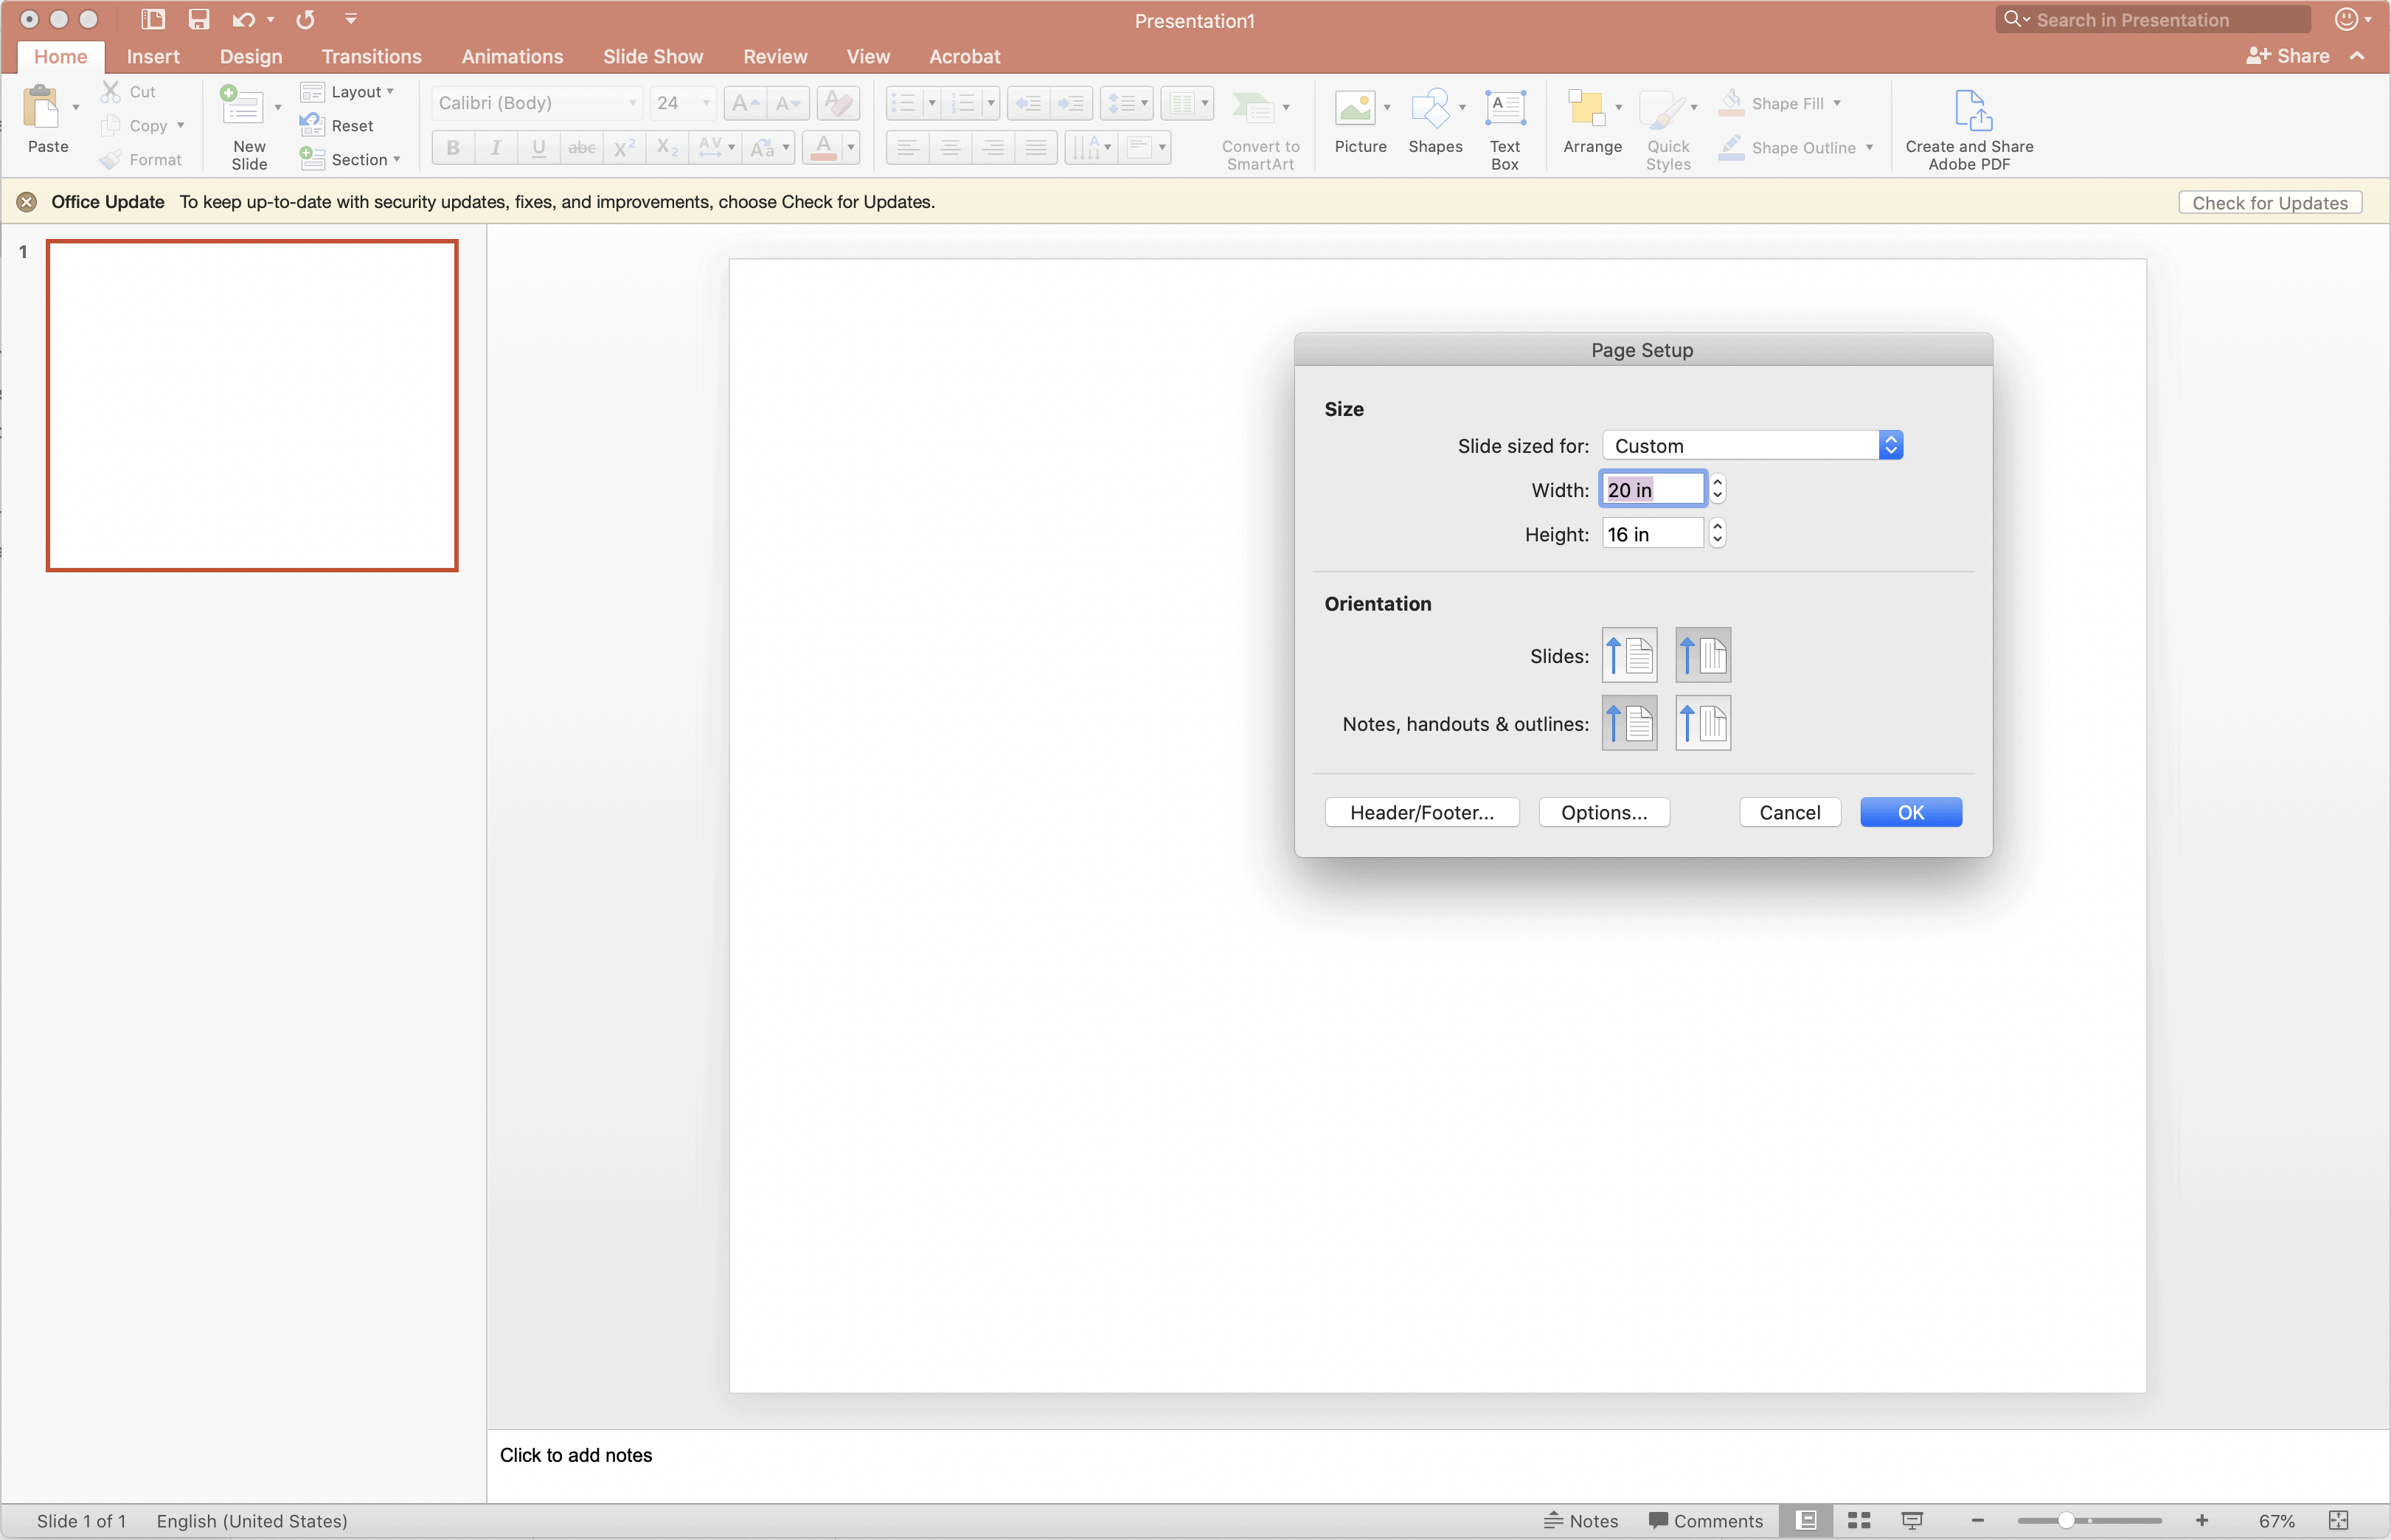
Once you open PowerPoint, navigate to File > Page Setup and adjust the dimensions of your slide to be the size of your desired art print. In my example, I set my dimensions to 16×20”.
Want to save this post?
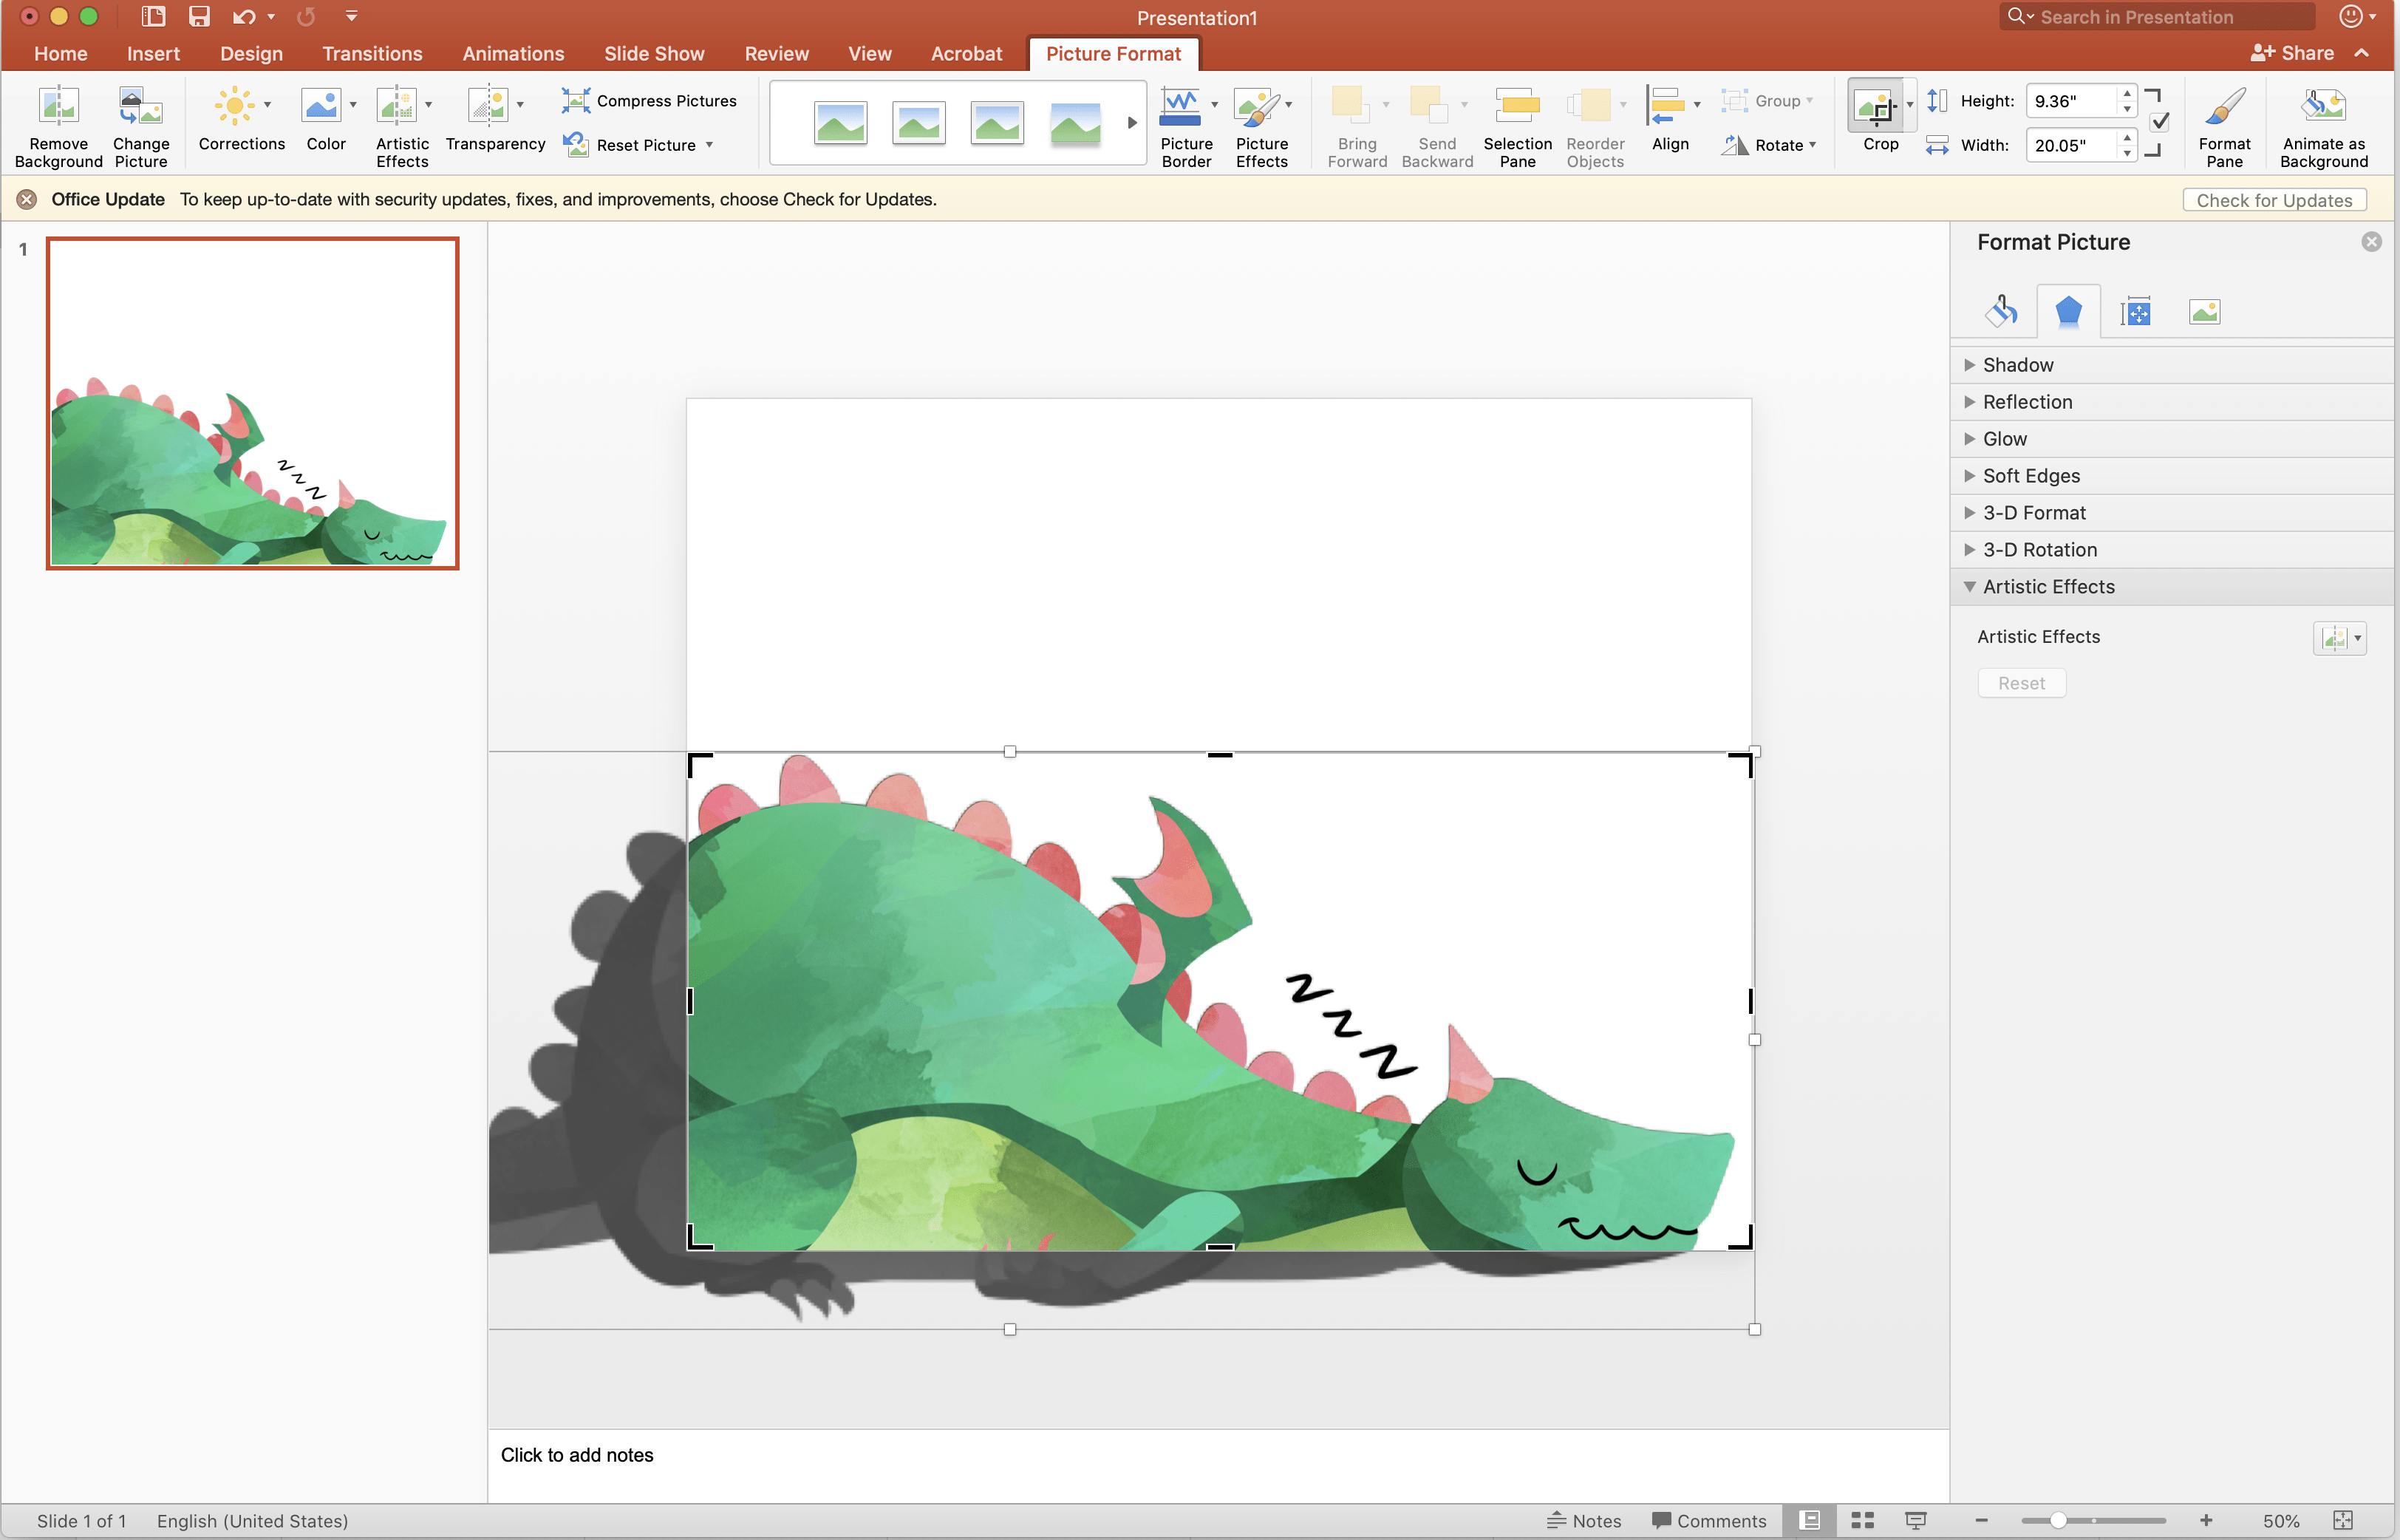
Next, drop your clipart onto the slide…
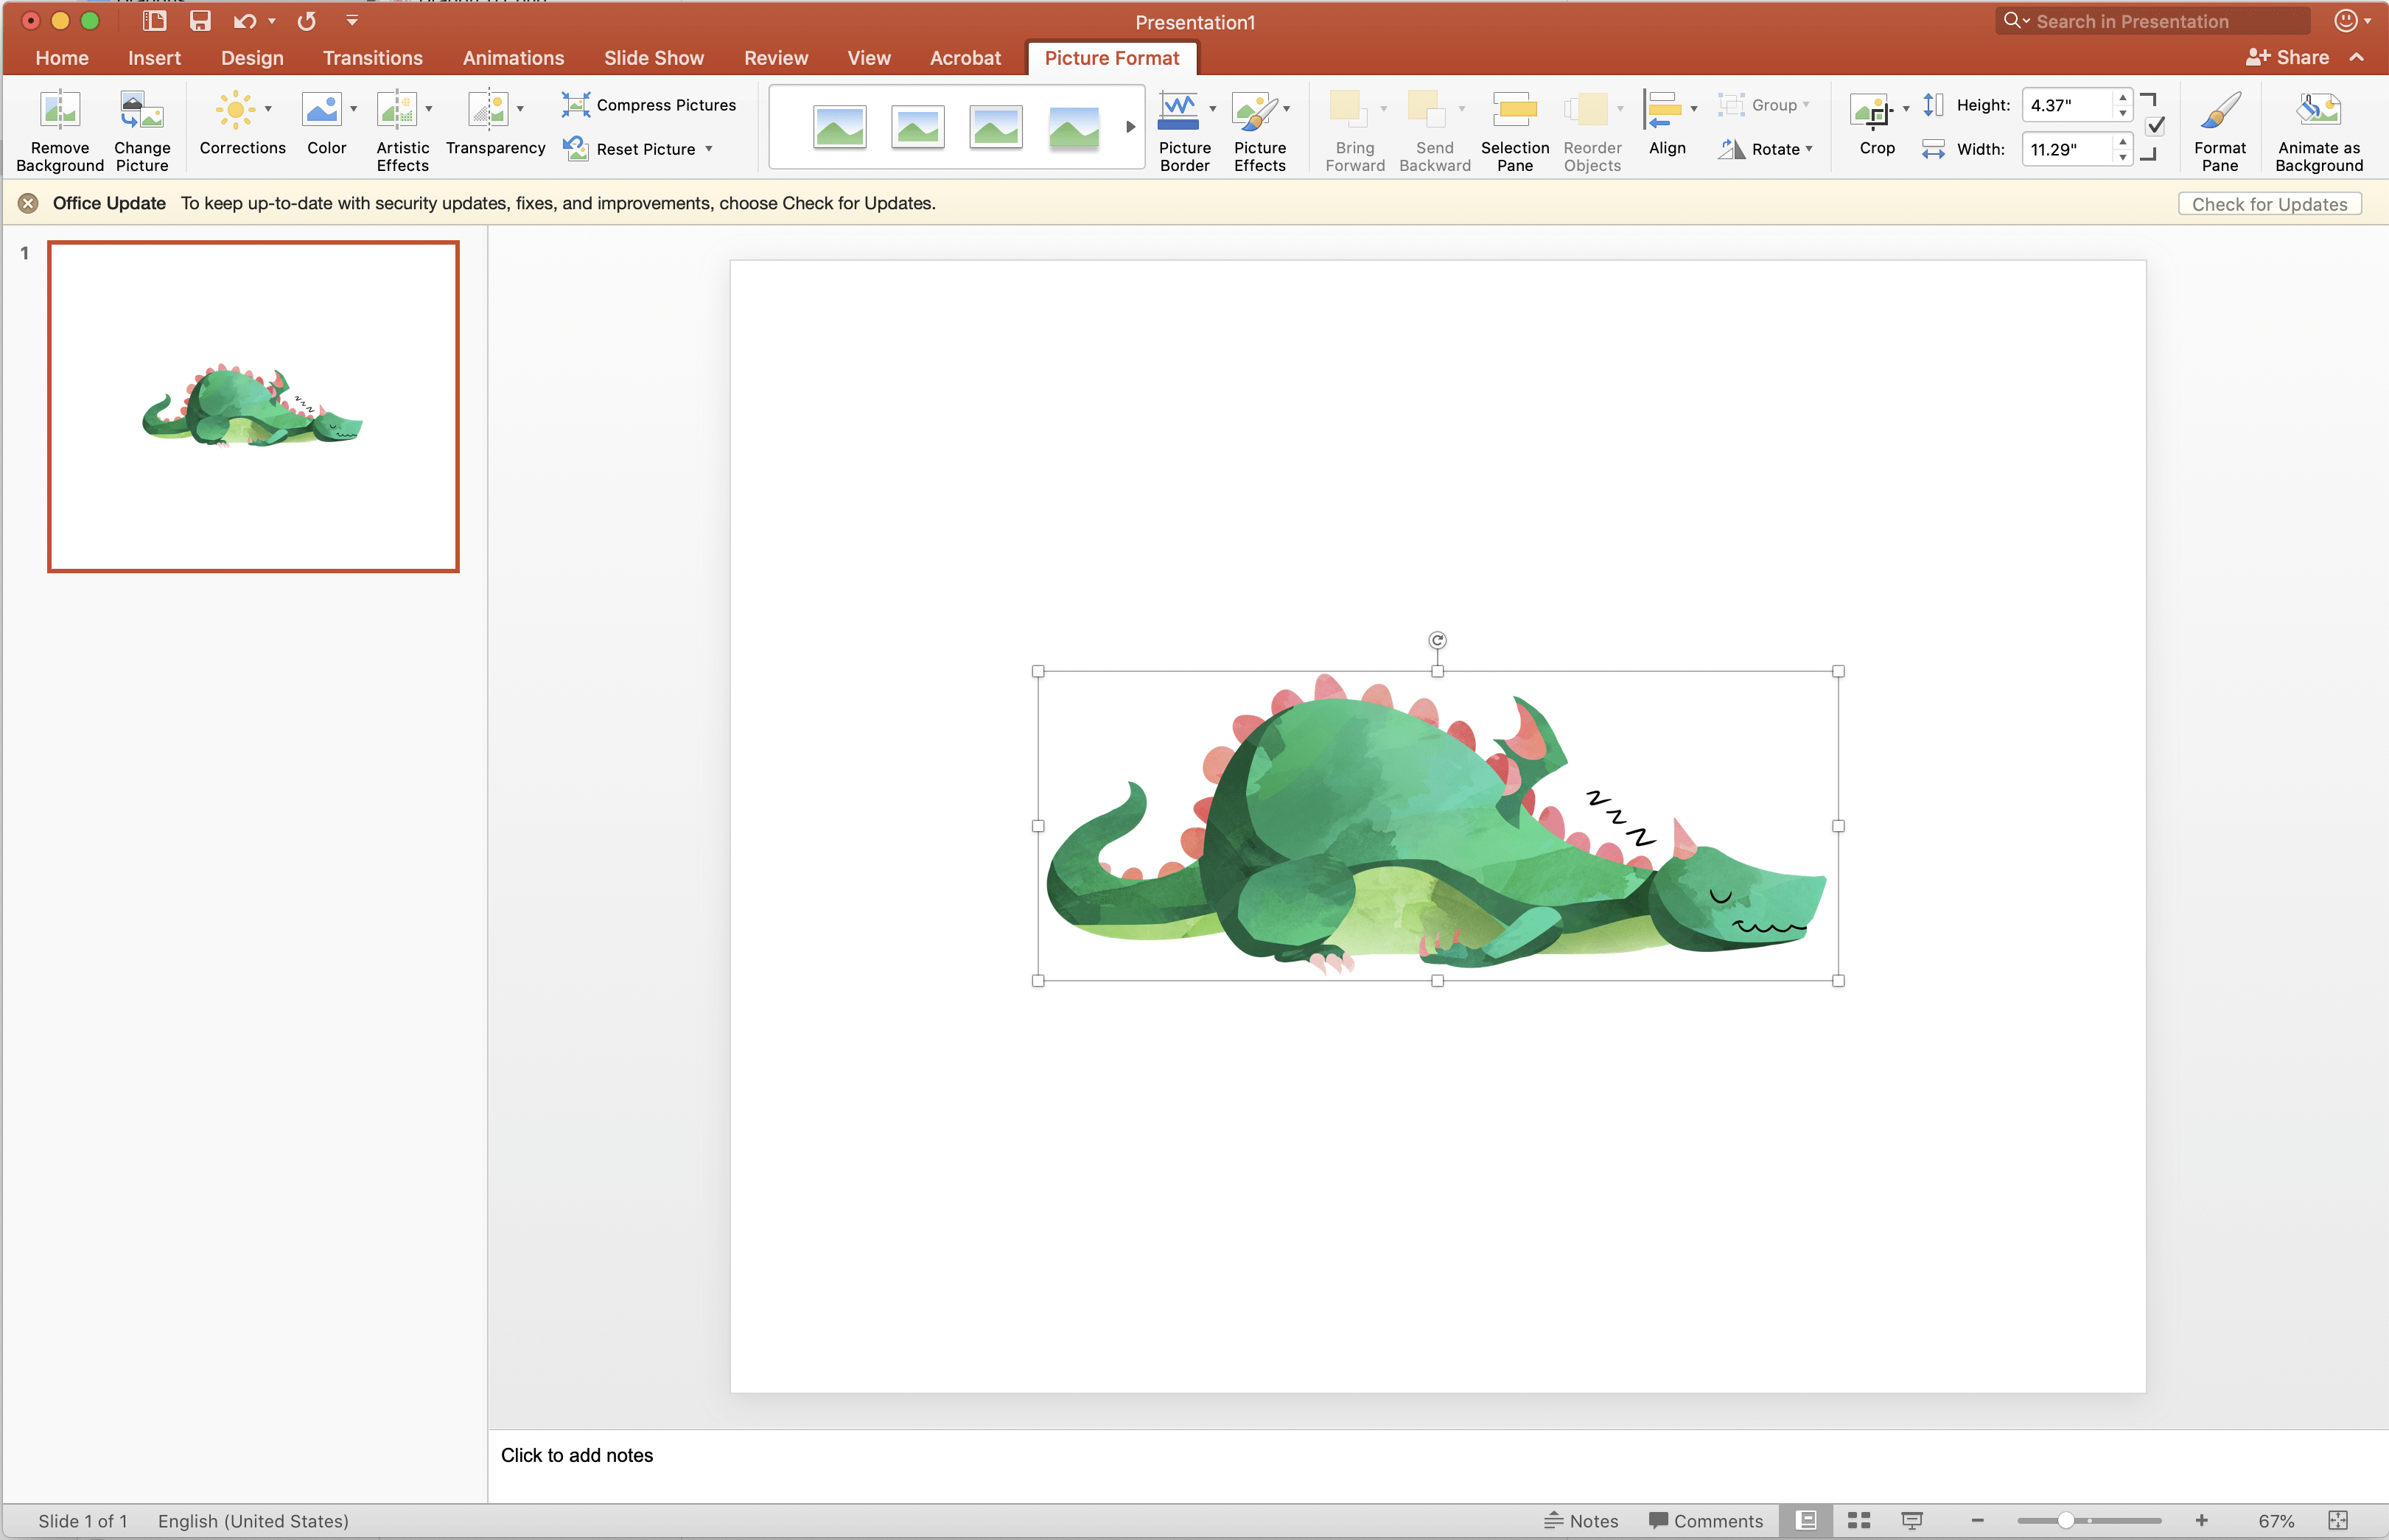
…and size and crop it to your preference.
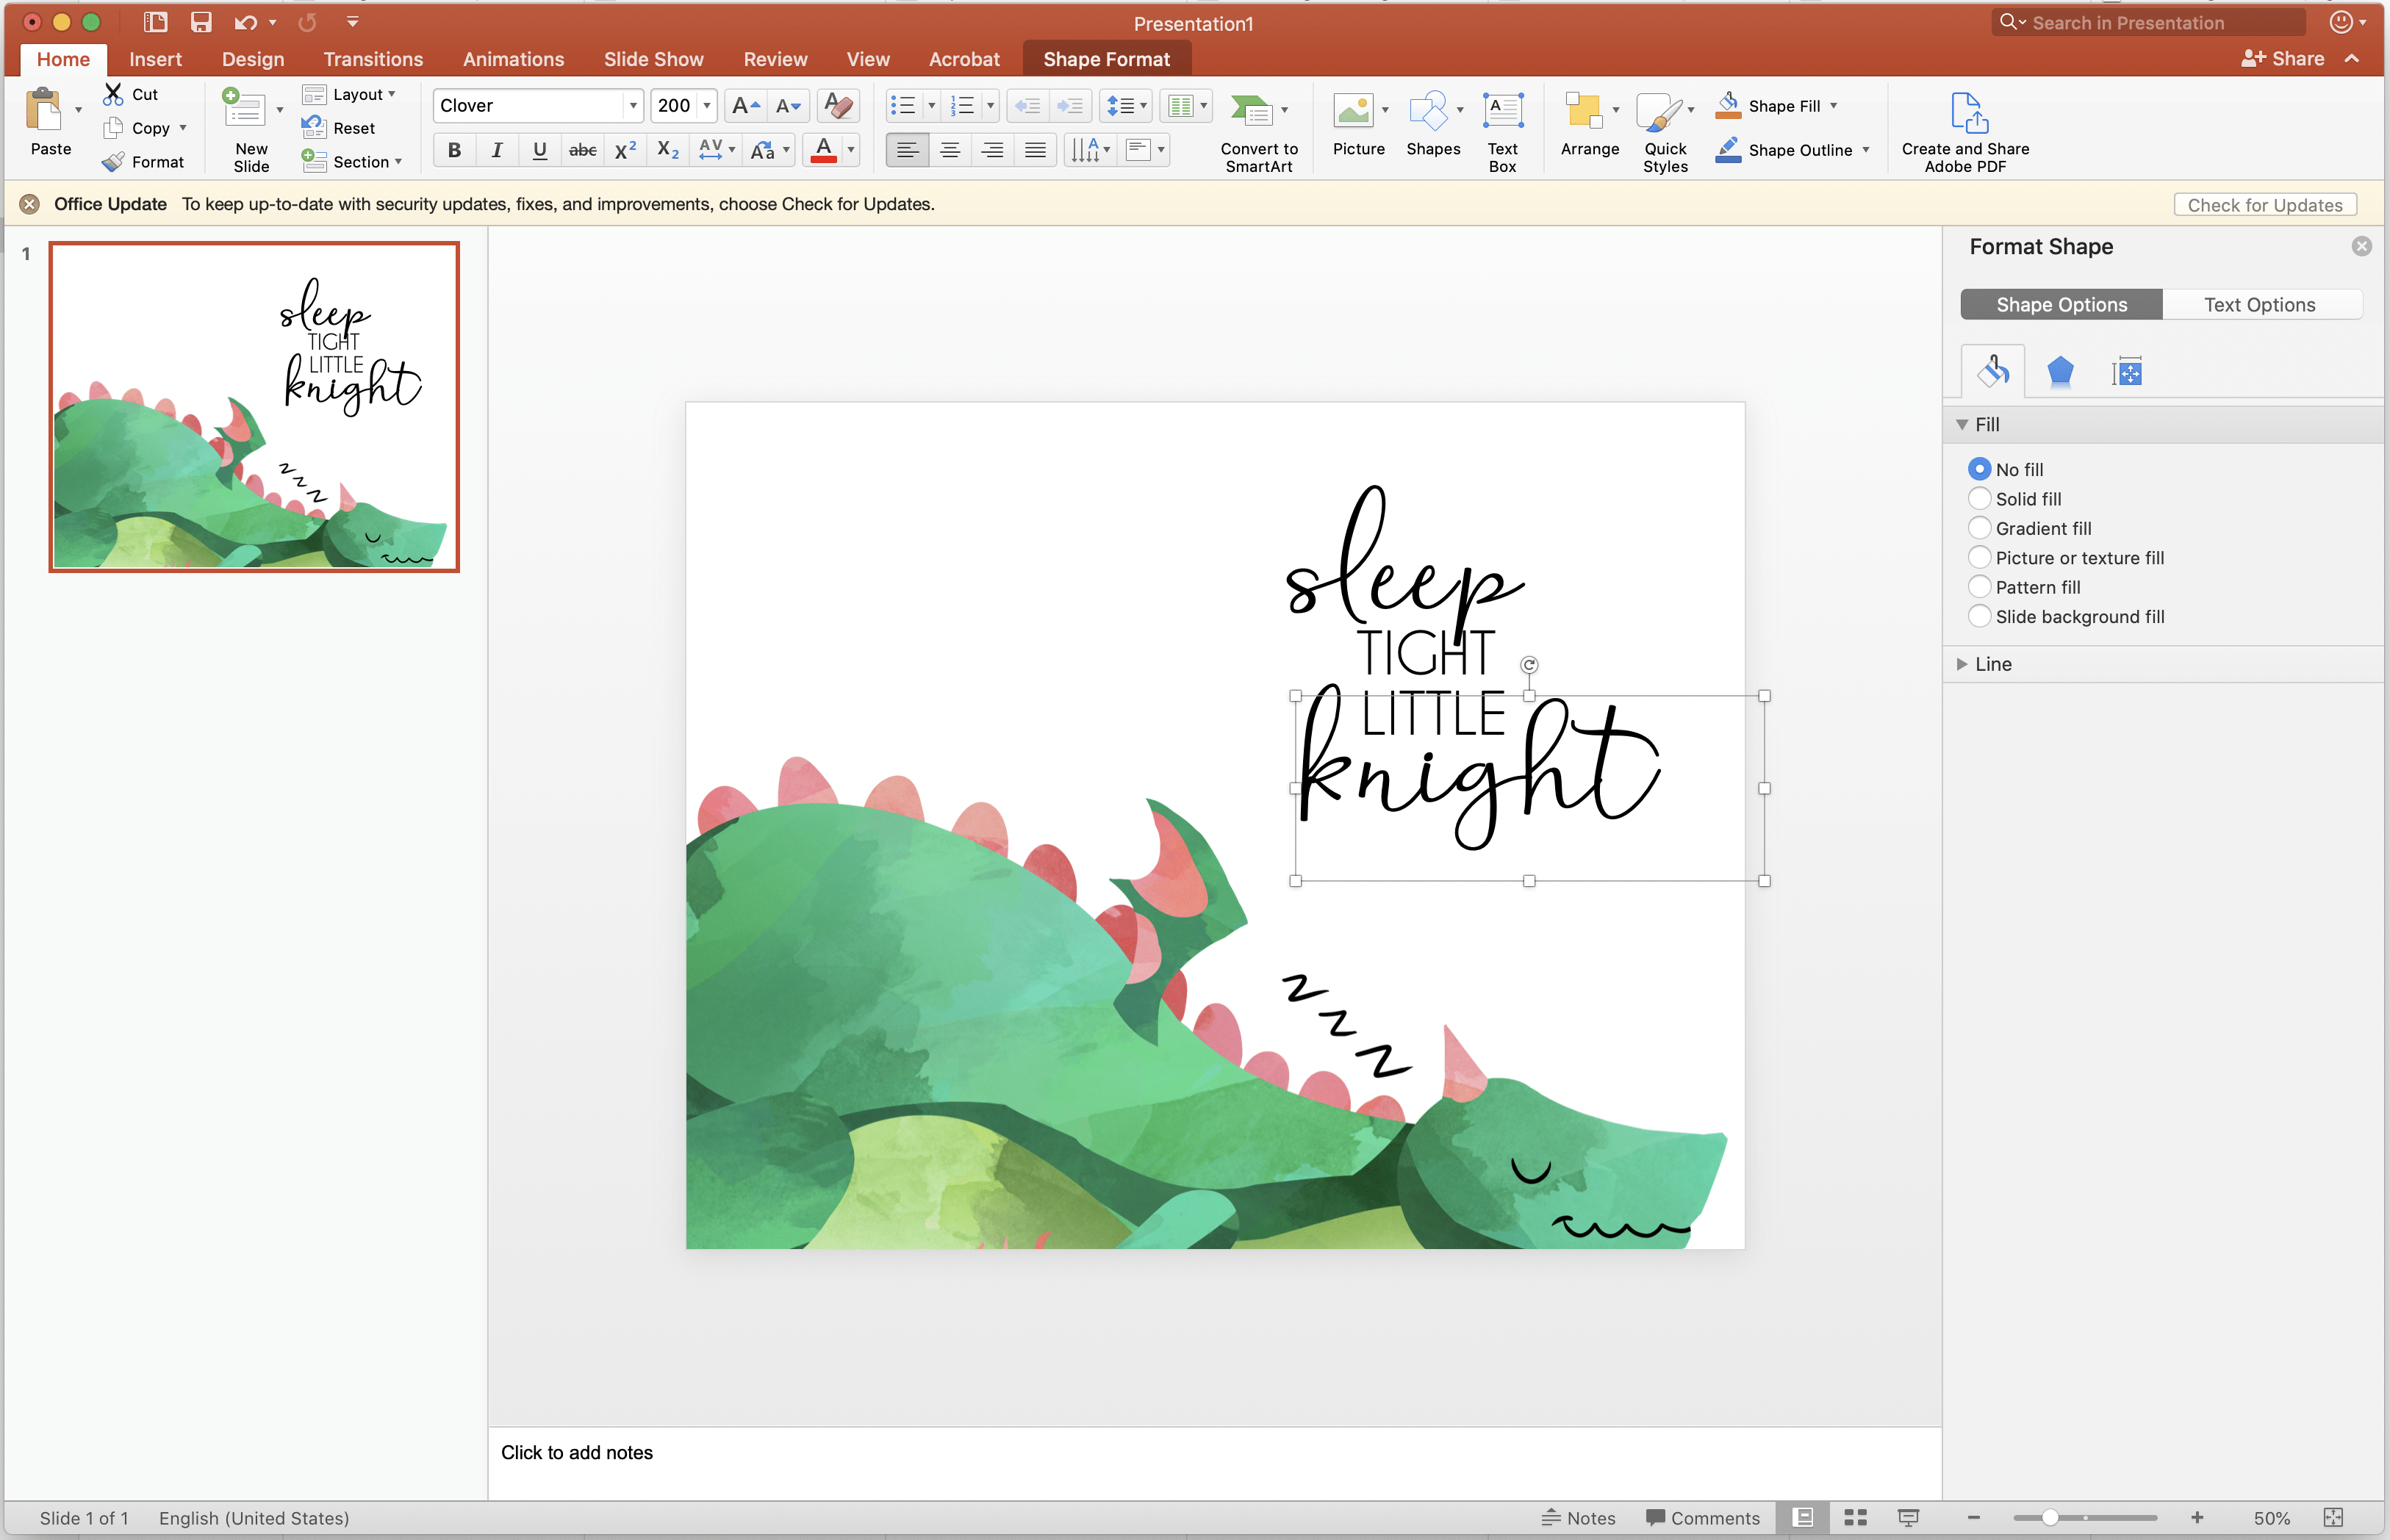
You can then add in other details such as background shapes (like stripes) and text based on your preference. If you’re struggling with colors for these additional elements, use the eye dropper tool to select colors directly from your clipart. Keep playing with the various elements until you have a composition you love.
If you are working in Illustrator, Canva or PicMonkey, you can export your file directly to a PNG or JPEG for printing (be sure to select High Quality Print when applicable). Saving as a PNG/JPEG isn’t an immediate option in PowerPoint, but there’s a pretty easy work around!
First, save your slide as a PDF (File > Save As).

Most online print companies won’t allow PDF file uploads…so instead, navigate to PDFCandy (a suuupper helpful PDF converter)…
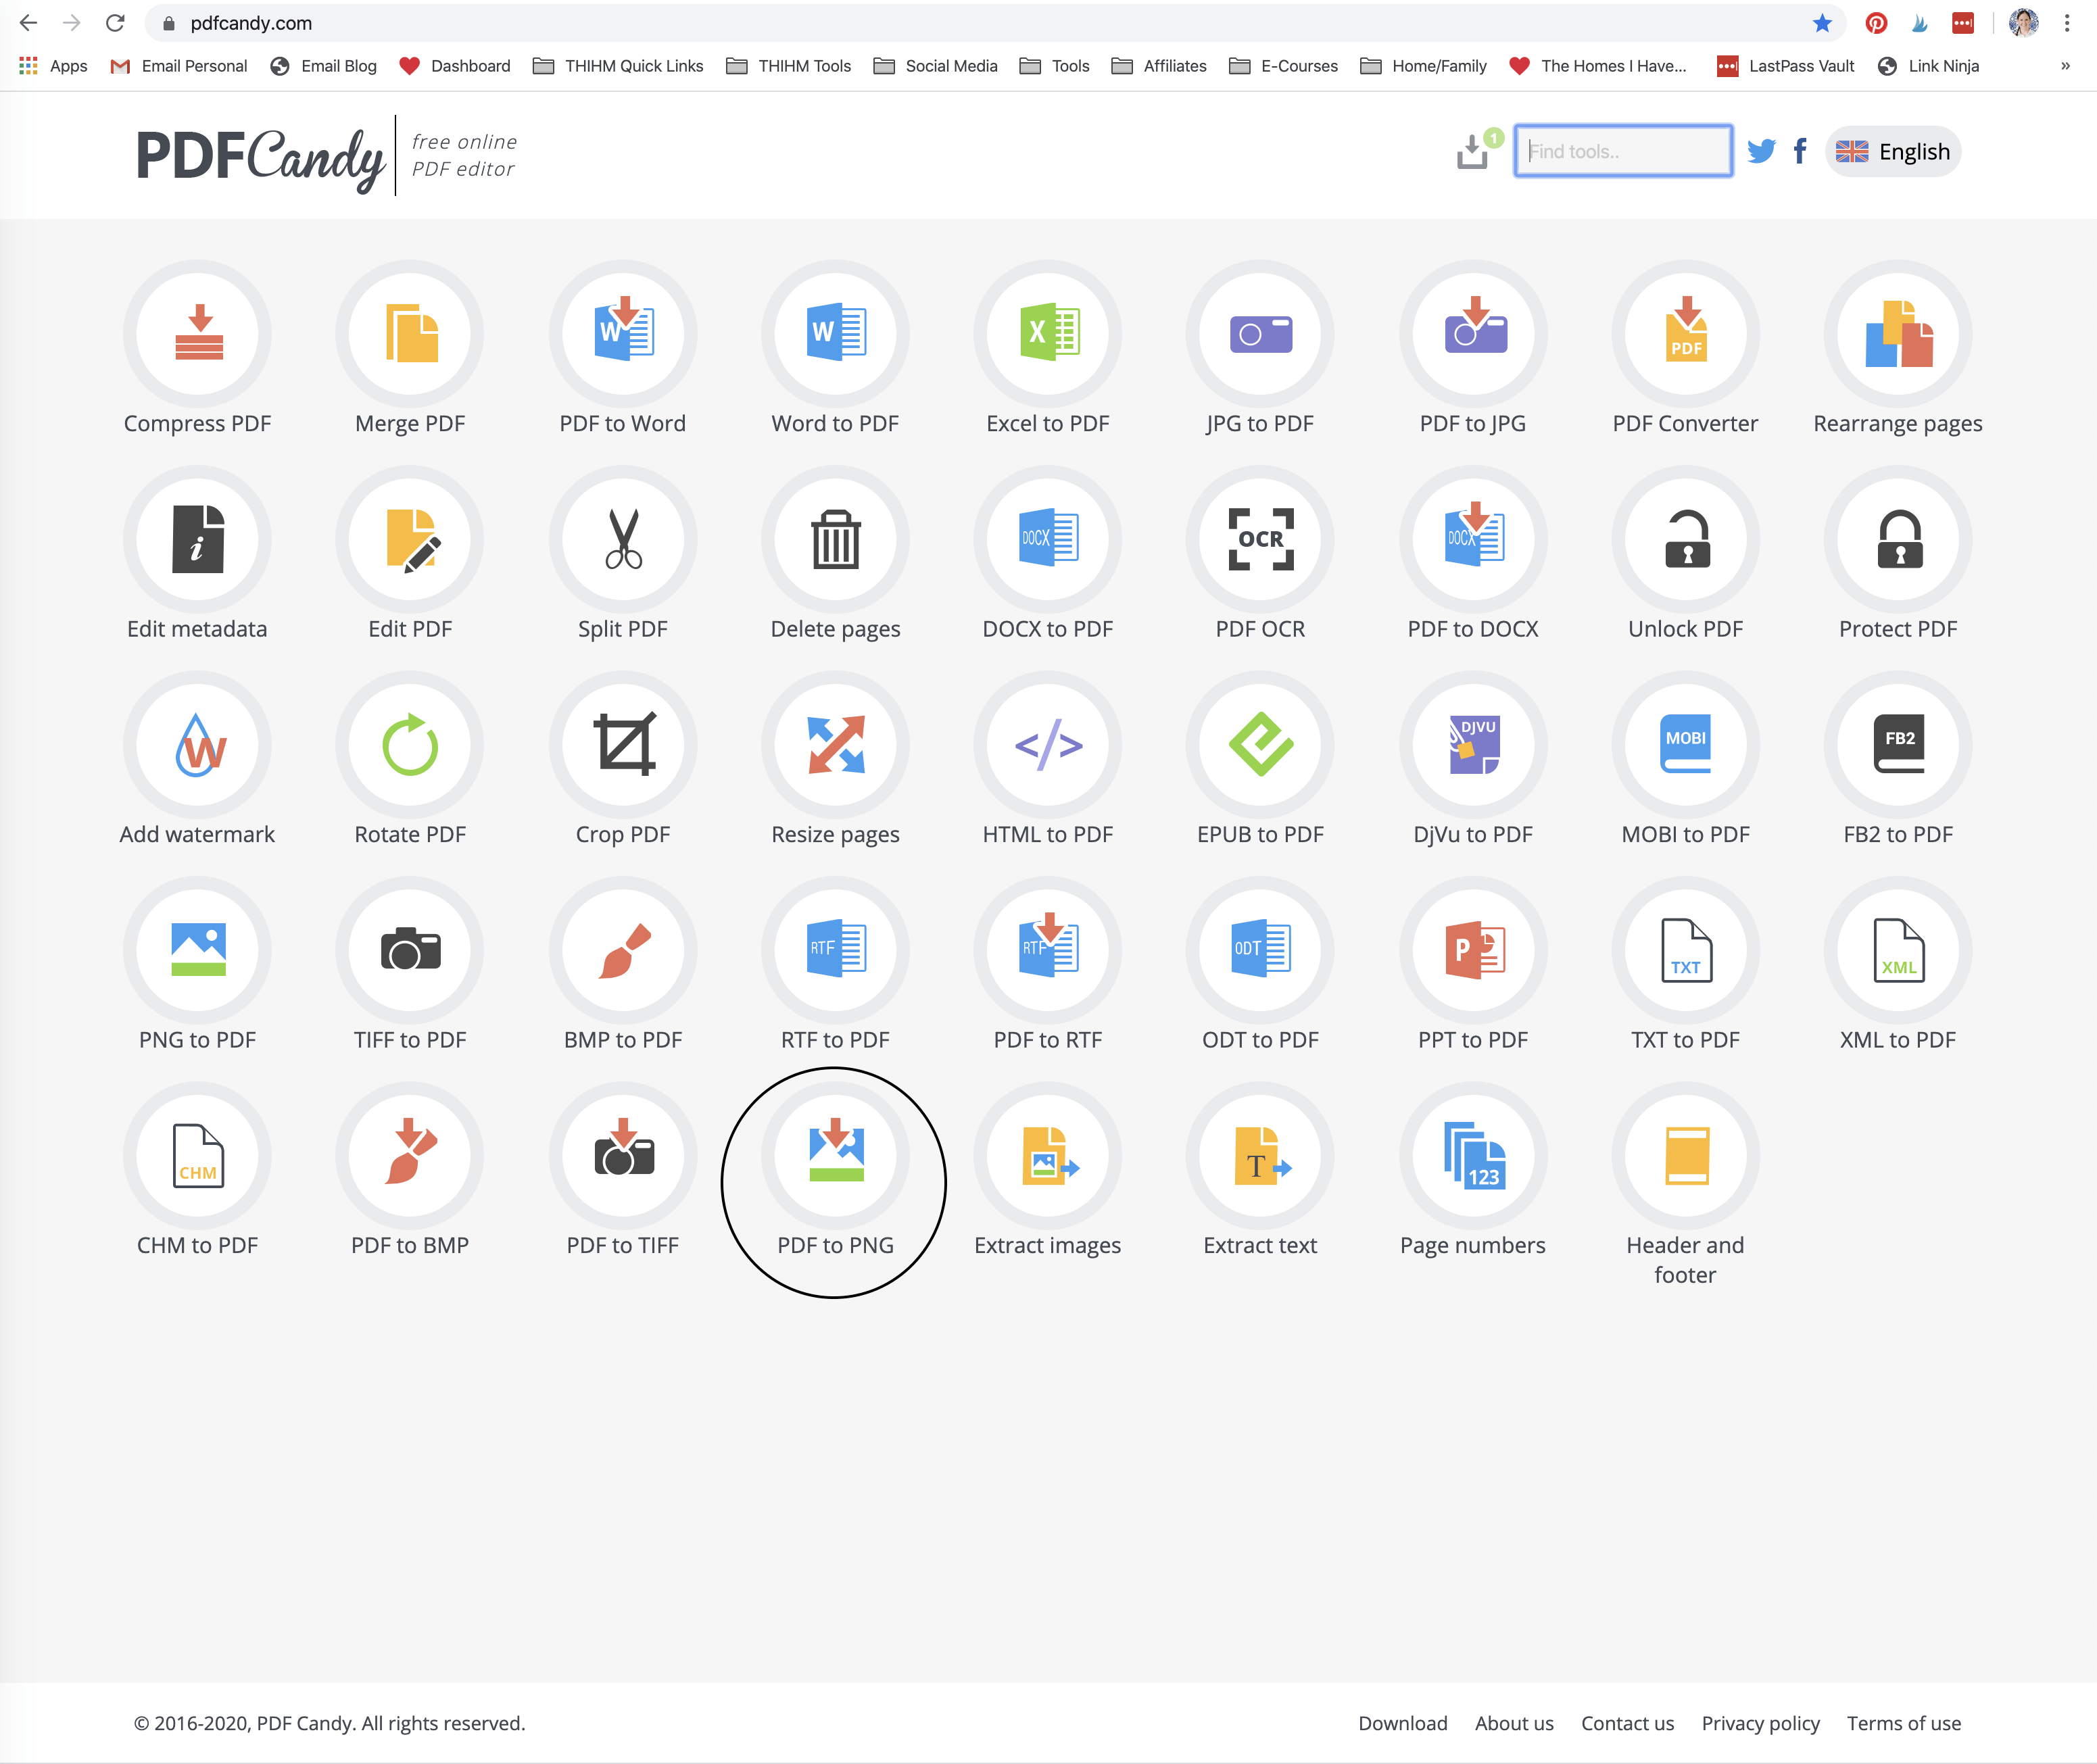
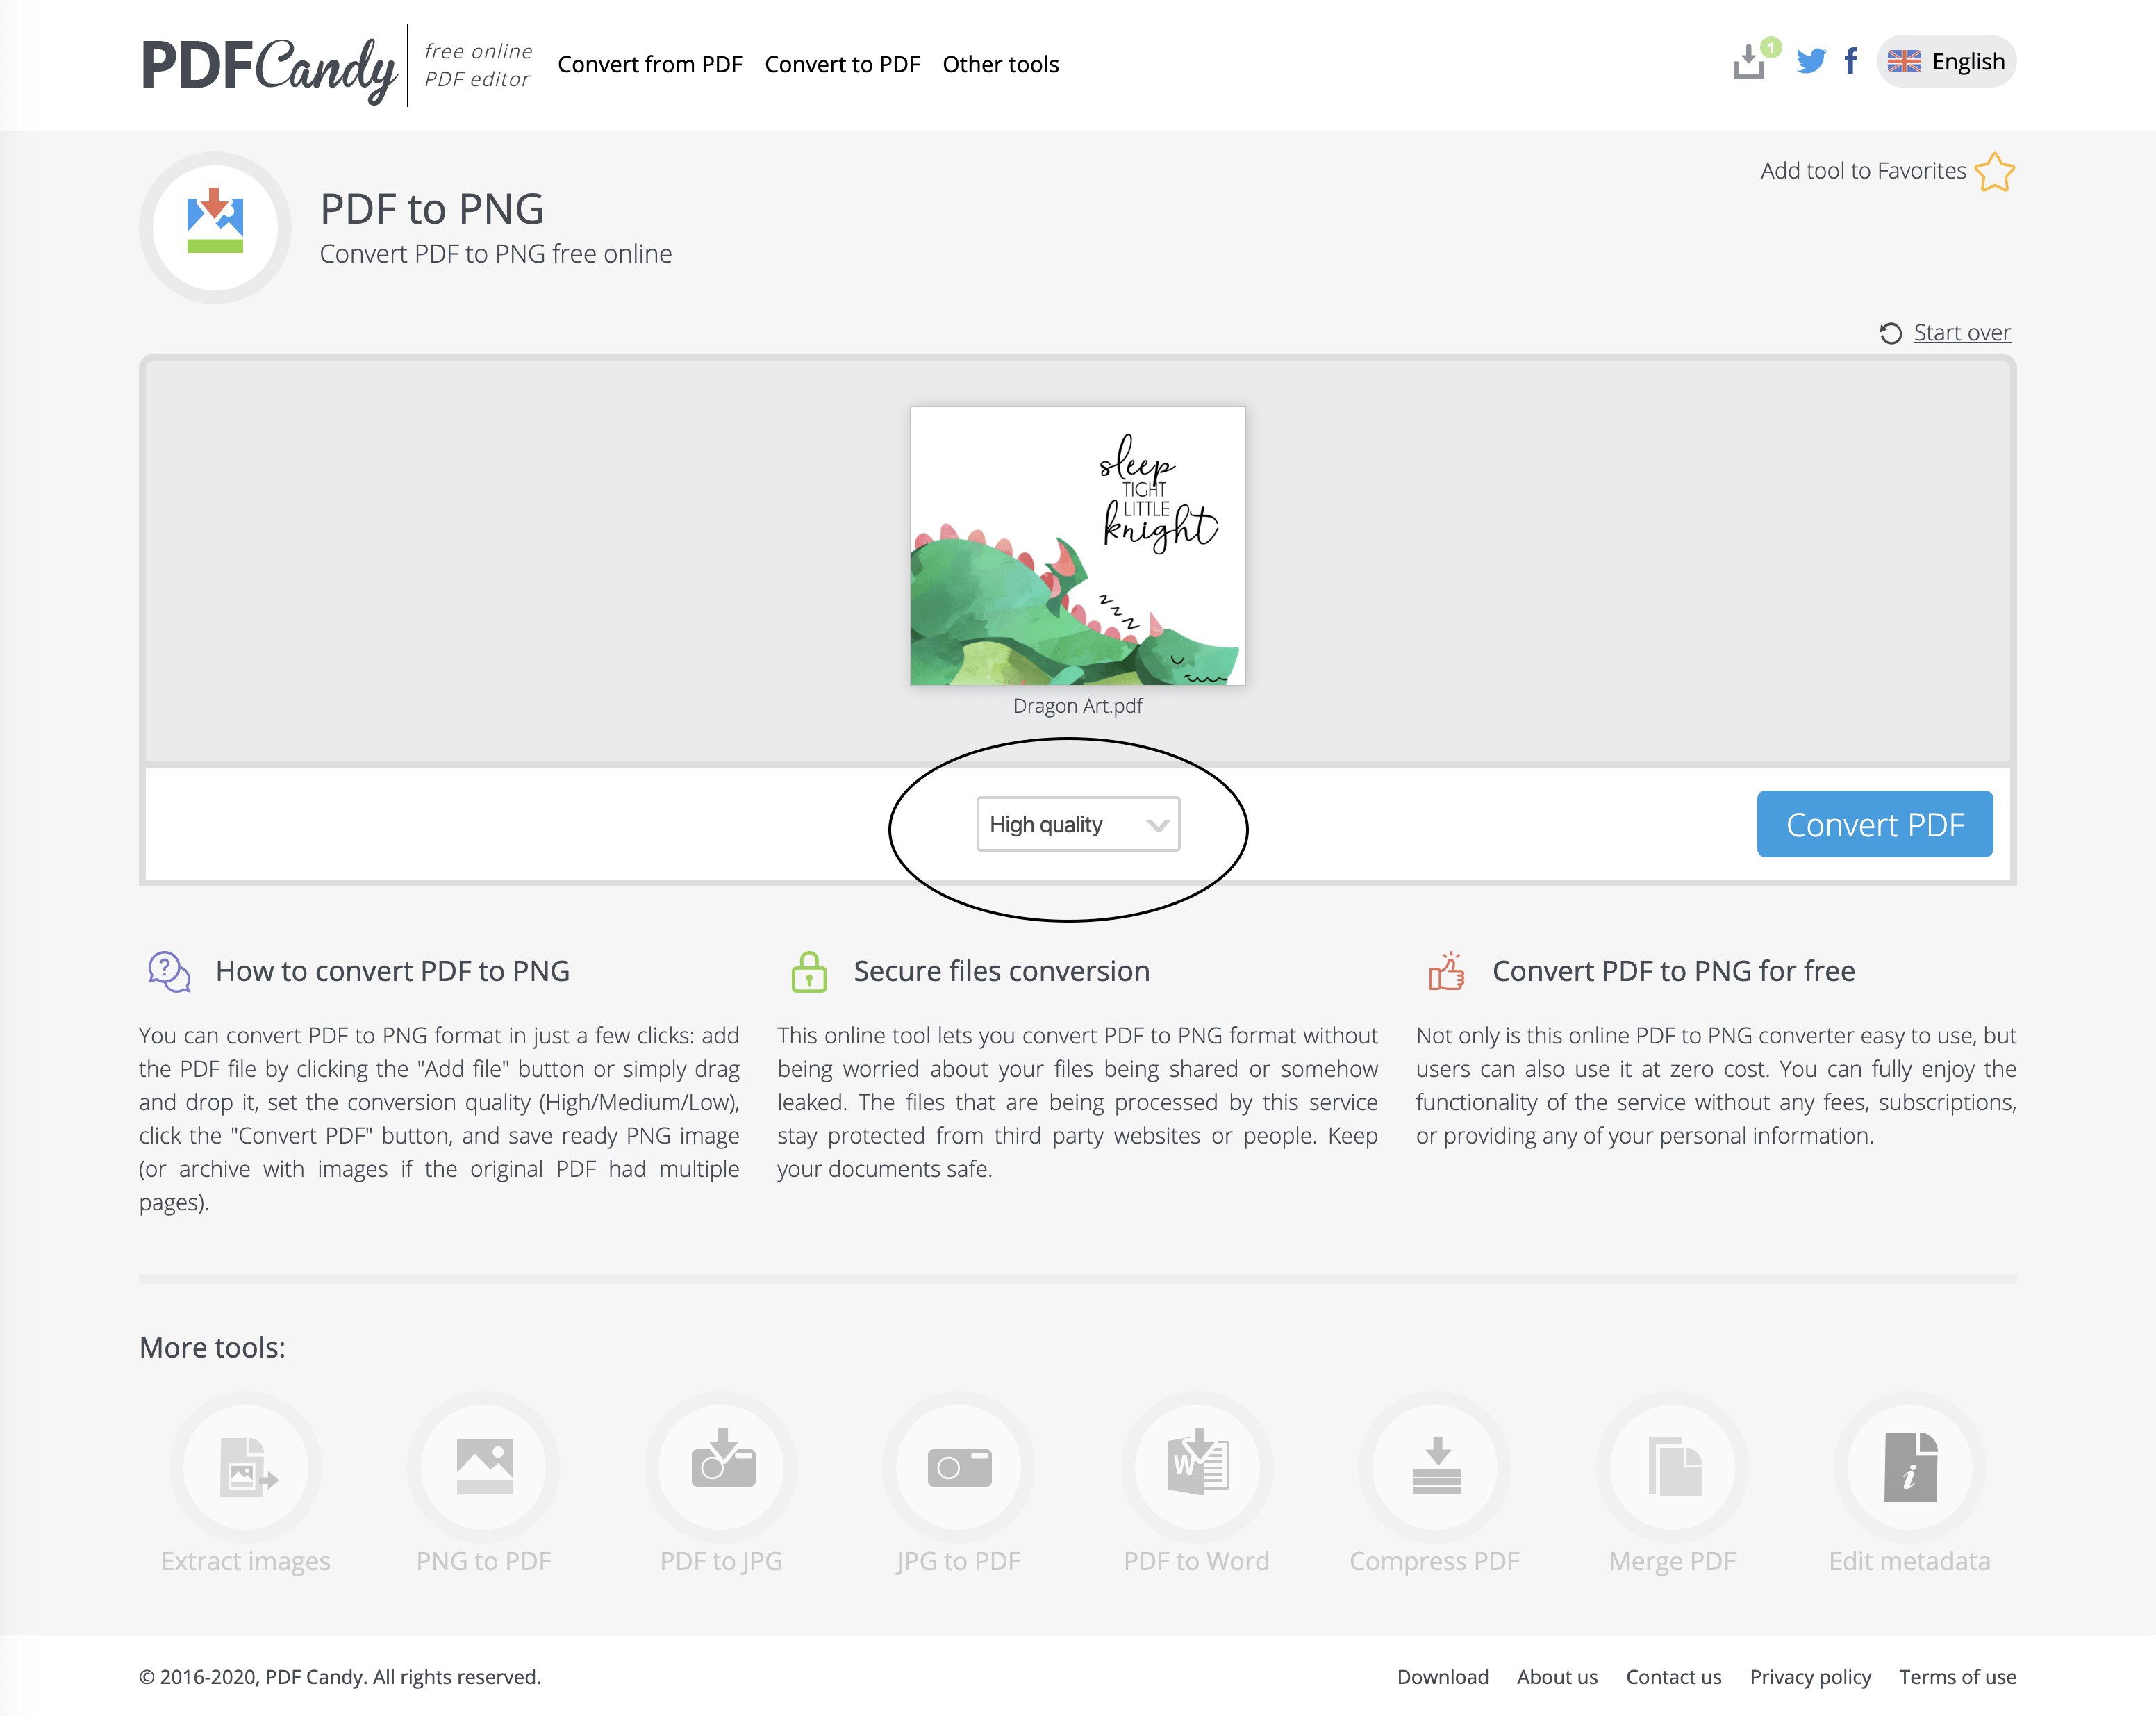
…and select PDF to PNG. From there, you can upload your PDF file and convert it into an image that most photo print sites will accept. (Be sure to select High Quality when saving or converting!)
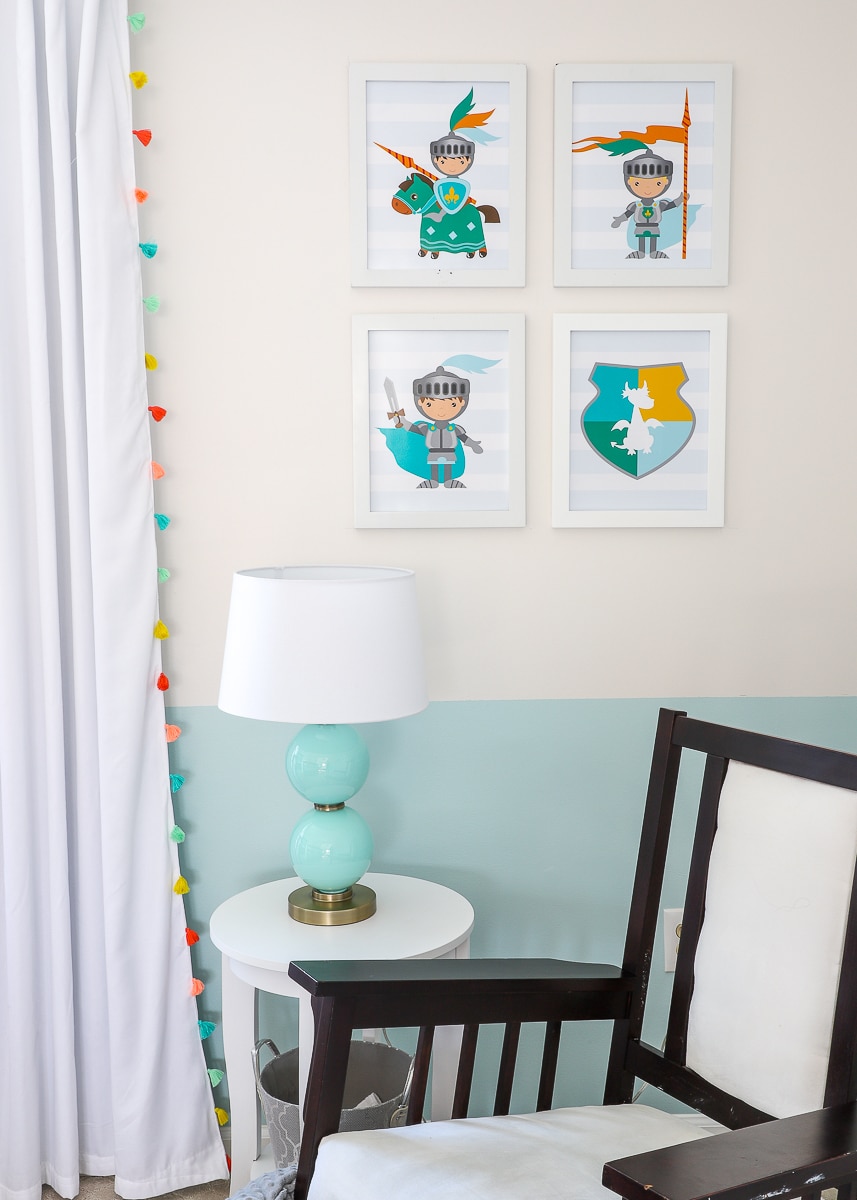
As I mentioned above, I like to use Mpix for my photo printing and always wait for their 50% off sales (which come around pretty frequently) to upload and order my prints. Within a few days, my custom artwork showed up, and I couldn’t be more excited with the results! Would you have ever guessed these adorable prints, started as red-and-blue digital clipart intended for scrapbooking and party invitations!
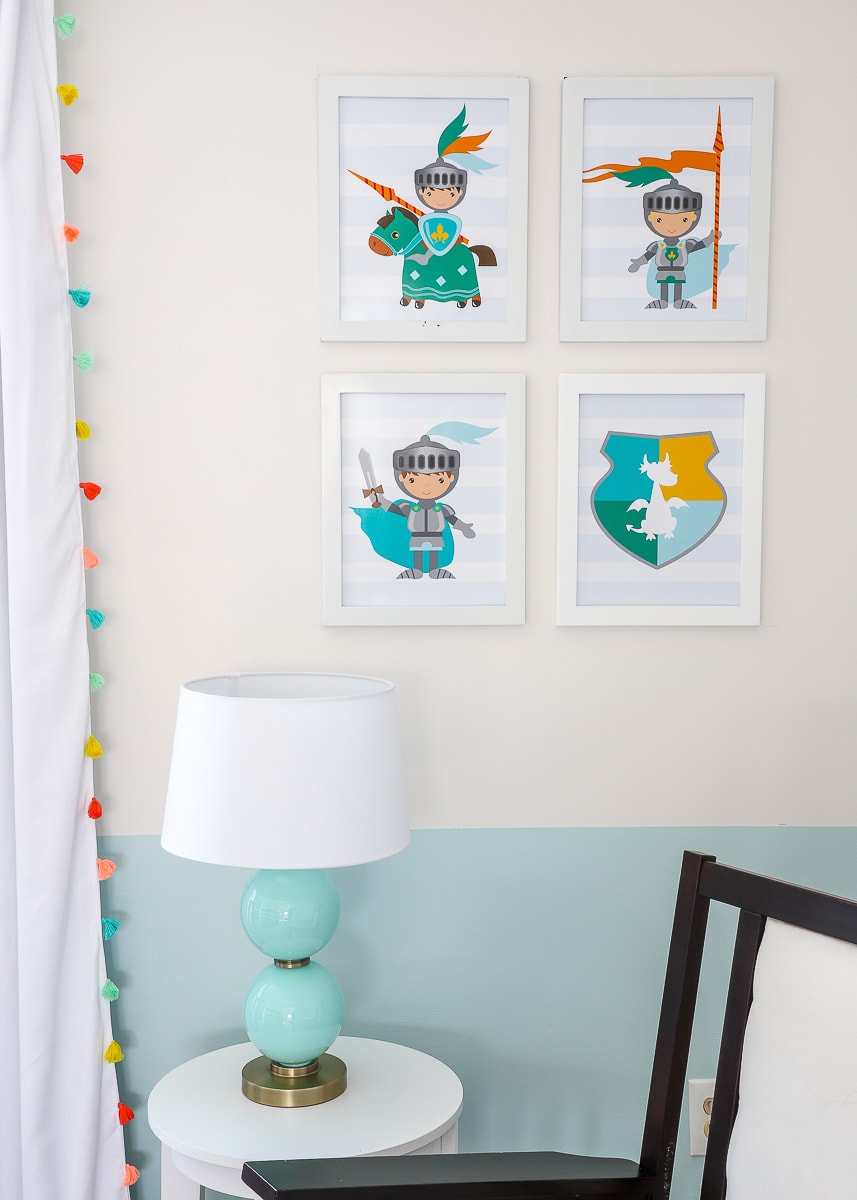
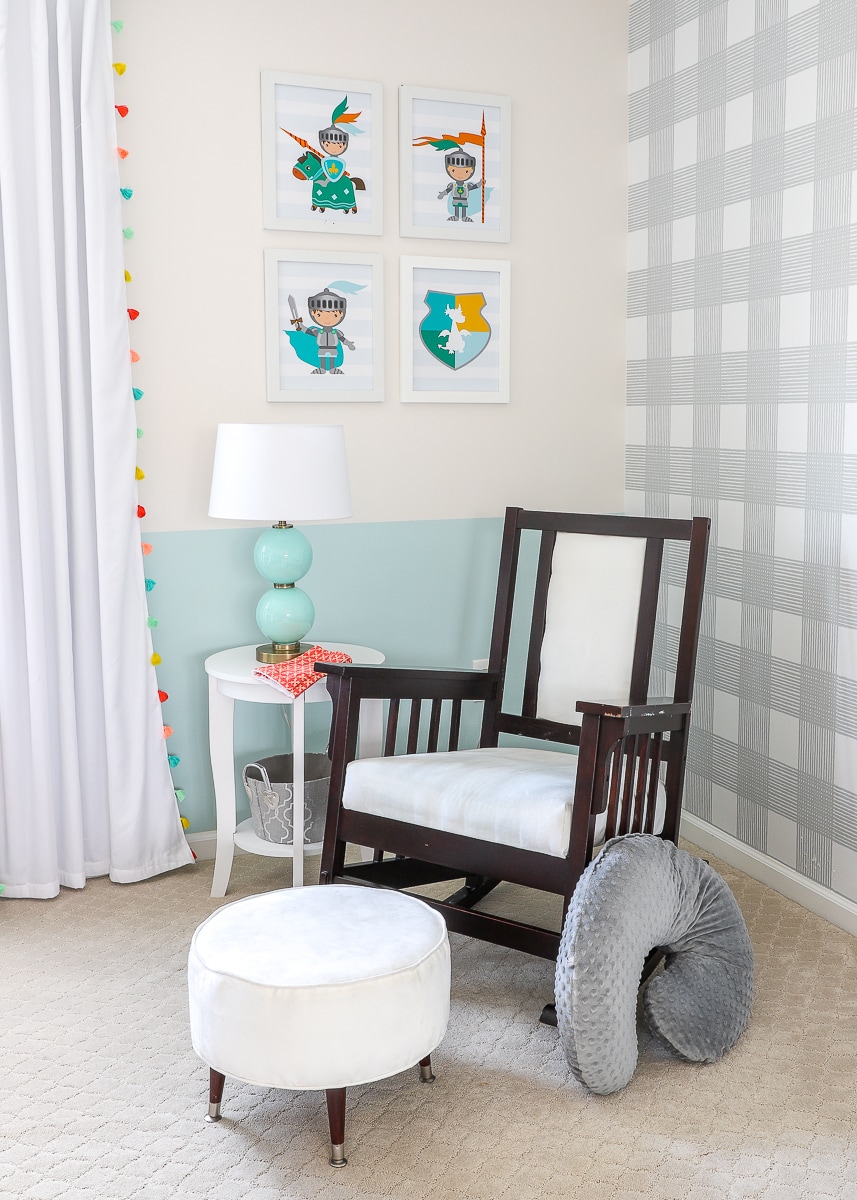
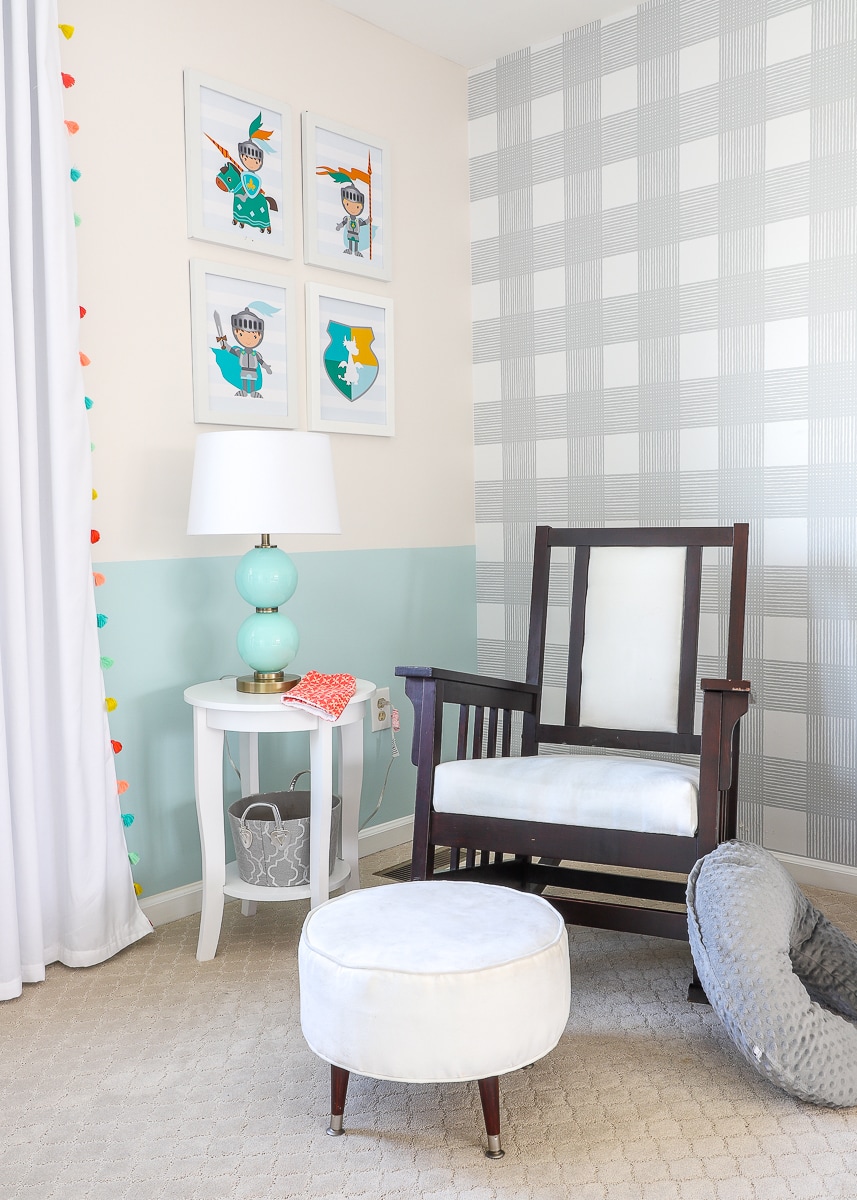
Attentive readers will notice I moved these prints from their original location next to the closet. They didn’t look like a cohesive collection in their vertical arrangement so I moved them to this corner. I really feel like they complete this part of the room nicely (although I do wish they were bigger!)
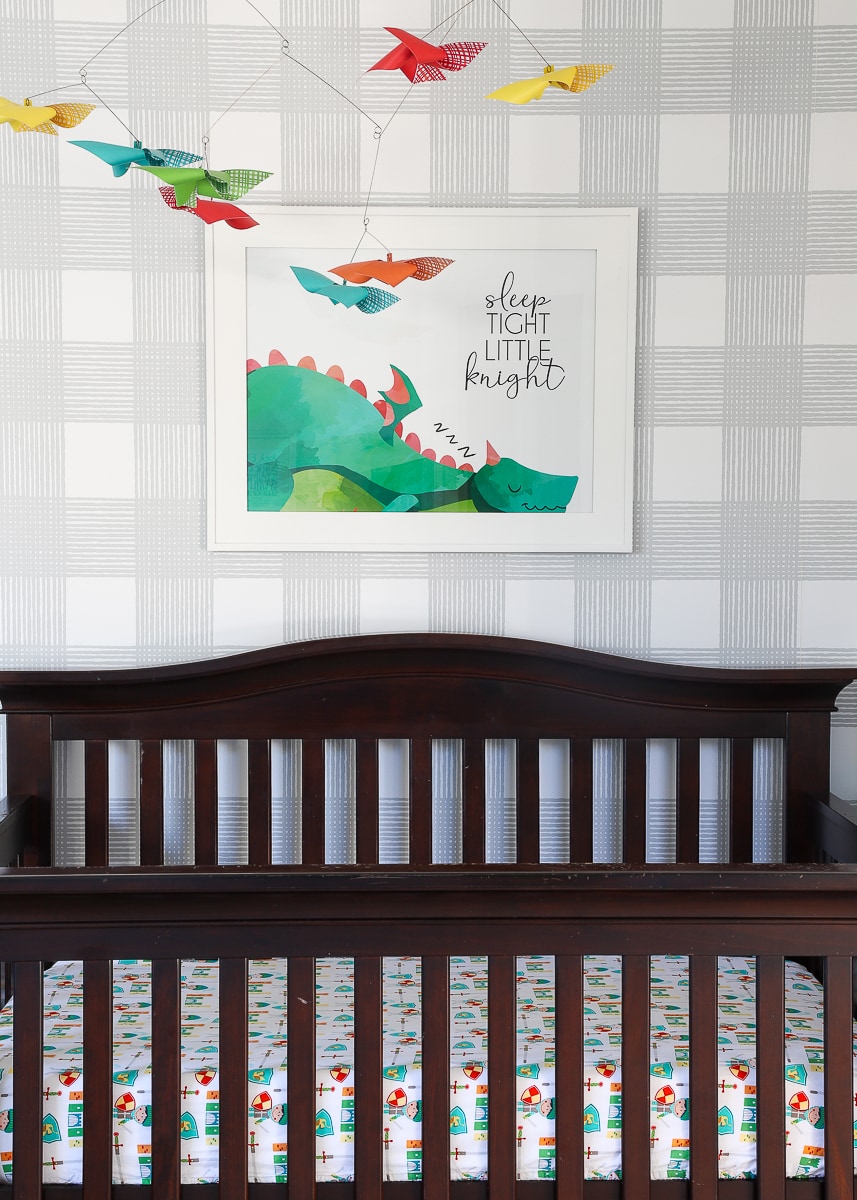
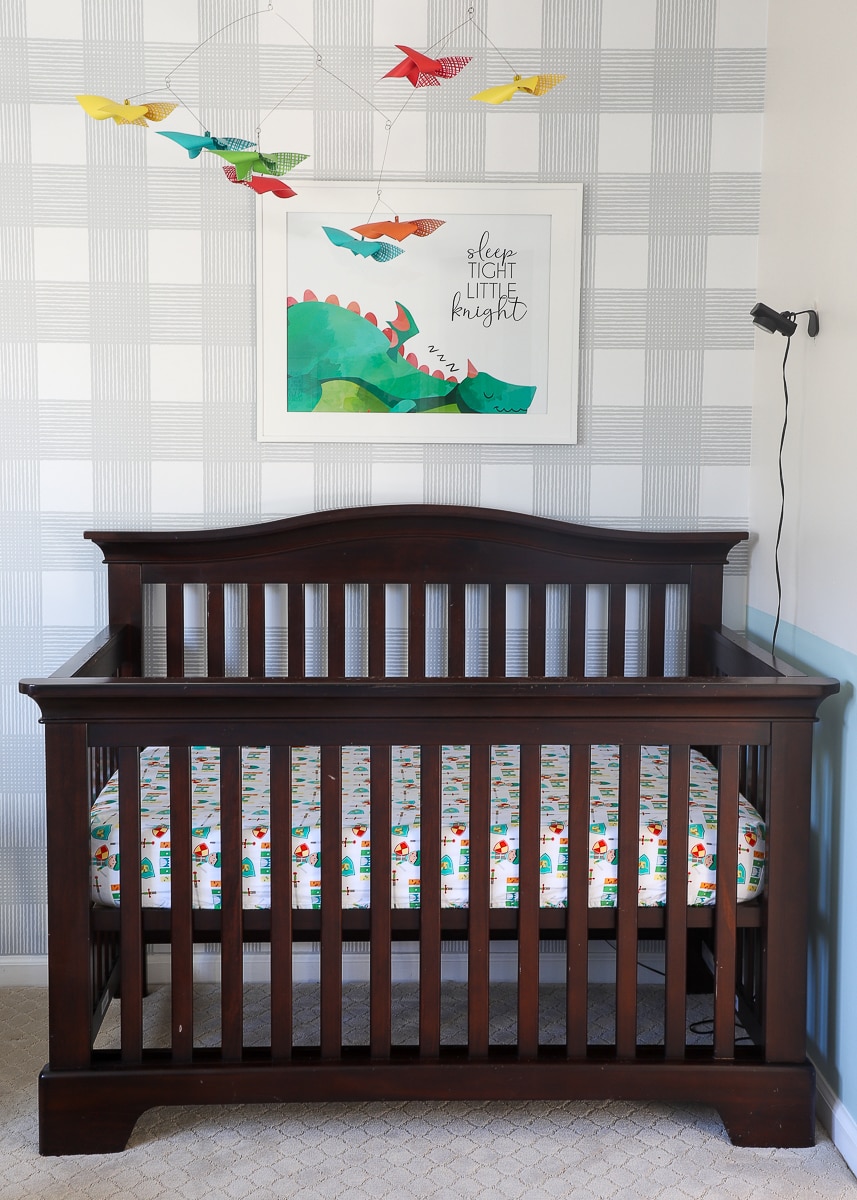
The large dragon art is easily one of my favorite details in the entire nursery! Not only did the colors turn out so vibrant…
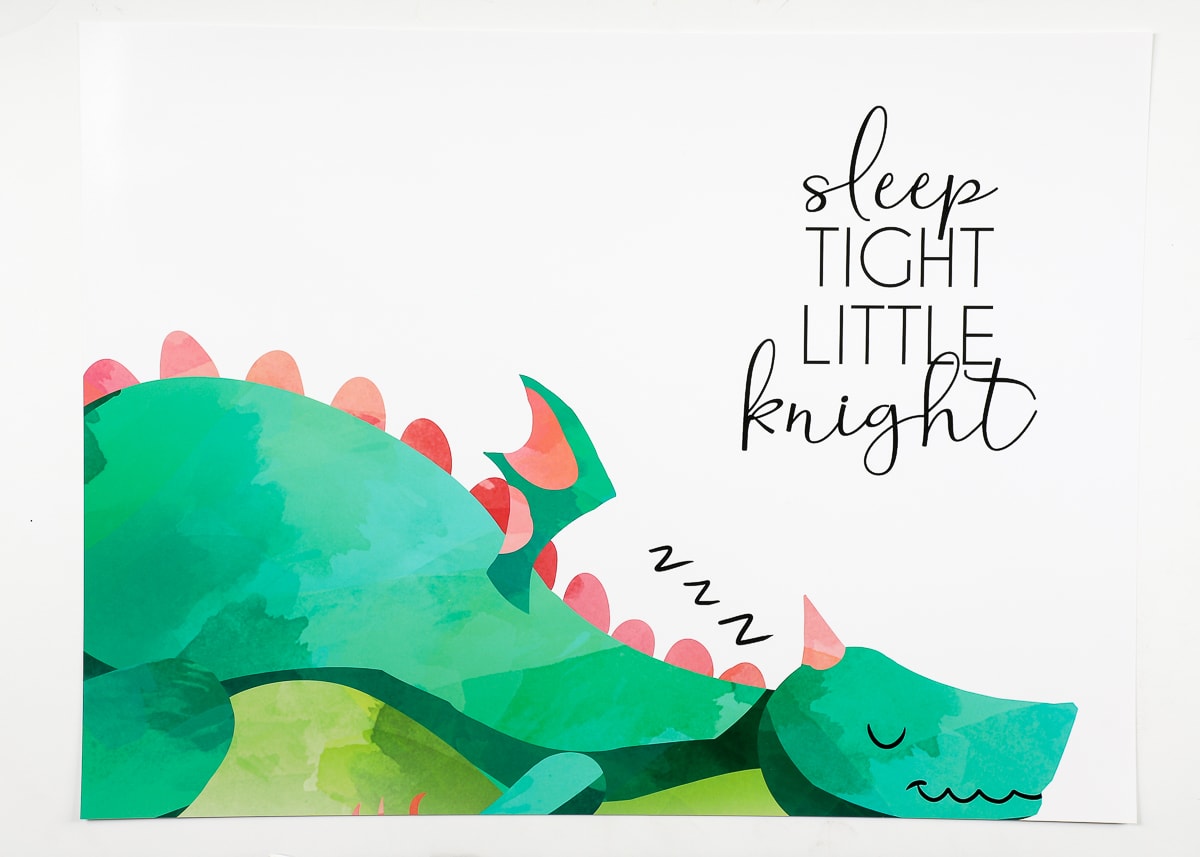
…but it provides such a fun focal point above the crib while pulling the mobile and sheet all together!
You guys know I am always on the hunt for creative ways to make inexpensive yet perfectly customized art, and I kinda can’t believe I’ve never used this approach! With the amount of fantastic digital clipart and designs out there now, it’s easier than ever to create designs that are perfect for your space! I hope this tutorial not only gives you new ideas for using inexpensive resources like clipart, but also empowers you to give this easy project a try!
Megan
6 Comments on “How to Make Custom Artwork With Clipart”
Megan,
Do you think if you put the knight prints in a bigger frame with a wide matte it would give you the bigger feel you are looking for?
Great tutorial!
Hi Heather!
Yes! That would absolutely help..especially with some colored mats!
I was trying to use what I have instead of add to our (already excessive) white frame collection, lol! We’ll see if the size bothers me enough to cave!
Glad you enjoyed this project! Happy Valentines Day!Megan
Great instructions! Thank you.
You have me scheming to see where I could try this in my house! Thanks for the tutorial!
You might like “King Jack and the Dragon” by Peter Bently and Helen Oxenbury for your guys. It’s a crowd pleaser!
Oh cute!!! Yes, we definitely need to check it out!! Thanks for the tip!
Have a great week!Megan