Framed Dry Erase Boards (from cabinet doors!)
Thanks so much for all the love on my new work station reveal on Friday! I’m so excited you guys seem to love it as much as I do (and thank you for taking a few moments to tell me so!!!) As promised, I am back today to chat a bit more about the framed dry-erase boards that are featured directly above the “new” counter station. If you look closely (and had been paying attention a bit before the holidays), you might remember that I (quite recently) revealed a Magnetic Task Board project. And you might be thinking to yourself that these new boards seemingly serve the exact same purpose as that board did…and you’d be right!
Here’s how the story of my new dry-erase frames goes!
Have you ever finished a project, after giving it a ton of thought and planning, only for it to turn out not quite right? Please tell me I’m not the only one! I thought and thought and thought about the best way to organize myself for the New Year and everything I was starting to juggle. I tried a few other options before even deciding on the concept of the magnetic, color-coded label system, and felt like it was really the way to go. I happily worked away on it, used it successfully for a few weeks, photographed it, and even wrote two posts about it here on the blog. It was working just fine, but the design of it was bothering me, and I didn’t like the way it looked situated above the counters.
While on a run one day, I was thinking critically about my magnets task board, specifically why it wasn’t quite working, what more I needed from that system, and how I could make it look better (I do a lot of my project brainstorming on my runs!). I knew I needed something a bit bigger (to visually take up more space above the counter) and needed something that would allow me to make long lists and jot down quick notes (neither of which the other system allowed). My heart was torn because I had literally JUST hung my new magnetic board on the wall, but I had this fresh new idea that I just couldn’t shake. By the time I wrapped up my 4 miles, I had made the decision to go in a new direction…and this is where that new direction ended up!

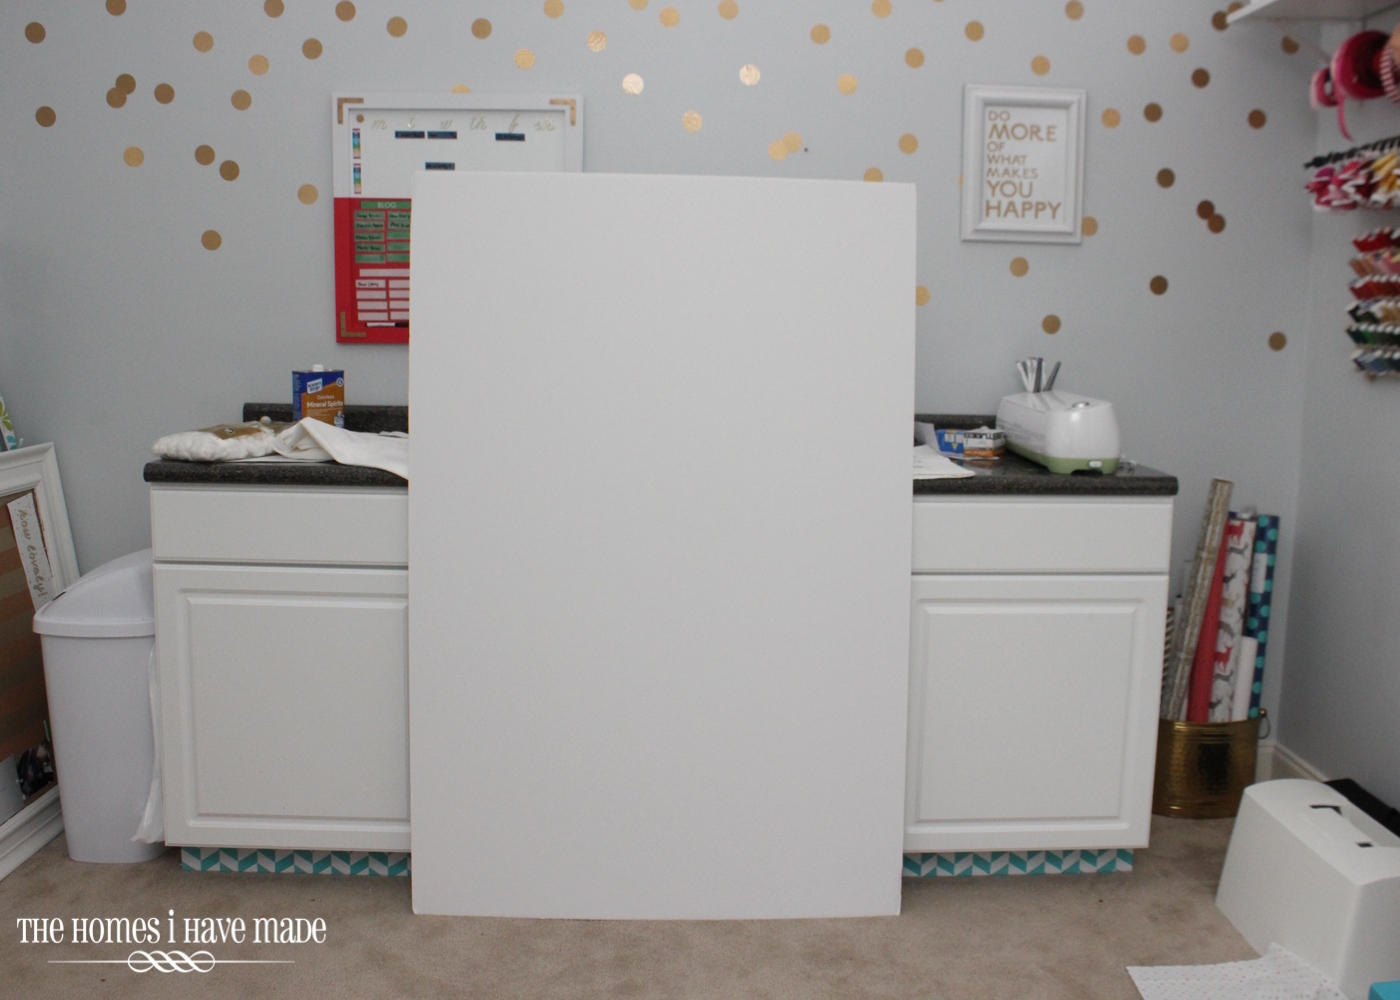
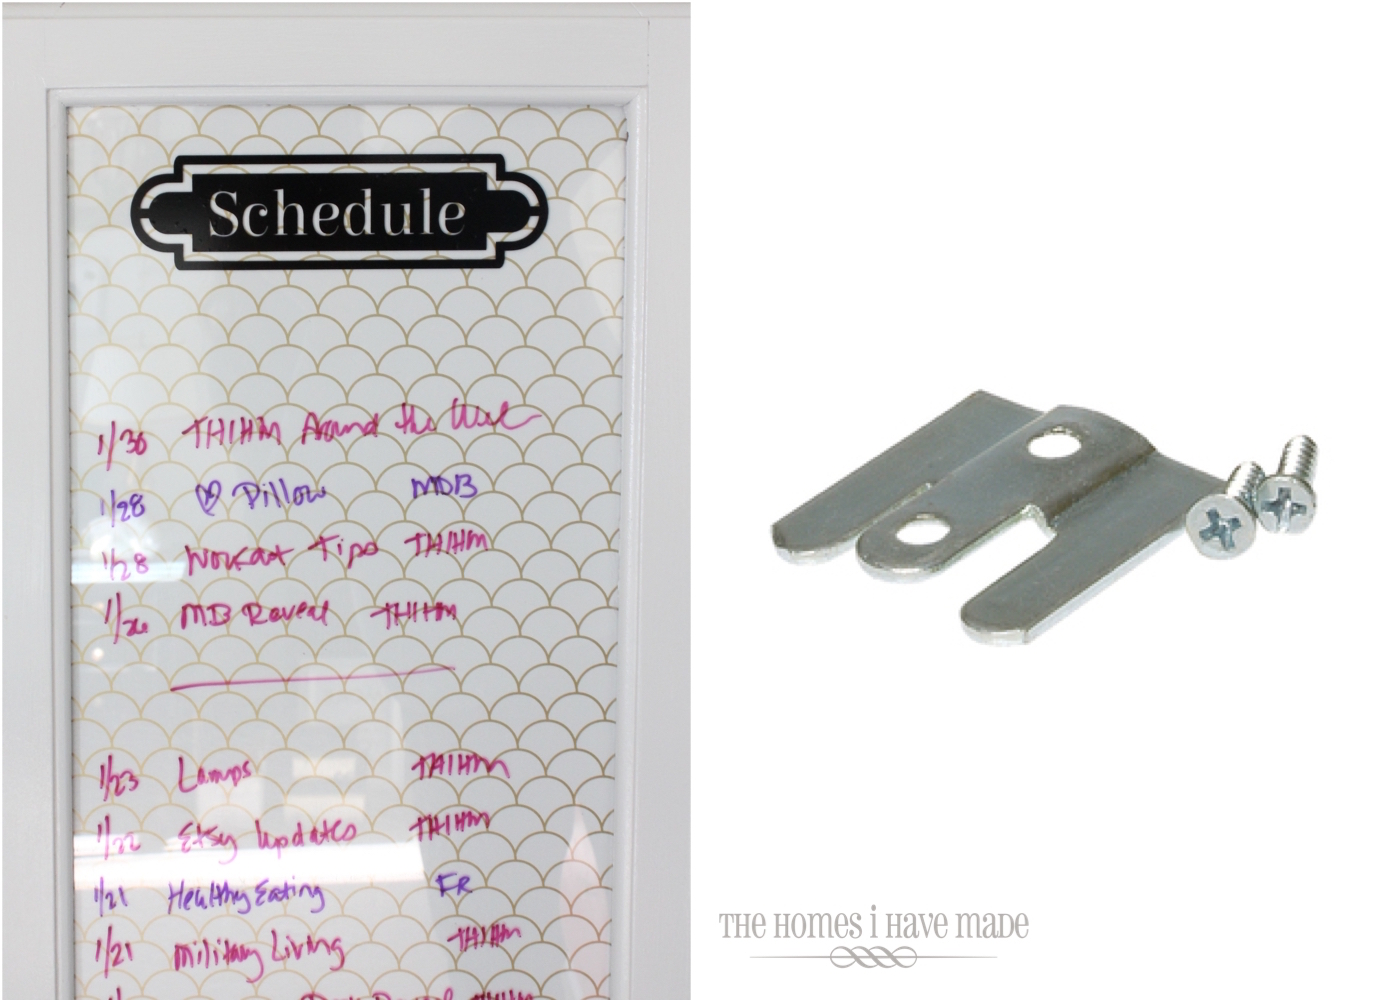
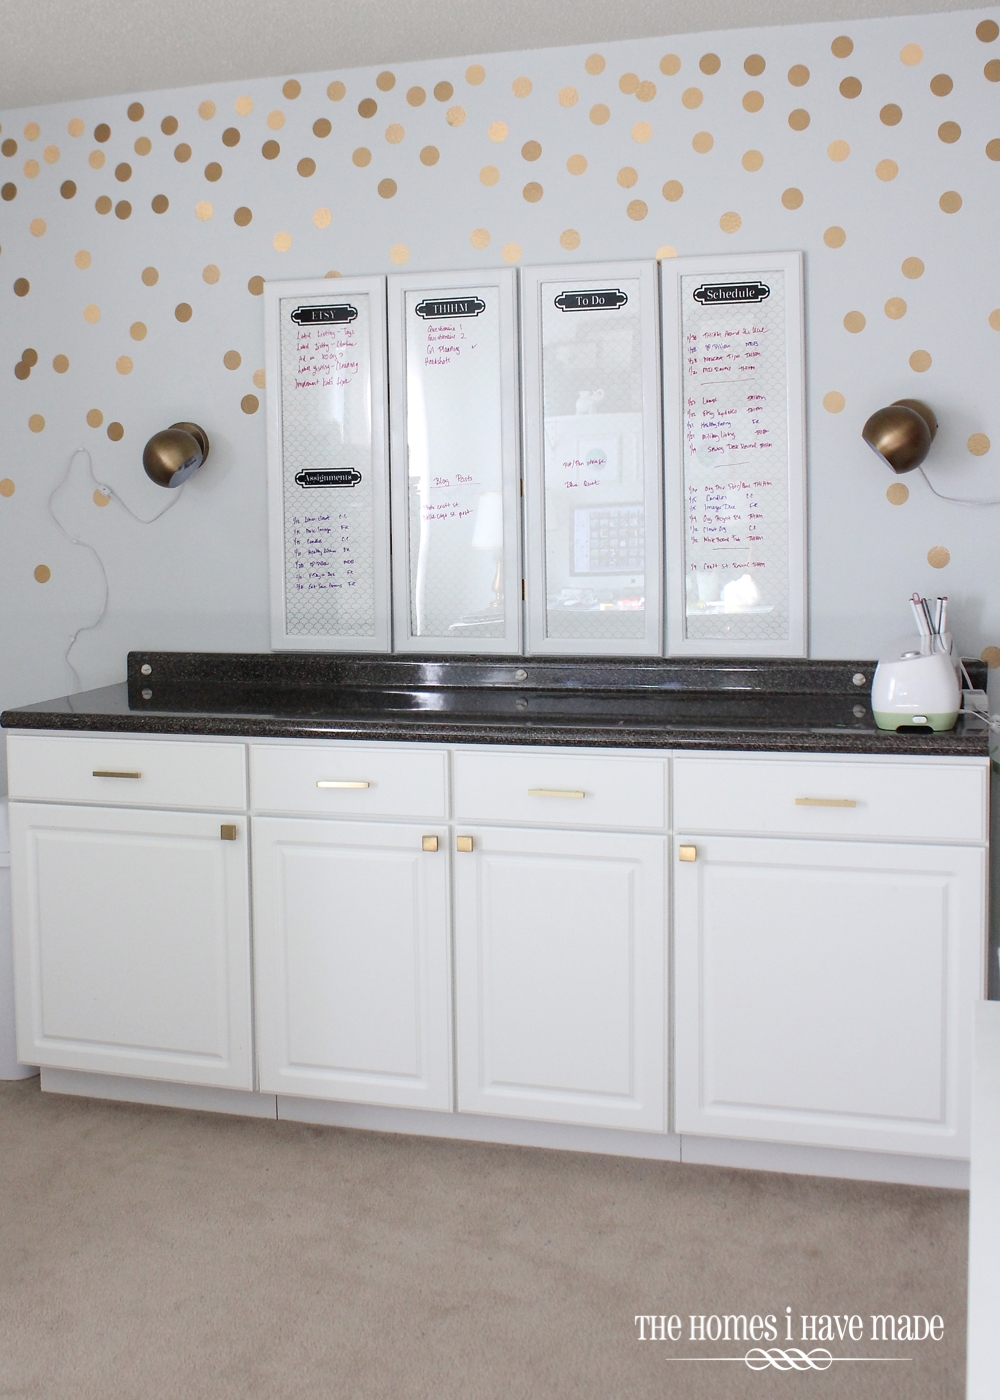
The nice big dry-erase panels are simply glass cabinet doors that I painted and backed with pretty wrapping paper. They take up a good portion of the wall, adding balance to the cabinets below and give me ample space to keep everything I’ve got going on in eye sight! I have panels for my Etsy Shop, the blog, an overall To-Do List, my posting Schedule, as well as my free-lance writing Assignment schedule. I have room to jot down a quick idea or measurement as I’m working, circle projects that need attention, and more! Best of all, everything wipes away with my finger!
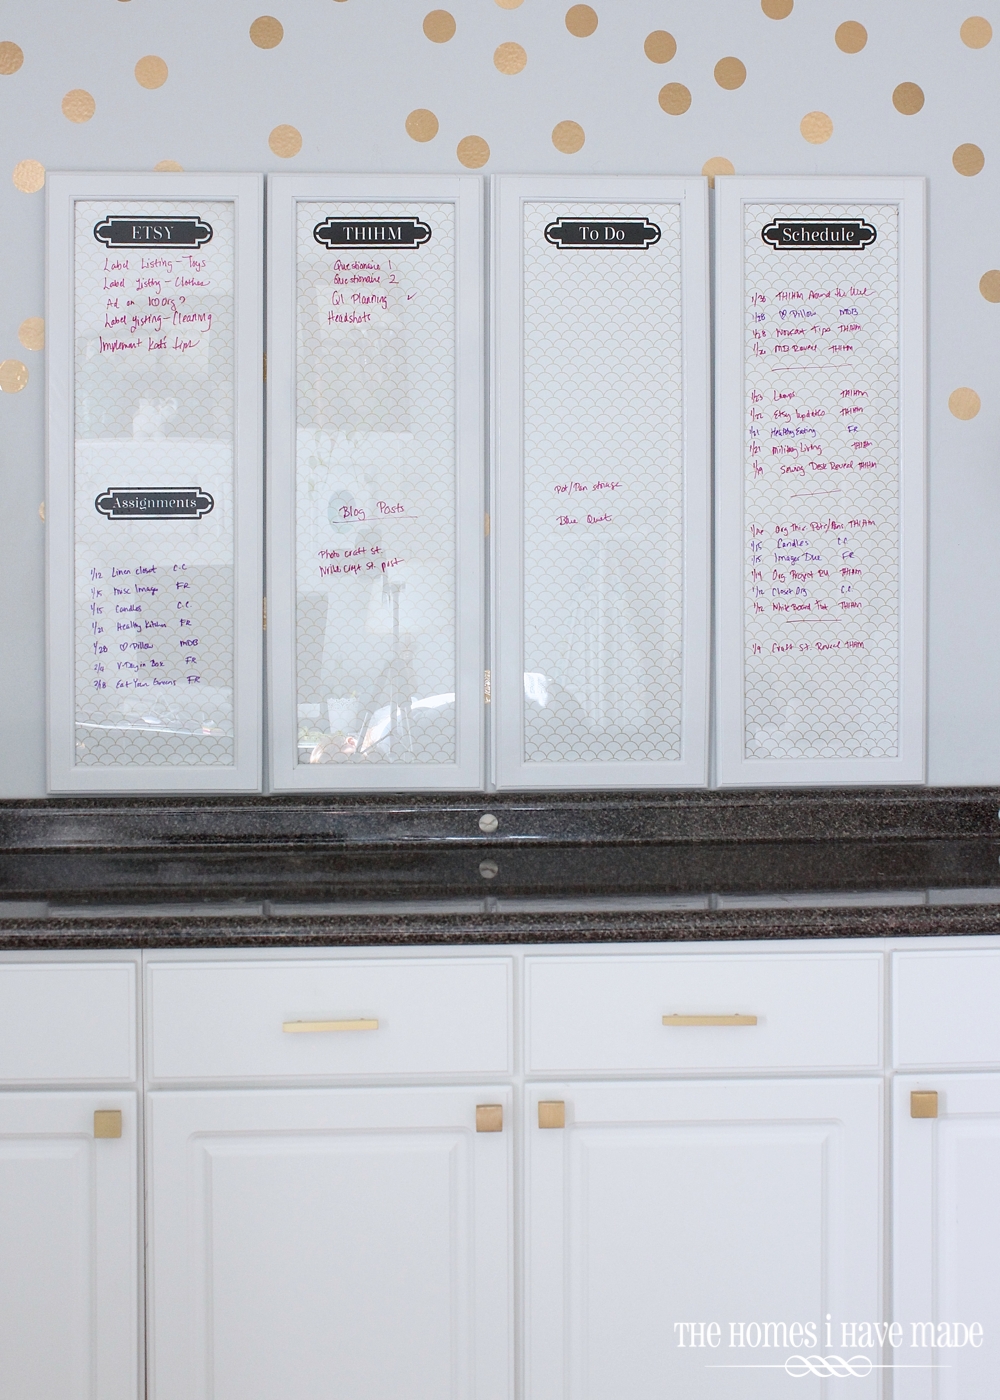
Instead of having a horizontal or grid-like calendar-type layout like before, I am now using a list system, which is organized by date and week. At first I was unsure this would work, but (to my pleasant surprise!) it has REALLY helped me prioritize which project and post comes next. If you look closely, you’ll notice my dates actually go up…don’t ask me why, but I’m working from bottom to top. It makes me more sense me and “go with what works” is my motto ;). Color-coded markers help me keep track of free-lance work versus projects for here on THIHM; I’ve got room for deadline dates and spots to jot down notes as necessary. I can’t over-emphasize how much this one panel has changed my blogging life. I can see what’s coming up next, as well as a few weeks down the road (so I can shop for supplies or start working on ideas) all in one quick glance. For the first time in 3+ years, I am ahead on my blogging schedule, and I have a hunch this system is what’s helping!

This project cost me about $20, took me a weekend to pull together, and helped clean out the garage! Do I have your curiosity peeked yet?
Let’s walk way down memory lane, shall we? Who remembers this dining hutch we transformed into a bookshelf? It was one of the very first projects I tackled when we moved into this house!
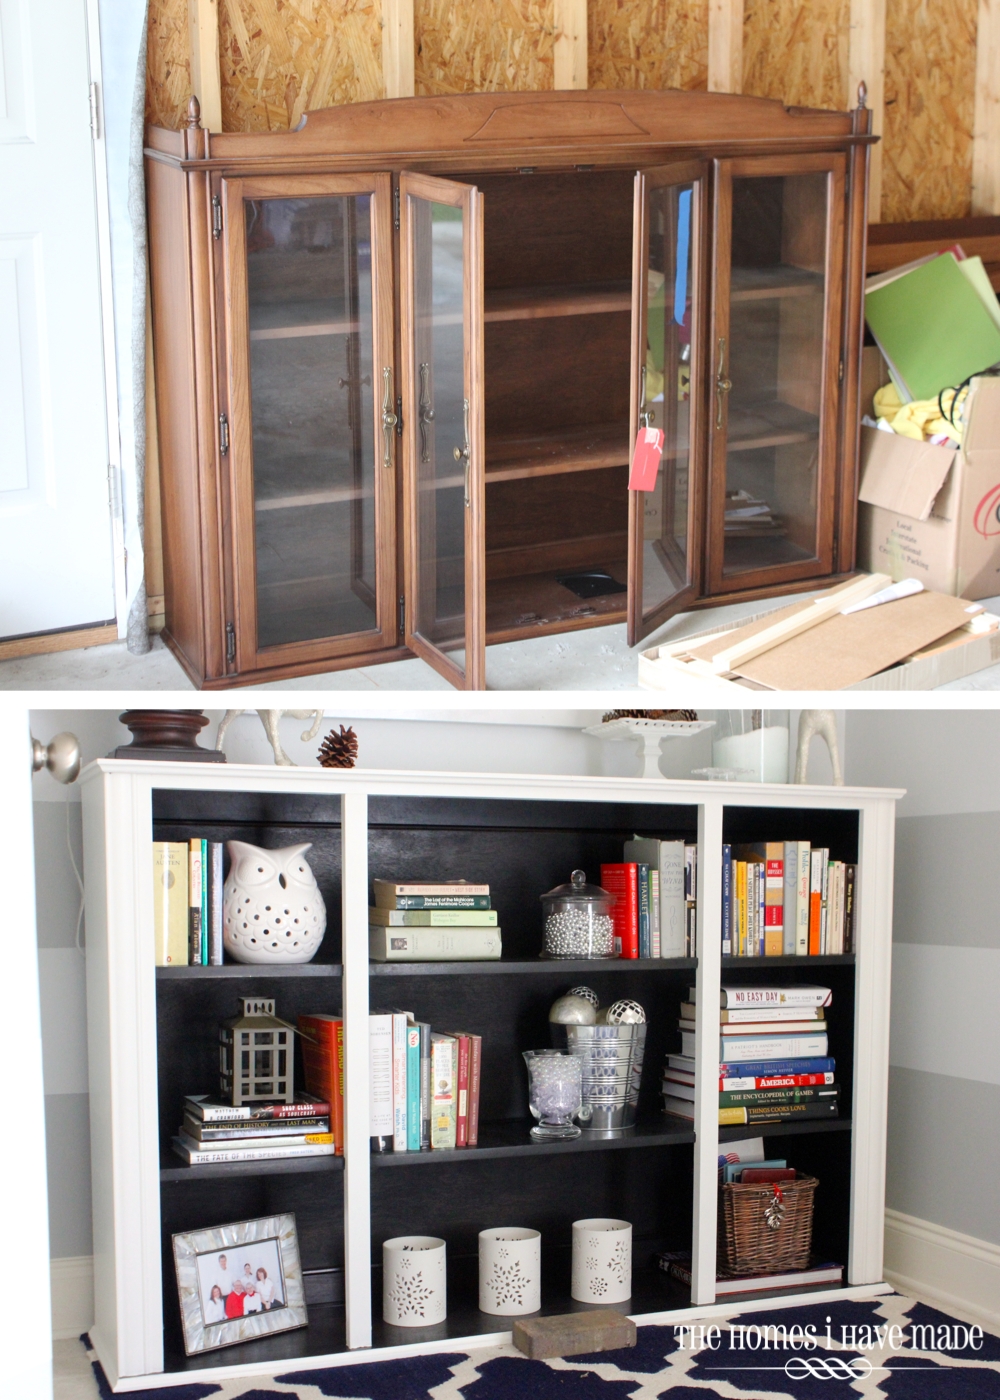
At the time, we removed the doors in order to modernize the whole look and create open shelving. I kept the four doors all these years because I knew I could do something with them. For years, I’ve toyed with idea after idea, but nothing felt quite right. On my run a few weeks ago, when I was brainstorming, I knew I had finally found the right project for our old cabinet doors!
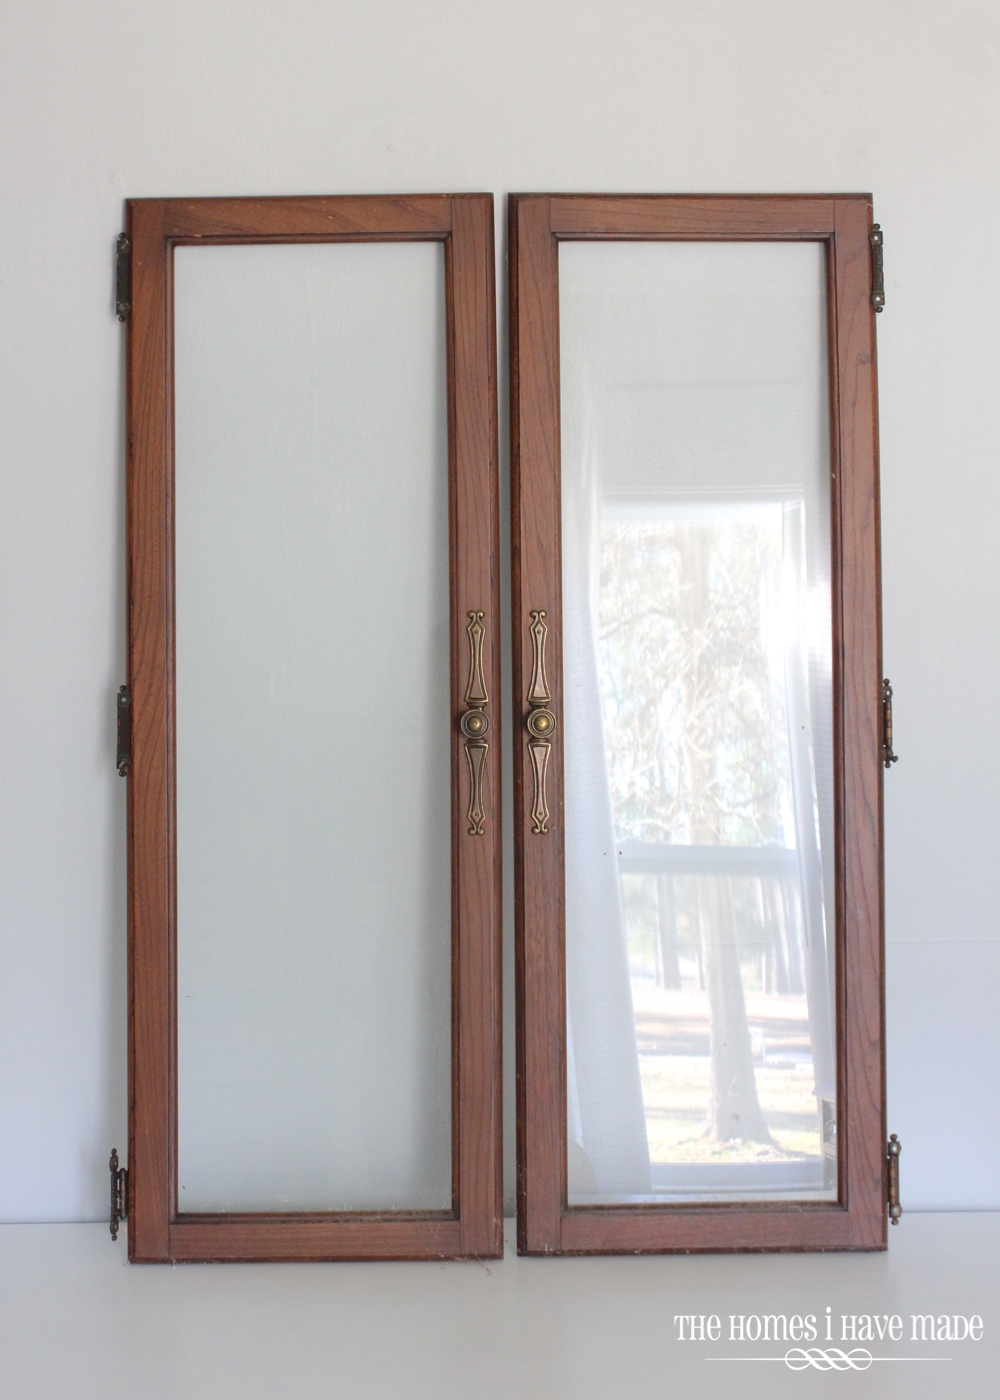
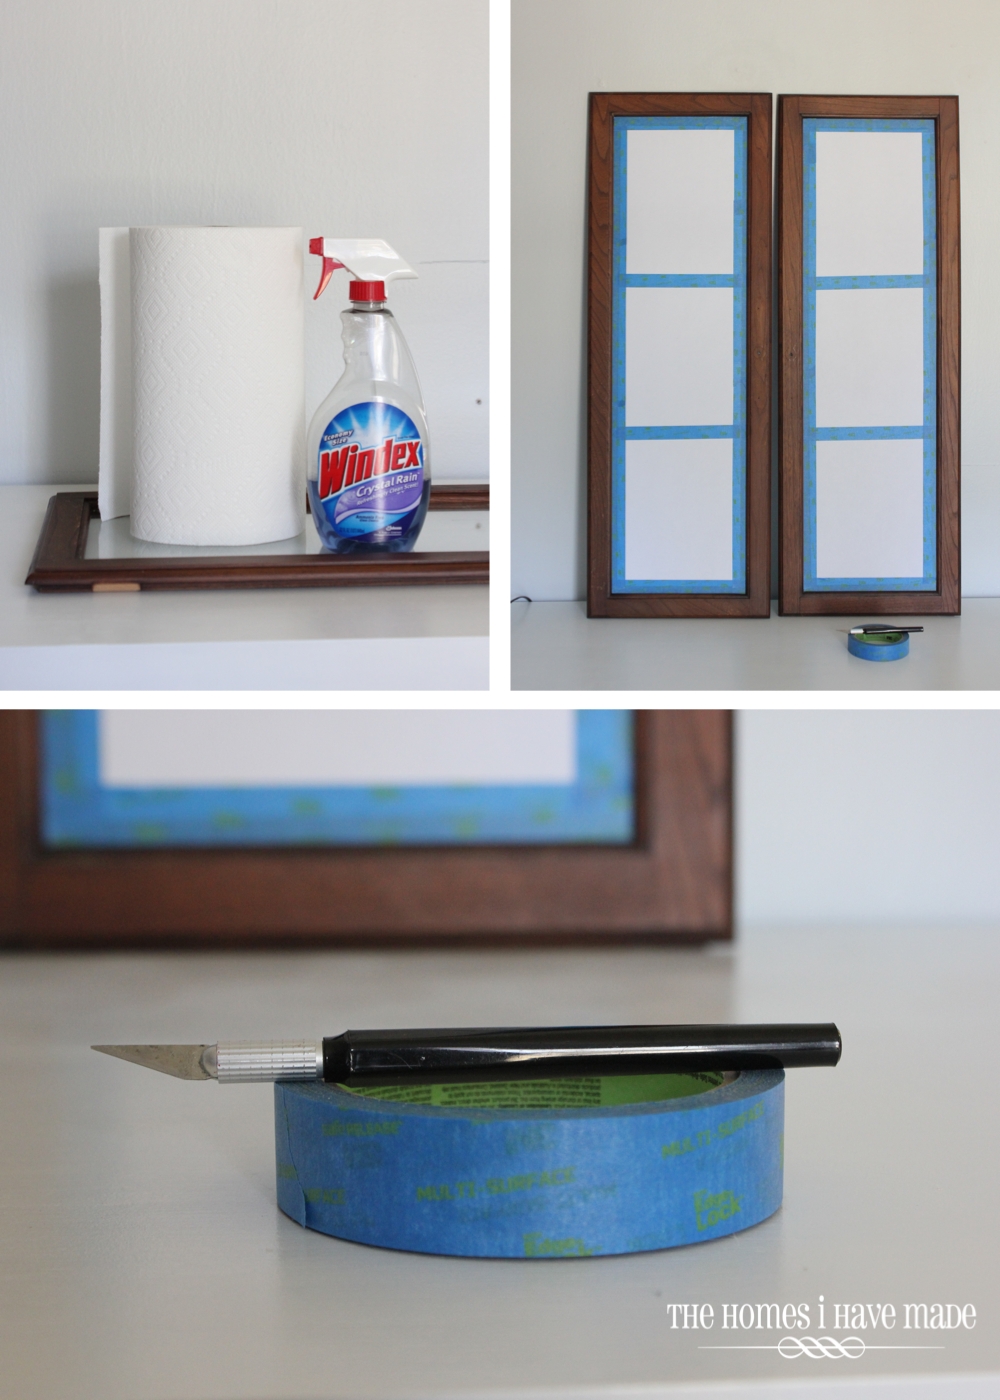
I had two sets of these doors to start with. I began by removing all the hinges and knobs, and then I gave the doors a really good cleaning (they had been in the dusty garage for over two years!). Before painting, I masked off the glass panes with copy paper and tape (using an Xacto knife to get clean edges).
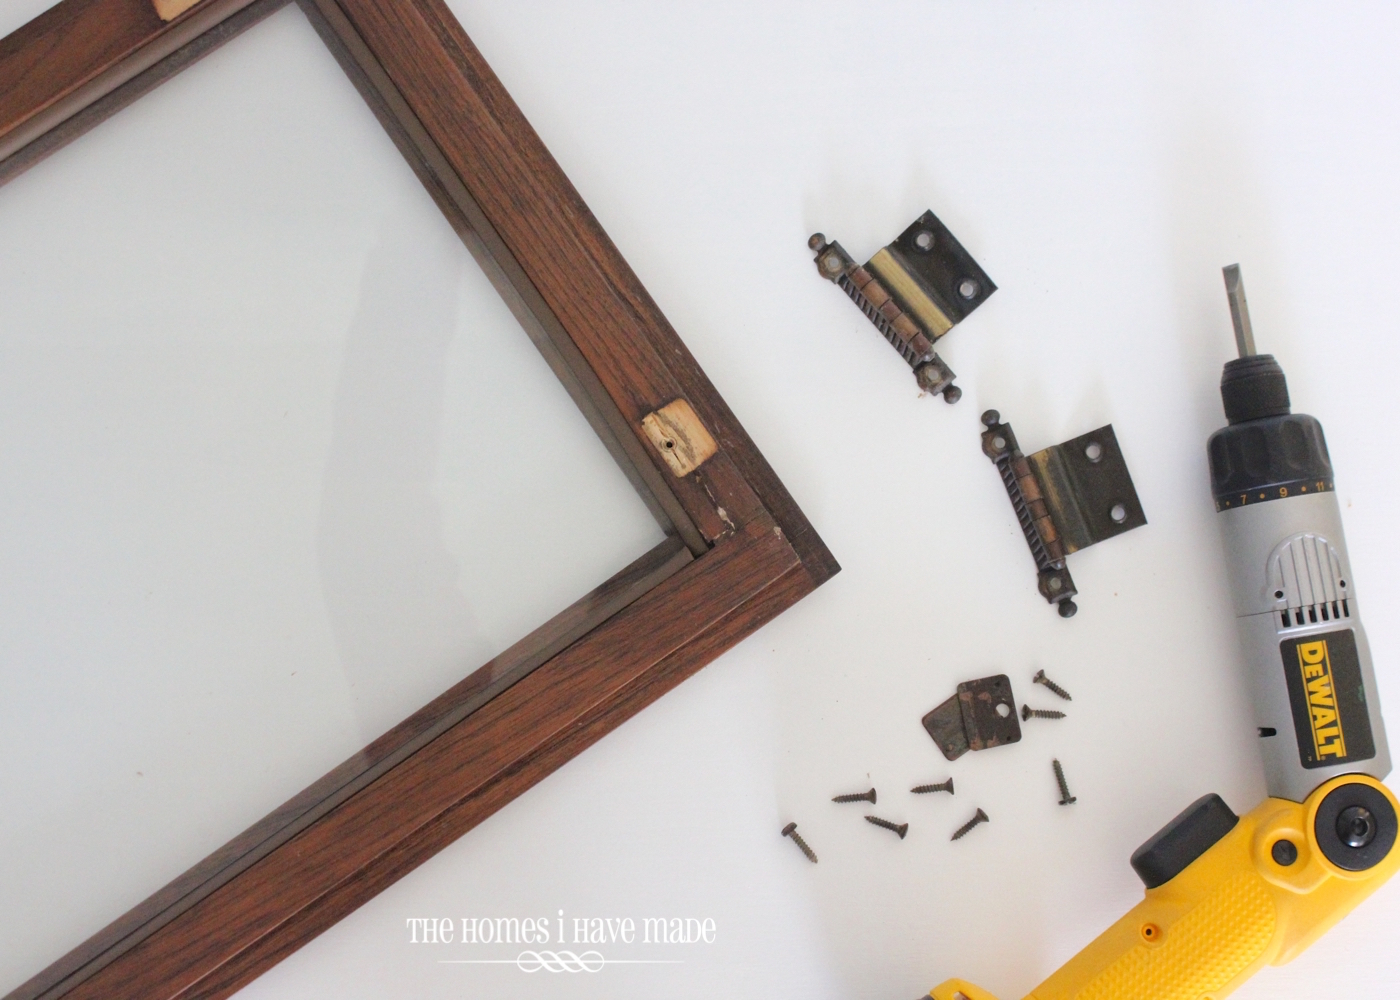
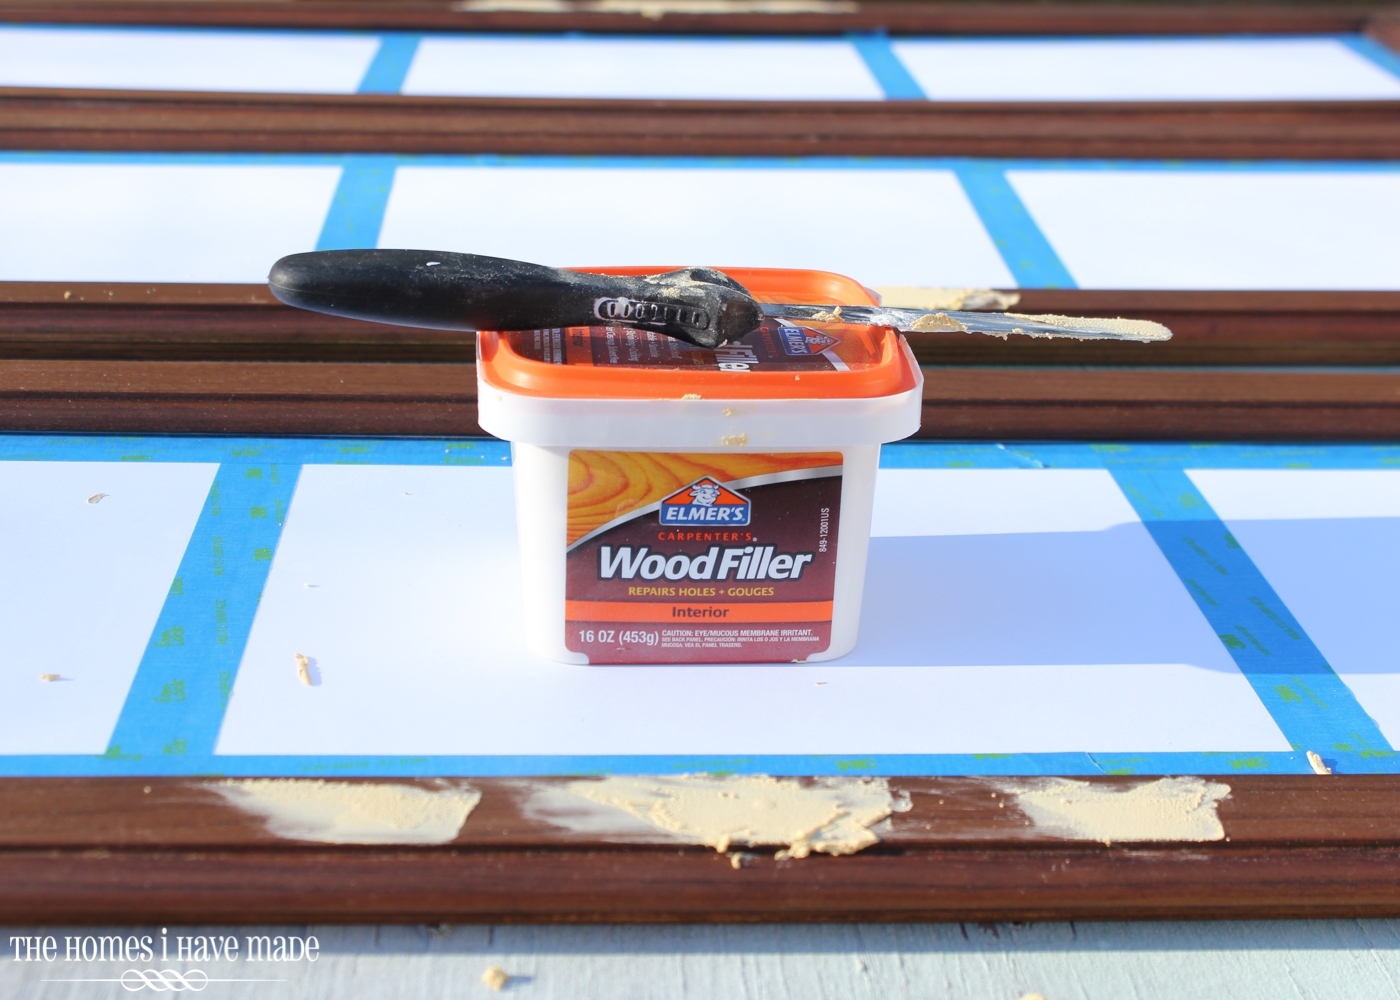
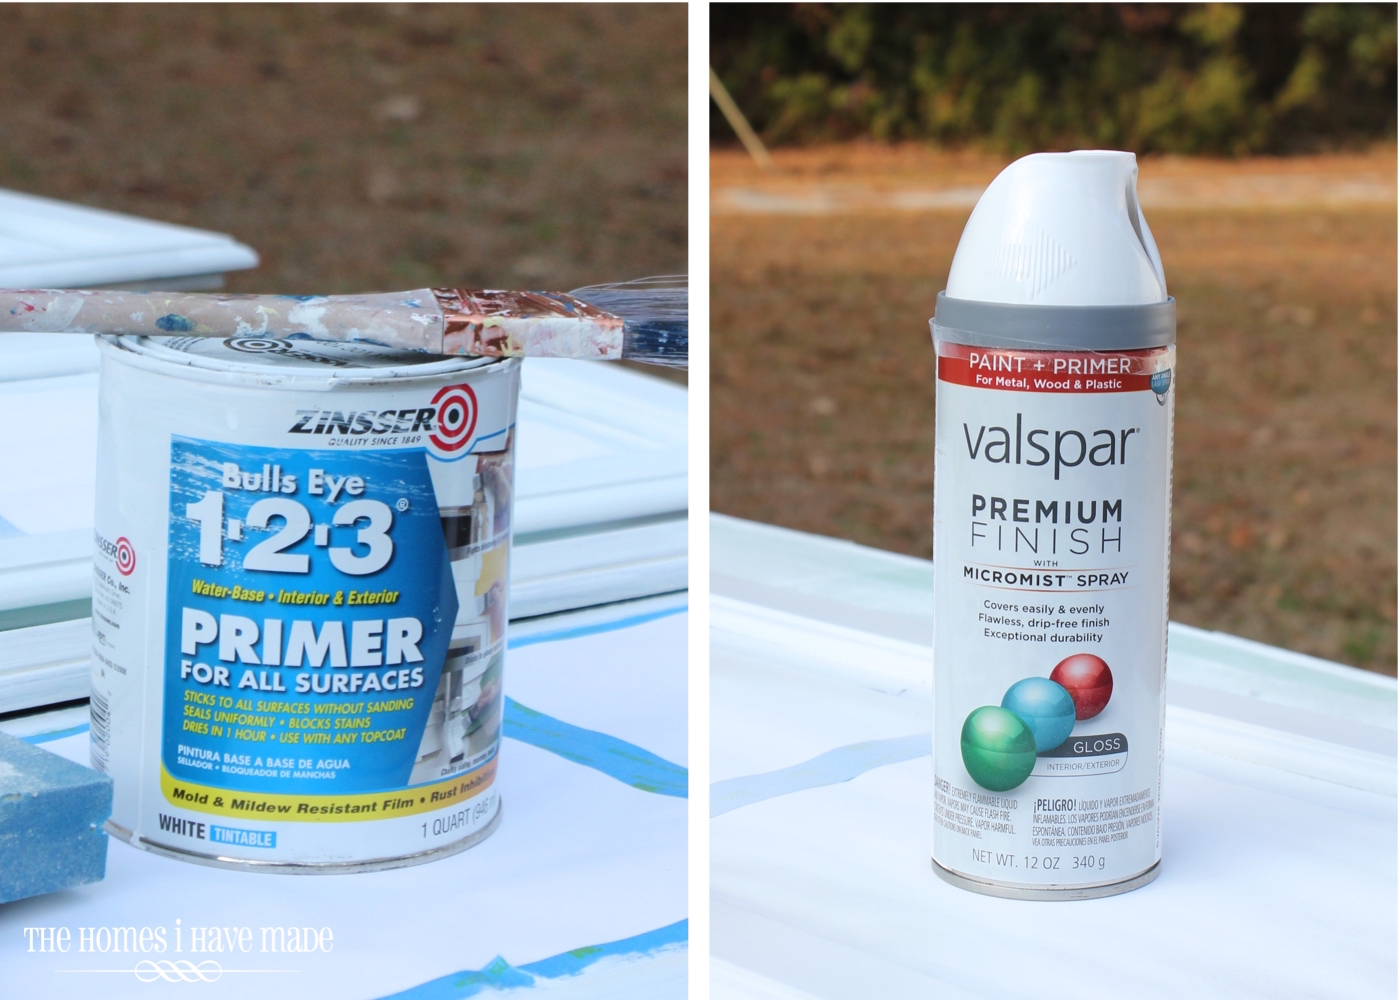
I then filled the hardware holes with wood putty, and sanded the spots smooth. Two coats of primer, a quick sanding, and 2 light layers of bright white spray paint later, these doors had a whole new look!
While the frames dried and cured for 24+ hours, I worked on making the patterned backings that would eventually get tucked behind the glass.
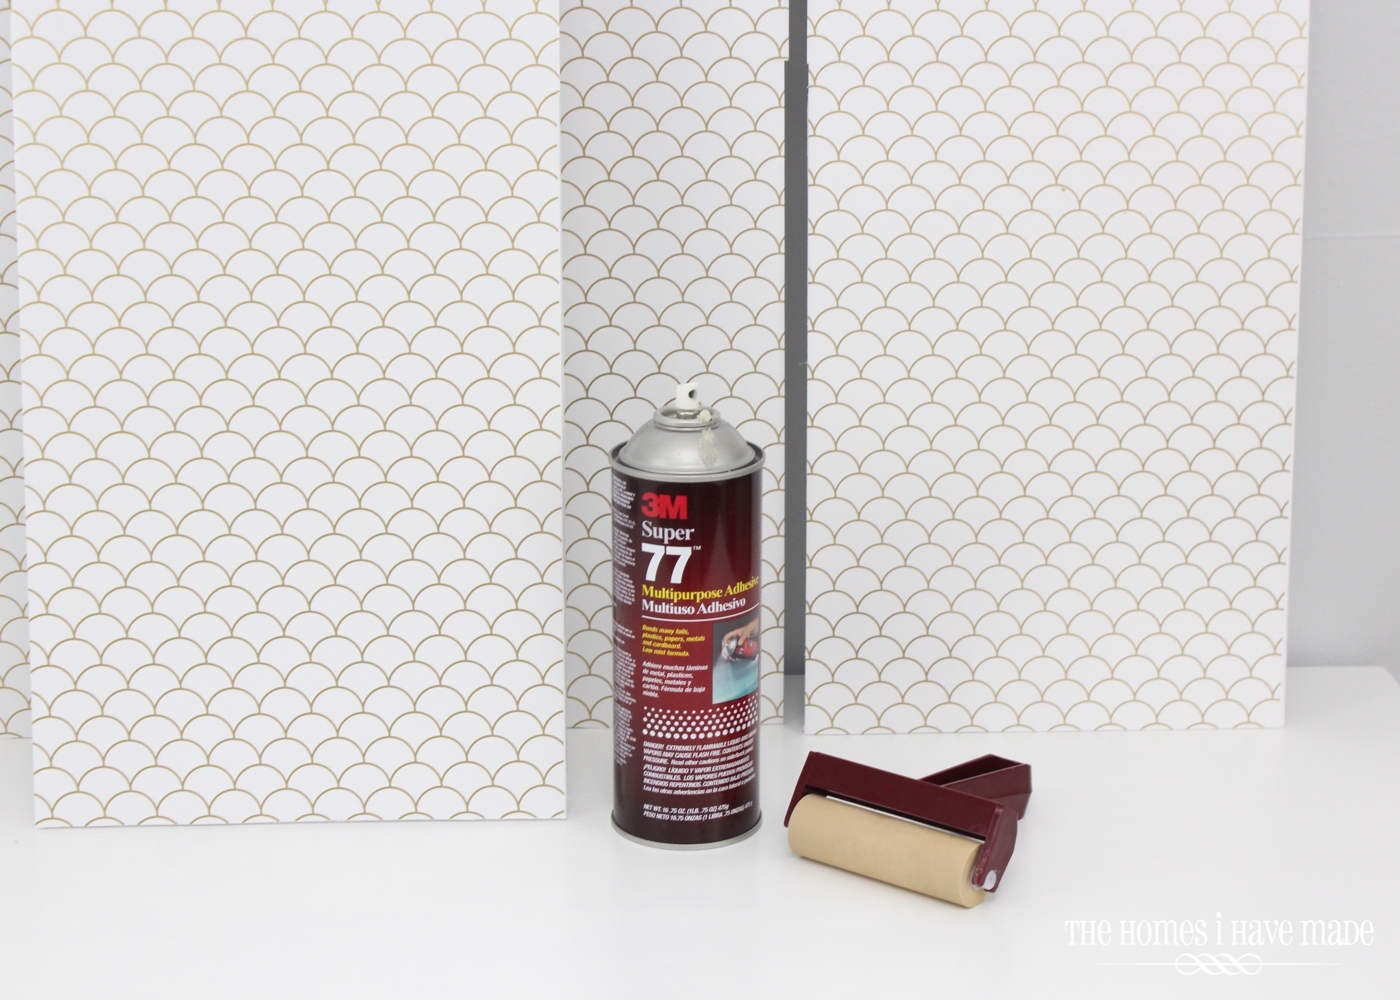
I started by hunting down some affordable foam core board. Hobby Lobby had a 40×60″ sheet for $10 (plus a 40% off coupon) which was just the right size and price! The only trouble was getting this big sheet home in my little Honda!
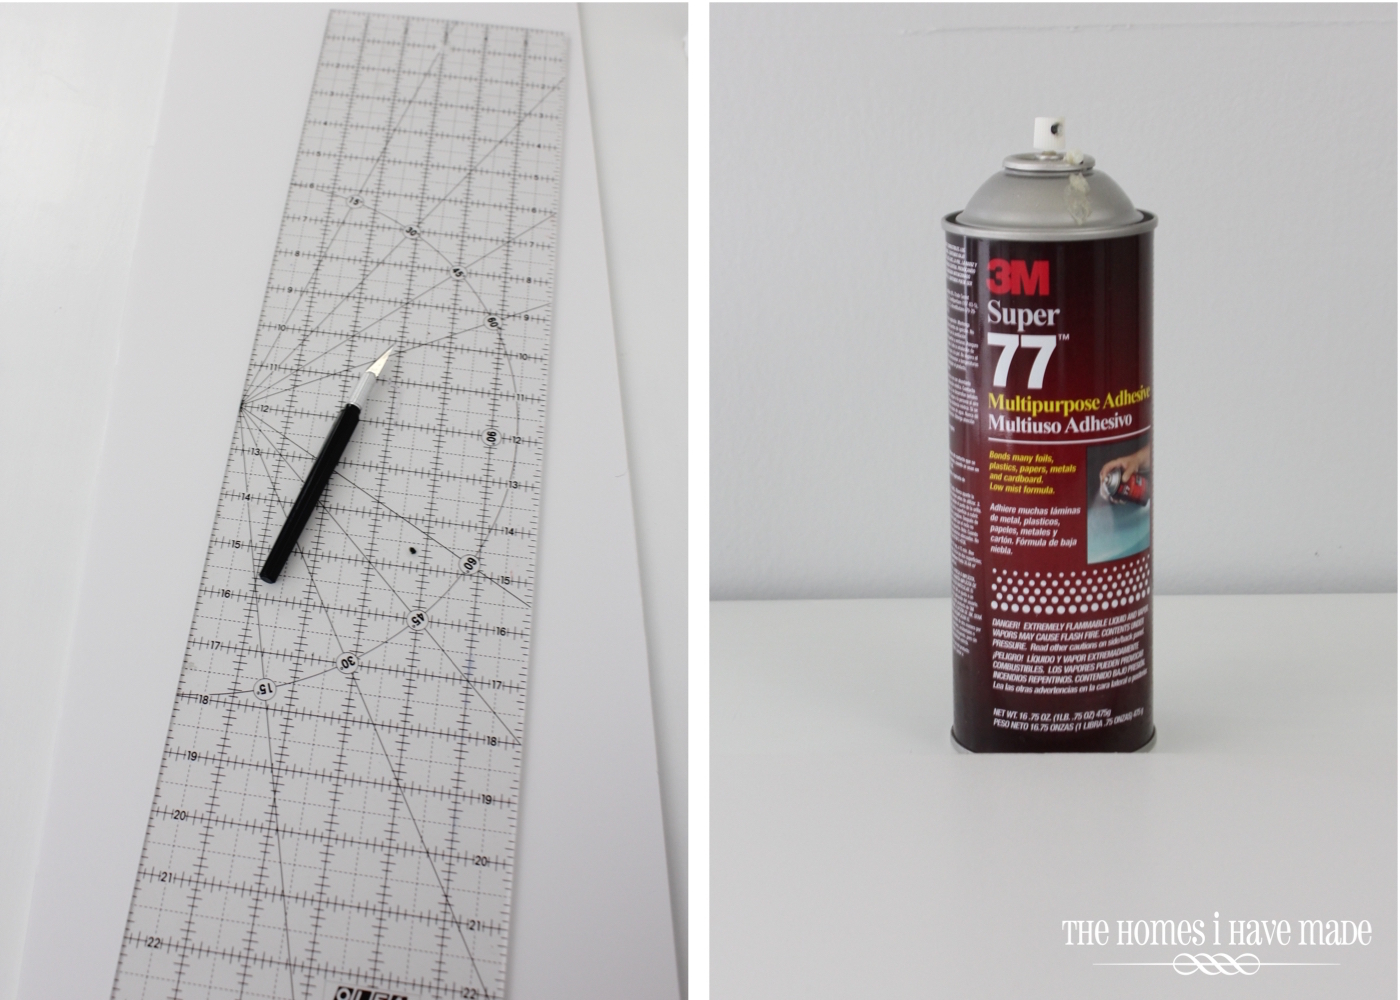
I measured the size of the glass panels in the cabinet doors and transfered those measurements to the sheet of foam core. I cut the rectangle panels out using a clear ruler and an Xacto knife. I then sprayed each sheet down with spray adhesive (work outside because this can produces a lot of overspray!)
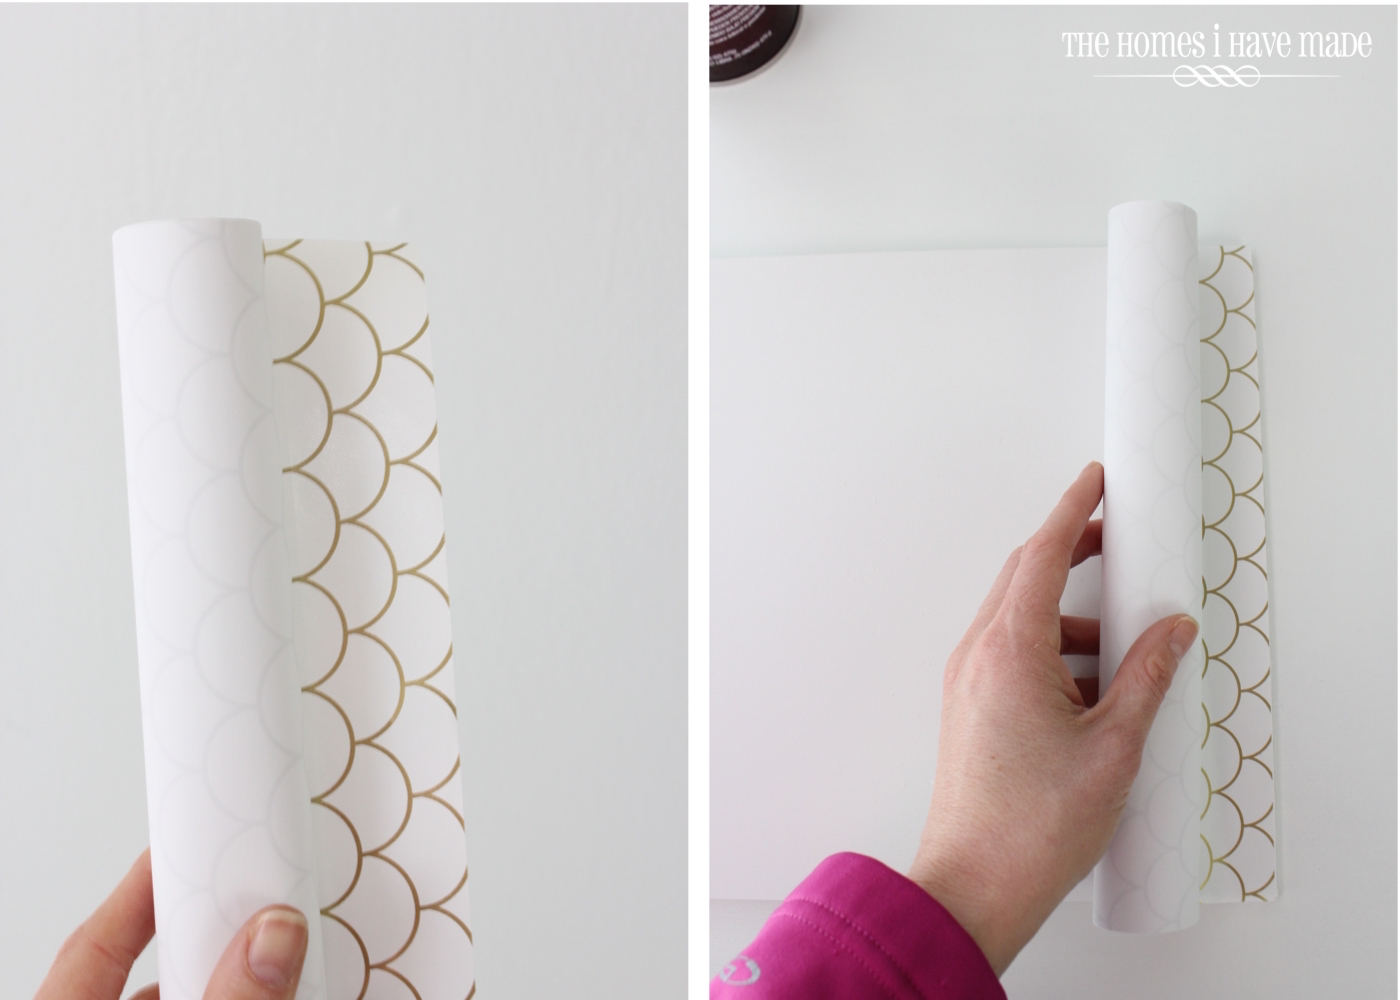
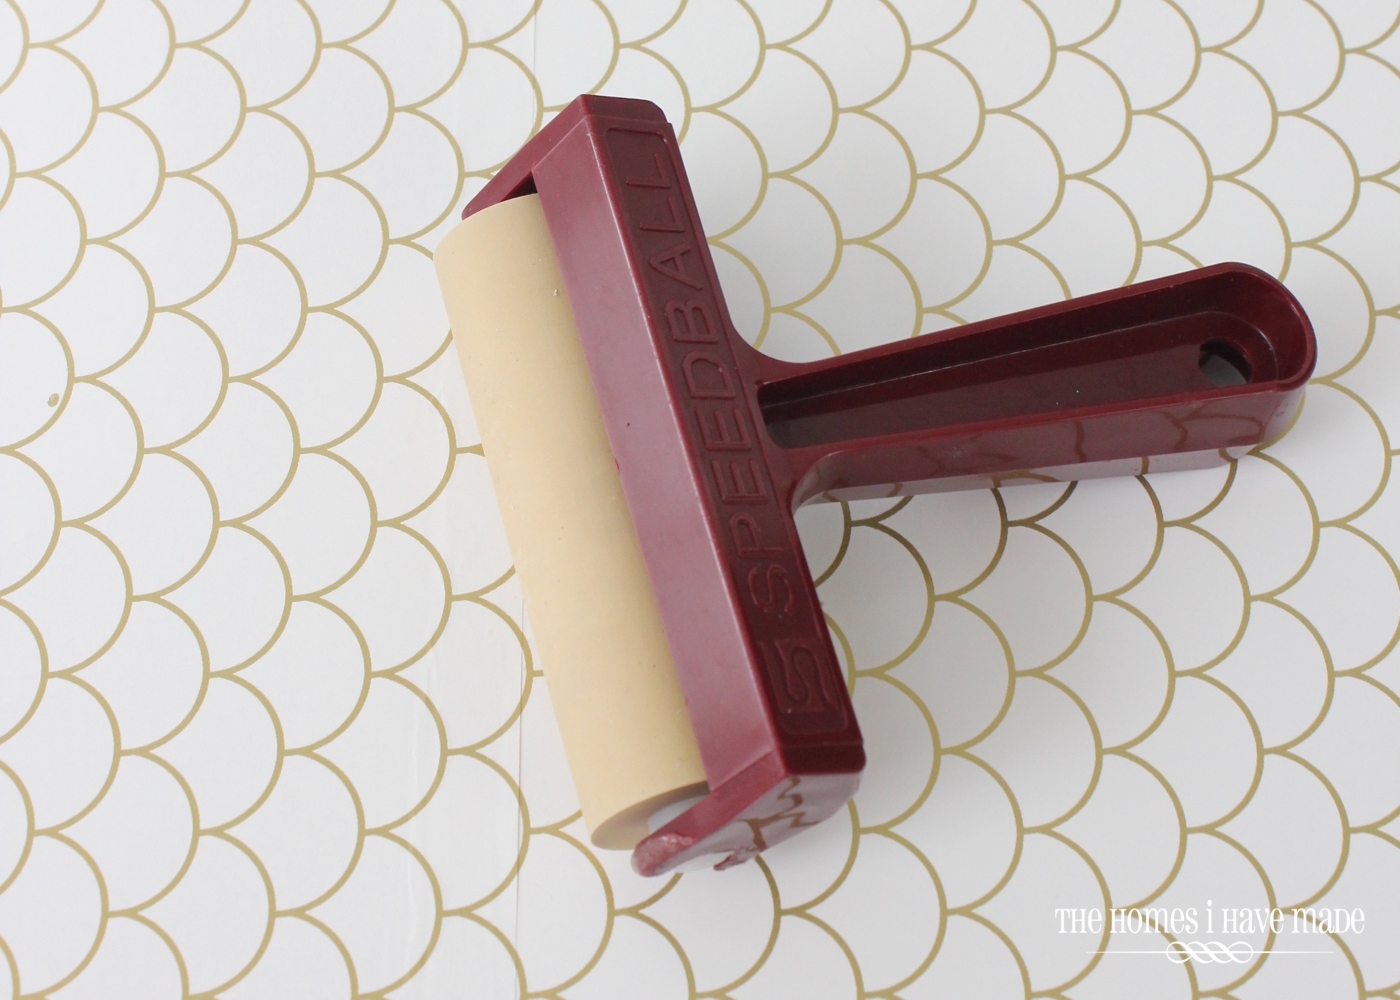
I then cut down this awesome wrapping paper I found at Michaels (for $2 a 10 yard roll!) into the right size rectangles, making sure my pattern was consistent across all four panels. The secret to laying the paper straight and bubble free is the roll up the paper backwards. Starting at one end, line up the paper and press it down onto the foam core. Use a brayer to smooth the paper as you unroll it down the foam core sheet. This adhesive is pretty strong, and you only get once shot, so take your time!
I popped the foam core sheets into the backs of the cabinet doors (behind the glass). The foam core was cut so that they fit pretty snug so they didn’t need any hardware to hold them in place. I finished off the frames by cutting out some labels in black vinyl with my Cricut Explore and placing them on the front of the glass (so I can swap them out if needed). We hung the dry-erase frames using flush-mount hardware from Lowes.
I am so glad I held onto these glass doors because they have turned into quite the useful accessory in our office! A little paint, foam core, and wrapping paper have given these old doors an entirely new purpose!
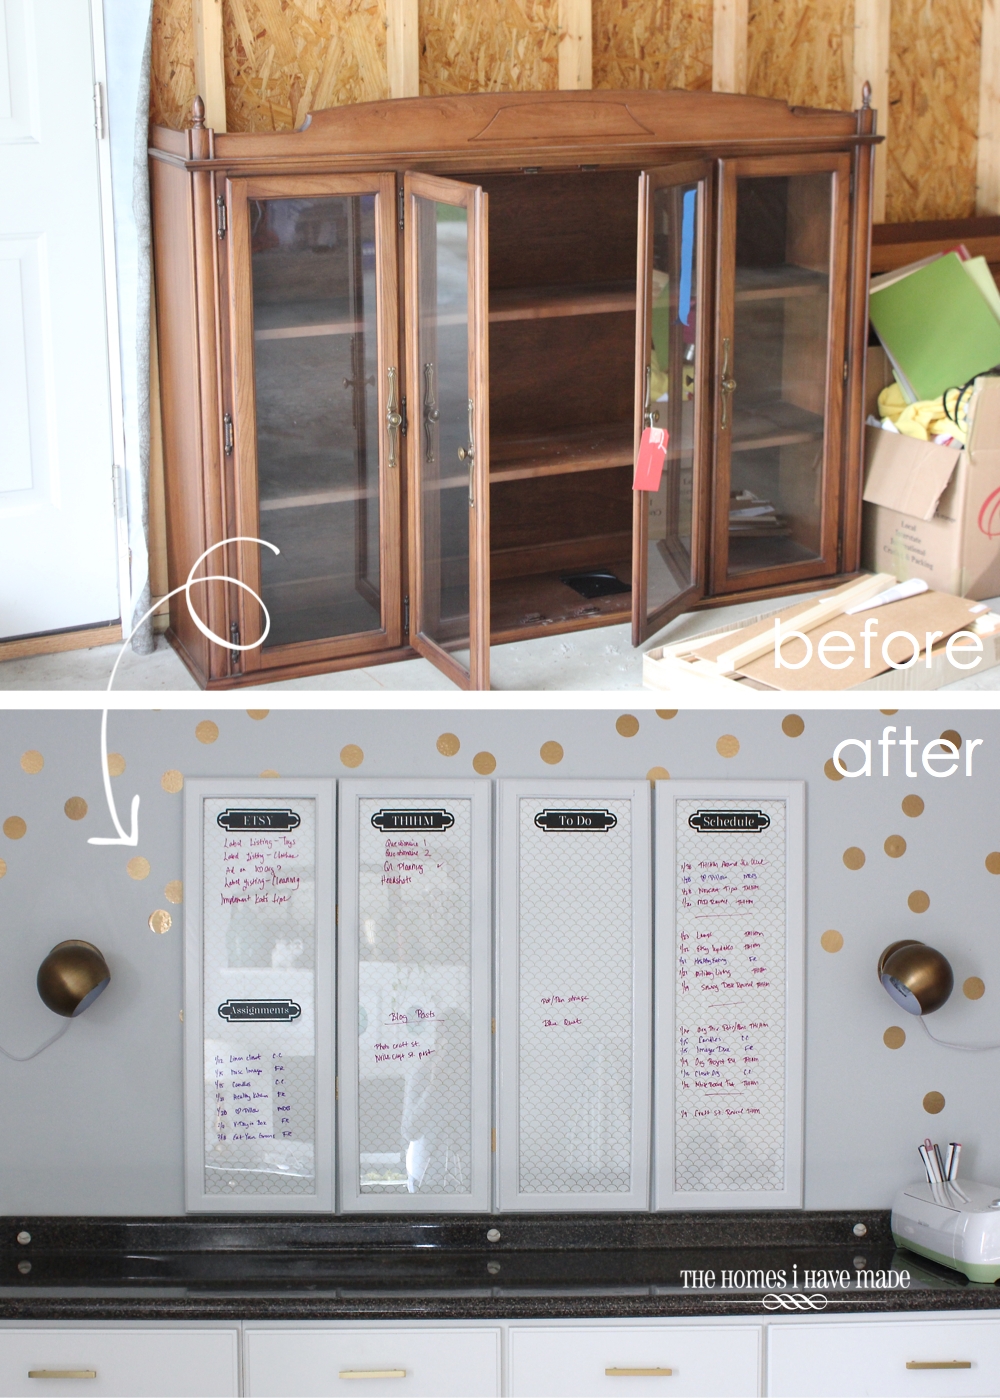
Not only am I pretty psyched that I was able to re-purpose something collecting dust in the garage into beautiful and useful office accessories, but I love that I can change out the papers in the back or the labels on the front as my whim changes – which, as you’re probably learning, changes a lot and quickly at that!

So yes…the magnetic task board I showed you back before the holidays has been replaced by this prettier and more functional system. Sometimes (okay, maybe a lot of times), it takes me a few tries to get something right! But!! Don’t feel too bad for the little pink magnetic board. You can bet she’s already on her way to a fantastic new look and new purpose! I’ll show you next month!
What do you guys think? Have you ever finished a project only to know in your gut it’s not going to work but it takes you a little while to admit it? Do you have a need for something like this in your home? Do you have some old frames or doors that you can re-purpose into something similar?
I hope your week is off to a wonderful start! On Wednesday, I’m actually going to talk about a few more organizational hits and misses in our home. If you’re on a mission to organize this year, you won’t to miss it!
See you soon!
Megan

7 Comments on “Framed Dry Erase Boards (from cabinet doors!)”
I love this idea! I am such a visual person and having everything right in front of me like this would be a huge help!
I'm such a visual person too – I love being able to brain dump, cross off and move things around as needed! Dry-erase really is my way to go!
I covet your craft room, and especially your counter and the panels above it. You are a fireball of energy! I get tired just reading about your projects. Wish I had boards like that at my office!
Thank you so much!!! I'm not the best at sitting still 😉
I like it! I must admit, I wasn't too jazzed about your magnetic board when you revealed it, but I thought that if it worked for you, then who was I to judge? I love the fact that you've repurposed those old doors into something that's useful for you. Waste not, want not!
Hi Kelly! Thank you for such a nice comment and your honesty! Sometimes it takes me a few tries, but (hopefully!) I land on a good solution! Have a great day!
Pingback: DIY Large Pin Board (with an acrylic dry-erase surface!) | The Homes I Have Made