DIY Valentine Vases with a Cricut
I’ll be the first to admit that I don’t do a lot of seasonal decorating. But when I do, I like it to be quick and inexpensive since I tend to change what I put out from year to year. These paper Valentine vases are a perfect project to get your home ready for Valentine’s Day last minute and on the cheap! Not only do they come together fast, but they are a great way to dress up any plant or bouquet on your mantel or romantic dining table. Let me show you how these paper vases come together!

There are three things I really love about this easy Valentine’s Day project!
First, you don’t need any fancy supplies. Some solid-colored cardstock, tape, and your Cricut machine are all you need.
Second, these are more like “wraps” than vases. As such, they can be made to fit around any waterproof vessel you already have on hand (as long as it’s cylindrical). This means you can make these Valentine vases just for the season and then discard them once February has passed…all without extra holiday decor to store!
And finally, these Valentine vases are 100% customizable. Thanks to your Cricut machine, you can create pretty much any love-themed design and then cut it out of whatever paper you like!
Supplies Needed
Here is what you need to make these simple DIY Valentine Vases:
- Cricut Machine – This project can be made with any electronic cutting machine, including all three Cricut models (Cricut Maker | Cricut Explore | Cricut Joy), but the size vase you can make will depend on which machine you use (e.g., Cricut Joy can only cut 4.5″ wide.)
- Fine-Point Blade (the one that comes with your machine)
- Standard Grip Mat
- Cardstock – This project looks the best with solid cardstock in pinks and reds; however you can choose any sturdy paper you like.
- Although not required, 24″ long paper makes this project much easier.
- Since this project wraps around a container, there is no need to use special waterproof paper unless you want to.
- Double-Sided Tape or craft glue (tape is recommended, as it doesn’t require dry time).
- Measuring Tape
- Glass or plastic cylindrical vase – This project works best on vases that are perfect cylinders. Even if you don’t have a traditional glass vase on hand, a water bottle, medium-sized glass, flower pot, or ceramic vessel will also work!
- Flowers or plants – as desired
Step 1 – Find & Measure Vases
Once you’ve identified what waterproof vessels you can use for your Valentine vases, start by measuring them with a tape-style measuring tape. You will need both the height of the entire vase, as well as the circumference. These measurements determine the size of the card stock wrap you’ll make with your Cricut.

Step 2 – Design the Valentine Vases
With measurements in hand, open Cricut Design Space (or whatever software you use for your electronic-cutting machine).
Create the Vase Wrap
Use the Shapes menu along the left-hand toolbar to insert a square for each vase you want to make. Click the Padlock icon (lower left corner handle) to unlock the proportions and then manually type in the dimensions that match your vases as follows: vase height x (vase circumference + 0.5″).
TIP! I recommend adding 0.5″ to the circumference measurement to allow for some overlap at the seam.
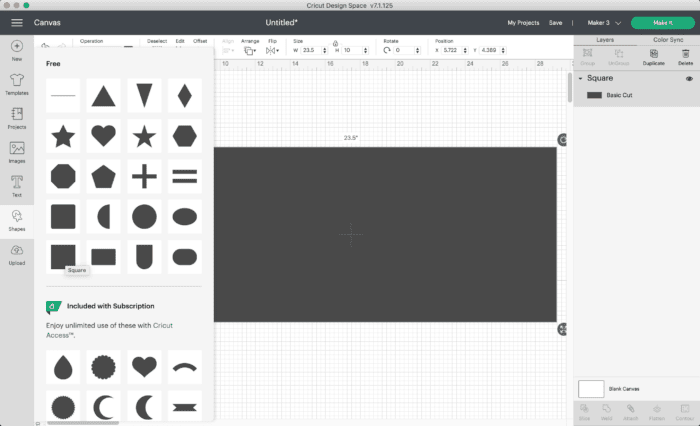
Keep in mind that on a Cricut machine, you can only cut paper up to 23.5″ long. If your vase has a longer circumference, you will need to tape paper together end-to-end.
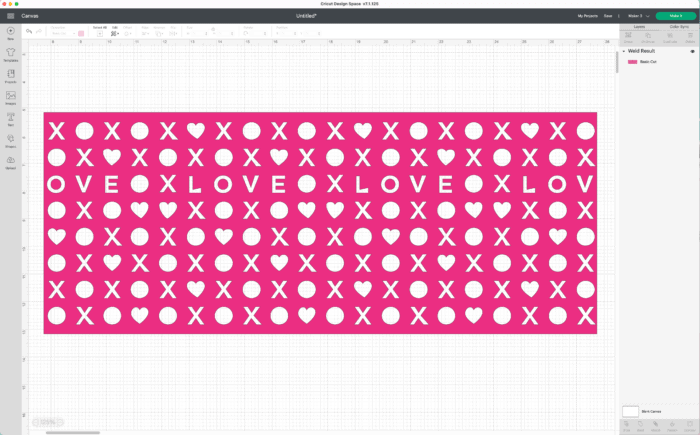
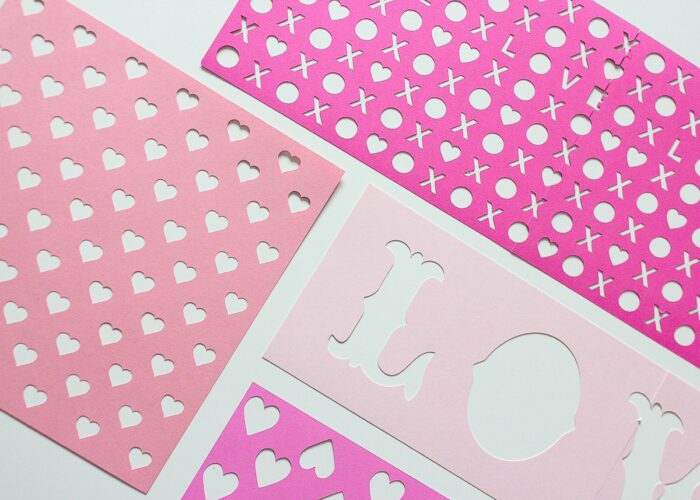
Create the Vase Design
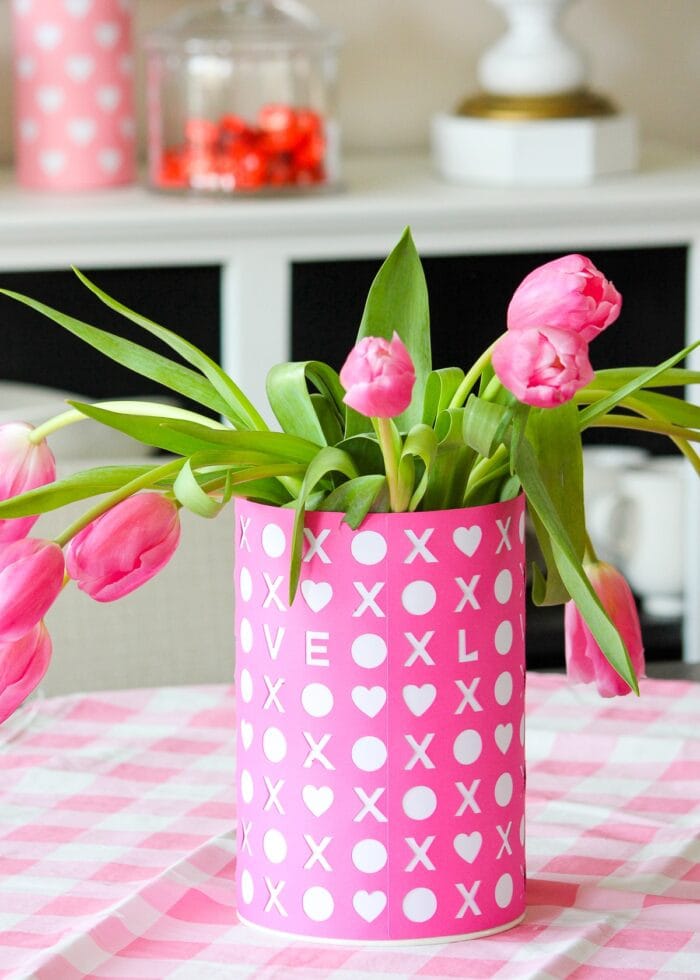
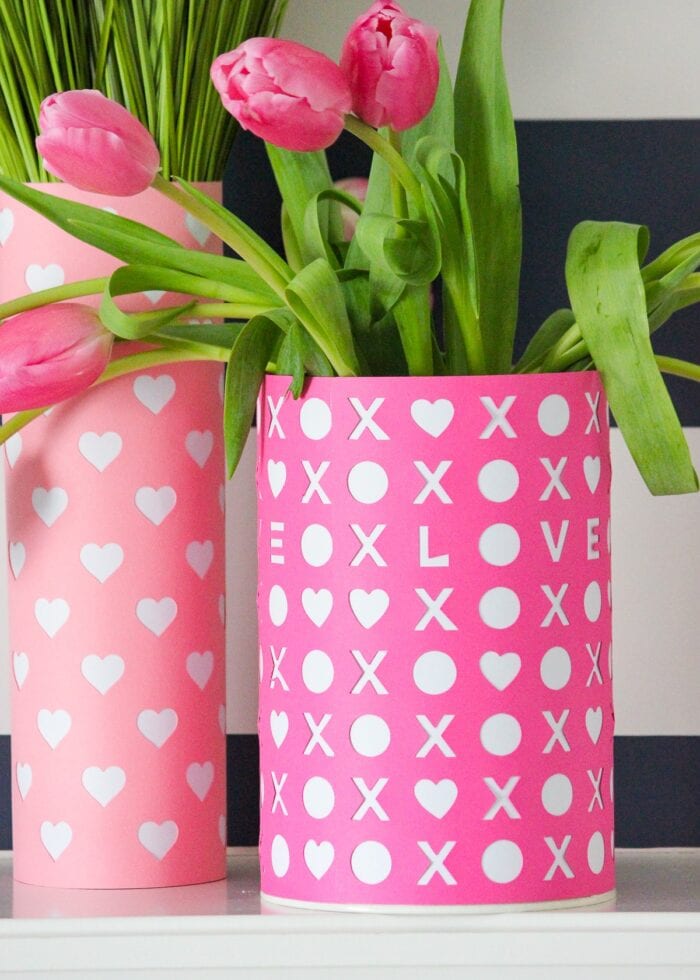
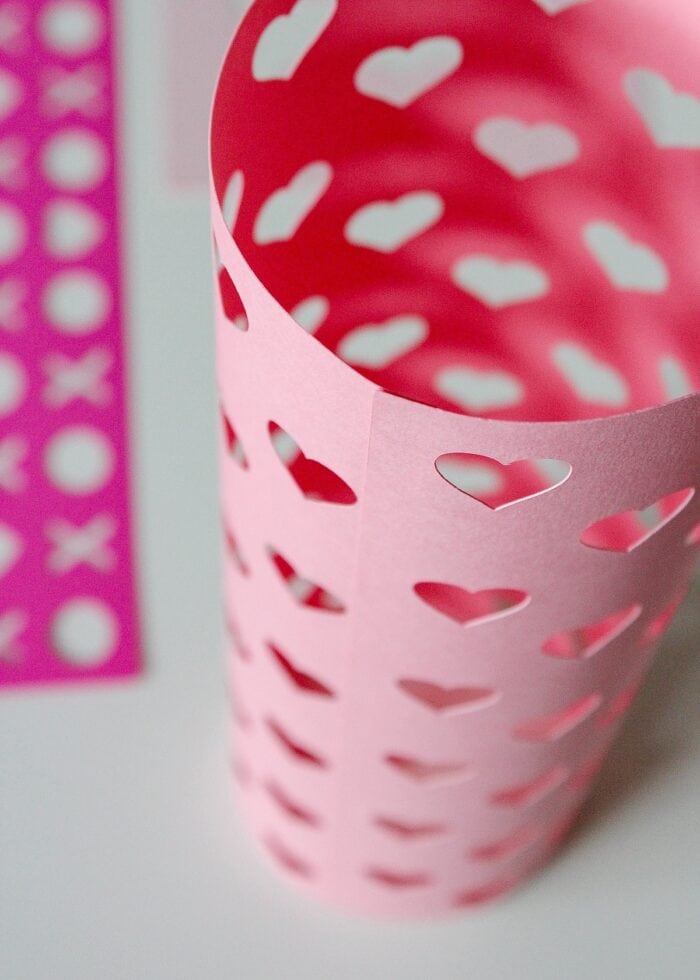
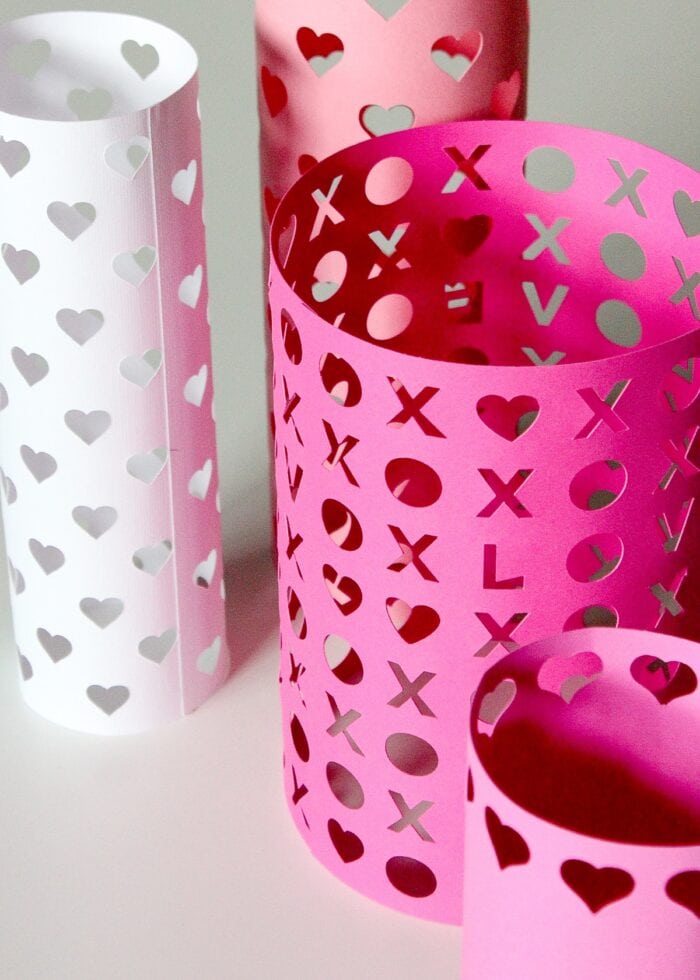
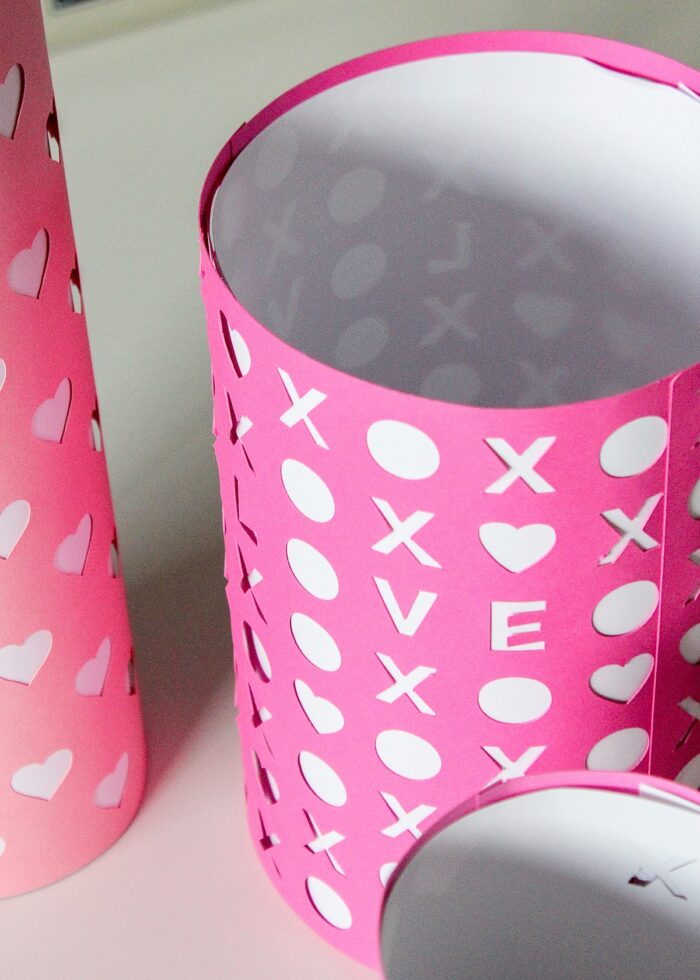
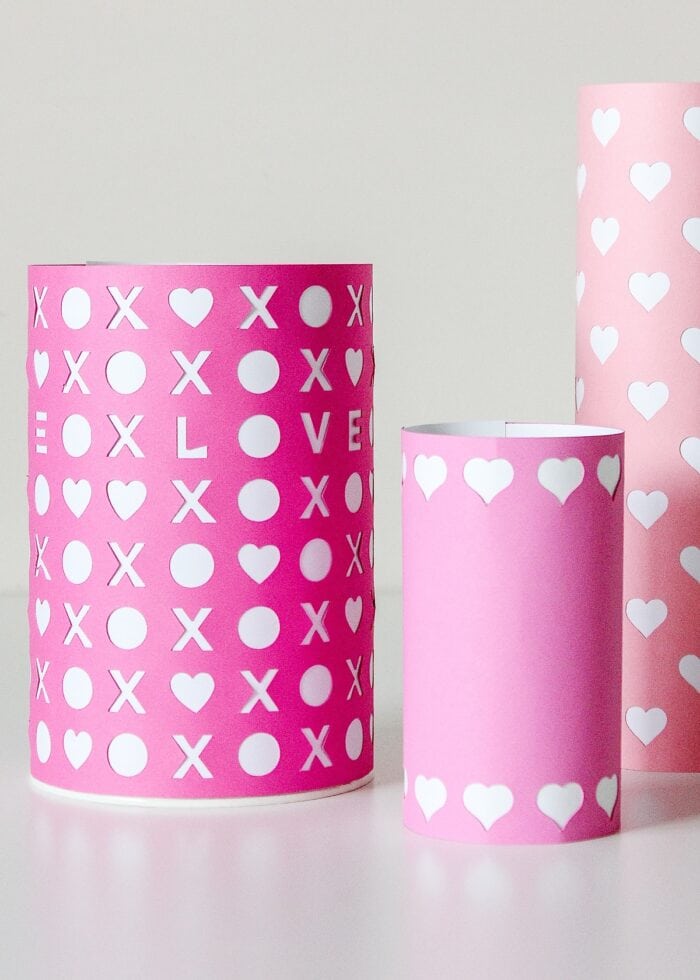
With the rectangles sized for your particular vase(s), you can now add any design you want. My hot pink vase comes from a card design in the Cricut Design Space Image Library (M4CF61), while the light pink vase was made using a set of pre-spaced hearts I quickly designed myself. Don’t hesitate to create your own unique design!
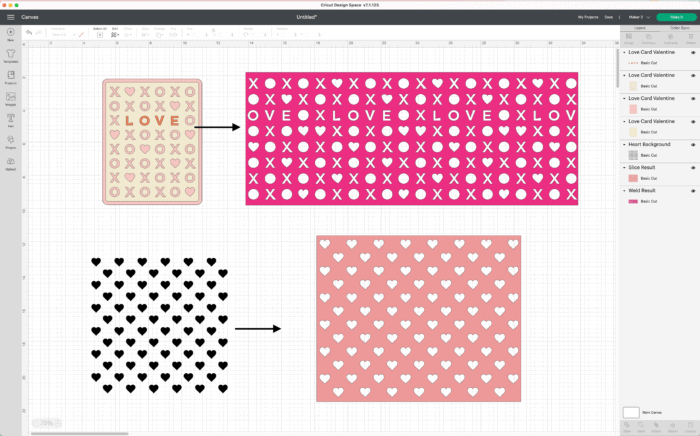
Once you find a design you like, place it on your canvas.
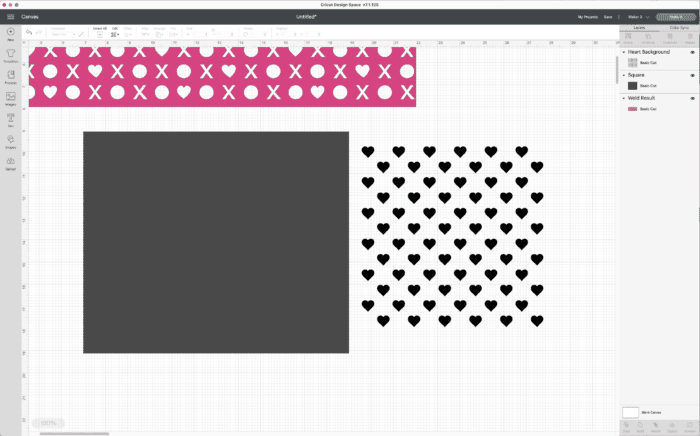
Then, size the pattern/image until it fits the height/width of the vase wrap. You may need to duplicate your pattern/image in order to completely cover the wrap layout.
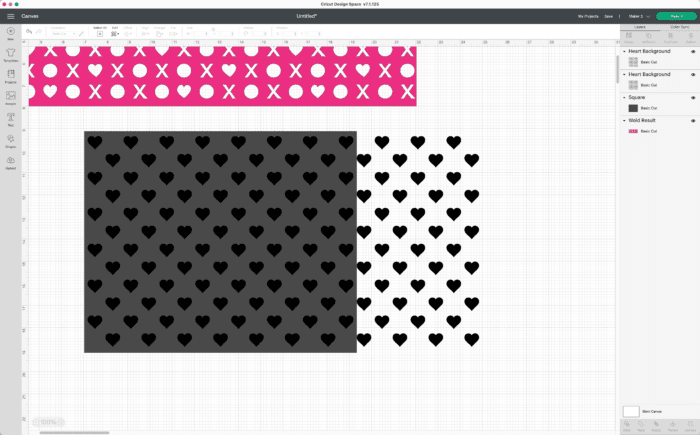
Once you have your pattern exactly as you want it, use the Slice Tool to cut the pattern out of the vase wrap. If you need more help with this, see my full tutorial: Slice Tool in Cricut Design Space.
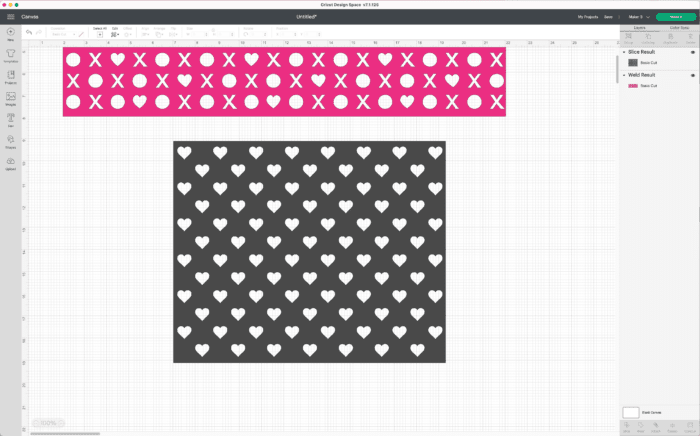
TIP! You can only Slice two objects at one time. So for longer designs where you repeat a pattern, you will need to first Weld your pattern together (into one layer) before slicing it out of the wrap shape. If you need more help with this, see my full tutorial: Weld Tool in Cricut Design Space.
Want to save this post?
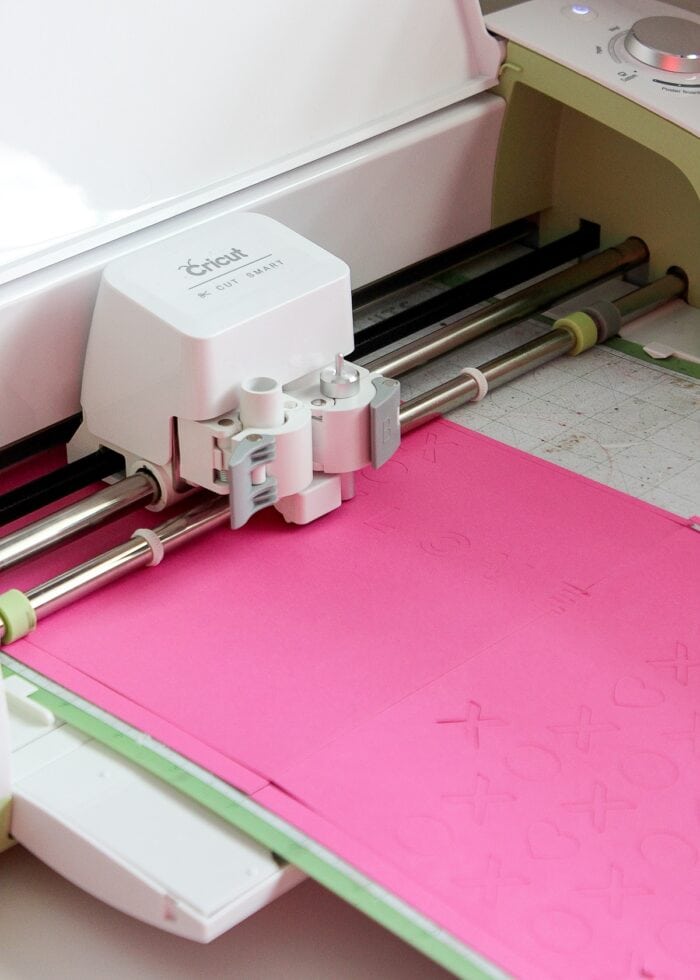
Step 3 – Cut out the Valentine Vases
With your Valentine vases fully designed, cut them out with your Cricut machine from the paper of your choice.
Step 4 – Assemble the Valentine Vases
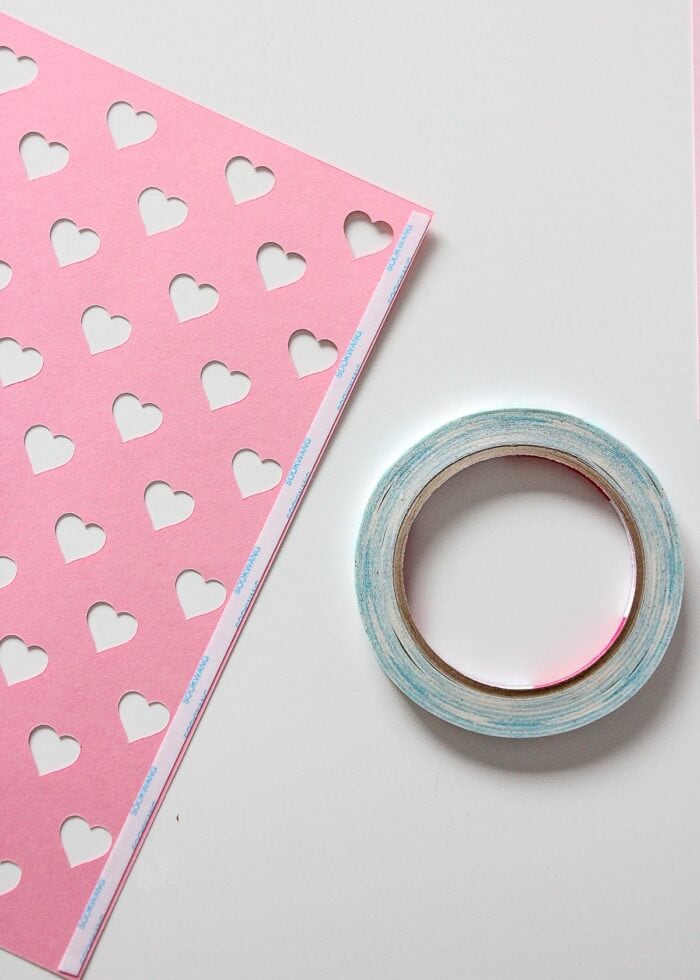
With the vases fully cut out, place a length of double-sided tape all the way down the back of one side of the wrap.
Peel off the paper backing from the tape…
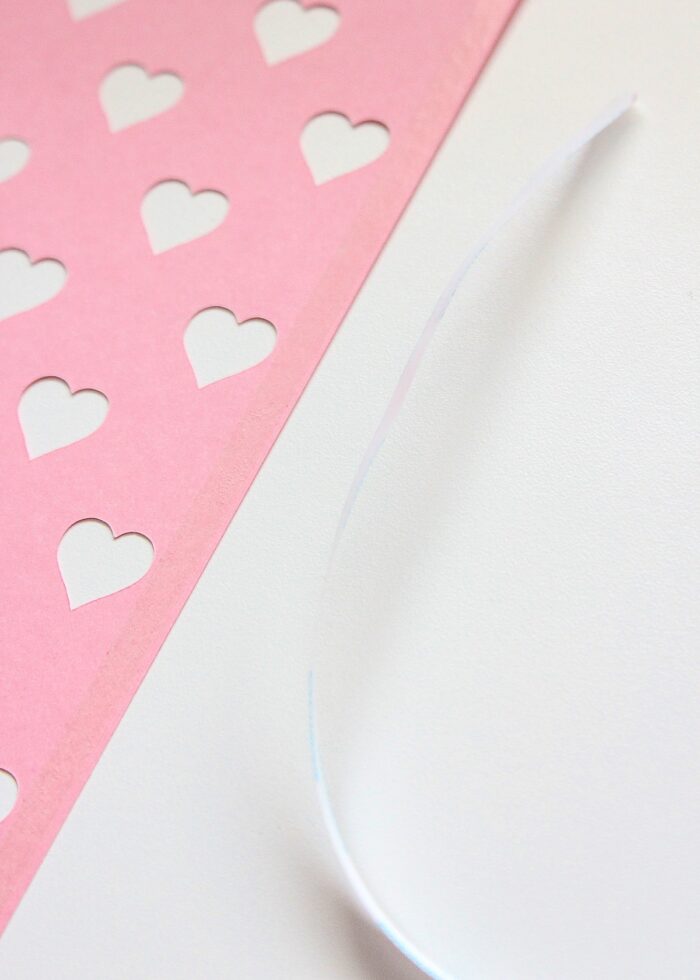
…and roll the paper vase into a cylindrical shape, overlapping the taped edge onto the front of the other side of the wrap.
Unless you are really good at getting precise measurements and rolling/taping perfectly, you might want to form the paper vases around your waterproof vessels so they end up sized just right!
Step 5 – Place Paper Vases Onto Containers
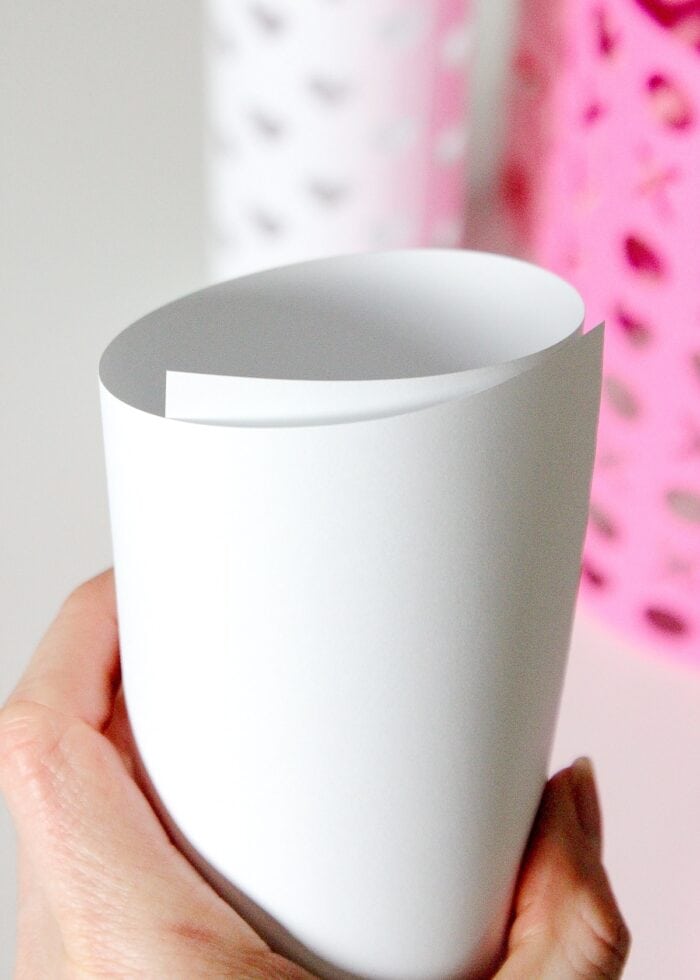
If your waterproof vessels are white (or another good contrasting color), you can simply slide the paper Valentine vases on. However, if you used a clear or odd-colored vessel, here’s a quick trick for creating a white background.
Simply trim a piece of light-weight printer paper down to the matching dimensions of your vase wrap (minus a little height). But don’t bother taping it together! Simply roll it up…
…and then drop it right into the assembled paper vase sitting on a flat surface.
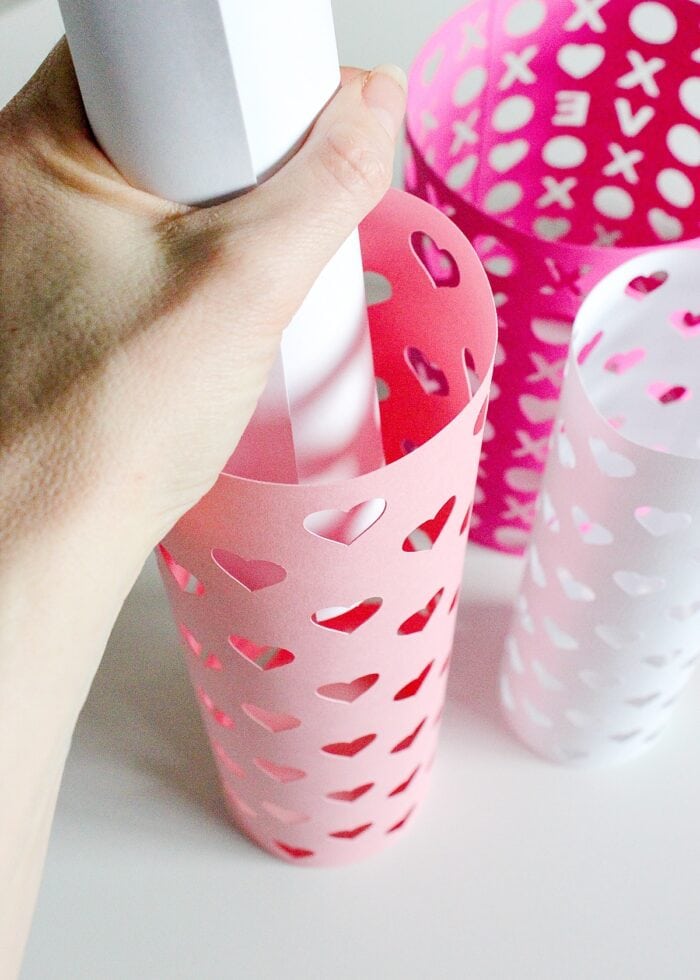
Once you let go, it will take the shape of the bigger paper vase (although you may need to adjust it so it’s flat and even all the way around).
This way, the waterproof vessel(s) underneath are completely camouflaged and you end up with a really coordinated collection in whatever color scheme you like!
Step 6 – Add Flowers!
Now that you have pretty Valentine vases wrapped around waterproof vessels, all you need to do is add flowers or plants!
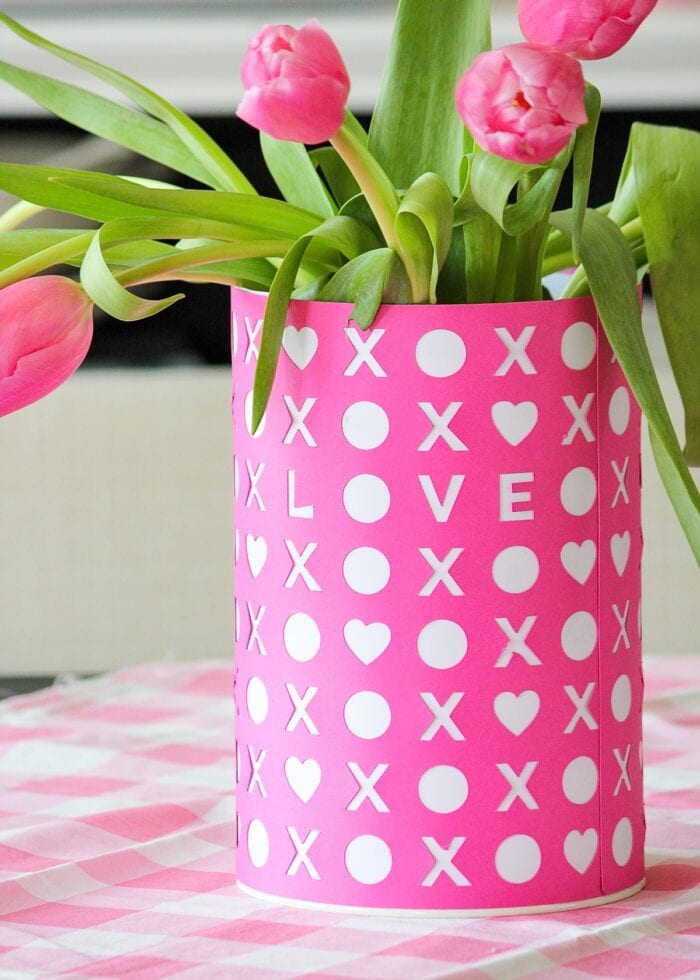
I love how this project uses pots or vases you might already have around your house. Additionally, it’s a great way to dress up grocery store flowers or plants as unique Valentine’s Day gifts for teachers, co-workers, family etc!
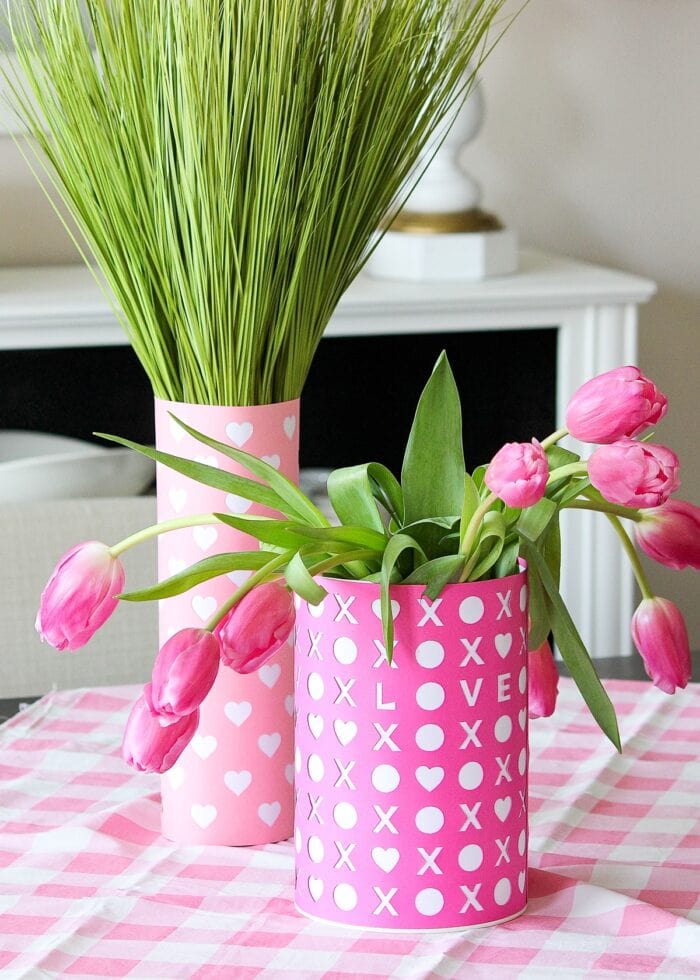
Whether it be for a mantel or sprinkled around the house, as a teacher’s gift from the kids, or the finishing touch on your romantic dining room table, there’s still plenty of time for this quick project before Valentine’s Day! I hope you give these paper Valentine vases a try!
Megan
2 Comments on “DIY Valentine Vases with a Cricut”
Thank you for sharing your Valentine Vases, these are awesome sure going to give that a try. What a great idea! Stay safe with your family.
I LOVE this idea! You could even incorporate the teacher’s name &/or holiday greeting in ur design. Or ur children’s names, etc.
I also appreciate the Emergency Kit reminder. We watched that traffic nightmare, also, & thought then that we should fill out our existing kit. And then promptly forgot all about it, naturally! Your well planned version put ours back on the top of my To Do list. Thanks for all your hard work and inspiration!
Dianne