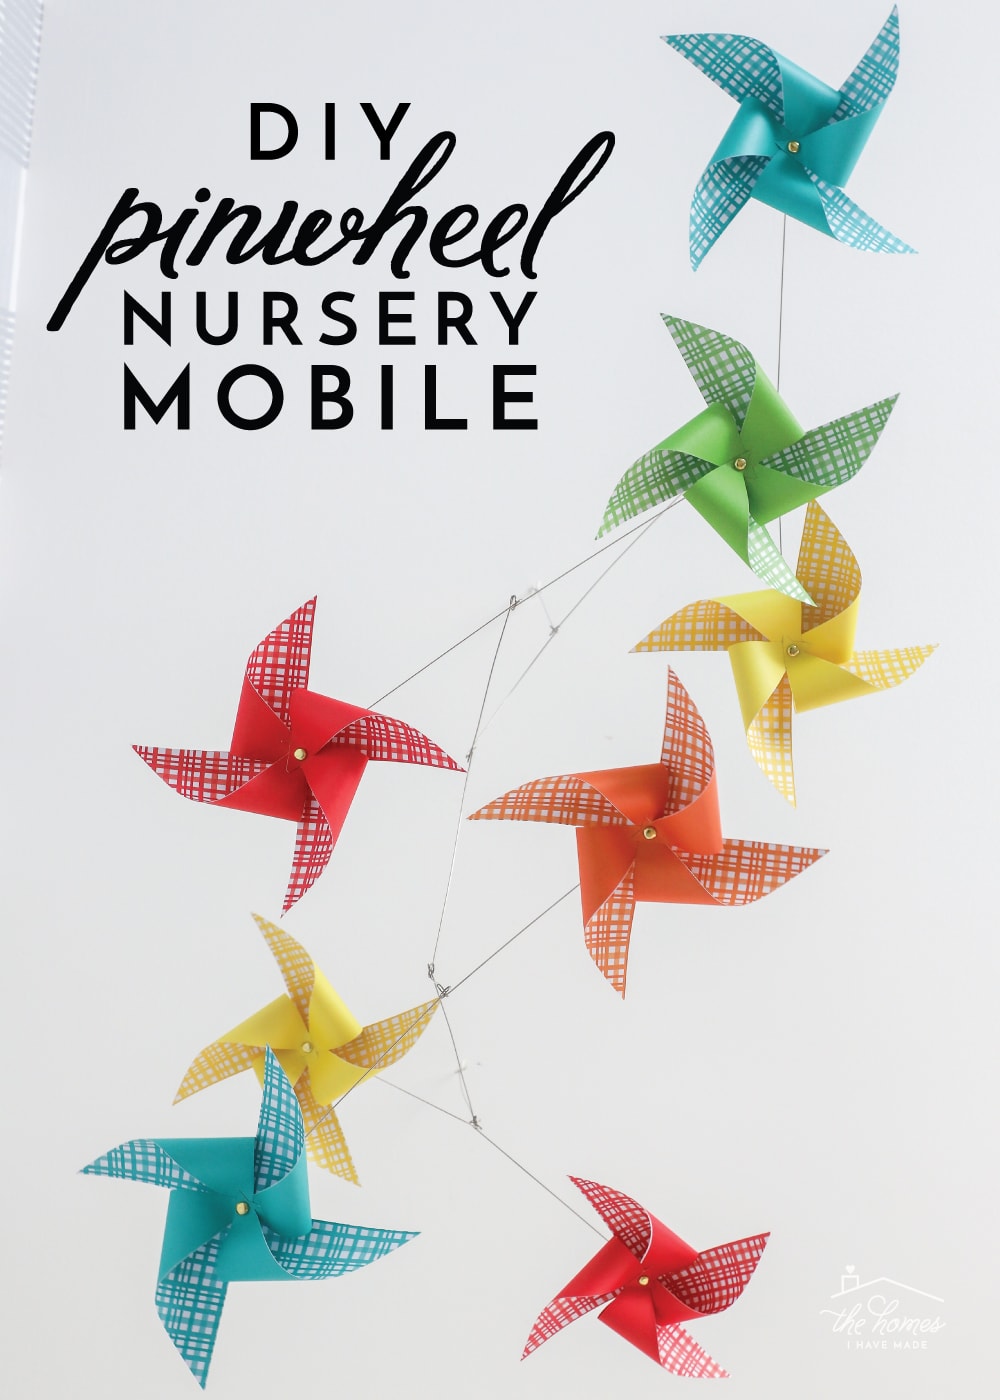
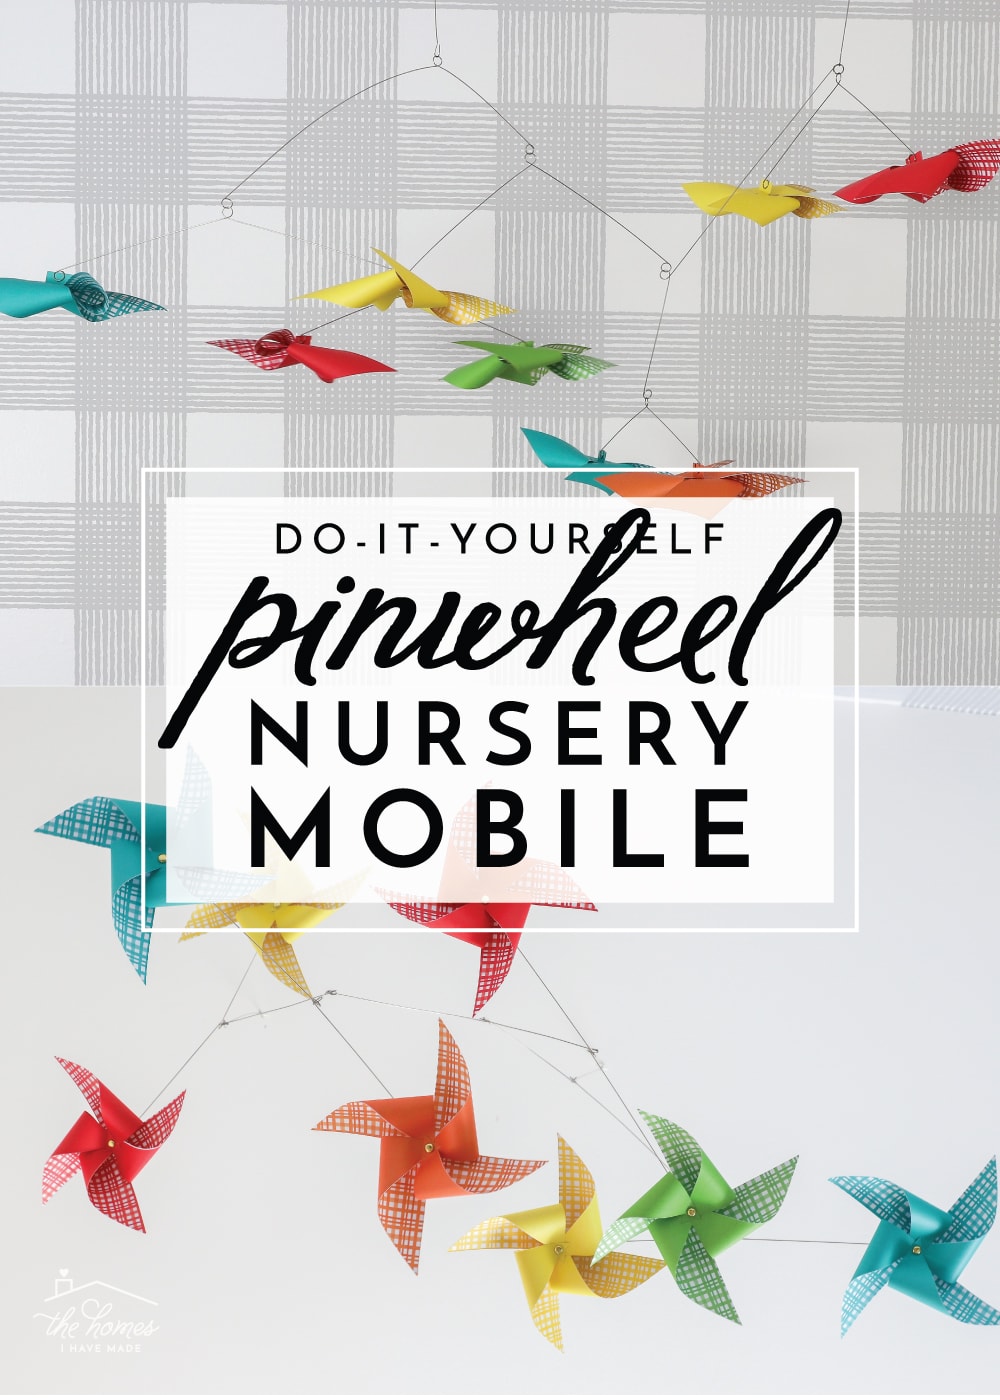
DIY Pinwheel Mobile for the Nursery
While most of the last few months has been been focused on getting unpacked and settled in, I was also on a mission to get Jack’s nursery as “done” as possible before he arrived. I realize brand new babies don’t need a decorated nursery; but I learned with Sam, that having the nursery (mostly) complete really allowed me to enjoy the newborn phase (especially since so much of the early days are spent sitting and nursing and staring at the nursery walls!) With time not really on my side this time around, I spent most of July laser focused on Jack’s room, pulling together the design plan I shared. Admittedly, most of the room came together rather quickly thanks to some statement wallpaper and off-the-shelf items. However, I did make time for some easy yet very high-impact DIY projects to help the room feel more personal and extra special. This DIY pinwheel mobile was not part of my original design plan, but once I saw a version on Pinterest, it moved to the very top of my “To Make” list. This mobile wasn’t just really easy (and fun!) to make, but it also makes a big, colorful visual statement that I absolutely adore! It’s perfect for any nursery theme, can be customized for any color and style, and is pretty inexpensive too! Let me show you how I did it!
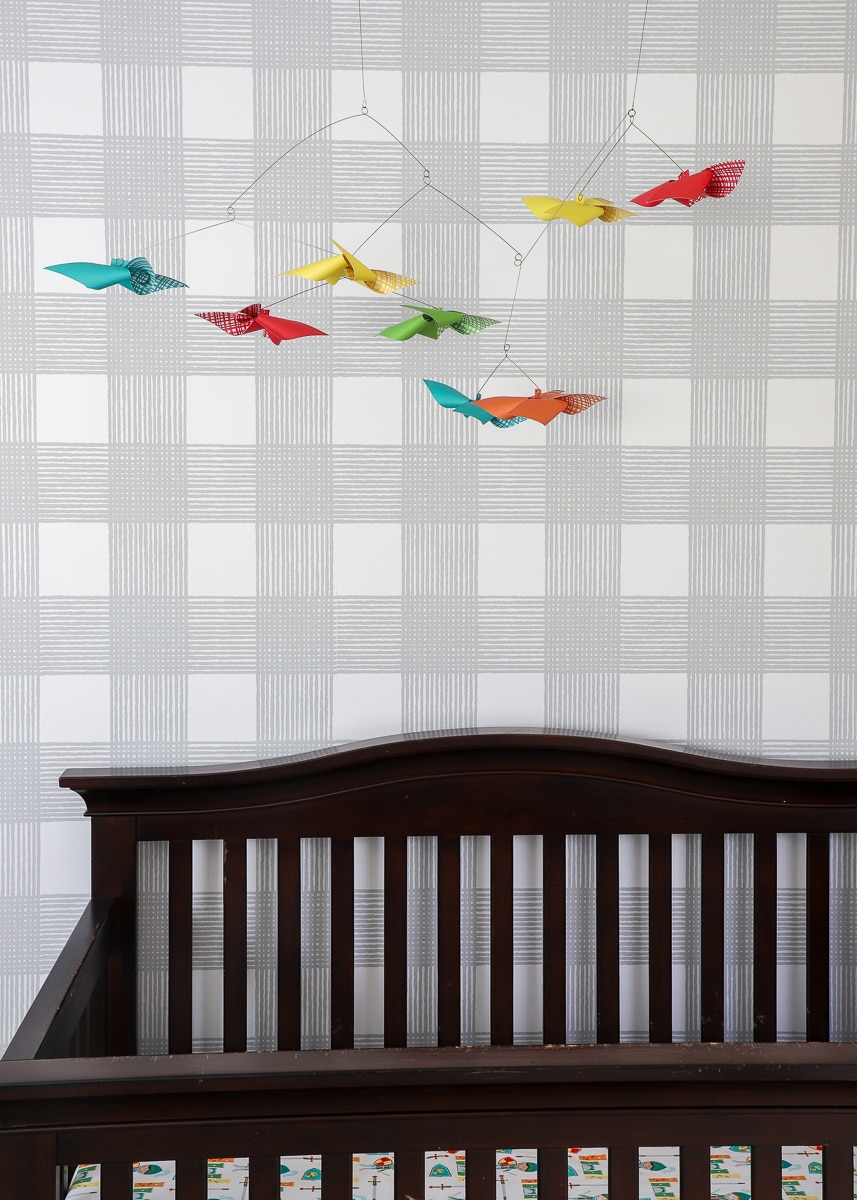
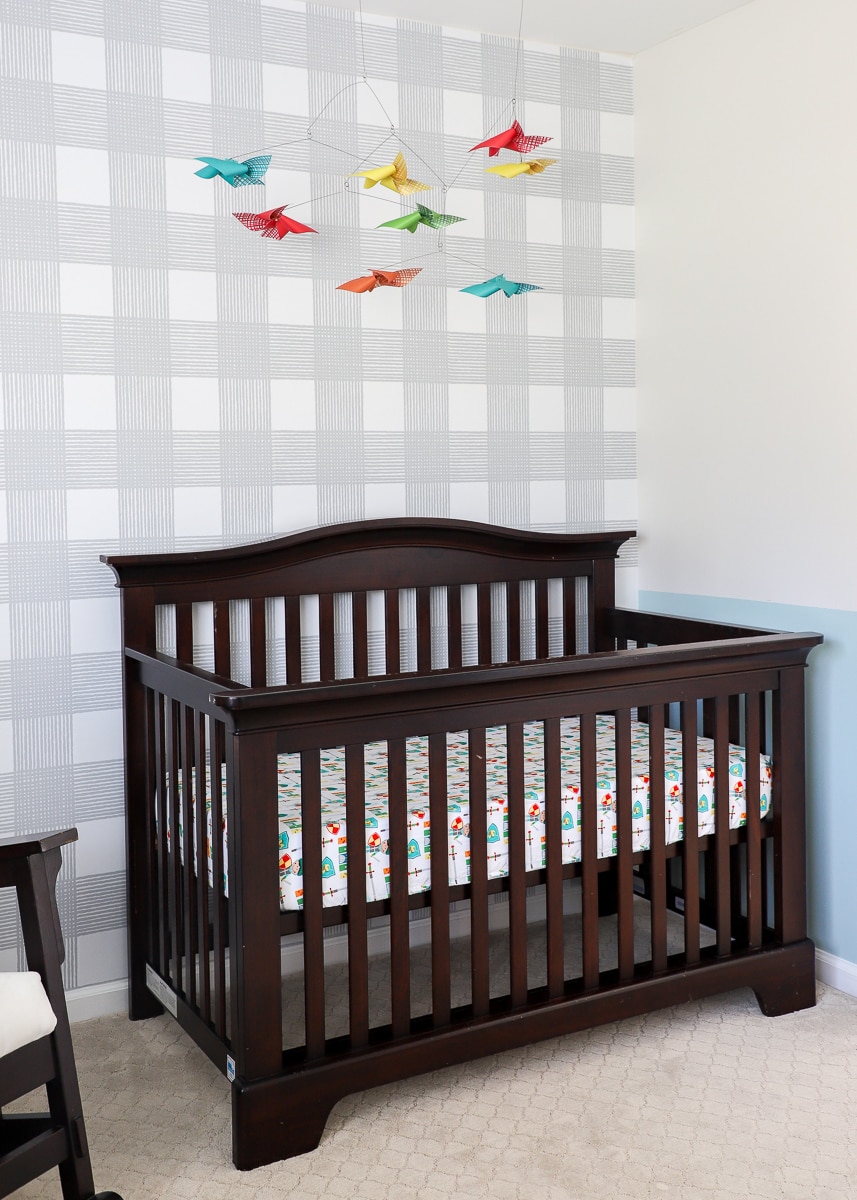
Because of how I have the crib and the rocking chair positioned in the nursery, a statement art display behind the crib wasn’t quite going to work (you’ll see why as I share more and more of this room in the coming weeks). Instead, I thought a large, colorful mobile would be just the thing to break up the plaid feature wall (which is amazing, by the way!), and give the baby something fun to gaze at!

When I came across this pinwheel mobile via Pinterest, I knew it was the whimsical statement piece I was looking for. And as much as I love to support creative shops on Etsy, DIYing my own version would allow me to save money and customize it for our nursery!
After crafting a few simple paper pinwheels (which are so easy and fun to make!) and securing them to an off-the-shelf photo mobile, I ended up with the charming, colorful display I was aiming for!
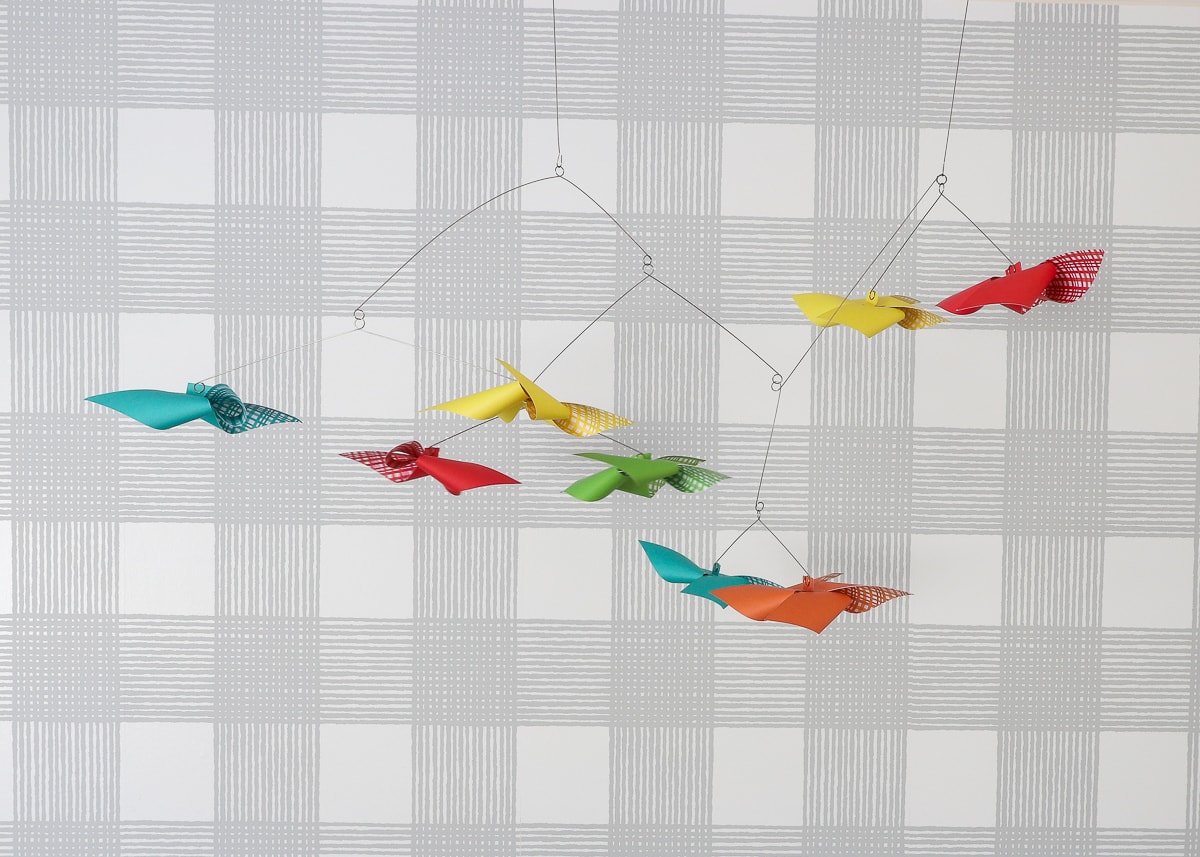
This mobile is darling at eye level (and the air circulation in the room causes it to gently move and spin) but Jack’s view from within the crib is just so fun! I mean…I could certainly lay and look at that all day!
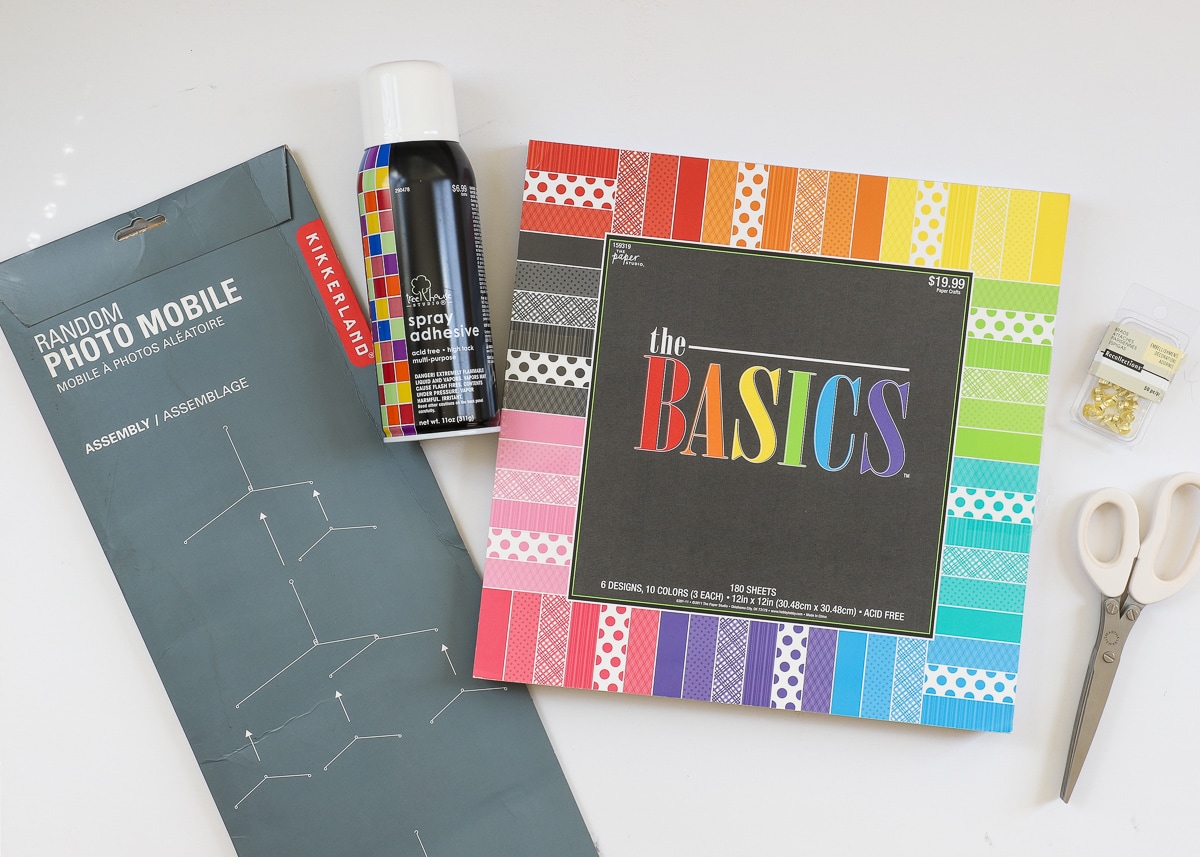
Supplies Needed
This mobile came together really easily and is something anyone can do! Here is what you need:
- Patterned scrapbook paper – double sided is preferred but not necessary
- Spray adhesive – only if you’re using single-sided scrapbook paper
- Paper brads
- Photo mobile – there are lots of options, I used this one
- Other tools: scissors or paper trimmer, hole punch, X-acto knife, ruler, brayer, hot glue gun and glue sticks
How to Make Double-Sided Paper
Pinwheels, especially on a mobile like this, look best when made with double-sided patterned paper. While there are lots of double-sided scrapbook papers available, I couldn’t find any that worked just right with our nursery scheme. Plus, I was worried that too many patterns against the plaid feature wall would look really busy.
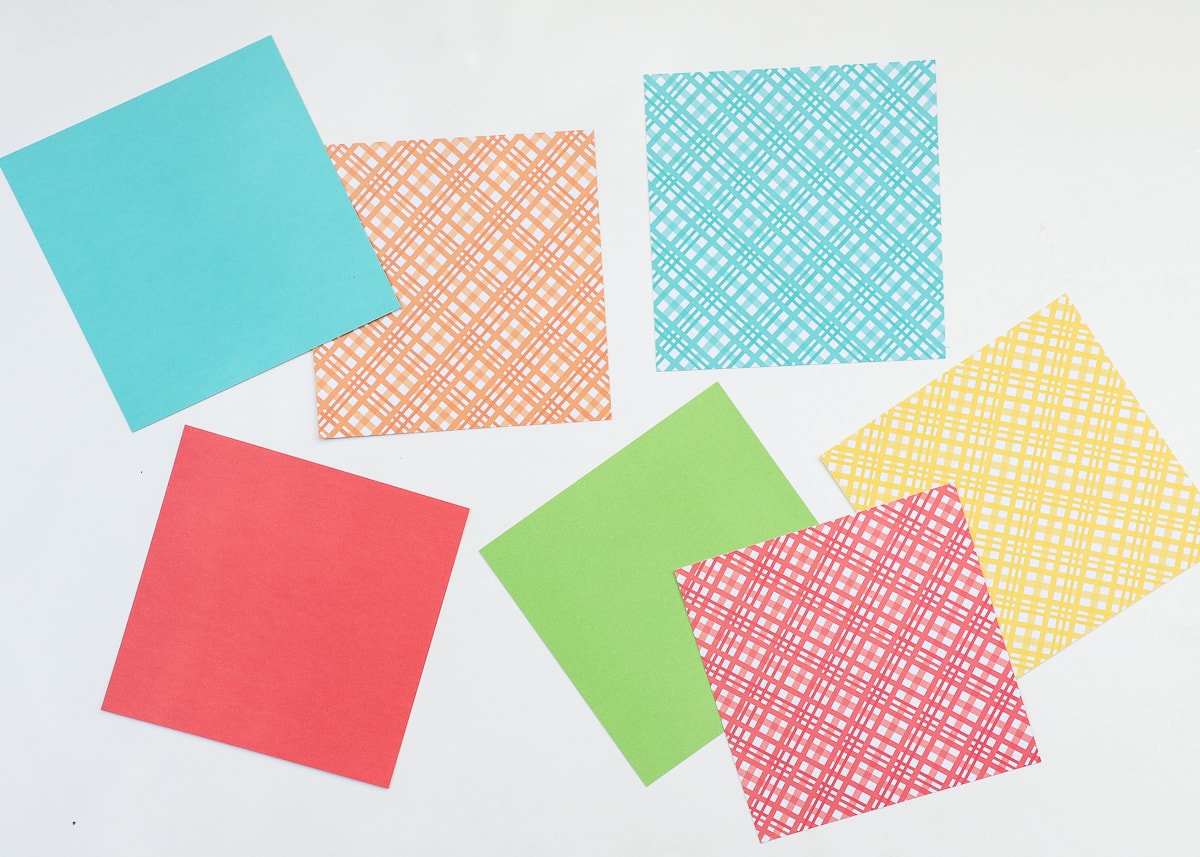
When I came across this stack of paper at Hobby Lobby (below), I decided to make my own double-sided paper for this project. I love that the plaid paper nodded to the plaid feature wall, but since each pattern had a coordinating solid, I wouldn’t end up with too many patterns in play!
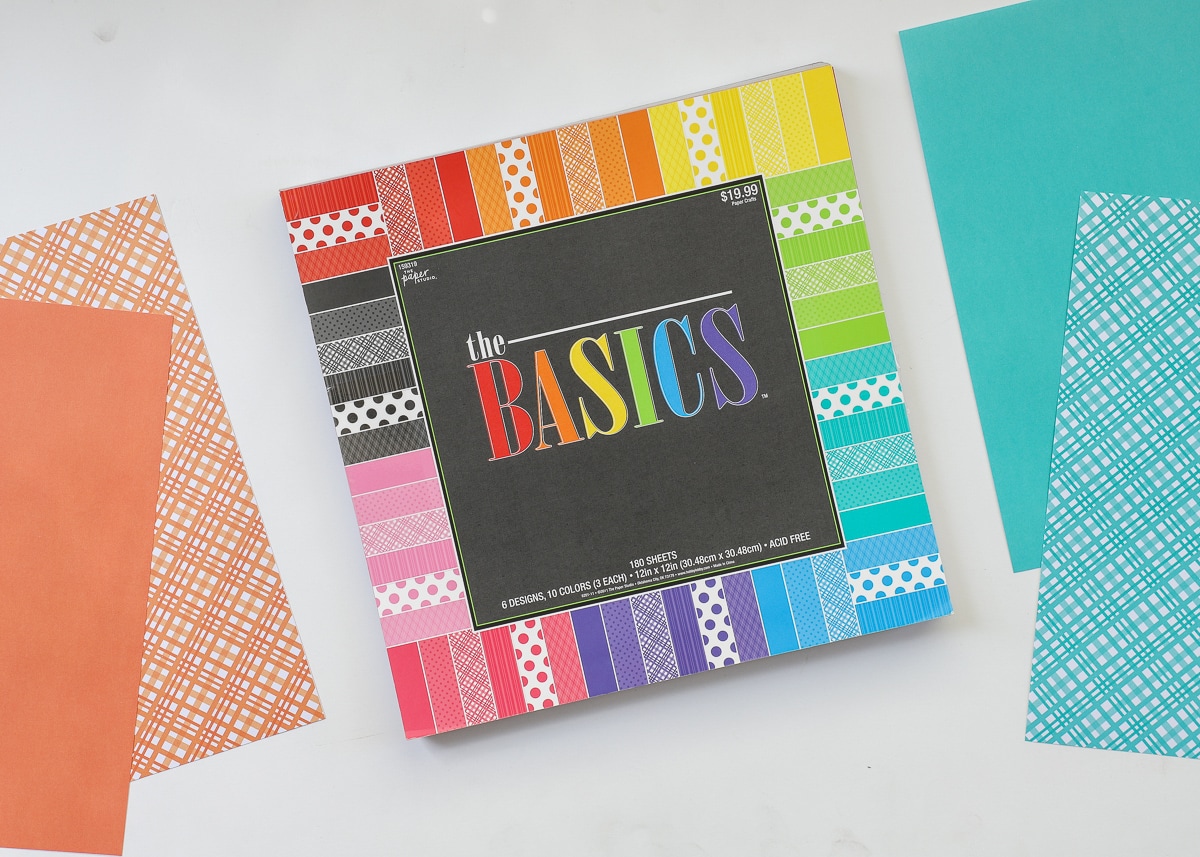
If you can’t find any double-sided paper you love, here’s how to make your own!
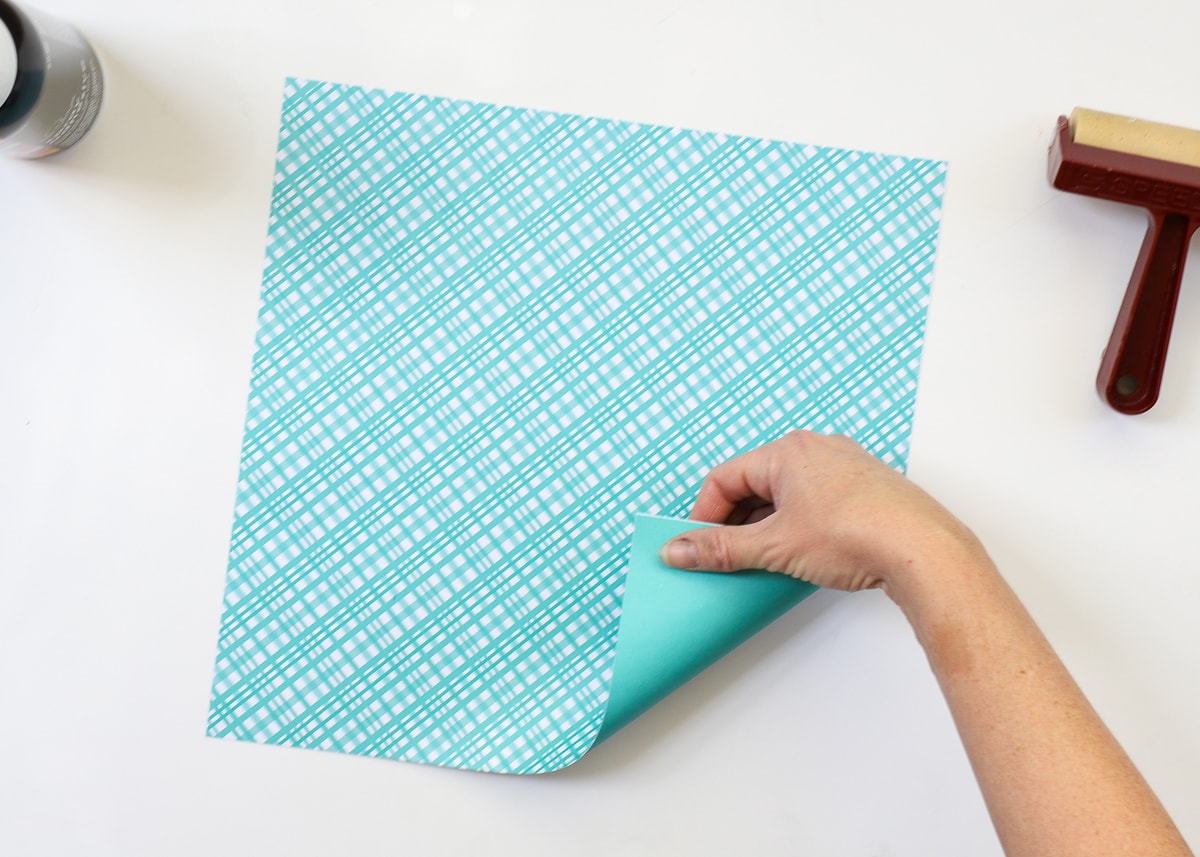
First, simply spray the back of one sheet of scrapbook paper with strong spray adhesive, ensuring you thoroughly saturate it…
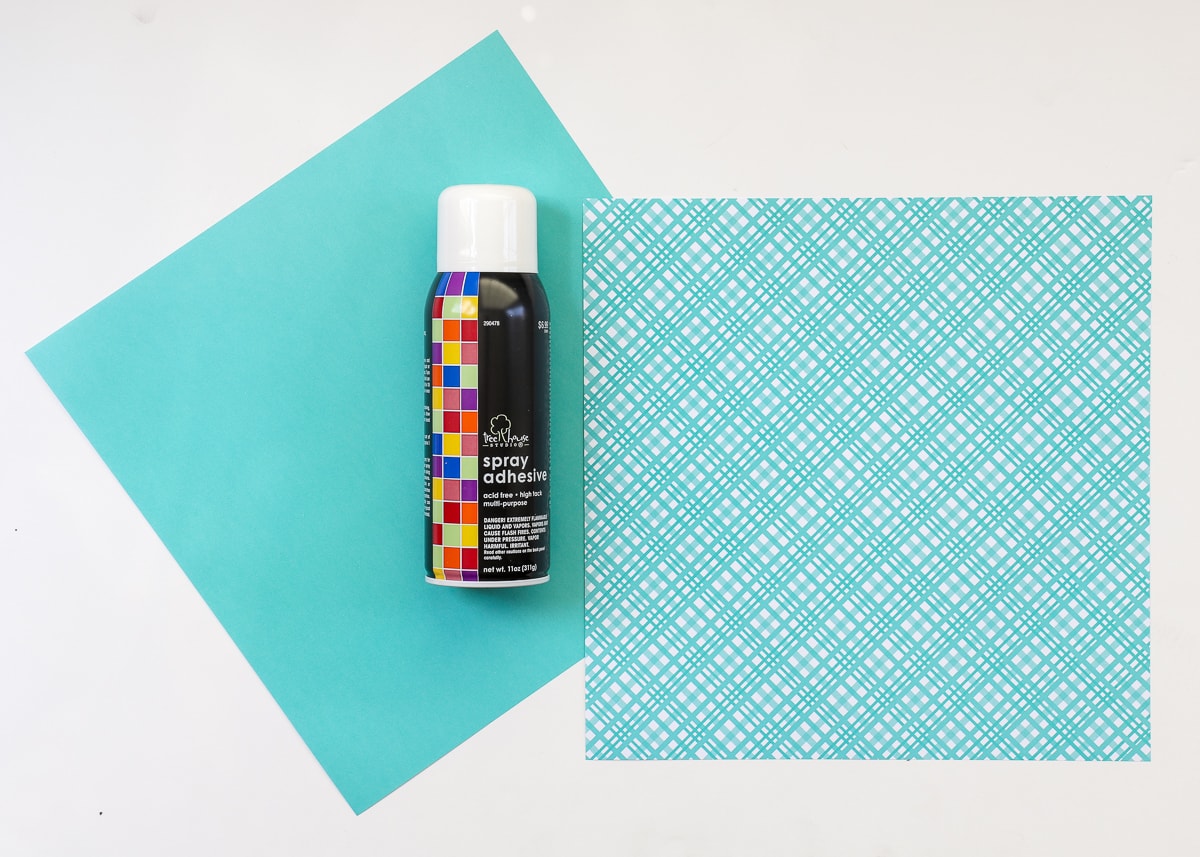
Then, place the two sheets back-to-back (with the patterns facing outward), and use a craft brayer to smooth out any bubbles and ensure the adhesive really sticks to every inch of the papers.
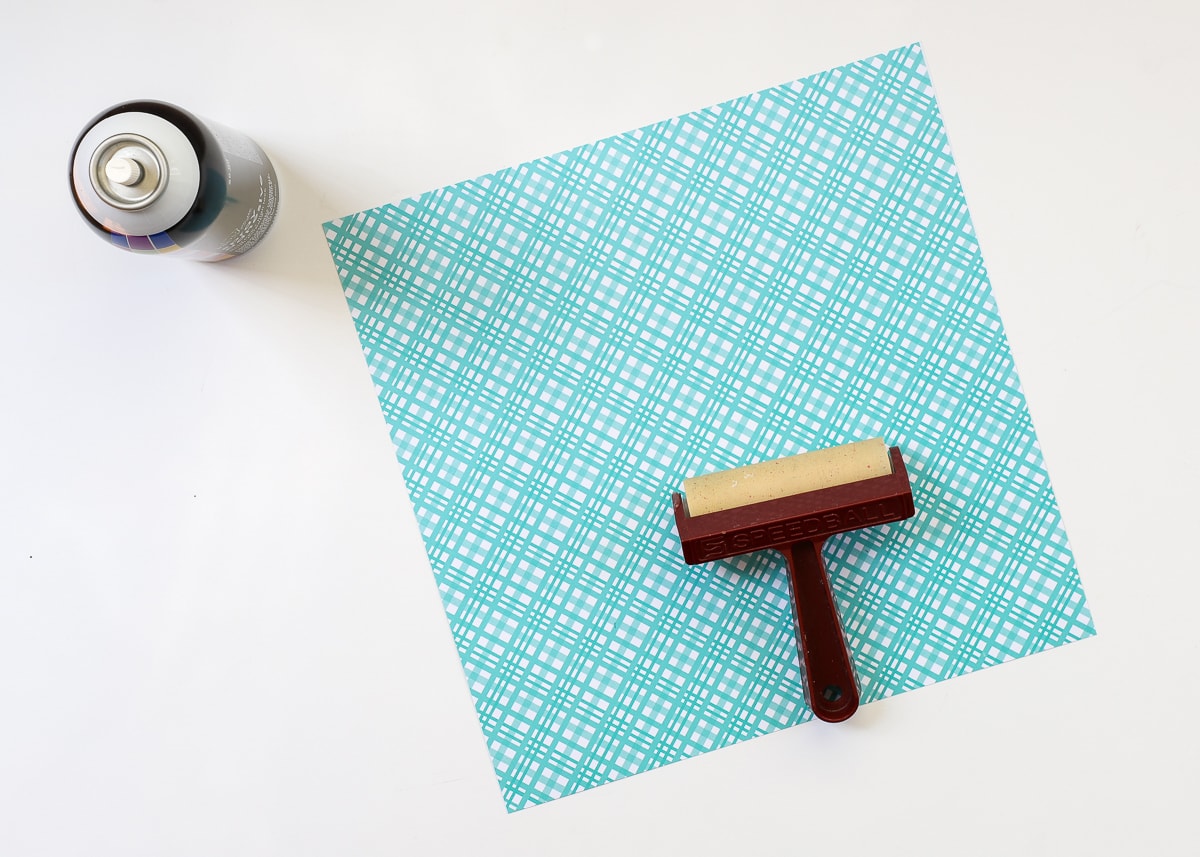
Now you have two-sided paper ready to be cut down!
How to Make Paper Pinwheels
One thing I really love about this project is that the pinwheels are really easy to make! Also, they can be easily customized (size, colors, etc) for your needs, and they don’t require any fancy tools or cutting machines. Whether you’re making pinwheels for this mobile project or for something else, they all come together the same way!
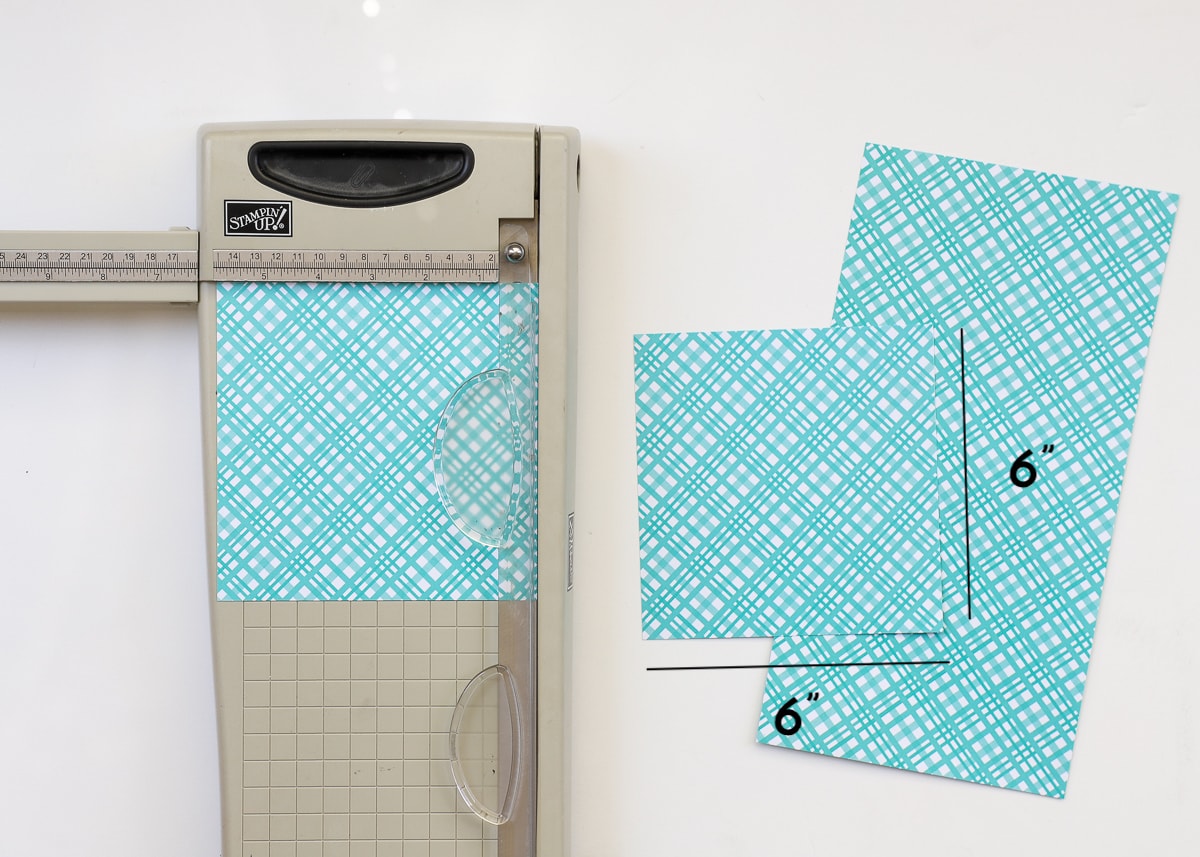
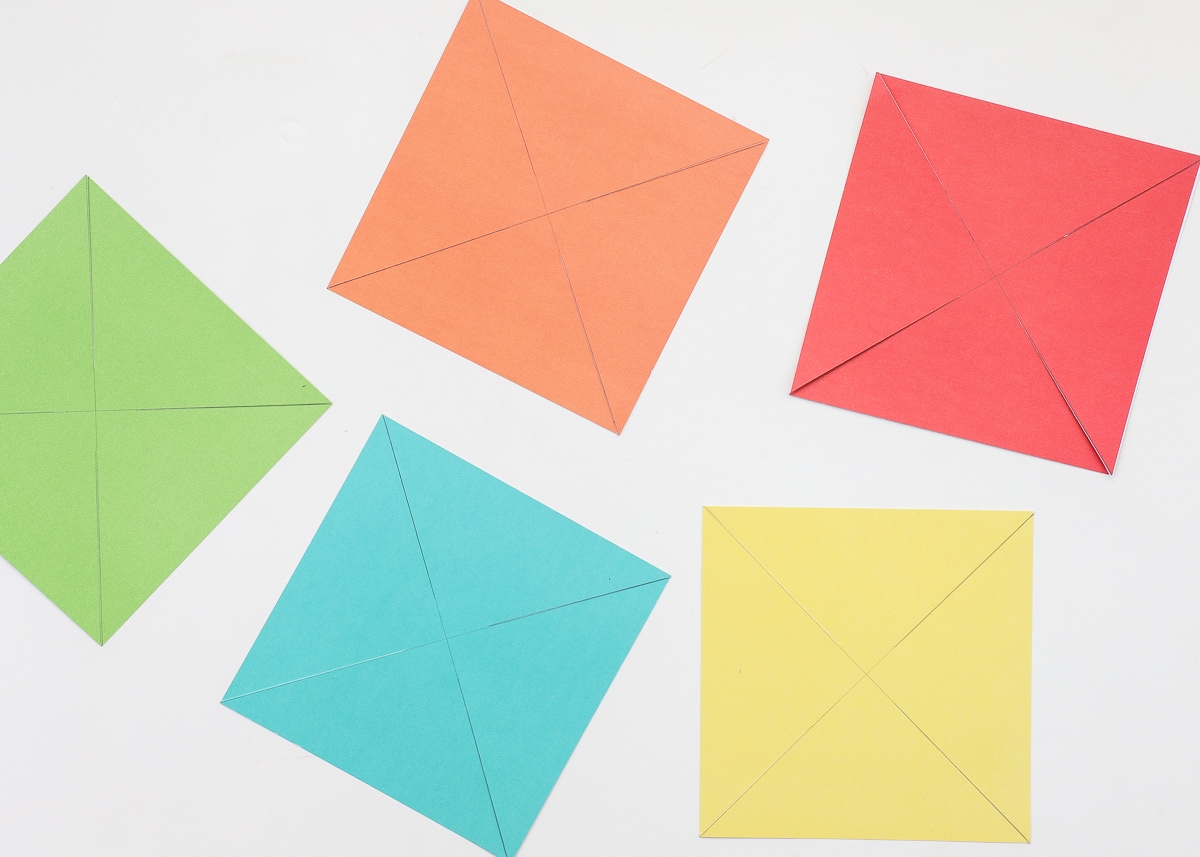
Start by cutting your double-sided paper down into squares using scissors or a paper trimmer. The bigger the square, the bigger the pinwheel. After some experimentation, I determined 6″ squares were ideal for the size of my mobile.
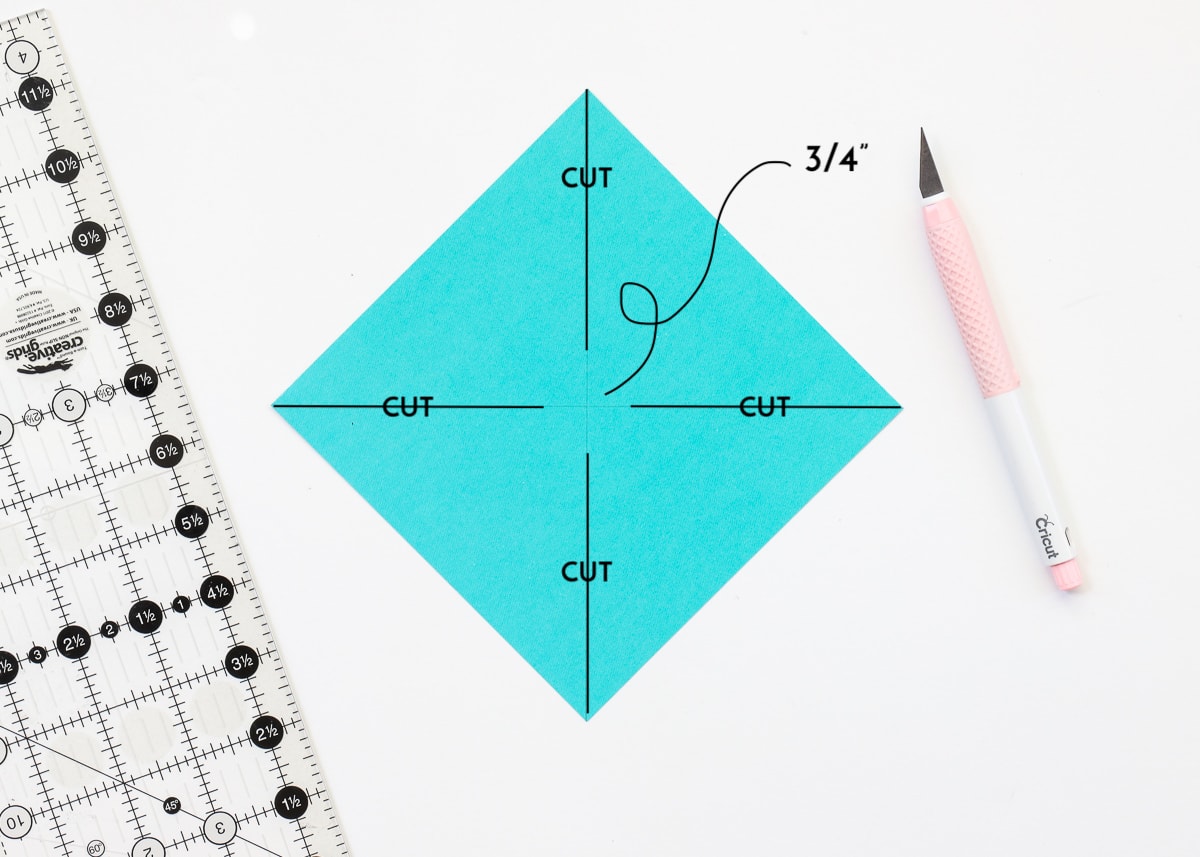
Next, use a ruler and a pencil to draw light lines from corner-to-corner on each square, as shown below.
Want to save this post?
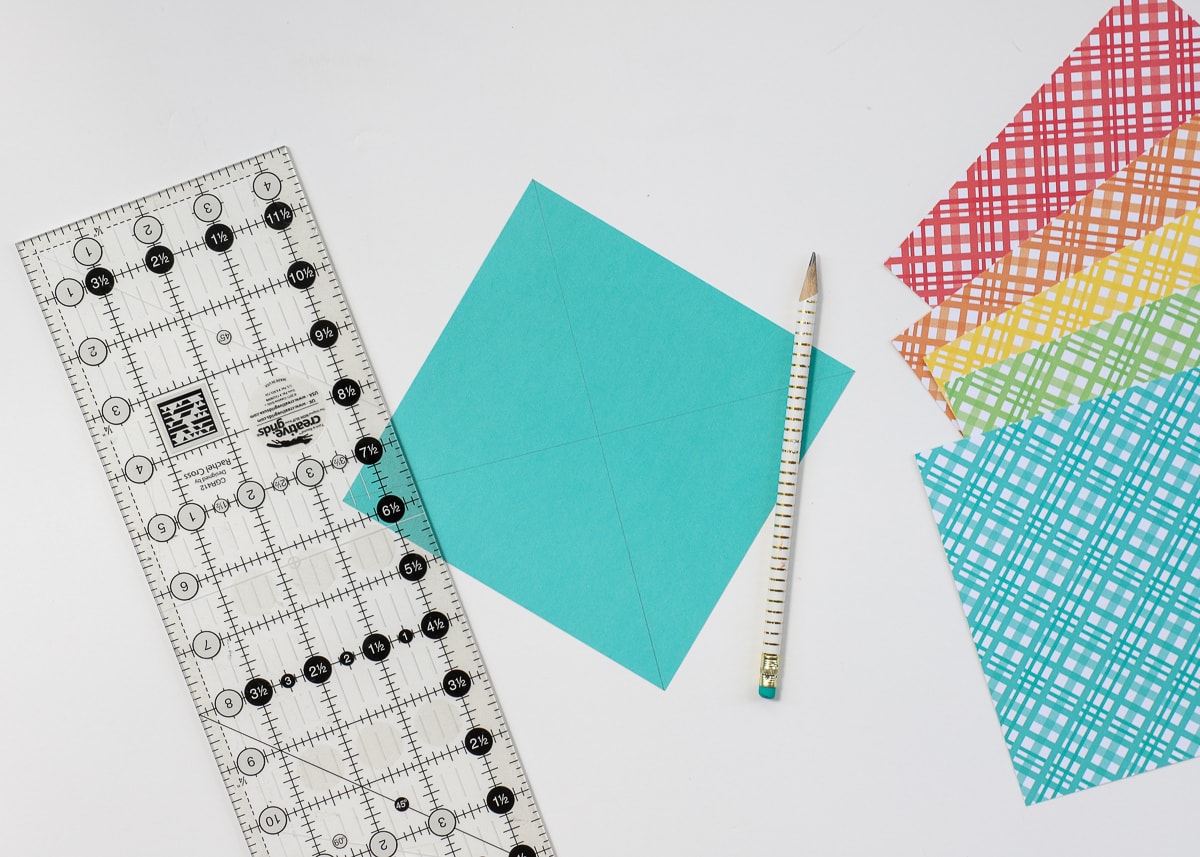
Using an X-acto knife and ruler, cut the square along those lines. Start at the corner, and slice until about 3/4″ from the center intersection. Refer to the picture below to help you.
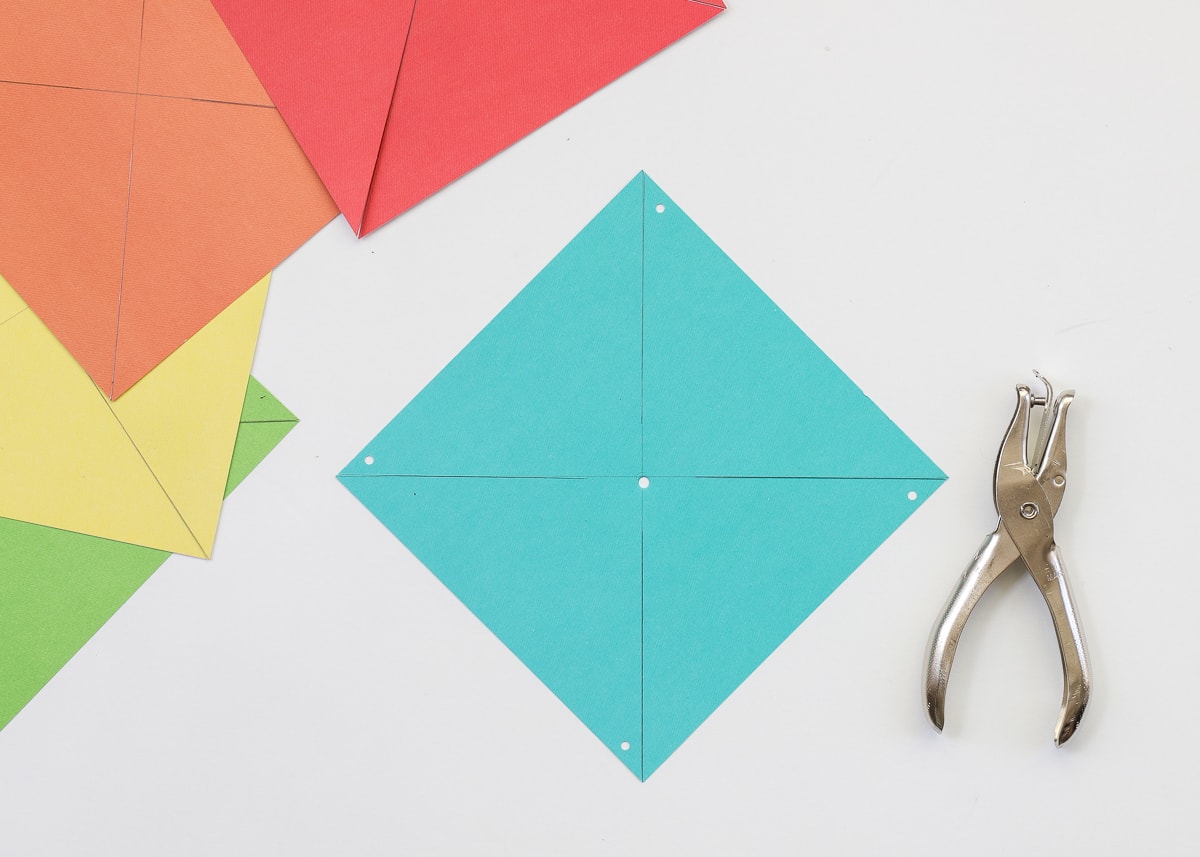
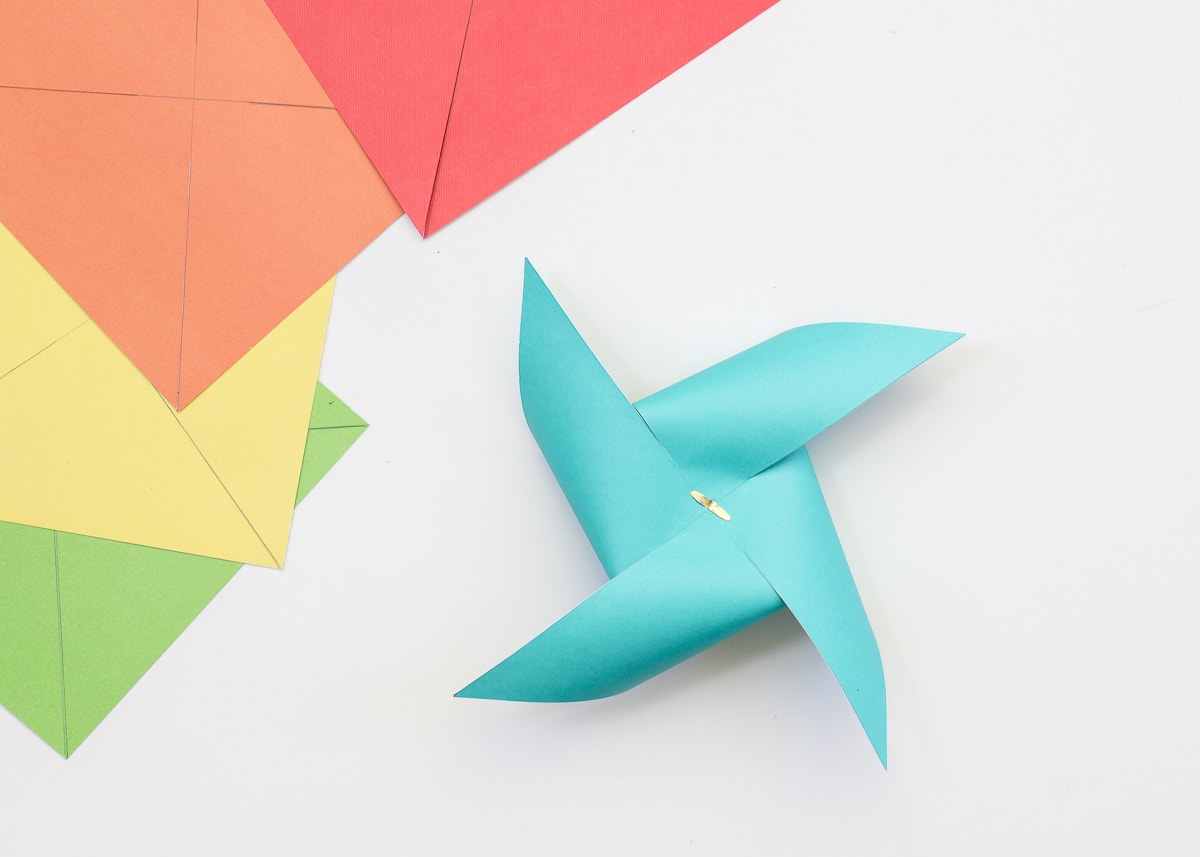
Next, use a hole punch to create a single hole in each triangle section of the square. Notice in the picture below that each hole is on the left side of the triangle. It doesn’t matter which side you use, as long as it’s positioned in the same place on each flap. Also make a hole in the middle of the pinwheel.
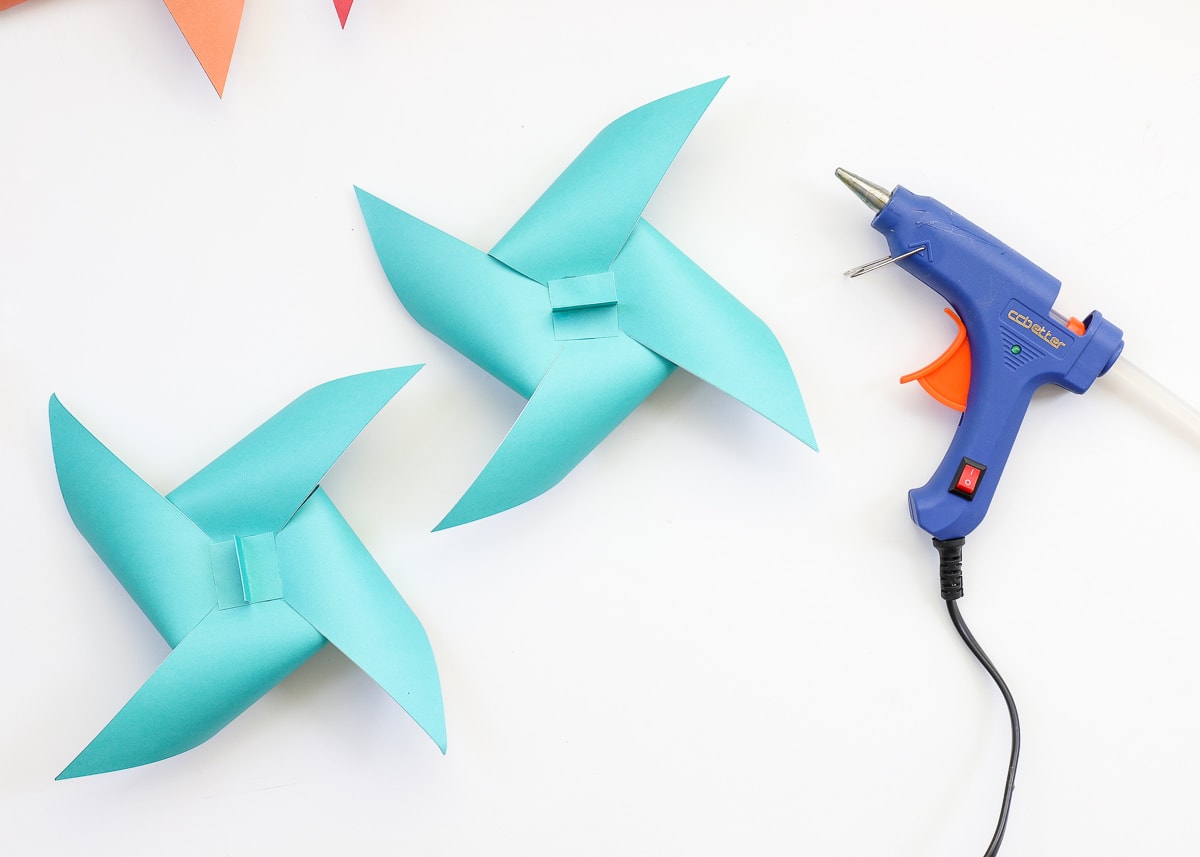
Next, take a single paper brad and put it through each of the outer holes, working around the pinwheel. As you do this, each flap will form that classic pinwheel design.
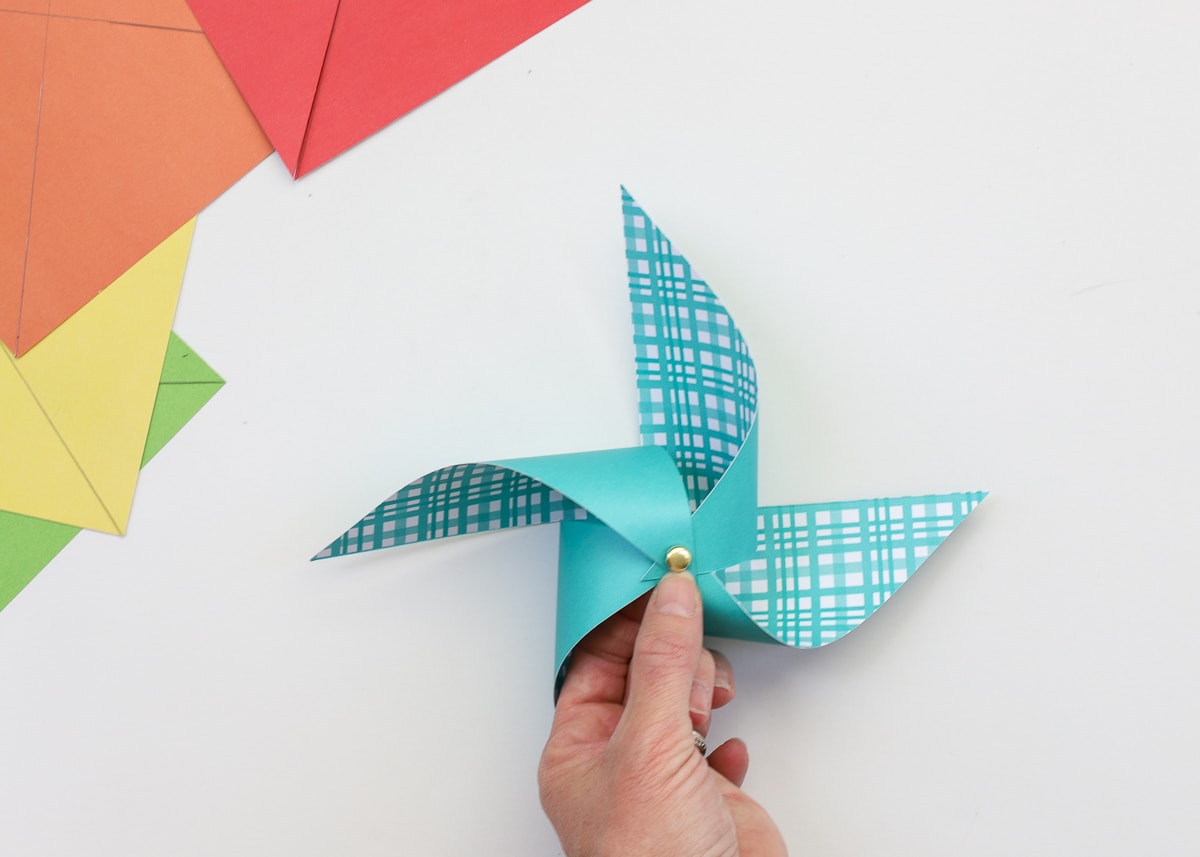
Once all flaps are on the brad, put the brad’s ends through the center hole and open it in the back to keep all the flaps in place.
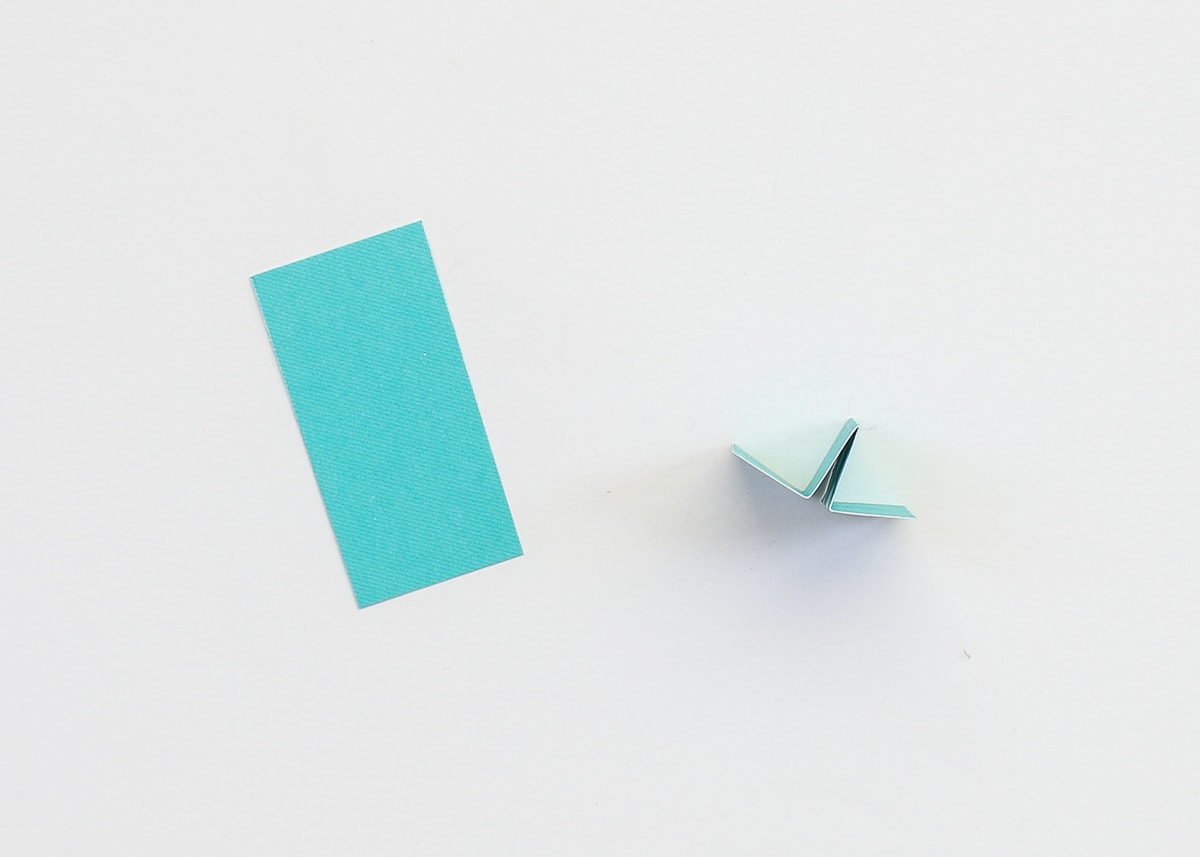
Because these pinwheels are going over a baby’s crib, I really wanted those brads to be as secure as possible. Plus…I needed a way to secure each pinwheel to the mobile. I was able to accomplish both with a single strip of paper.
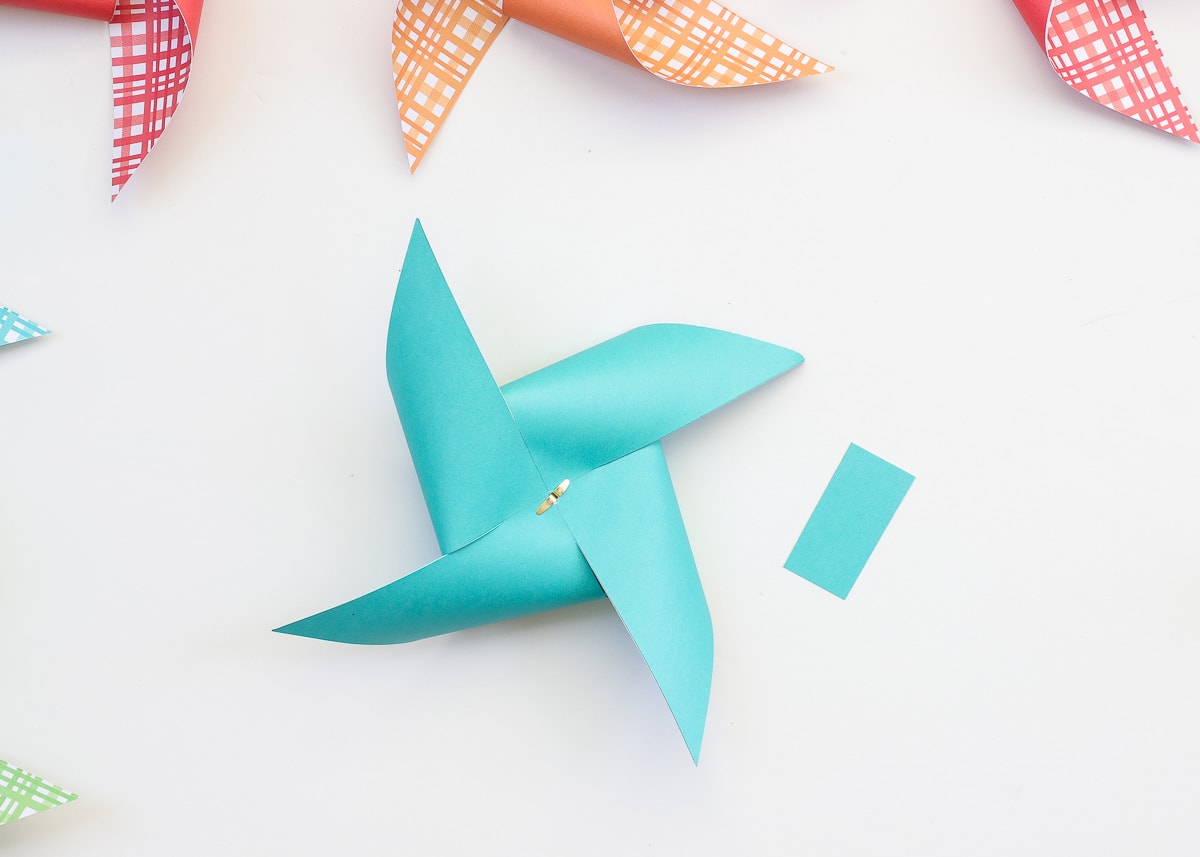
Start by cutting a coordinating piece of paper into a 1″x2″ rectangle (below left). Fold the rectangle in half and then fold each end back on itself (below right).
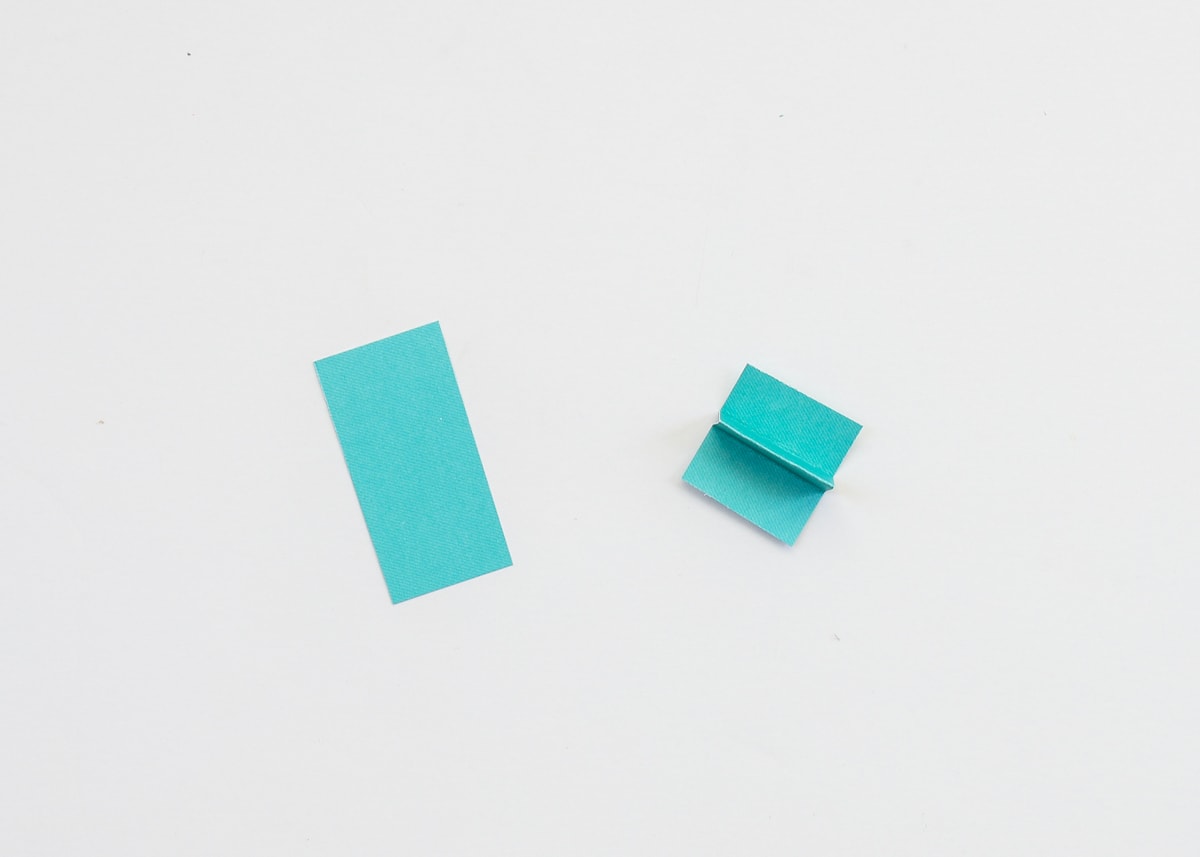
Then use a hot glue gun to secure each paper tab on top of the paper brad.

Assemble the Mobile
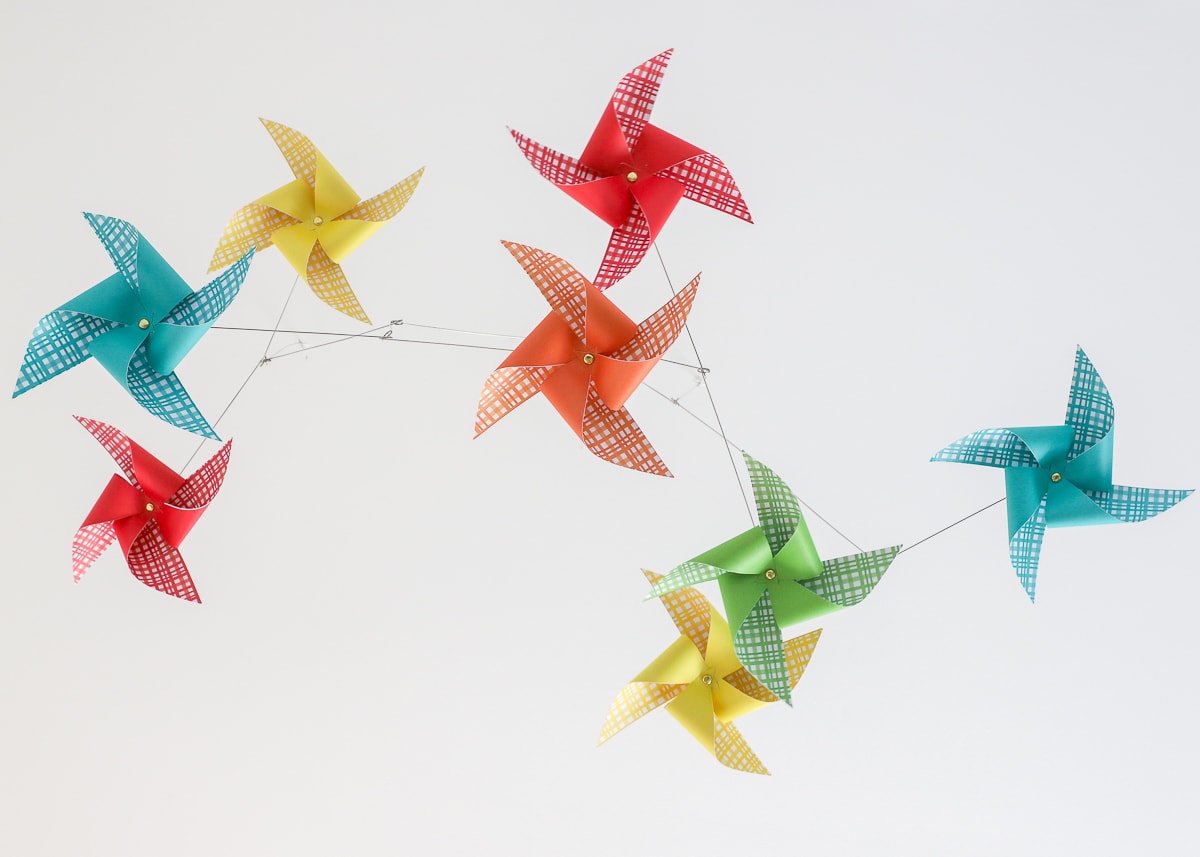
The photo mobile comes with assembly instructions that are really easy to follow. However, I didn’t love how the original design was longer than it was wide. Since I wanted the mobile to hang wide over the crib, we played with the assembly until we had an arrangement that looked more proportionate.
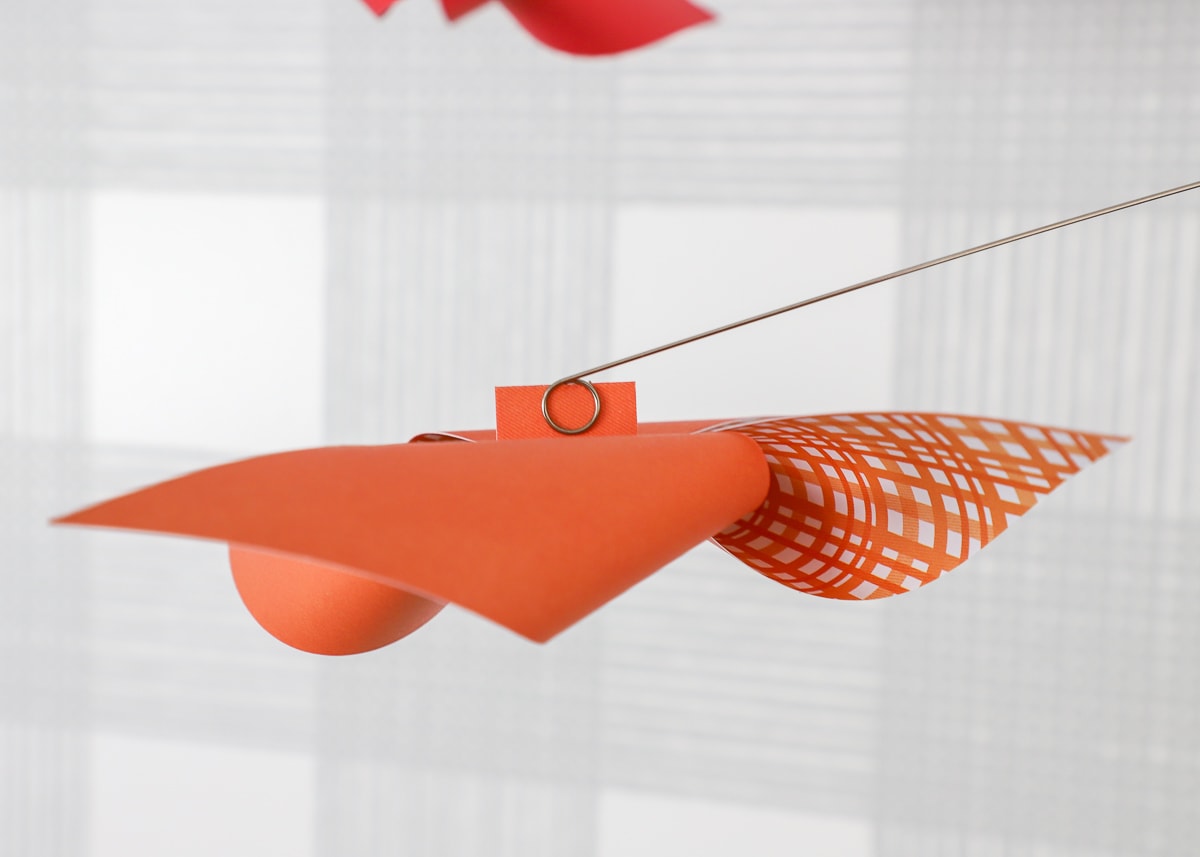
With the mobile assembled, Greg first hung it above the crib using two cup hooks twisted directly into the ceiling. We then attached all the pinwheels by sliding the paper tabs into the included clips on the mobile!
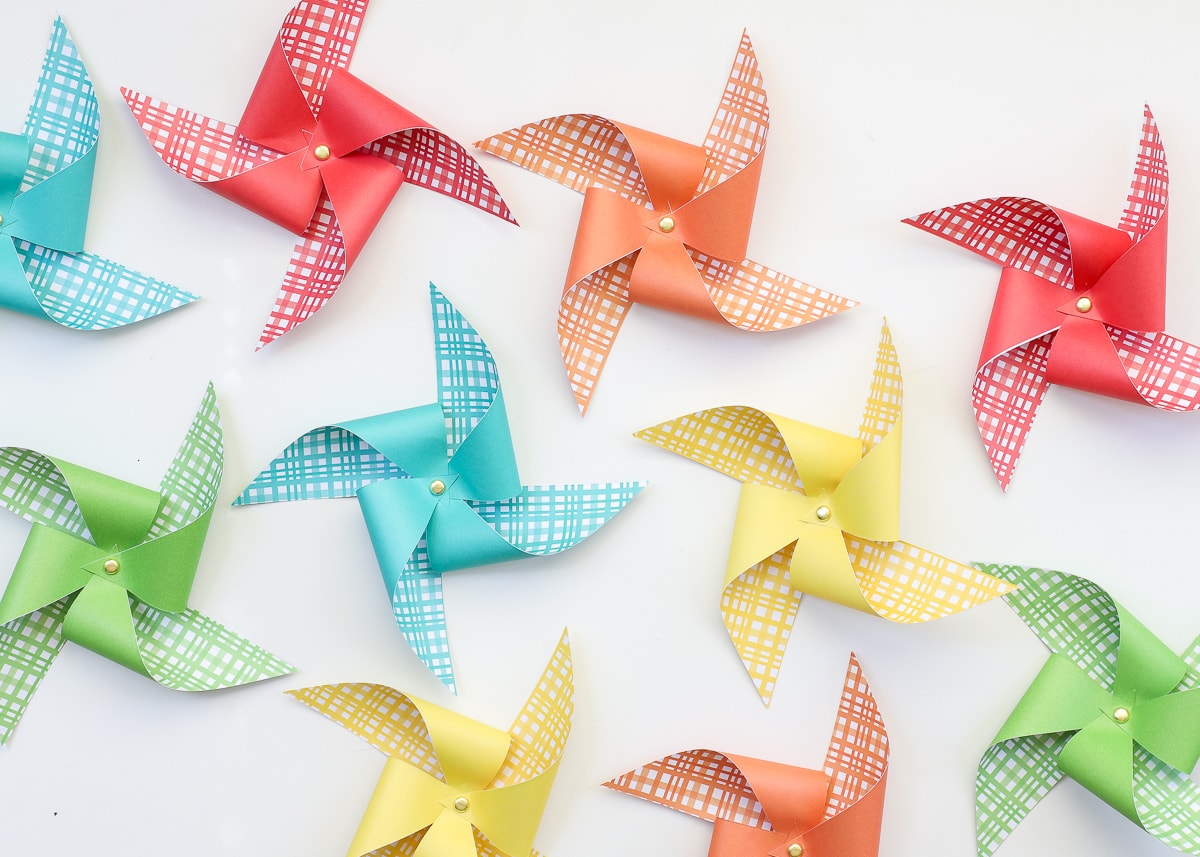
It didn’t take long at all to get the color assortment just right and everything balanced for a nice, even display!
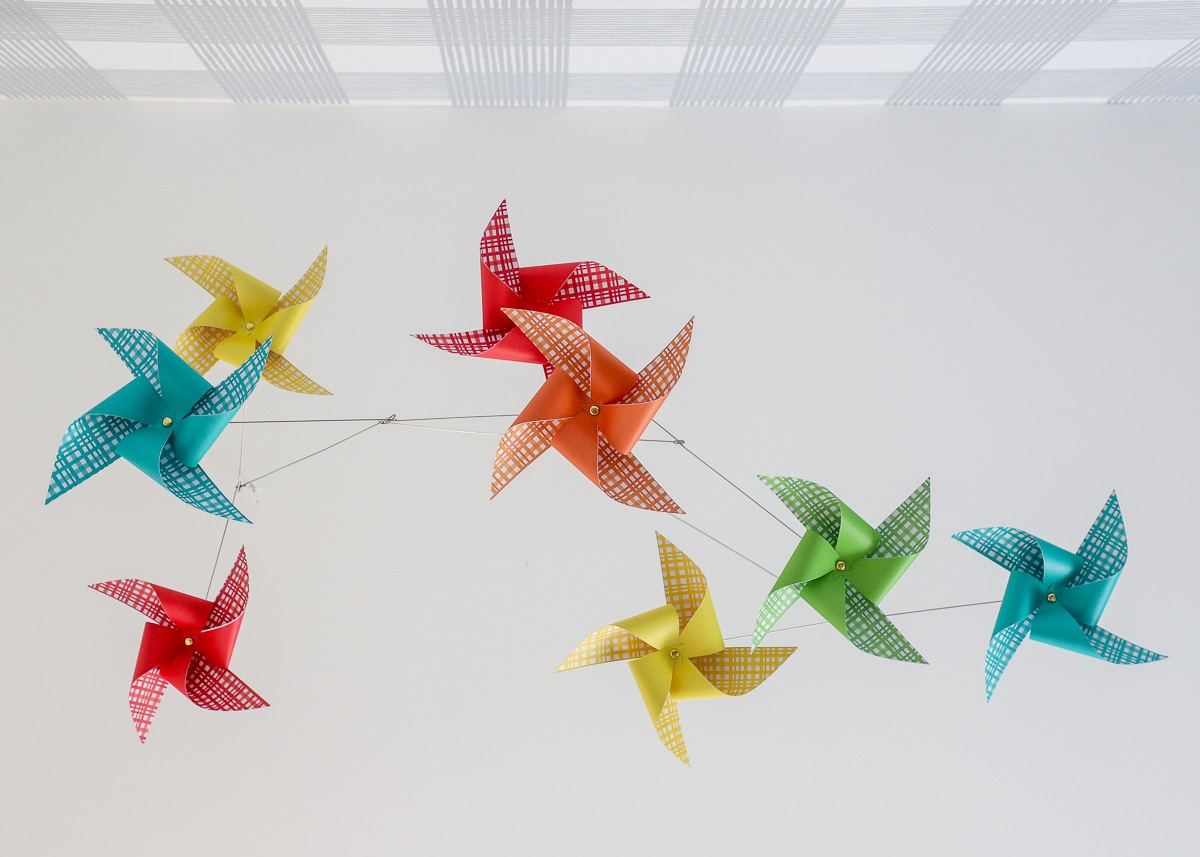
This mobile project was certainly not hard or that time intensive, but I wasn’t quite sure it was going to work until it was all up and assembled! You better bet I breathed a sigh of relief when we stepped back and had the whimsical display I was so hoping for! While I love the splash of color against the grey and white wall, I really love how easily the mobile moves. Thanks to the ceiling fan in the next room, the soft breeze causes it to look different every time I look at it!
I won’t lie – I kinda wish this mobile was double in size for a really grand effect above the crib, but I just couldn’t justify the cost of two wire mobiles. Regardless, with just some wire and pretty papers, we ended up with a really charming, budget-friendly, and perfectly customized accessory for the nursery! If you have a little one you’re decorating for, I hope you give it a try because it’s a fun one!
Megan
3 Comments on “DIY Pinwheel Mobile for the Nursery”
I love it! I think I might put one in my lounge room…
Almost looks like butterflies! Very cool idea!
What an adorable idea! Yours tuned out so cute! <3