3 Inexpensive Artwork Ideas You Can Make in Minutes!
A while back, I shared with you all how I often use companies like Minted to source a variety of budget-friendly but high-quality art for our homes. I like that their price point is manageable and their options are endless, which allows me to display great art in home after home, even when our wall sizes and needs continually change. But even with super affordable options like Minted or Etsy, I sometimes find myself wanting even cheaper alternatives to fill frames and blank walls…especially for infrequently used rooms, small spaces, or areas that just need something. And when I say cheap…I mean just a few dollars cheap. Such was the case with our foyer bathroom. I wasn’t planning on giving the bathroom a huge overhaul; but when I stumbled upon some awesome wallpaper and a great rug, I wanted to round out the makeover by filling up some leftover frames I had on hand. Well…a few lucky finds and less than $5 later, I had three frames filled and my bathroom looking all pulled together. Today, I want to share with you three easy and inexpensive artwork ideas so you too can fill your walls without breaking your budget!
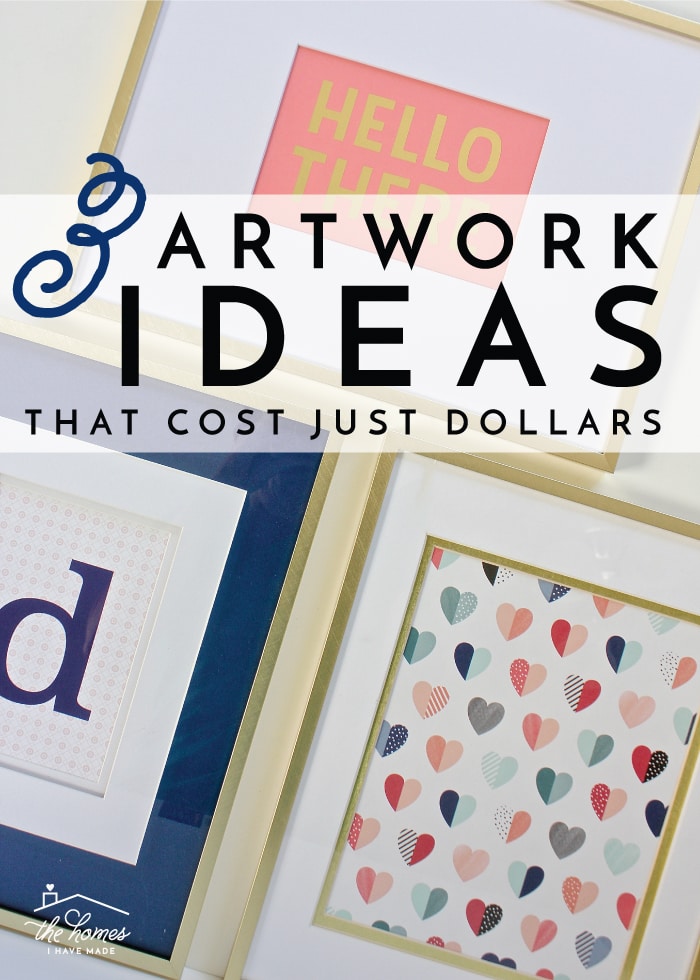
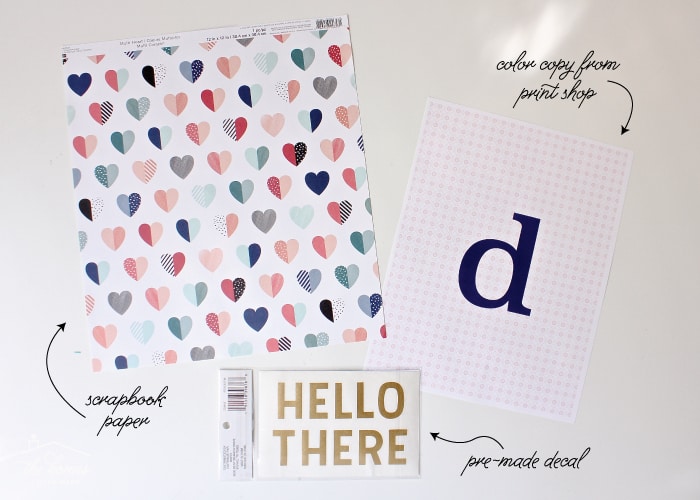
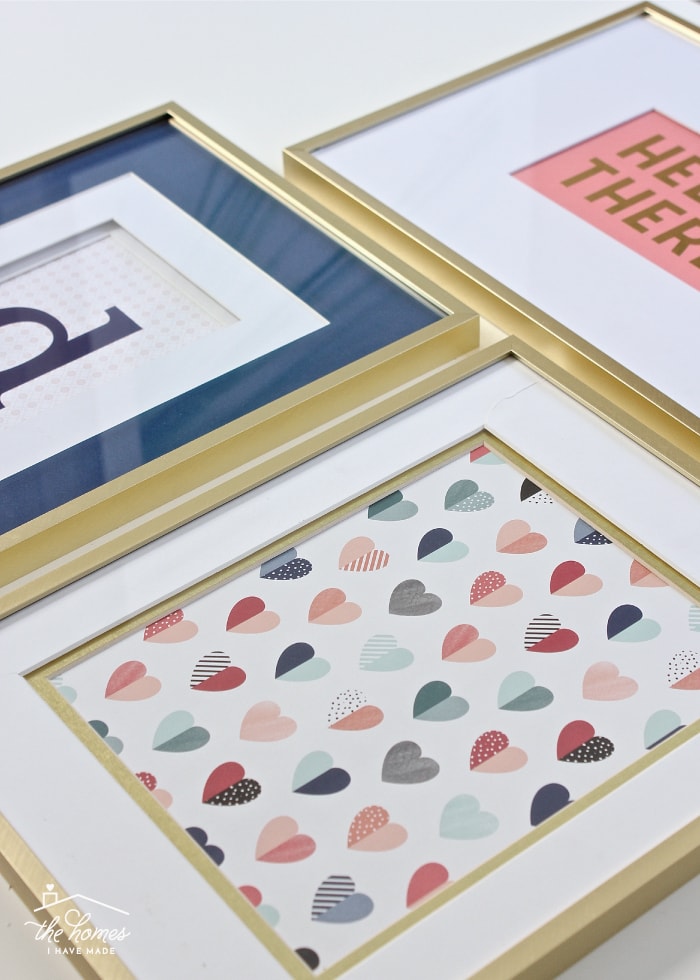
Here are the three things I used to fill up my frames: a sheet of scrapbook paper I stumbled upon at Michaels, a pre-made vinyl decal, and a monogram I had printed at our local copy center. By coordinating the colors and placing them into stylish frames, they became a perfectly coordinated mini art collection. Let me show you what I mean!
Idea 1: Scrapbook Paper
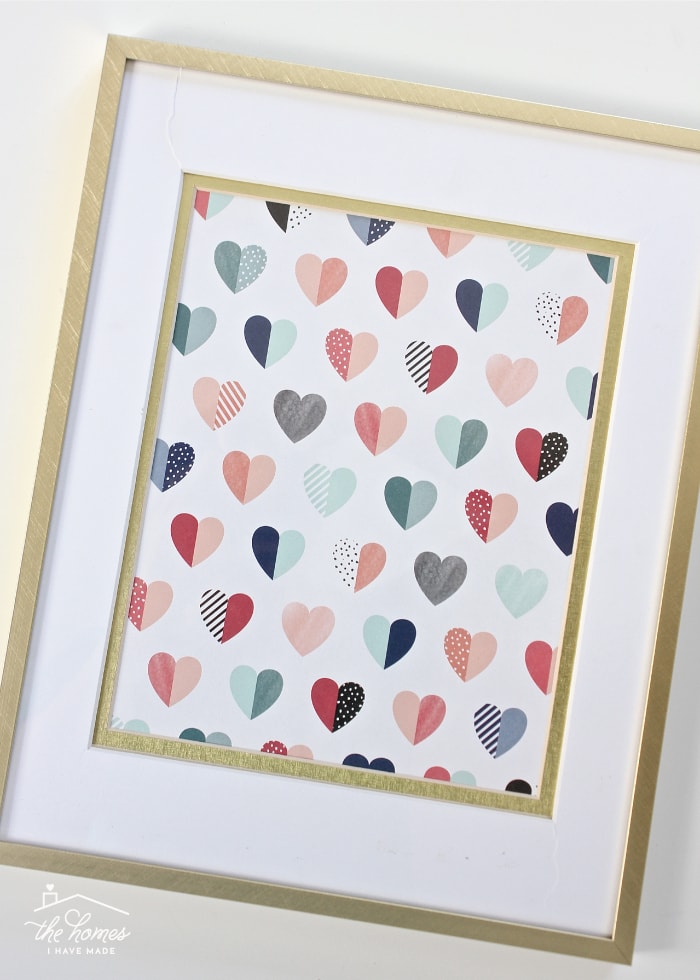
I’ve gotten into the habit of breezing through the scrapbook paper aisle every time I go into a craft store. Not only does the stock rotate pretty frequently, but now there are so many different lines and packs that contain really pretty patterns, foil designs, and even pre-printed art. When I stumbled upon this sheet of 12×12″ scrapbook paper, I was struck that it used pretty much every color in our whole-home color palette.
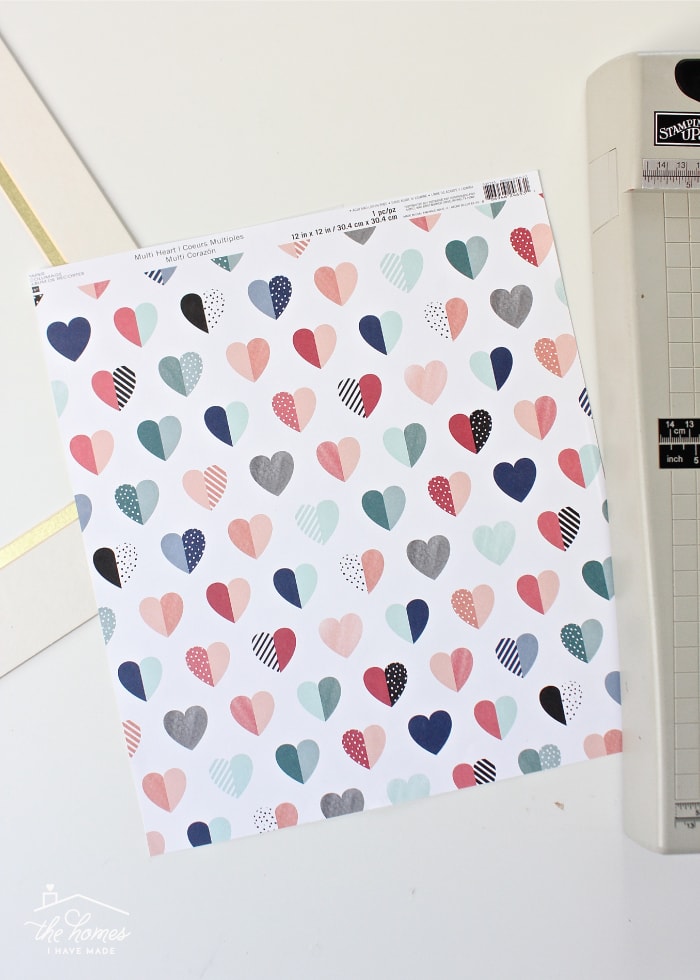
I snagged the paper for $0.79, trimmed it down with a paper trimmer, and then centered the design in a gold-foil mat I already had in an old frame. Voila! Pretty art for less than $1!
Idea 2: Printed Monogram
I’ve used this next idea in several different gallery walls over the years, so I just replicated it with a new size and color scheme for this display.

Using any computer software you’re comfortable with (I use Illustrator, but you can easily do this in Canva, PicMonkey, or even PowerPoint), simply layer a meaningful letter in whatever font you like over a patterned background. For the backgrounds, I typically use one of the many digital scrapbook papers I have saved on my computer. If you don’t have any, Etsy is a great source or just Google free digital scrapbook papers. With some hunting and pecking, you can easily find one that matches your color or style preferences. Once I had the blue “d” over a pink pattern I loved, I exported the design as a PDF and had it printed at my local copy store for less than $1. You can easily print yours’ on a home printer, I just find the laser printing used in copy stores provides a more professional finish!
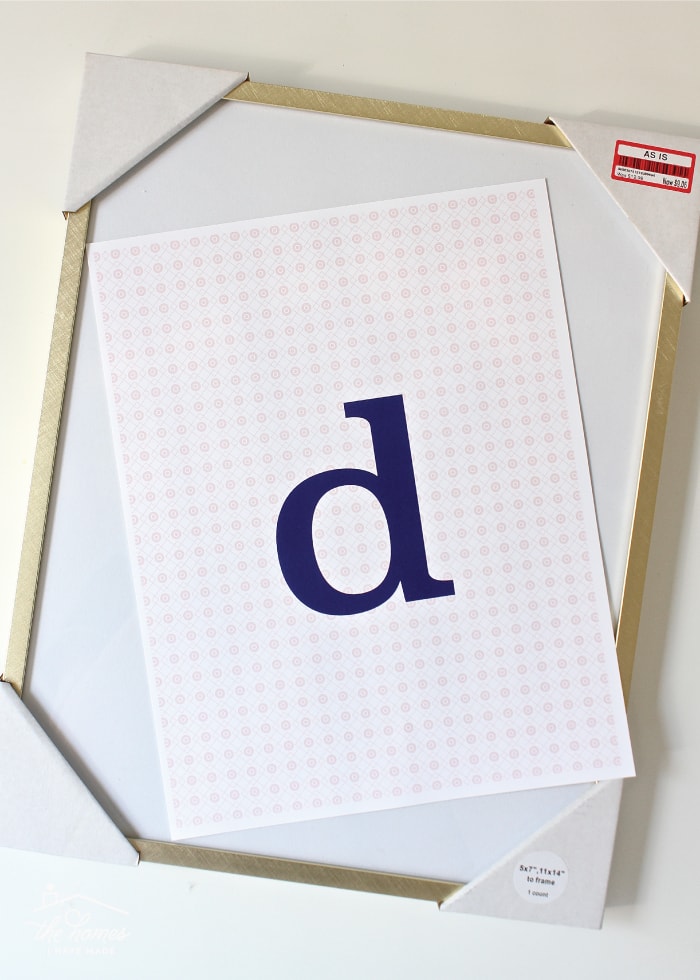
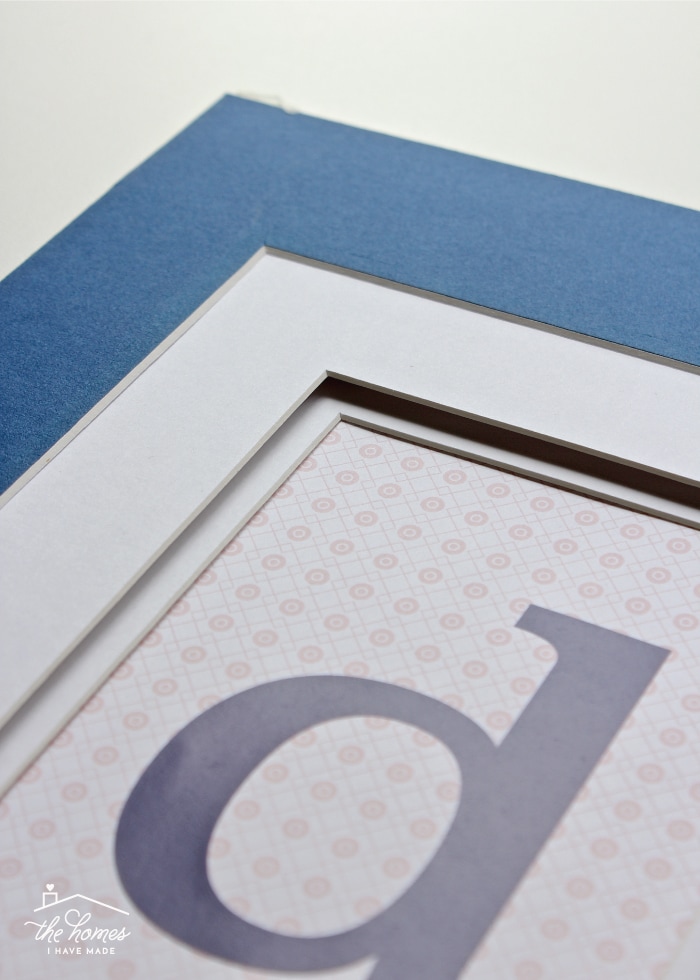
Once I got home from the print shop, I popped it in a frame and hung it right up! You’ll notice in all of these art projects, but most especially this one, that the mats and frames really go a long way in elevating the inexpensive artwork. The printed “d” alone in the frame was a little lackluster, but by layering it under several different mats (all of which I had on hand…even the blue one!), the whole display felt much more purposeful!
Idea 3: Foil Decal
This final idea mimics the gold foil prints you see in high end shops or local boutiques. But it cost me just $2, and I could customize the color to match my other prints. You can do this even if you don’t have any craft skills or fancy machines…let me show you!
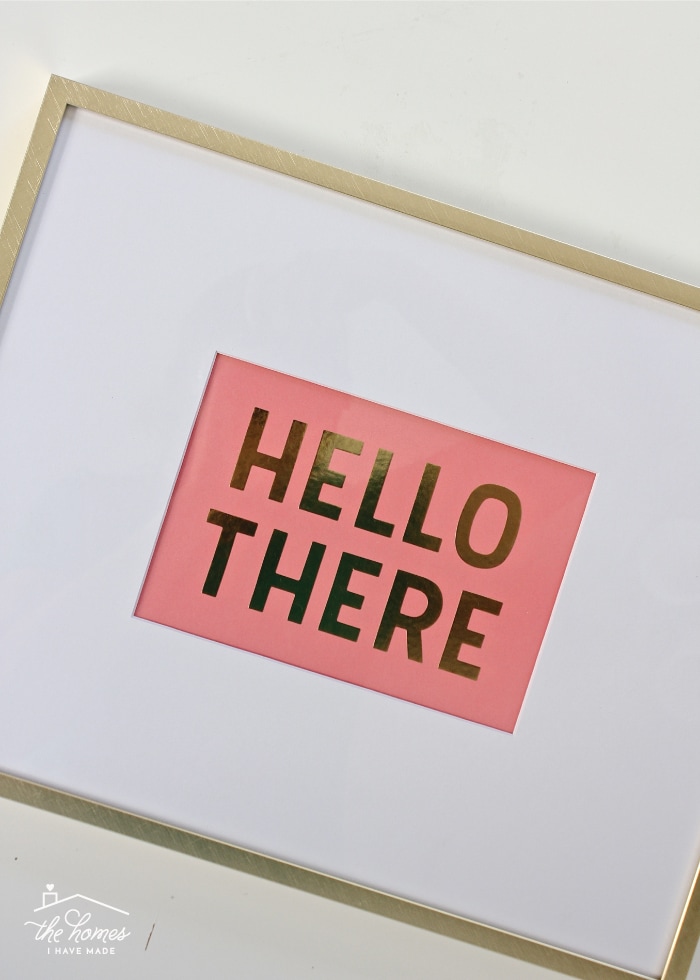
I could have cut any letters or design from foil adhesive using my Cricut machine (and if you have one, then your options really are endless!) BUT…I wanted to show that anyone can do this using pre-made decals from the craft store (or Etsy). Sure, you’re a little limited by what is offered, but they still make for really affordable, whimsical art! I started with the gold foil letters “Hello There” that I found at Michaels. I used a 50% off coupon, making it only $2. I then layered it over a piece of salmon-colored cardstock I had on hand.
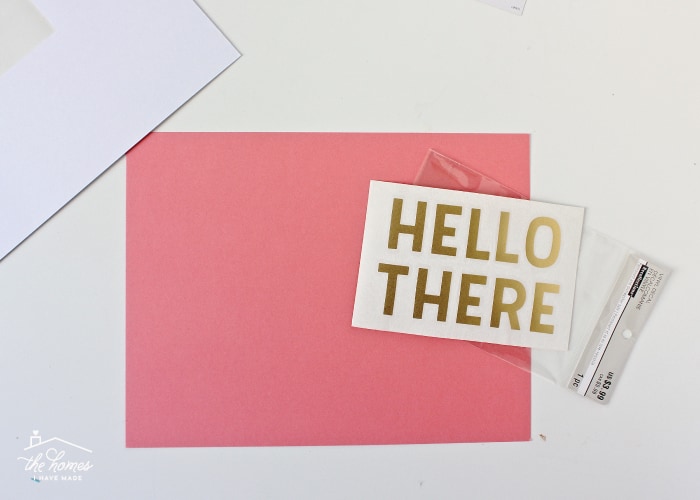
If you’ve never worked with these decals, they are super simple. Here is how you do it:
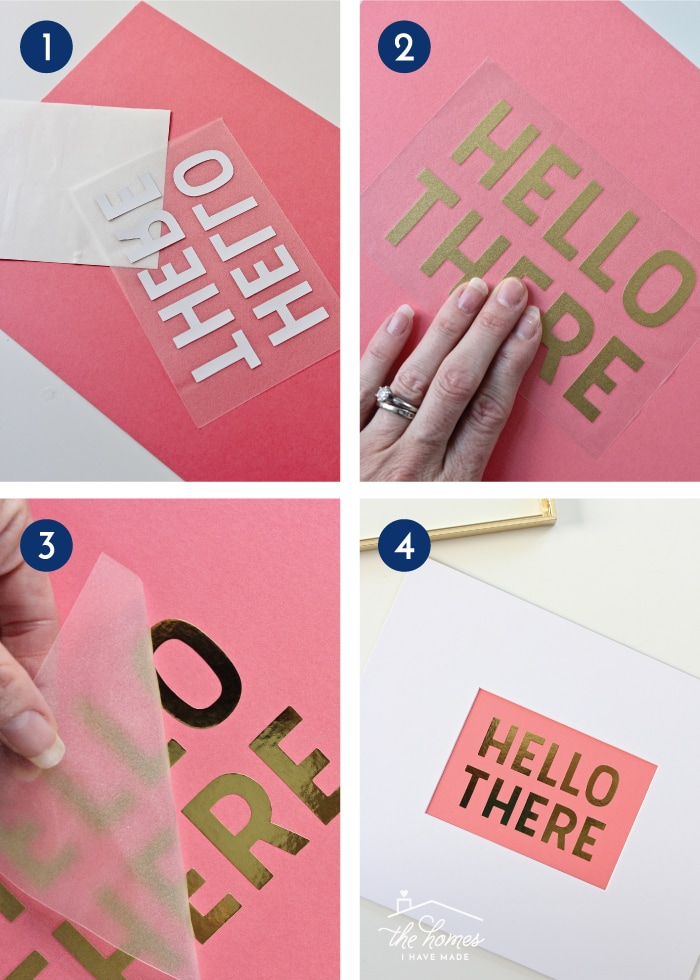
- Peel the paper backing off of the decal.
- Place the decal (plus the clear cover) onto your desired background and smooth down really well.
- Pull the paper back at 180 degree angle to carefully remove the paper, leaving the decal behind.
- Center your design in a mat opening and load into a frame!
All three of these frame fillers cost me less than $5 (total!), and each took just minutes to pull together. By coordinating the colors and loading them into good quality frames with mats, I ended up with the perfect little art collection for our downstairs bathroom!
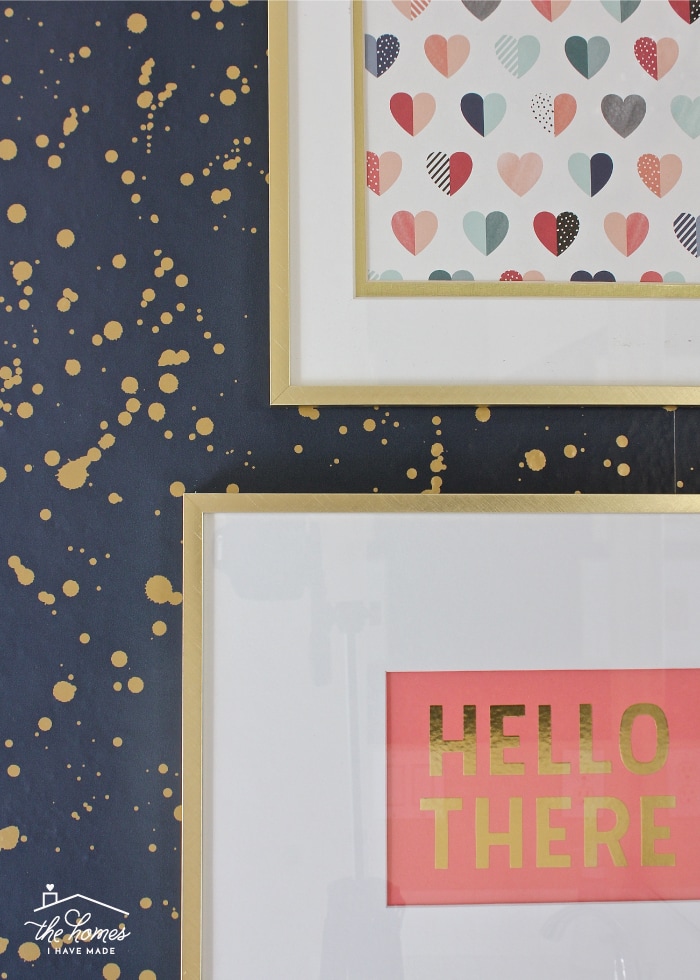
I have one more tiny project to wrap up in this bathroom, and then it will be ready for its reveal. In the meantime, here is a sneak peek of the art with the wallpaper together! I can’t wait to show you the rest!
I hope these projects give you some creative ideas for filling up some empty frames you might have on hand. I’d love to hear if you have a favorite cheap art find in your home or if you have ever used something clever as art too?!? Feel free to share in the comments!

I’ve mentioned a few times here and there that I’ve been on a major de-cluttering spree in recent weeks. Before I show you everything I’ve done, I first want to dive deep into how I go about organizing any space…from a small drawer to a large, overstuffed craft room. Back here on Tuesday, I’ll be breaking my tried-and-true process down…and then on Friday, I’m going to chat about how I decide whether to sell or donate my unwanted items. If you have some major decluttering to do in your home, you won’t want to miss next week’s posts!
Megan

3 Comments on “3 Inexpensive Artwork Ideas You Can Make in Minutes!”
There are some really nice ideas here. I love the scrap paper book.
I’ve framed scrapbook paper as art for years, but my other fave is gift bags and greeting cards. Specifically, gift bags from TJMaxx (fancy) and those papyrus greeting cards from Target (super fancy!). Pop them into a frame and you’ve got some more gorgeous and super-affordable art!
My other go-to is to use an app like Waterlogue to convert a photo into a watercolor and then print it out through a printshop or print myself on textured watercolor paper or card stock. You can use anything from a picture of leaves, flowers, trees, a pet or even grandma’s house and end up with something spectacular and custom!
Love the blog!💜
I have framed pictures from old calendars but never thought of framing scrapbook paper. That’s a great idea!