Easy Fall Table Centerpieces (You Can Make In Minutes!)
This past weekend, we hosted a party to celebrate Jack’s baptism. Hosting a big party for a lot of friends and family with a 2 month old is no easy feat, and I just didn’t have time to craft up my usual party decor. However, the day before the party, it was really bugging me that I didn’t have anything to put on the tables to dress them up a bit. So I did what any decor-obsessed hostess would do! I rummaged through my craft and party stash, and in minutes, pulled together some really darling Fall table centerpieces. These were so simple to make, use really basic supplies, and couldn’t be cuter, so I thought I’d share how to make them in case you too need something to dress up your Thanksgiving table this Fall!
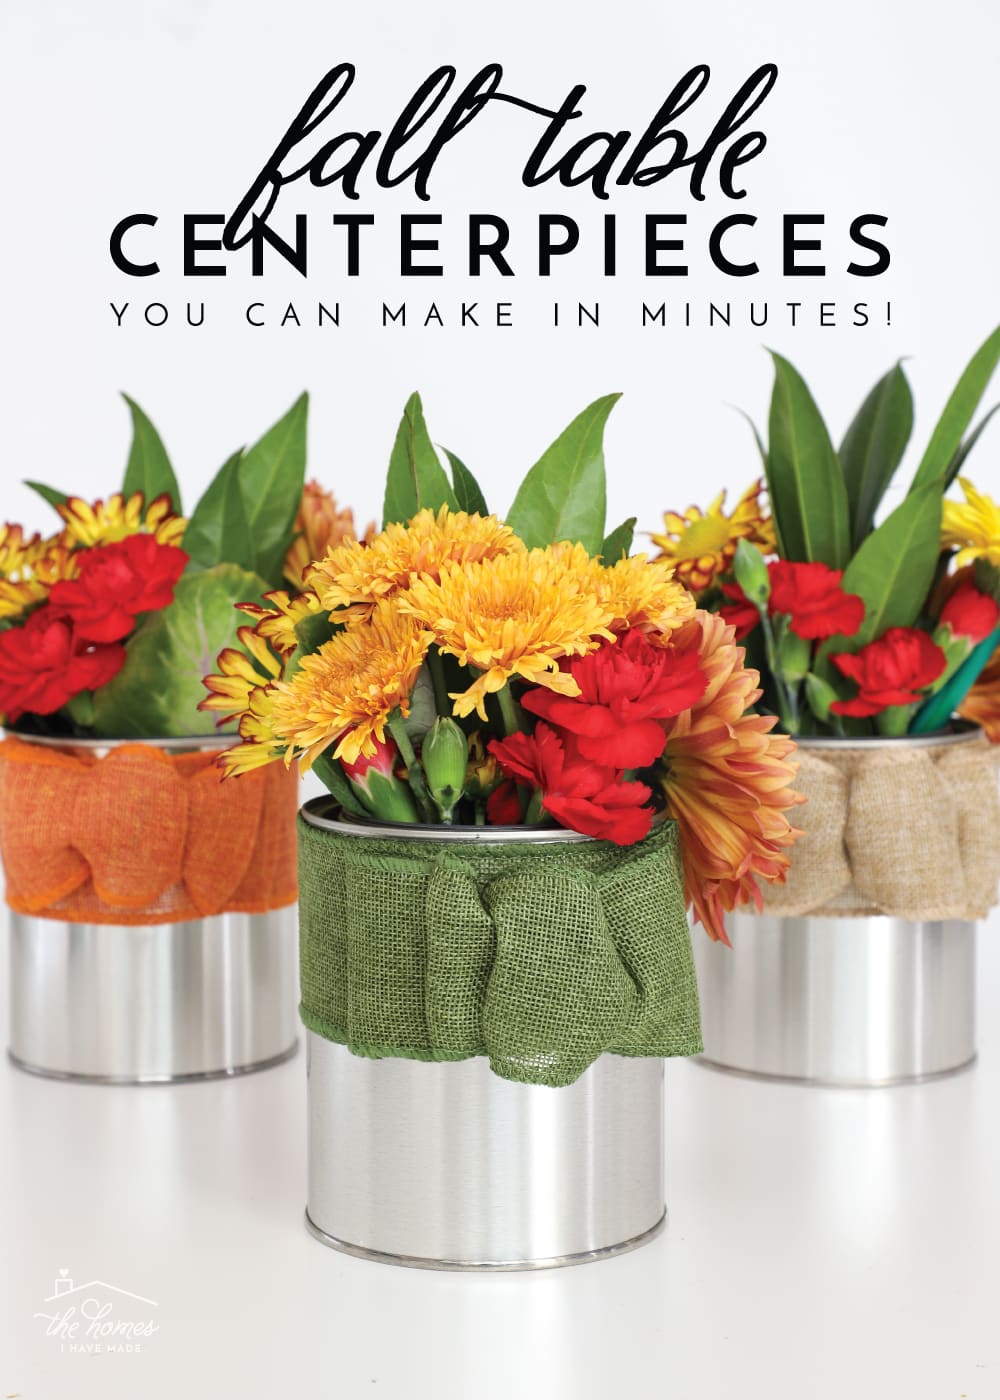
Years ago, I bought some simple quart-size paint cans and have repurposed them for all sorts of things over the years. They are a great size for table centerpieces and are neutral enough that they work for pretty much any party theme.
While I made my centerpieces very “Fall-ish” by using burlap ribbon and Fall flowers, this idea could be easily translated to any season and any color scheme by swapping out the ribbon and flowers!
Speaking of flowers…I am no flower arranging pro. Seriously. I simply bought some Fall bouquets from the grocery store, trimmed them down to fit my cans and spread the assorted flowers across all the centerpieces. I’m telling you…this is a project anyone can pull together…even at the very last minute with a baby strapped to their chest 😉
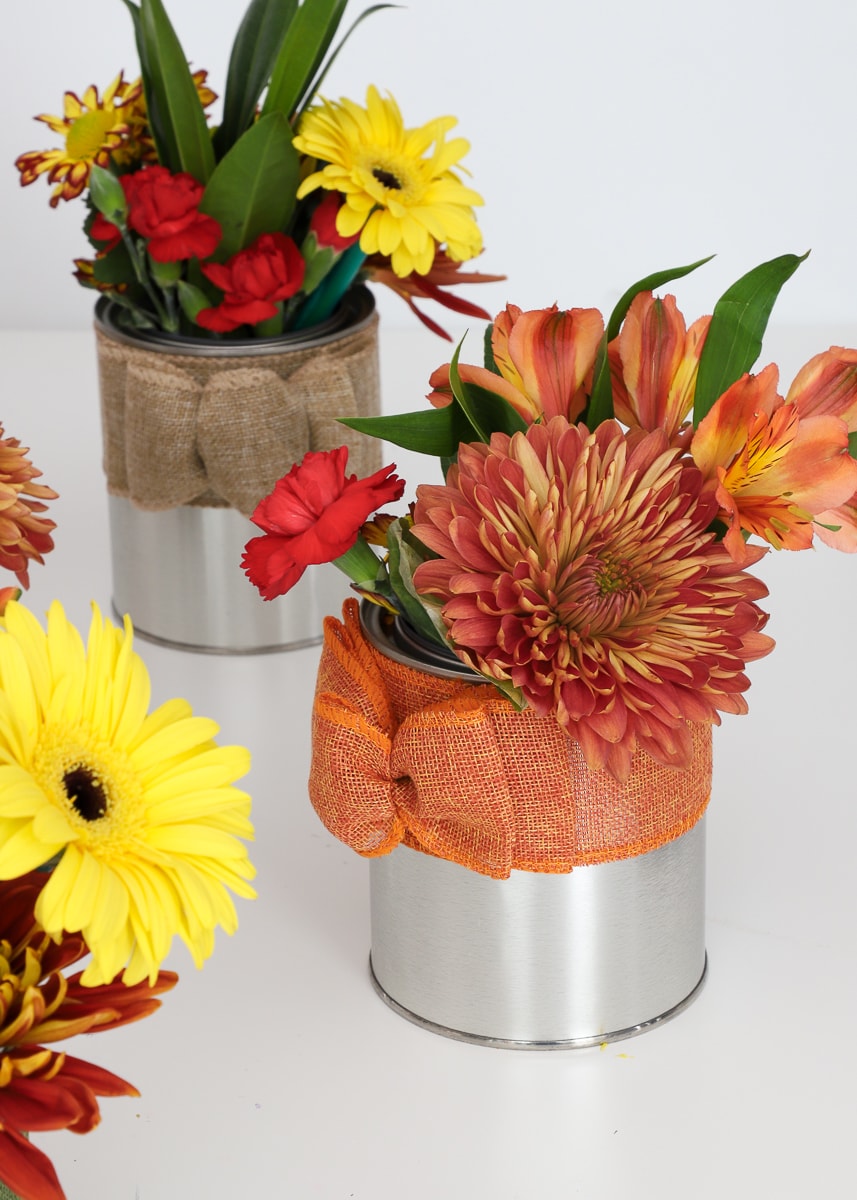
Below is what I used to make these simple Fall table centerpieces; but again, don’t hesitate to swap out the various elements to match your party’s theme or style. That said, when picking out containers for this project, I highly recommend you use perfect cylinders since it’s tricky to wrap ribbon nicely around tapered containers.

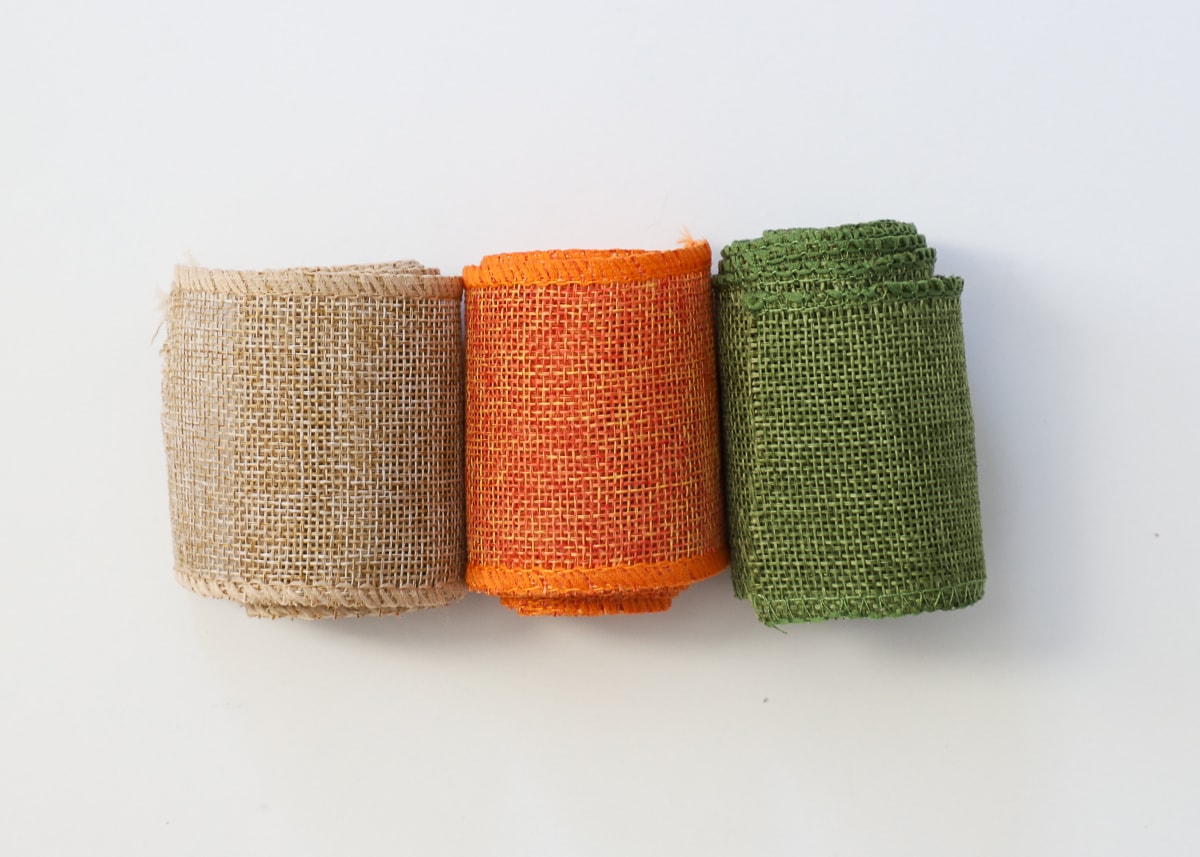
Tin Cans | Burlap Ribbon | Zip Ties
In addition to using cylindrical containers, this project will also come together MUCH easier if you use double-sided ribbon (meaning the ribbon looks the same from both sides). I used this 2″ burlap ribbon I had on hand.
I said these centerpieces were simple and come together in minutes, and I really mean it. The main thing you have to do is put pretty bows on the cans. But don’t panic if you’re no bow-tying expert. I actually find bows really tricky, but you’re going to LOVE how foolproof this one is!

I first saw this bow-tying method HERE and then adapted it a bit for this project and the size of my can. However, if you need a big gorgeous ribbon for a wreath, I highly suggest you check out the full video; I think this technique is just so clever!
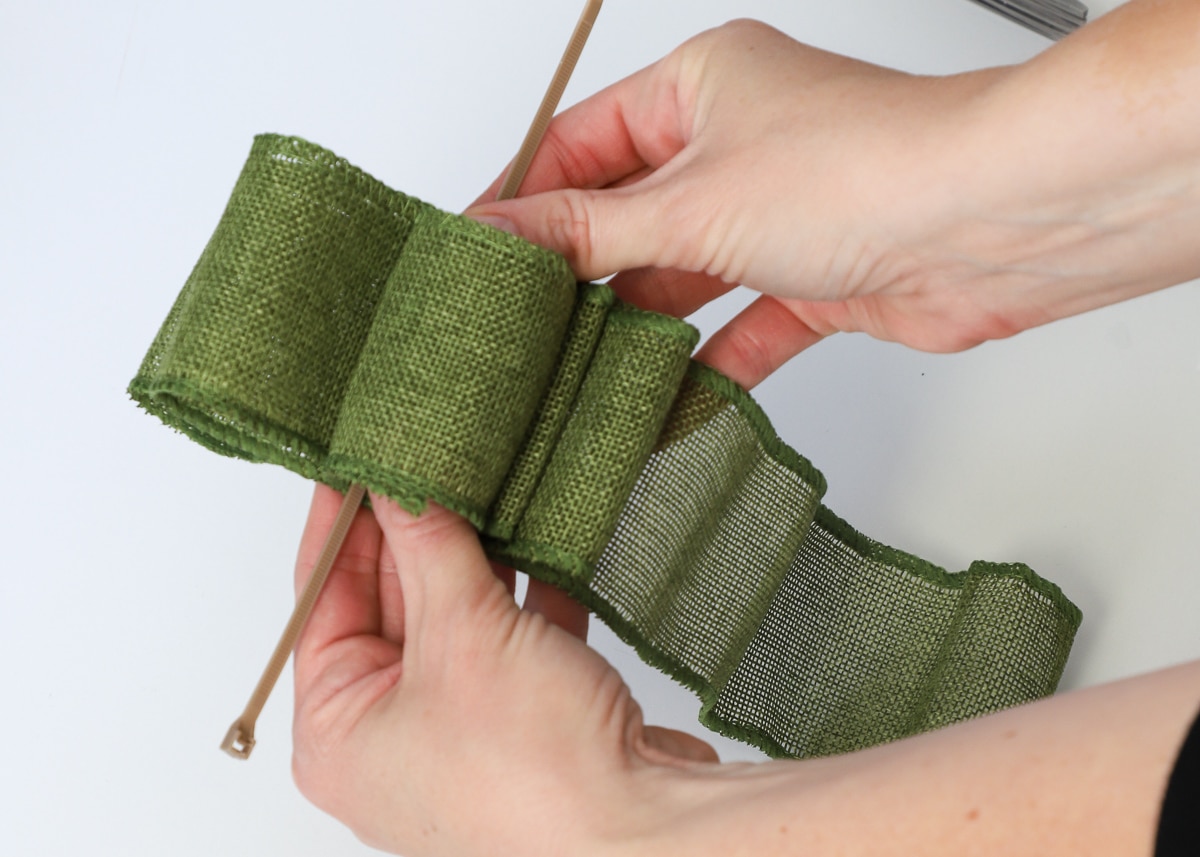
Okay – first, don’t cut your ribbon just yet. Instead, start by taking the end of the ribbon and rolling it onto itself as shown below. This initial roll will be the center of your finished bow.
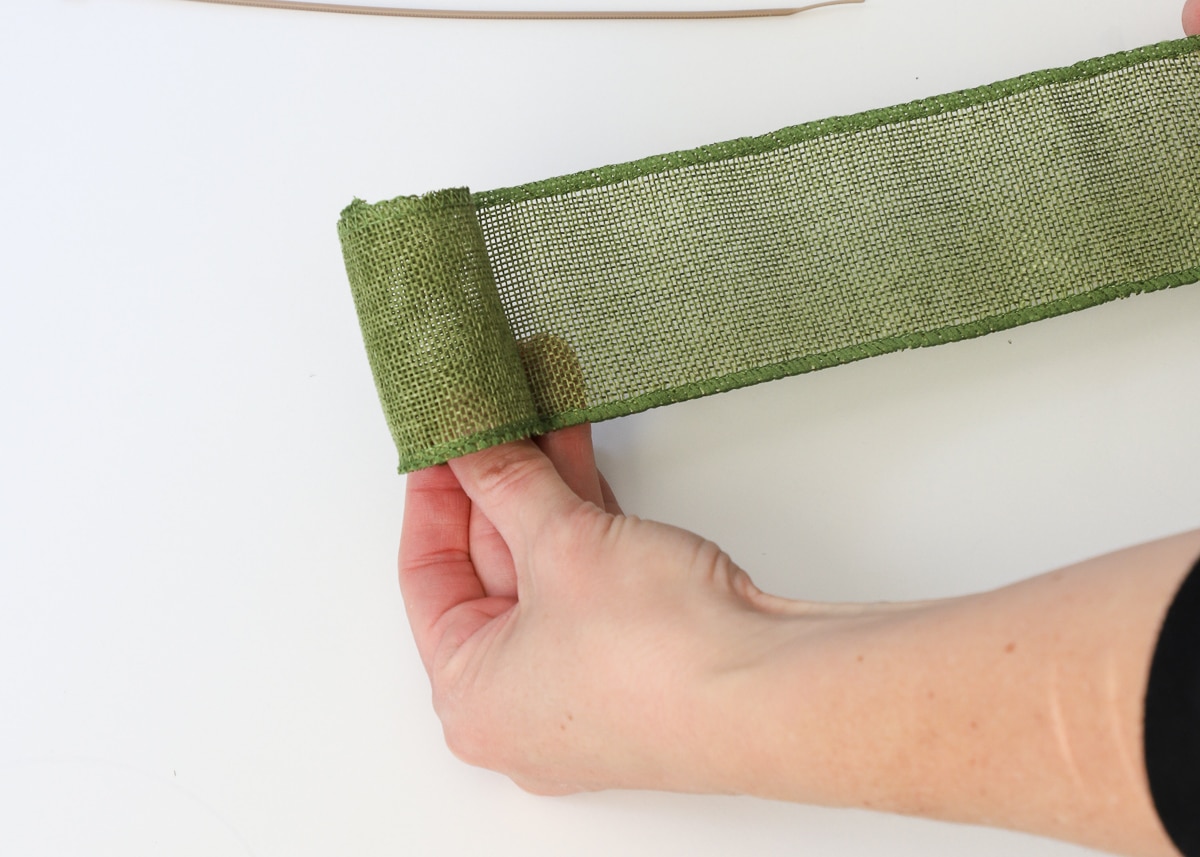
Hold firmly onto the initial roll you just made and then make additional loops on each side by folding the ribbon back and forth under the initial loop; do this two times so you end up with 5 total loops (the center one plus two on each side). Be sure to make each loop bigger than the one before it and hold all the layers together tightly between your thumb and fingers. Just pull the tail of the ribbon off to the side, don’t cut it yet!
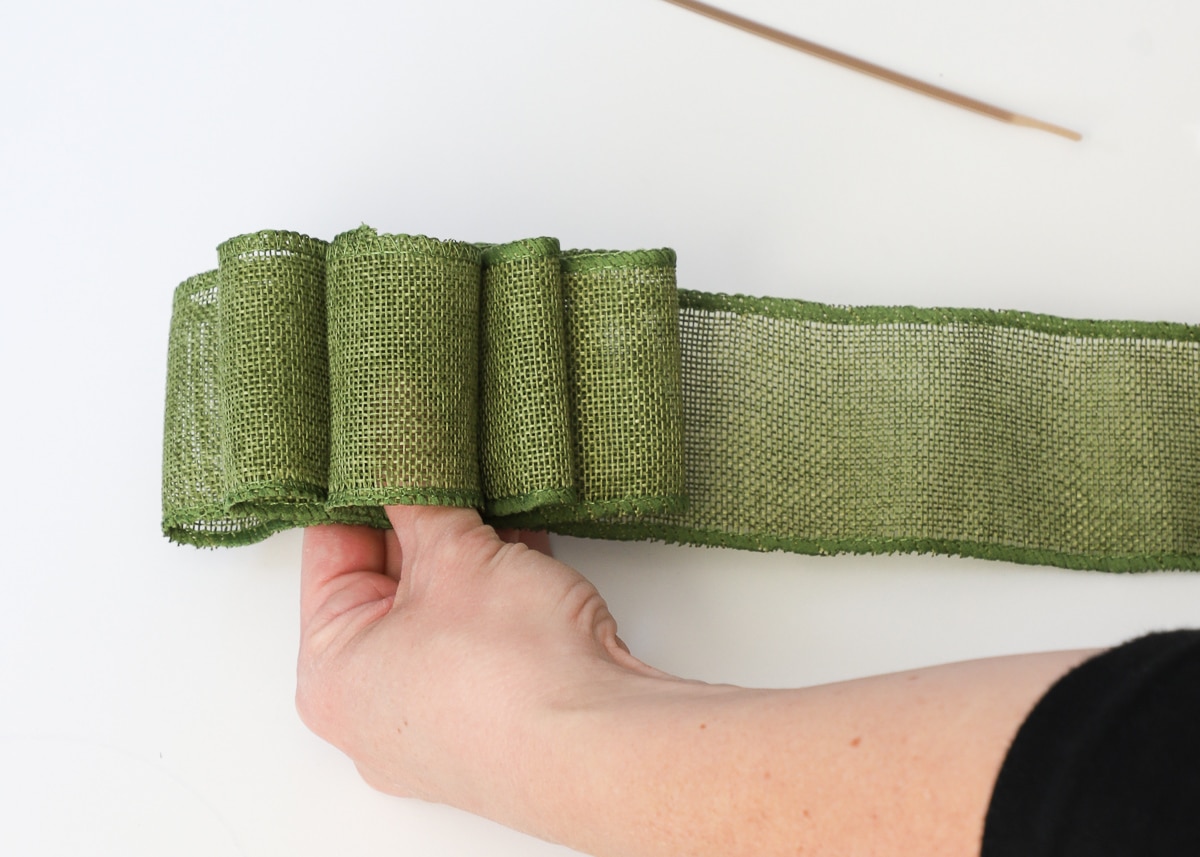
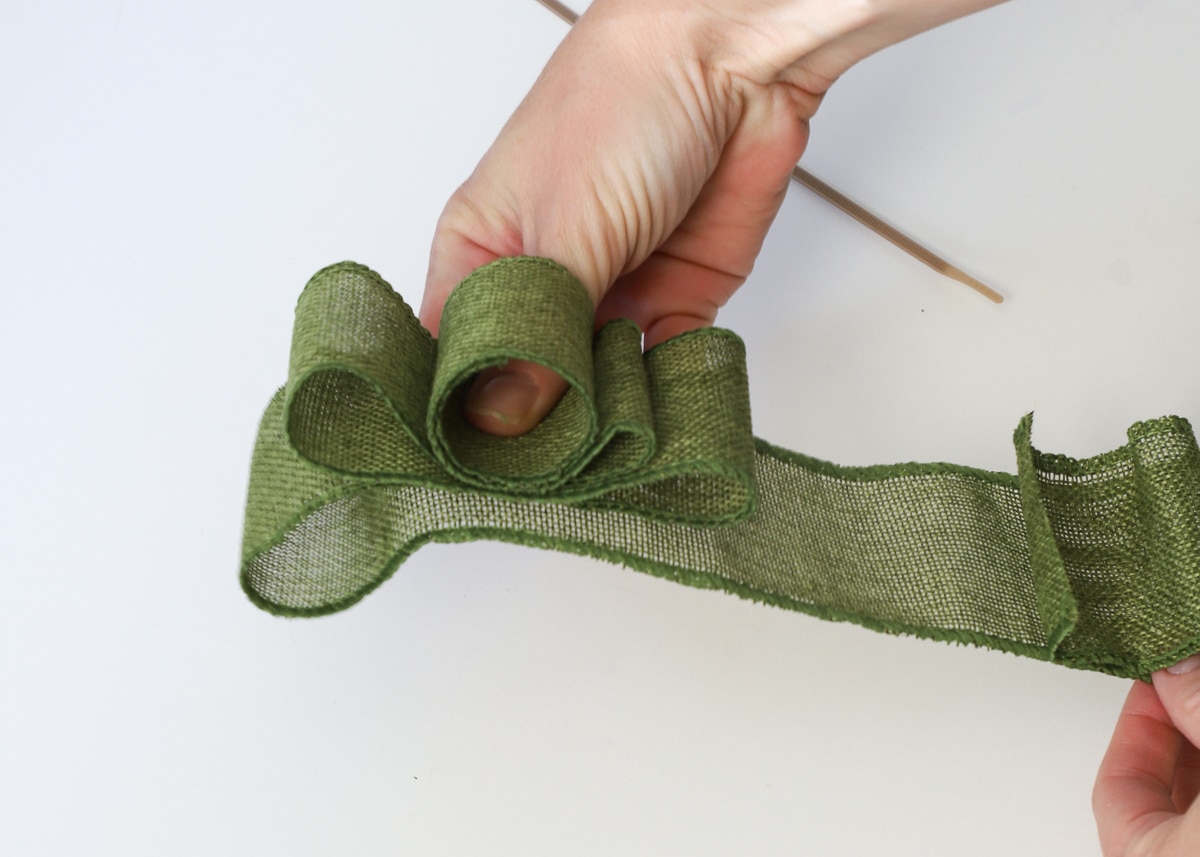
While holding the layers together, place the zip tie through the initial center loop and bring the ends toward the back of the bow around all the layers…
Thread one end of the zip tie through the other and cinch it as tight as you can. When you do this, your loops will not only scrunch together to form a bow but the zip tie will also keep the entire length of ribbon from unraveling.
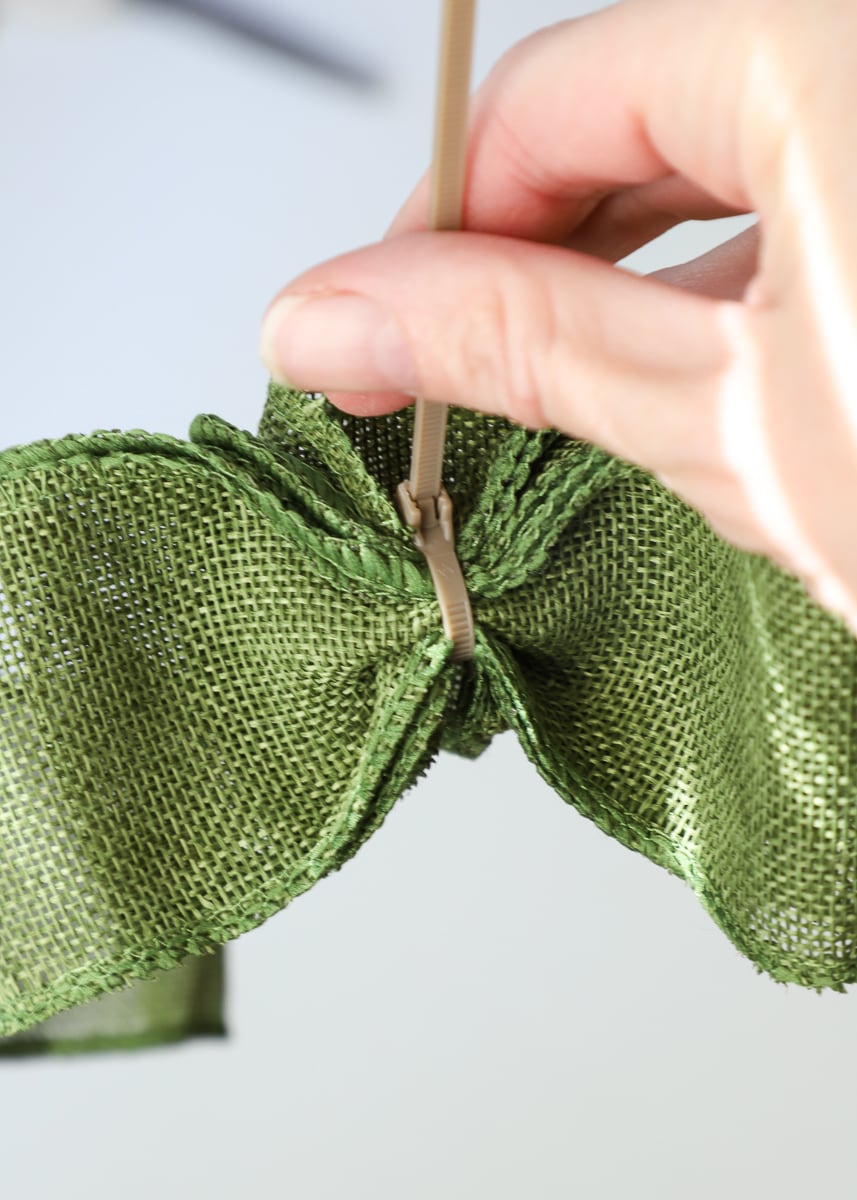
Trim off the excess zip tie, but don’t cut off the excess ribbon just yet…
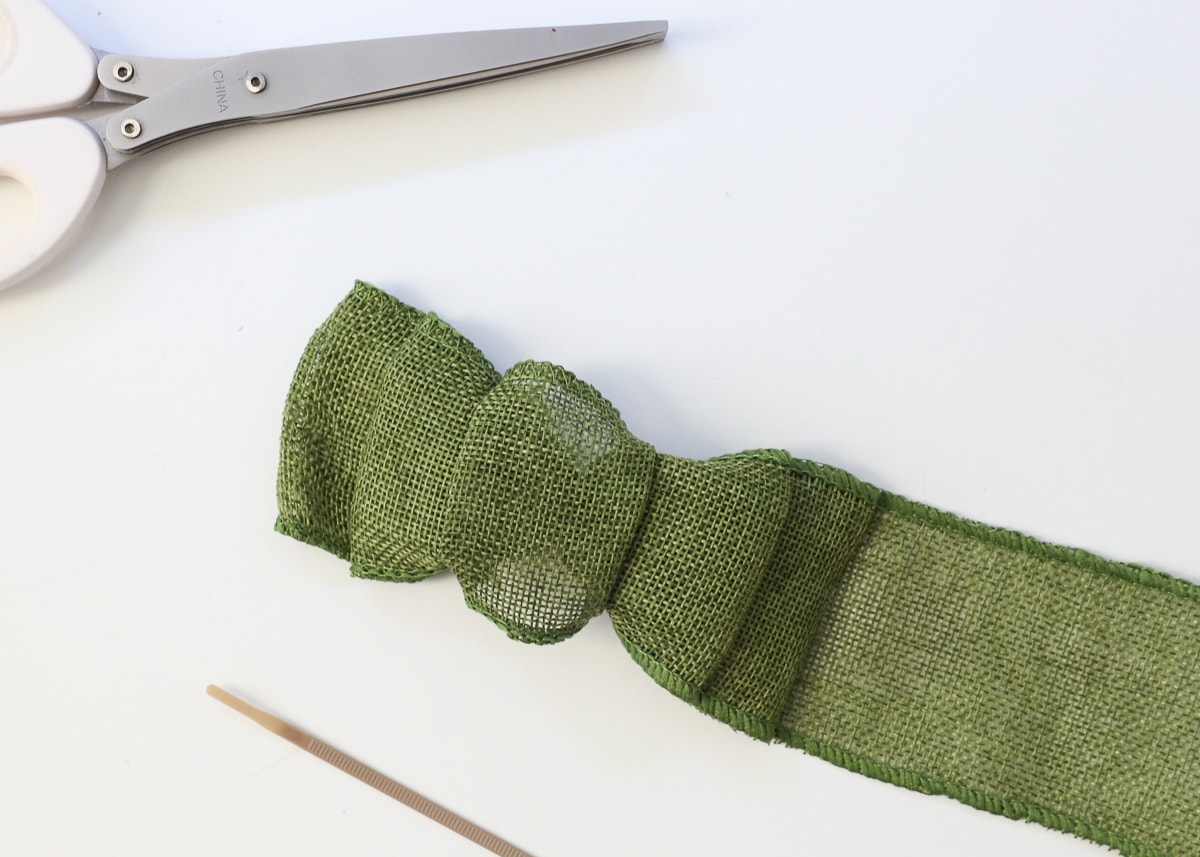
Next, you’ll secure the bow to the can with some hot glue. I like using hot glue here because it dries fast and holds things in place really well, but it’s also pretty removable. The hot glue peels right off these cans, so I can easily remove the bows and use the cans for something else down the road!
Before gluing in place, do a “dry fit” of the bow and excess tail around the can. Once you determine how much length you need, add an extra inch and then go ahead and trim off the rest of the roll of ribbon.
With the ribbon’s end trimmed down, secure the far end (the non-bow end) to the can with a thin, vertical line of hot glue…
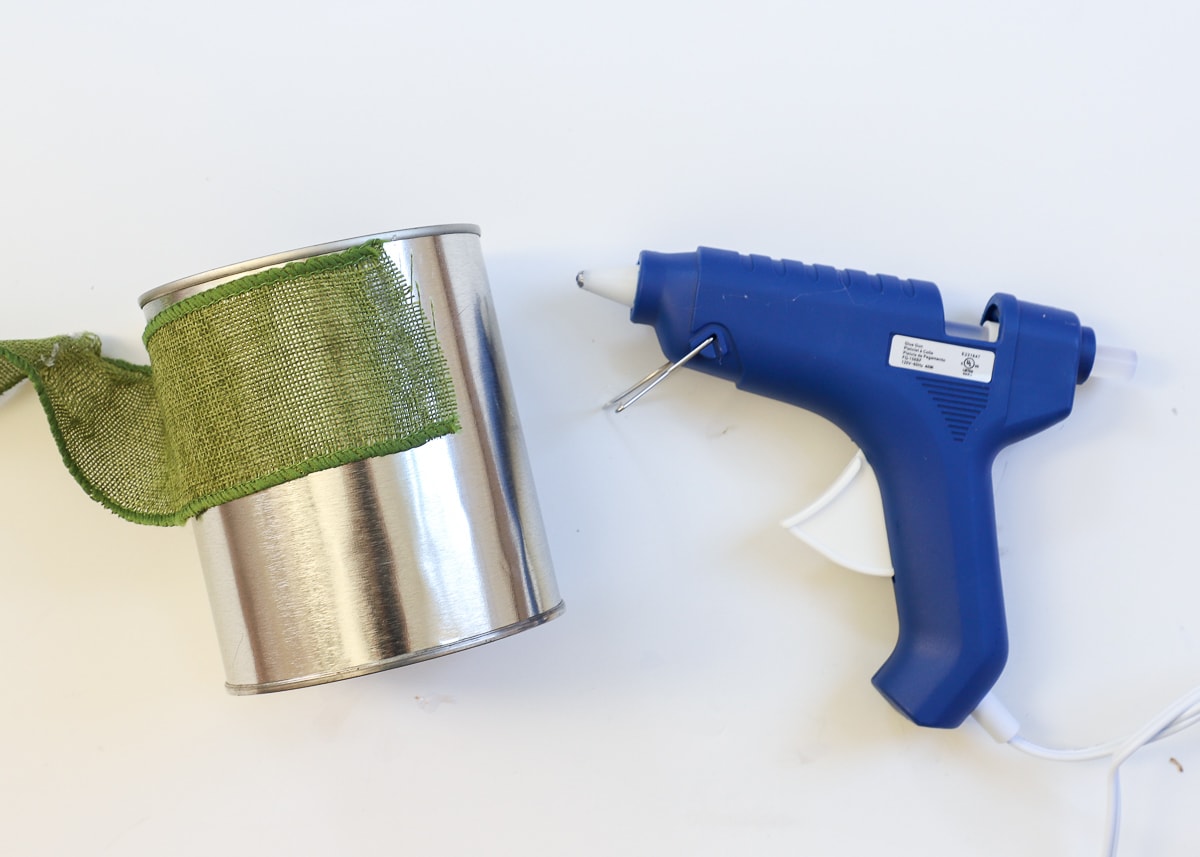
Wrap the bow+tail around the can, keeping the edge of the ribbon up next to the edge of the can. You don’t need to glue the whole way around. Once you bring the bow all the way around the can, use more glue under the furtherest loop to secure the bow tight to itself and the can.
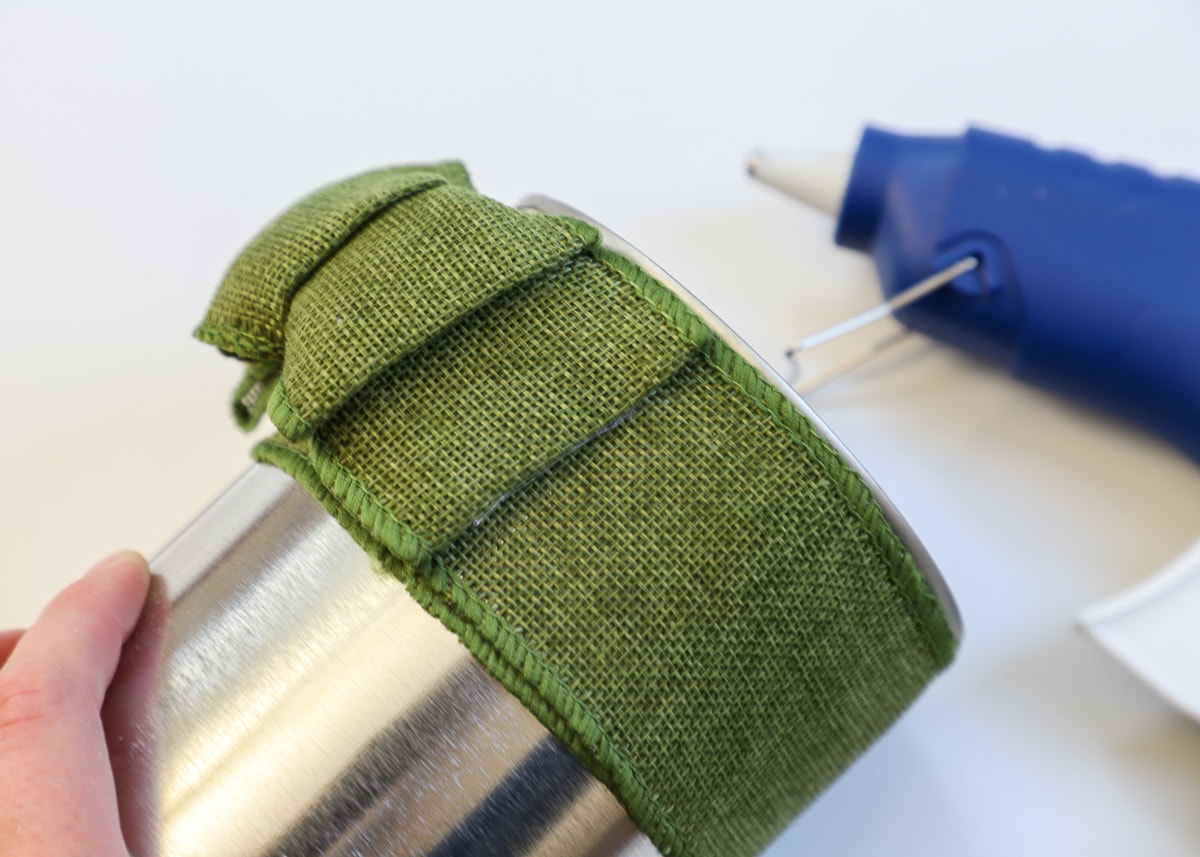
To keep the bow looking nice and clean and uniform, I recommend glueing the undersides of the far outside loops to the underlying ribbon with thin lines of hot glue. The middle three loops will lay nicely on their own.
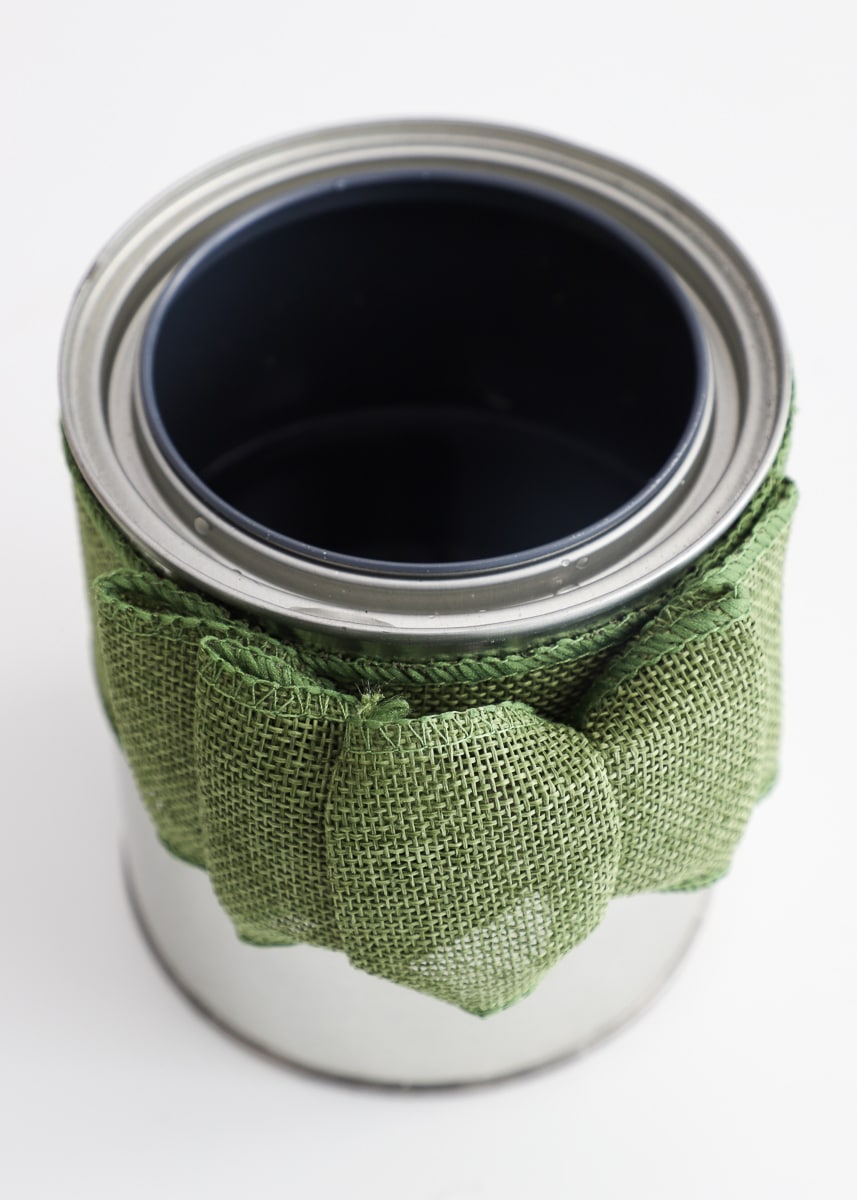
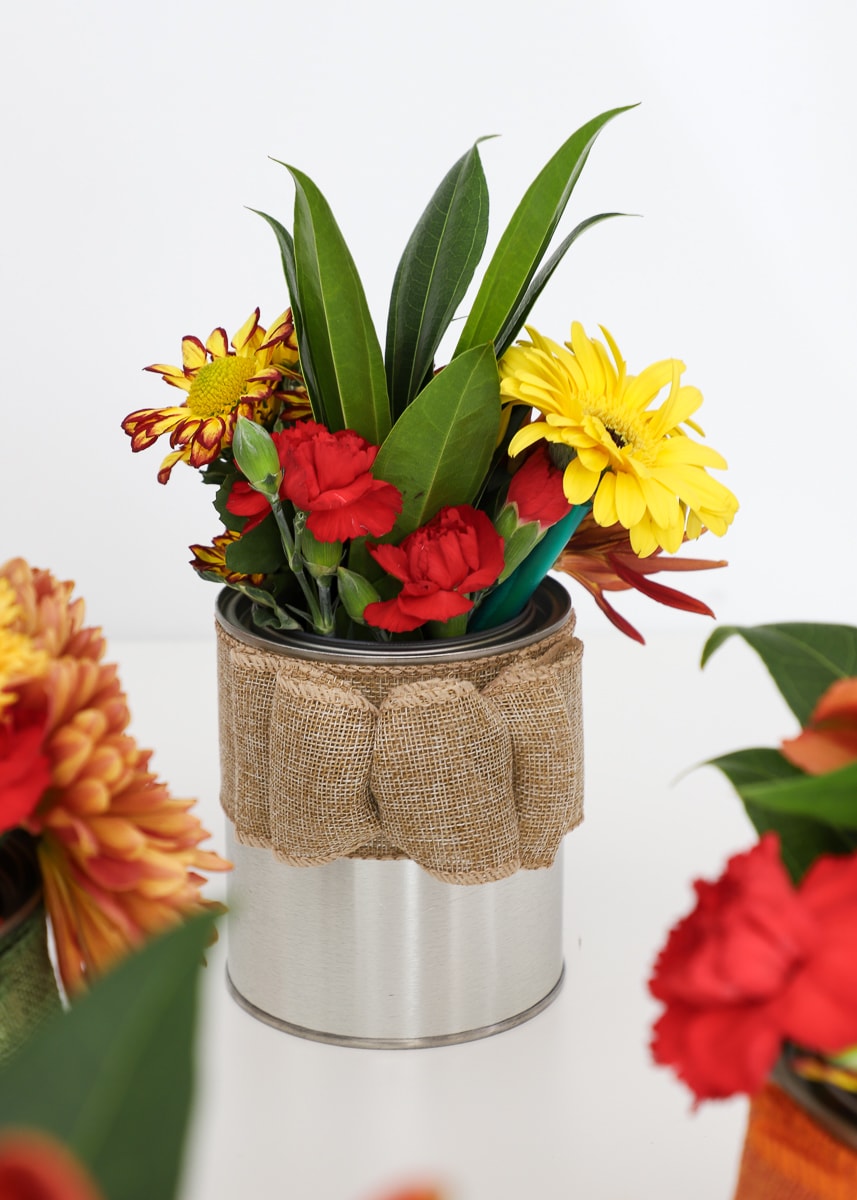
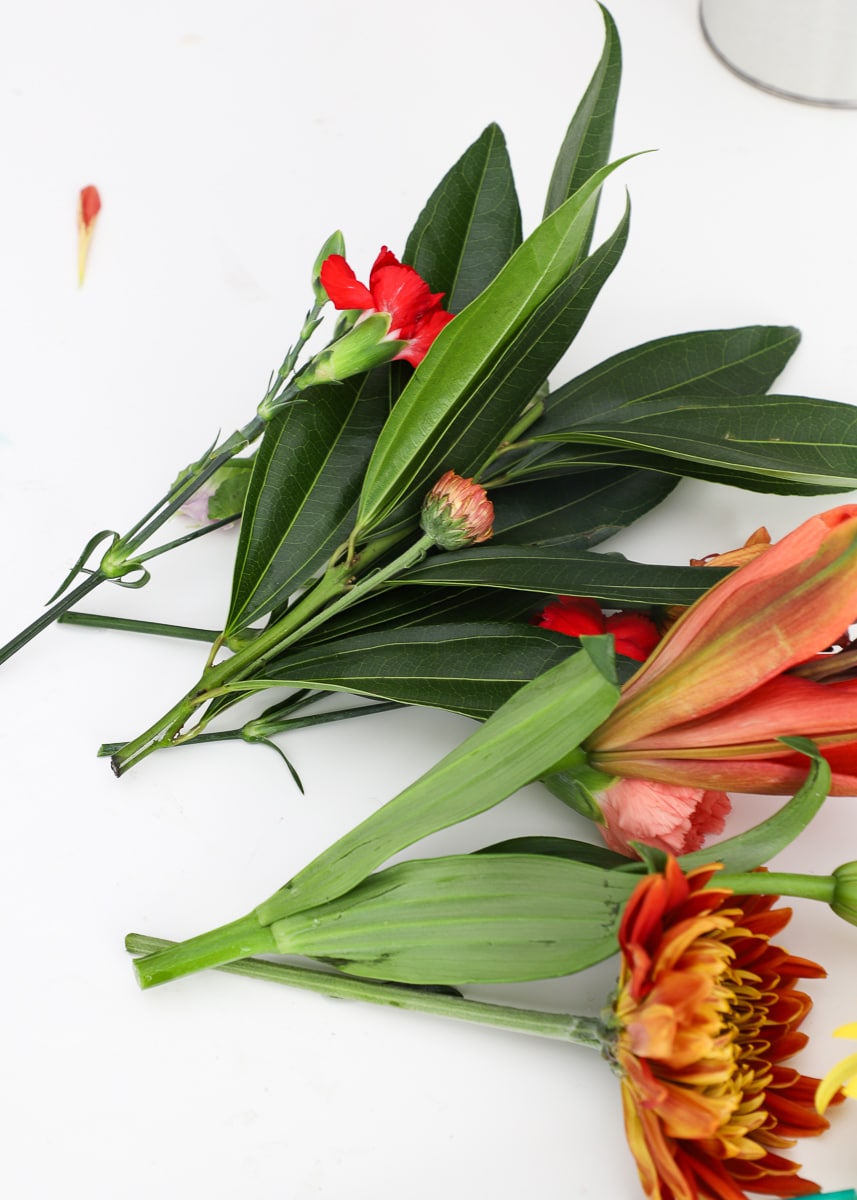
Now the can is done, let’s add the flowers! Un-wrap your grocery store bouquet of flowers and pull everything out. Using a scissors, trim all the stems down to just a few inches taller than your cans.
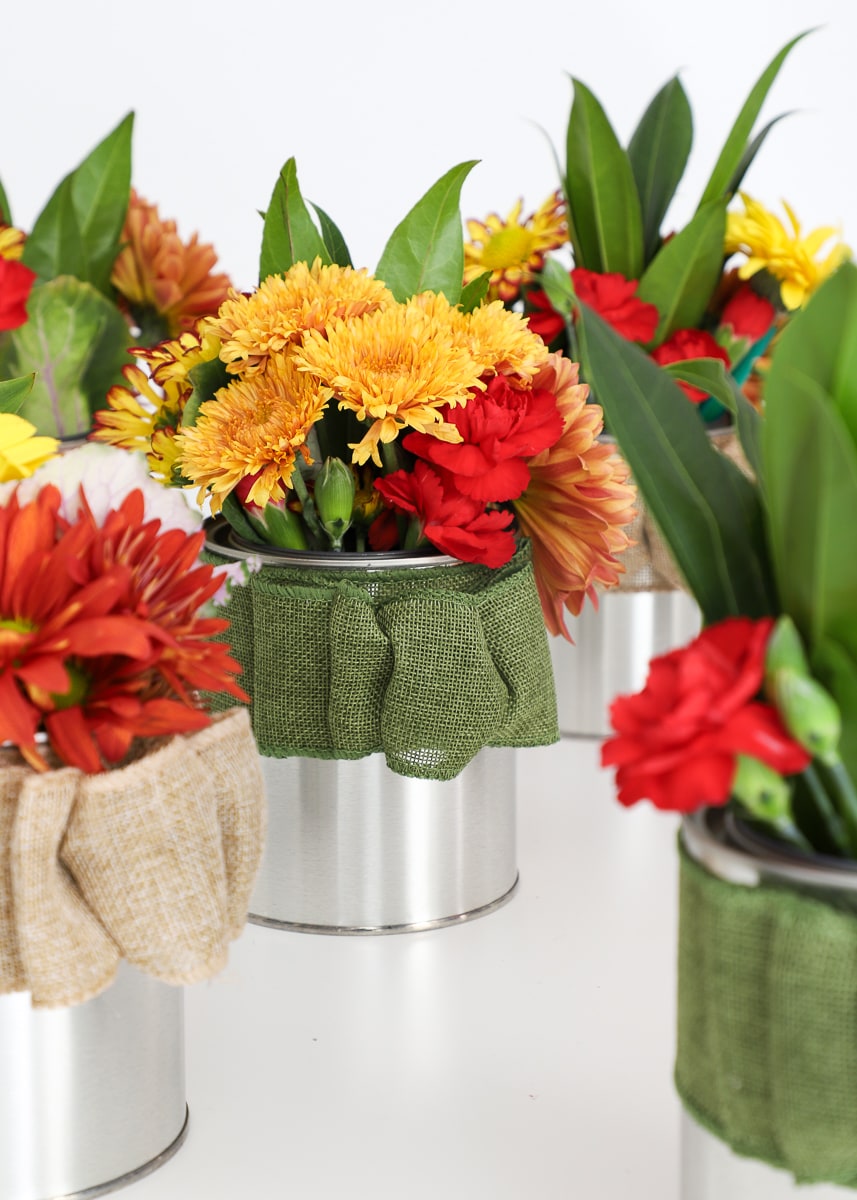
Fill the cans with water and then stuff the flowers in the cans…and I mean stuff! These Fall table centerpieces look best when they are nice and full.
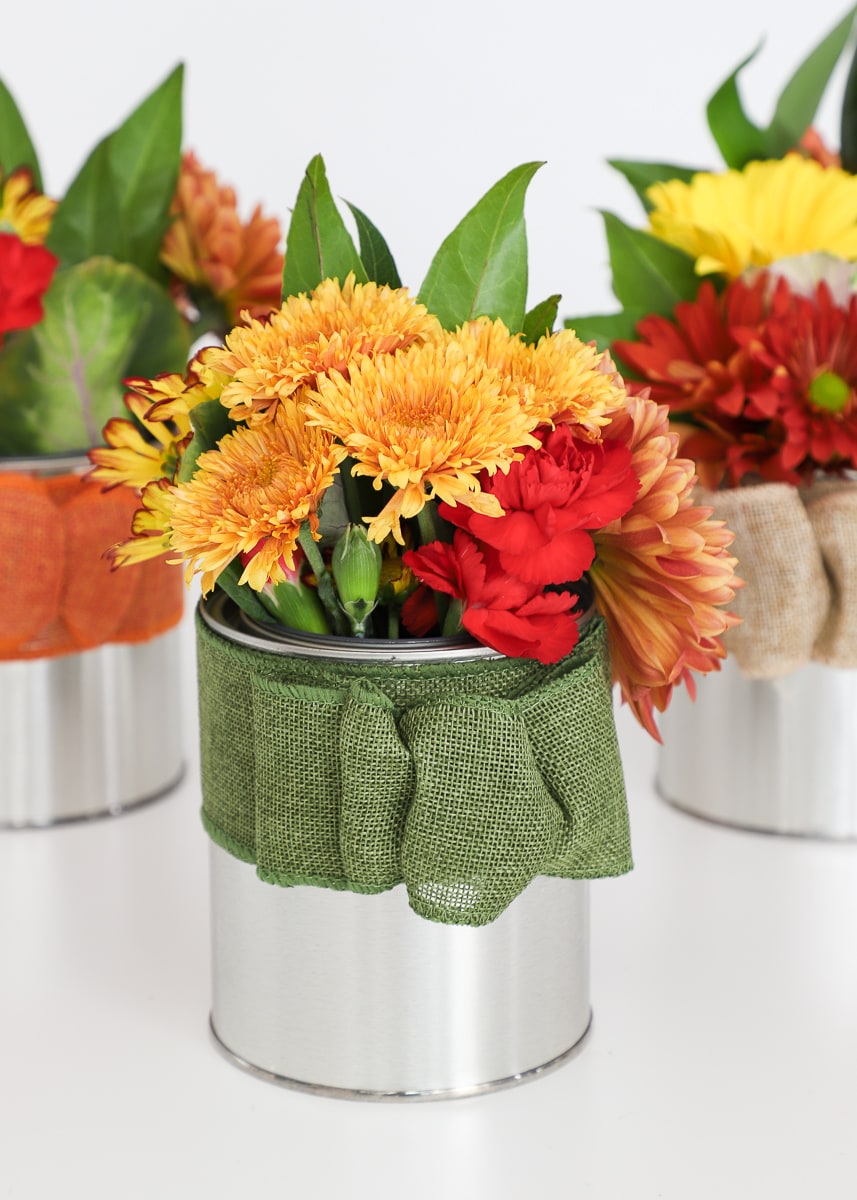
Don’t stress about getting the arrangements perfect. Just keep moving flowers around until they look full and balanced. I also suggest using everything that comes in the store bouquet. The bunches of leaves look really nice tucked right into the center of all the flowers!
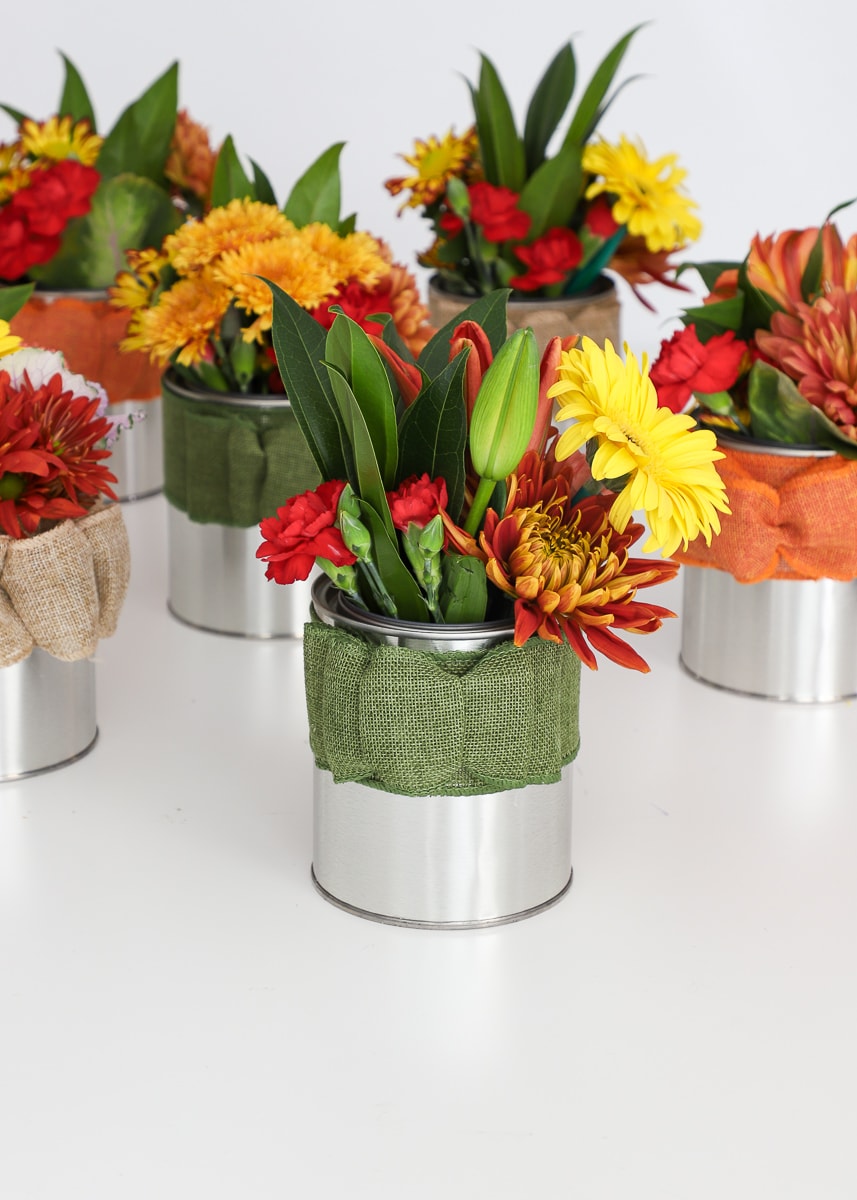
Admittedly, I wasn’t planning on blogging this little last-minute project, but even I was impressed with how quick they were and how cute they turned out. I swear I made all 6 of them in about a half hour with the baby asleep on my chest in the carrier. I got so many complements on them that we’re keeping them to use for our Thanksgiving table too (with fresh flowers, obviously!) If you’re hosting Thanksgiving this year, give them a go! I promise these oh-so-simple Fall table centerpieces will make your table look amazing without the stress!
Megan


4 Comments on “Easy Fall Table Centerpieces (You Can Make In Minutes!)”
I love how cute these are, even better is how simple they are to make! Saving for Thanksgiving, I think even I could do this 🙂
These look great – I saw fall flower bouquets at the market, and thought – but I don’t have anything to put them in. Such an easy idea. I will have to look for the burlap ribbon. Thank you! Aloha, Tenney
Easy peasy and pretty! For the win! <3 xoxox
I made these last minute for Thanksgiving. Sent the husband to the paint store, I went for flowers & wala! Came out beautiful, wish I took pictures. I am making another for a welcome home though and will photograph~ Thank you so very much~