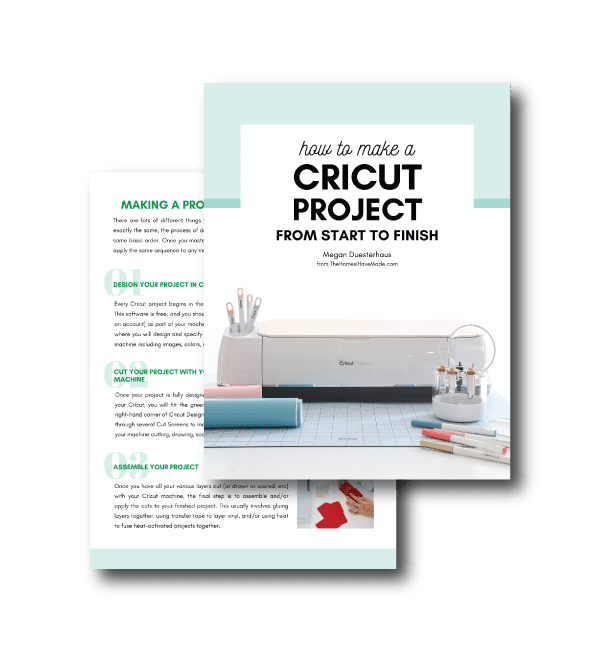
How to Make a Cricut Project from Start to Finish
I’ve been loading materials into and cutting projects with a Cricut machine for over 10 years now. And while it’s something I can practically do in my sleep, I realize that for anyone just getting started with a new machine, even making a basic paper or vinyl project can feel super intimidating and maybe even frustrating. Today, I’m going back to basics and showing…in crystal clear, step-by-step detail…how to make a Cricut project from start to finish. If you’re just getting started or are thinking about buying a new machine, this post has all my best tips and tricks for avoiding frustration and getting your first projects to turn out just right. Let’s get started!
This is a sponsored conversation written by me on behalf of Cricut. The opinions and text are all mine.

There are lots and lots of things you can cut and make with a Cricut. Today’s post will specifically cover how to make a Cricut project with both cardstock and vinyl, the two most common materials used by Cricut crafters. Once you master the process for these two mediums, you’ll be able to apply the same techniques to other popular materials such as iron-on, chipboard, fabric, and more!
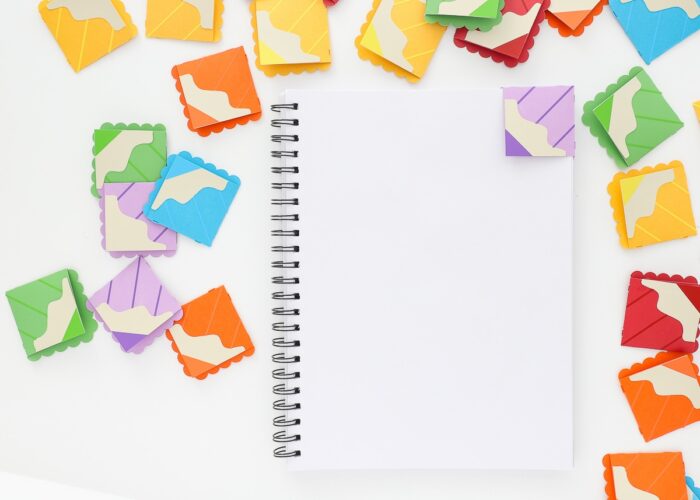
The sample project I’ll be demonstrating today are these adorable “colored pencil” corner bookmarks (perfect “welcome back to school” treats for the kiddos, don’t you think?!?). Not only are they super simple to make, but they utilize both paper and cardstock in a really fun and easy way for beginners.
That said, the steps I’m showing today can be used for any Cricut project, so feel free to pick a design you love from the Design Space Image Library and follow along just the same!
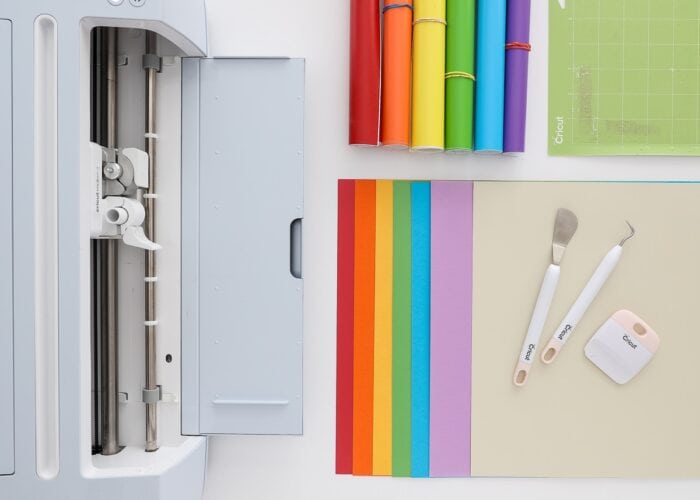
Supplies Needed
For this tutorial, I will be using the following supplies:
- Cricut Maker 3 (although this tutorial applies to any Cricut machine)
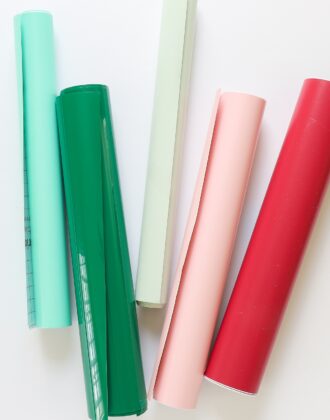
- Cardstock in assorted colors
- Vinyl in assorted colors (I love this combo pack for projects like this when you need a lot of colors!)
- Standard Grip Mat
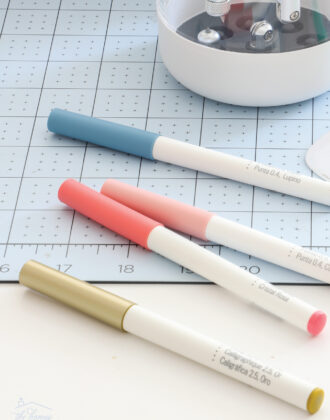
- Essential Tools: Paper spatula, scraping tool, paper trimmer, and weeding tool
- Transfer Tape (not shown)
- Colored Pencil Bookmark Design Space File – click HERE to use my file to make these exact bookmarks
Always Start In Cricut Design Space
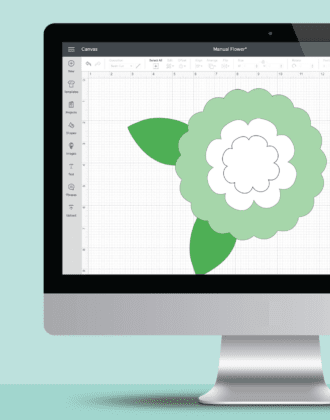
Every Cricut project begins in the design software, Cricut Design Space. This software is free; and you should have installed it and created an account as part of your machine setup. Design Space is where you will design and specify everything to be cut with your Cricut machine from colors, sizes, and so much more.
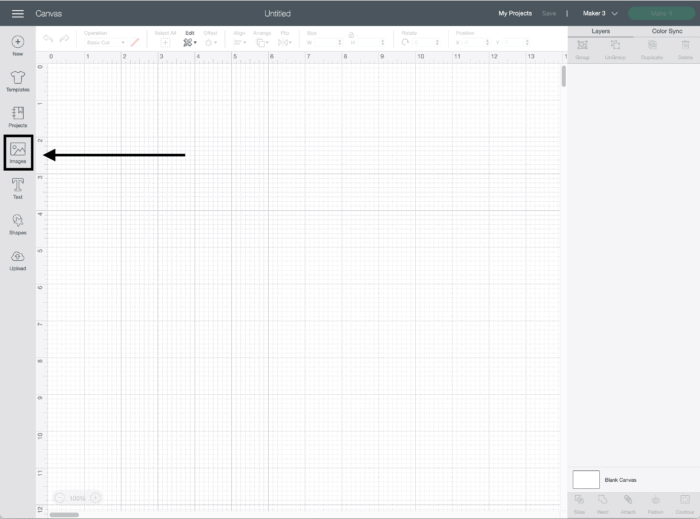
From the home screen in Cricut Design Space, click “New Project” on the left side.
Immediately, a blank canvas will load. Cricut Design Space has tons of tools and functionality that you will learn and become proficient with over time. However, the best way to get started is to simply pick a basic design you love from the Image Library. Do this by clicking the “Images” button along the lefthand toolbar.
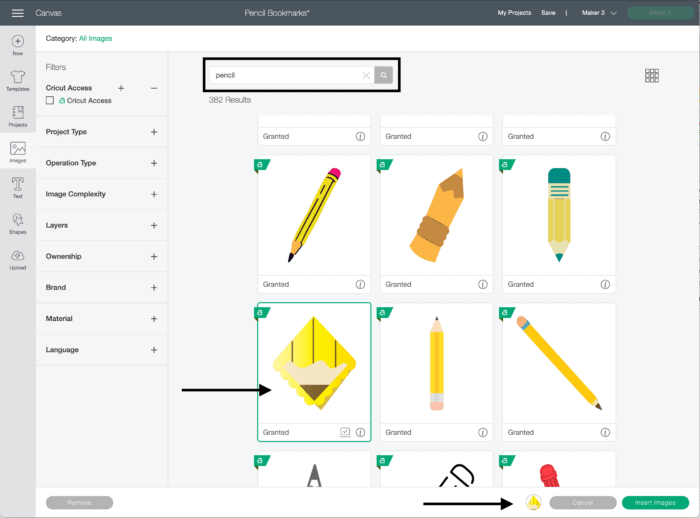
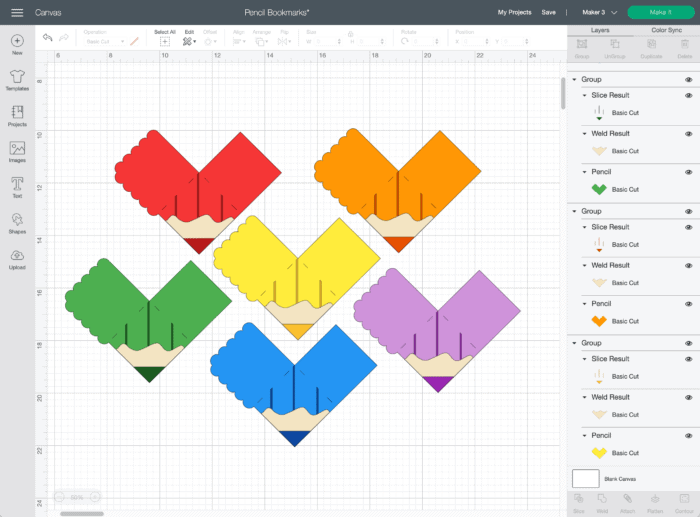
When the Image Library loads, use the search function to find a design you want to try. To make these specific pencil corner bookmarks, simply type in “Pencil” and look for the image highlighted below. When you click on a design, a green box will appear around it to indicate it’s selected. Any image you select will also populate along the bottom bar so you can keep track of what images will load onto your canvas.
You can also access this Design Space file with the bookmarks ready to go HERE.
After selecting an image and clicking the green “Insert Image,” it will load onto your canvas. From here, you can use the wide range of tools along the top toolbar to re-size, rotate, edit, and more. To learn all about the various tools and how to use them, refer to my free Cricut Design Space Cheat Sheets HERE.

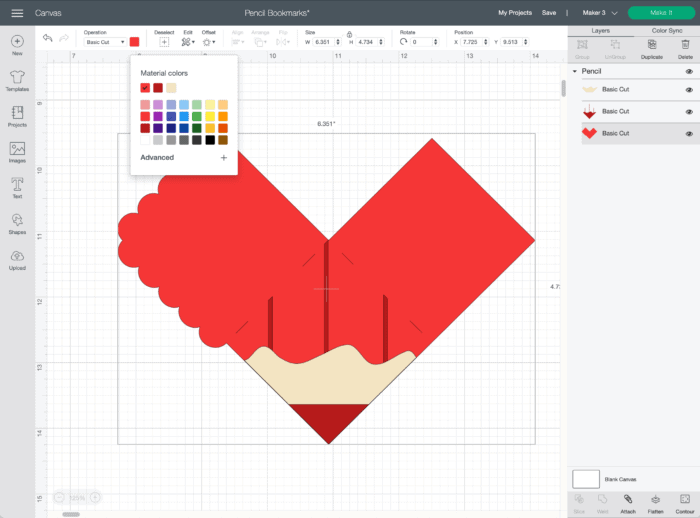
I am not going to play with this image too much, but I am going to change the colors of the layers to demonstrate how easy it is to alter the entire look of a pre-made design. By selecting each element in the right-hand Layers panel, you can adjust the color using the Material colors menu along the top. By changing the yellow and black to shades of red, I suddenly have a colored pencil rather than a classic pencil!
Once you are satisfied with your basic design, click the green “Make It” button to send it to cut.
NOTE: If you are using a Cricut Maker 3, Cricut Explore 3, or Cricut Joy, select “On a Mat” when prompted.
On the cut screen, you will see all your various elements assigned to the correct color mats. Mats will appear in ROYGBIV order along the left-hand side, with neutrals coming up last. You cannot re-arrange this order, but you can manually select which mat you want to cut next by clicking directly on it. This color-coding is exceptionally helpful in ensuring you load the correct color material at the right time to cut a certain part of the design.
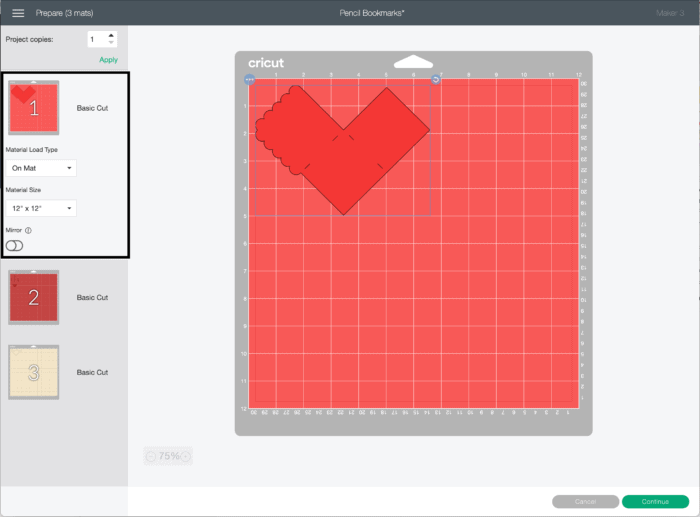
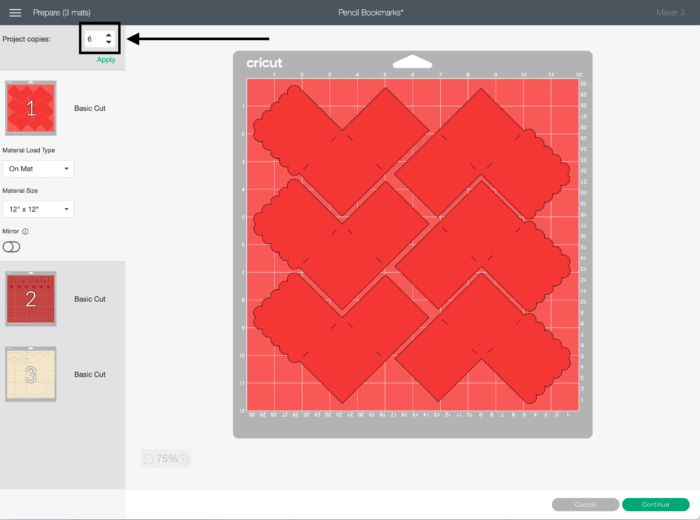
There is a lot of useful things you can do on this cut screen (including changing material size, setting “Mirror,” and more). It is also here where you can quickly and easily adjust how many copies are made at one time. I wanted to use up my full piece of 12×12″ cardstock, so I adjusted my Project Copies number to 6.
TIP! You can easily re-arrange how items are placed on these mats (and even move cuts from one mat to another) by clicking the three dots on each image.
Once you are satisfied with your cut specifications, click “Continue.”
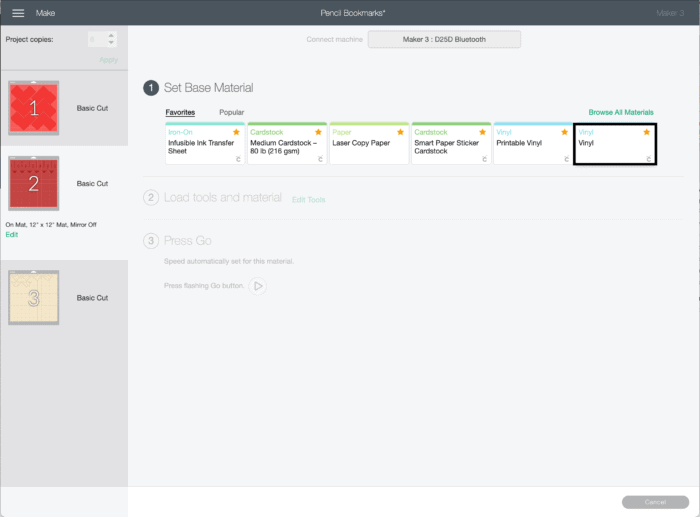
How to Cut Cardstock with a Cricut
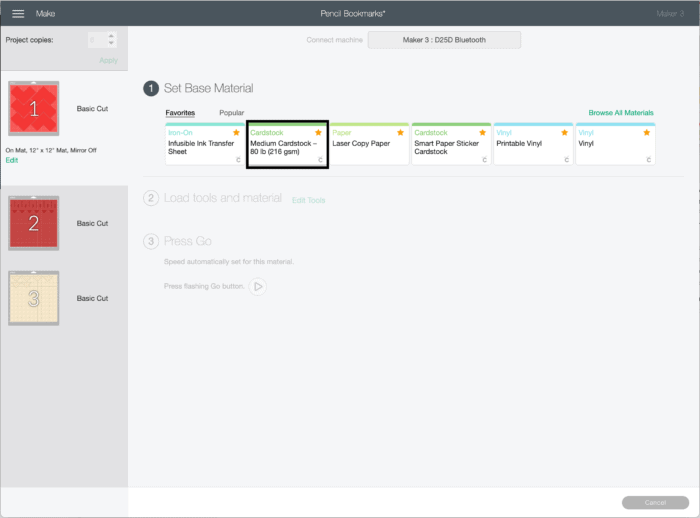
On the next cut screen, you will notice that a particular mat is highlighted on the left-hand side (in this case, it’s the bright red mat). Whatever mat is highlighted is the one that will be cut next. You will then be prompted to set a material. Since I want the bright red part of this design to be cut on cardstock, I select “Medium Cardstock.” Feel free to “Browse All Materials” to find the specific material you are using if necessary.
NOTE: If you are using a Cricut Explore or Cricut Explore Air, you will need to adjust your machine dial to the correct material instead of using the software.
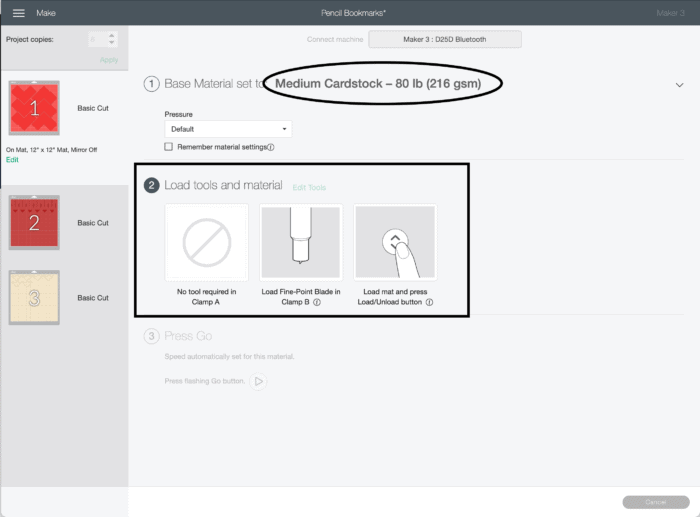
This final cut screen may be easy to skip over but don’t! It will always have all the information you need to actually cut out your project. It will not only display the material that is selected (and you can easily change it by clicking the material name), but it also tells you exactly what tools/blades to load into your machine and what buttons to push. While these instructions aren’t super unique for this particular project, these details come in very handy when you start adding details such as pens, scoring, foiling, and more. In this case, it is telling me to load the Fine Point Blade (the blade that comes with all machines) and load a mat.
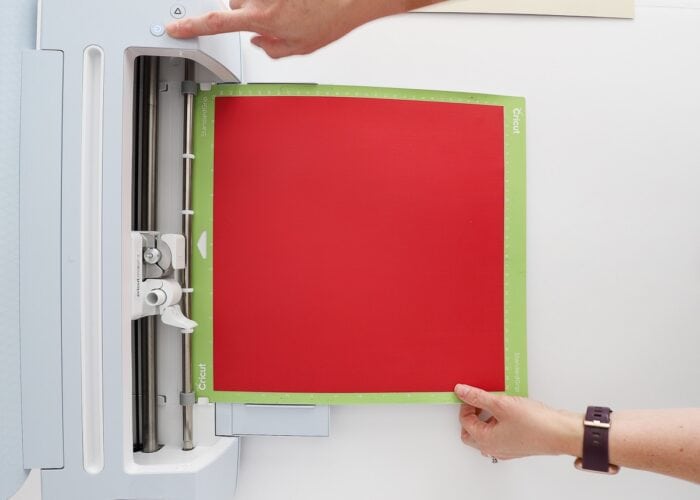
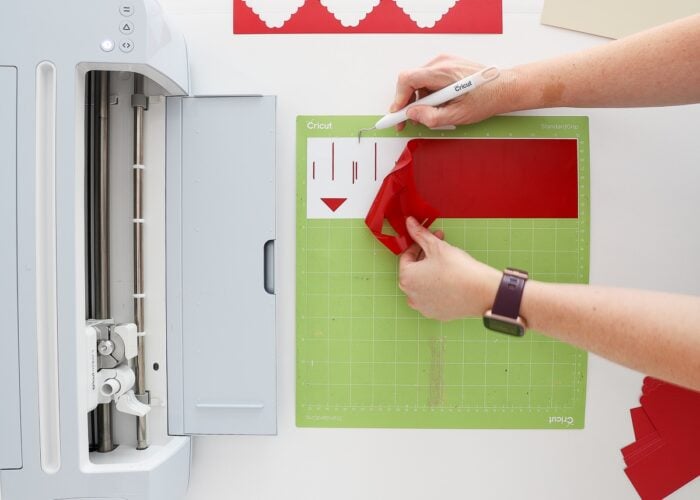
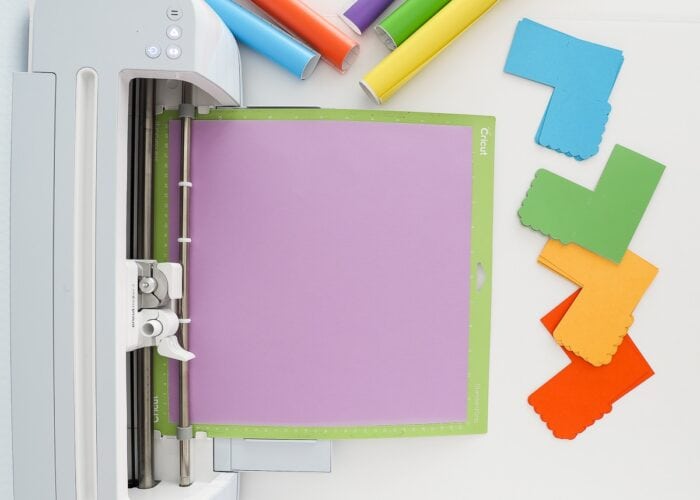
To cut cardstock with a Cricut machine, you will want to adhere a piece of paper (in the correct color) to the sticky side of a Standard Grip Mat. Make sure the piece of paper is big enough for your entire design and is lined up with the printed grid on the mat. Smooth down the paper to make sure there are no bubbles and it is fully adhered.

Once the Load/Unload button starts flashing, slide the mat under the white feed guides on the right and left sides of the machine. When you press the flashing button, the mat will be pulled into the machine.
NOTE: If you have a Cricut Joy, Cricut Maker 3, or Cricut Explore 3, the machine will pre-measure your material to ensure you have enough before proceeding.
With the mat loaded, the “Go” or “Cricut” button will start flashing. Press it to begin the machine cutting. Once the machine is done cutting, you can again press the Load/Unload button to release the mat from the machine.

Removing Cardstock from a Cricut Mat
If you just peel cardstock off a mat, there’s a very good chance the paper will curl up (which will affect the way your final project assembles and looks). So instead of pulling the paper up off the mat, flip the mat over and pull the mat away from the paper.
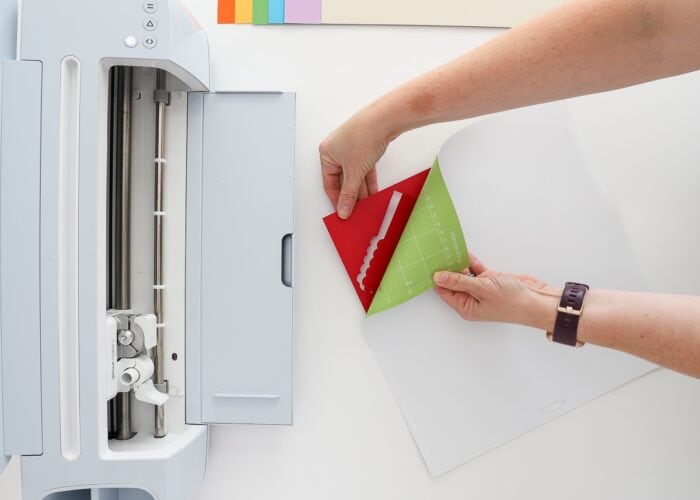
Keep the paper down on your work surface while you bend the mat backward to release the cuts. Don’t worry about bending the mat; it won’t crack or warp at all!
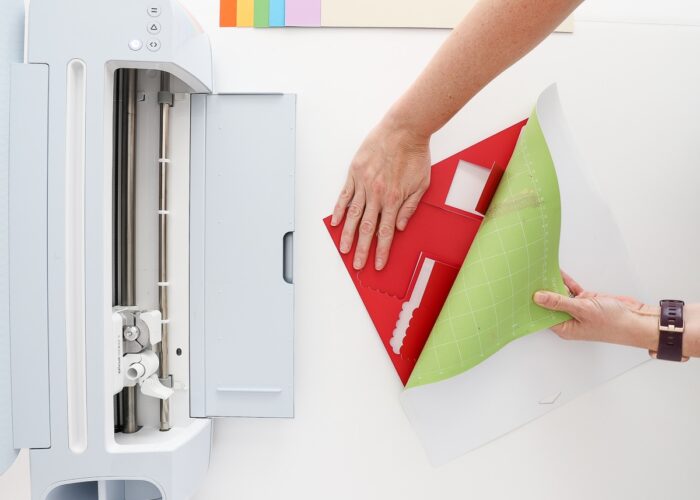
Another option for removing cardstock from the mat is to use a paper spatula. Start by pulling off all the excess paper around your cut designs, then slide the spatula under the shapes to release them from the mat. This technique works best on smaller paper shapes.

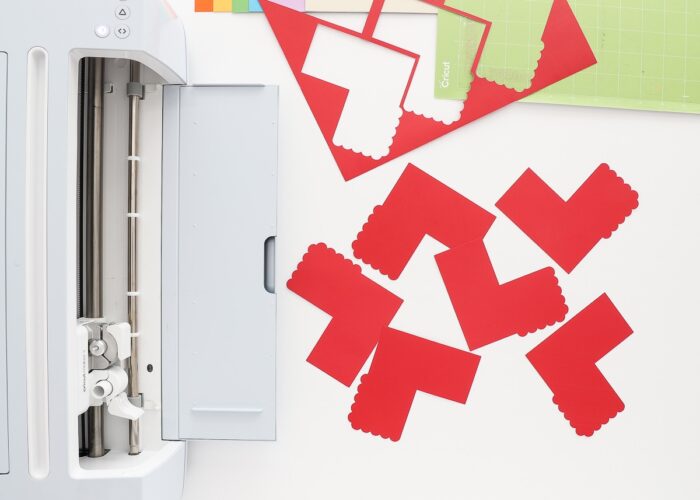
Assuming you used the correct materials setting, a good Fine Point Blade, and a sticky mat, you should end up with perfectly-clean cuts from the cardstock!
How to Cut Vinyl with a Cricut
The darker red layer of my design is the pencil tip and line details. To avoid having to glue everything together, I’m going to cut these elements from vinyl instead.
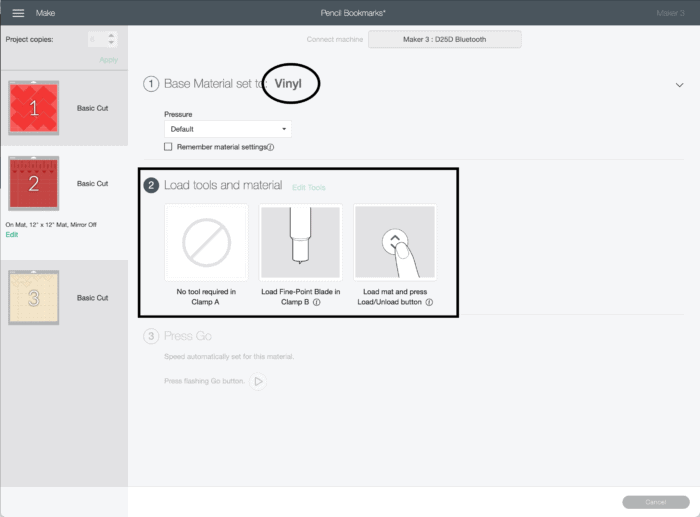
Back in Design Space, notice that the dark red mat is now highlighted. I am prompted to again select a material; this time, I will choose vinyl.
NOTE: If you are using a Cricut Explore or Cricut Explore Air, you will need to adjust your machine dial to the correct material instead of using the software.
Once the material is selected, the screen will populate with all the instructions you need for cutting this next layer.
Oftentimes, your design will not take up the full 12×12″ of the mat. In these instances you may want to use scraps or cut down larger sheets in order to save material. To determine precisely how much material you need, click the “Edit” button under the mat on the left-hand side. This will open an edit window where you can better see the design dimensions. From here, you can determine how much material to load onto your mat to cover the entire design. In my case, I needed a cut about 12 x 3.5″.

I will rarely cut down my cardstock, but will often trim down my vinyl before loading it into my machine (this helps with the weeding process later on). I find using the Cricut Paper Trimmer as the best method for getting precise measurements.

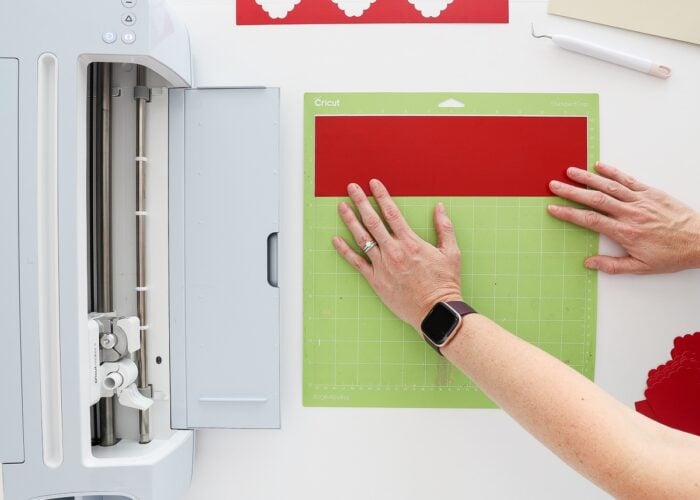
With the vinyl trimmed down to size, load it onto the mat, again using the printed white guides on the mat to help.
NOTE: You always want to make sure you load your material onto the mat in the same place the software is set to cut your design. If you choose to have your design cut further down on the mat, you’d want to place your material accordingly.
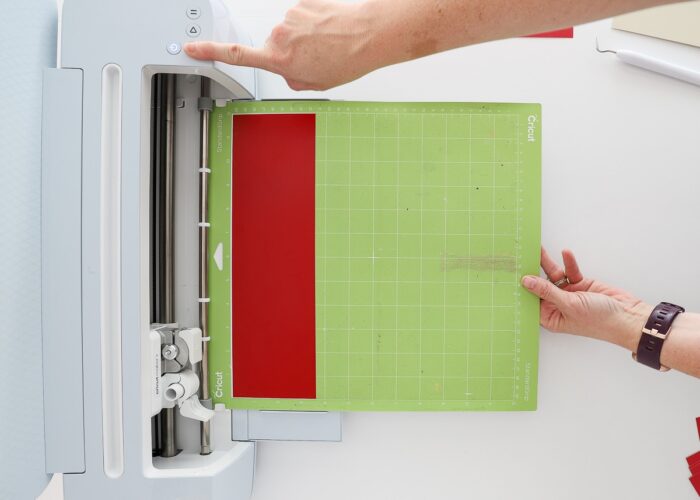
Once the Load/Unload button is flashing, slide the mat under the white feed guides on the right and left sides of the machine. When you press the flashing button, the mat will be pulled into the machine.
NOTE: If you have a Cricut Joy, Cricut Maker 3, or Cricut Explore 3, the machine will pre-measure your material to ensure you have enough before proceeding.
With the mat loaded, the “Go” or “Cricut” button will start flashing. Press it to begin the machine cutting. Once the machine is done cutting, you can again press the Load/Unload button to release the mat from the machine.
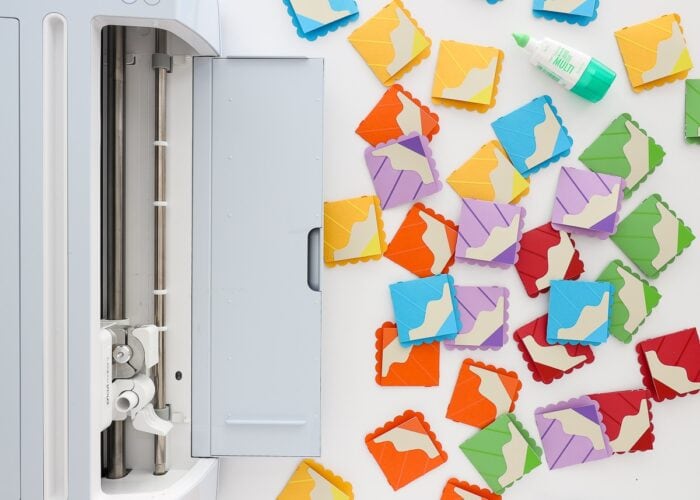
Weeding Vinyl Designs
In order to use your vinyl designs, you must first “weed” them, which is the process of removing all the excess material around (and within) your cut design. You can learn all about how and why to weed HERE.
TIP! I recommend leaving your vinyl attached to the sticky mat for weeding, since it keeps it from rolling back up onto itself!
Assembling Your Finished Project
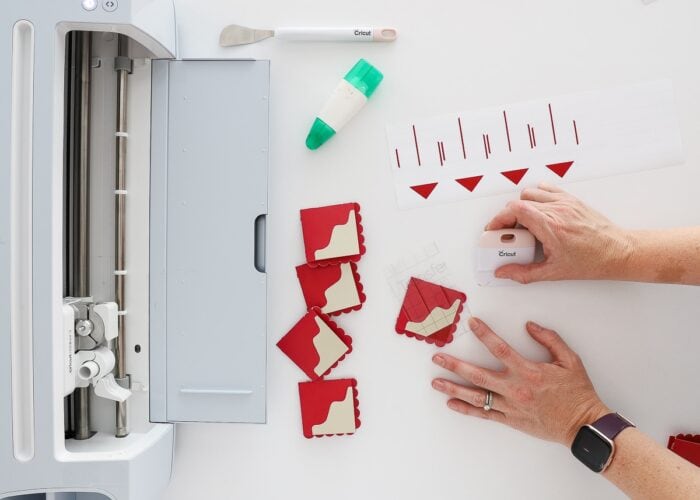
Continue working down mat by mat (color by color) in Design Space until all your design elements are fully cut out and prepped for assembly.
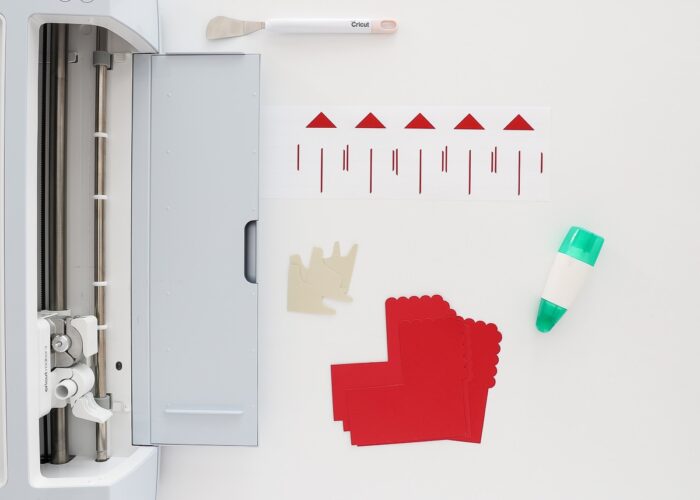
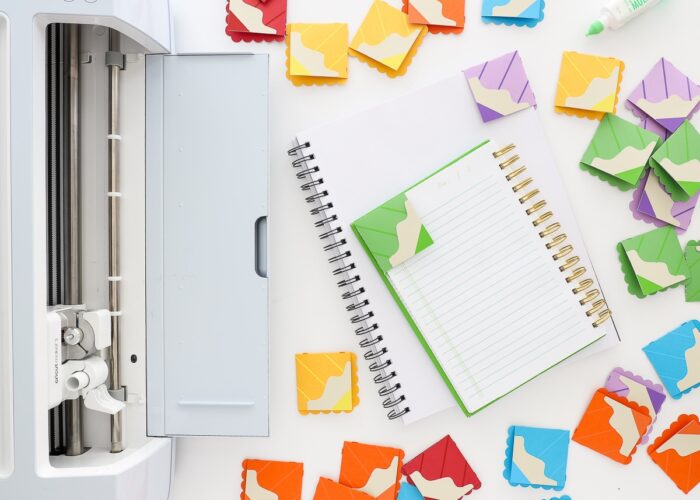
From here, you can use your favorite glues and techniques to assemble your finished project. For these colored pencil bookmarks, I started by folding and glueing the red layers together along the provided cut lines.
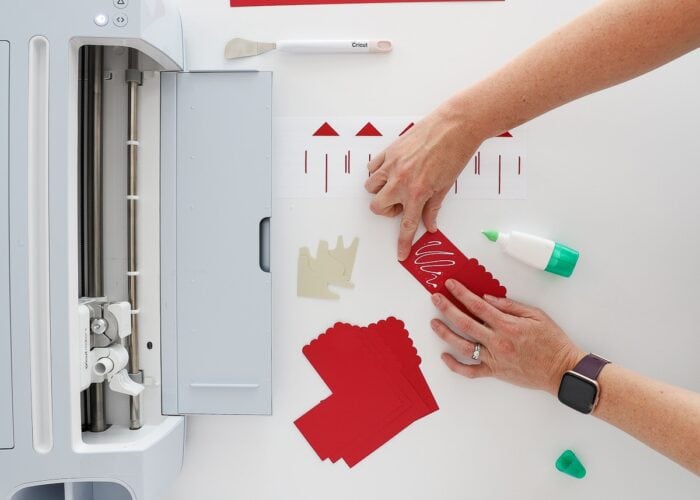
Next, I added the tan cardstock layer via more glue, and then placed the vinyl details with transfer tape. Refer to this step-by-step guide on how to use transfer paper with your vinyl projects.
Practice Makes Perfect
Although there are so many different things you can do with your Cricut machine (and hundreds of different materials to cut!), how to make a Cricut project from start-to-finish is generally the same no matter what you’re making. The best way to really get the hang of it is simply to practice.
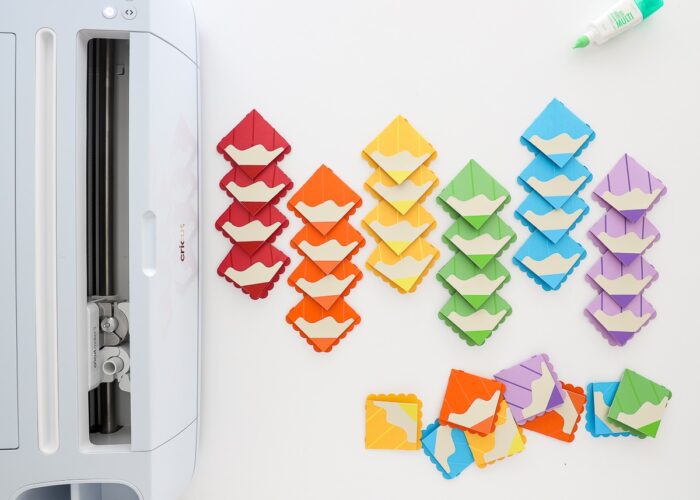
So perhaps after you make some red bookmarks, make the rest of the pencil box!
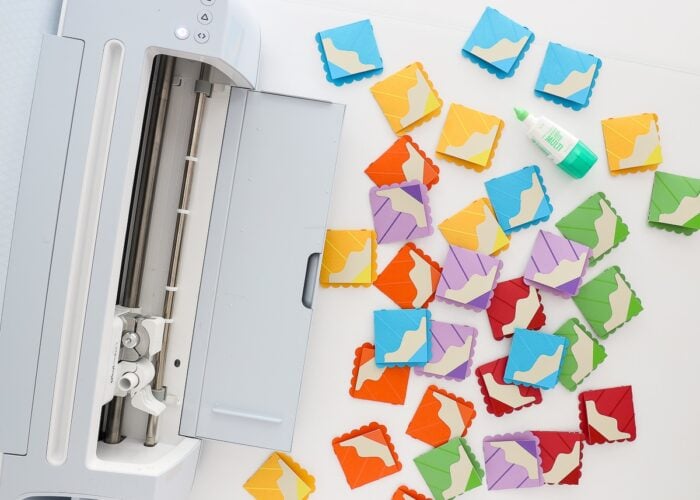
Because I promise you…after loading and unloading all these layers…
…and folding, gluing, and assembling them all together…
…you’ll feel super confident working with your Cricut machine and be more-than ready to take on your next project!
My absolute favorite part of owning a Cricut machine (or 4!) is that I can take sheets of paper and vinyl and turn them into something amazing in a matter of minutes! Don’t let the complexities of the Design Space software, a whole host of unfamiliar terms, or even some unusual supplies keep you from just trying a simple project. The basics of how to make a project with a Cricut is right here, so go pick out a design you love and give it a go! I’m here to help if you get stuck!

The Cricut Beginner Bundle
Looking for How to Make a Cricut Project From Start to Finish in a print-friendly format? Get the PDF version inside the Cricut Beginner Bundle!

Megan

One Comment on “How to Make a Cricut Project from Start to Finish”
Megan: Thank you so much for showing us how to do a project from start to finish. Your teaching is wonderful and very precise. I know I was blessed by your teaching. I am sure you have blessed many with your hard work in putting the lesson together. Thank you again for your class. I certainly learned a lot from you!!!