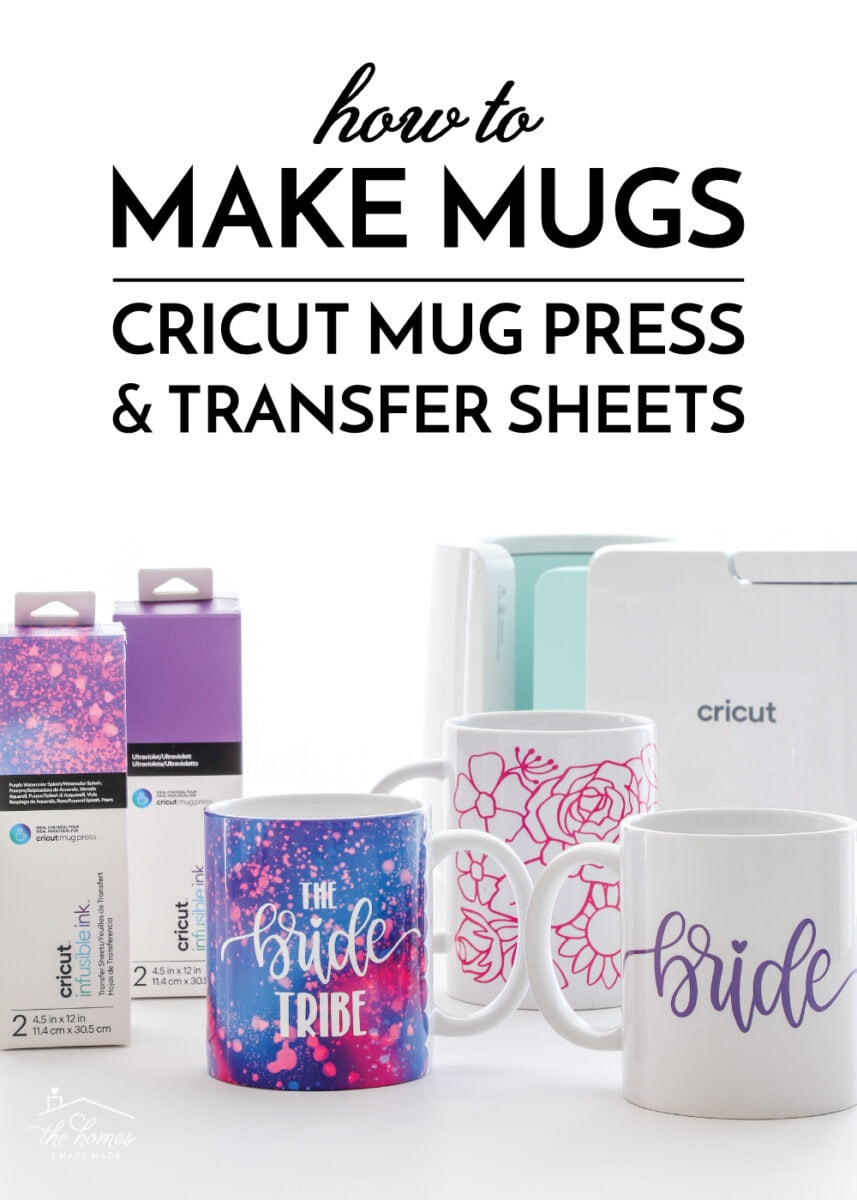
How to Make Mugs with the Cricut Mug Press and Infusible Ink Transfer Sheets
Last week, I told you all about the brand new (and oh-so-amazing) Cricut Mug Press, and it’s now officially on sale! So today, I’m going to show you exactly how to use the Cricut Mug Press to make custom, professional-quality mugs in mere minutes! I’m sharing my very best techniques and tricks I learned while making mug after mug, so you can get flawless results the first time (and every time after). In this comprehensive tutorial, I’m showing you three different techniques for making mugs with Infusible Ink Transfer Sheets. Let’s dive in!
This is a sponsored conversation written by me on behalf of Cricut. The opinions and text are all mine.
Series: Getting Started with the Cricut Mug Press
I am so excited to share with you a bunch of tips and tricks for creating flawless mugs in mere minutes with the new Cricut Mug Press! Here is everything you need to know to start making mugs today!
- About the Cricut Mug Press
- How to Make Mugs with Infusible Ink Transfer Sheets – you are here!
- How to Make Mugs with Infusible Ink Pens
- Tips and Tricks for Desinging Your Own Mugs
Make Mugs with the Cricut Mug Press and Infusible Ink Transfer Sheets
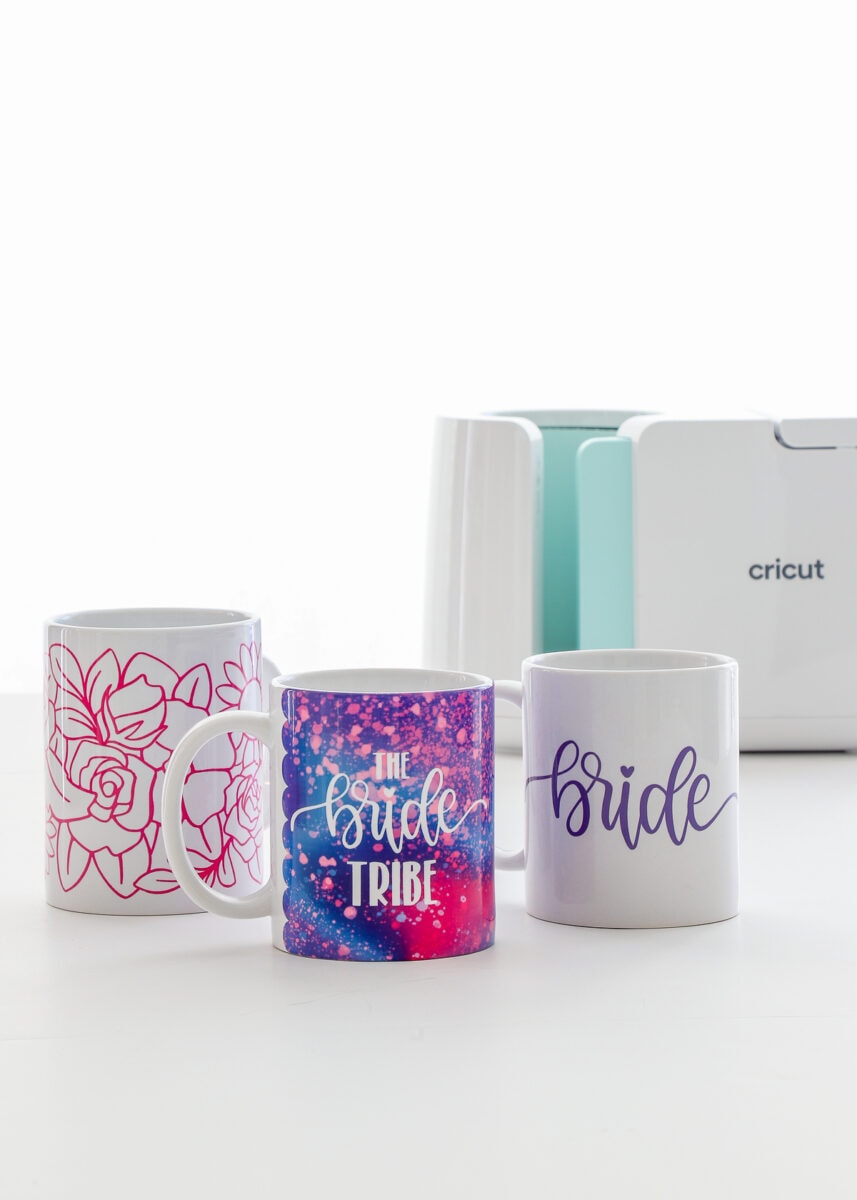
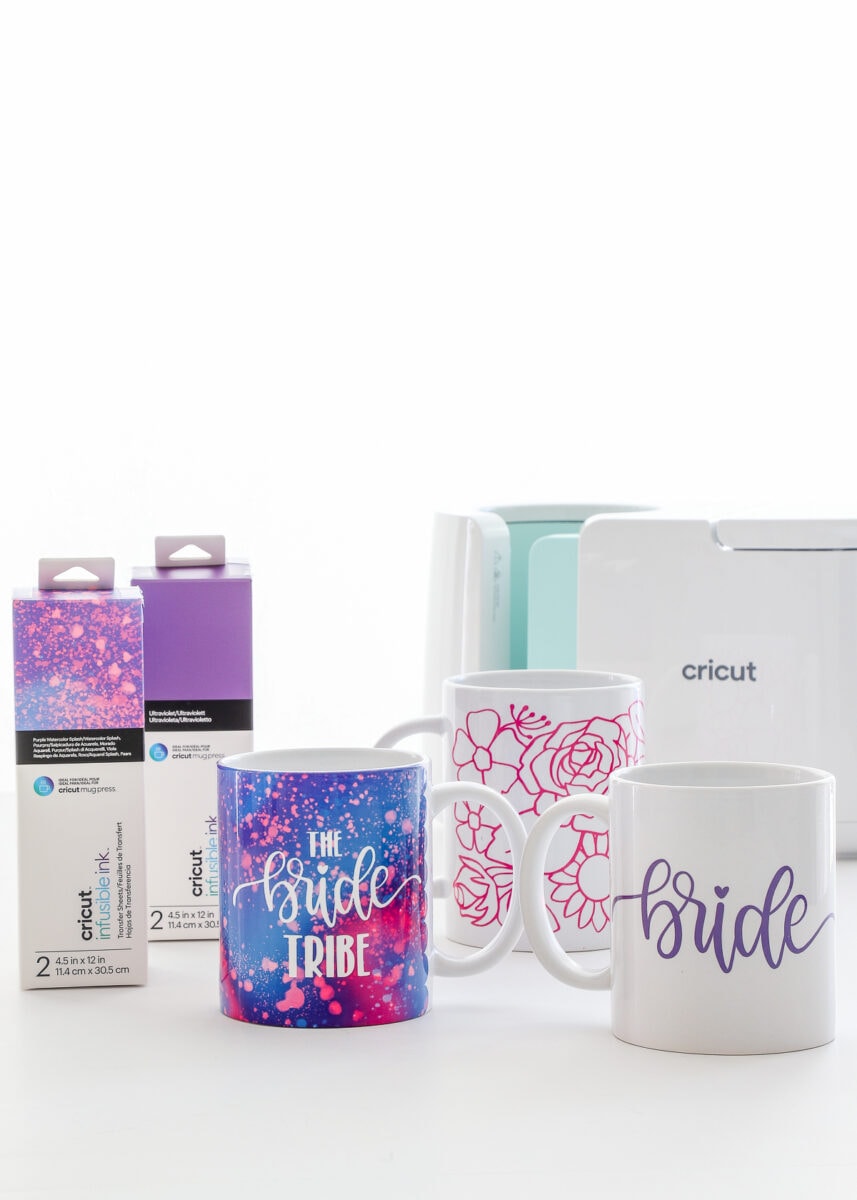
In this tutorial, I am going to show you how to make mugs with the Cricut Mug Press using Infusible Ink Transfer Sheets. There are three main techniques I am going to cover, each giving you a very different look using the exact same materials:
- The Full Mug Design (pink floral mug)
- The Wrap Mug Design (purple “Bride Tribe” mug)
- The Single Cut Mug Design (bride mug)

Supplies Needed
These three mug projects use the new Cricut Infusible Ink Transfer Sheets designed for the Cricut Mug Press. They measure 4.5 x 12″ and are sized perfectly to fit both the 12 oz. and 15 oz. mugs with minimal waste. That said, these techniques can use ANY Infusible Ink Transfer Sheets you might already have, opening up countless colors and patterns for your creations!
Here’s everything you need for these mug projects:
- Cricut Mug Press
- Cricut Machine – Cricut Joy, Cricut Explore Air, and Cricut Maker will all work for these projects
- Cricut Infusible Ink Transfer Sheets for Cricut Mug Press – I used Ultra Violet, Pink, and Purple Watersplash
- Standard Grip Mat
- Cricut Mug Blanks (either 12 oz or 15 oz)
- Heat Resistant Tape
- Lint roller or cloth
- If you’d like the make these exact Bridal Party Mugs, you can access the designs HERE.
All Cricut Mug Press supplies are now available at Cricut.com, as well as Target, Walmart, Amazon, Michales, Joann, Hobby Lobby, and HSN.
![]()
How to Make a Full Mug Design
Let’s start by making a design that covers a majority of the mug but doesn’t go all the way to the edge, like my pink floral mug. For this project, I used one of the many pre-designed mug images within Cricut Design Space.
To find these designs:
- Click “Image Sets” on the lefthand-side of the main Image menu.
- Type in “Mug” to see 11 different sets of mug images.
- Under the “Full Mug Designs” set, you will find several designs that cover the full mug.
- Click the (i) symbol to ensure you select either “Small” (for 12 oz. mugs) or “Large” (for 15 oz. mugs) so the design fits whatever mug you are making. In the example below, notice I selected the “Large Rose Mug Design” to fit my 15 oz. mug.
![]()
When the mug image loads onto your canvas, you will see that all of the design work is done for you: both the floral design and the mug wrap outline are sized for the 15 oz. mug and ready to be cut without any modifications.
![]()
Simply click the green “Make It” button to send the design to be cut.
IMPORTANT: On the Cut Screen, you must click the toggle button to turn ON “Mirror” so your image turns out exactly as it’s designed. While this is less important for an abstract design like this one, it’s good to get into the habit when doing ANY Infusible Ink project.
![]()
Load the Infusible Ink Transfer Sheet, paper side up, onto a Standard Grip Mat and load it into your Cricut Machine. Select “Infusible Ink Transfer Sheet” as your materials setting, and click the flashing button to start your machine. Once your design is done cutting, unload the machine.
![]()
Next, you will need to “weed” out all the negative parts of your design. With iron-on or vinyl, this is typically done with weeding tools. With Infusible Ink, it’s best just to use your fingers to pull all the paper away from the clear liner sheet.
![]()
When weeding Infusible Ink Transfer Sheets, it’s easiest to bend the design backwards until the element you want out “pops” off the liner sheet. Resist the urge to use any tools, and work carefully to remove each element cleanly.
![]()
It’s important to note how these the Cricut Mug Press images are designed. The mug design itself (the blooms, in this case) will be cut through the transfer sheet just to the liner, but not all the way through the liner. The mug wrap outline though, will cut through both the transfer sheet and the liner. When everything is fully weeded away, you will have a clear liner sheet that matches up perfectly with the height, circumference, and handle of your mug.
![]()
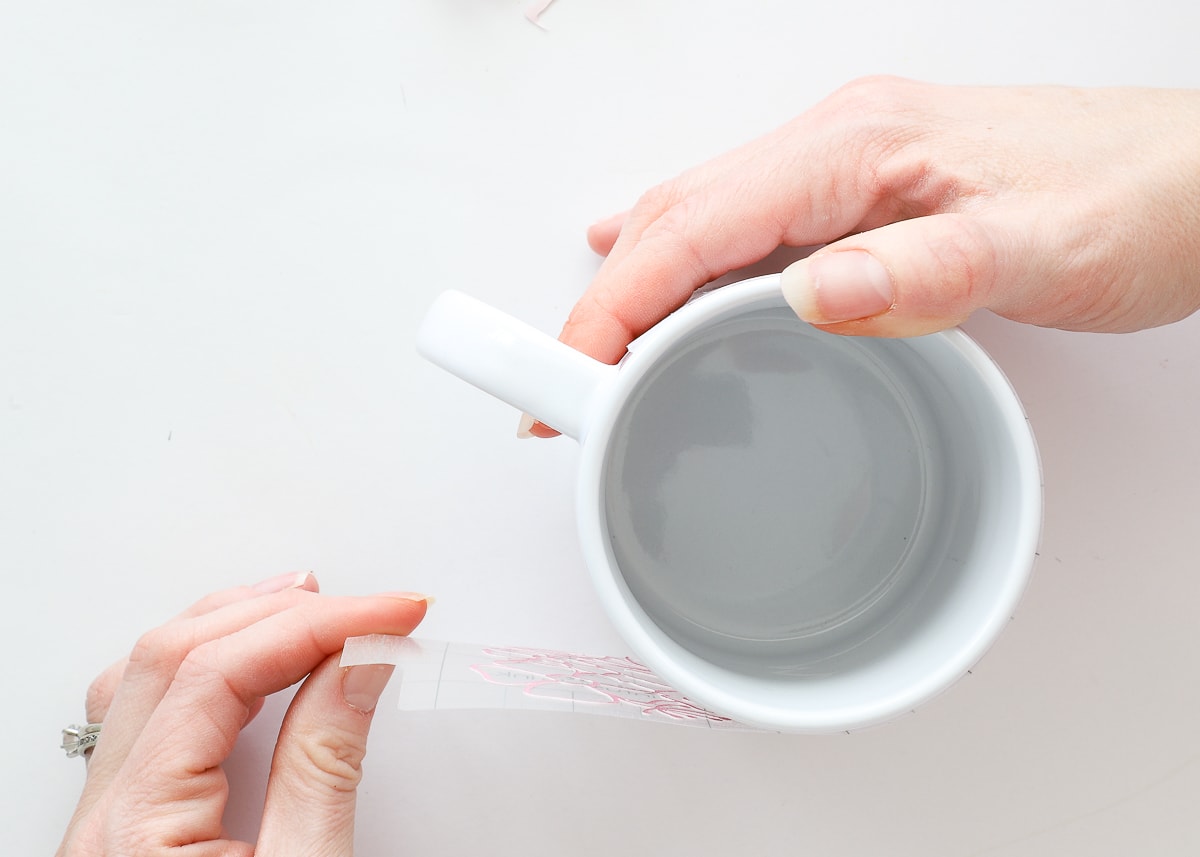
Before applying any design to an Infusible Ink blank, it’s extremely important that you clean it of any lint, fingerprints, or other residues. You can use either a lint roller or lint-free cloth to wipe down the mug.
![]()
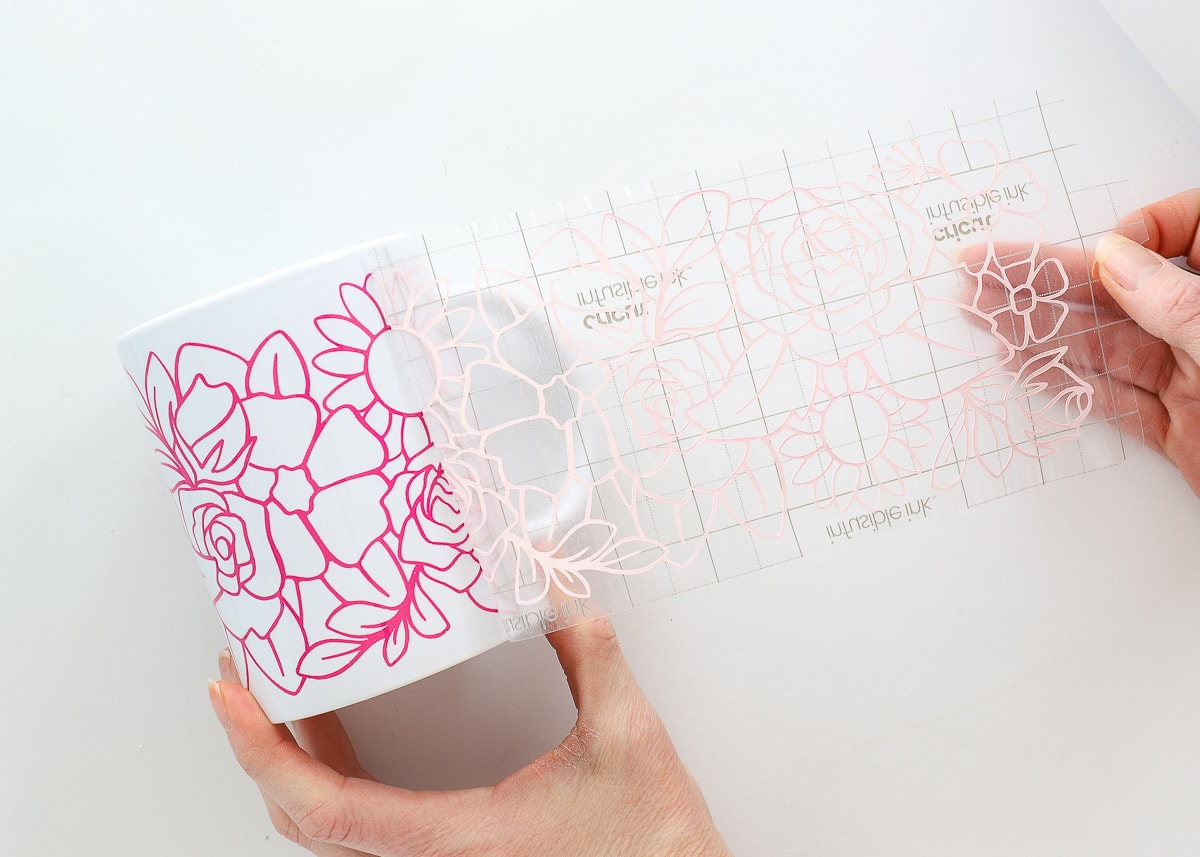
Your next step is to wrap the design around the mug. While this isn’t hard, it does take some practice to find a technique you like in order to get the design centered (both around the mug and vertically on the mug’s height). Here is my favorite way to do it:
Place a mug on a flat surface with the handle facing away from you. Without letting the design stick to the mug, bring the two side tabs around, toward the handle, with the bottom edge of the wrap resting on the table. Adjust right and left, as needed, to get the tabs centered on the handle.

Once you find a location you like, secure just one of the tabs under the mug handle.
Then, flip the mug so that it’s laying on the table. Roll the mug, as you stick down the design, lining up the edges of the liner sheet with the edge of the mug.
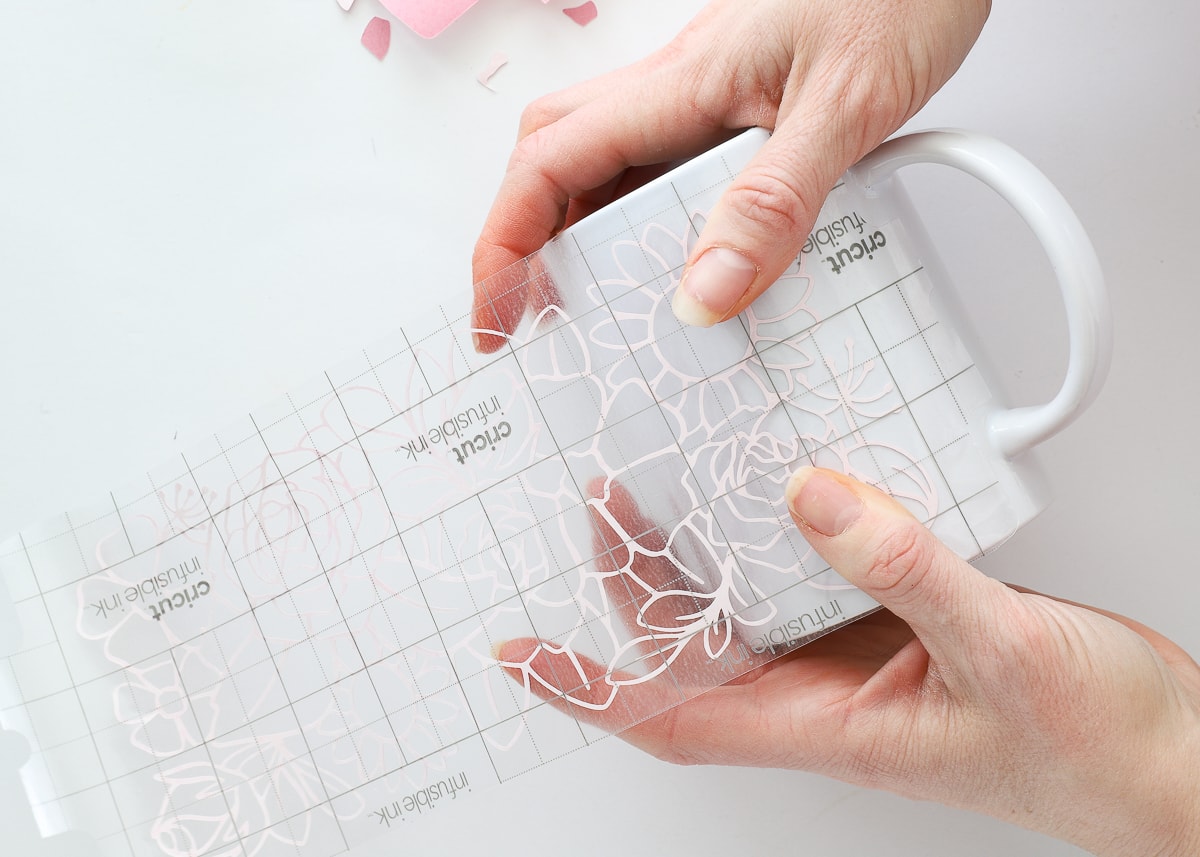
Smooth the transfer tape down as much as you can onto the mug’s surface to firmly hold your design in place.
TIP! If you don’t like where your design ends up, don’t hesitate to peel it up and lay it back down again (you won’t ruin your cut design). When you’re first starting out, you will likely have to place it over and over as you get the hang of it.
![]()
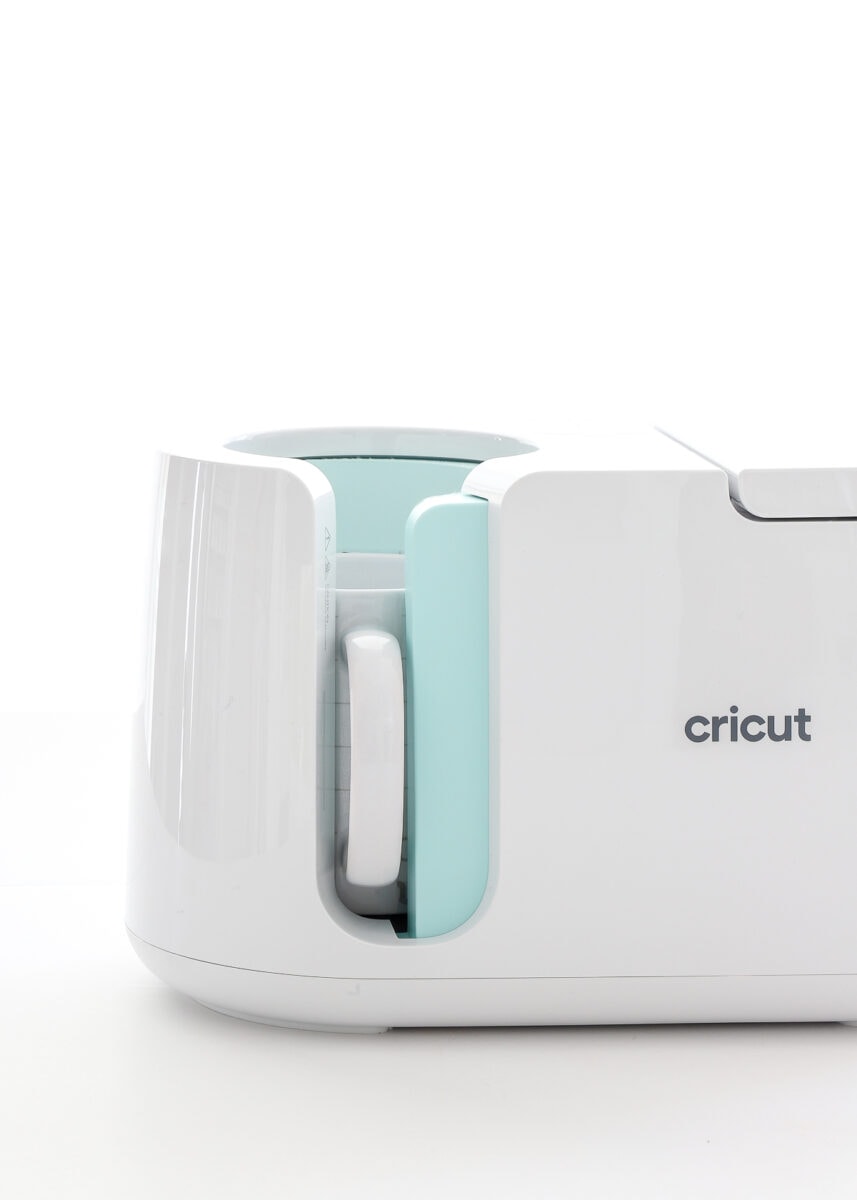
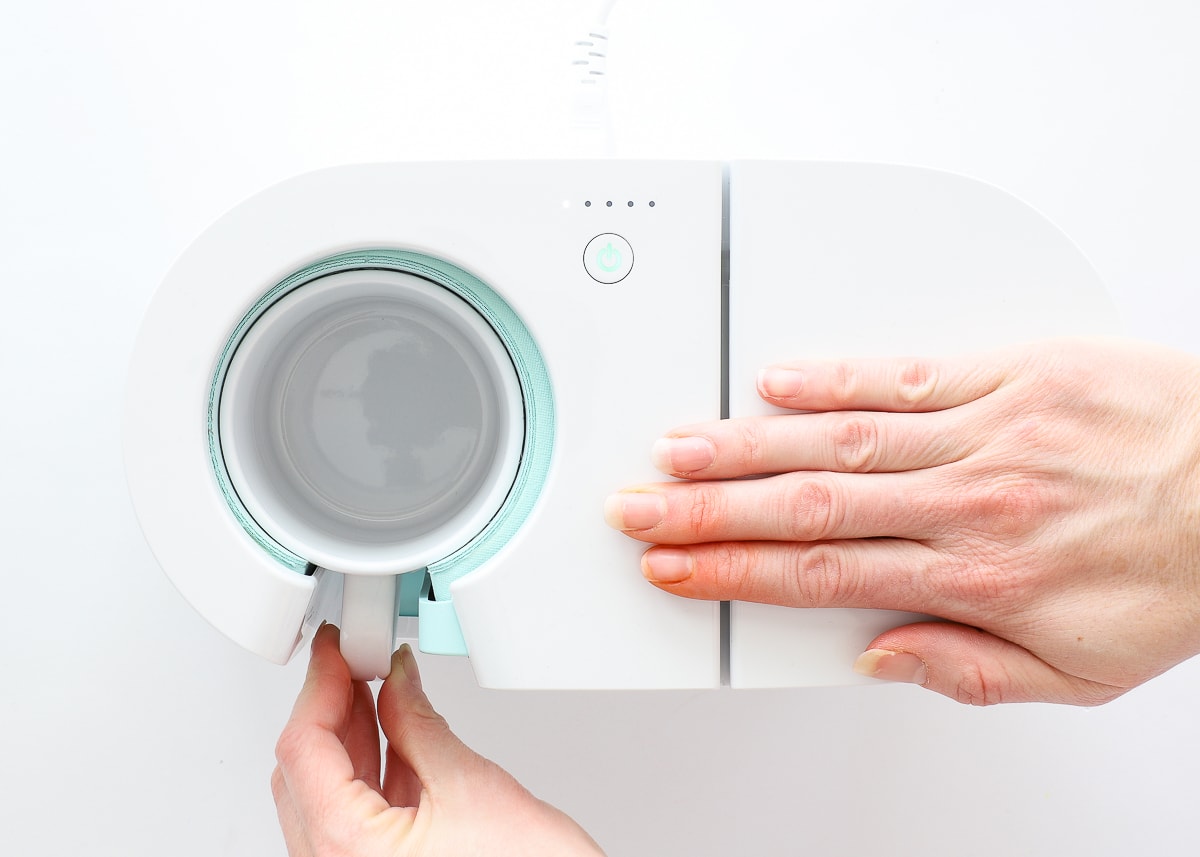
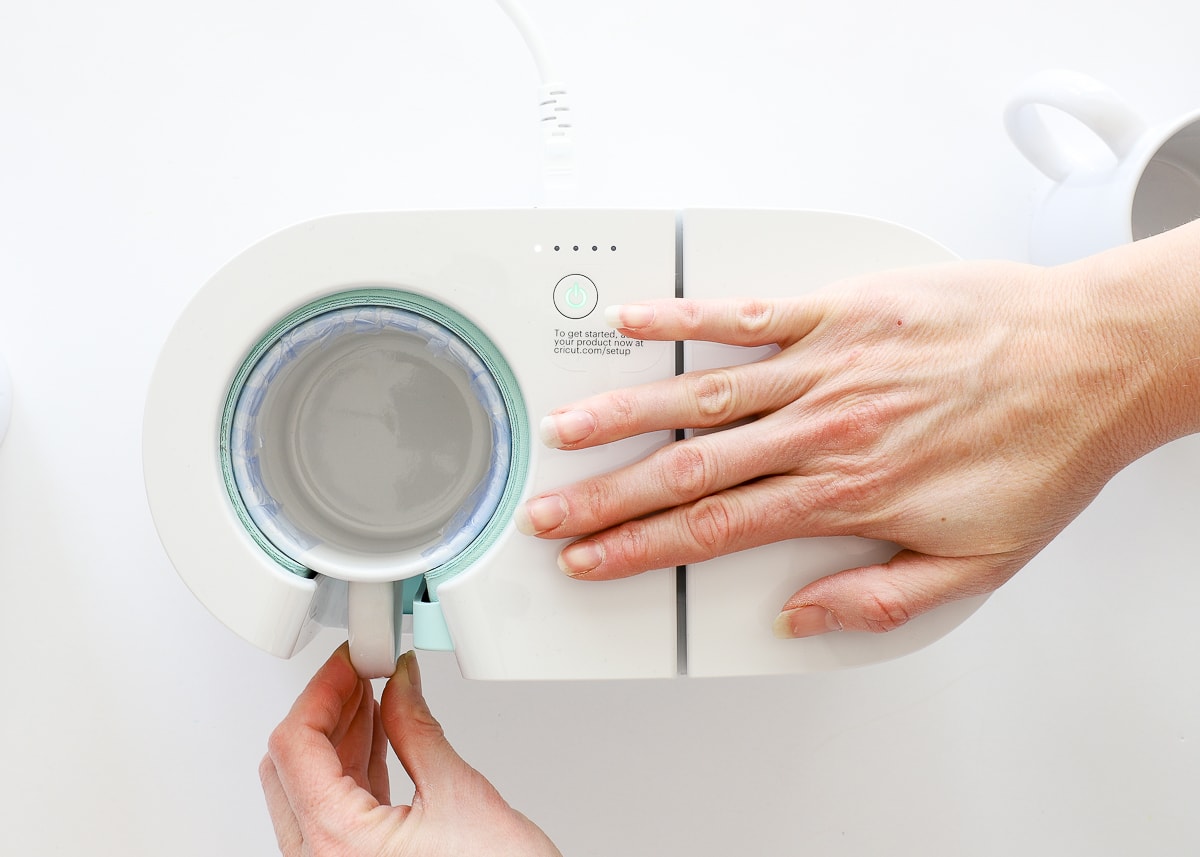
Since this specific design doesn’t extend all the way to the mug’s edge, no Heat Resistant Tape is needed. So now…you can simply place your mug into the pre-heated Cricut Mug Press and close the handle.
It is important to note that the Cricut Mug Press does not close around the handle. This is important for two reasons:
- When placing your design onto the mug, ensure only the design-free tabs are under the handle, and not any of the Infusible Ink image.
- When you close the Cricut Mug Press handle, be sure the mint-colored walls completely cover your cut design. If the handle closes and you can still see a bit of your design peeking out, open the handle and rotate the mug to ensure it’s fully covered by the heat elements.
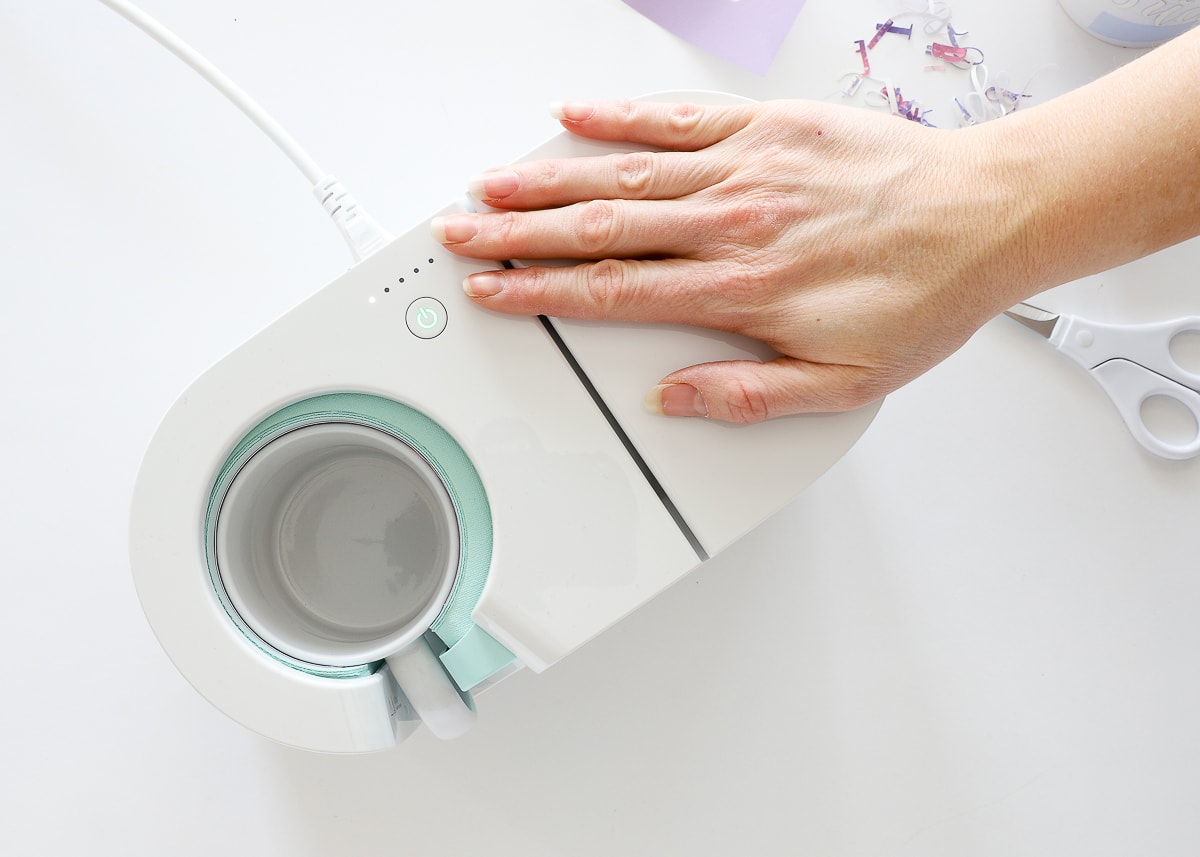
The Cricut Mug Press doesn’t not require any time, temperature, or pressure adjustments. You simply close the handle and wait. A series of 5 lights along the top of the machine indicate your mug’s progress.
After about 5-8 minutes, the Cricut Mug Press will beep to let you know the transfer process is complete. The mug will be incredibly hot, but the handle will still be cool to the touch. To remove your mug, hold and lift the mug out by the handle with one hand while opening the Cricut Mug Press lever with the other. Place your mug on a heat-safe surface (such as an EasyPress mat) to cool for about 15-20 minutes.
Once the mug is cool to the touch, all that’s left to do is remove the transfer sheet design!
![]()
You don’t need to worry at all about your design smudging, bleeding, bubbling, ripping…anything! Simply remove the clear transfer sheet liner to reveal a gorgeous, bold design transferred perfectly to your mug!
How to Make a Mug Wrap Design
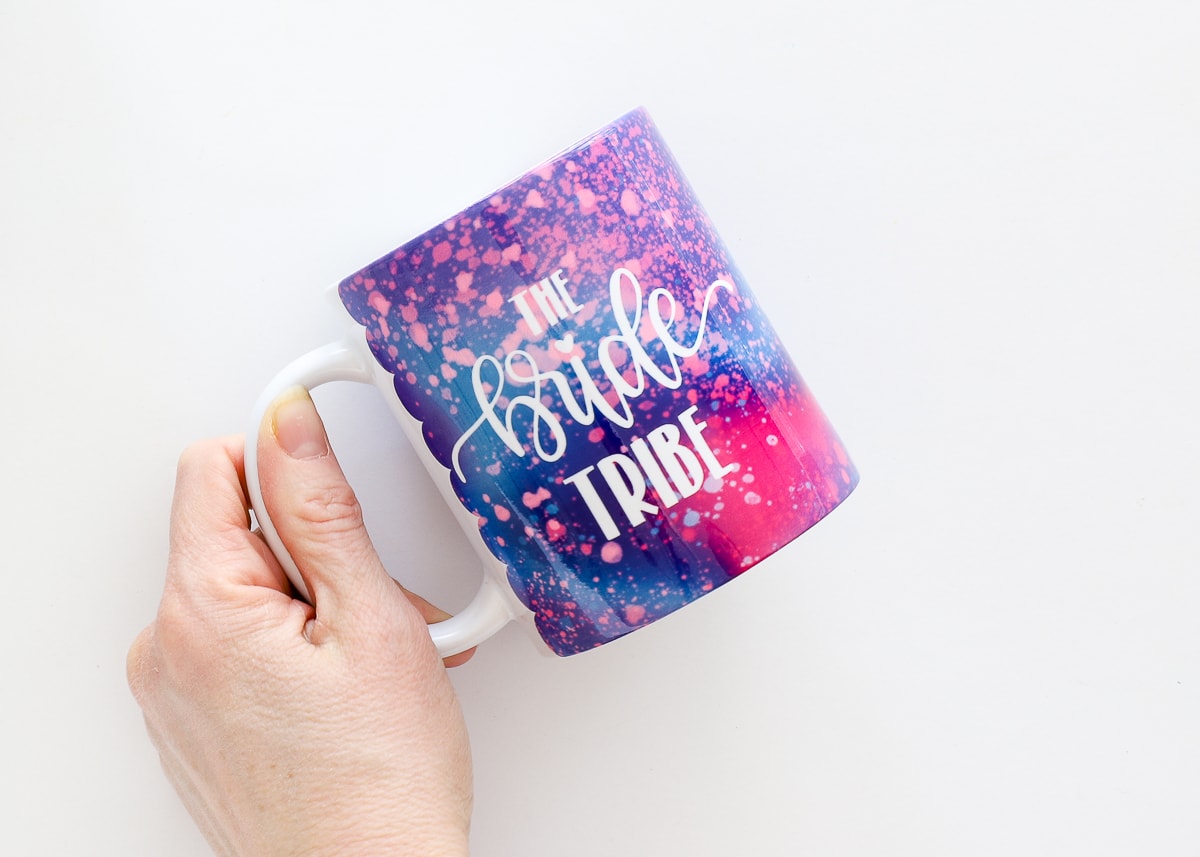
Next, let’s cover how to make a wrap-style design…one that takes the ink color all the way to the edge of the mug, and from handle-around-to-handle (like the “Bride Tribe” mug below). Although these look the most incredible, I do find these designs the trickiest to make, so let me share my best techniques with you!
There are many different pre-made designs for wrap-style mugs in the Cricut Design Space Library. However, if you want to use your own design or phrase, start with the Mug Design Setup in the Projects menu in Cricut Design Space.
When you open this project, you will be able to select a variety of edge designs (e.g., Wavy, Scalloped, Ripped, Straight, and Zig Zag) for both the 12 oz. and 15 oz. mugs. Once you make your edge and size selection, click “Customize.”
![]()
On your canvas, your selected mug will load along with some handy guides to help you place your images.
![]()
Using the red guides, place your design(s) wherever you want them. I chose to put the “bride tribe” image on both sides of the mug, using the far right and far left guides for placement.
![]()
Once your mug is designed just as you want it, follow these steps to cut it out:
- Hide the red placement guides by clicking the eye symbol for that image in the right-hand toolbar.
- Select both the mug template and your designs and Attach them together to maintain your placement.
- Click the green “Make It” button.
- On the Cut Screen, be sure to click the “Mirror” button (which is especially important when cutting text).
![]()
Just like before, load a Cricut Infusible Ink Transfer Sheet onto a Standard Grip Mat and load it into your Cricut Machine. Cut the design using the “Infusible Ink Transfer Sheet” settings.
![]()
Just like before, weed out all the excess parts of the design. This time, you just need to remove the letters, as well as the area on the sides between the scalloped edge and the tabs.
TIP! Remember, you won’t want any design on those tabs since the heat element doesn’t reach that far.
![]()
After cleaning your mug, wrap the design around the mug, just as I showed previously. Take your time to make sure the wrap follows the edges of the mug evenly all the way around and is as snug as possible.
![]()
This next step is very, very, very important:
Although the wrap may seem snug around the mug, you will want to fully secure BOTH the bottom and top of the sheet to the mug itself with Heat Resistant Tape. If the transfer sheet is not perfectly flush with the mug, air can get in between the ink and the mug at the edges, resulting in poor color transfer. Since it’s really hard to fix or re-do mugs once they are done, I found it best to tape everything down so no air can get it at all!
NOTE: This is only necessary for designs that go all the way to the edge, which is why we didn’t do it with the floral design above.

Admittedly, this step can be quite tedious, but getting clean borders all the way around your mug is well worth it…trust me!
![]()
Once the mug is fully taped up, pop it into the Cricut Mug Press and close the handle.
When the mug is done and cool, remove and discard the transfer sheet.
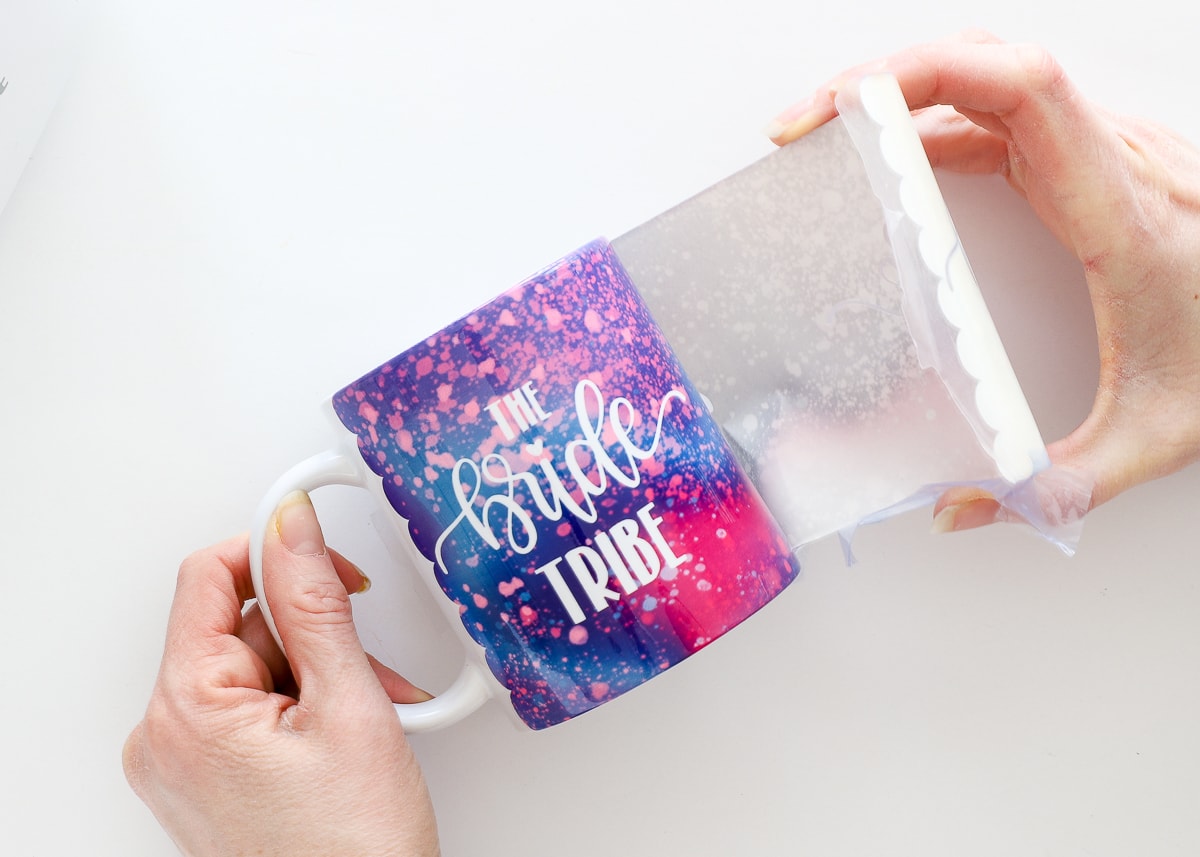
All that taping along the edges resulted in perfect color saturation from the bottom of the mug to the top. I cannot get over how vibrant these Infusible Ink Transfer Sheets are!
How to Make a Single Cut Mug Design
There is one more technique I want to show you that also uses the Infusible Ink Transfer Sheets. This time, instead of creating a design that goes all the way around the mug, we are going to create a single cut, almost like a decal, and place it on the mug manually. This is the easiest technique and uses the least amount of transfer sheet material.
Below, I have a simple image “bride,” sized for the small mug.
NOTE: Although I used the mug template for size reference, I am NOT attaching it. Instead, I will just cut out the “bride” image by itself.
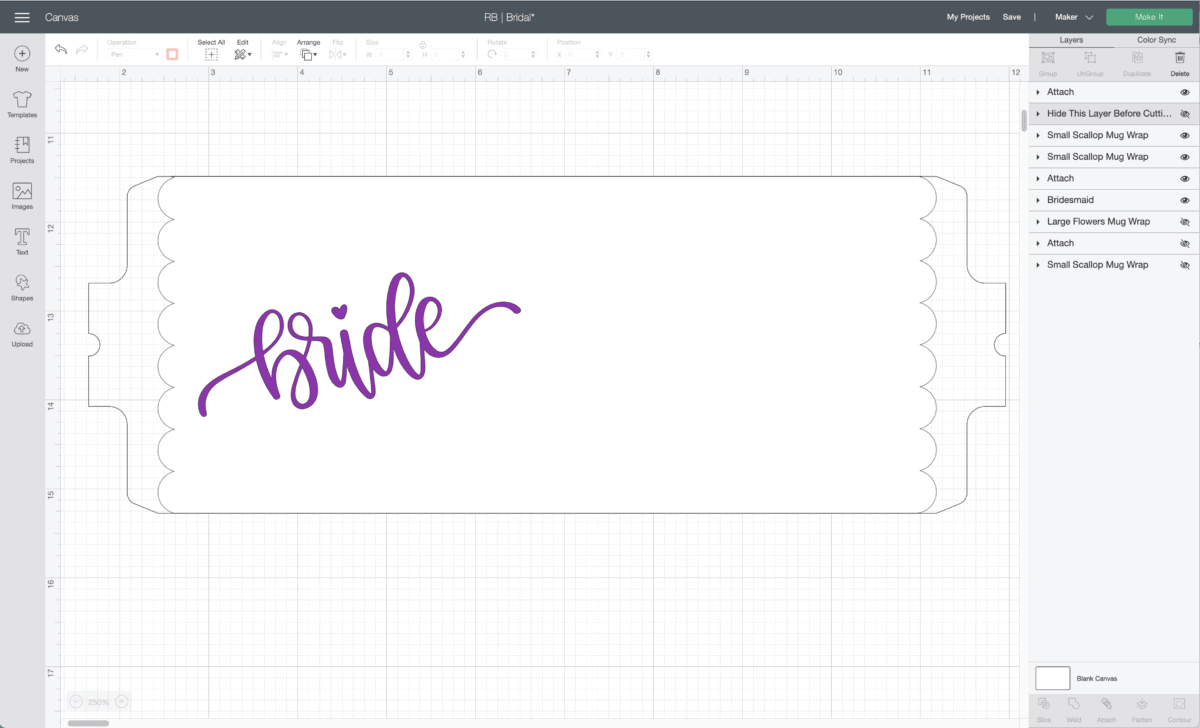
Just as before, I mirrored the image and cut it from the Infusible Ink Transfer Sheet. But notice instead of loading up an entire sheet, I used just a small 2.5 x 4.5″ scrap.
![]()
Once cut, the process is almost identical to the other mugs. First, weed the design…
![]()
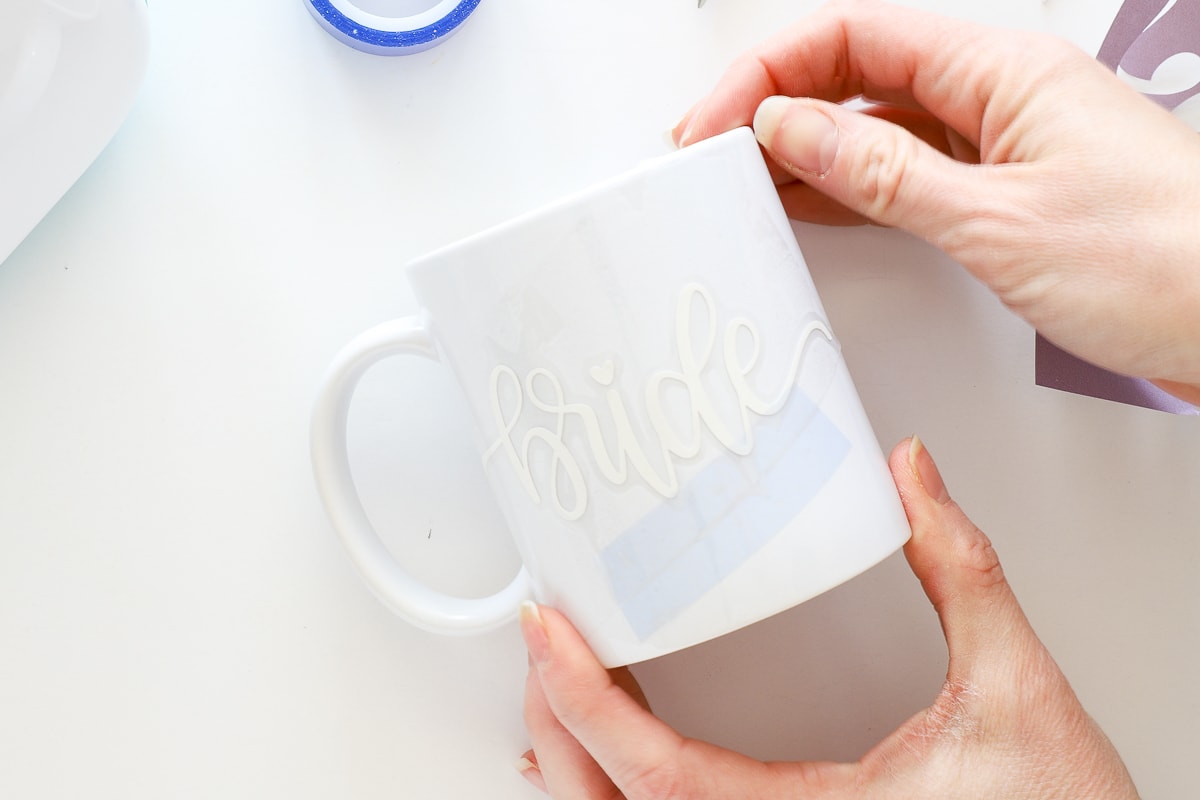
…and then secure it to the mug. Without the mug tabs to help, it’s up to you to center the design and ensure it’s exactly where you want it.
Although the clear transfer paper is sticky and can hold your design in place, it never hurts to add some more Heat Resistant Tape to ensure your design doesn’t budget at all.
Then load the mug into the Cricut Mug Press…
…and once cool, remove the transfer sheet to reveal your single image!

Using the Cricut Mug Press Infusible Ink Transfer Sheets, I was able to make three very different mug designs. Sooooo many design possibilities await my friends!
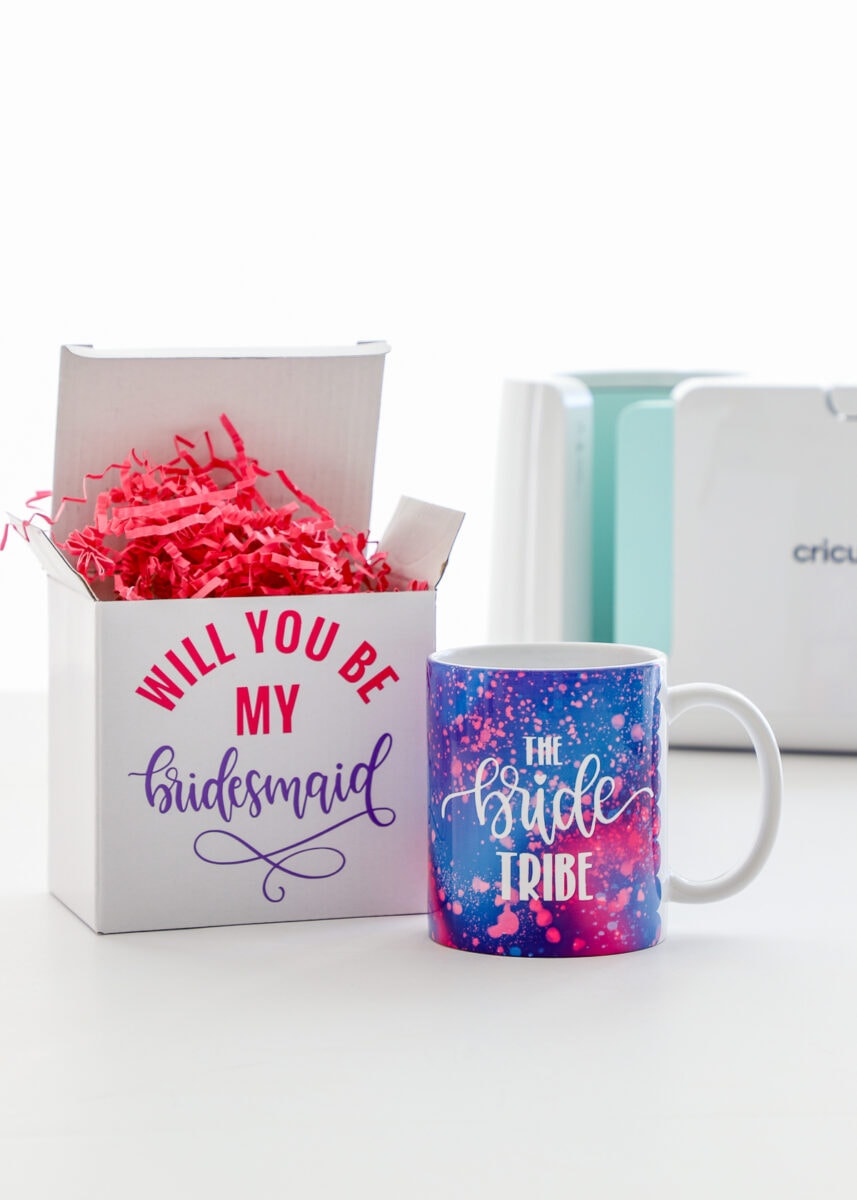
Don’t Forget to Decorate the Box!
Personalized mugs are such a great gift idea for so many different people in your life. And the personalization and customization doesn’t have to stop at the mug! Use your Cricut machine to decorate the box, make tags, cards, and so much more to complete a gift set.
For this bridesmaid gift, I simply cut out a few phrases from vinyl with my Cricut Joy…
![]()
….and secured them to the box with transfer tape. I had a lovely gift ready to go in mere minutes!
![]()
I can’t get over how adorable these wedding mugs are. How fun would it be to make a whole set for a bridal party to use while getting ready before the wedding or even at the Bridal Shower or post-wedding brunch! I wish the Cricut Mug Press was around when I was planning my wedding!
If you’d like the make these exact Bridal Party Mugs, you can access the designs HERE.
Phew! I know there is a lot here, but I hope this post thoroughly teaches you how to make mugs with the Cricut Mug Press and Infusible Ink Transfer Sheets. But this is just the beginning, my friends! Next week, I am going to show you how to use the Infusible Ink Pens to make even more incredible designs, and I think you will just love the super cool techniques I’m going to share.
Until then, let me know what questions you have about these projects in the comments below!
Megan

5 Comments on “How to Make Mugs with the Cricut Mug Press and Infusible Ink Transfer Sheets”
Thank you very much! For taking the time to explain everything!
Love these! When I made a mug with the “Decal” method, the edges of the transfer tape were showing on the mug. Very faint, but it doesn’t look good. My mug was clean and there are no other marks. I was hoping you came across this before and had a solution. Thanks!
thank you so much. I have added a shortcut to this site on my desktop
You are welcome, Robin! So glad you find my tutorials helpful!
Good luck with your projects!
Megan
Thank you so much, I just did my first mug and it worked great!