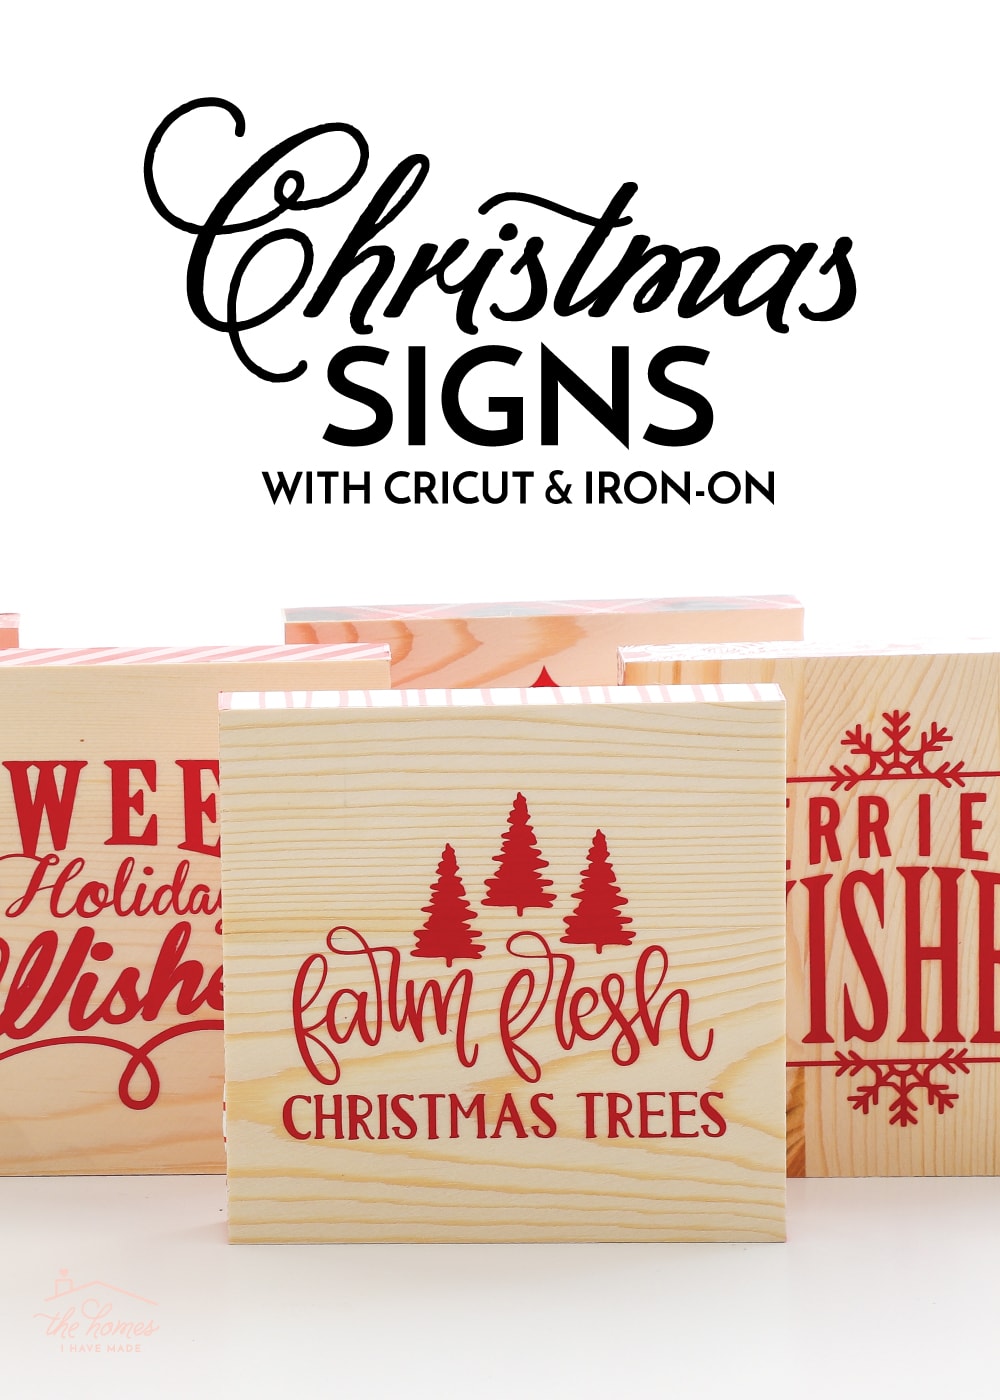
DIY Wooden Christmas Signs with Cricut Iron-On
I grew up with a very “handmade” Christmas. From ornaments and quilts, to cards, stockings, and even many gifts, so many of my Christmas memories were made by my Mom’s own two hands. So it’s probably no surprise that my favorite way to spend the Christmas season is to craft and make homemade gifts. These DIY wooden Christmas signs with Cricut iron-on are easy to produce in bulk and are endlessly customizable to whatever holiday motif you like. As such, they make the perfect DIY gift for grandparents, teachers, co-workers, or anyone who deserves a little something special. Let me show you how they come together!
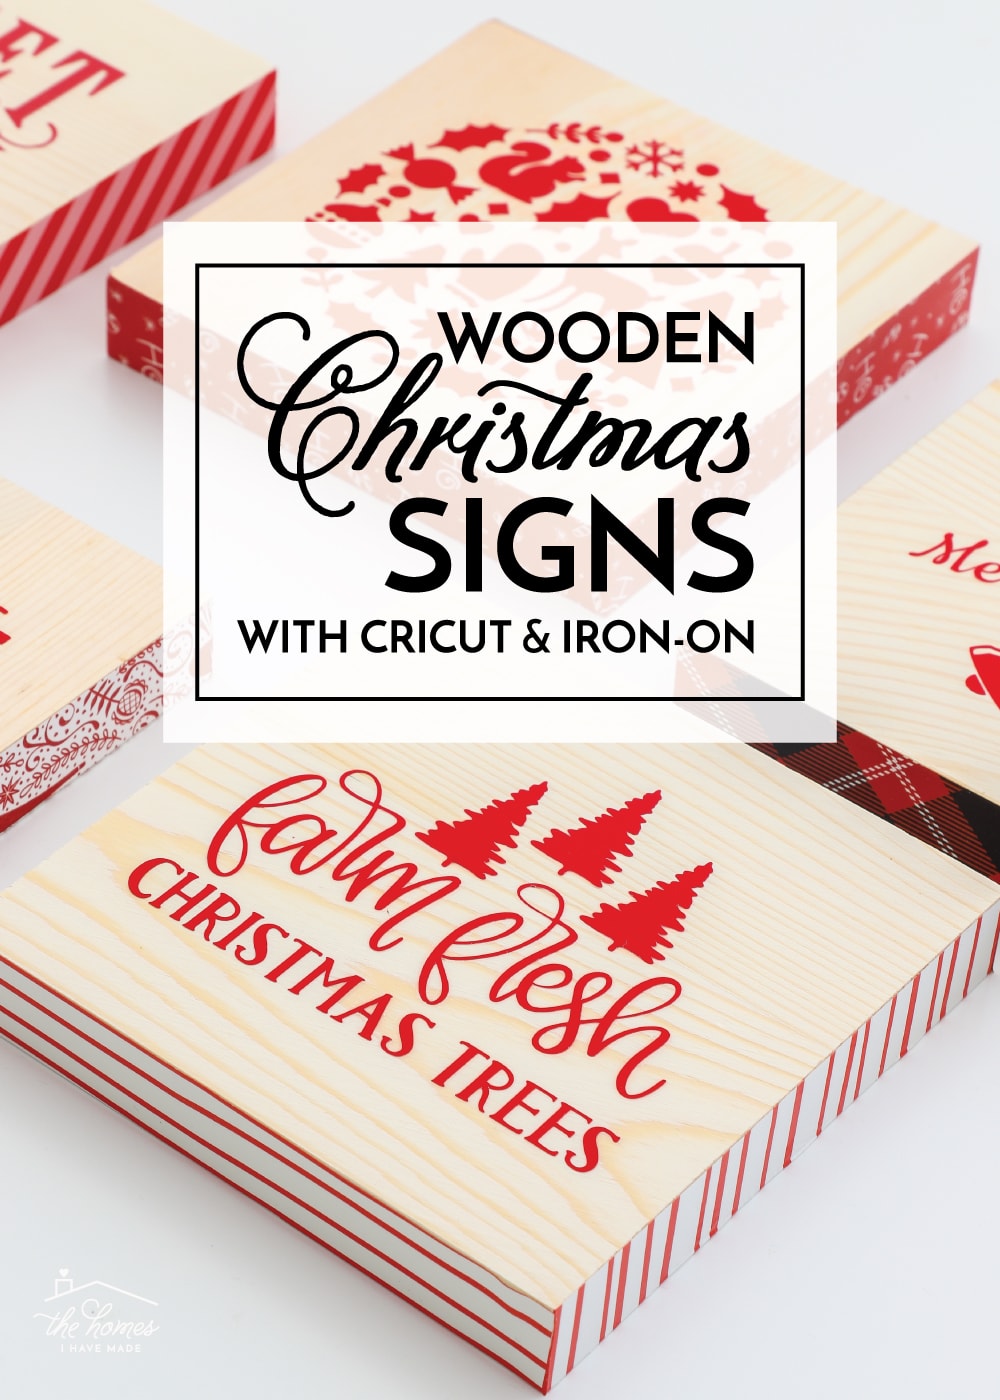
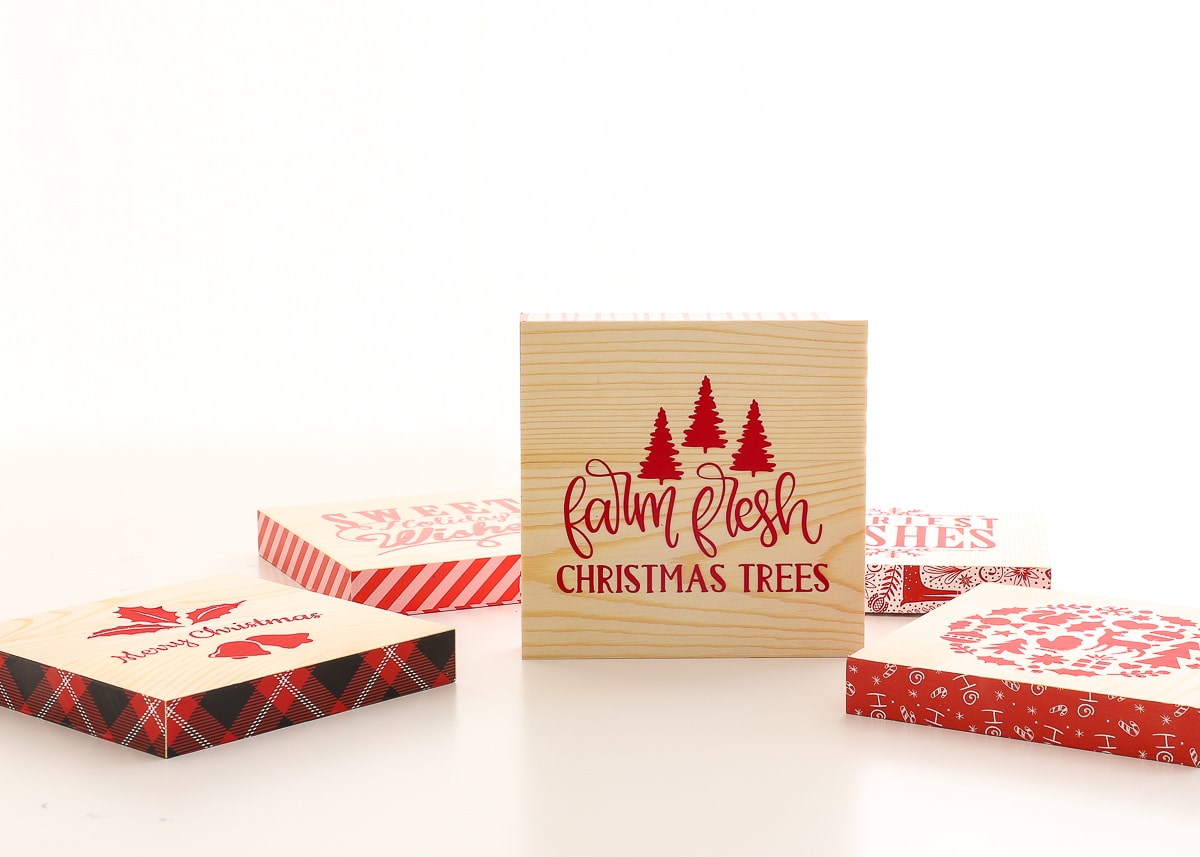
I’ll admit, I’m fairly obsessed with these little signs! Not only do they look like they came from a specialty boutique or booth at a holiday craft show, but the contrast between the raw wood and bright iron-on vinyl results in such a classic holiday decoration! 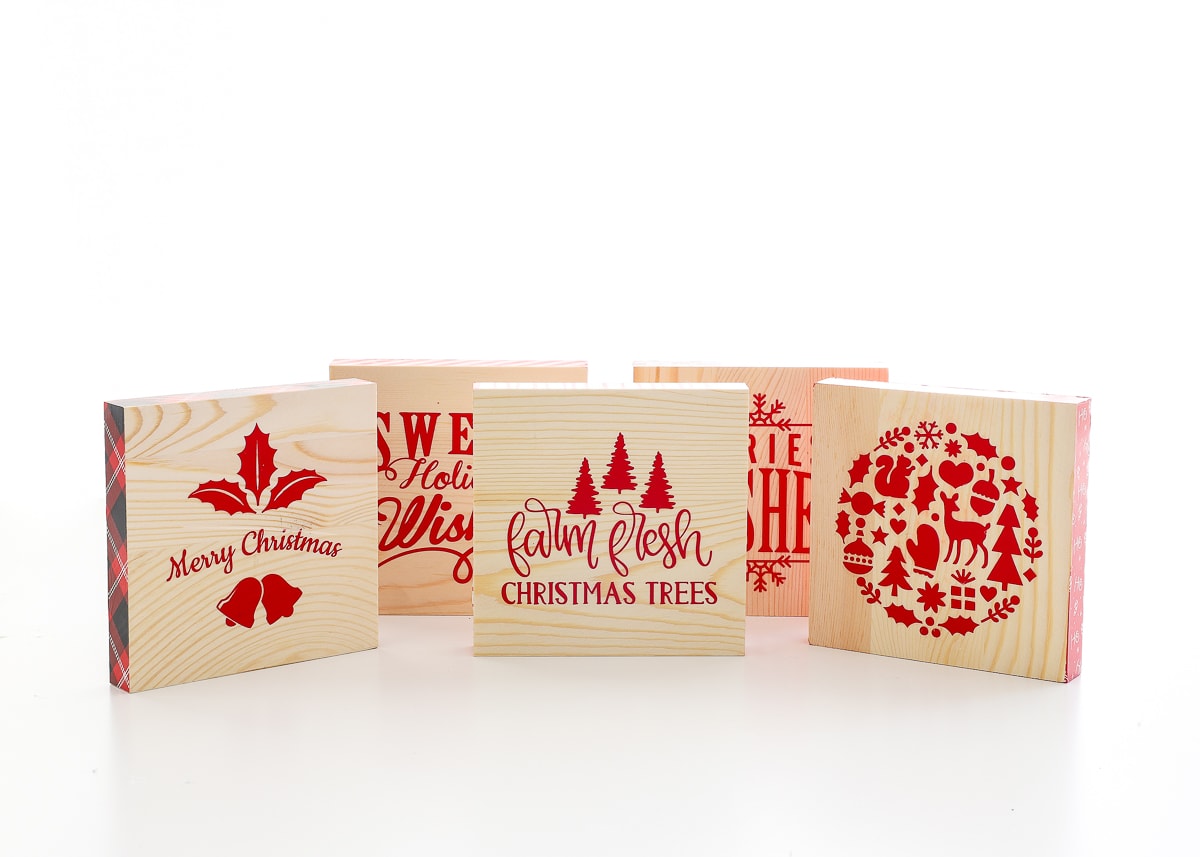
Their mini size (just 5″ square!) makes them quaint little gifts and quick to assemble. They are perfect for hanging on walls, placing on bookshelves, or even decorating desks, mantels, or nightstands.
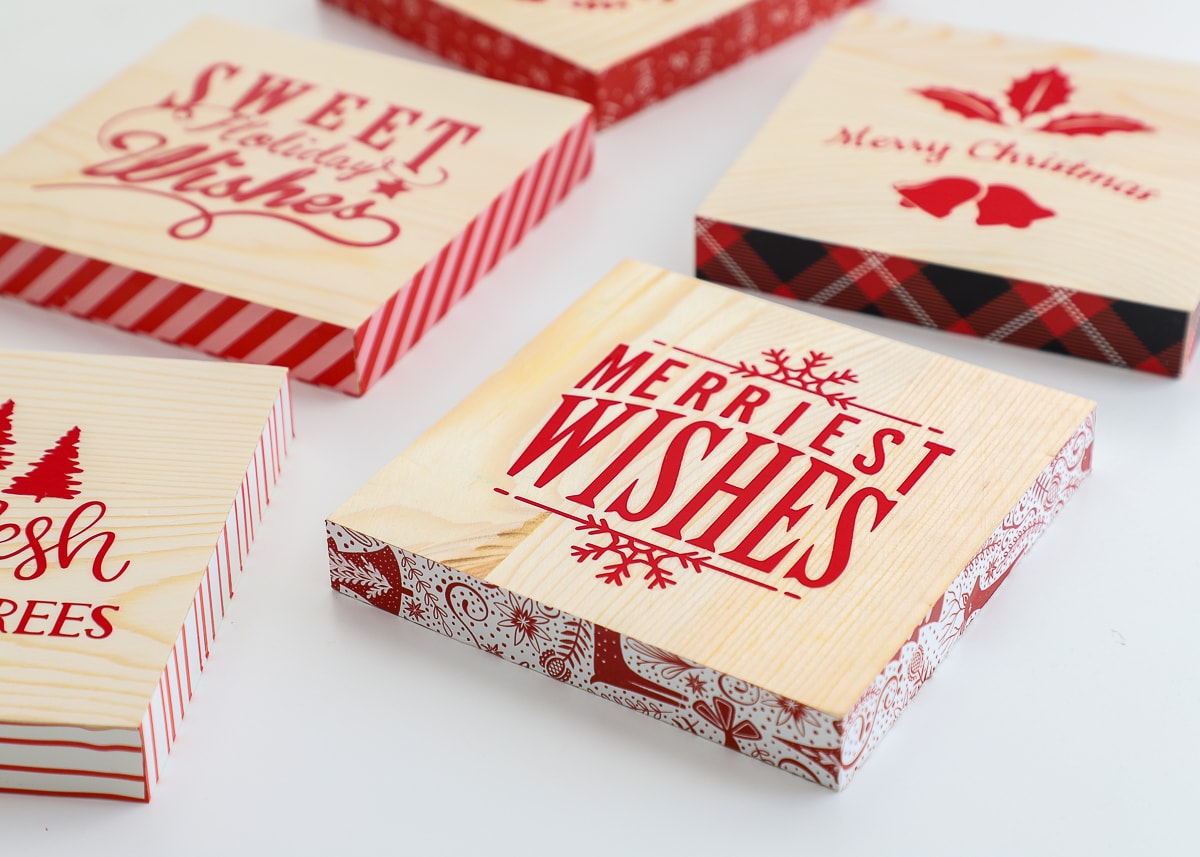
Aside from the adorable holiday designs, my very favorite aspect of these wooden Christmas signs is the addition of the festive pattern along the edges and back. With so many iron-on vinyls now available, you can make these in any color-scheme you desire!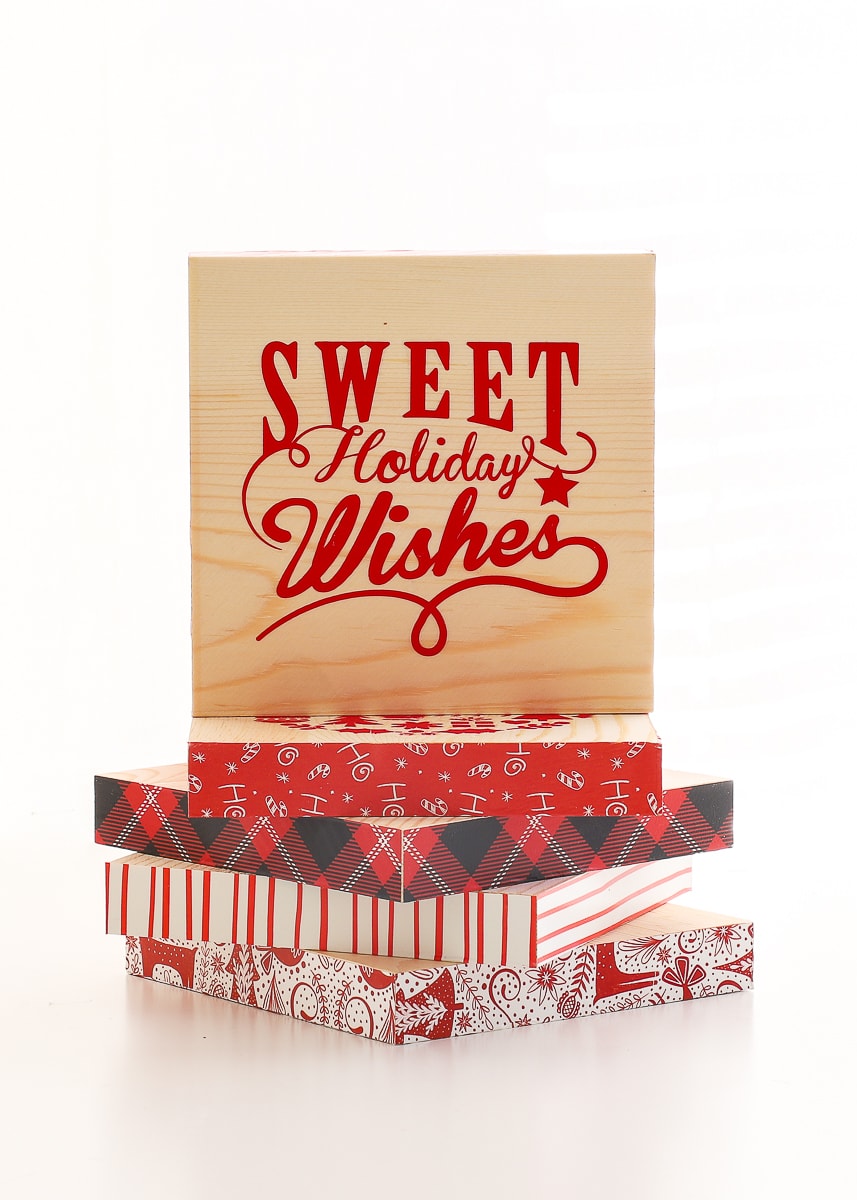
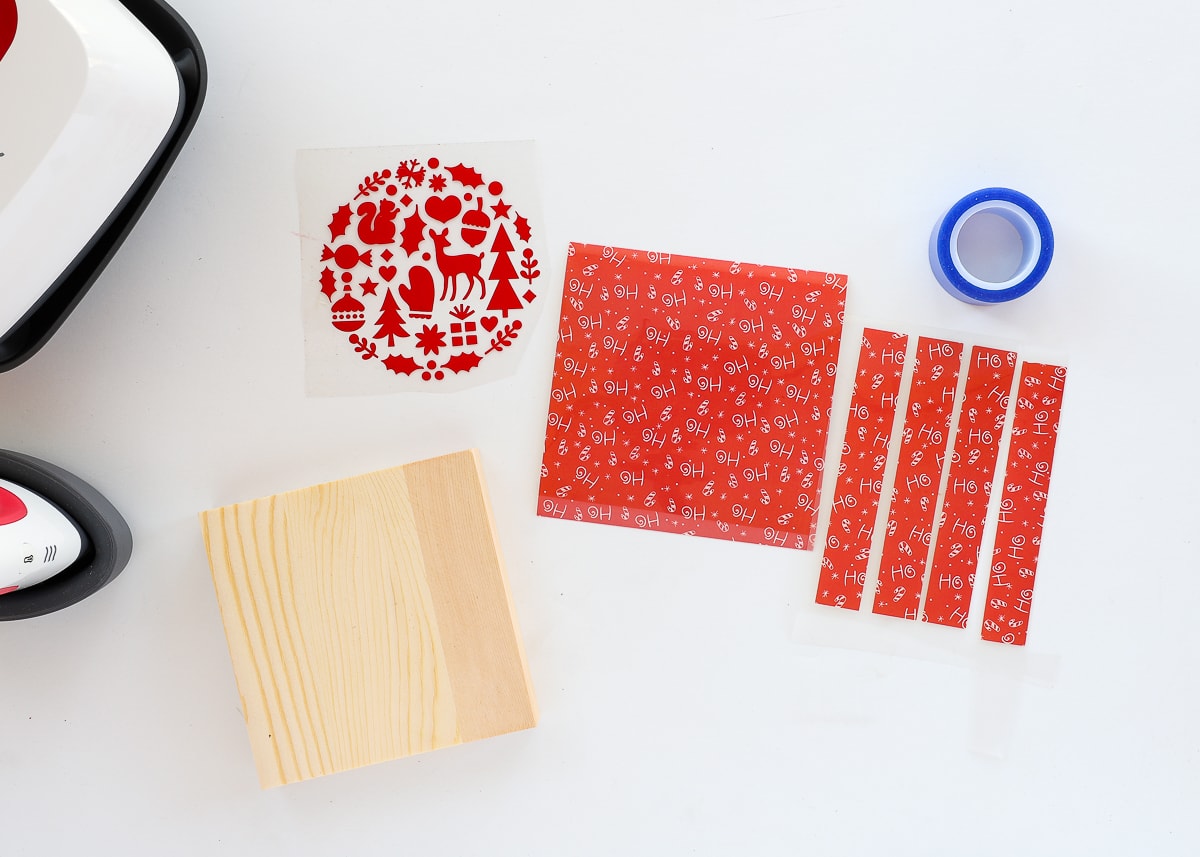
Supplies Needed
Here is what you need to make these DIY Wooden Christmas Signs with Cricut Iron-On:
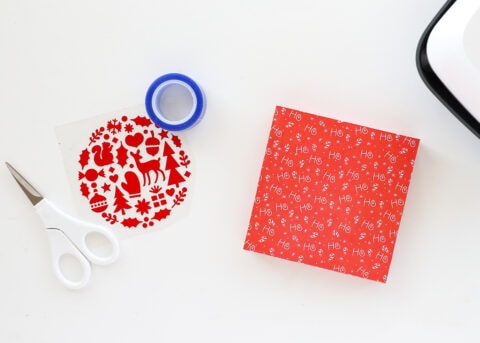
- 5″ Wood Squares – These are one of the BEST items in all of Michaels Craft Stores, but they can be tricky to find this time of year. Hunt through the wood section for these inexpensive raw cuts and stock up when you see them. This is a great alternative on Amazon.
- Iron-On Vinyl:
- Heat Resistant Tape – Handy for keeping your designs in place.
- Cricut Design Space File – you can access my exact designs HERE.
You will also need these tools:
- Cricut Machine – this project can be made with the Maker, Explore and Joy models.
- Cricut EasyPress Mini – the smaller size is ideal for this smaller project.
- Weeding Tool

Cut & Prepare the Designs
Start by opening my Cricut Design Space file HERE and selecting which design(s) you want to make. You shouldn’t need to re-size anything in my file; but if you want to design your own, here are the sizes I recommend for 5″ wooden squares:
- Front Design: 3.5 – 4″
- Side Trim: 5″ x 0.8″
- Backing: 5″ x 5″
NOTE: You’ll notice the side pieces measure slightly wider than the 5″ wood square sides. This will accommodate shrinkage and allow the pattern to slightly overlap with the back, giving the wood sign a “wrapped” look.
When ready, use your Cricut machine to cut the front design from solid iron-on (it shows up better than patterned) and the sides/back from the patterned iron-on.
If you need help cutting iron-on vinyl, refer to my comprehensive instructions HERE.
Before ironing the designs to the wood sign, you will need to weed out your holiday message (refer HERE for instructions), and cut the squares and rectangles apart from each other so you can apply them individually.
Iron On the Designs
Next, refer to this handy Heat Guide to determine the right settings for your specific heat press and iron-on materials.
TIP! I found the Cricut-brand patterned iron-on needed MUCH less heating time than recommended. If possible, do some practice on a spare piece of wood to get your timing down.
Follow the steps below to secure the iron-on designs to the wood squares.
-

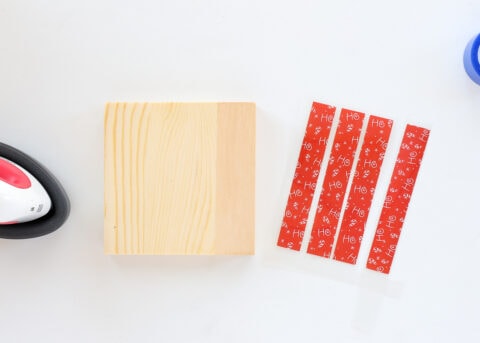
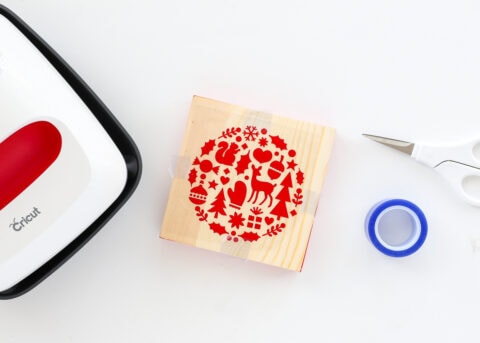
- Start with the edging around the wood square. Trim the strips apart, then pre-heat the edges with the EasyPress.
-
- Place 1 strip along the front edge and heat it with constant motion. Remove the plastic sheeting, and fold the excess edge down toward the back while warm.
-
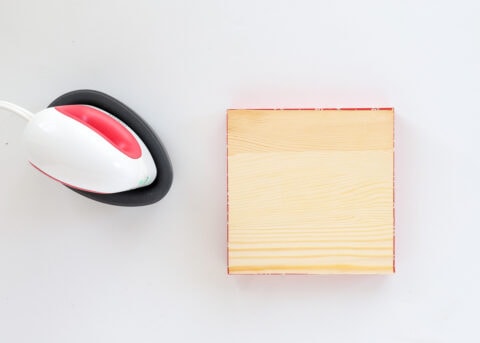
- Use Heat Resistant Tape to hold the back square in place. It should cover the folded-over edges from the sides.
-
- Adhere the square to the back with the EasyPress, using the time/temperature specifications in the Heat Guide.
-
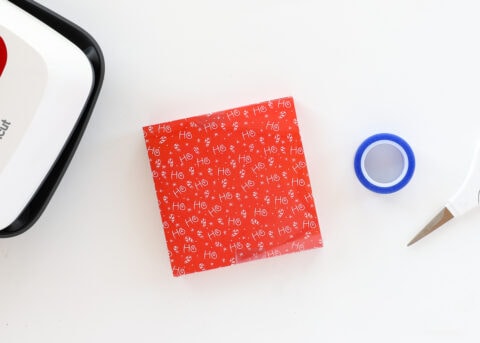
- Flip the sign right-side up. Then use more Heat Resistant Tape to hold the holiday design in place wherever you want it.
-
- Finish by heating the design onto the front of the wood square according to the Heat Guide specifications.

NOTE: You might be wondering if the Heat Resistant Tape is really necessary. In my experience, the iron-on had a tendency to “slide around” on the wood during heating. The tape will ensure the design doesn’t move at all, and you won’t end up with sticky residue showing on the raw wood.
You’re all done! Simply repeat the process for any other signs you want to make!
TIP! If you are going to make several signs, I recommend doing each step in batches: all the cutting at once, all the weeding at once, and then all the ironing at once. This will keep it efficient, and help you not waste materials.
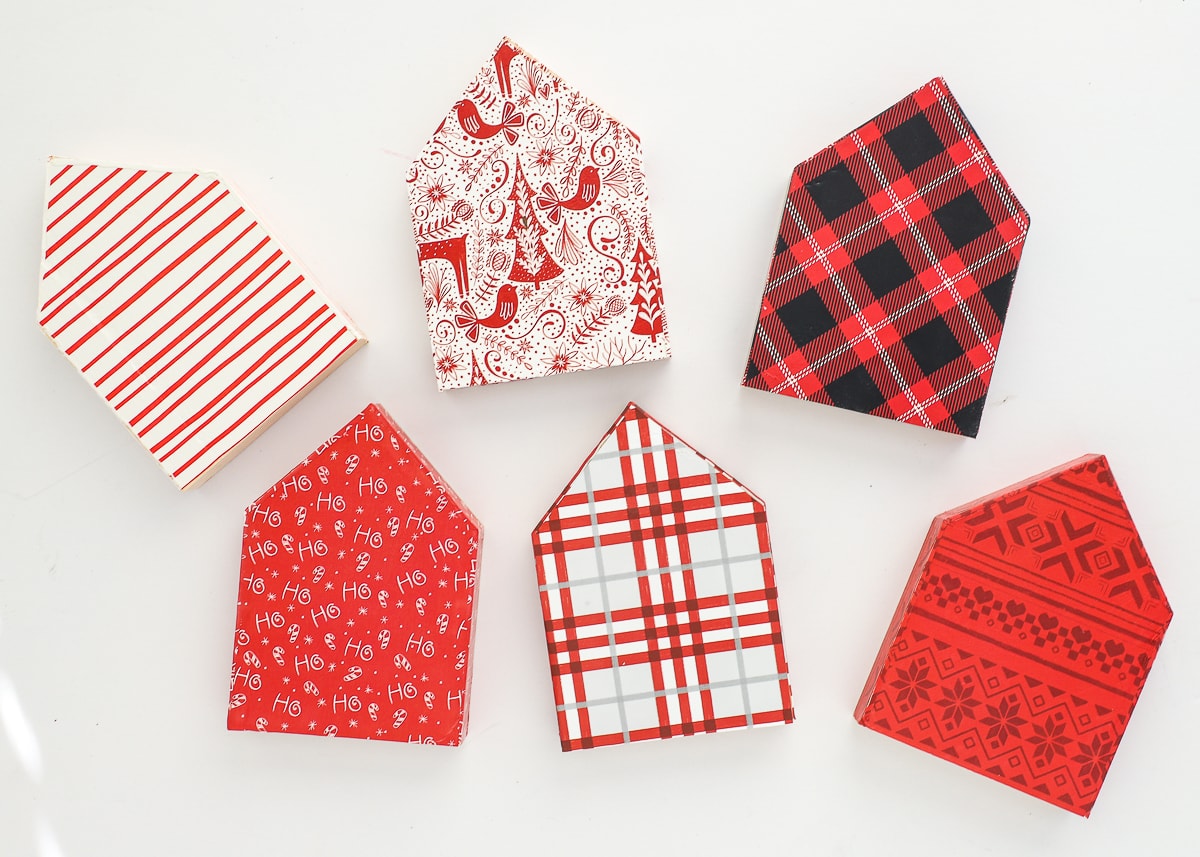
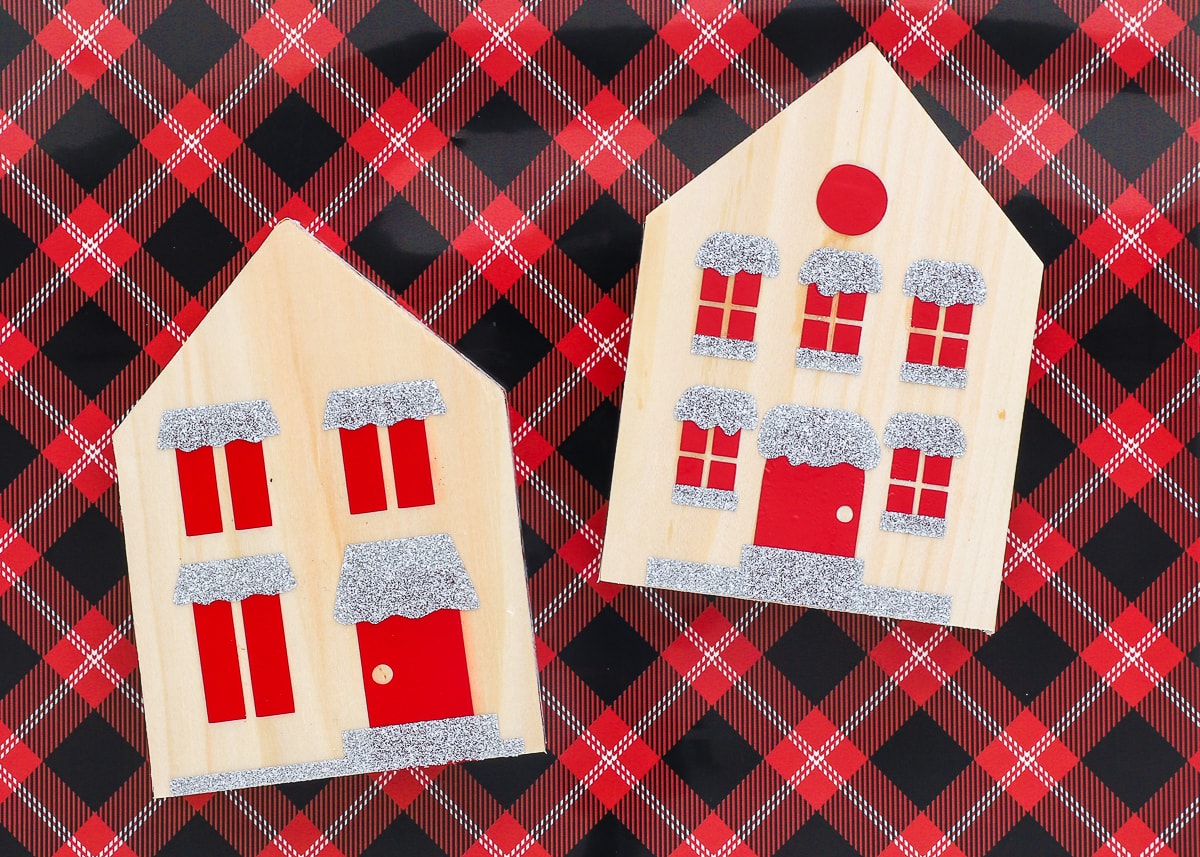
Bonus Idea!
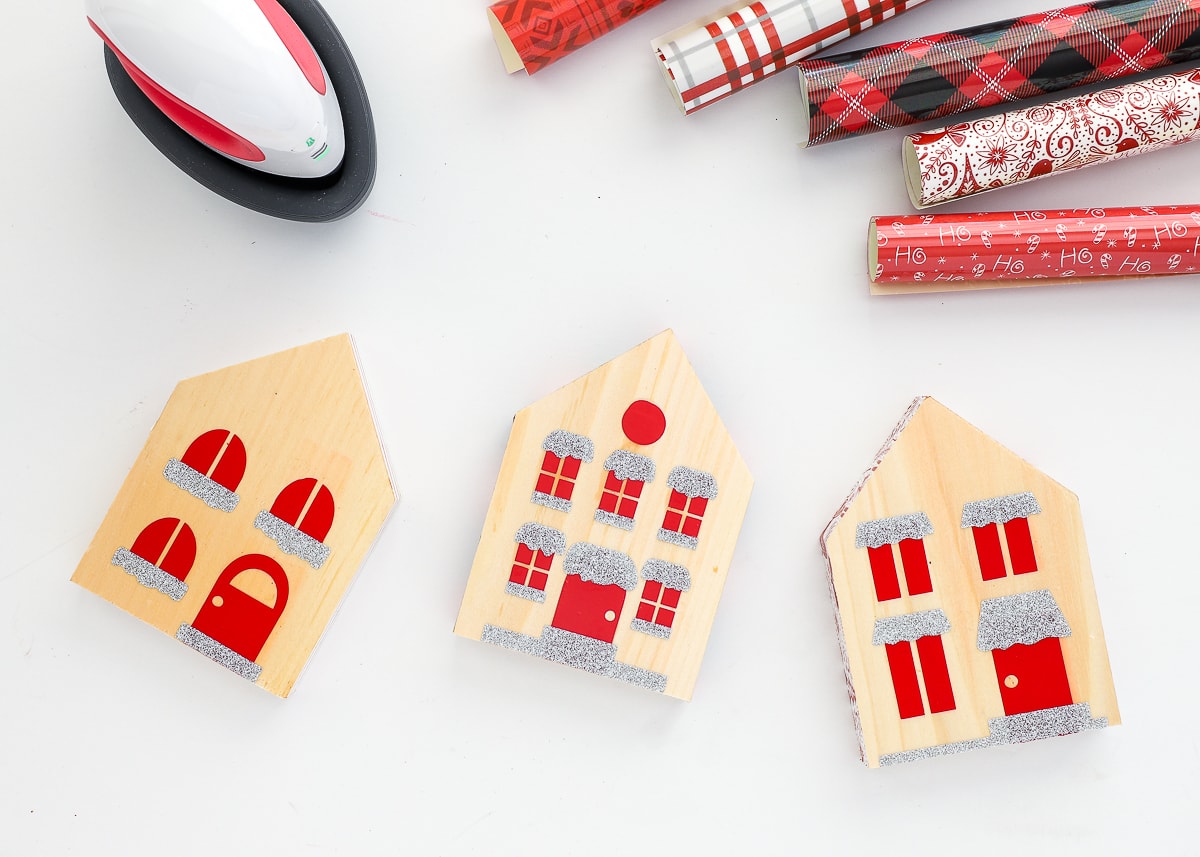
Have you ever seen those little wooden house shapes in the checkout line at Michaels? I always wanted to do something with them, but couldn’t figure out what until I did this wooden sign project. I used the exact same process detailed in this post to create a sweet Christmas village! You can access this file HERE if you want to give it a try.
These DIY Wooden Christmas Signs with Cricut Iron-On are a really fun DIY holiday gift idea. Consider putting your own spin on them by swapping out the messages and color-scheme (they’d look amazing in glitter iron-on!), or even try using the same technique to add a family name or other holiday message to a wooden tray or larger sign!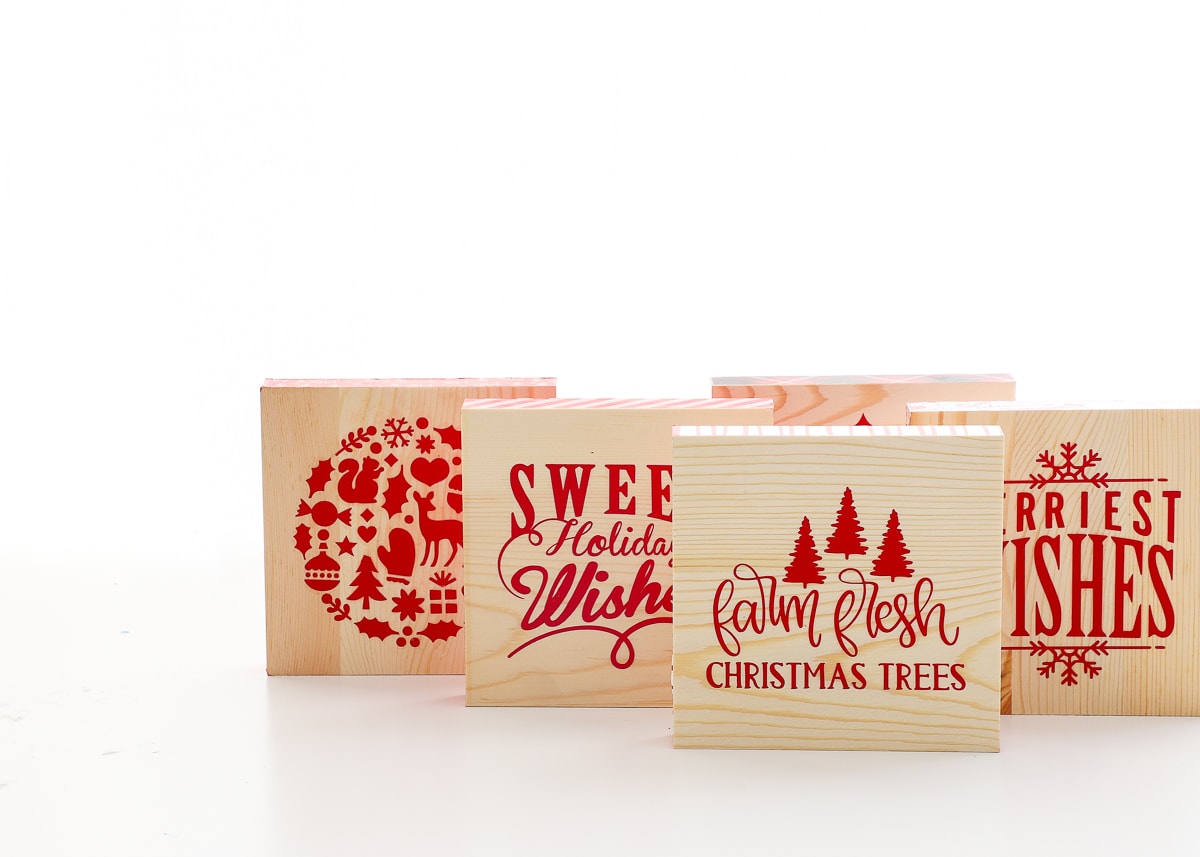
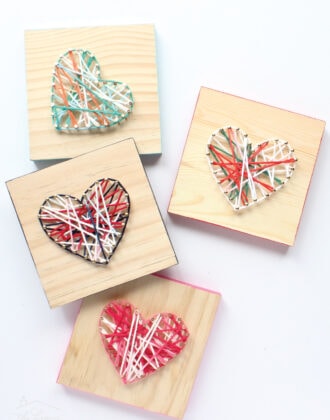
I love using these little wooden plaques for gifts. Here’s another idea using the same wood square, and this one is great for kiddos to try!

You’ll have to let me know if you give any of these holiday projects a try. (And don’t forget to share this project with friends and family so they can try it too!!!)
Megan


3 Comments on “DIY Wooden Christmas Signs with Cricut Iron-On”
These are absolutely adorable. I love working with vinyl, but have yet to try the heat transfer type. Thanks for the inspiration!! Have a wonderful and safe Christmas.
I found a cute little saying I would like to put in the center of a wood tray, so I can fill the tray with small gifts to give my neighbor lady who always knocks on my door at Christmas and other special days, as she knows I have no family around and I am a Senior Citizen, Do You Make such iron on to sale.
I’d like to know why you use heat transfer vinyl and not the regular vinyl? We have made other wood signs to hang that we used the regular vinyl. just wondering why the heat. thanks for your help. the little signs are adorable.