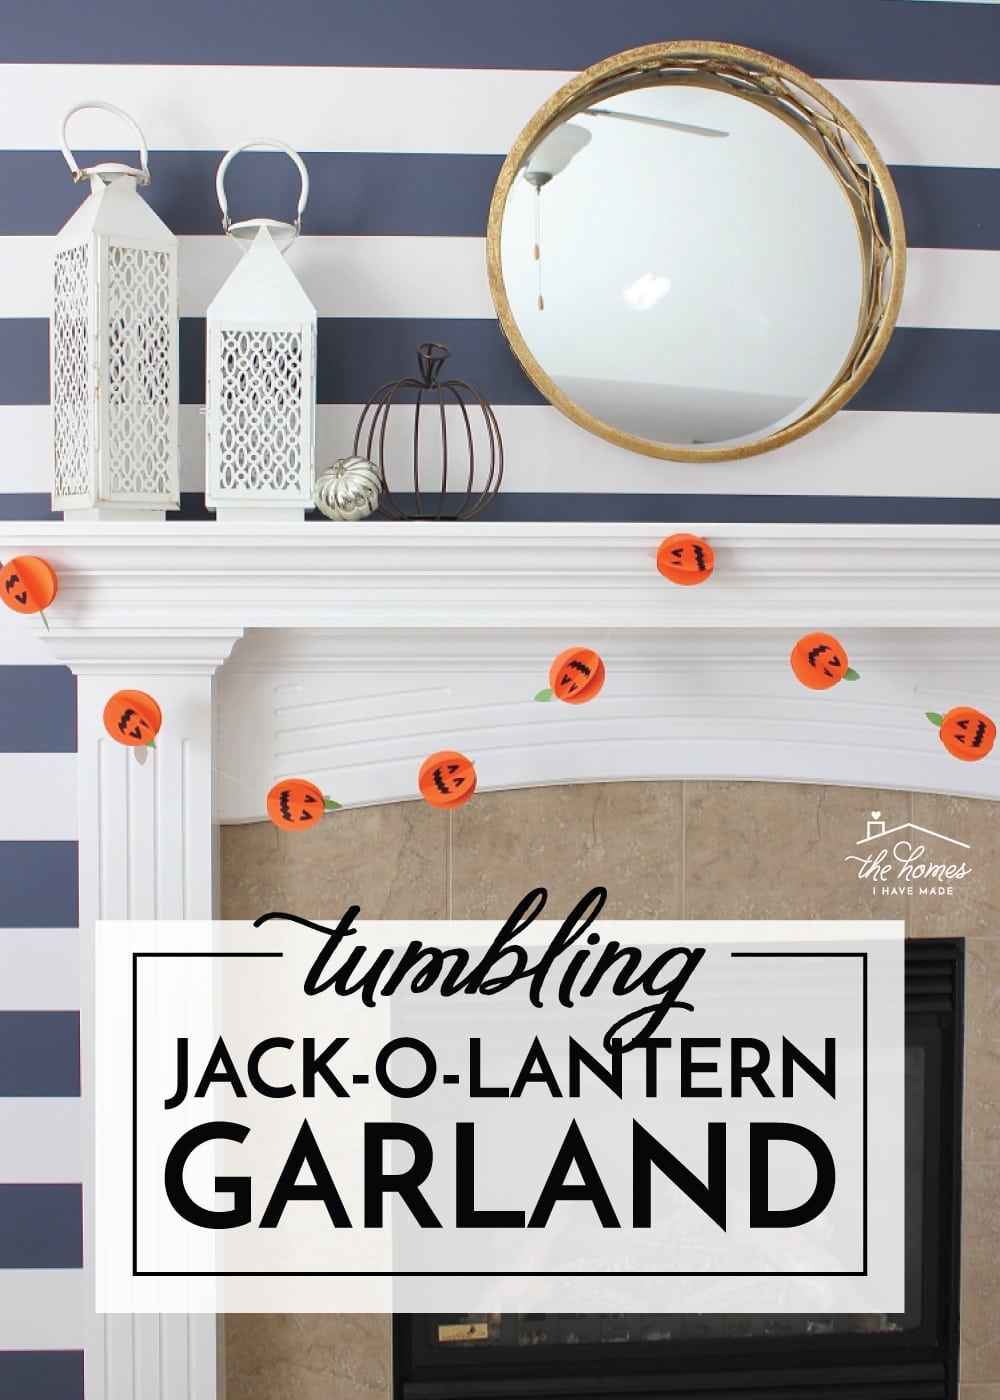
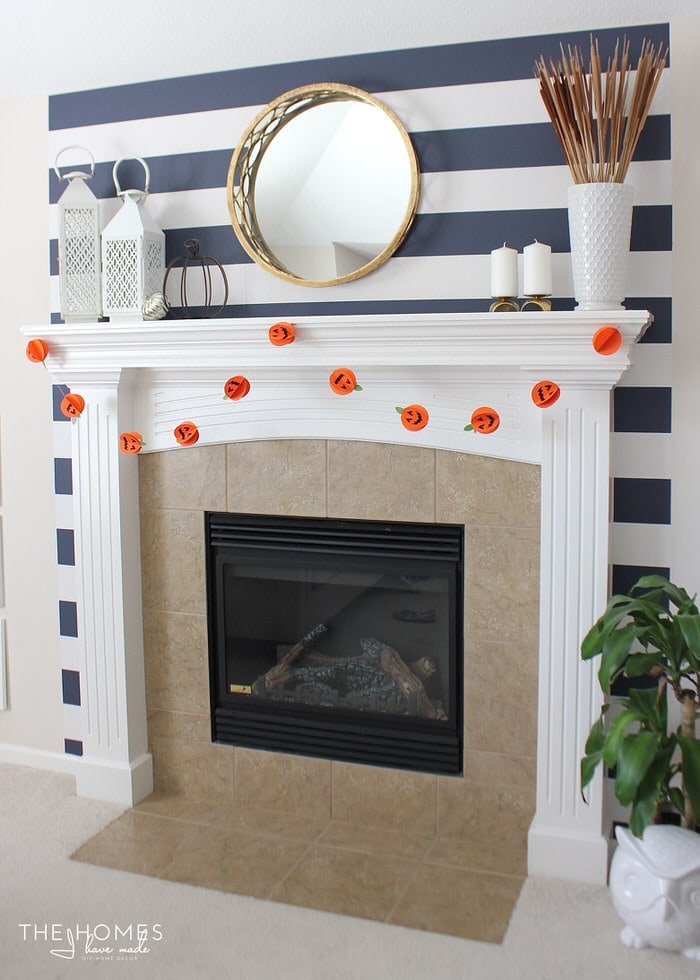
DIY Jack-O-Lantern Garland
I will admit, Halloween is not a holiday I get super excited about (I know, blaspheme in the blog world!) But with little ones in the house, even I can get on board with this simple paper pumpkin project. This whimsical Jack-o-lantern garland adds the perfect touch of Halloween to your home. It’s fun and silly without be too spooky, and it can be pulled together using items you probably have around the house! Let me show you how it comes together! (And yes, you totally have time to do it before Halloween gets here!)
This pumpkin garland is so simple to make, whether you have an e-cutter machine (like a Cricut) or not! You can even get the kids involved by having them cut out the shapes and glue everything together. With just a few sheets of colored cardstock, some scissors, and a sewing machine, you are mere minutes away from a simple Jack-o-lantern garland that can hang anywhere in your home!
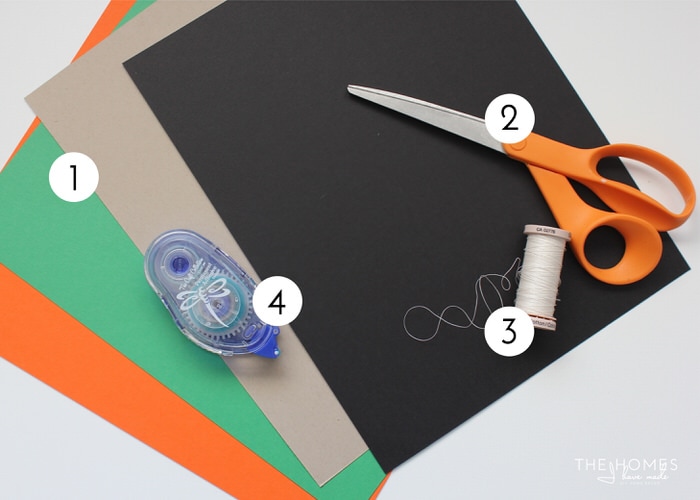
Supplies Needed
- Colored cardstock in orange, green, brown and black
- Scissors (NOTE: an e-cutter machine, like a Cricut, and/or punches make this project even quicker but aren’t necessary!)
- Thread and a sewing machine (not pictured)
- Your favorite craft adhesive (this one is mine)
Assembling the DIY Jack-O-Lantern Garland
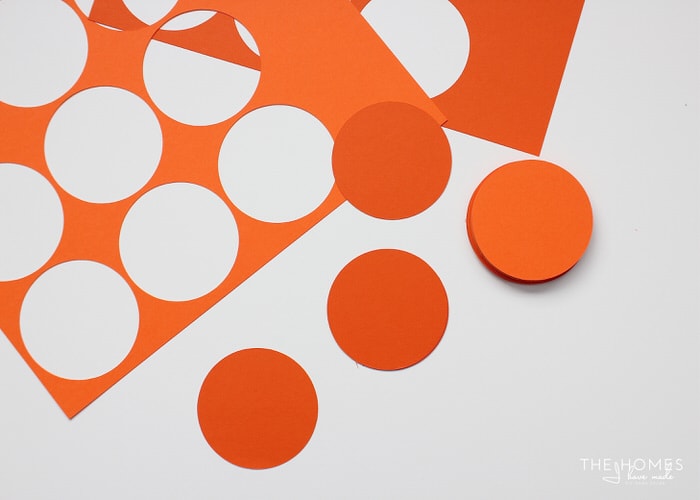
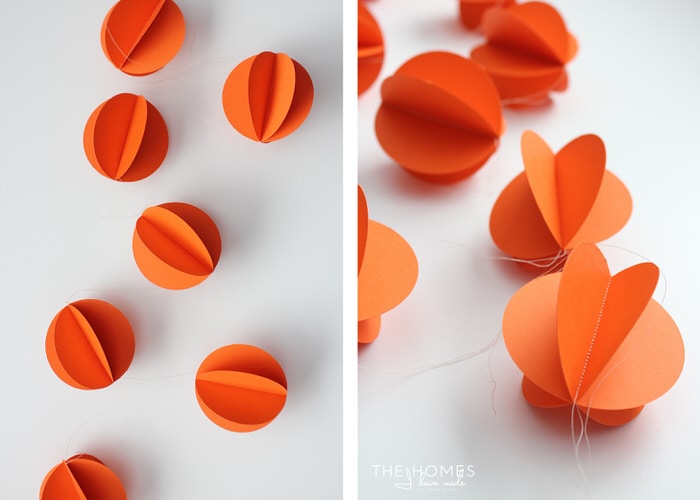
Start by cutting out a bunch of orange circles. These measure 3” in diameter, but you can make yours’ as big or small as you want. You’ll need at least three circles per pumpkin, so plan out how long you want your garland and determine how many to cut. A basic circle punch will make this step super quick, and kids love to use punches!
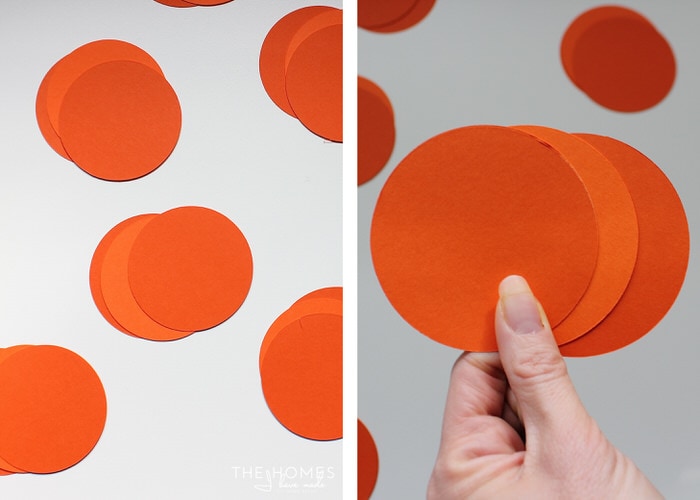
Place your circles in stacks of three or more (the more circles, the fuller the pumpkin once folded). Using various shades of orange will also give a more dynamic appearance.
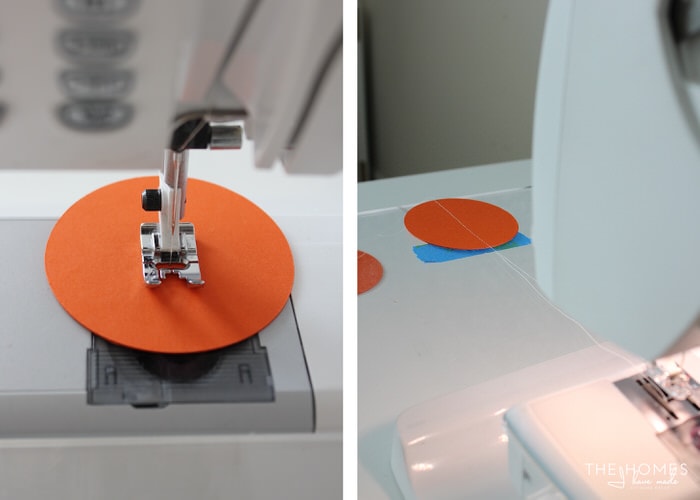
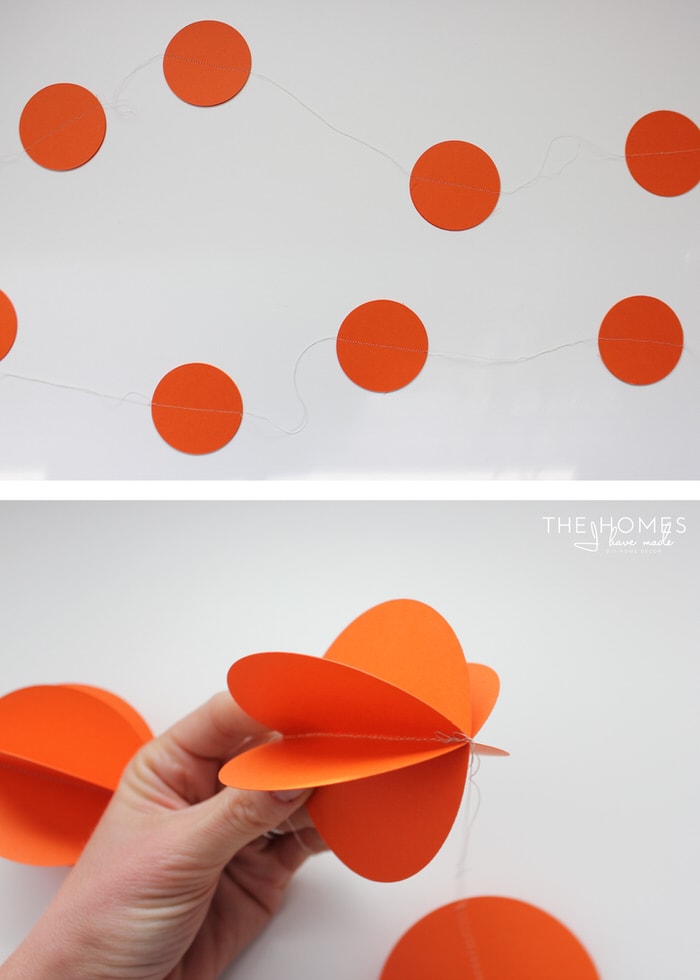
Thread your sewing and pull a long tail of about 12” out of the machine (you’ll need this excess thread to hang the garland once it’s done). With your circles stacked, sew straight down the center (below left). Without cutting your thread, pull the circle back behind the machine to create a gap of thread before the next circle. To keep your spacing even between pumpkins, use a piece of tape on your table to denote how far back to pull each set of circles (below right).
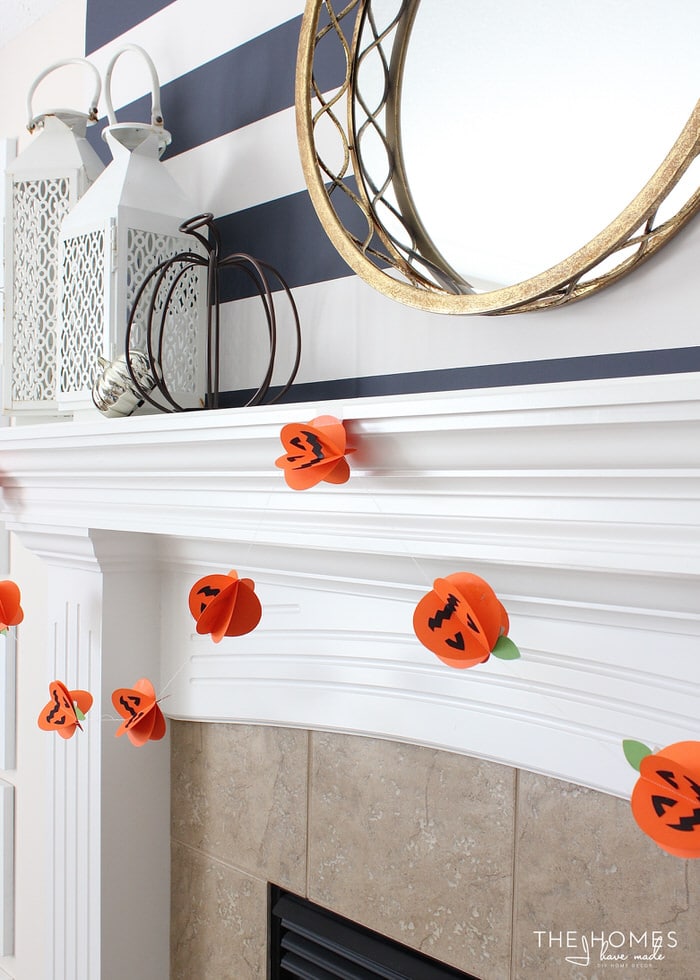
Keep sewing and pulling until all your circles are sewn onto the garland. Once sewn, fold the front circle toward the front and the back circle toward the back along the thread line to create a three dimensional/rounded shape.
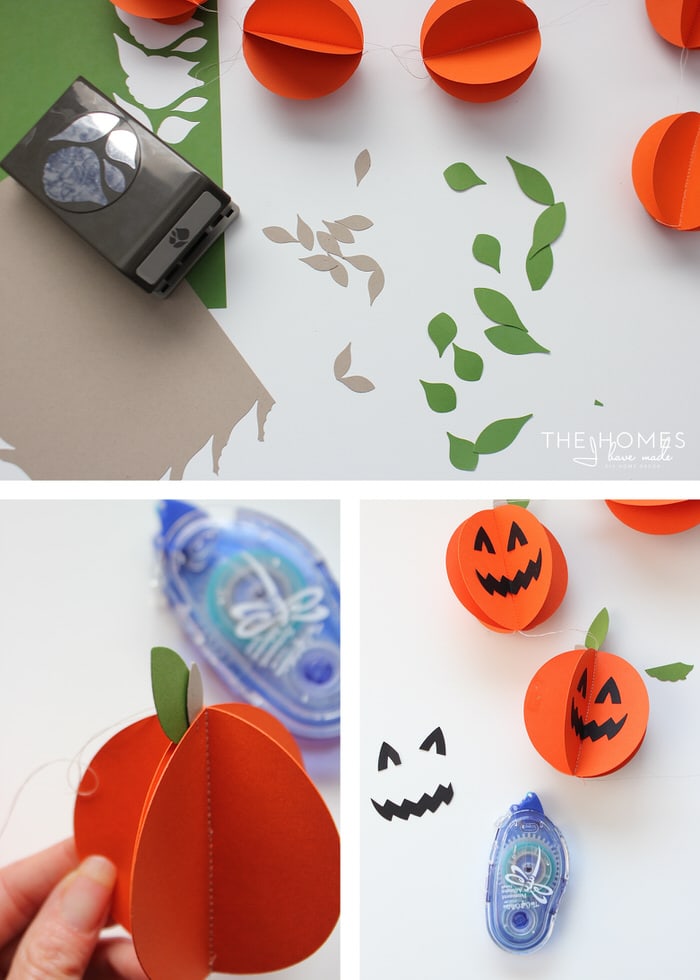
Next, use a scissors (punches or e-cutter machines work great here too!) to create leaf, stem and face shapes out of the green, brown, and black cardstock. Secure the leaves between two flaps of the pumpkin with adhesive, and add the face to one or more sides of the pumpkin.
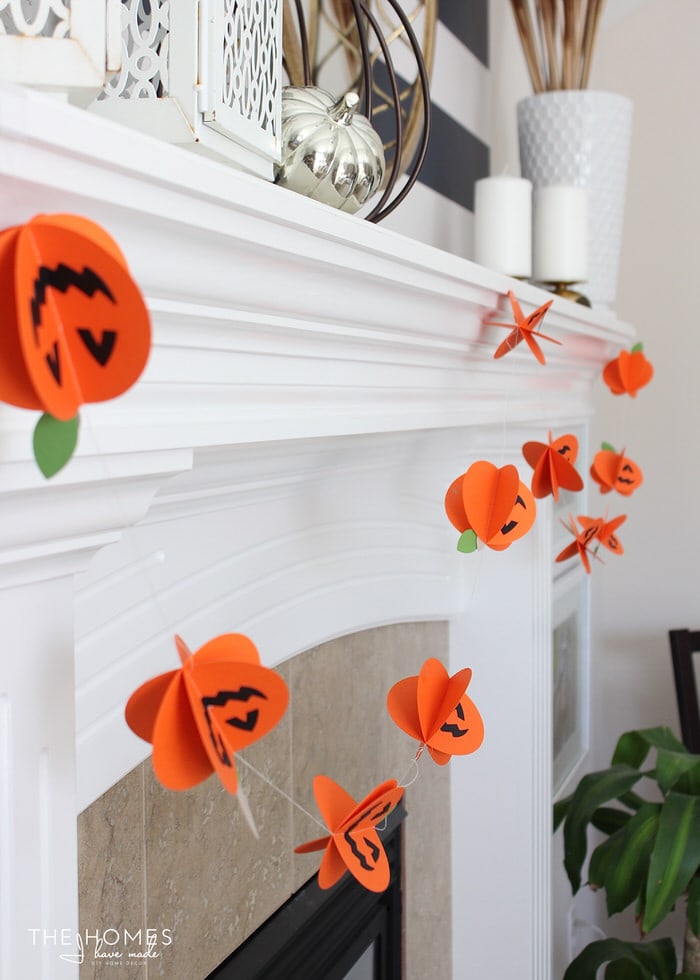
Once you’ve added all the leaves and faces, the garland is ready to hang! Since it’s so lightweight, simple clear tape should work just fine!
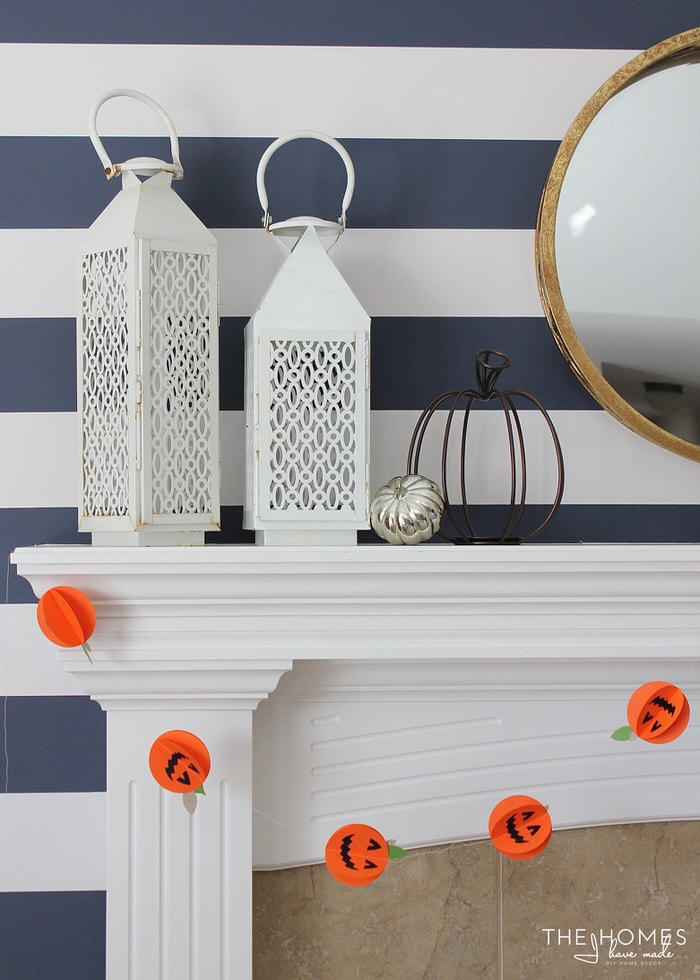
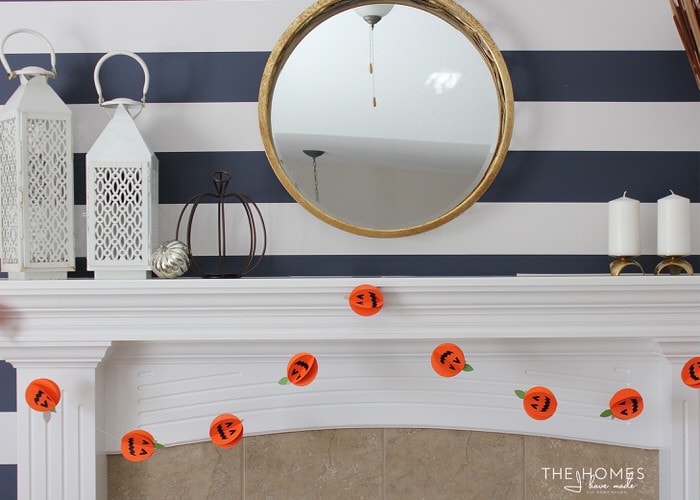
I chose to alternate which way the Jack-o-lanterns faced along the garland. Once strung, they look like they are tumbling out of a truck, and their alternating pattern just adds to the silliness of it all!
TIP! If it drives you crazy that some of the Jack-o-lantern garland faces aren’t “upright,” hang your garland first to determine which way the faces should point on each pumpkin before gluing them in place!
Whether you love a ton of Halloween décor around your home or just want some simple accents to remind you what month of 2020 it actually is, this is the perfect craft to add to your Fall Bucket List. This Jack-o-lantern garland is simple and inexpensive to make, is super kid-friendly, and is sure to bring a smile to everyone’s face this Halloween season!
Megan

