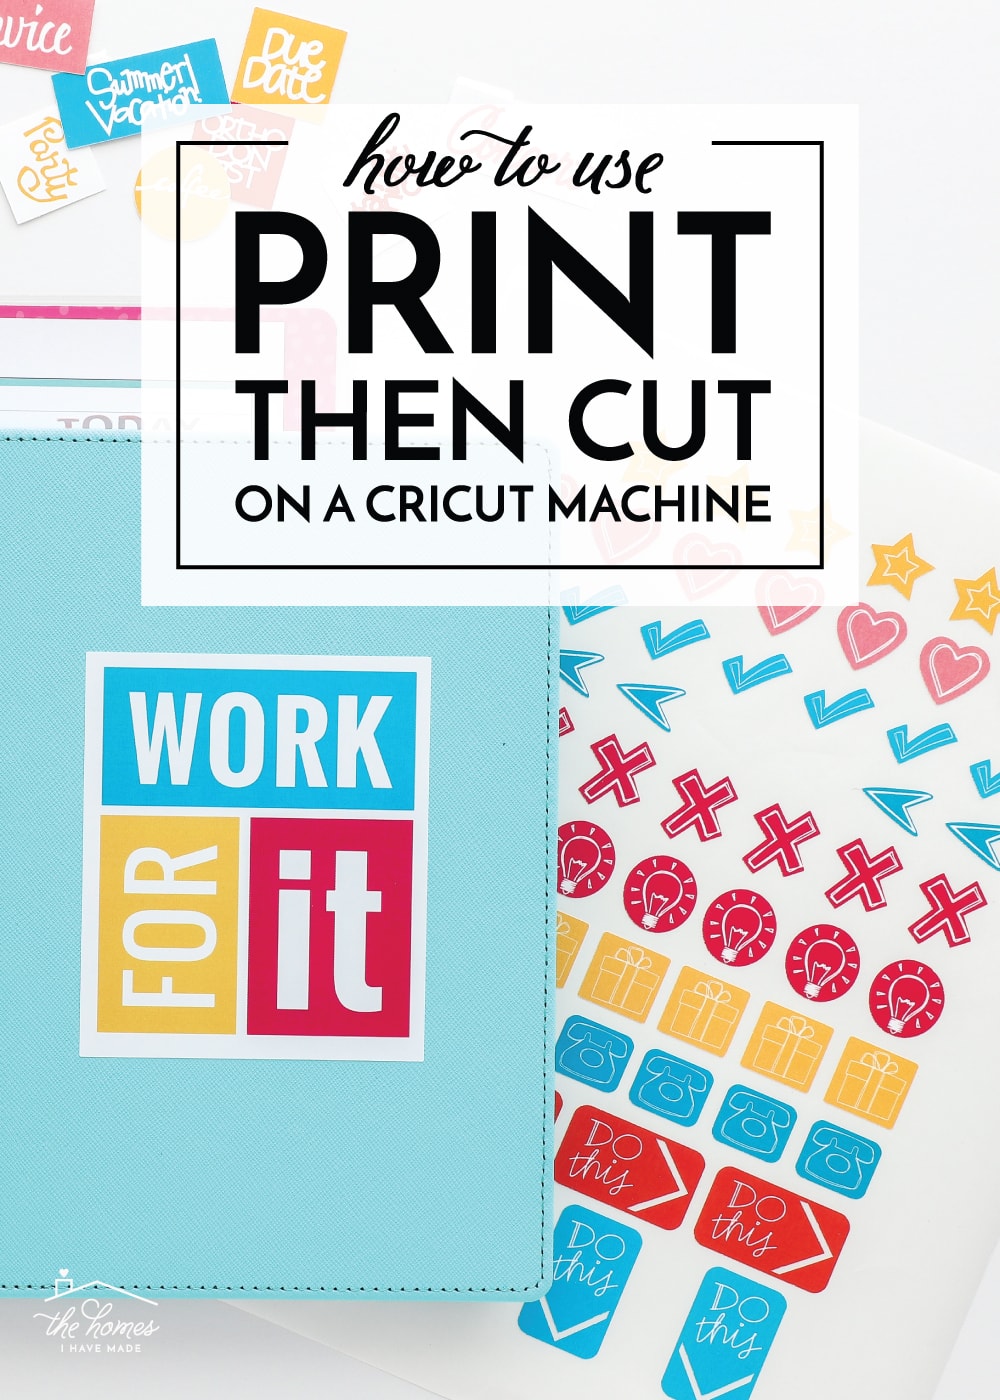
How to Use Print Then Cut on a Cricut
The Cricut machine is well-known for cutting cool designs from paper and vinyl, but one function that is super fun and really useful but not talked about a whole lot is the Print Then Cut feature. Instead of cutting shapes out of colored cardstock, vinyl or some other medium and layering them yourself, this feature allows you to print the entire design from your home printer, and then cut it out with a Cricut. I’ve used it a ton over the years, and it’s one of my favorite “short cut” methods for creating party decor, stickers, labels and more, but I’ve never broken it down for you step-by-step. Since I have a bunch of Print Then Cut projects coming down the pipeline this Fall, I figured it was a good time for a comprehensive tutorial so you can reference it as needed moving forward! Let’s get started!
What Is Print Then Cut on a Cricut?
Print Then Cut is exactly what it says: designs that you first print (from a home printer) and then cut out with your Cricut. I like to consider Print Then Cut as the “lazy way” to create multi-layer, multi-color designs in one step. What do I mean?
- Instead of having to cut various details from different colors of vinyl and painstakingly layer them all together, you “flatten” the image into a single layer and then print onto Printable Vinyl for a one-step application.
- Instead of cutting and layering different colors of iron-on, you “flatten” the image into a single layer and use Printable Iron-On.
- Instead of cutting stickers from red vinyl, then pink vinyl, then blue vinyl…you can print them together onto Sticker Paper and cut them all at once.
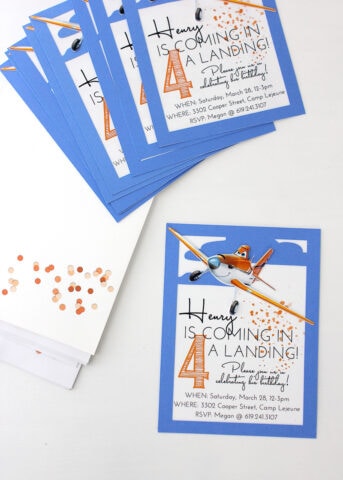
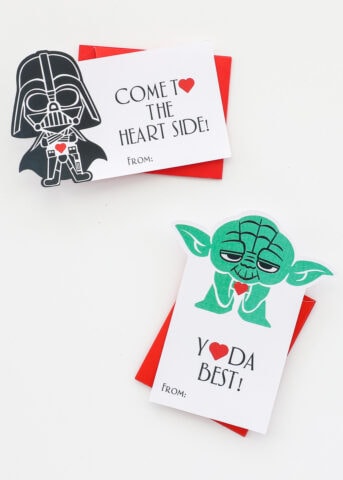
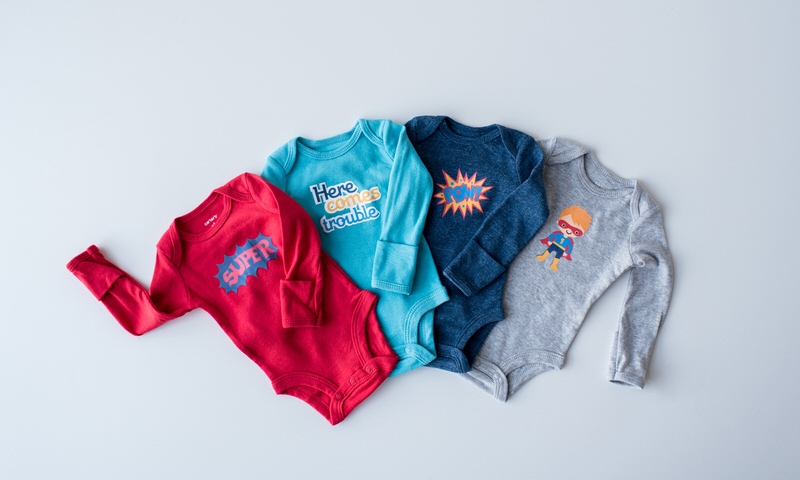
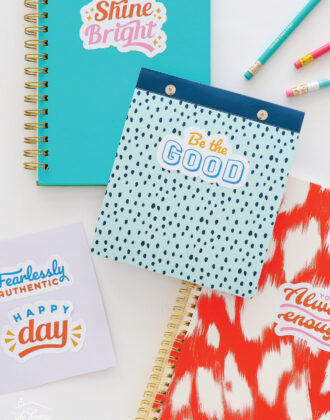
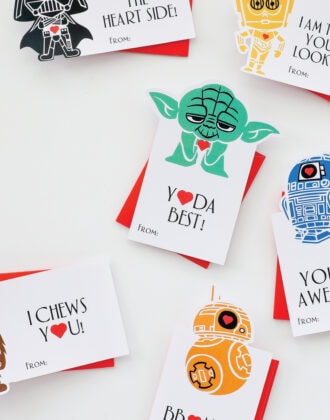
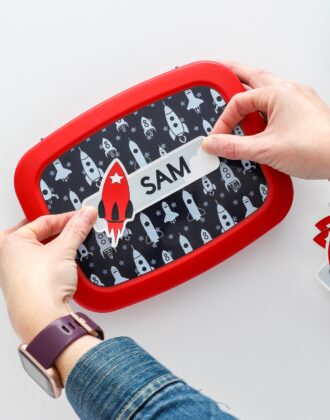
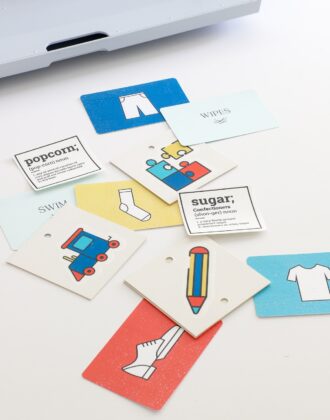
Print Then Cut is my favorite way to make stickers, planner accessories, cards, invitations, magnets, and labels; as well as create anything with commercial logos or images (e.g., the Dusty Crophopper Party Invites, below, top left). Once you get going, you’ll be amazing at what you can use this technique for!

What You Need For Print Then Cut Projects
- A Cricut Machine – only the Cricut Explore and Cricut Maker can do Print Then Cut; the Cricut Joy does not support this feature.
- Basic Cricut Tools – machine mats, weeding tools, blades, etc
- Cutting Material – any printable material such as cardstock, paper, sticker paper, printable vinyl, printable iron-on, printable magnetic paper, etc.
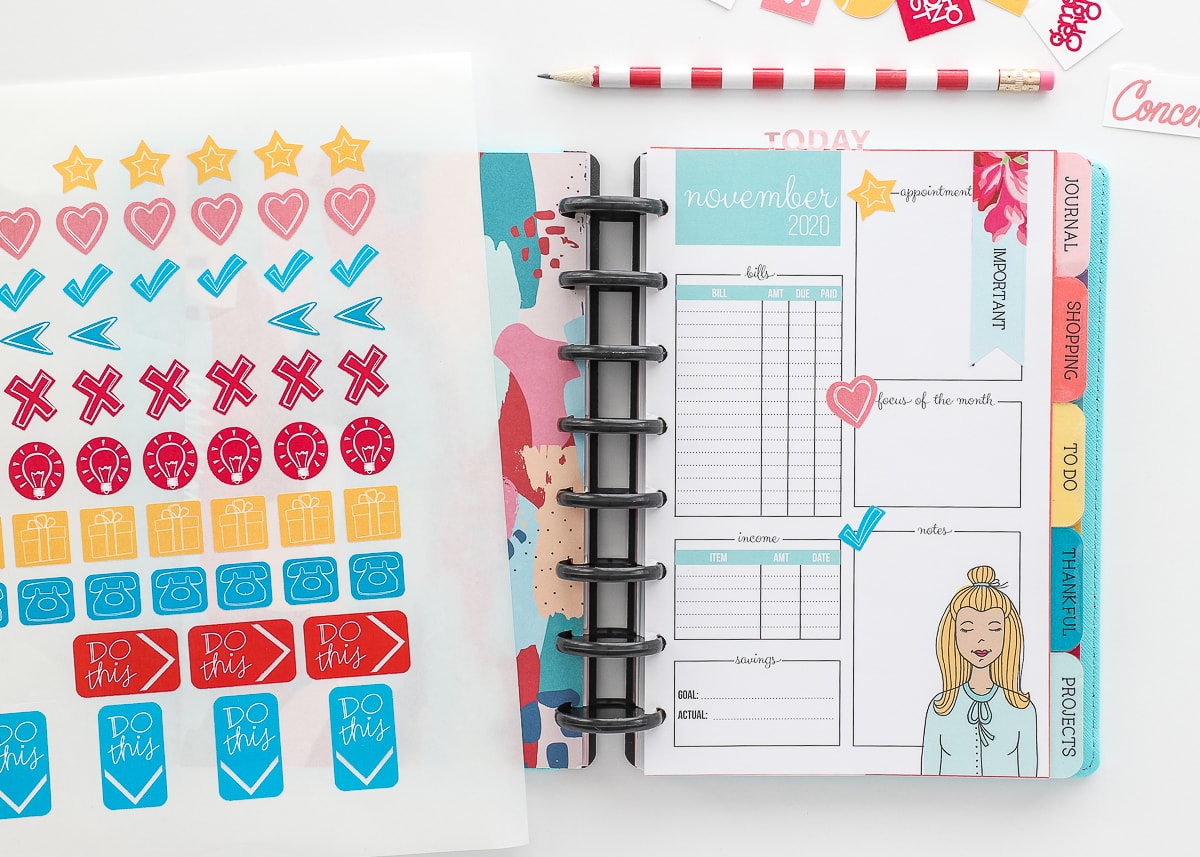
- Access to Cricut Design Space – if you’d like to use my Printable Planner Stickers file, you can access it HERE!
Before you can use the Print Then Cut feature, you must first understand how to find and make your designs “printable.” So let’s start in Cricut Design Space!
Finding Printable Images in Design Space
There are LOTS of different ways to make printable images. The easiest (and most obvious) option is to look for “printable” images in the Design Space Library. You can find these images by selecting “Print Then Cut” under the “Art Type” filter, or use “Print Then Cut” in your search terms.
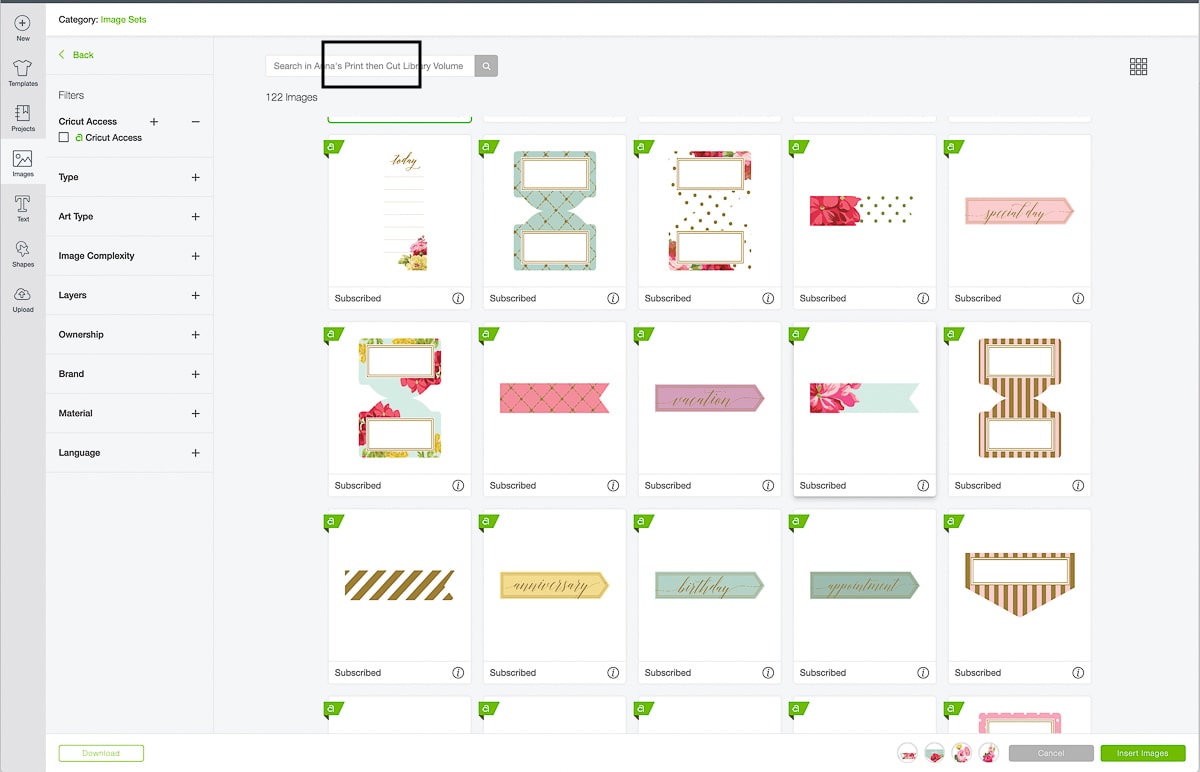
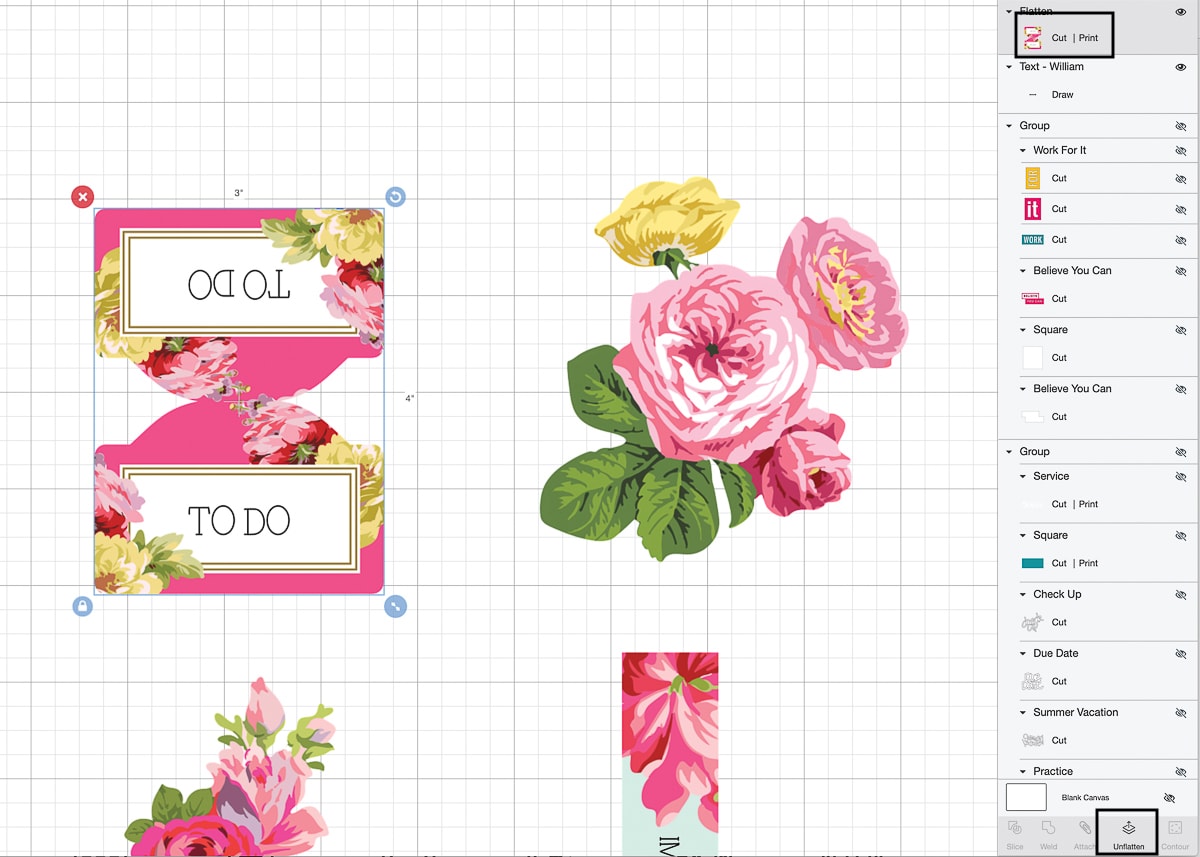
When Print Then Cut images are first loaded onto your canvas, you will notice they are immediately designated as Cut | Print in the right-hand layers panel. These images are specifically designed to be printed; and as such, you will not be able to separate out the layers, change colors, etc.
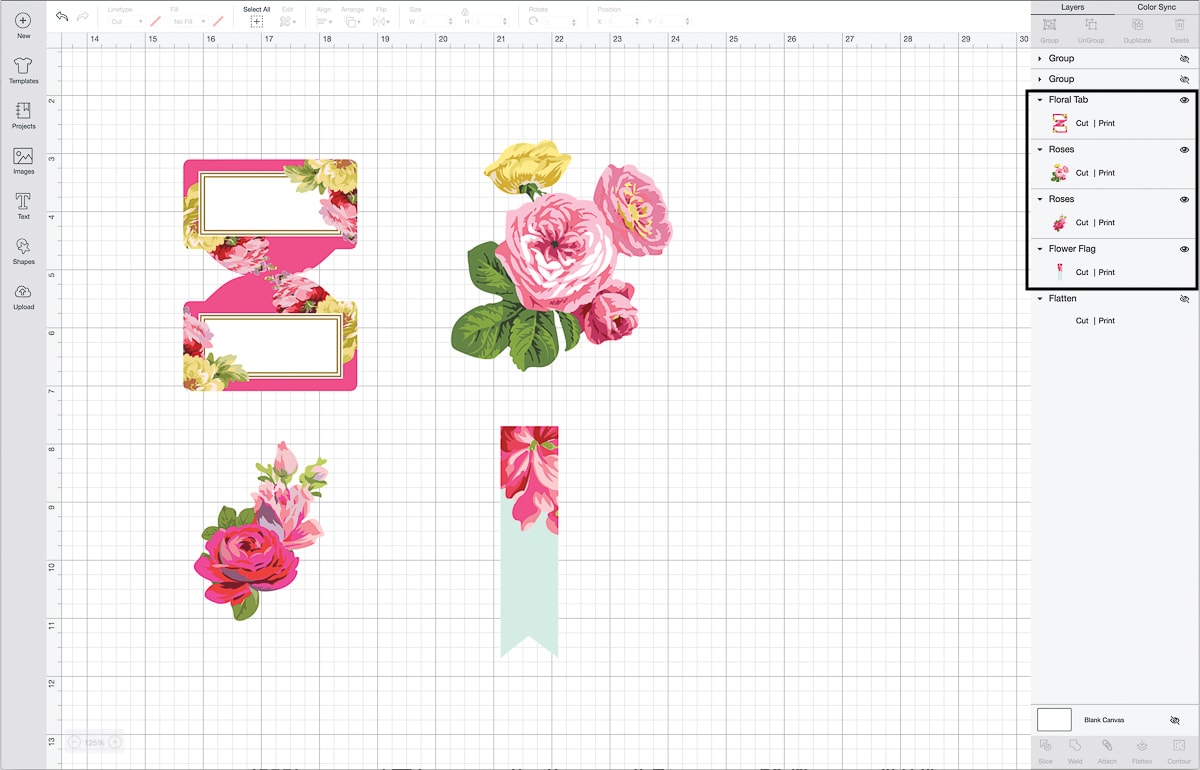
While you are not able to change the design itself, you are able to re-size it, change its orientation, group/attach it, and add text to it just like you would any other image. To add text to a Print Then Cut Image, insert a text box (like normal)…

…then select both the Print Then Cut image AND the text box and click the “Flatten” button along the bottom right-side toolbar. “Flatten” means to take any multi-layer image and make it into one “flat” image that can then be print and cut. Below, you can now see in the right-hand layers panel that my label+words have been flattened into one single (printable) image.
Turn Any Image Into a Printable Image
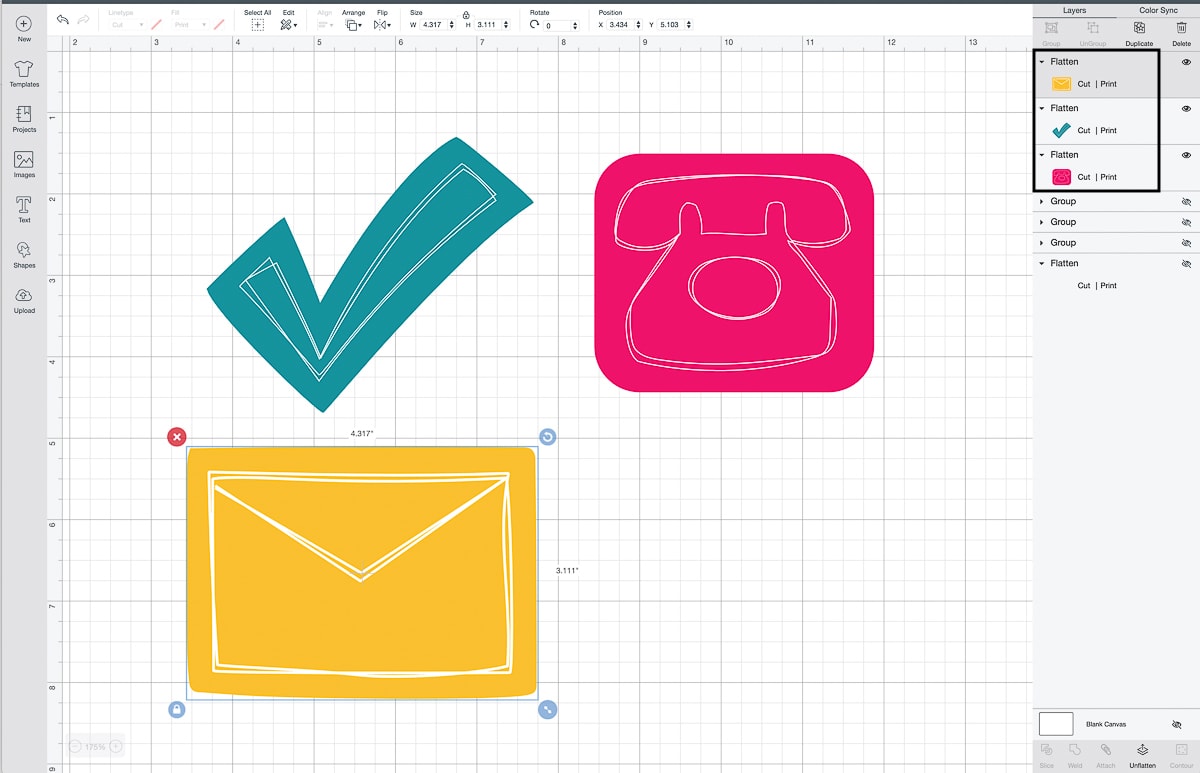
Print Then Cut Images aren’t the only designs you can use with the Print Then Cut feature. In fact, you can “flatten” ANY image in order to make it printable. This is actually my preferred way to make my printed designs, since I have ultimate control over colors, which layers are included, etc.
Start by placing any cut/drawn images onto your design canvas. Notice in the right-hand layers panel that the designs are set to be “Cut” or “Draw” by default.
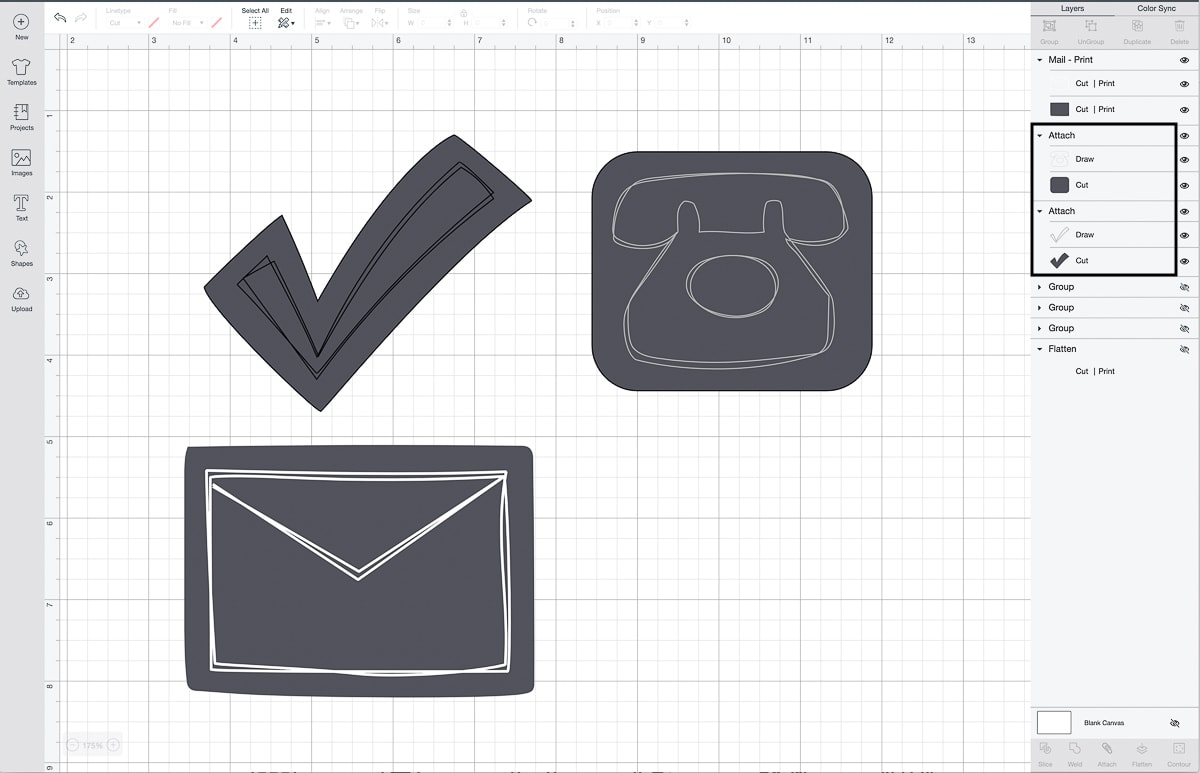
Before you “flatten” your image in order to be printed, go ahead and change the colors to your liking using the Linetype and Fill menus along the top toolbar. If your design includes “Drawn” elements, make sure you adjust those colors too!
TIP! If you want to make a “Drawn” line white, you must first change the line to “Cut” and then select white from the colors menu.
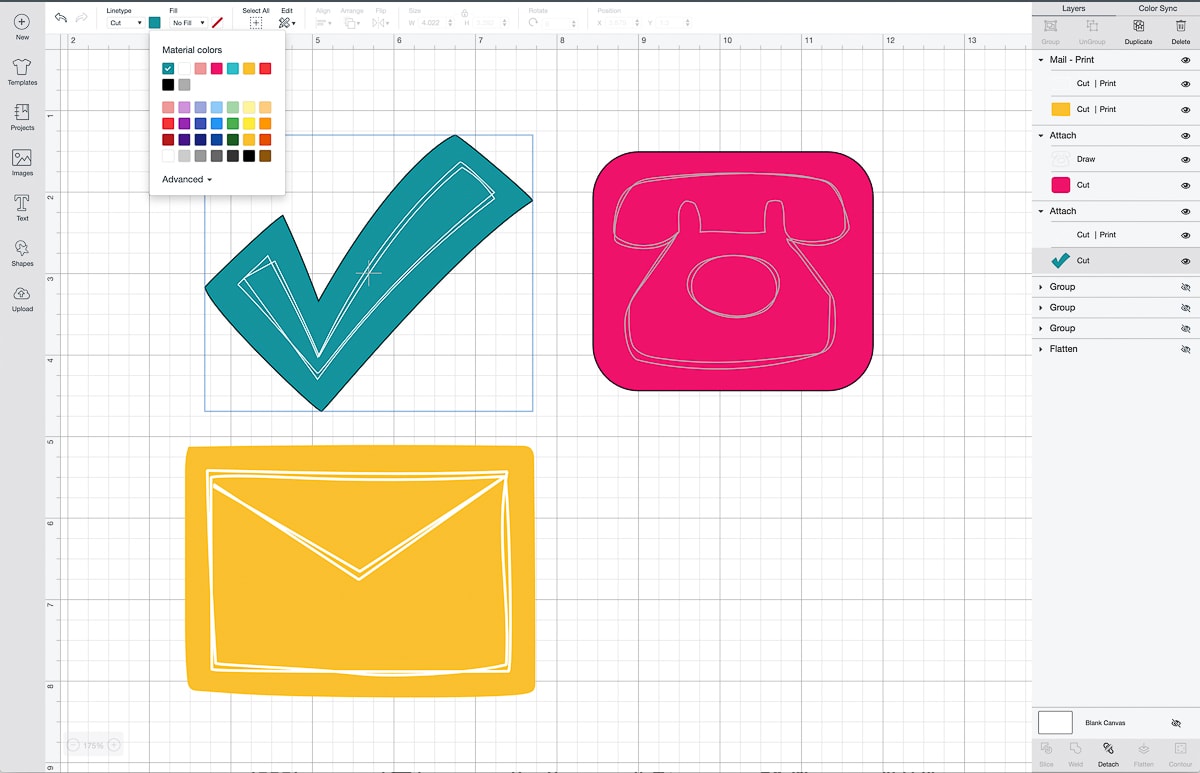
Once your colors are to your liking, now you can flatten them into printable images. To do so, select all the layers you want flattened together (in my example, both the pink box and white telephone drawing.) Then click the “Flatten” button on the bottom right-hand toolbar.
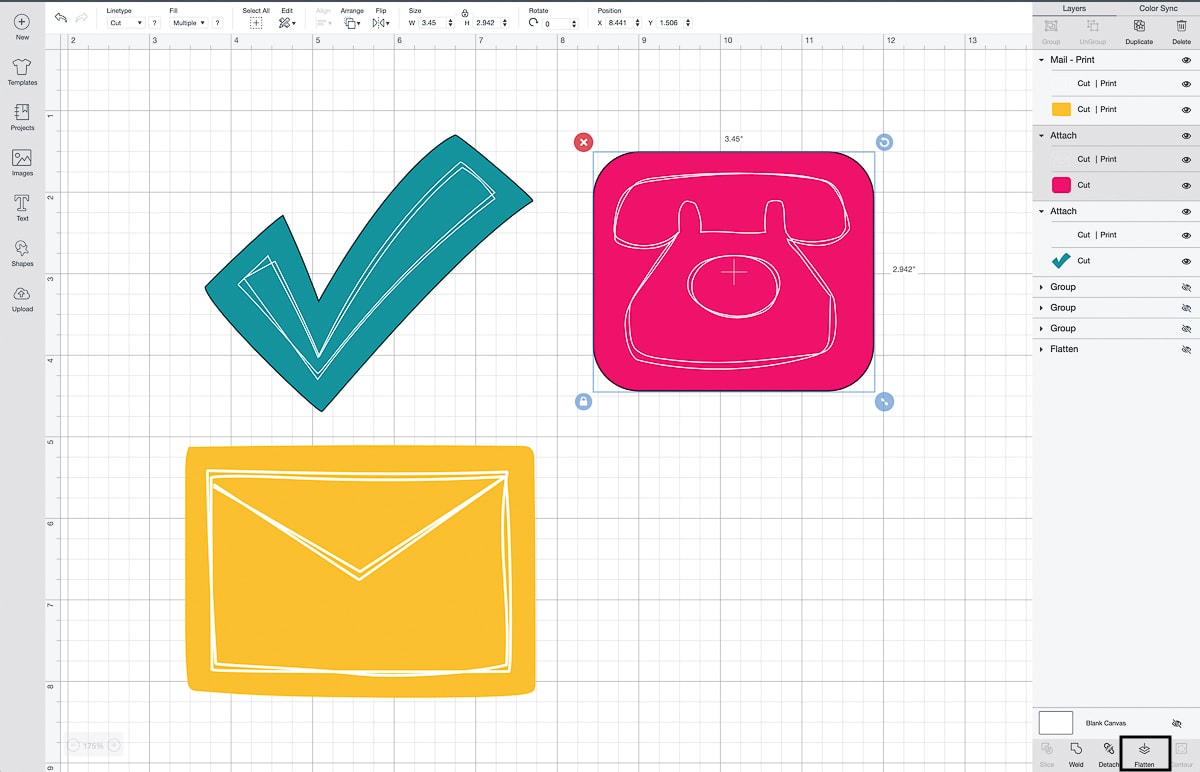
When you click “Flatten,” you will notice the image on your canvas looks slightly different. Not only will it no longer have really obvious black cut lines, but you will see that all your flattened images are listed as Cut | Print in the right-hand layers panel.
TIP! You can “Unflatten” your image at any time in order to adjust colors, change text, etc. Once you make your changes, just be sure to re-flatten it in order for it to be printed.
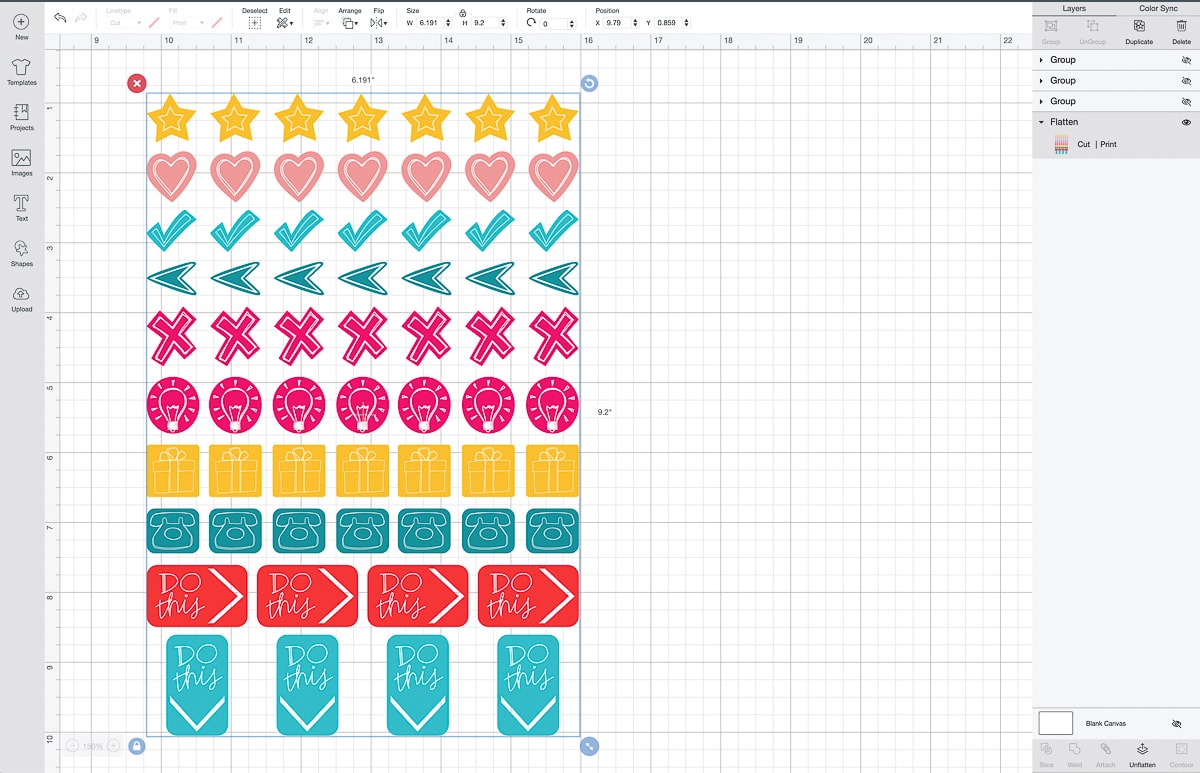
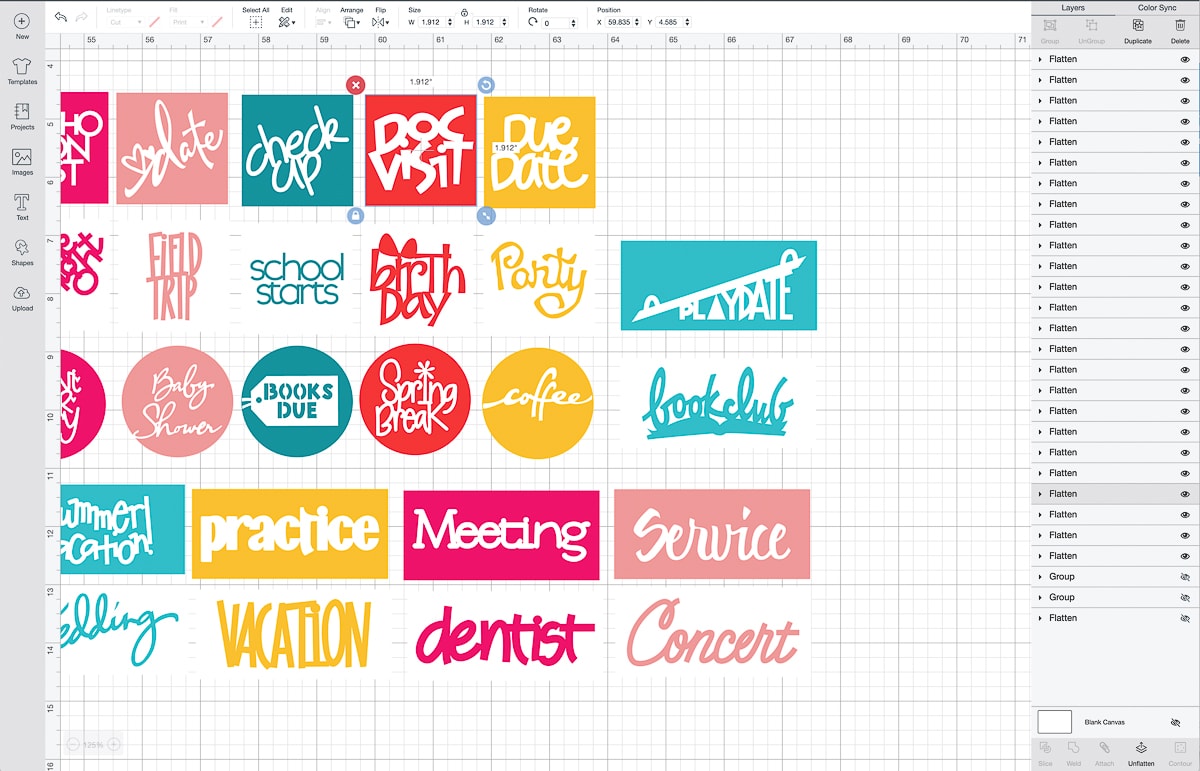
I want to point out that you can flatten images, group them together and flatten them over and over again in order to make a larger set of printed images. Below, I started with flattened versions of all my planner stickers. I then copied and pasted those flattened images over and over and over again. To ensure they printed in a nice uniform pattern and optimized paper space, I flattened them into one set, as shown in the right-hand layers panel. Grouping them together also makes it easier to uniformly re-size them.
NOTE: The biggest image you can Print Then Cut is 9.25″ x 6.75.” If you make your design too big, you will see a yellow “Yield” sign in the right-hand layers panel, indicating you need to make it smaller.
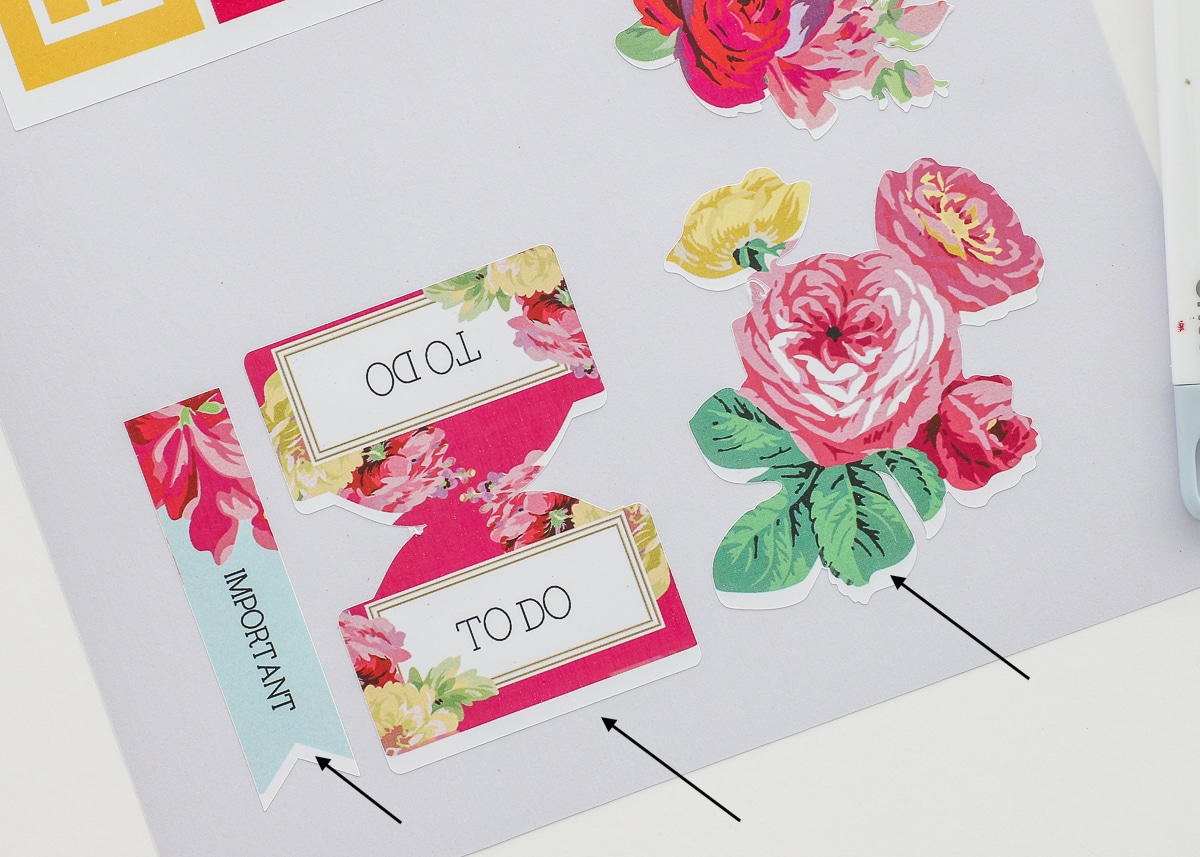
One thing to consider when working with Print Then Cut is the path the Cricut machine will use when cutting each design out. In general, the Cricut will cut along any path that was previously designated as “Cut.” In my images above, all of the shapes were cut out along their outlines; the white arrows were also cut out of the bigger stickers.
TIP! If you can see the grey grid lines under/inside your image, those elements will be cut out.
However, depending on what you’re making, you might not want to cut out every last detail…like in the case of making stickers. Let’s use the “Doc Visit” sticker shown below.
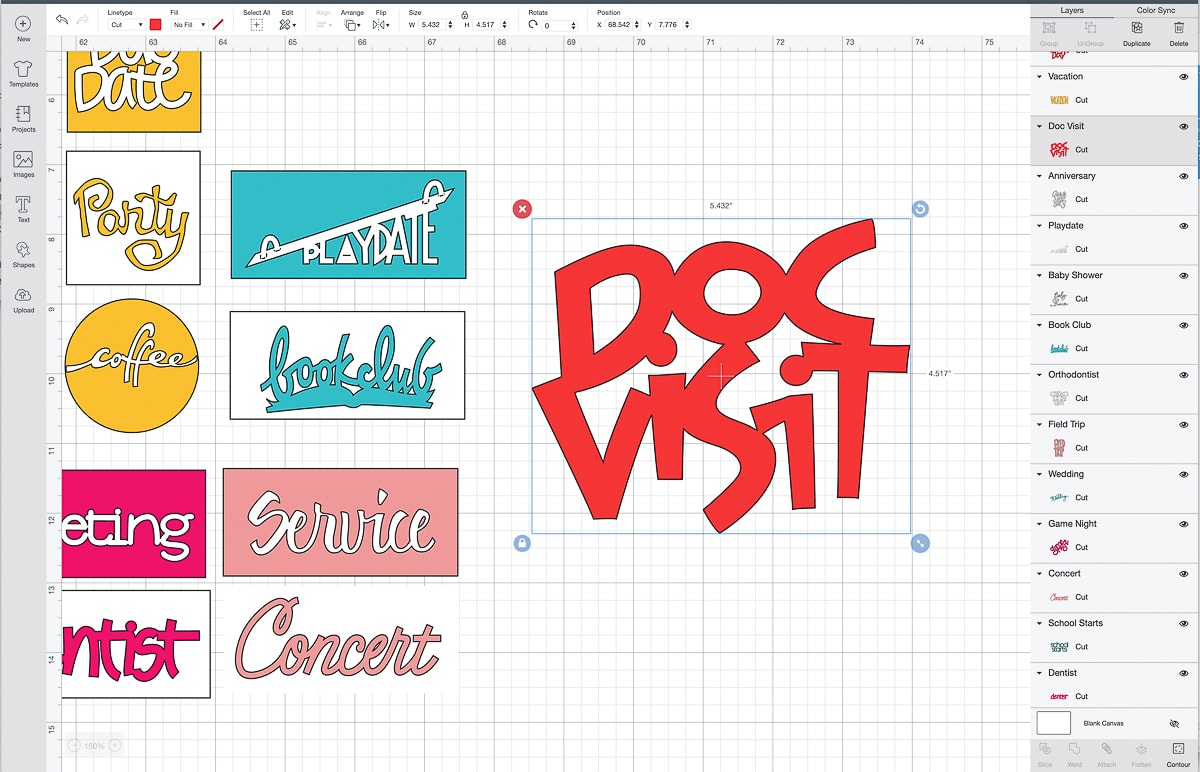
When I flatten this basic image, you’ll see that all the details will be cut out (as shown by the grey gridlines inside all the letters). This would make a super delicate planner sticker.
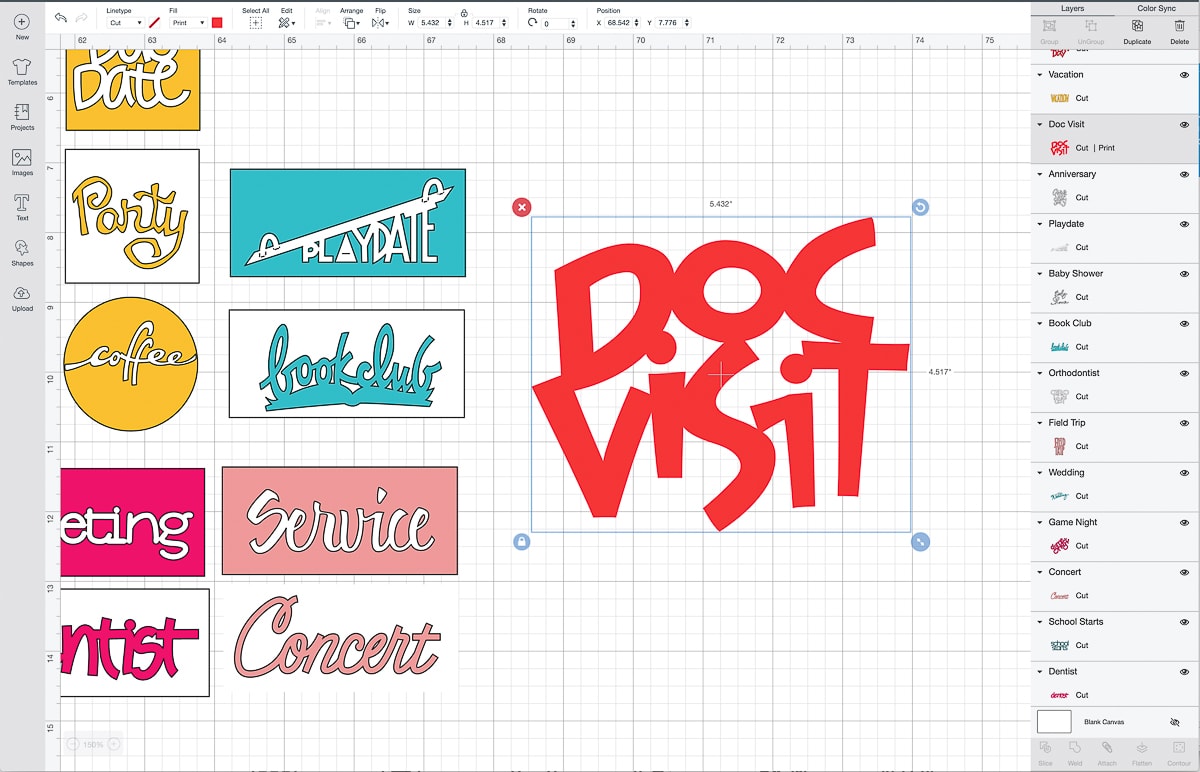
In order to make really detailed images (like words) into cleaner, simpler shapes, I suggest placing them onto another layer (such as a square, circle or other solid image from the Design Space Library).
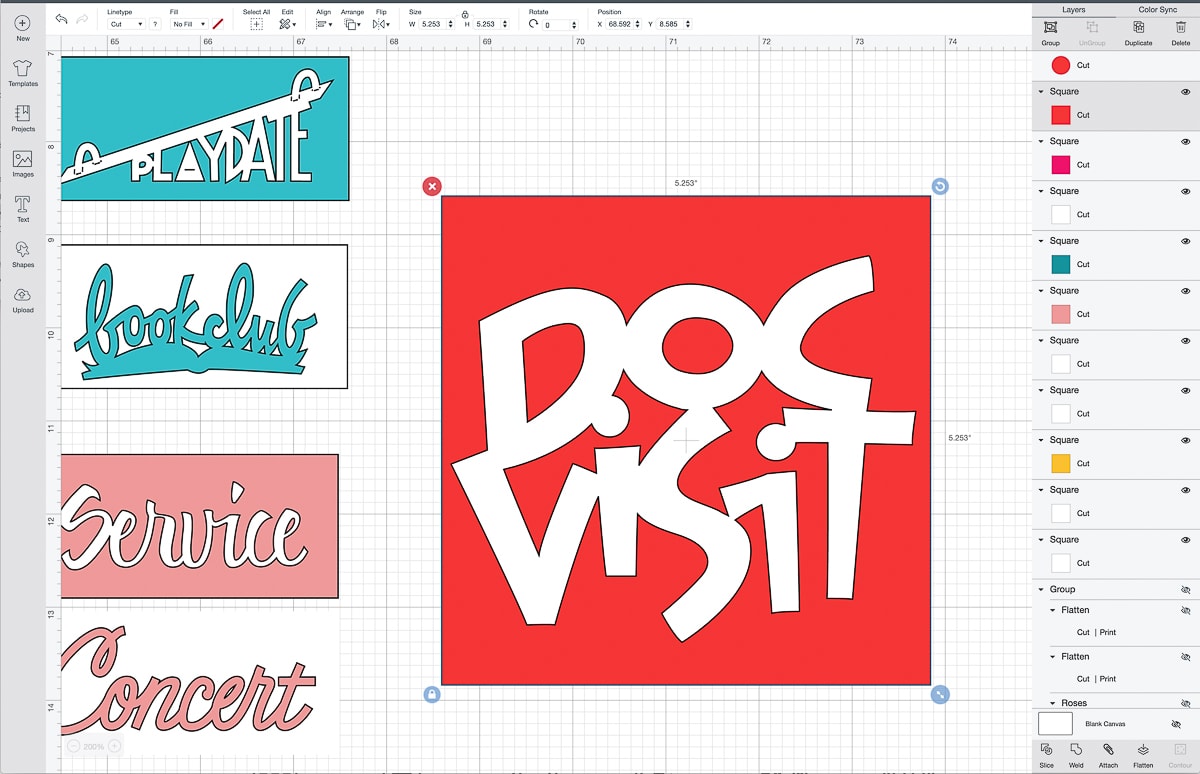
Once you select both the word and background shape and flatten them together, now just the outline will be cut rather than every single tiny detail. Notice below that even my stickers with white backgrounds will be cut into squares (since the grey grid isn’t showing through the square layer).
Uploading Images for Print Then Cut
Your final option for creating Print Then Cut designs is to upload your own image. Whether you use a graphic you find online (like a logo or character image) or some planner stickers or other clipart you buy off a site like Etsy or Creative Market, you can upload them directly to Cricut Design Space as Print Then Cut images.
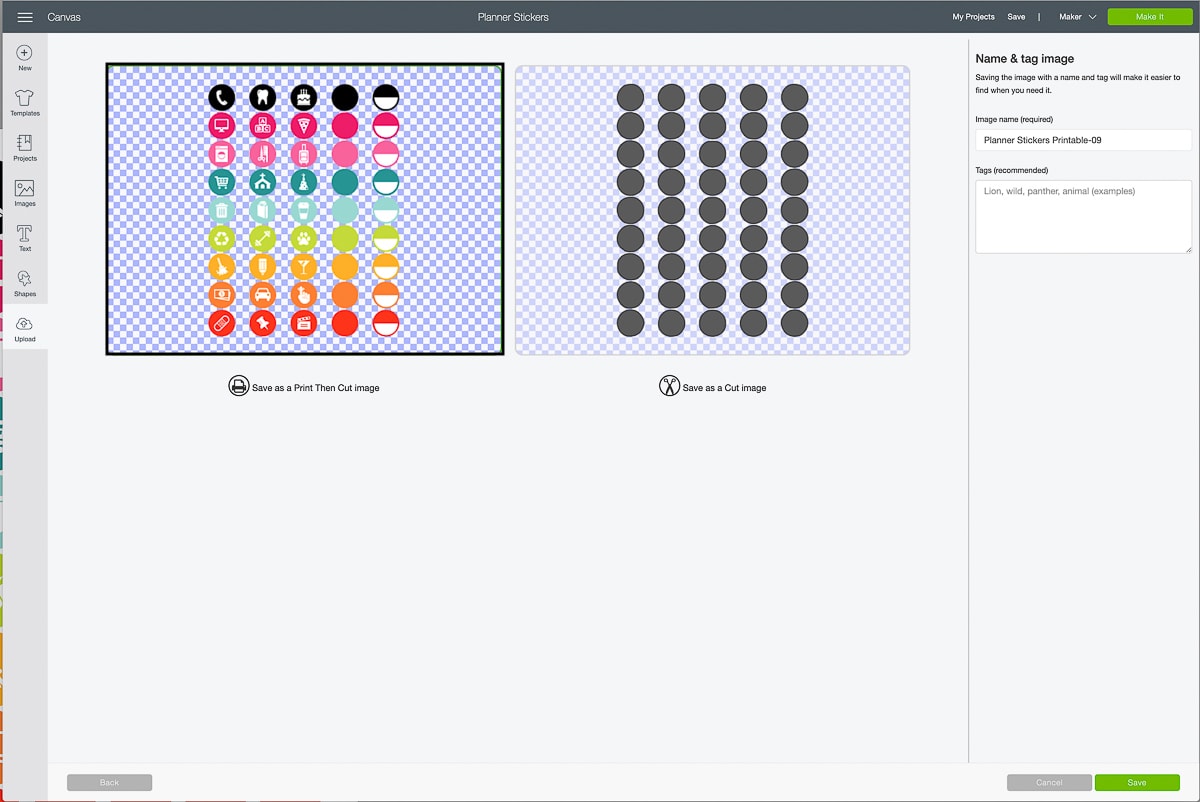
Start by referring to my tutorial HERE on how to upload images. Then on the final screen, you will be given the option to save your image as a Cut Image or a Print Then Cut Image. Here, you will want to select the left-hand Print Then Cut option.
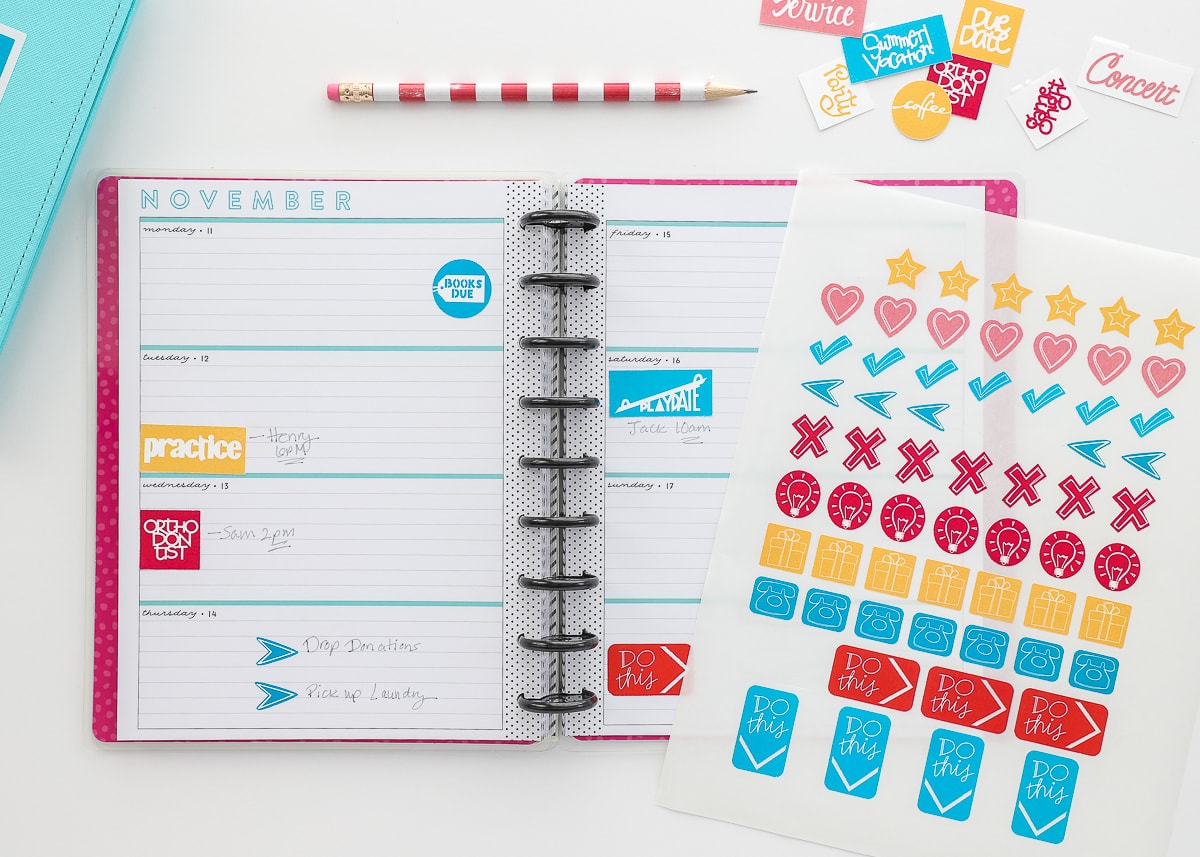
Below are my own Planner Stickers that I used just for fun!
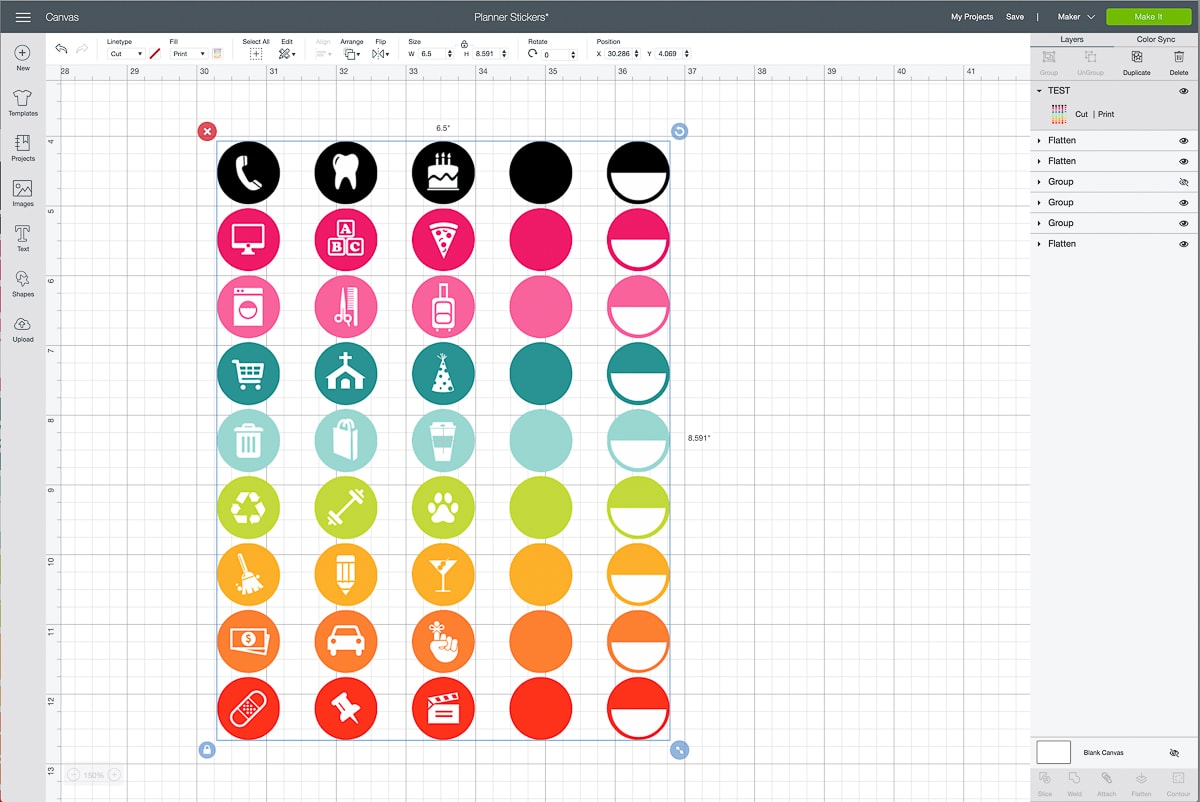
Once you add your uploaded image to your canvas, you will notice right away it’s a Cut | Print image, which you can then size, rotate, label etc. You’ll then be able to print and cut out the upload, just as you would any image from the Design Space Library!
How to Use Print Then Cut on a Cricut
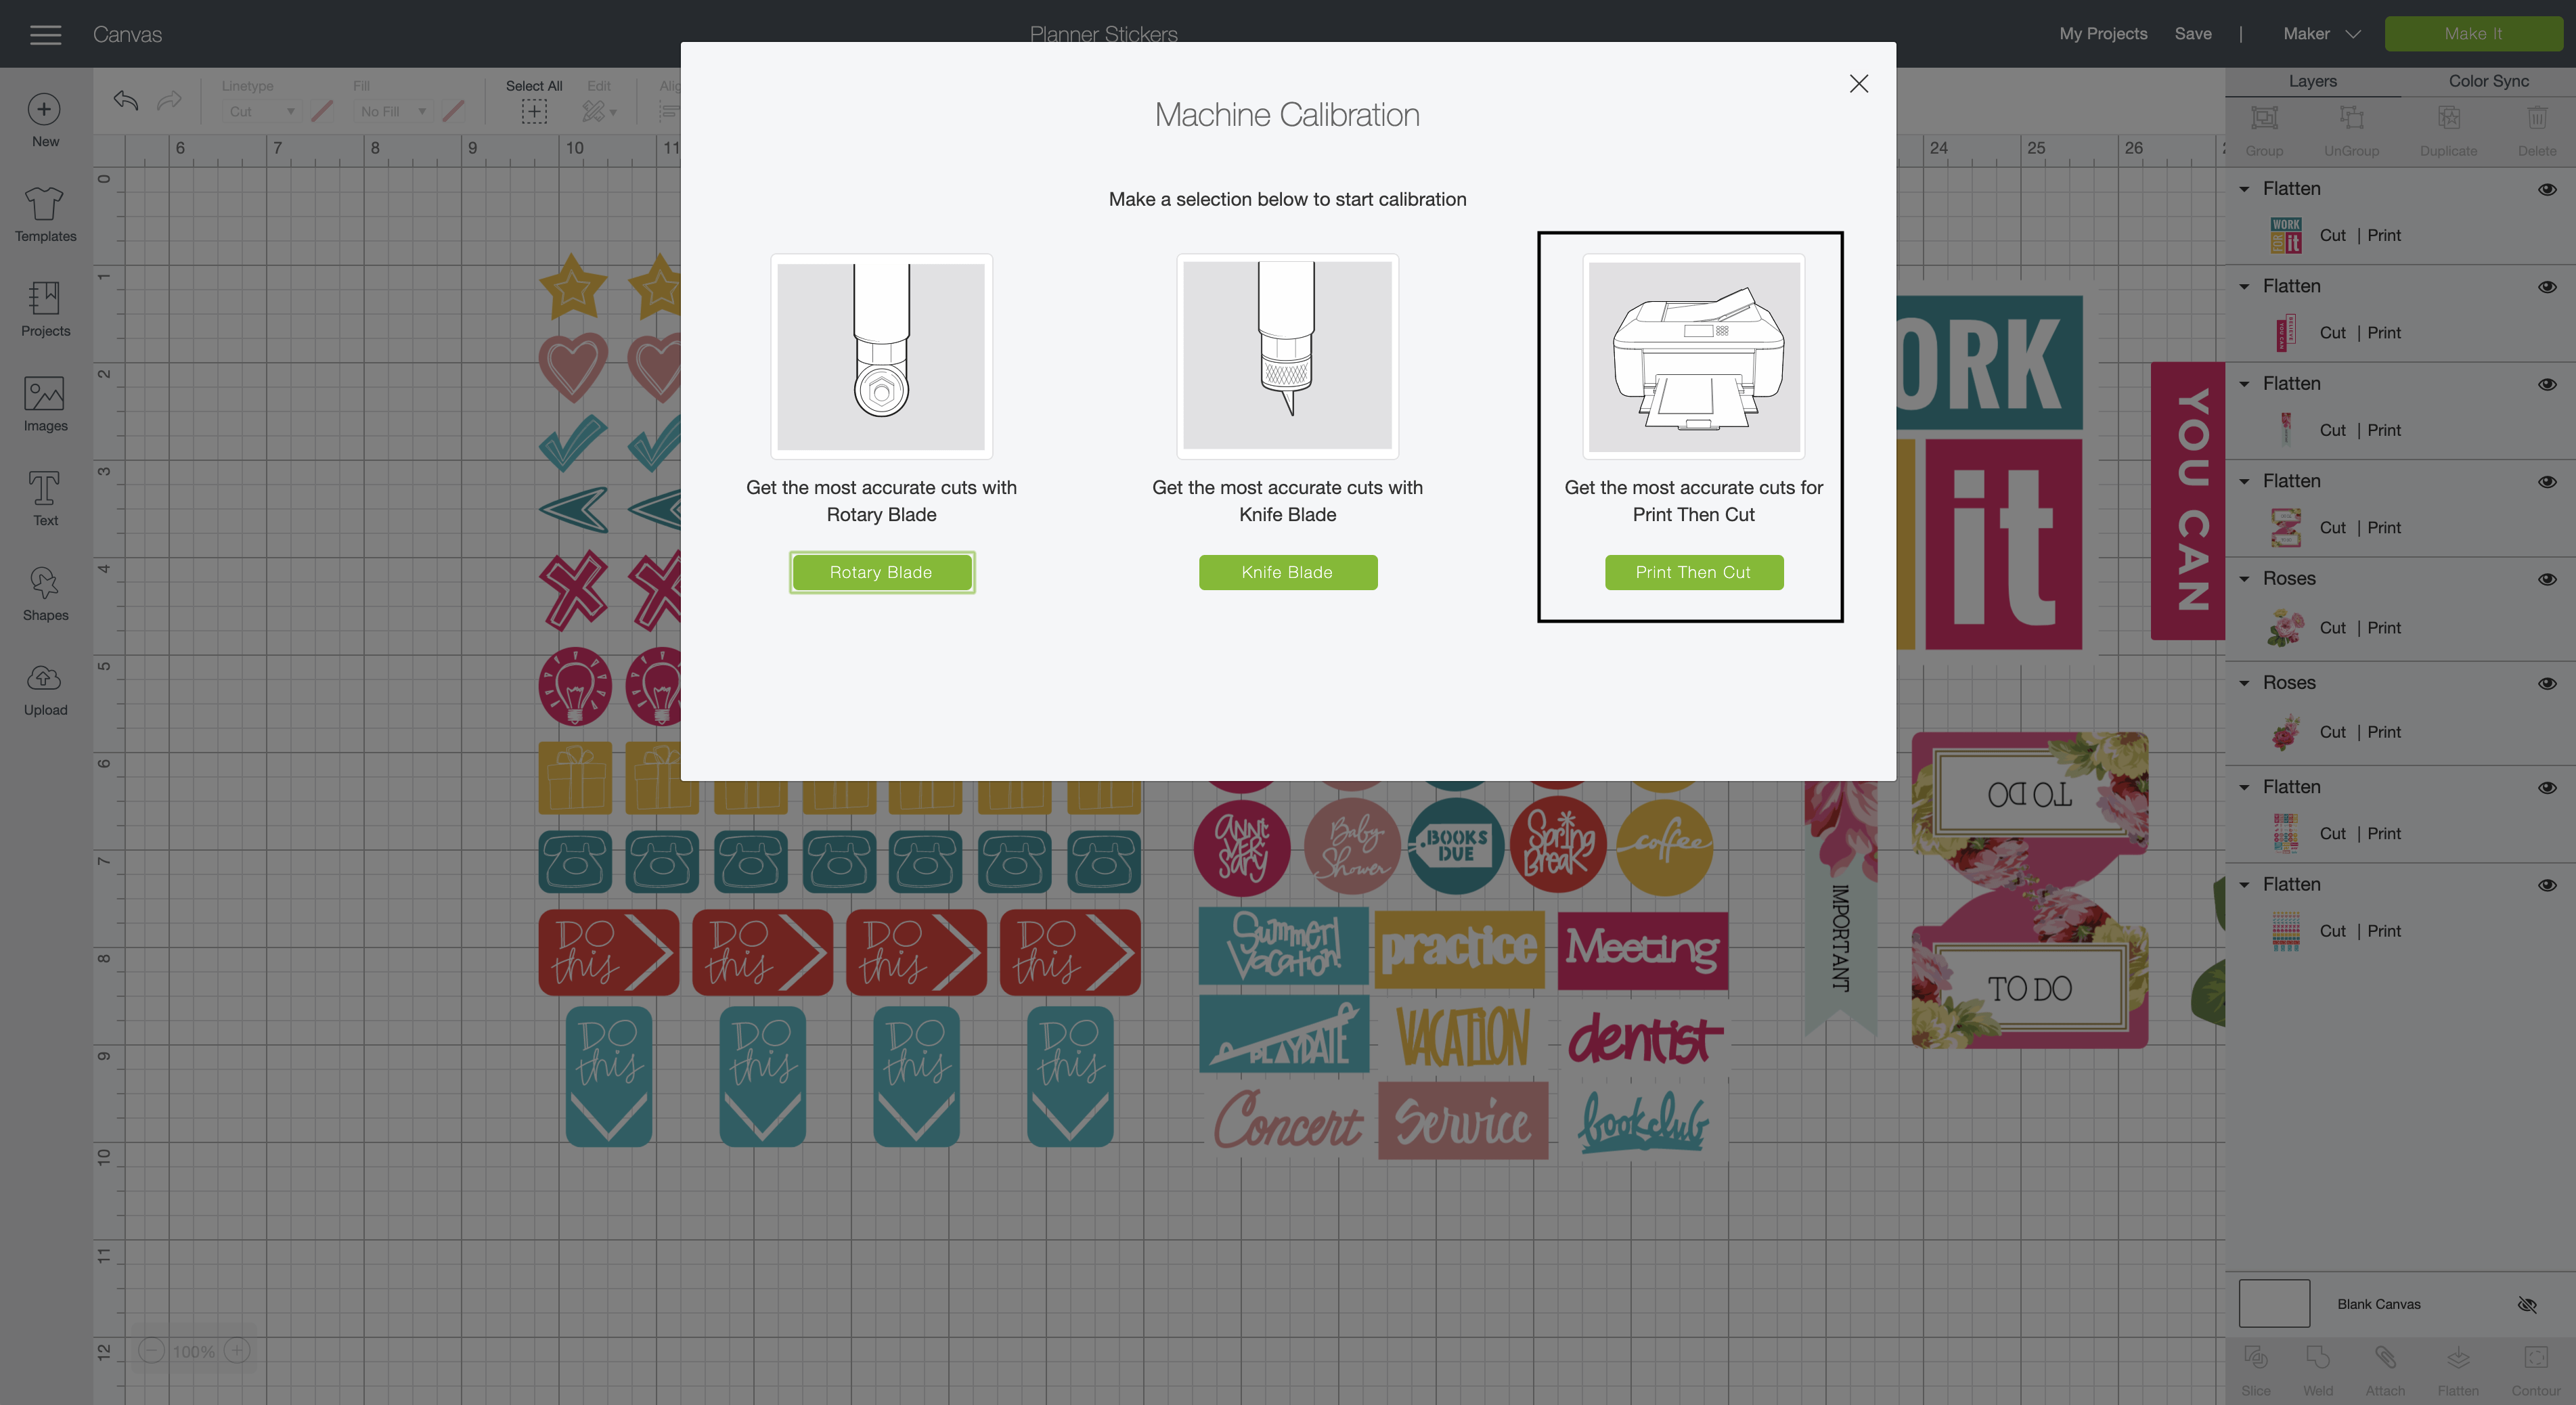
Okay! Once you have your printable images all designed, colored, and sized the way you want (using one of the methods outlined above), it’s finally time to print and cut them out!
Once you hit the green “Make It” button, you will find the series of steps a bit different from traditional “Cut” projects. First, you will see your images populated onto 8.5×11″ paper with a black rectangle around each image (more on this in a minute!) While you can move images around the white paper to space them out differently, you will NOT be able to “Hide” or “Move” single images across mats like you can during “Cut” projects.
Your first step will be to send the page to your printer:
NOTE: Make sure you have your printer loaded with whatever paper/printable material you want your design on!
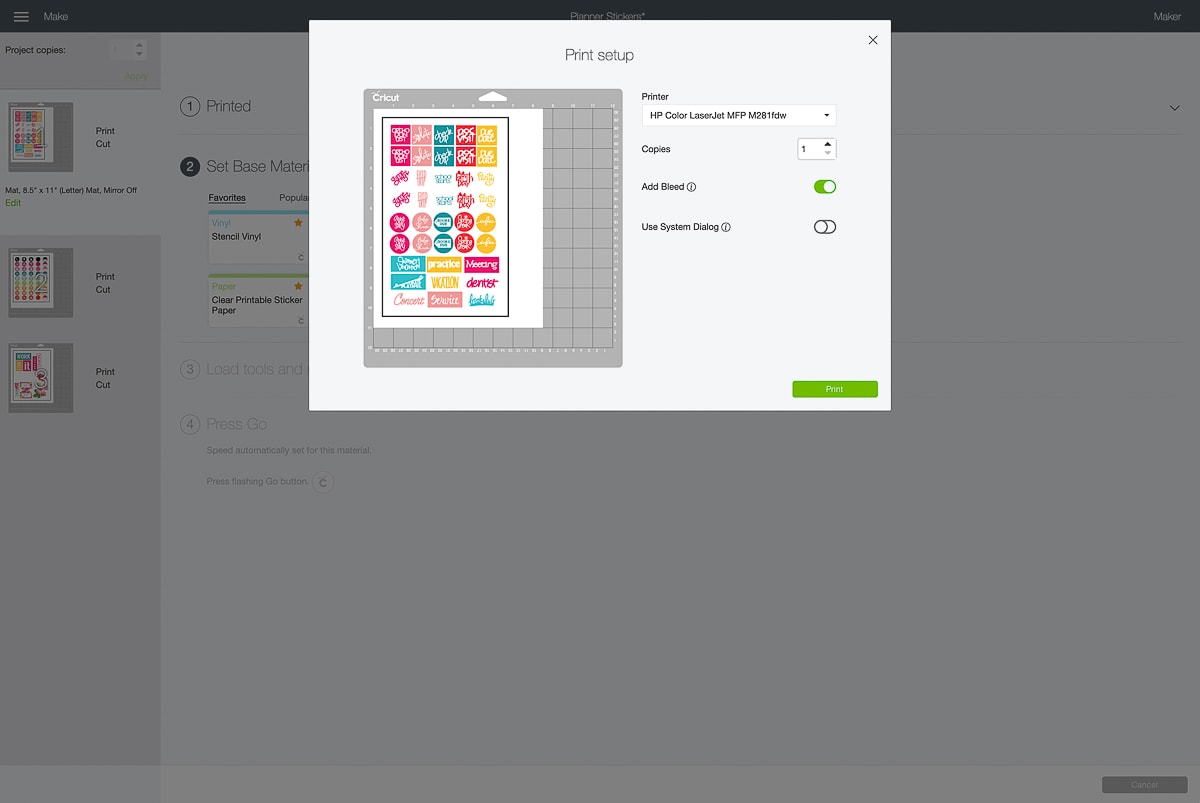
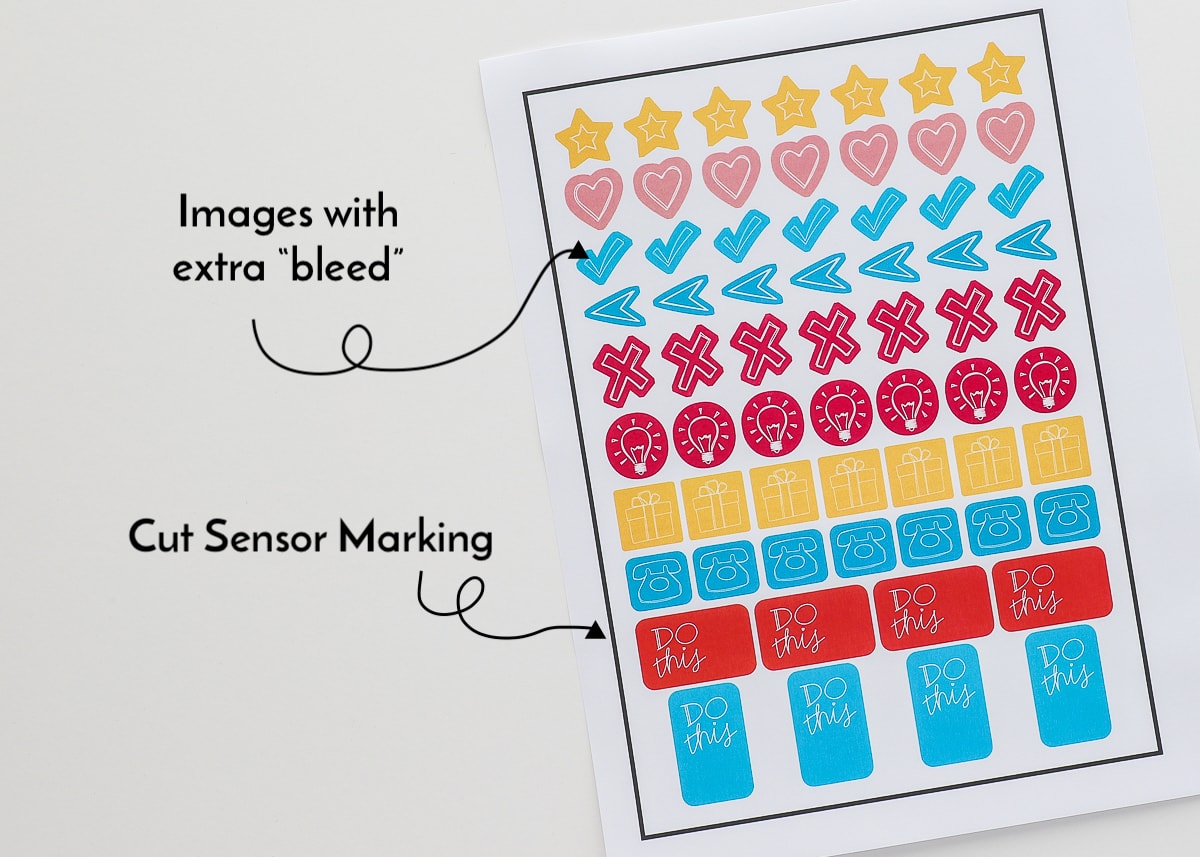
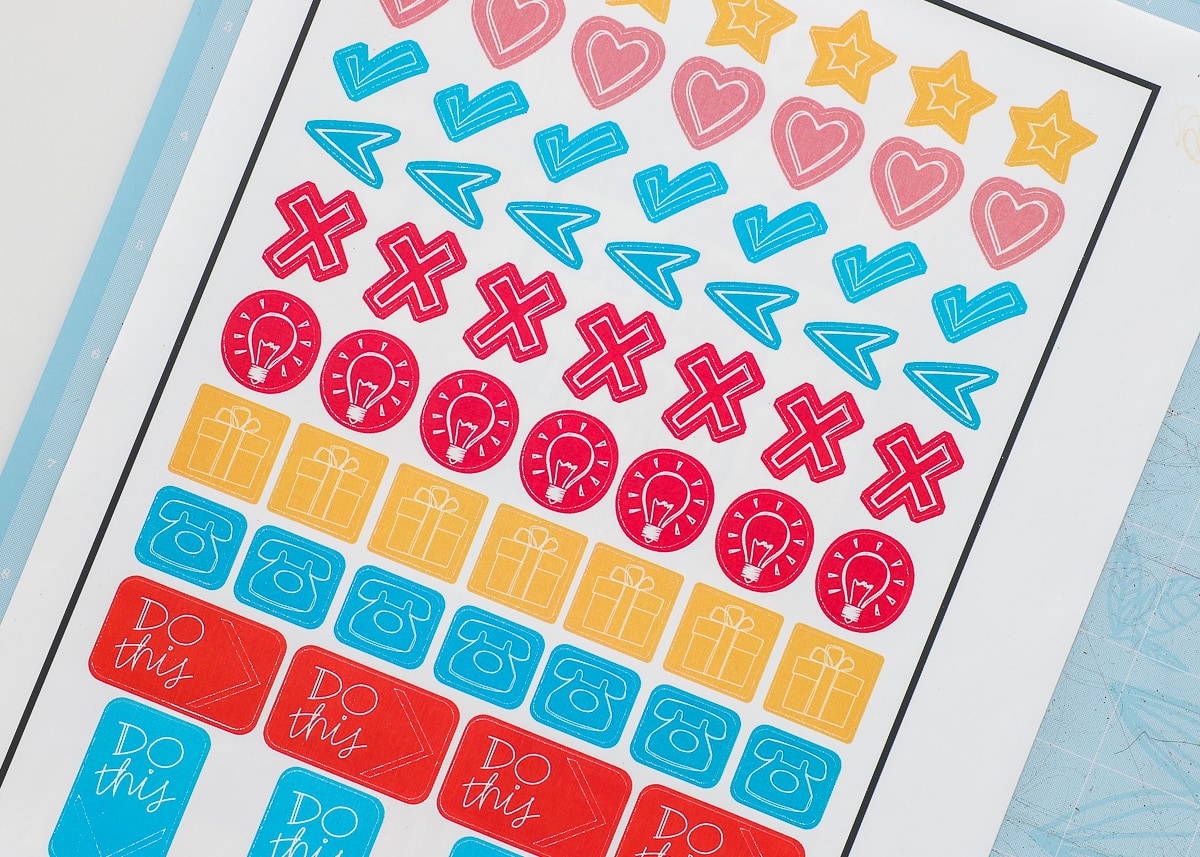
When your design comes off the printer, there are a few things you’ll notice. First, each image will look a little “puffy” or “swollen.” This is because a “bleed” area has been added to each image. This extra border of color will ensure your cut lines fall onto colored paper rather than white background.
There will also be a black rectangle around your image(s). This rectangle is called the Cut Sensor Marking and is what your Cricut Explore/Cricut Maker will use to align the cuts with your printed image. If this black rectangle is for some reason printed too light or smudged, your Cricut will have a hard time reading the design and won’t cut out your image.
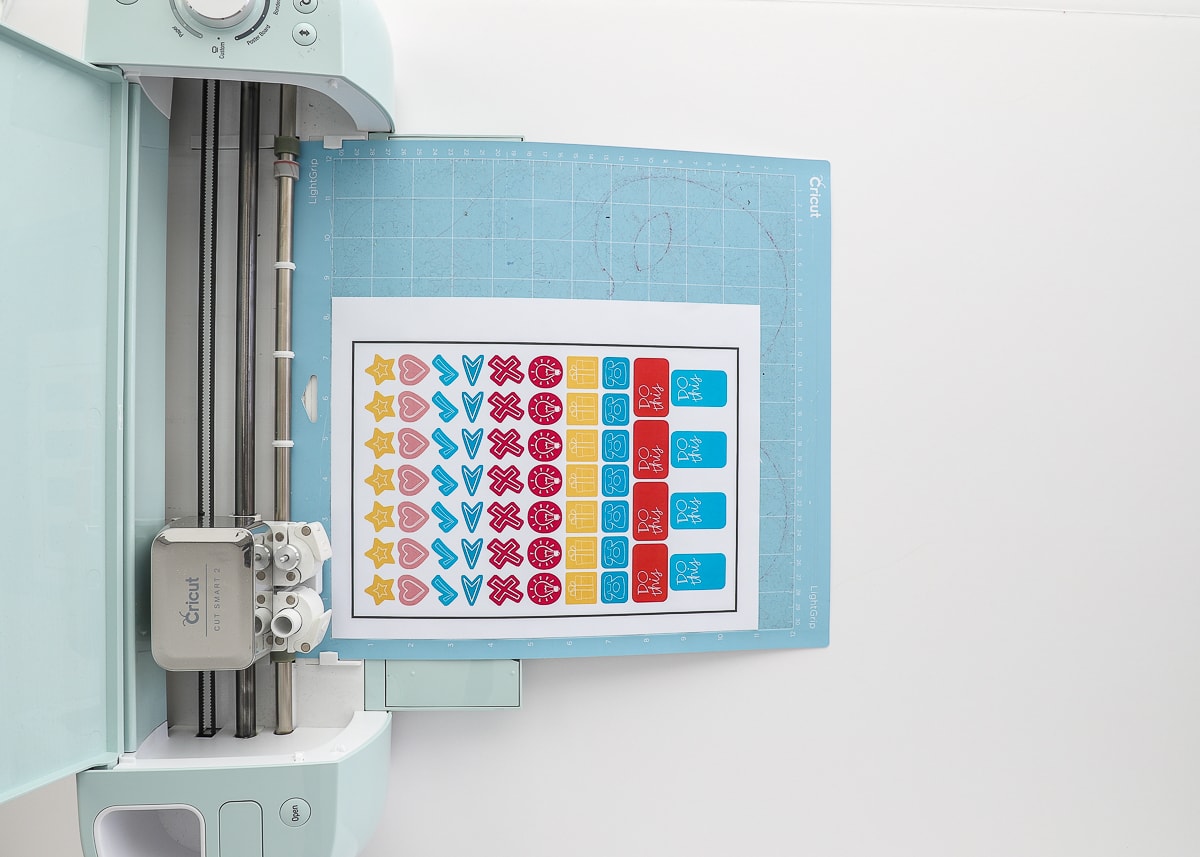
Next, load your printed material onto a cutting mat, aligning the paper to the upper left-hand corner.
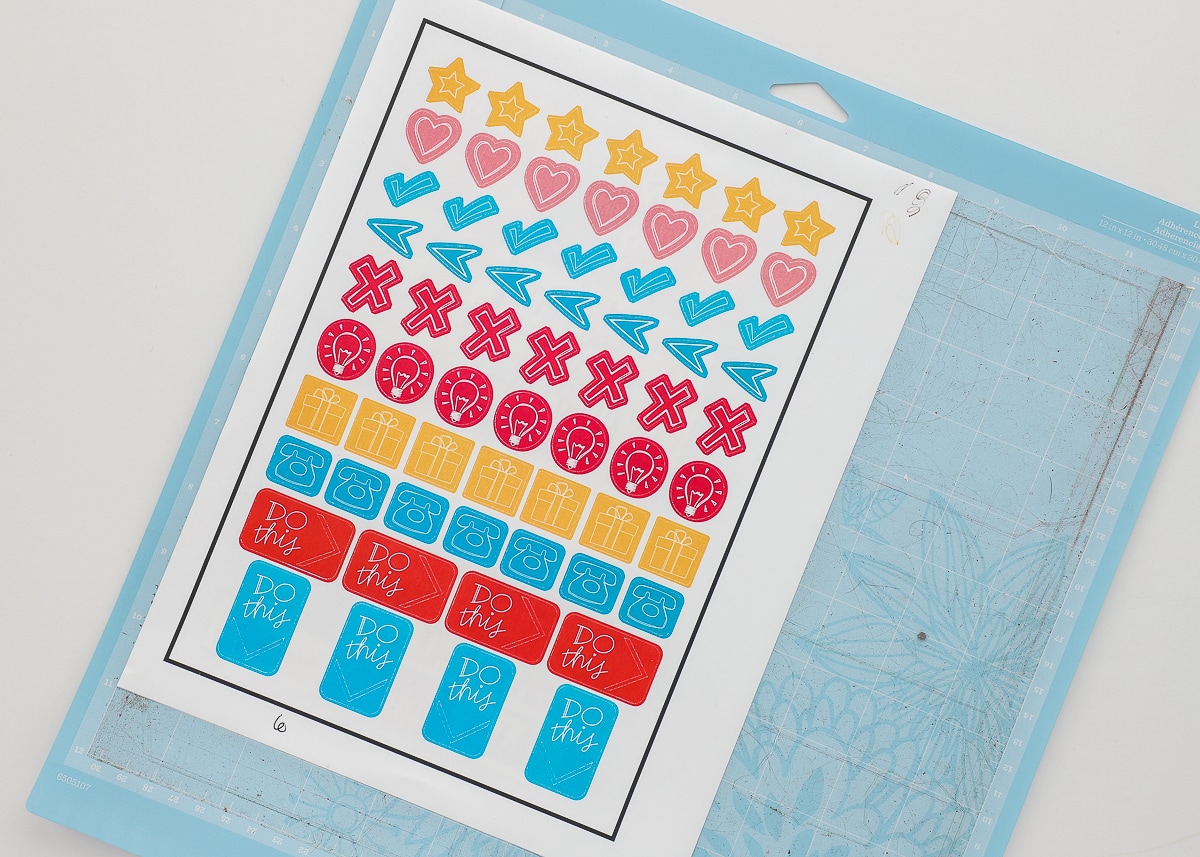
At this point, Cricut Design Space will prompt you to make a materials selection, insert the correct blade accordingly, and load the mat into your machine…all just like a “normal” cutting project.
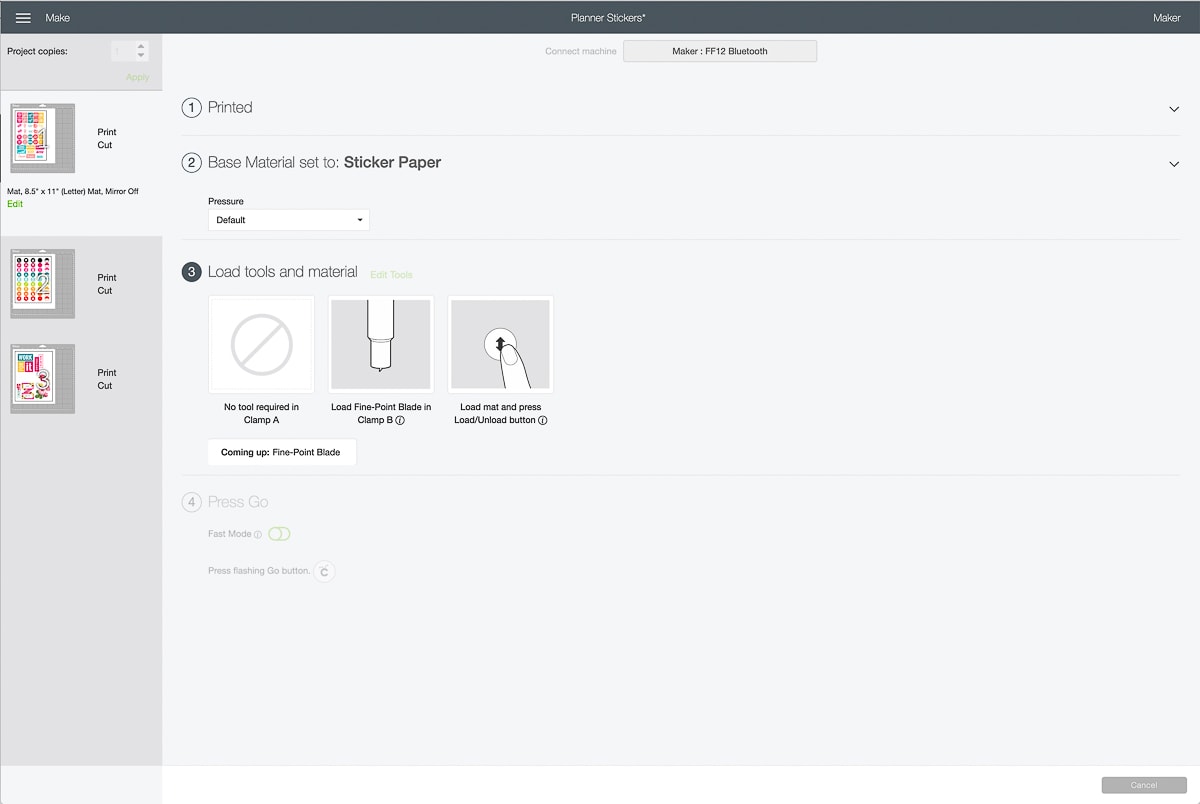
When you first load your mat into your Cricut machine and press the flashing “Go” button, it will not start cutting right away. Instead, it will make a series of passes over the black lines (from lots of different directions); this is the scanning process that ensures your cut lines match up with your printed images. Once it’s done scanning, it will begin cutting right away (no action needed on your part).
NOTE: If for some reason the software tells you it can’t read the sensor lines, I always suggest trying again before you unload and re-print. If after a second scan, the Cricut still can’t read the black rectangle markings, go ahead and re-print your design and try again!
Below are my stickers as they first came off my Cricut. Notice how there are now cut lines within the printed shapes!
Whether you’re working with stickers or another printable medium (e.g., cardstock, printable vinyl, etc), the next step is to pull away all the excess paper to reveal your perfectly cut out designs!
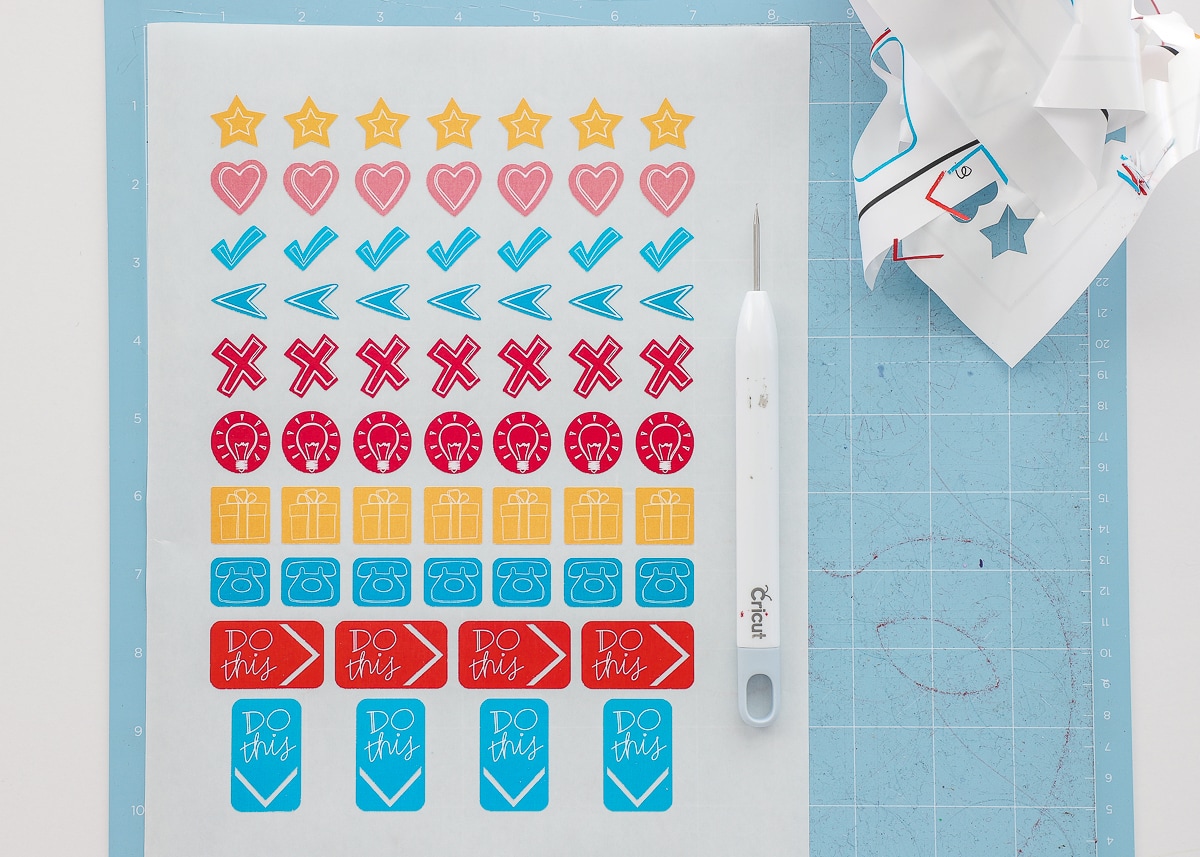
Now instead of cutting, weeding, and layering vinyl or loading color after color of cardstock, you can have several colors of designs (as well as multi-color designs) done in a snap and ready for use!
Calibrating Your Cricut
If you have never used the Print Then Cut feature on your Cricut, or it’s been a really long time since you have, you may need to calibrate your machine. How do you know if calibration is needed? Take a look at my stickers below. Notice how the cut lines don’t match up within the printed images at all. In fact, the cut lines are about 0.25″ off the printed images. If you’re cut lines don’t match up close-to-perfect with the printed design, it’s time for calibration!
To calibrate your machine, click on the three horizontal lines in the upper left-hand corner of Cricut Design Space. In the dropdown menu, select “Calibration.”

Select the “Print Then Cut” option, and then follow all the on-screen prompts to fully calibrate your machine. Once you’re done, re-print and re-cut your project; your lines should now match up much better!
The Cricut Beginner Bundle
Looking for the Ultimate Guide to Cricut Print Then Cut in a print-friendly format? Get the PDF version inside the Cricut Beginner Bundle!

More Helpful Cricut Design Space Tutorials
Cricut Design Space is a very powerful program, but it can have a steep learning curve for beginners. Check out my other comprehensive tutorials below:- How to Use Cricut Design Space | A Breakdown for Beginners
- 20 Cricut Design Space Tips & Tricks You Really Need to Know
- The Ultimate Guide to Cricut Terms & What They Mean
- How to Find Free Images to Use with Your Cricut Machine
- How to Use the Attach Tool in Cricut Design Space
- How to Use the Slice Tool in Cricut Design Space
- How to Use the Weld Tool in Cricut Design Space
- How to Use the Contour Tool in Cricut Design Space
- How to Use the Offset Tool in Cricut Design Space
- How to Use Print Then Cut in Cricut Design Space
- How to Design Monograms in Cricut Design Space
- How to Cut Really Big Designs on Your Cricut (The Off-the-Mat Technique)
- How to Design Mugs in Cricut Design Space
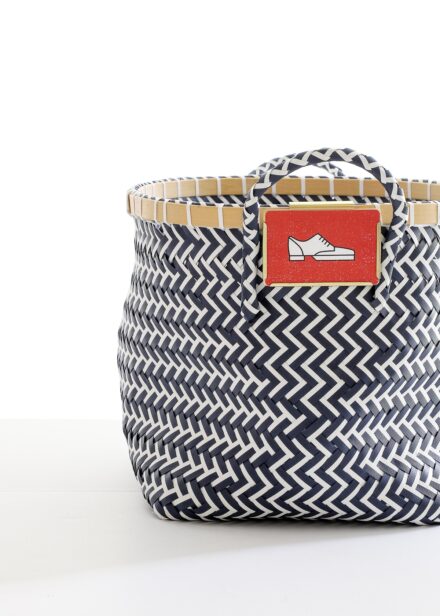
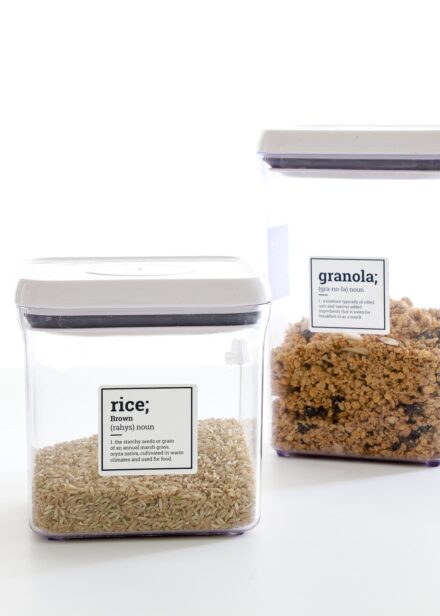
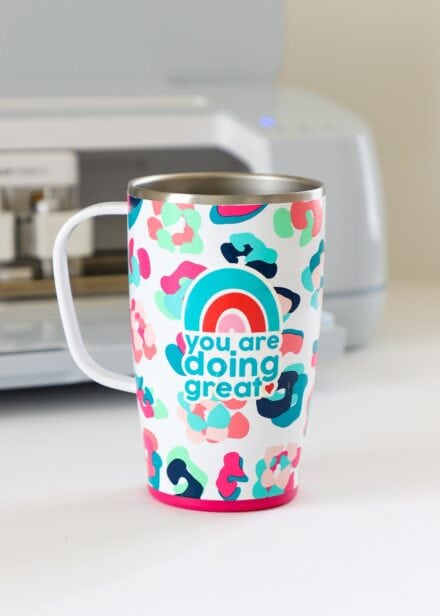
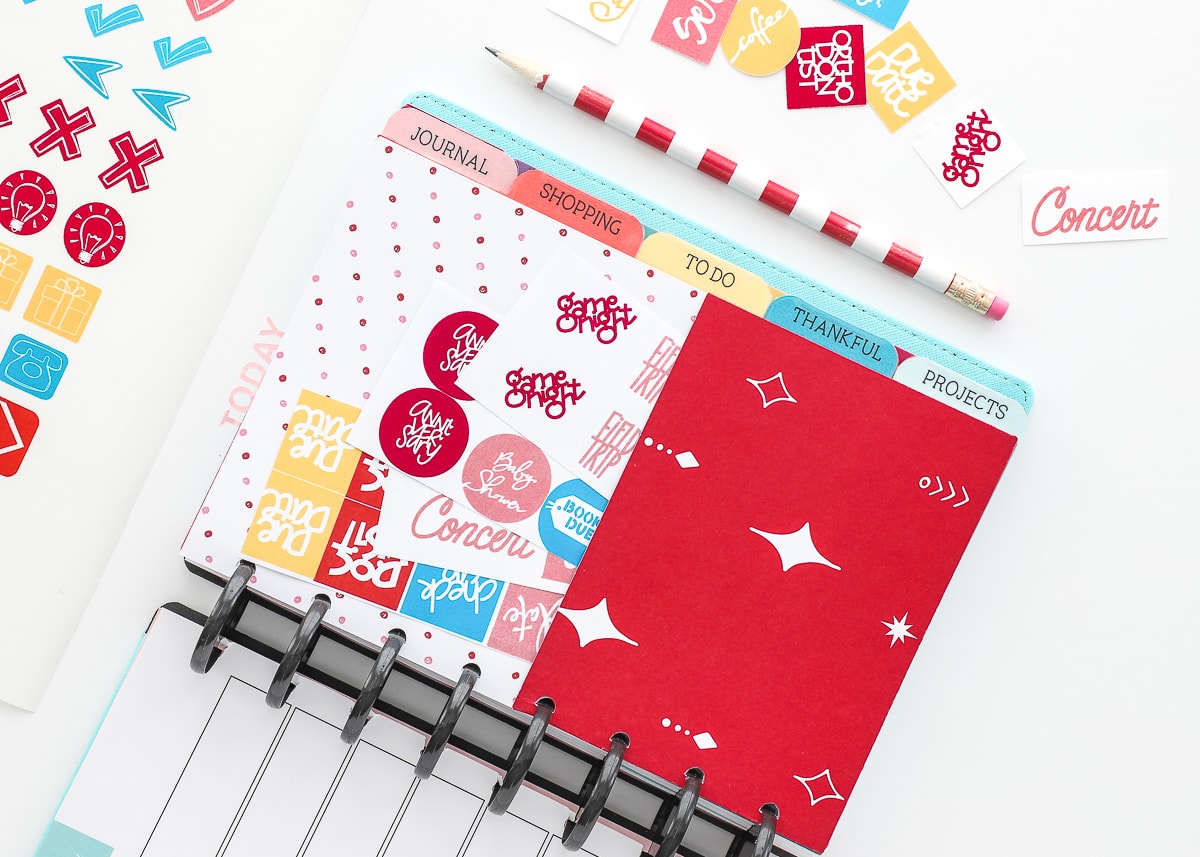
Beyond teaching you how to use Print Then Cut on a Cricut, I hope this tutorial inspires you to give it a try in ways you’ve never considered. Not only does this feature make creating stickers and decals super quick, but it’s also a great shortcut for party invitations, wall art, custom labels and more. In fact, pretty much everything you see in the photo below was made via Print Then Cut! I can’t wait to share even more fun and inspiring ways to use Print Then Cut in the coming weeks to help you create awesome things for your life and home!
Megan

5 Comments on “How to Use Print Then Cut on a Cricut”
Good evening, I am new to Cricut and design space. I am trying to do a print and cut image I purchased off of Etsy. Every time I print and cut the image it cuts out all the insides of the image instead of around the perimeter. I placed a box behind it and it just doesn’t look good. I would like to cut around the image. Is there any way to do this without putting a box behind it? Can I duplicate the image and flatten it to itself? Thank you so much for all your help!!
this sounds like a great feature but how do you connect your printer with the design space thank you
Hi Rosemary!
You don’t have to connect your printer to Design Space. You will be prompted to “Print” and you do so just like you would anything else (a Word document, recipe, etc). As long as your printer is hooked up to your computer, you should be good to go!
Hope that helps,
Megan
Hi Megan. Thank you so much for taking the time to explain clearly how to create labels and stickers. I was just starting to try them and struggled until now. I understand print and cut but not the most important part, the Flatten tool. Im so excited to get to my machine and make it happen. I have grand and great grands to make happy with stickers and my own need for making labels. Thank you again. You Rock!!!
Thank you so much for this tutorial! I didn’t even realize my Cricut machine could do print/cut! I feel like I just got a new toy! LOL 😅