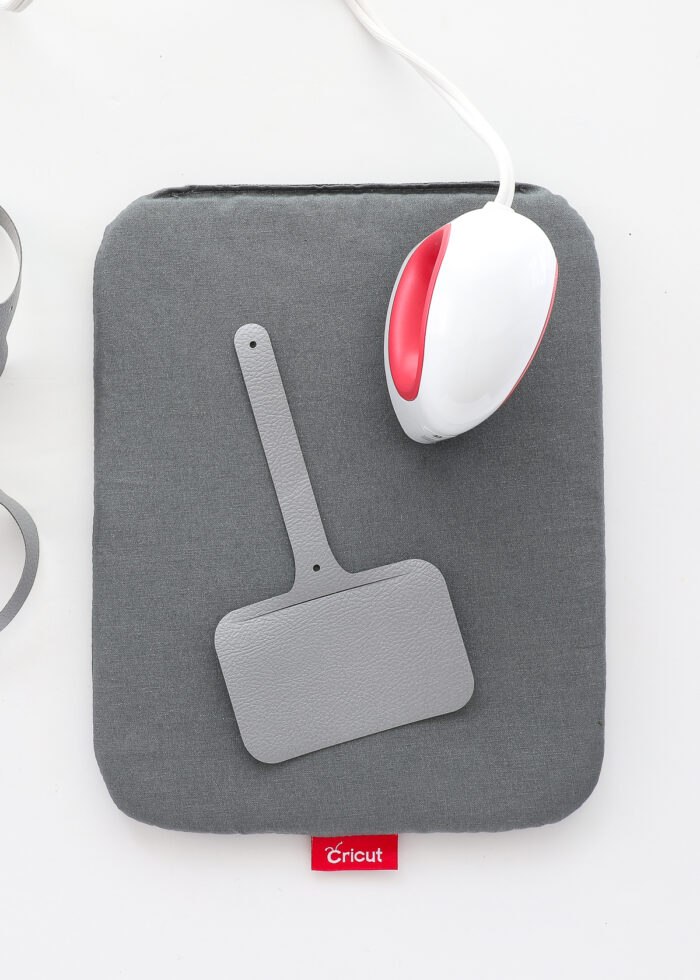
How to Make (Super Chic) Luggage Tags with a Cricut
DIY luggage tags are not only super simple to make, but are perfect for labeling and accessorizing your suitcase (and even bins and baskets around your home). They come together in mere minutes thanks to the help of a Cricut machine, and can be easily customized to suit any style. This is a really fun DIY craft project, so let me show you how they come together!
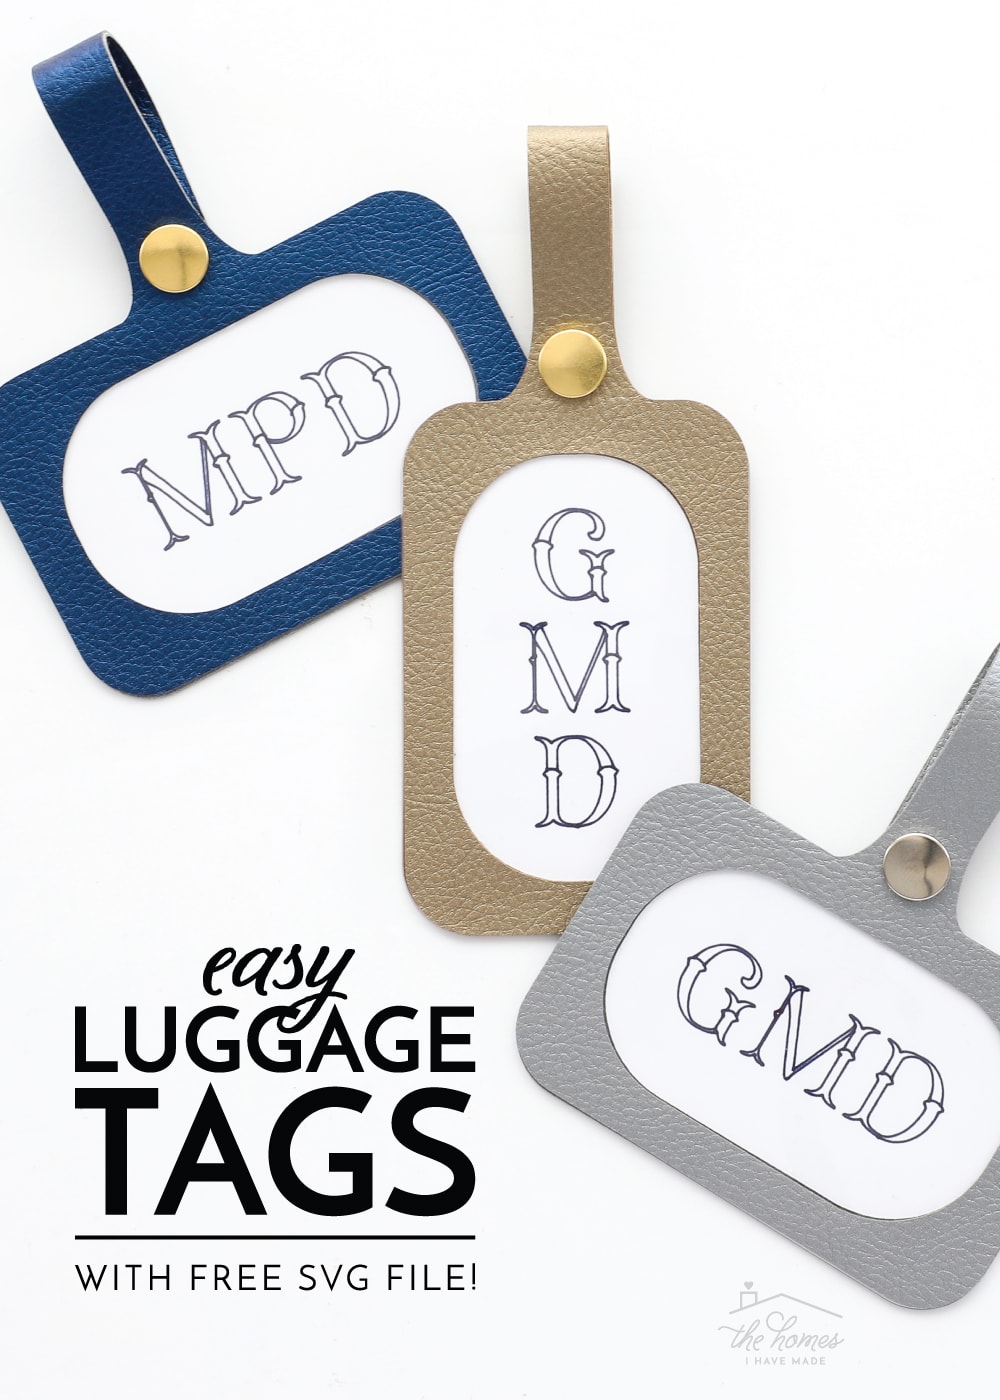
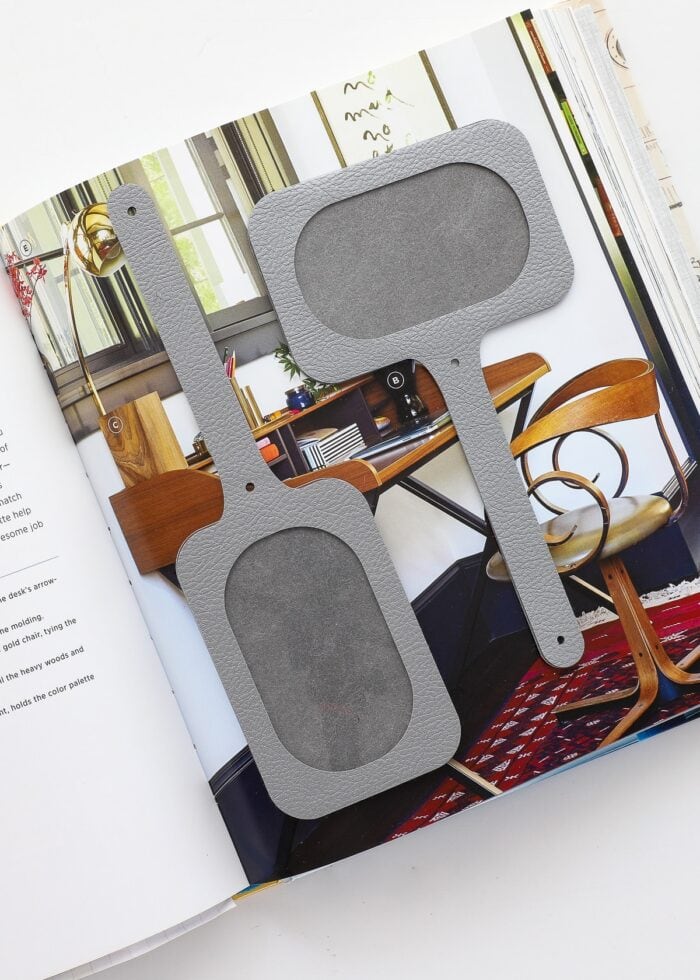
These simple custom luggage tags are made of faux leather, which is an easy-to-cut, no-fray material that comes in a wide range of colors, textures, and patterns.
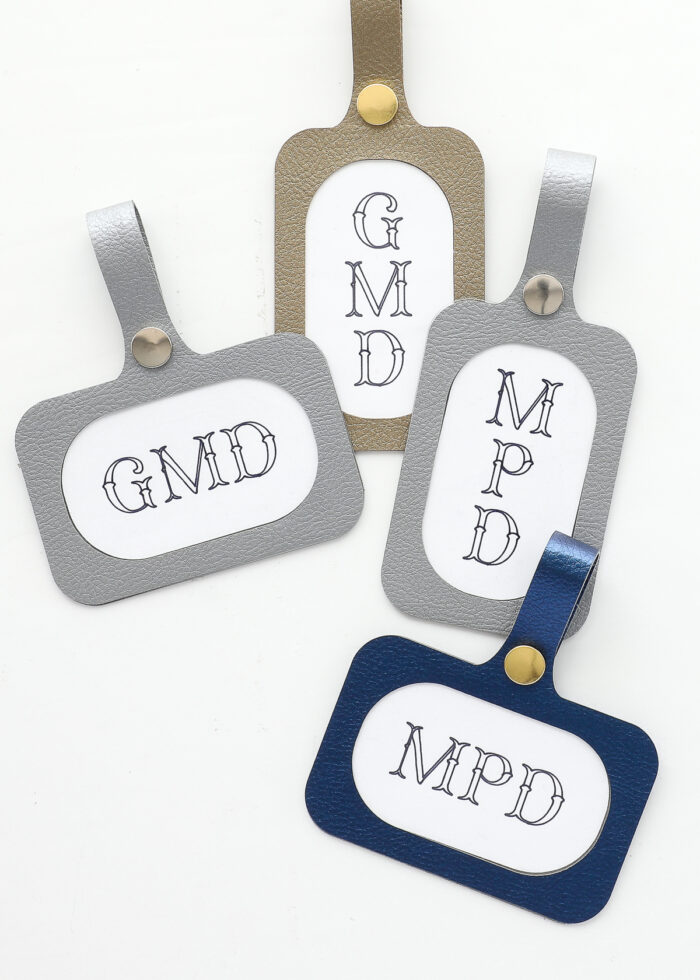
Thanks to a simple, classic design, these can be easily cut with any Cricut machine; and they are held together with some basic adhesive, which means no sewing is required!
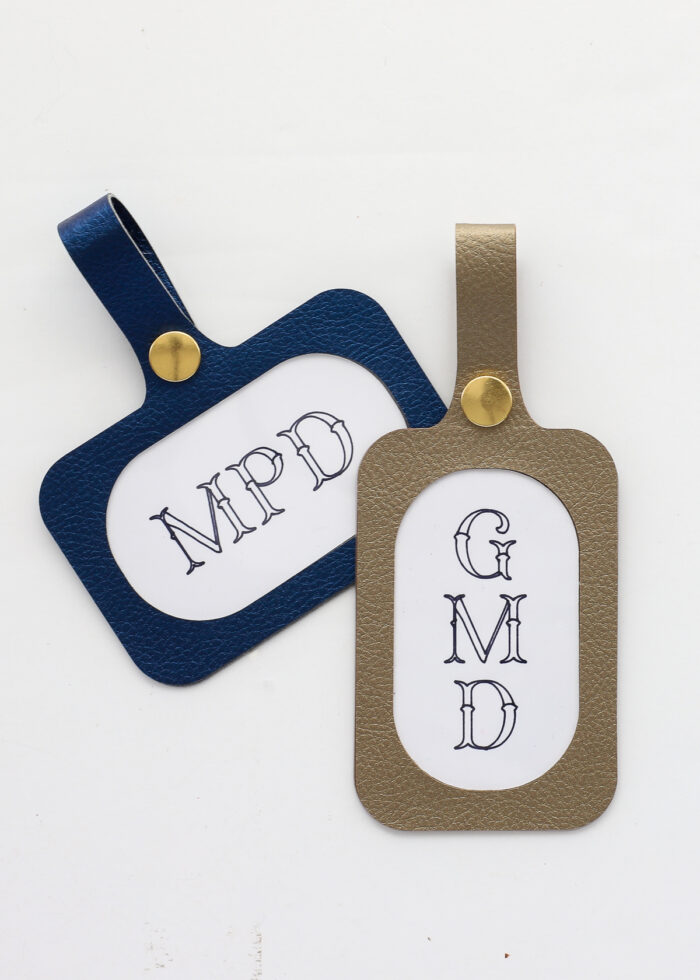
My free pattern pieces are available in SVG format (so they are ready to upload to Cricut Design Space right away!), and include both the landscape and portrait orientation. When combined with a chic snap and Cricut-drawn label, your luggage will be ready for your next vaca in no time!
Supplies Needed
These DIY luggage tags looks professional, work seamlessly, and require just a few budget-friendly supplies! Here is what you need:
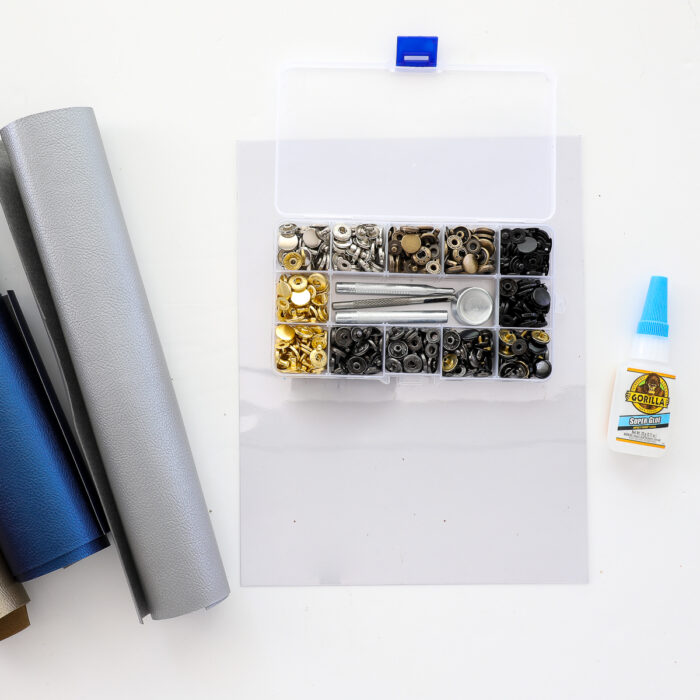
Faux Leather | Clear Plastic Windows | Snaps | Gorilla Glue
Materials
- Faux Pebble Leather – This lightweight, easy-to-cut material is amazing for luggage tags, but you could also make them with other non-fray fabric such as suede, felt, etc.
- Clear Plastic Sheets – I have a whole stack of clear workbook covers, but these smaller ones would work perfectly!
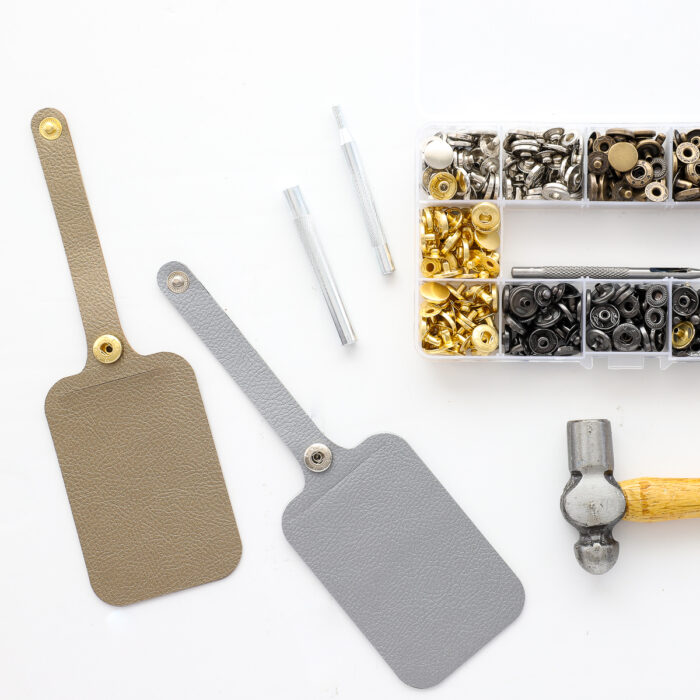
- Snaps – I am totally smitten with this inexpensive kit since it includes everything you need to make super stylish clasps.
- Gorilla Glue – You can certainly use any other strong adhesive (including hot glue), but this clear gel is the strongest and easiest to control with no bubbles or drips.
- Printer Paper or Cardstock – For the label inserts.
- Luggage Tag SVG File
Tools
- Electronic Cutting Machine – Any Cricut machine can be used for this project (Cricut Maker | Cricut Explore | Cricut Joy); but since I am providing the SVG files, you can also use other electronic cutting machines (e.g., Silhouette, Scan-n-Cut).
- Fine-Point Blade – The one that comes with your machine.
- StandardGrip Cutting Mat
- Iron or Cricut EasyPress Mini
- Small Hammer
- Home Printer or Cricut Pens – To make the label inserts.
How to Make Luggage Tags with a Cricut
Step 1 – Upload the Luggage Tags SVG File
Once you download my FREE SVG file, you will need to upload it to your machine software. If you are a Cricut user, you can use my tutorial here: How to Import Your Own Images In Cricut Design Space.
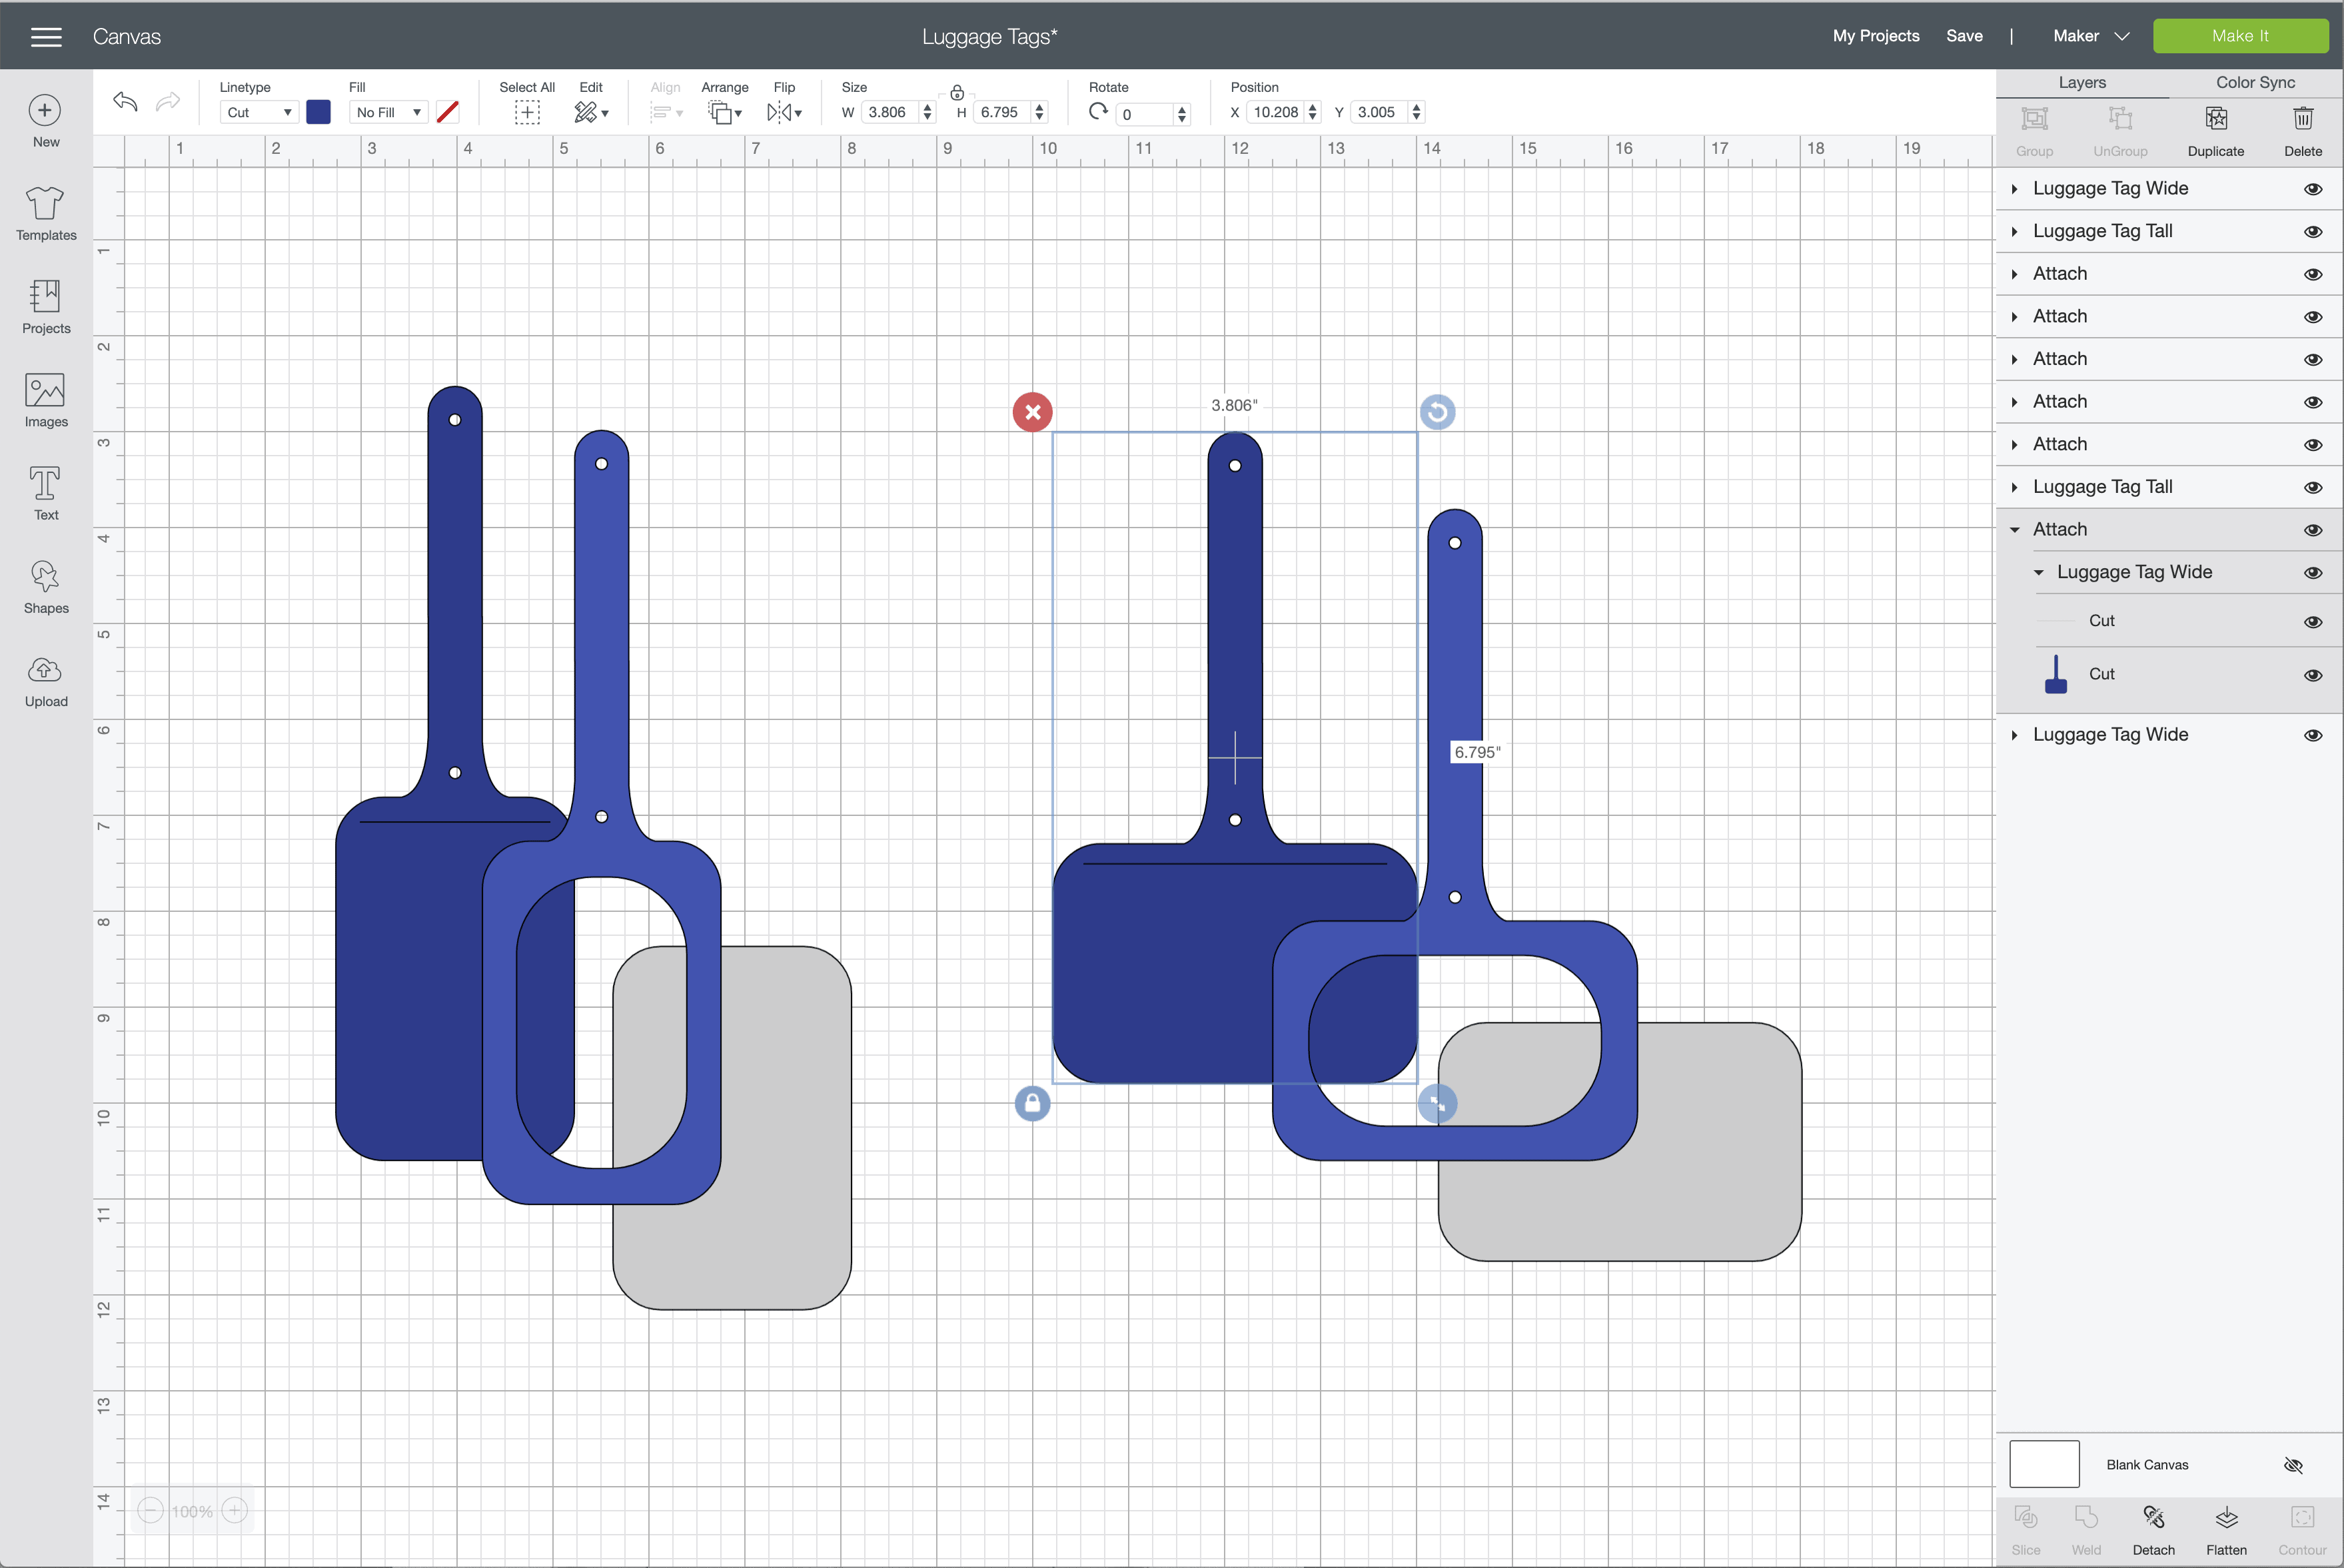
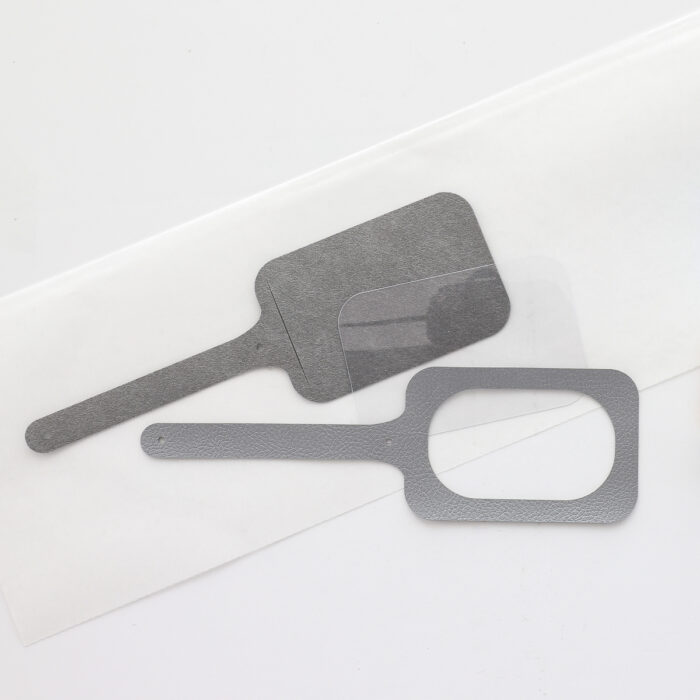
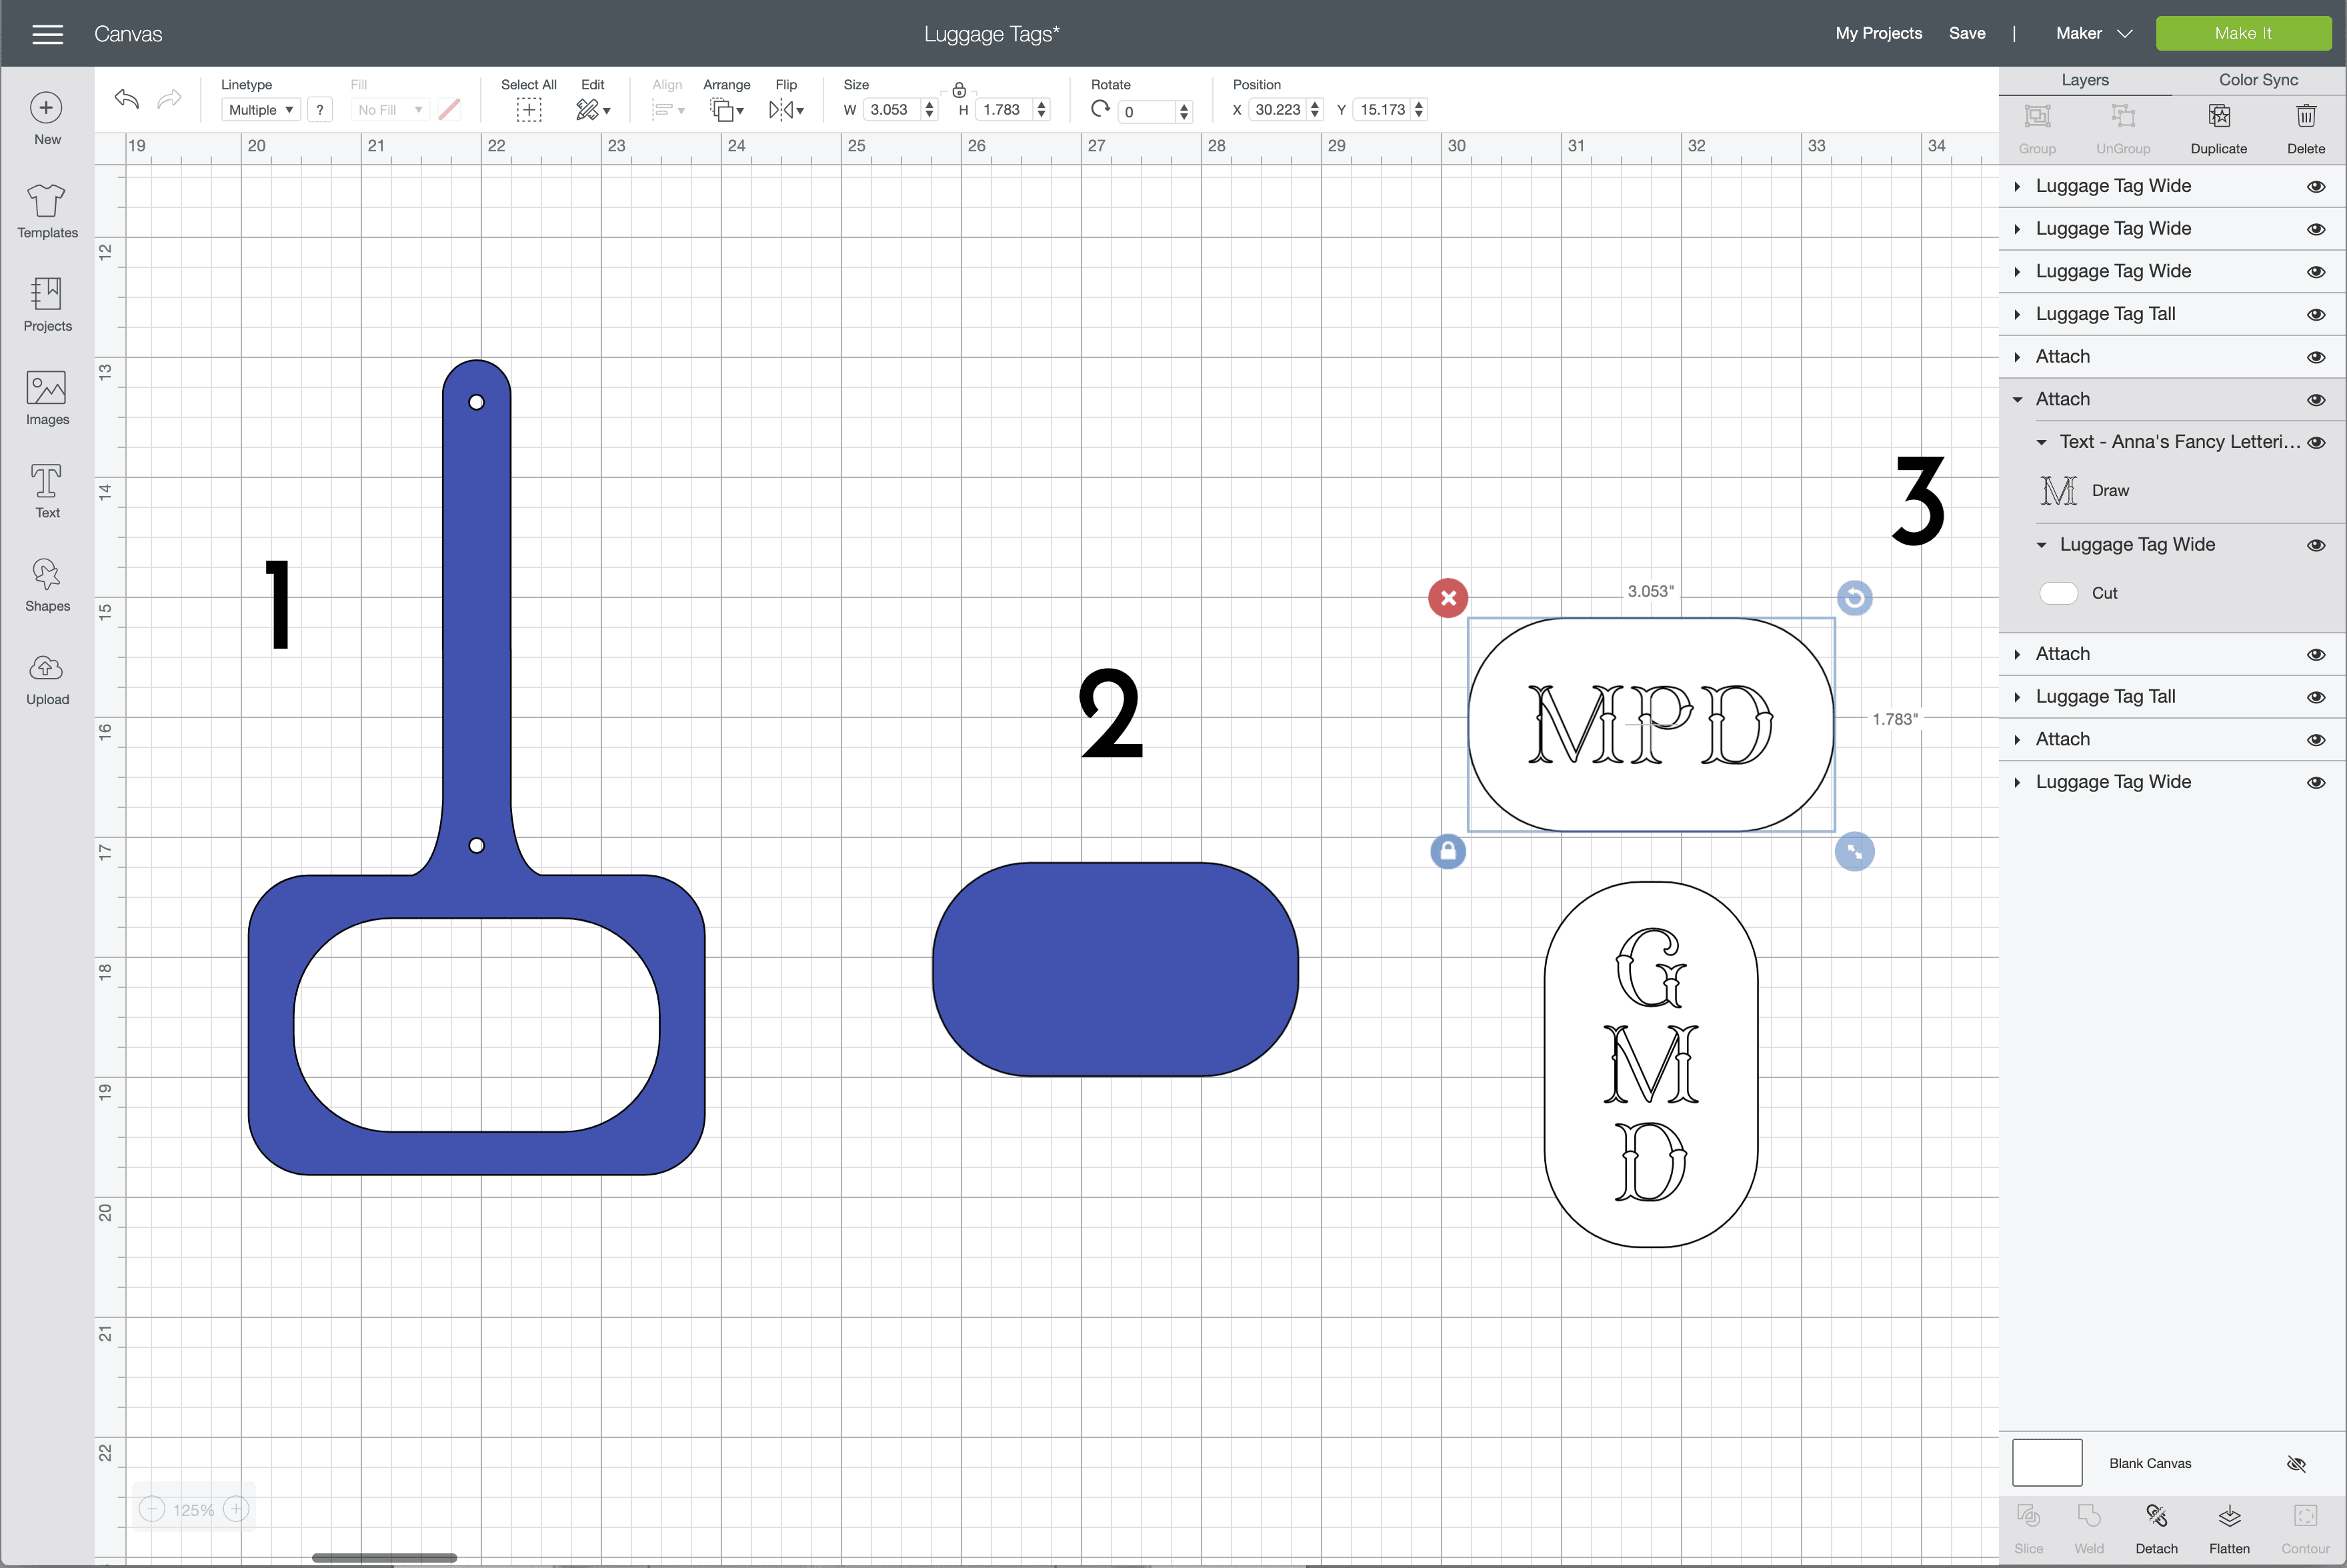
Once the file is placed onto your design canvas, you will notice there are three layers for each luggage tag:
- Top Layer (light blue tag with the cutout window) – to be cut from faux leather
- Middle Layer (light grey rectangle) – to be cut from clear plastic
- Bottom Layer (dark blue tag with single line) – to be cut from faux leather
IMPORTANT! Although the luggage files are sized and designed to be cut as is, you will need to first Attach the straight line to the bottom layer so they are cut together (see below).
Step 2 – Cut the Materials
Cutting the Luggage Tag Pieces
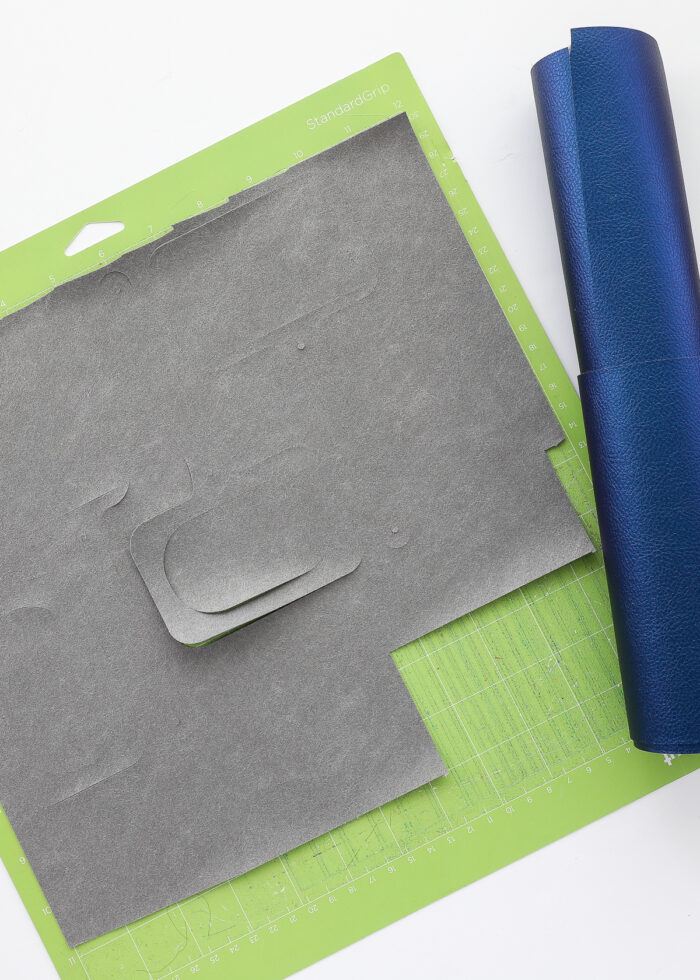
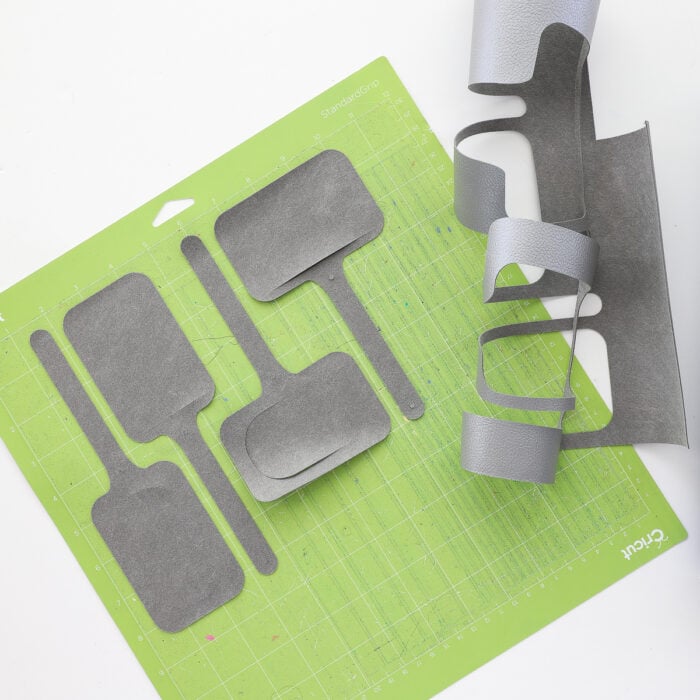
Cut the top and bottom layers out of faux leather using your Cricut machine:
- Place the faux leather, face down, onto a Standard Grip Mat.
- Select “Faux Leather (Paper Thin)” from the Custom Materials Menu.
- Use a Fine-Point Blade to cut out the luggage tag designs.
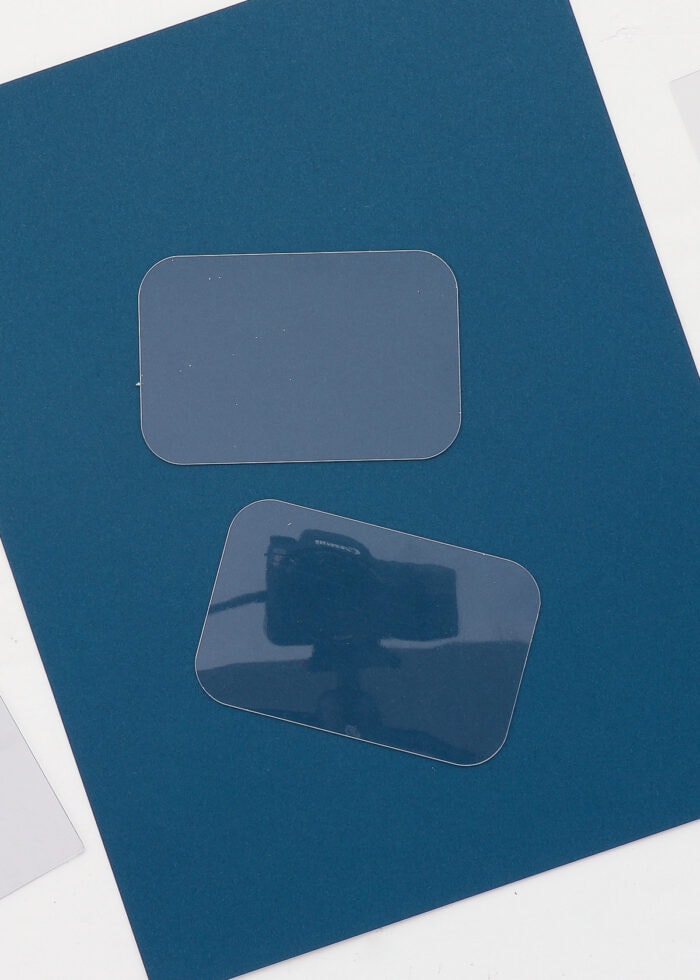
Cutting the Clear Window Piece
To cut the middle rectangle layer from a clear plastic sheet:
- Load a plastic sheet onto a StandardGrip Mat.
- Select “Plastic Packaging” from the Custom Materials Menu.
- Use a Fine-Point Blade to cut out the rectangle shape.
- Before unloading your mat, check to make sure the plastic was cut through. If not, re-cut it as many times as needed (just hit the flashing Cricut button) before unloading.
Step 3 – Assemble the DIY Luggage Tags
When the faux leather luggage tags come off the mat, they will likely be all curled up. Although not necessary, I suggest lightly pressing them with a low-temp iron or an EasyPress Mini to make for easier assembly.
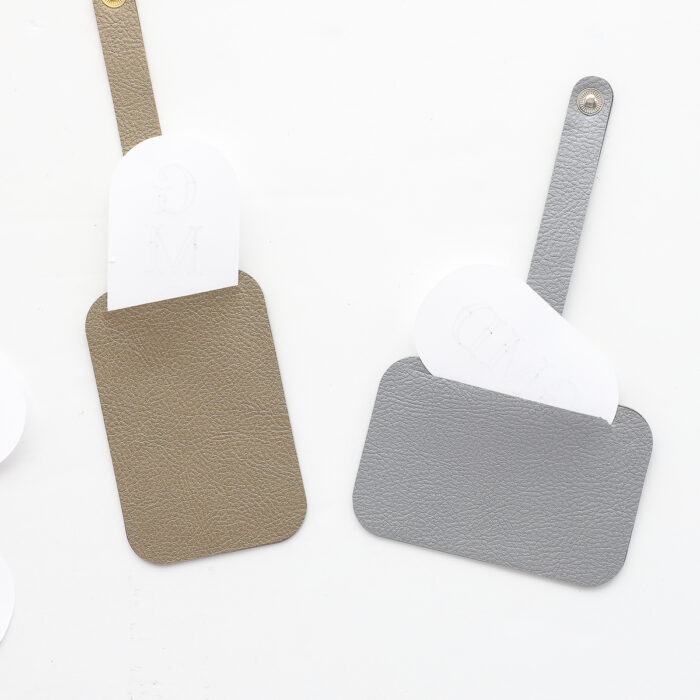
To assemble the luggage tags, make a sandwich with the three layers, as shown below:
- Bottom layer, wrong side up
- Middle clear layer
- Top layer, right side up
Start by using a light line of Gorilla Glue along the very outside edge of the tag (bottom layer). Do your best to not get any glue on the slit opening. Working quickly, place the clear rectangle onto the glue, lining up the edges all the way around.
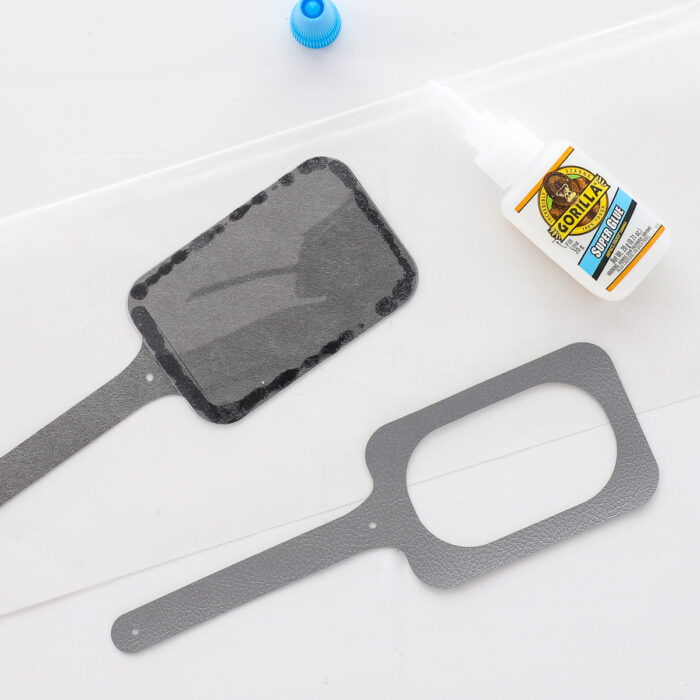
Next, place another light line of Gorilla Glue around the frame opening of the top of the tag. Place it down, right side up, onto the clear rectangle, again lining up all the edges.

Finally, use more glue to secure the top and bottom straps to each other, lining up the two holes and edges all the way around.
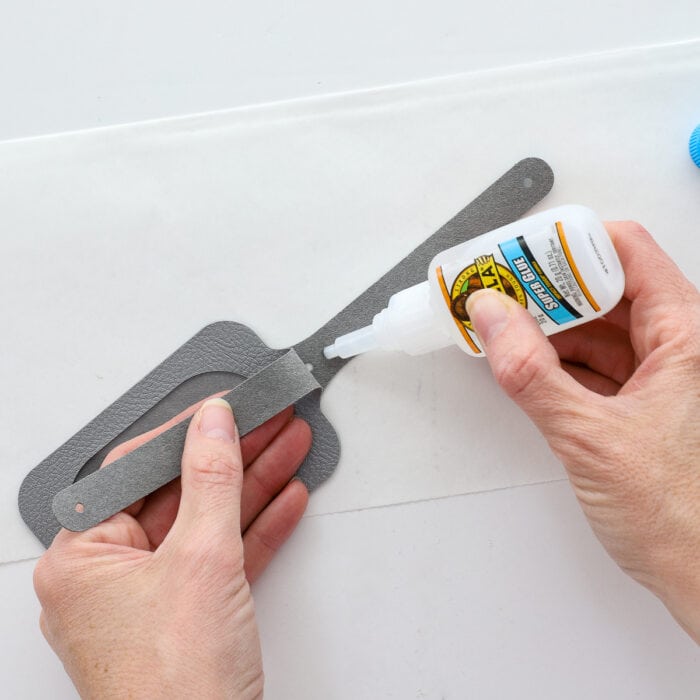
Unlike hot glue, you might find that the Gorilla Glue is not immediately tacky enough to hold your tag together (but I promise, it will hold once it’s fully dry!) You may want to sandwich your tags in between heavy books as they dry to really secure all the layers together.
Step 4 – Apply the Snaps
The next step is to secure snaps into the two holes on the assembled luggage tags.
Friends…I used to hate working with snaps. I could never get them to stay on my projects tight enough without warping or damaging the snapping mechanism itself. After loving these rivets so much on my faux leather keychains, I ordered this coordinating kit of snaps and they are the most user-friendly snaps I’ve ever used! Just use the included instructions and a few strong whacks of a hammer to put chic and functional snaps on your tags, as shown below!
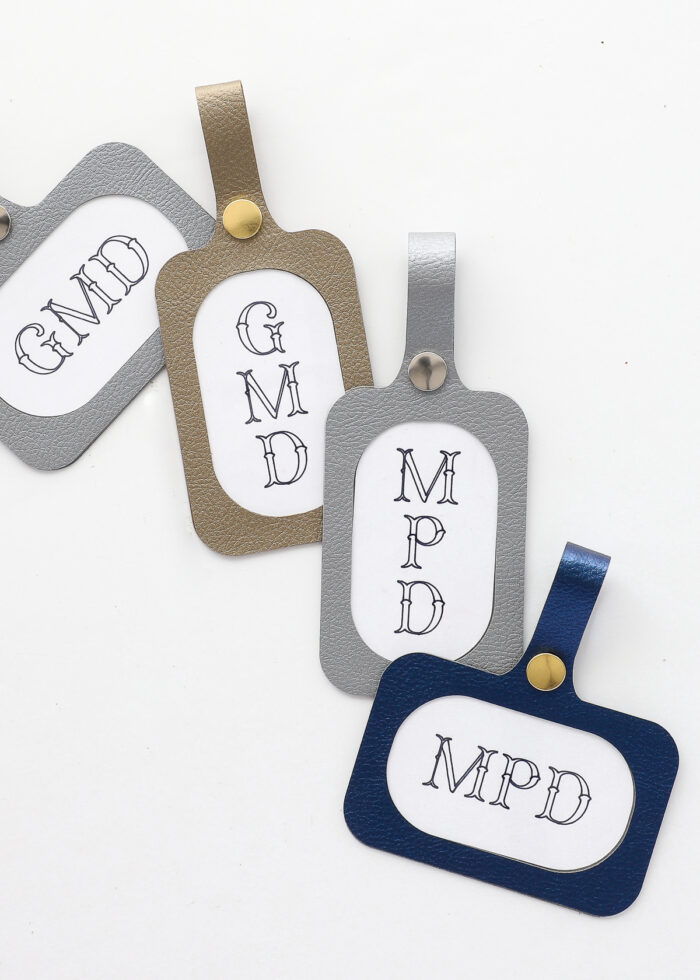
Step 5 – Create Label Inserts
Your DIY luggage tags are pretty much done, but the final step is to create the label inserts to go inside the plastic window. There are lots of different ways you can do this, but if you want to make labels using your e-cutter, here is how I recommend doing it:
- Place another top layer luggage tag image onto the design canvas.
- Use the Contour tool to turn off the luggage shape and turn on the interior window shape.
- Add text or pictures for whatever you want your luggage tag label to say. Then Attach the label and text together before sending it to your machine.
Want some fancy letters? Learn how to make your own monograms for your Cricut!
For this project, I chose to use a basic black Cricut Pen and Fine-Point Blade in my Cricut Maker to make the labels out of white cardstock. You could also use the Print-the-Cut function to make your labels.
Here are some tutorials that can help you:
- How to Use Cricut Pens to Make (Gorgeous) Custom Labels
- A Guide To Making Labels with Cricut Print Then Cut
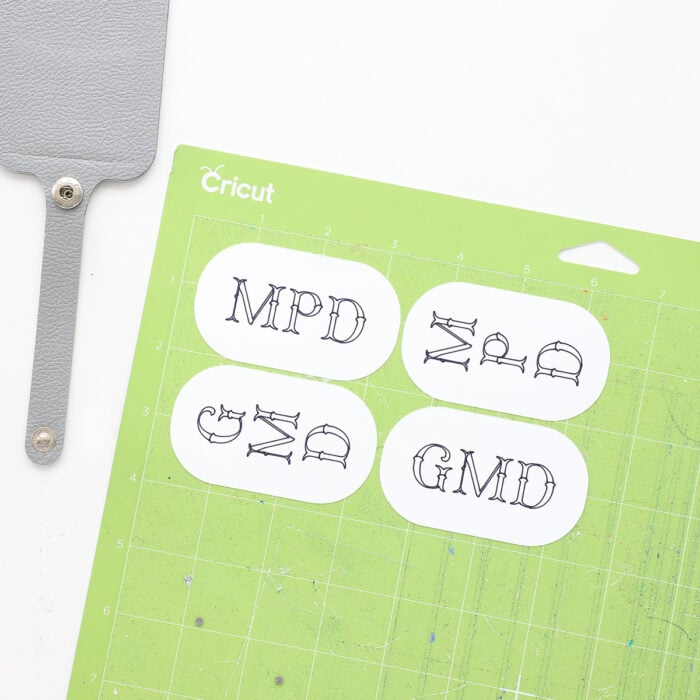
Once you have the inserts cut and ready to go, slide them into the open slit along the back of the luggage tag and line them up with the open window.
TIP! Don’t feel like fussing with Cricut labels? You can also create similar monograms with letter stickers, markers, pencils, crayons, iron-on/HTV, or even embroidery.
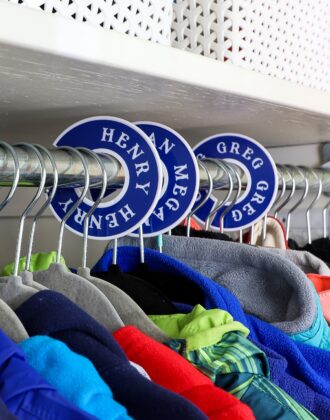
Now your bag tags are all ready to snap onto your favorite travel items so you can quickly and easily find them on the luggage carousel!
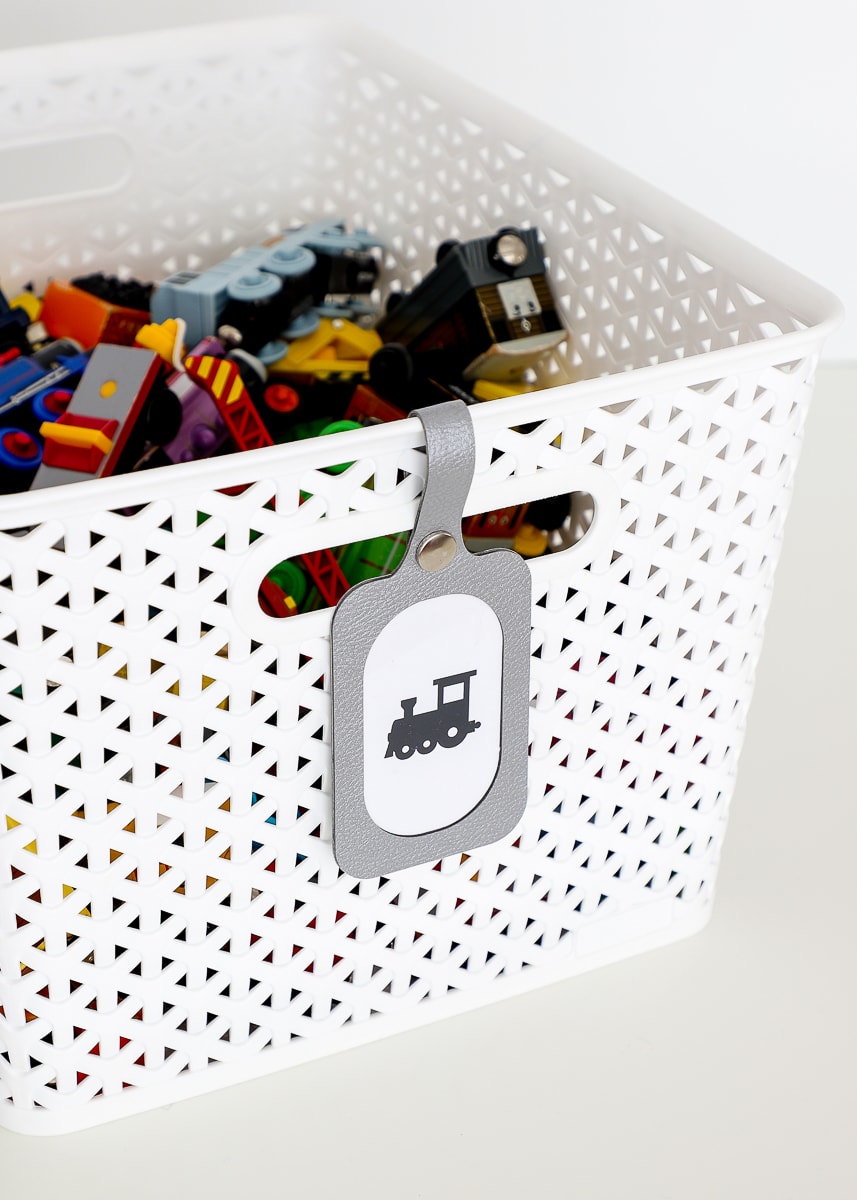
Although I technically designed these labels for luggage, I couldn’t resist trying them as basket labels on my favorite baskets with some printed toy labels. Man, I might need to find some baskets to use these luggage tags on because they look ah-mazing!
More Great Cricut Labeling Projects
Ready to label even more with your Cricut machine? Check out these other awesome projects:- Make Vinyl Labels with a Cricut
- Make Labels Using Cricut Pens
- Make Labels with Cricut Print Then Cut
- Make Waterproof Labels with a Cricut
- How to Label Fabric with Iron-On Vinyl
- Iron-On Clothing Labels with a Cricut
- Toy Bin Labels with a Cricut
- Pantry Labels with a Cricut
- Dresser Drawer Labels with a Cricut
- Luggage Tags with a Cricut
- Return Address Labels with a Cricut
- Fast Labels with the Cricut Joy App
- Make Easy Round Closet Dividers with Cricut Vinyl
- Custom Drawstring Backpacks with Cricut Iron-On
I mean it when I say these homemade luggage tags come together in a snap (ha!) They really are easy enough to pull together for your next family vacation (even if it’s next week) or label and an entire playroom’s worth of baskets. They also make great gifts, party favors, or a craft group project!
(And if you have leftover faux leather, just use it to whip up a bunch of matching faux leather keychains or DIY cord keepers while you’re at it! 😉)
Megan


8 Comments on “How to Make (Super Chic) Luggage Tags with a Cricut”
Cute! Where did you get your font?
When I tried to download the SVG file, it came up as a regular image and will not upload into the Cricut software. It says “unsupported” file. Is there another way that we can download? Such a cute tag and loved your tutorial!
Hi Lyndee,
Hmmmm…it’s downloading just fine (into an SVG) for me and uploading into Cricut Design Space without issue. Maybe try again? HERE is the link.
Keep me posted,
Megan
Hi Megan
I have just gotten mine and had the same problem as Lyndee. It just comes up as an image, not an SVG file.
These look really nice and it is wonderful that you provide such good resources for materials that work in addition to your proven pattern. Why has it become fashionable to call vinyl faux leather, or pu leather, or even worse – leather?? It is vinyl!!
Hi Kim!
Hmmm…I guess it depends on what you consider “vinyl.” Yes – faux leather or PU are a lot like “marine vinyl” from the fabric store. But many crafters think of “adhesive vinyl” (the stretchy, sticky, contact paper-like stuff) when you say “vinyl”…which this product is not.
Faux leather is much more like fabric than “adhesive vinyl” and acts more like leather. Cricut’s “official” name for the product is faux leather, so that’s why I chose to use it!
Hope that helps a bit!Megan
Love the idea of the bins. I have some fabrics sorted by color in the cube shelving with the bins. I could use these to attach the color in the keychain. The plastic labels I’m using now always pop off. This would be perfect. Thanks for the idea.
Ooooo, I love that idea, Martha!
If you give it a try, be sure to let me know how they turn out!
~Megan