DIY Travel Cord Organizer – An Easy 1-Hour Sewing Project!
Cord organization is always a challenge, isn’t it?! There is just something about those pesky yet all-too-necessary charging/connecting accessories that make them so hard to manage. And with more and more of us (and our families) having phones, watches, tablets, gaming devices and more that often need charging on the go, keeping these cords handy, accessible and tidy can be a bit of a challenge. Whether you’re just heading out for the day or away on a longer trip, you can easily keep all your cords sorted, organized and protected in this simple DIY Travel Cord Organizer!
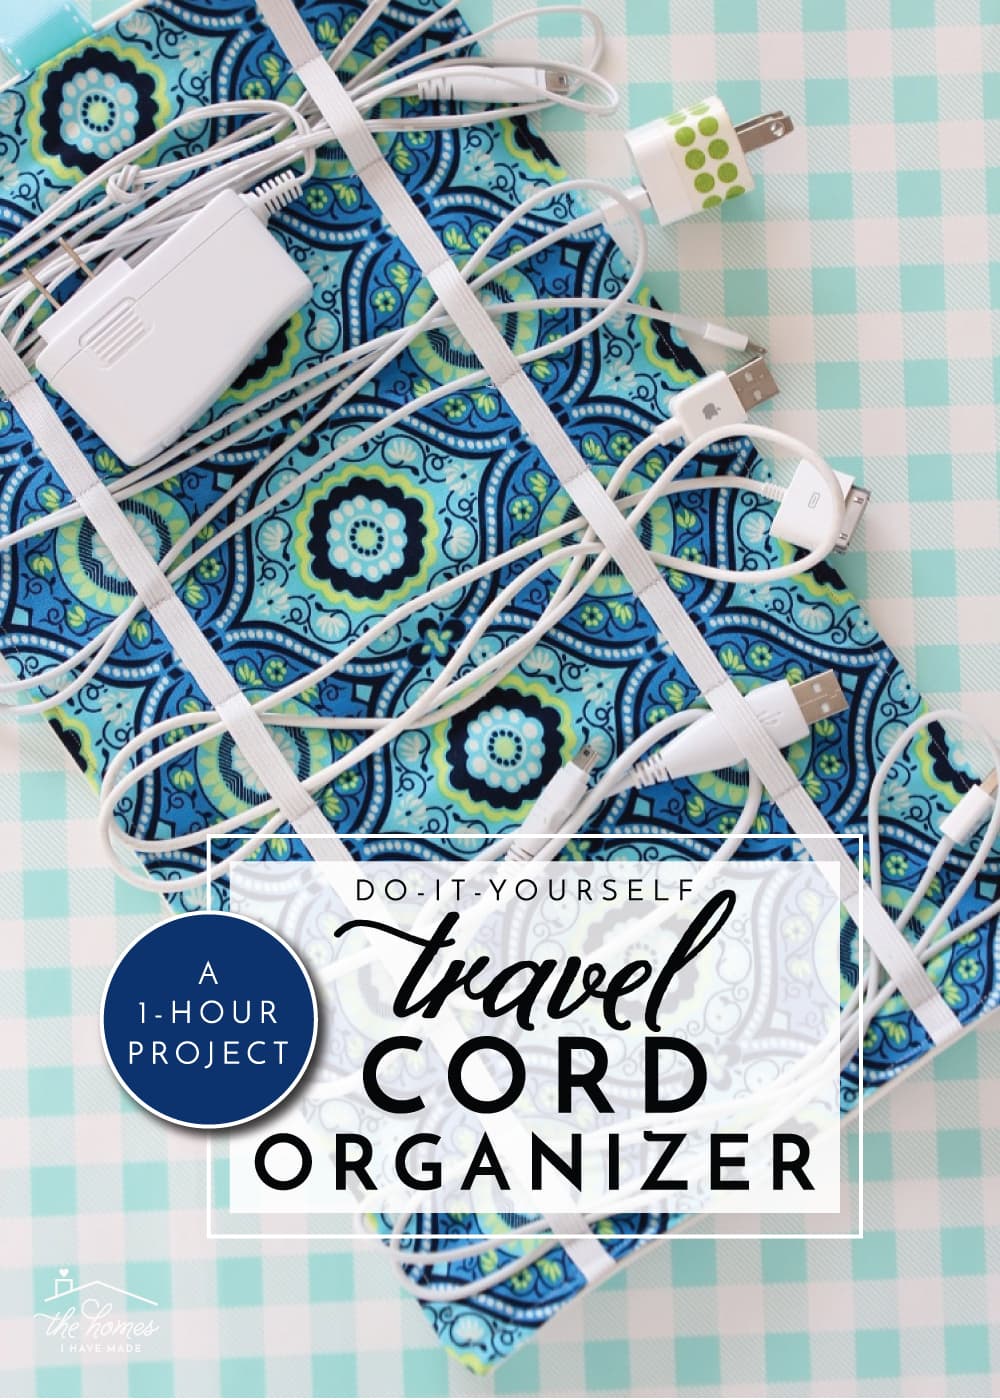
Both the concept and construction of this DIY Travel Cord Organizer could not be easier! Simple elastic straps keep various cords from being tangled and misplaced, and the whole travel case rolls up to keep everything safe yet accessible in whatever tote you’re carrying! And the best part…the whole thing can (likely) be made with items you already have in your craft stash!
With completely customizable options (such as size and fabric types), you can make an organizer to coordinate with your luggage or even make several to separate out cords by family member or device. If you’ve got a big family with lots of devices to bring along, consider using different novelty prints (characters, school prints, etc) for each member of the family!
This DIY Travel Cord Organizer is a simple project, even for the newest of sewers, and can be accomplished in less than an hour! Here is what you’ll need:
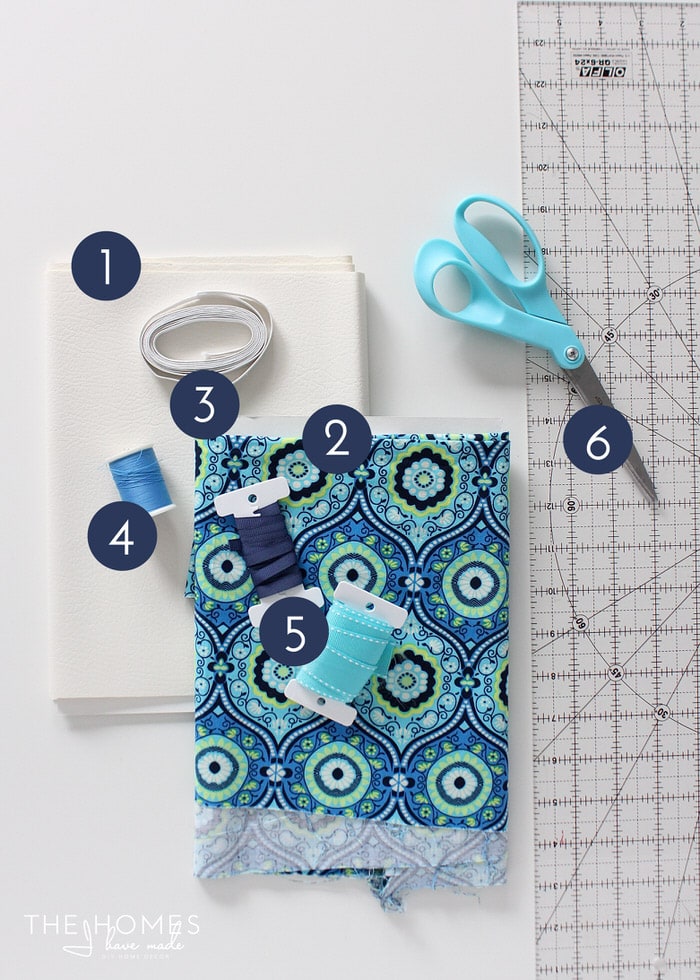
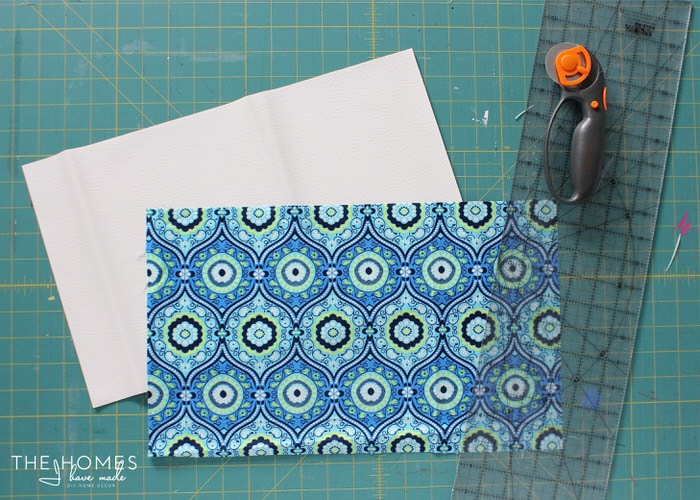
- Outer fabric – how much depends on the size of your organizer (1/4 yard of marine vinyl was used here to give the organizer a little more durability)
- Inside fabric – how much depends on the size of your organizer (this one was lined with a 1/4 yard of basic quilting cotton)
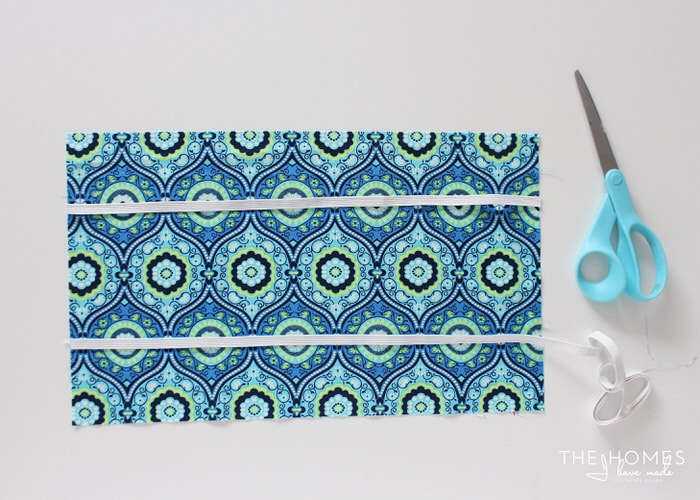
- .25” elastic – about a yard (in a color that matches your inside fabric)
- Coordinating thread
- Coordinating ribbon, cord or decorative elastic – about 1 yard
- Tools: ruler, rotary cutter/scissors, pins, sewing machine, iron
Start by cutting down both the outside fabric and lining fabric to your desired size and shape. When deciding how big to make your organizer, consider both the length of your cords and how many you want to store; and then be sure to add 1” to both the height and width for seam allowances. The organizer shown here was cut to 10×18” for a finished dimension of 9×17”.
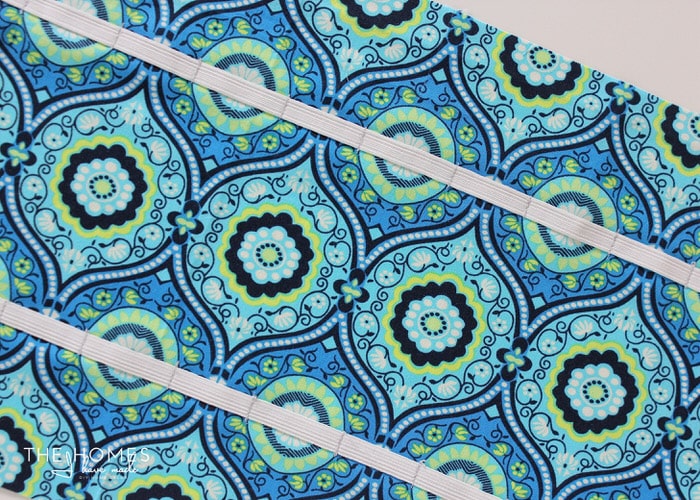
Next, cut (at least) two pieces of elastic the same length as your fabric pieces (the ones shown here were cut to 18”). Two lengths of elastic were sufficient for the height of this organizer, but you may want to consider adding another strip of elastic if you make your organizer much taller.
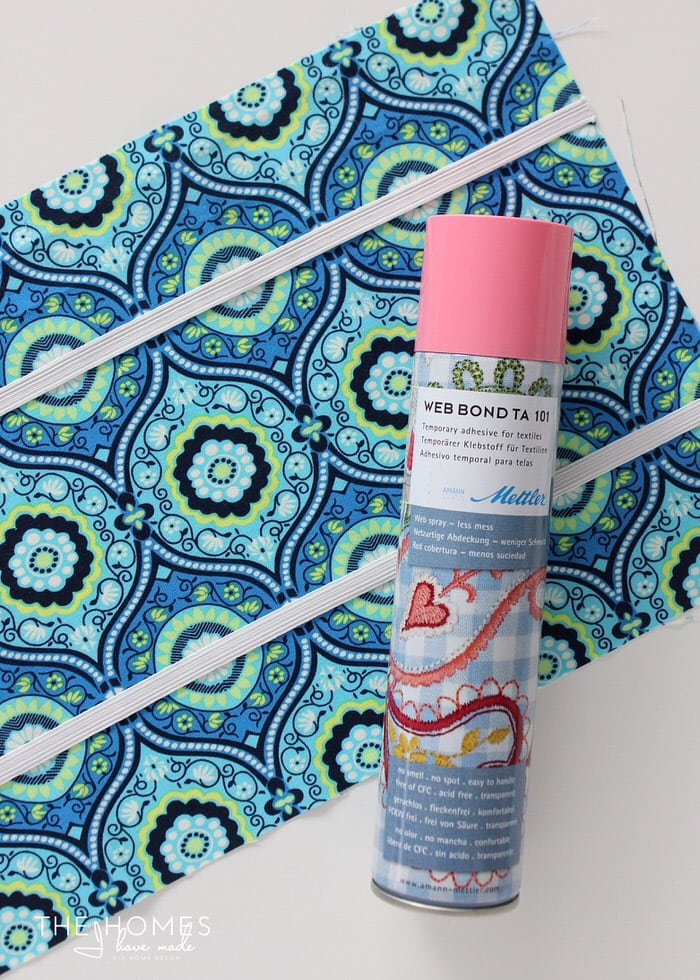
Next, secure the elastic to the RIGHT side of the inside fabric. You can use pins to hold it in place; however, I found basting spray also works great in keeping things, like the elastic here, flat and in place while sewing it down!
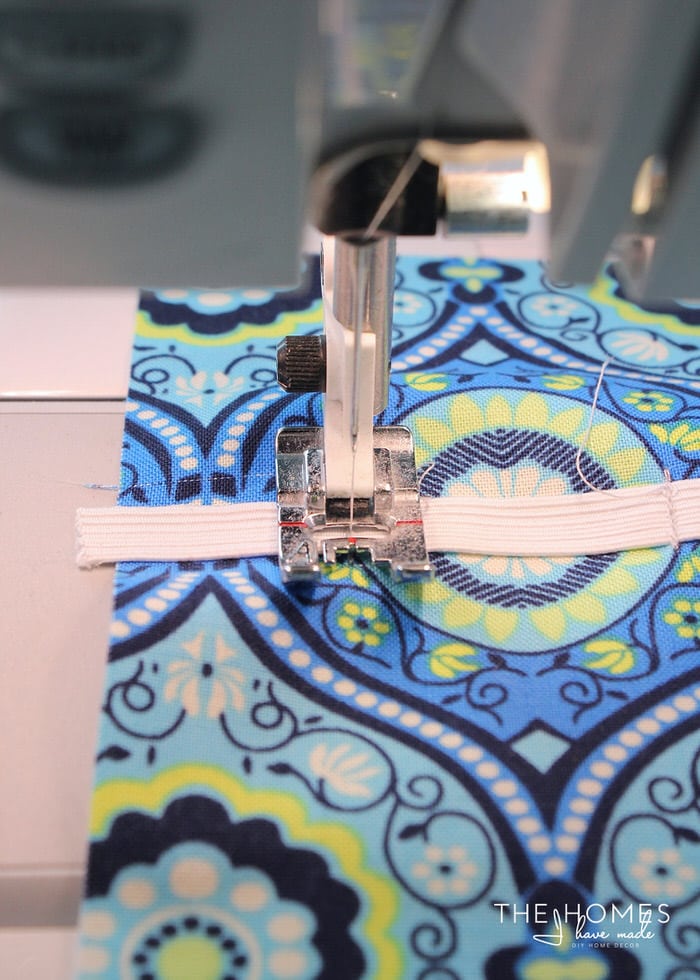
Next, secure the elastic to the inside fabric by sewing small perpendicular lines at regular intervals down the entire length of the elastic. The elastic shown here is sewn about every 1”. You can make the gaps as narrow or as wide as you like, just make sure you can fit cords into them.
Repeat with all strips of elastic, taking care to space them evenly down the fabric and sewing at the same intervals to essentially make vertical columns.
With the elastic sewn in place, it’s time to assemble the organizer!
With WRONG sides facing, place the inside and outside fabrics together and pin around the outside. To avoid getting pinholes in the marine vinyl, clips were used instead of pins here. Note that the right side of the organizer is left open (shown below).

Sew around 3 sides of the rectangle with a 1/2“ seam allowance, leaving one end of the pouch open.
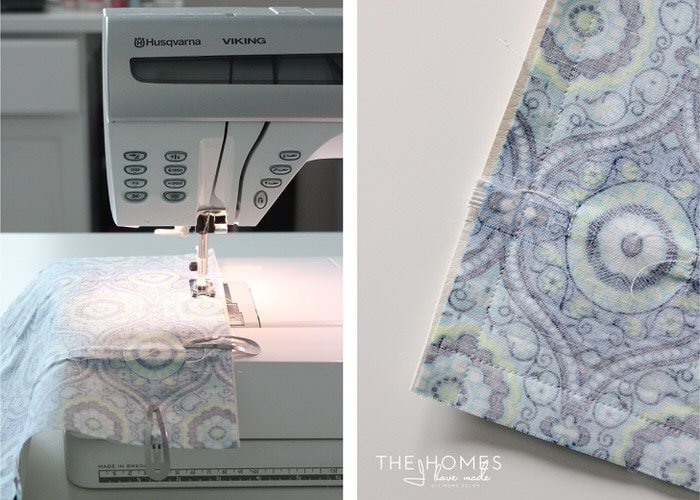
Before flipping the pouch right-side-out, be sure to clip the corners to reduce bulk. Be careful not to clip through the stitches!
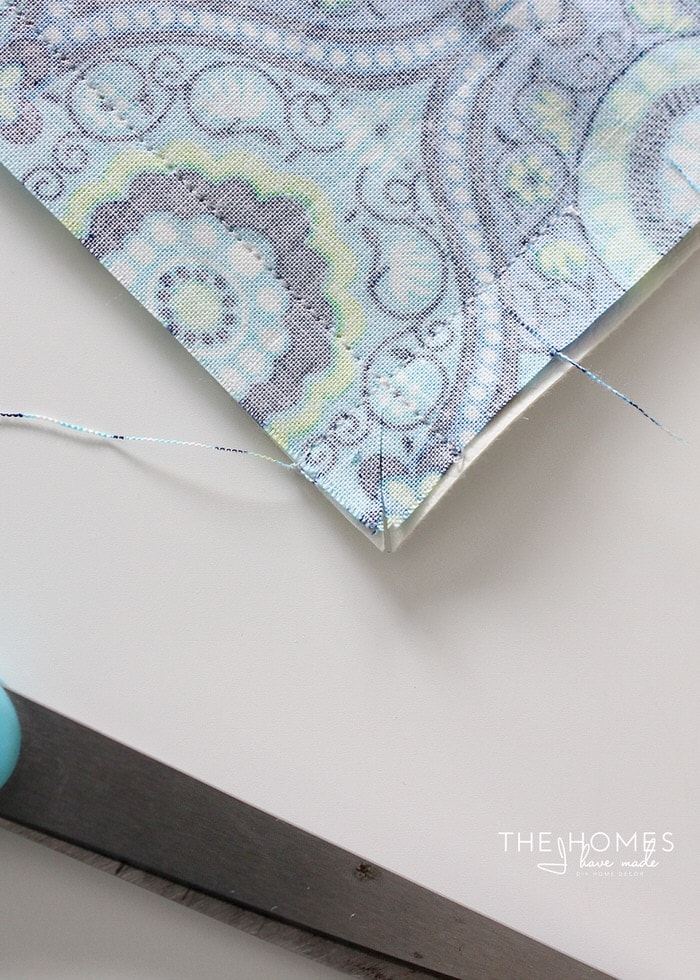
Next, flip the entire pouch right-side-out through the opening and iron it flat. Fold under the opening edges ½” and press.
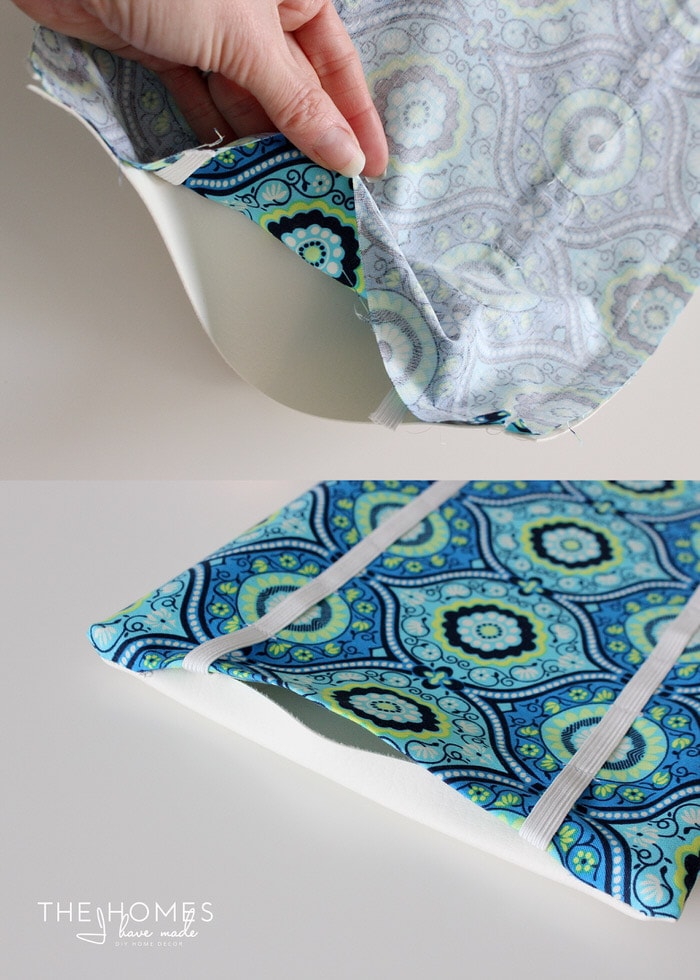
Next, trim two pieces of coordinating ribbon/cord/decorative elastic about 15” each.
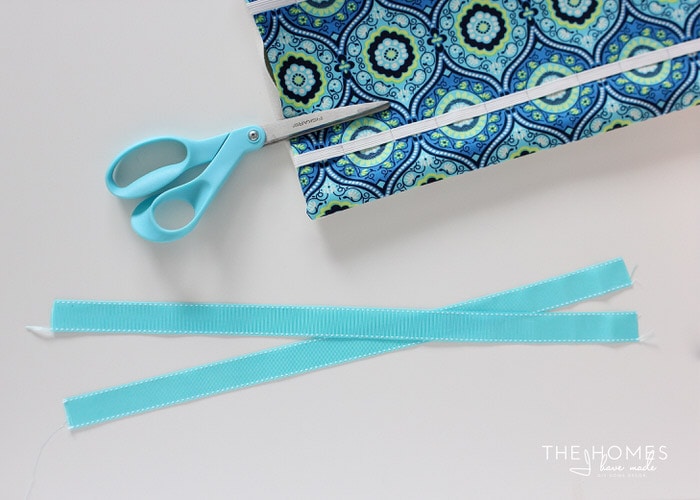
Stack the two pieces of ribbon on top of each other and place them into the open seam at the end of the organizer. Secure the open seam together with the ribbon in between with more pins or clips.

No matter what fabric you use, but especially if you use a stiff fabric like marine vinyl, you’ll notice the pouch doesn’t lay perfectly flat.

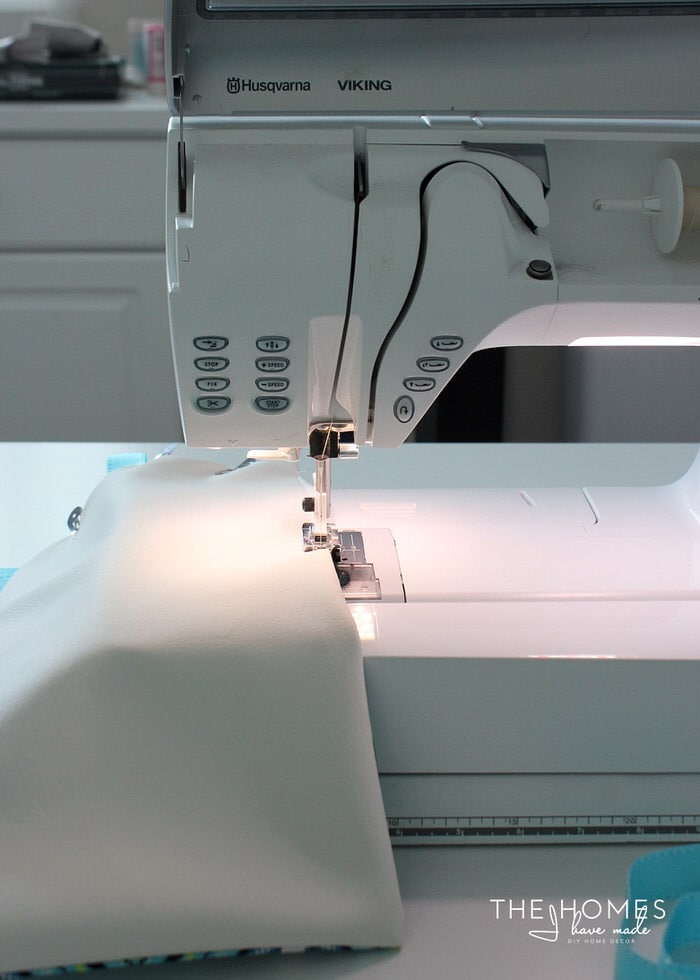
To close up the final seam AND get the fabrics to lay nice and flat, you will need to top-stitch all the way around the organizer one more time. Be sure to use thread and bobbin colors that coordinate with the fabrics, as these stitches will be visible.
Here you can see the top stitching along the entire outside perimeter of the organizer…

Not only does top-stitching make it look more professional, it makes the pouch lay nice and flat and smooth!
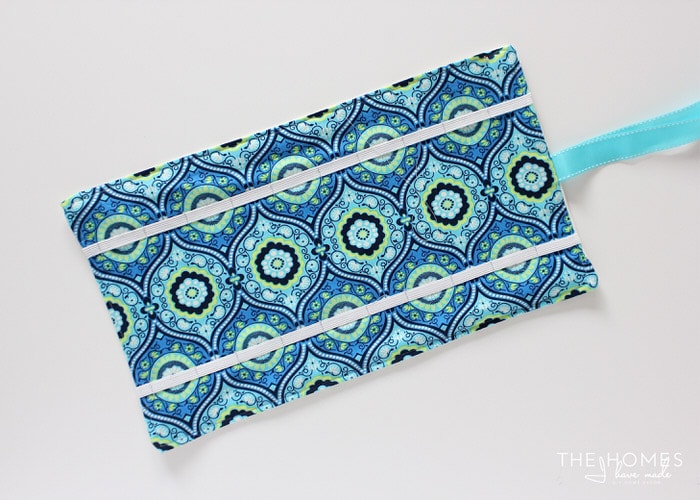
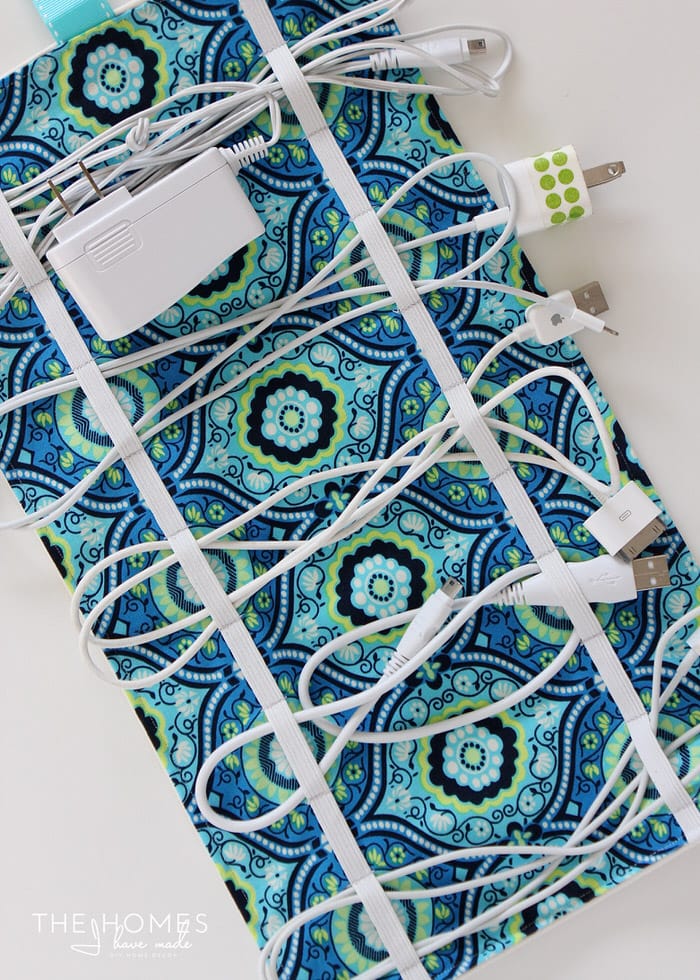
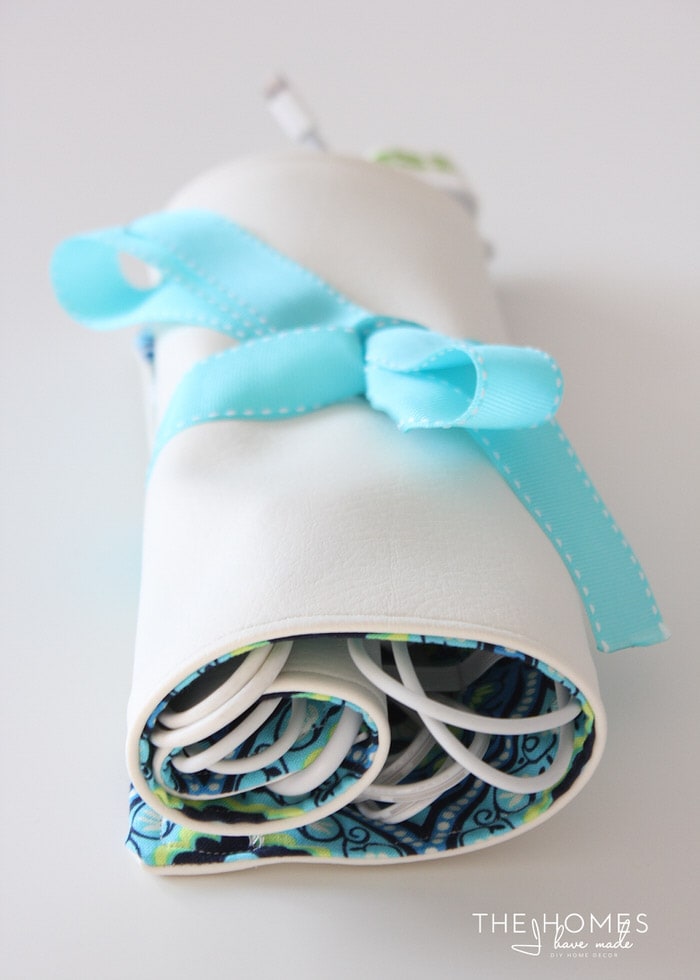
And with that…your travel cord organizer is done! It’s time to load it up with whatever cords you want and need by simply threading them through the elastic openings.
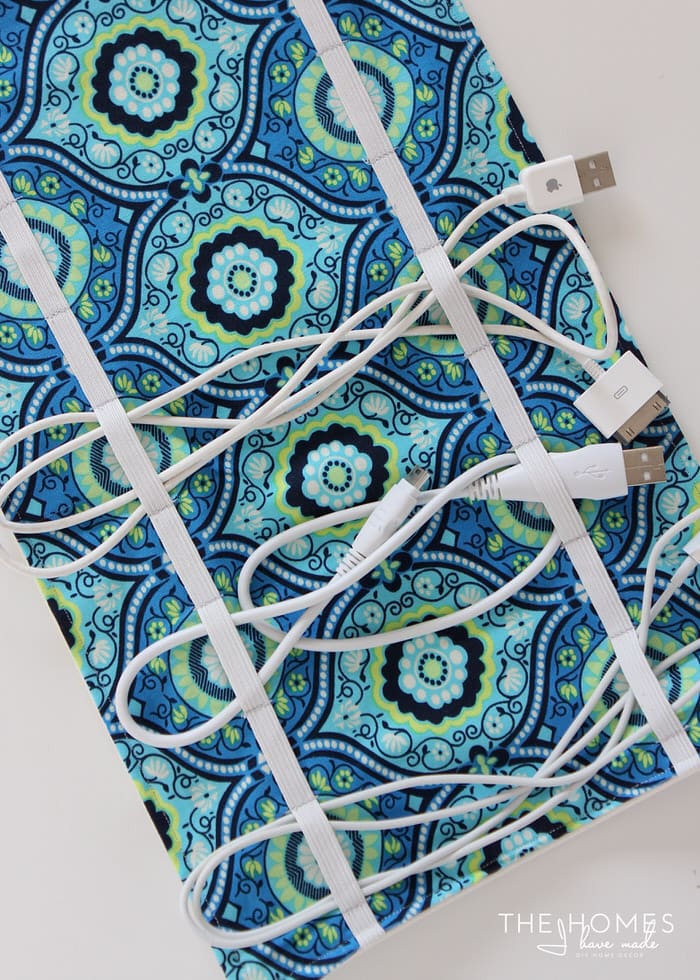
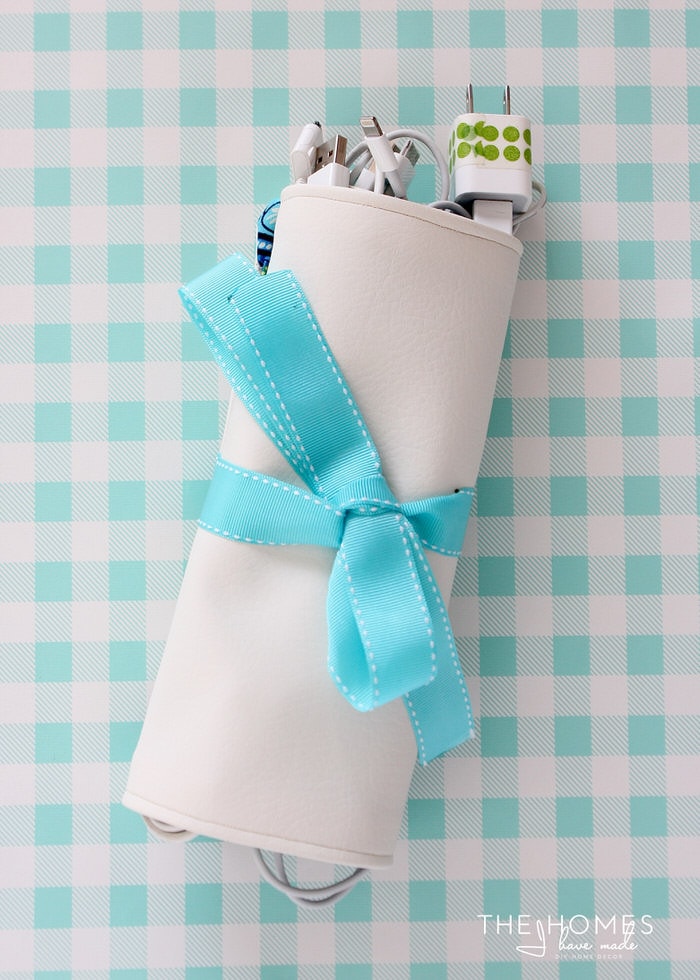
Then…no matter how full your organizer is…you should have no trouble rolling it up and tying it shut to keep all the cords protected inside! Toss your organizer into your bag or luggage for quick and easy access to whatever charging device you need while on the go!
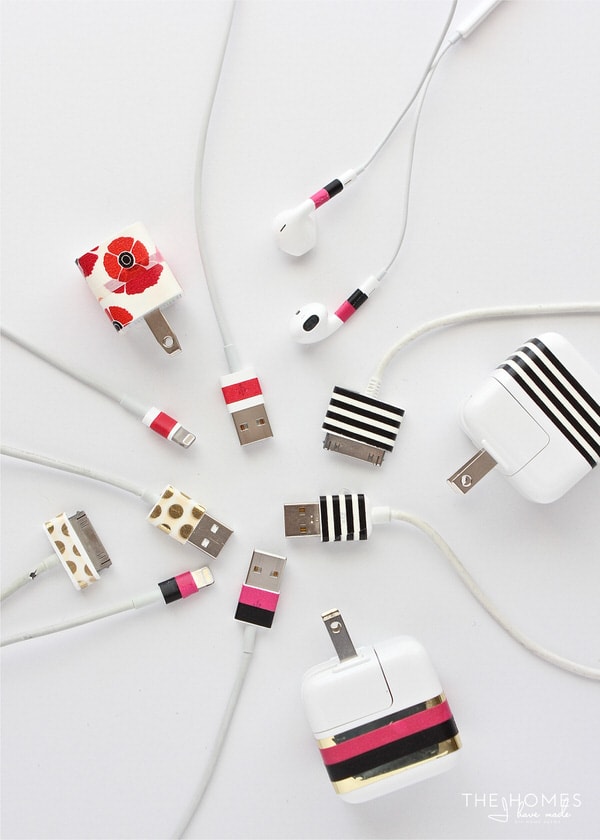
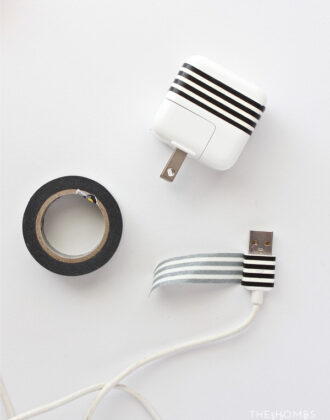
Oh! And if you’re lumping a bunch of cords together in one travel case, be sure to use my oh-so-easy trick for keeping everyone’s cords and accessories “labeled”: matching washi tape! Simply pick a different pattern/color for each person and wrap it around plugs, cords, ear phones and other accessories! You can read more about this idea here!
With just some fabric scraps and less than an hour of your time, you can whip up a travel cord organizer for yourself (and everyone else in the family!). Personalize it by using your favorite colors, patterns, fabrics, and tailor the size based on how many cords you typically travel with! With such a cute and functional accessory in tow, you’ll be sure to be charged up and ready no matter where you go!
Planning a trip? Be sure to check out these other great travel resources!
Megan


4 Comments on “DIY Travel Cord Organizer – An Easy 1-Hour Sewing Project!”
What a handy little thing!
Super cute idea!
Awesome idea!!
Instead of “with wrong sides facing” shouldn’t that say “with right sides together”?