4 Creative Ways to Use the Slice Tool in Cricut Design Space
Over the last year or so, I’ve been slowly teaching you all about the various tools in Cricut Design Space that allow you to customize images and make your projects uniquely yours. So far, I’ve covered Attach, Weld, and Contour; and today I want to dive into the Slice Tool. I am constantly utilizing the Slice Tool to manipulate and change my designs in countless ways, and I personally think it’s one of the most powerful tools available to you as a Cricut creator. Today, I want to break down exactly how to use the Slice Tool in Cricut Design Space, and then show 4 really creative uses for it that you may not have considered!
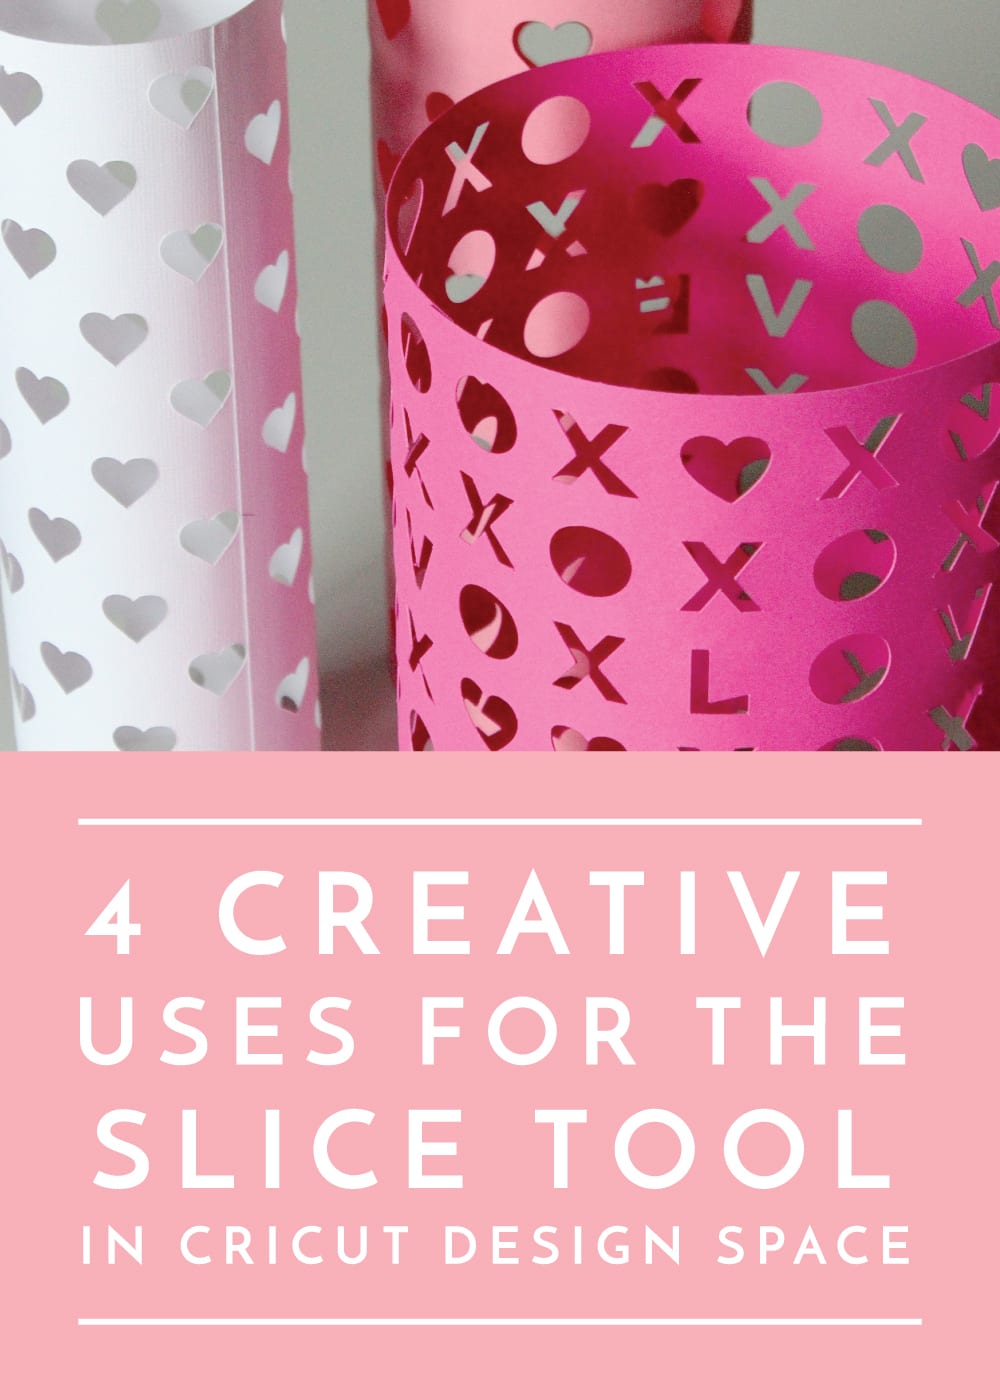
The Slice Tool in Cricut Design Space does exactly what it sounds like: it “slices” one image out of another. Instead of creating a design with a cut out image, you essentially create a design by cutting out or removing an image. The Slice Tool was used for all these projects…
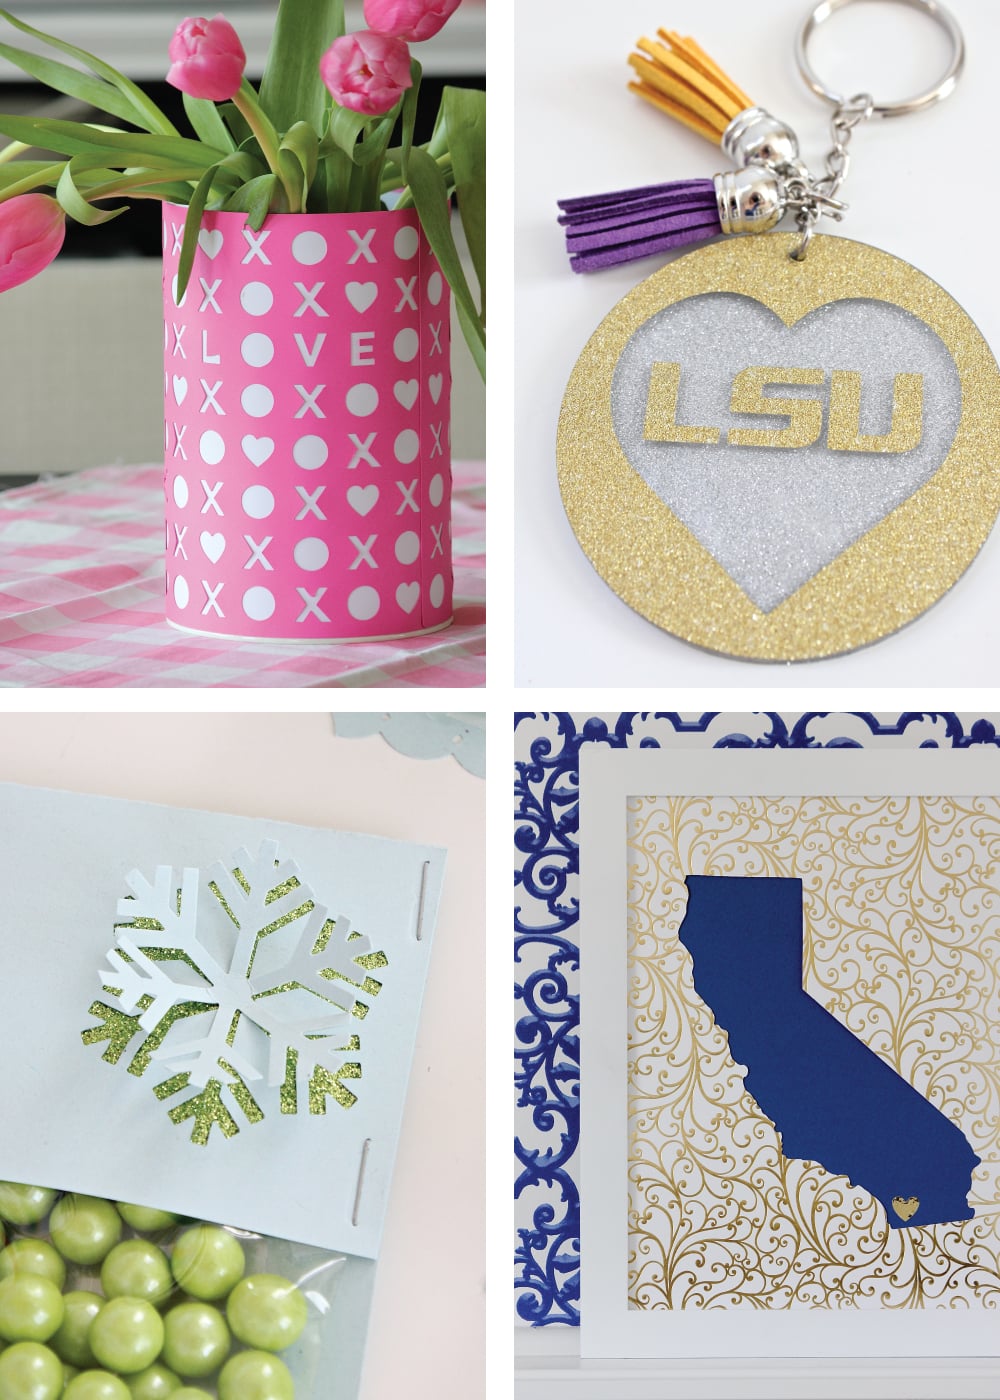
Valentine’s Day Paper Vases | School Spirit Keychains | Winter Treat Bags | DIY State Art
Technically anything you cut with a Cricut can be considered “sliced.” By nature of any cut, there is both the cut design and what is left over (the relief). The Slice Tool enables you to take any design and make it your relief, allowing you to layer projects in an entirely different way!
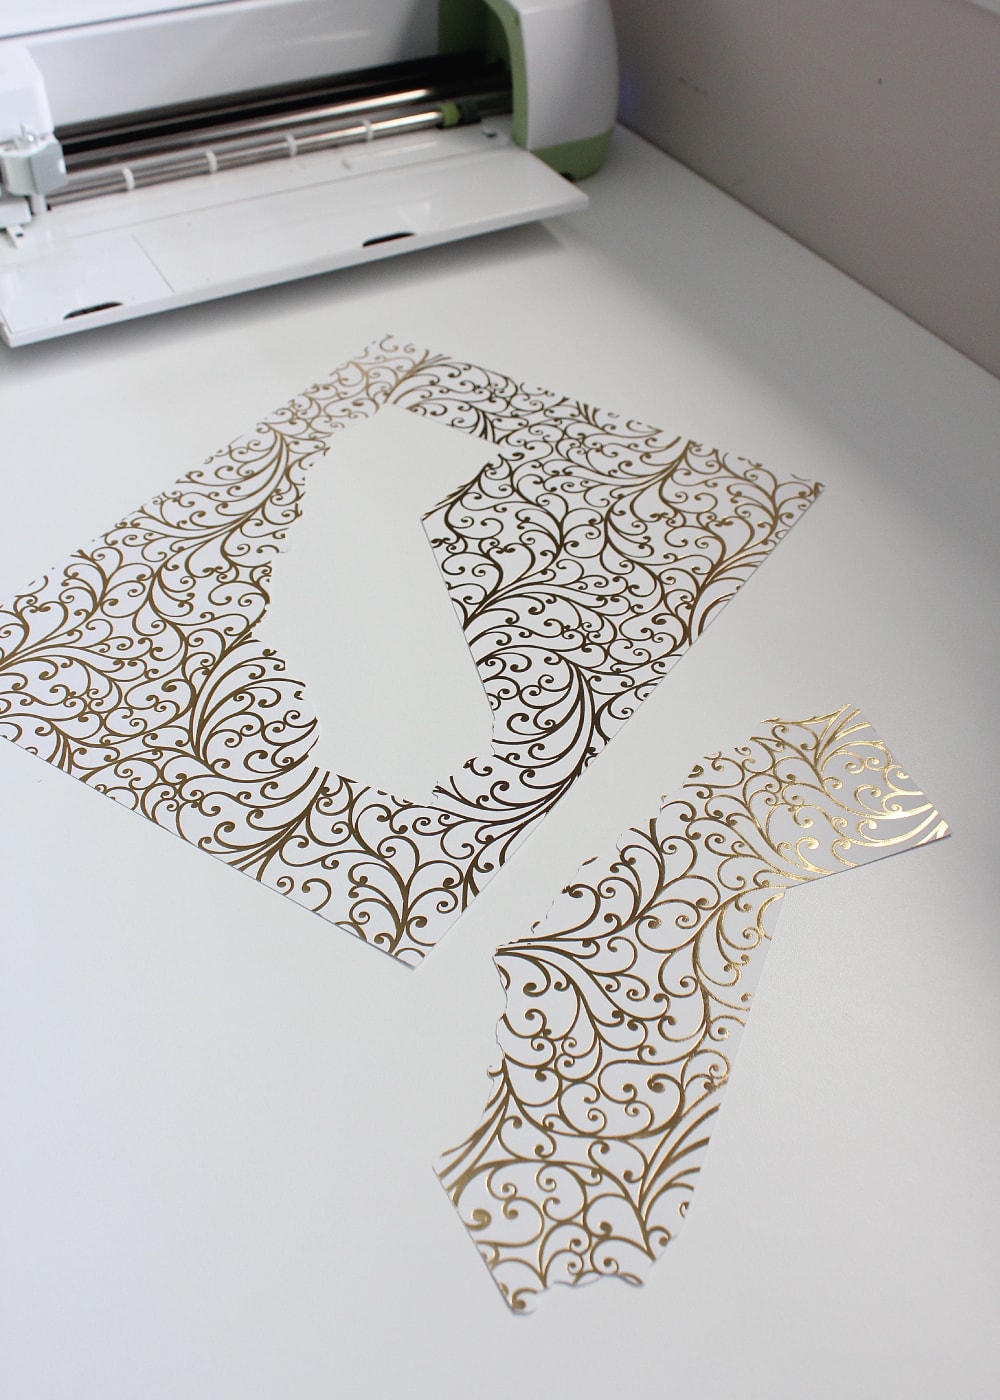
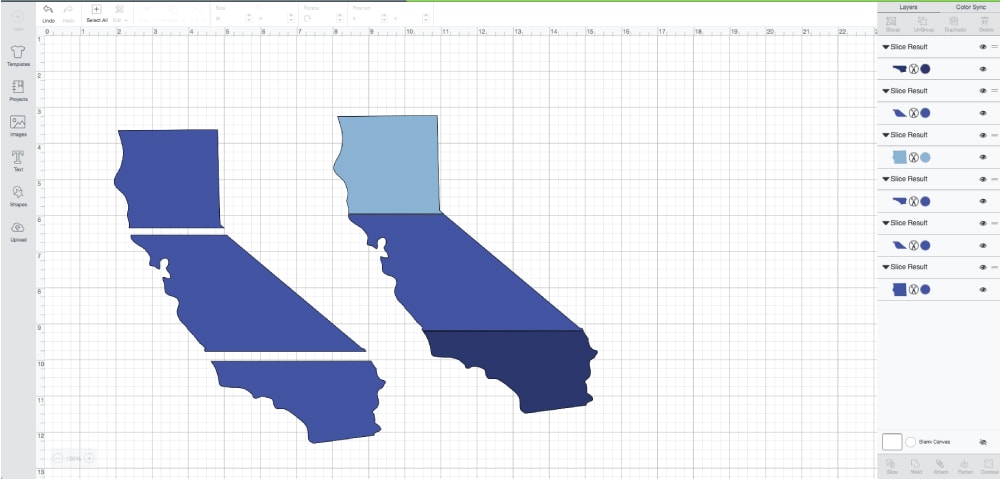
Let me explain. In the photo below, I sliced the California image from the gold swirl paper. I then placed a blue sheet of paper under the gold layer to change the color of the state. In the other example, I layered the cutout gold California onto a solid sheet of blue cardstock. This example demonstrates two different ways to get the same look, but there are times when the Slice Tool can really be a preferable method!

How to Use the Slice Tool In Cricut Design Space
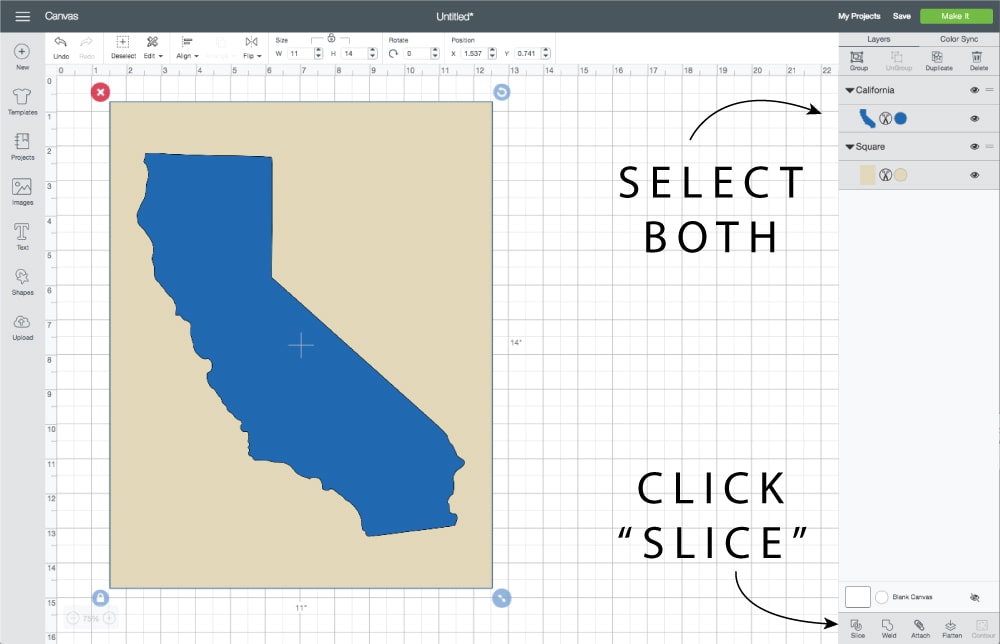
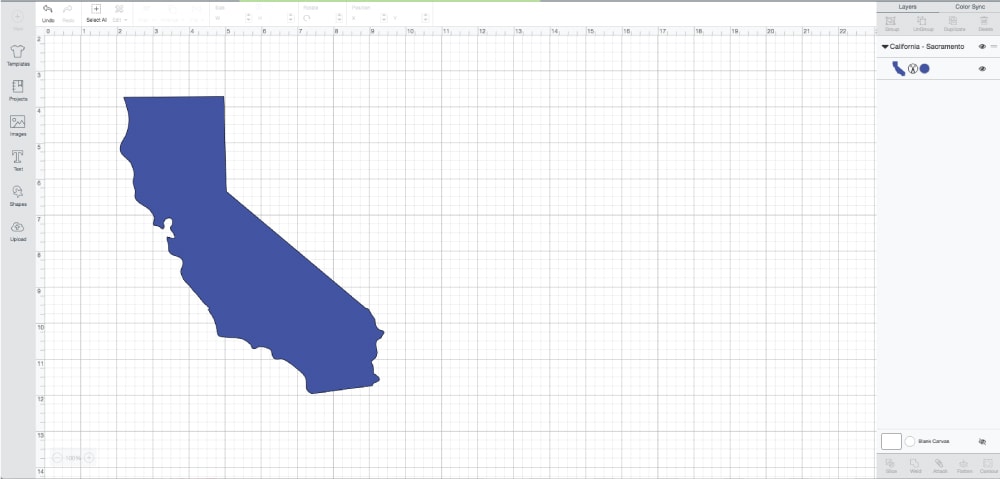
Before I get into the different reasons why to use the Slice Tool, first let me show you how to use it. To make the DIY State Art shown above, I placed a tan rectangle and a blue California onto a blank canvas. Be sure to place whatever image you want cut out of the other one on top. In the example below, I want the California cut out of the rectangle, so it is placed on top.
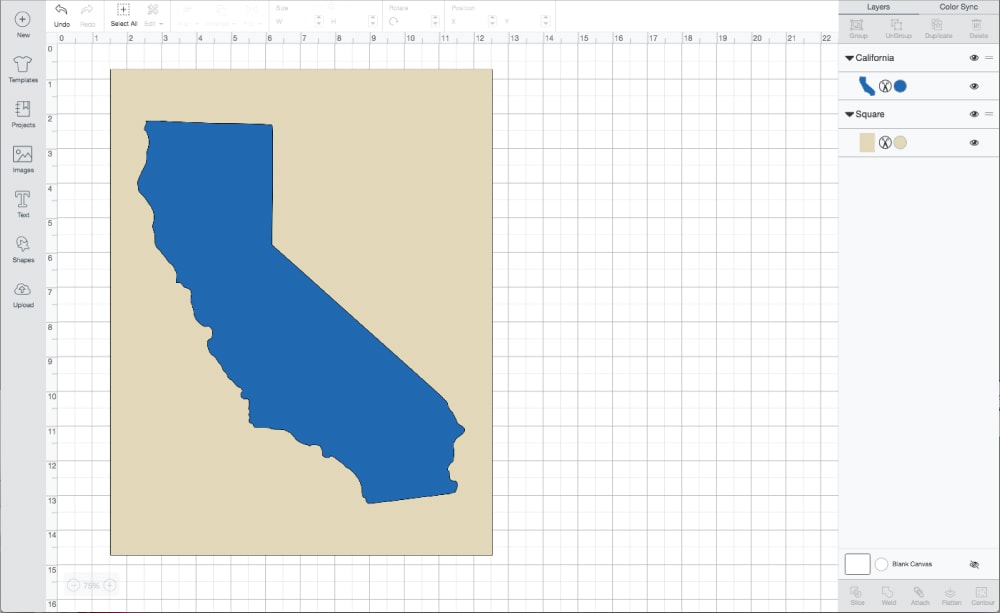
Select the two objects you want to slice (check to make sure they are both selected in the right-hand layers panel), then click the Slice Tool on the bottom toolbar of that right-hand panel.
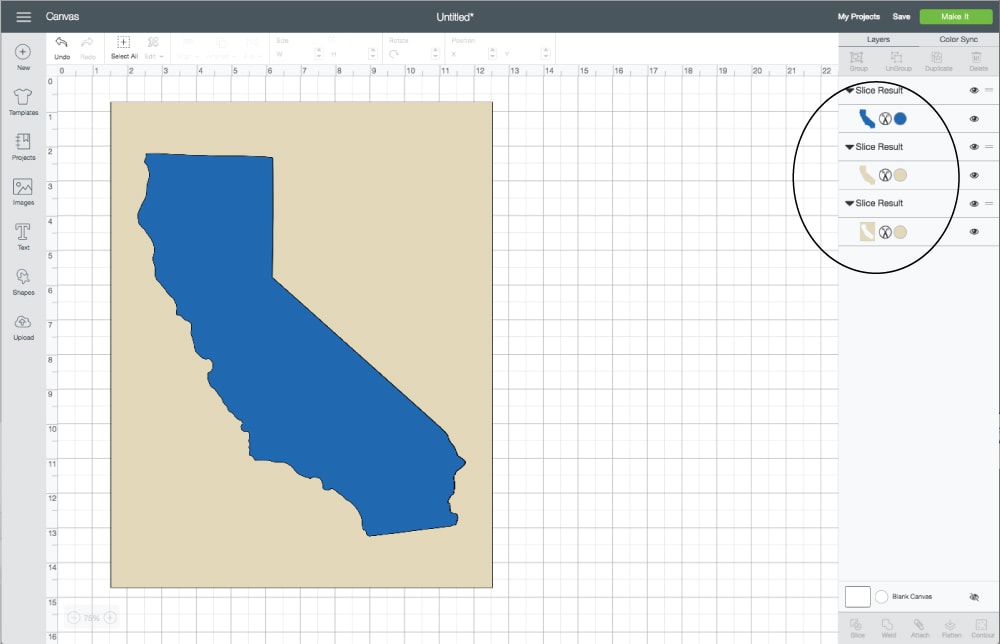
At first glance, it will appear that nothing happened; your images will look exactly the same. But if you look over to the right-hand layers panel, you will now see that your original two images have been sliced into three: the original blue California, the tan sliced California, and the leftover tan box.
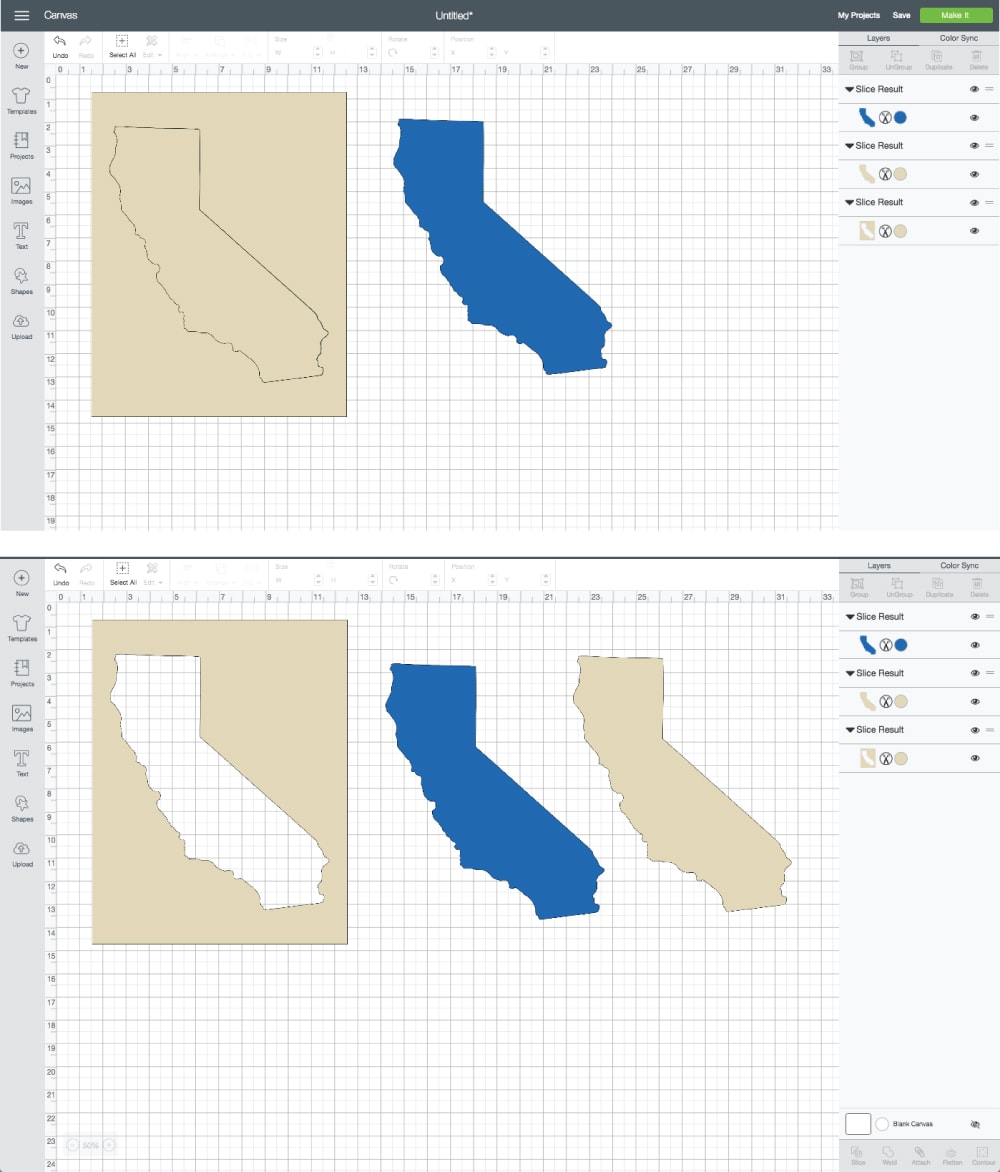
If you pull off your original top image (in my case, the blue California), you will see that your bottom image has indeed been sliced. Based on what you’re doing, you can then delete out any images you no longer need (in my case, both Californias).
If, for some reason, the Slice Tool is not highlighted for you, ensure that all of your images are un-grouped and un-attached. Also, you can only slice two images at once, so if you have multiple slices to make on a single image, you will need to do them one at a time.
By using these simple steps, you can essentially slice any image out of another one! Now that you know how to slice, let me show you why you might want to use this tool over others!
Use the Slice Tool for More Efficient Layering
As I demonstrated earlier, the look of a sliced image versus a layered image is subtle. You will either layer your cut design over or under another piece of paper, but the end look will be very similar. What won’t be similar though, is the work required to assemble your cut project. Here’s what I mean:
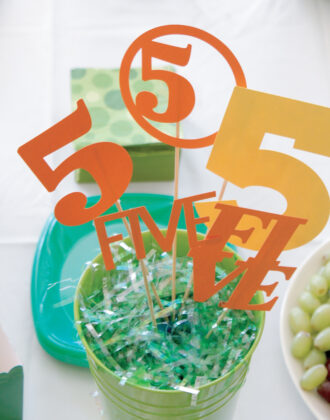
In the art piece below, my phrase is made up of lots of different letters. Letters that need to be spaced and lined up perfectly in order to look nice.
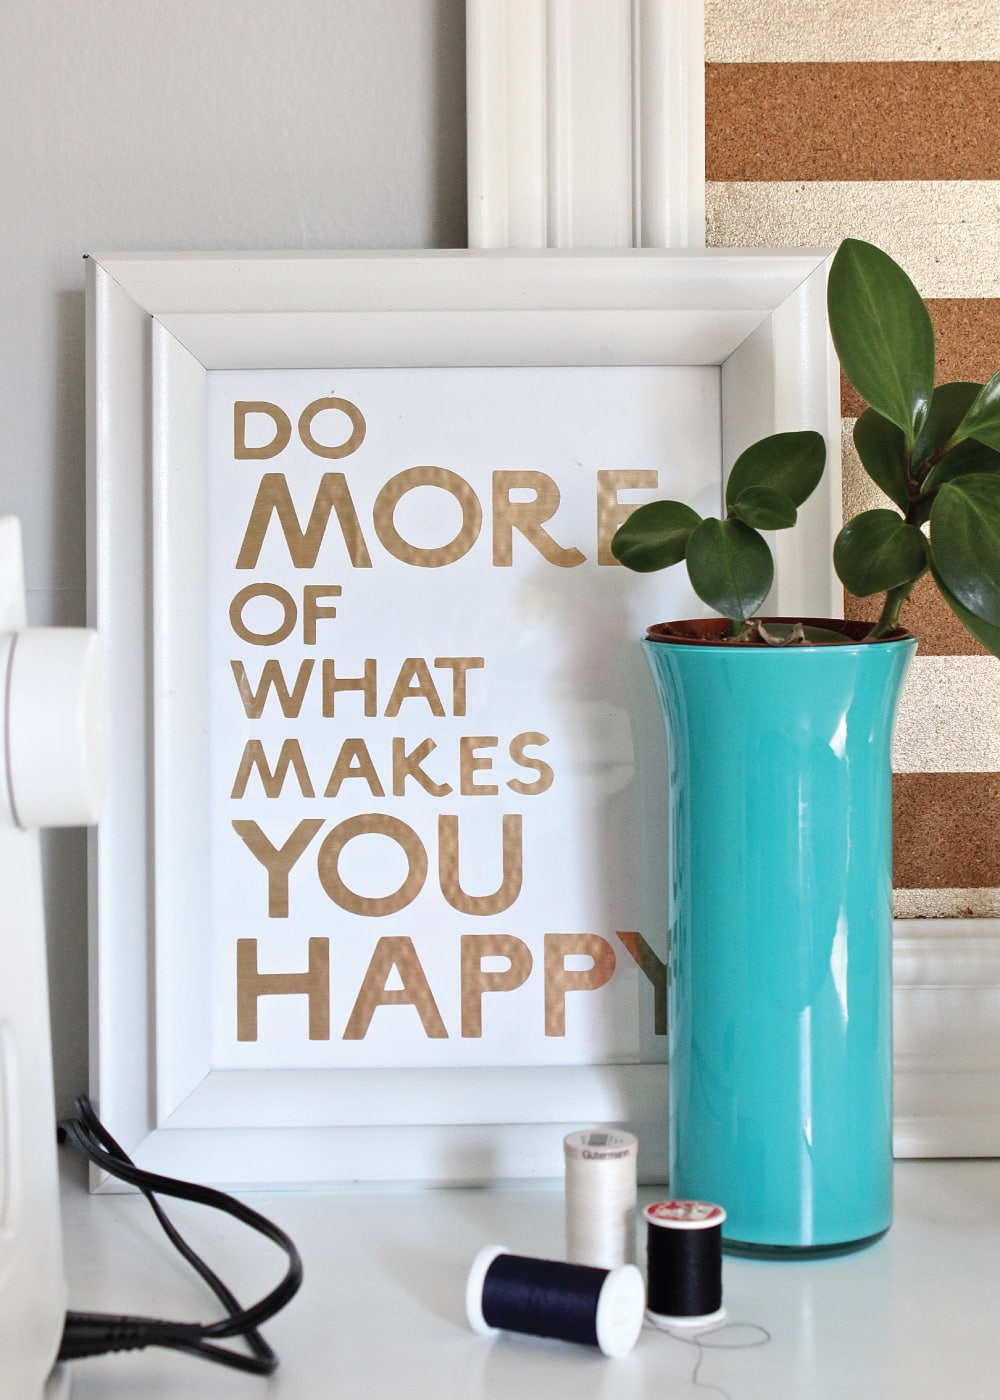
This art piece can be made in two different ways. I could have cut out the letters from gold and then layered them onto a white piece of paper, placing one letter at a time. Or, I could slice the phrase out of the white layer…keeping my spacing perfectly in tact…and simply layer a gold piece underneath the cutout words. The amount of precise cutting the machine does is exactly the same, but the amount of work you have to do to assemble your project differs dramatically.
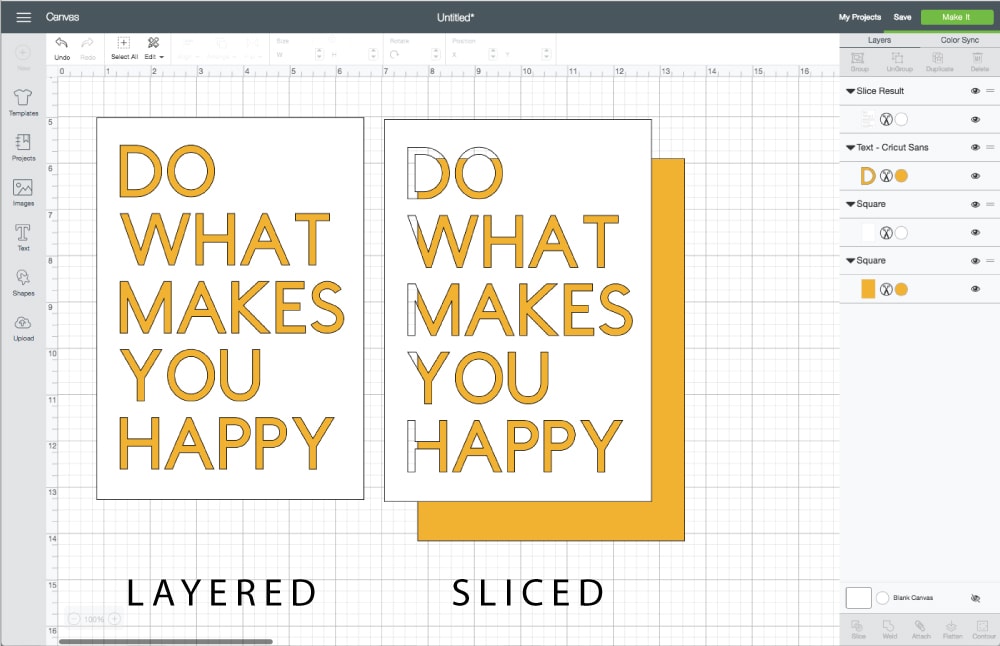
I had no interest in placing each letter by hand, so I chose to slice my phrase out of white cardstock and then layer a solid, shiny gold sheet underneath it. When I am working on paper projects that require very precise spacing, I almost always choose to slice it rather than layer it by hand after it’s cut. Again, the amount of cutting doesn’t change; it’s just a matter of what image is cut from what color and how you layer it afterwards.

Use the Slice Tool to Crop
I am not entirely sure why Cricut Design Space doesn’t have a crop tool (it sure would make things easier!), but the Slice Tool is the next best option! If you want to be able to crop an image or cut anything apart, the Slice Tool is how you do it. The only (tedious) problem is that you have to use another shape to do it.
Below is a fundraising thermometer I found online for a project I was working on for my son’s scout pack. I liked the overall design, but I didn’t want the lines going up the thermometer’s side. Because it’s a continuous image, I couldn’t use the Contour Tool to get rid of the lines, so my only other option was to use the Slice Tool.
To use the Slice Tool as a cropping tool, place a shape onto your canvas from the “Shapes” menu on the lefthand side. For straight-line cuts, I always use a rectangle. If I’m trying to crop a round image, I’ll use a circle.
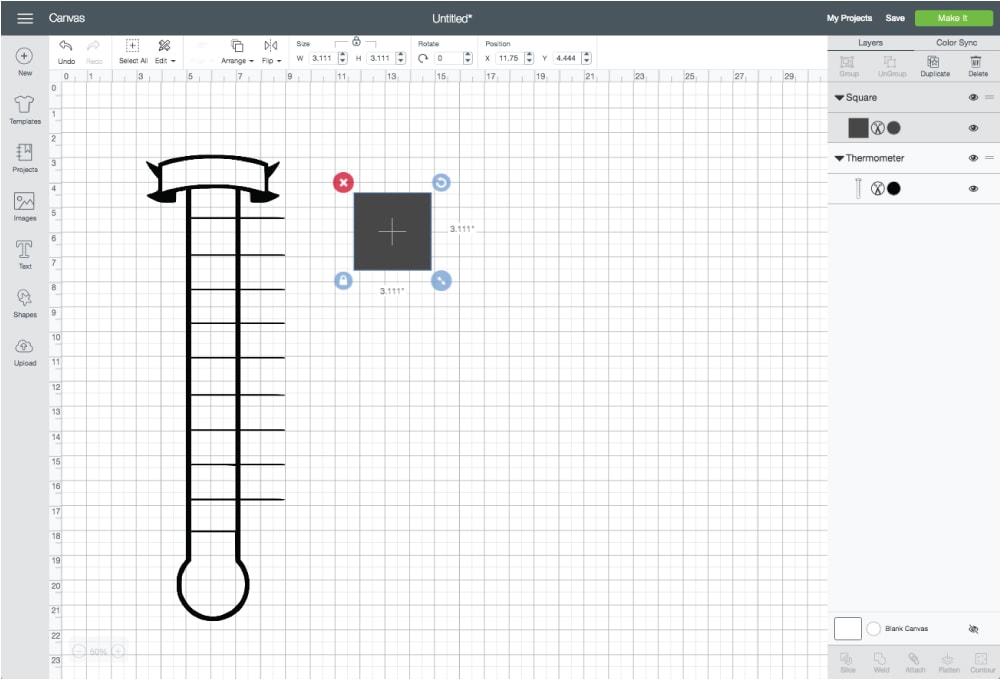
Unlock the dimensions of the square (by clicking the lock icon in the bottom lefthand corner) and then re-size it to cover whatever it is you want to crop out (in my case, those lines off the right side of the thermometer).
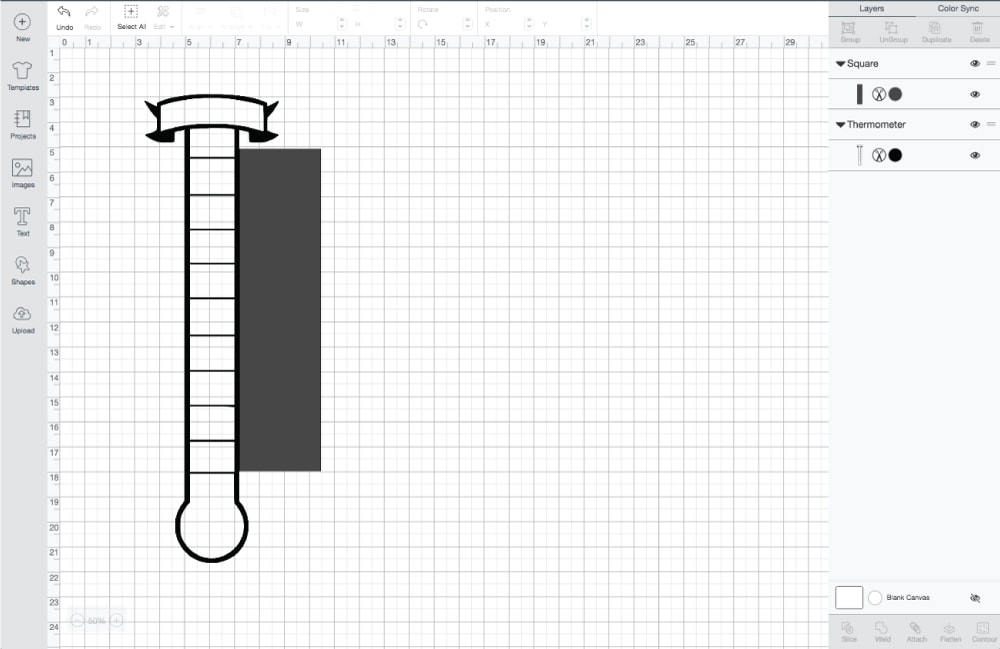
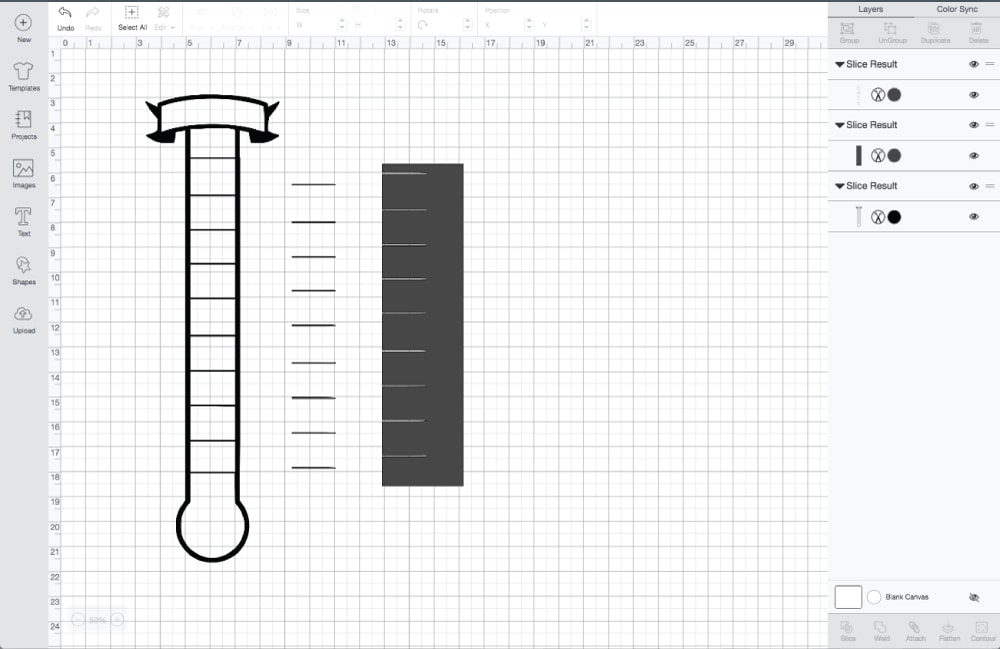
Just as I showed you before, select the two images (both the thermometer and the rectangle) and then select Slice. Once you pull everything apart, you will see that whatever was under the rectangle (or whatever cropping object you chose) has been sliced off, and you can now delete them if they are no longer needed. You can then insert a new square/rectangle/circle to crop out more of the image if needed.
Admittedly, this is the number one way I use the Slice Tool. Although certain cuts may be tricky because you’re confined to using another shape to do the cropping, if you keep slicing and slicing at different angles using different shapes, you can almost always take off any part of a design you need to!
Use the Slice Tool to Break Apart Solid Images
Taking the cropping idea a little further, another way I like to use the Slice Tool is to break apart a solid image. I’ve already shown you how to re-color different parts of an image with the Contour Tool. But if your design is a solid cut (instead of having disconnected elements), the only way to re-color it is to slice it apart. Let’s go back to our California example.
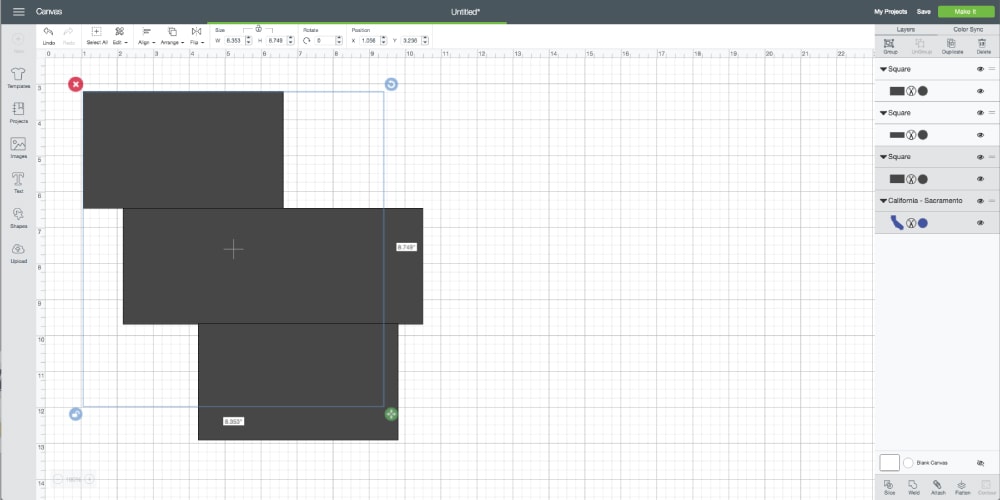
In this instance, I want to make my California ombre-colored instead of solid blue. To do this, place some shapes on your screen that you will use for cropping, just as I described above. I used three black squares. You can make your cropping shapes any width and height you want, just make sure they cover your original object (below, top). Once you are satisfied with how your original shape will be cropped, send your top image to the back (below, bottom).
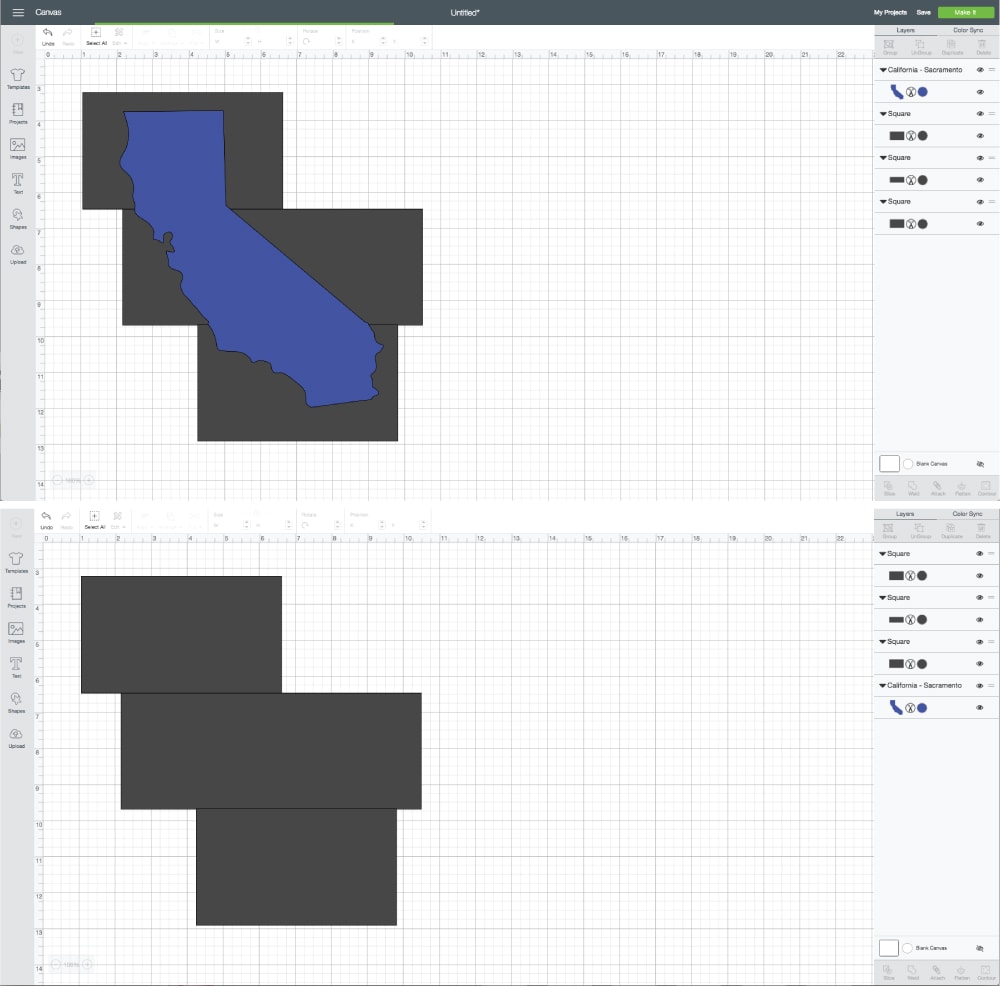
As I said before, you can only slice two objects at a time so you will need to select your bottom image (California) and then one top cropping shape to make a slice. Use the panel on the side to help you select your images as necessary.
When you hit slice, you’ll notice your original object will be cut into cropping shape on top of it (in my case the top rectangle). Delete out the slices you no longer need, then repeat, as needed, with the rest of your original image.
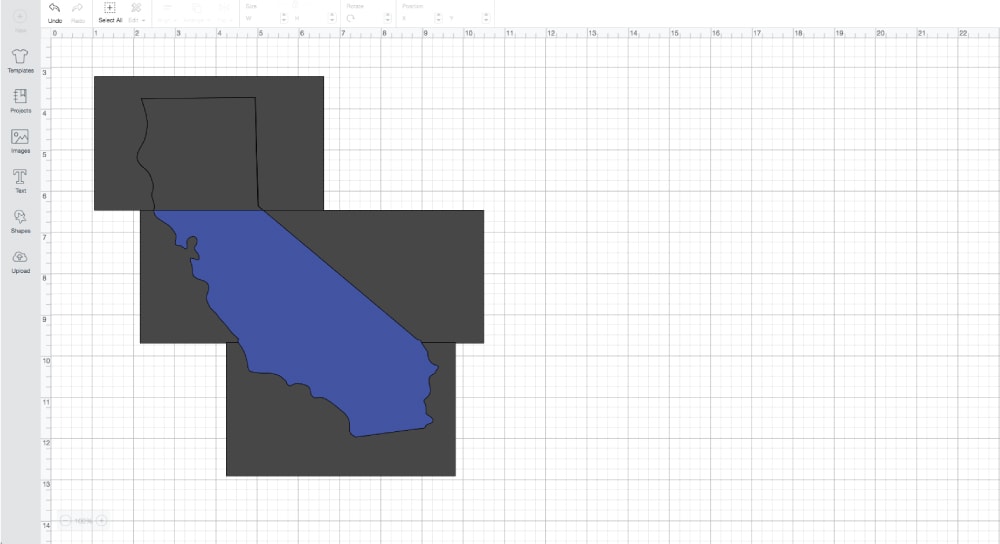
By slicing the middle rectangle and then the bottom rectangle, I cropped my solid California into three pieces that can be colored, sized and manipulated individually.
NOTE: This slicing concept…when used on a much bigger scale…is also called the “Off-the-Mat Technique,” which essentially allows you to take really large images and slice them down (exactly as I’ve shown here) so they can be cut on 12×12 or 12×24″ mats. While there are a few more things to consider when cutting large images (see the full Off-the-Mat tutorial HERE.), this slicing technique is pretty much how you do it.
VIDEO DEMO
See how I sliced a monogram apart using this same technique:
Video not loading? You can watch it HERE.
Use the Slice Tool to Make Multi-Layers Designs Perfectly Flat
If you’ve made layered projects at all, you know that…depending on how many layers/colors you have…the projects can get kind of thick. Cardstock isn’t thin and sometimes adding layer upon layer upon layer can make for some pretty “tall” projects. However, if you slice your colored layers, you will be able to inset them rather than layer them on top of each other…thereby making a completely flat project!
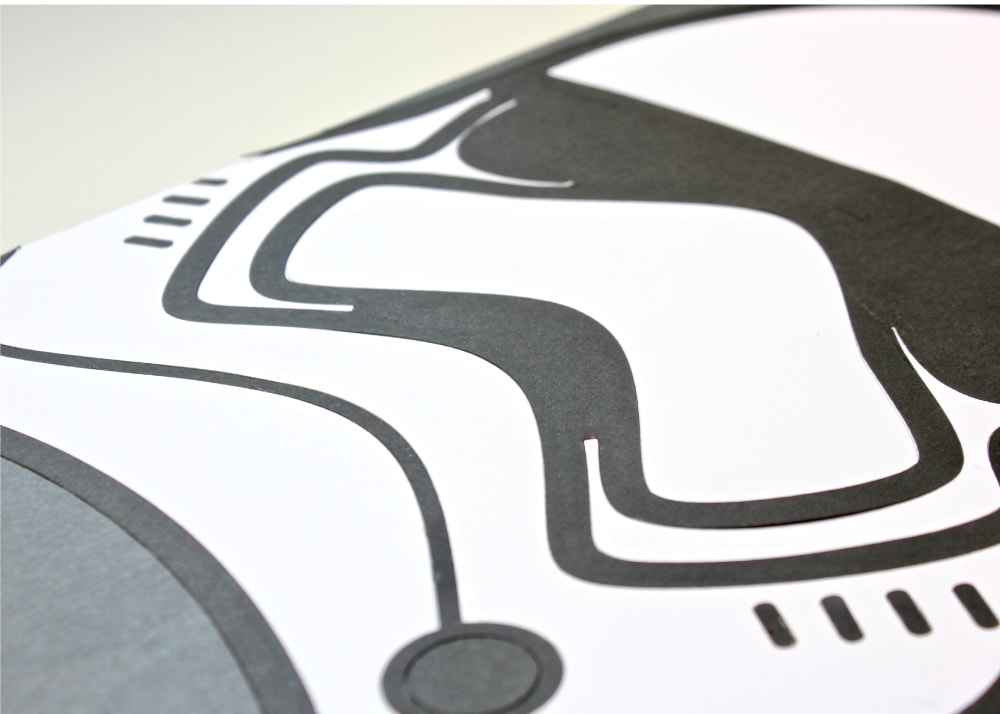
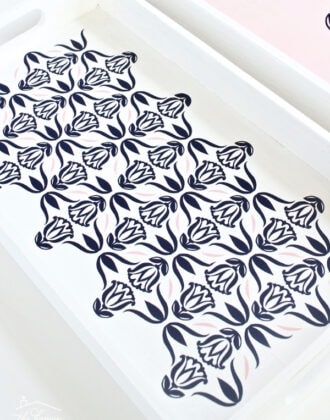
I am going to go into MUCH more detail when I show you how I made the Star Wars Art for Henry’s room, but let me just show you this slicing technique here. These Star Wars designs have lots of colors and layers, and I was worried they would look too chunky in frames. So instead of layering each color on top of the previous one, I sliced each layer out of the one below it.

This meant that instead of layering the stacks of paper cutouts, I inset each piece side-by-side with the others. Think of it like a big puzzle where everything fits just right into everything else.
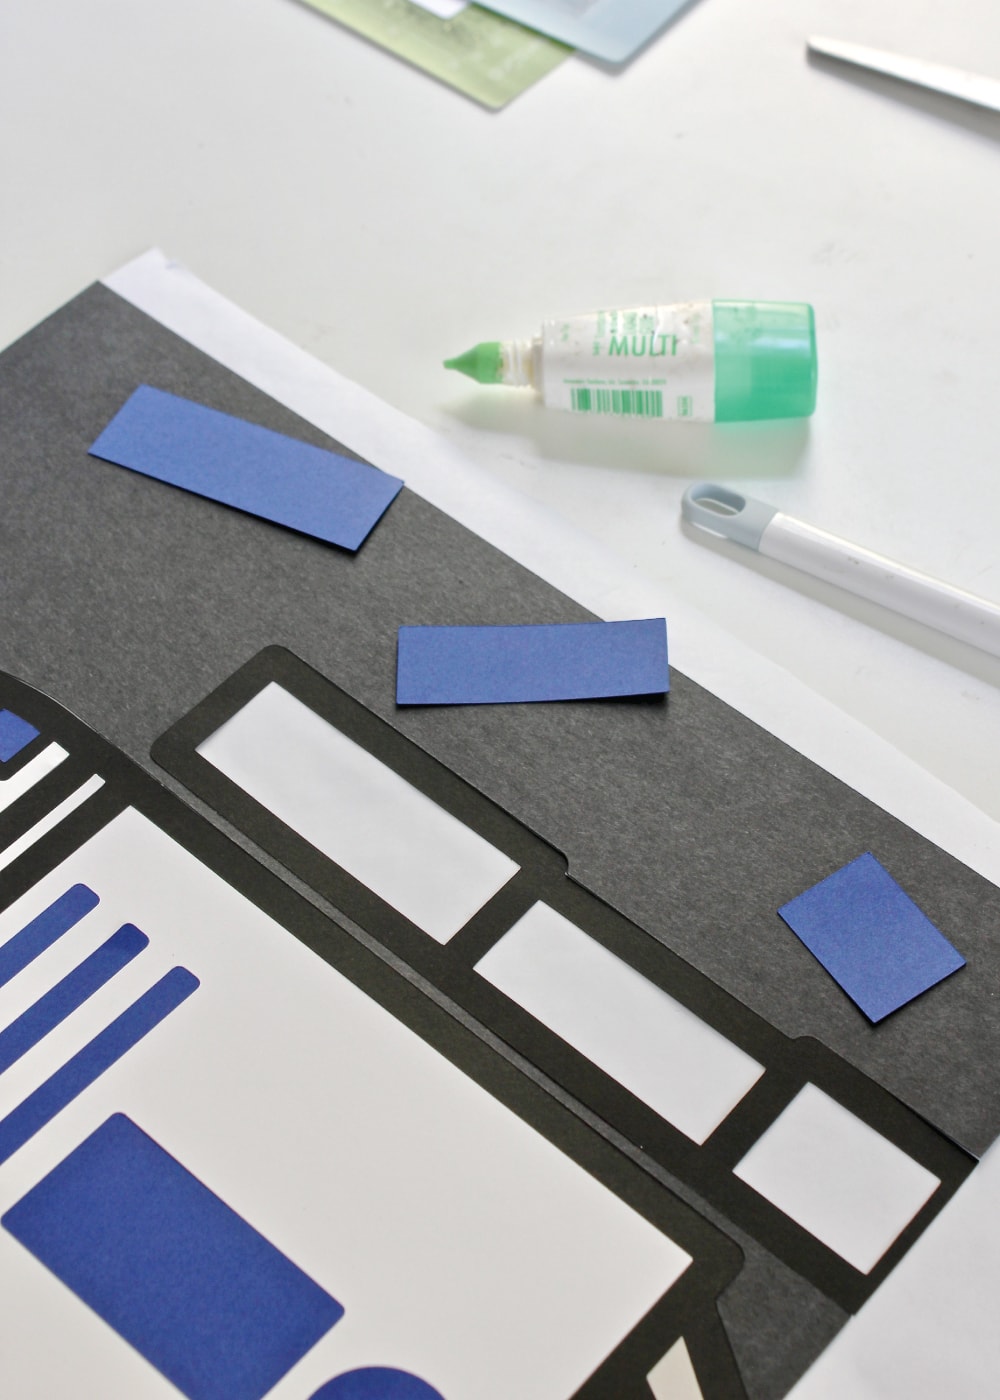
By using the Slice Tool in this way, I not only was left with perfectly flat, smooth artwork (ideal for framing!) but it also ensured that the spacing of each and every detail was PERFECT. Why? Because I didn’t have to guess where on the white mask each black detail went. Instead, the spots for all the black details were sliced out of the white mask, leaving me a hole to inset the black cuts.
Don’t get me wrong…it can be VERY tedious to slice lots and lots of layers from each other, but the super-flat, smooth results can often be worth it. If you love making multi-color, multi-layer designs but hate the bulk that comes along with them, the Slice Tool is your answer!
More Helpful Cricut Design Space Tutorials
Cricut Design Space is a very powerful program, but it can have a steep learning curve for beginners. Check out my other comprehensive tutorials below:- How to Use Cricut Design Space | A Breakdown for Beginners
- 20 Cricut Design Space Tips & Tricks You Really Need to Know
- The Ultimate Guide to Cricut Terms & What They Mean
- How to Find Free Images to Use with Your Cricut Machine
- How to Use the Attach Tool in Cricut Design Space
- How to Use the Slice Tool in Cricut Design Space
- How to Use the Weld Tool in Cricut Design Space
- How to Use the Contour Tool in Cricut Design Space
- How to Use the Offset Tool in Cricut Design Space
- How to Use Print Then Cut in Cricut Design Space
- How to Design Monograms in Cricut Design Space
- How to Cut Really Big Designs on Your Cricut (The Off-the-Mat Technique)
- How to Design Mugs in Cricut Design Space
I hope this tutorial gives you some new ideas for using the Slice Tool in Cricut Design Space. What appears to be a simple cutout tool really has some neat capabilities that can not only change the look of your projects but also dramatically change how and how fast they come together after they are cut! If you have another neat way to use the Slice Tool that I haven’t covered here, please feel free to share in the comments!
Megan

9 Comments on “4 Creative Ways to Use the Slice Tool in Cricut Design Space”
Thanks so much, Megan. Your Cricut articles have been extremely helpful to me.
I had an “a-ha” moment reading this, thank you SO MUCH for the time you put into this.
Loads of really well explained content on your website – thank you so much from S Wales, UK
Hi Clare!
You are most welcome! I am so glad you find my tutorials helpful!
Have a great week!Megan
This idea is genius!!!! Thank you.
You are most welcome!
Happy Thursday!Megan
This is one of the best tutorials I have seen yet! Thank you for taking the time to do it. My goodness! I learned a lot from you.
I appreciate anyone taking up their time to help us understand and be able to use Cricut Design Space. However, I am really impressed by your tutorials over and above anyone else’s I have seen because you are so articulate; nothing is left unchecked because you cover it all. It makes you easier to understand and follow without any need to try elsewhere. You manage to cover every aspect of each and every function in Design Space, talking us through visuals and cross referencing. Not only do you show us how to use the software, you are generous with your ideas, knowledge, experience, skill and freeware, but most of all-your time to save us time, with all of your shortcuts!! I can’t thank you enough 😘
I’m left feeling more confident to take my Cricut Maker 3 out of its box now, where it’s been since this machine was released because of you and now having a firm grasp of knowledge from watching your comprehensive tutorials.
I don’t know how you do it?! You’re simply amazing and you deserve the very best in life because you have worked for it!
Thank you ❤️ xxx
Hi Megan
I appreciate the time you putting in for all our new beginners.
Your tutorials are very understandable and helpful.
I understand everything so much better and are no longer afraid to use my cricut machine.
Thank you so much