Make Your Own Cute Binders (with Printable Binder Covers!)
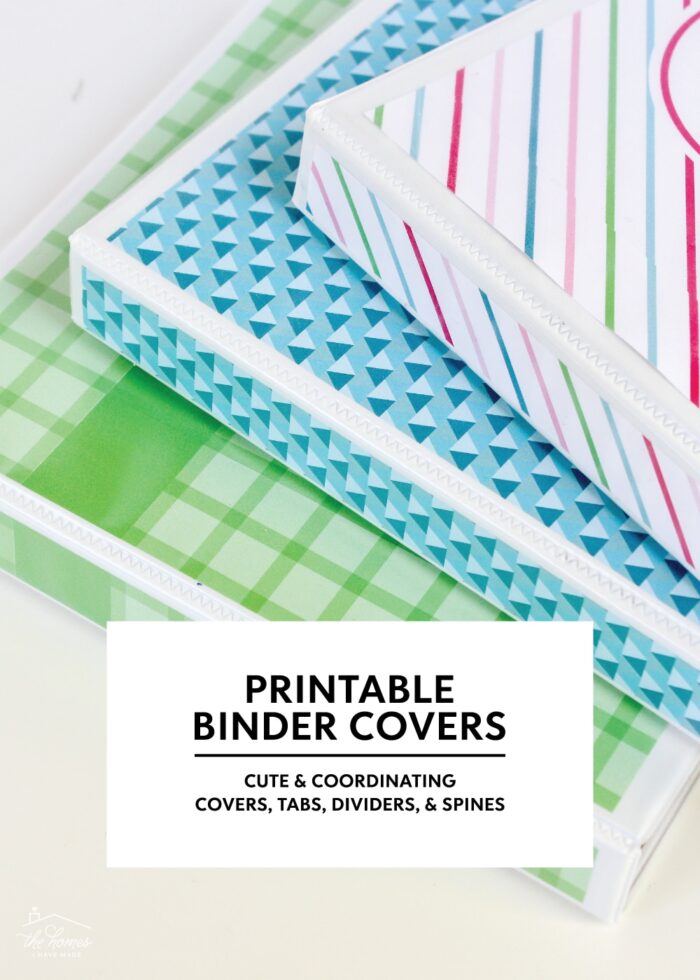
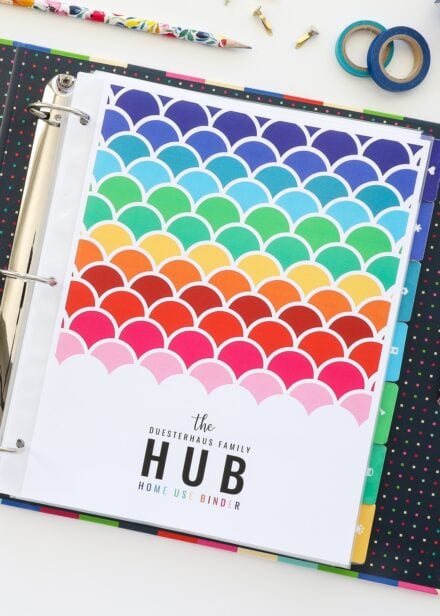
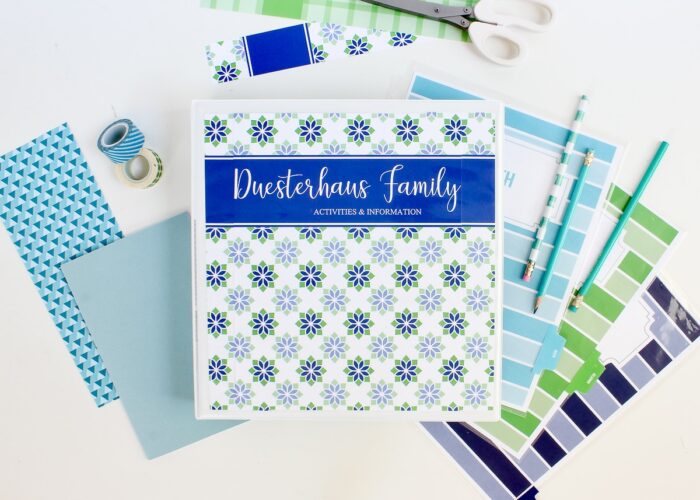
There’s something about a colorful binder that makes school work, a project, or planning a little more fun, don’t you think?!?! And while you can find an array of cute binder supplies on store shelves, there’s something to be said about the convenience (and fun!) of printing and assembling your own perfectly coordinating binder system right from home. If someone in your household is heading back to school or you’re getting ready to tackle a big paperwork organization project such as The Family HUB or Recipe Binder, you’re going to love the whole host of printable binder covers, spines, dividers, and tabs available for download from The Organization Toolbox. I’ve got options galore…so get ready to print, cut and assemble the cutest organization binders ever!
Using Binders to Get Organized
When it comes to organizing paperwork, one of my go-to methods is to use a binder. While they aren’t always the right solution for some kinds of paper, binders really are an easy and inexpensive way to sort, organize, and categorize a compact collection of papers related to a specific topic (e.g., a move, a school subject, a project, a weekly planner, etc).
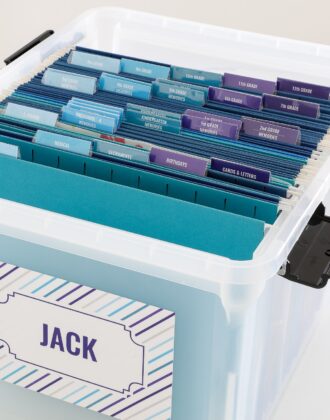
Over the year, I have used dedicated binders to organize our military moves, recipes, our family’s important documents, and our household information and logistics. But they can be used for so much more including, a budget binder, teacher binder, classroom binders by grades, food and fitness planning, and more!
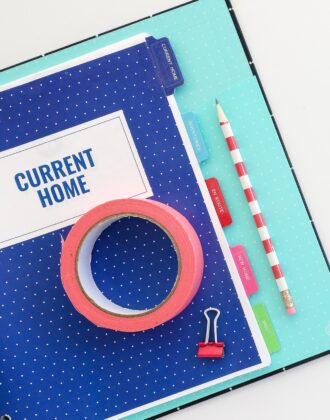
In order for binders to really function optimally, it’s imperative that they be clearly labeled on the outside (with a descriptive cover) and categorized on the inside (with easy-to-read tabbed dividers). These accessories will not just make it easier to find the right binder when you need it, but also the correct contents within.
Sure…any ol’ set of basic dividers can do. But why not go to the extra step to make your binders both functional AND pretty? After all…if a particular organization system looks amazing, you’ll be more likely to use, love it, and maintain it!
About the Beautiful Binder Bundle
Whether you simply need cute binder covers for the upcoming school year or are making your own binder organization system for something else, my Beautiful Binder Bundle will help you easily create the exact covers, dividers, and tabs you need to make your binder look and function just right.
What’s Included
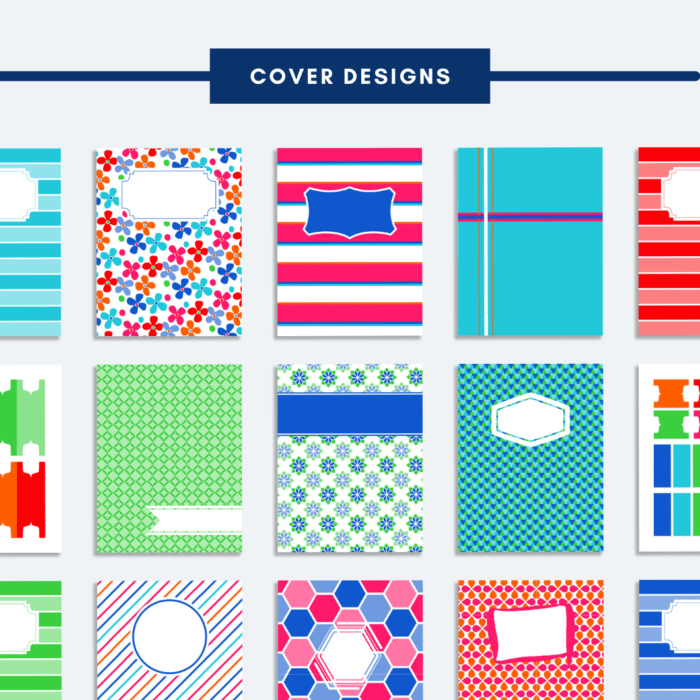
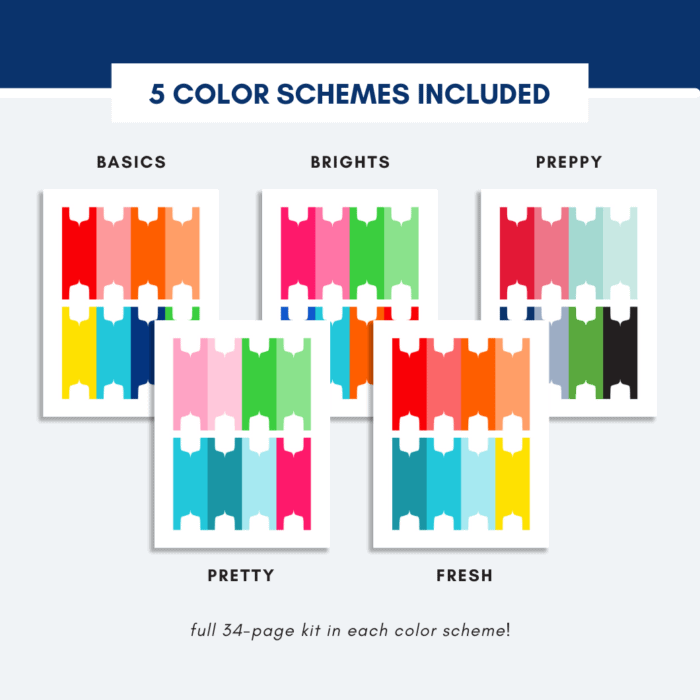
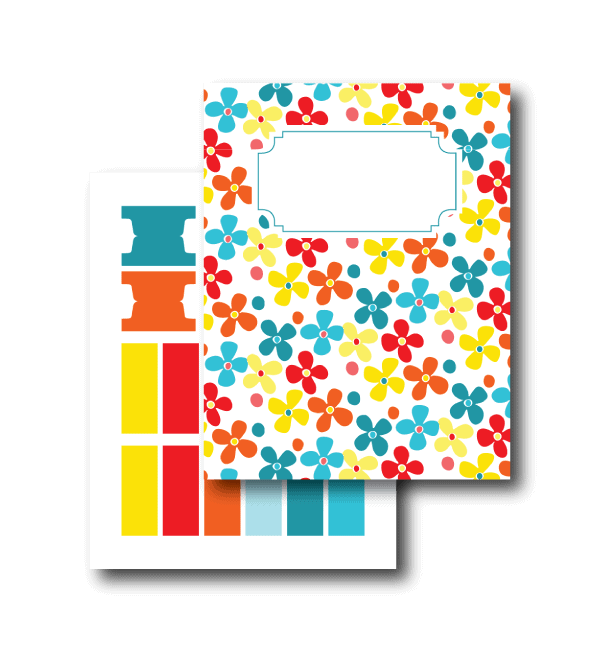
The Beautiful Binder Bundle includes 5 different colors of the same 34-page set:
- 10 colorful printable binder covers with editable names/monograms
- 10 coordinating pattern sheets (to widen covers or make spines)
- 3 tab styles in coordinating colors
- 6 striped divider pages in coordinating colors
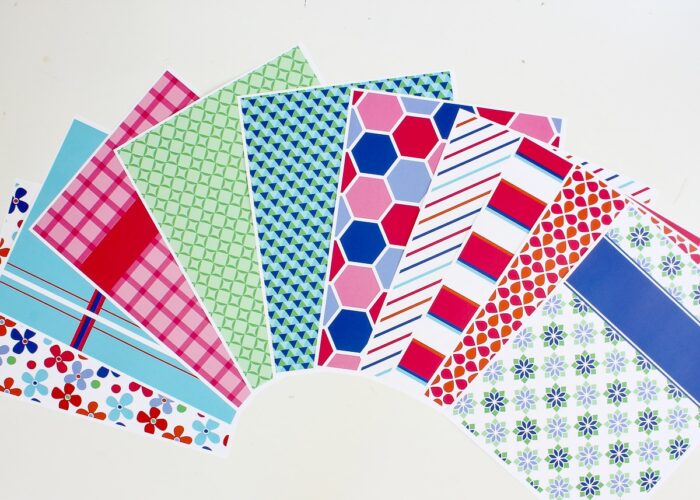
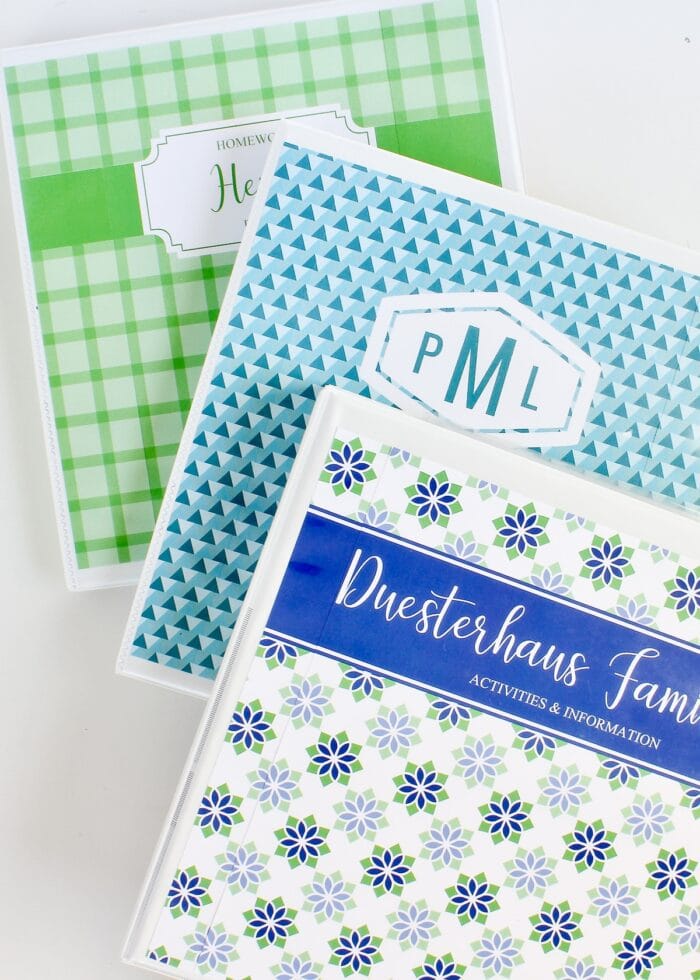
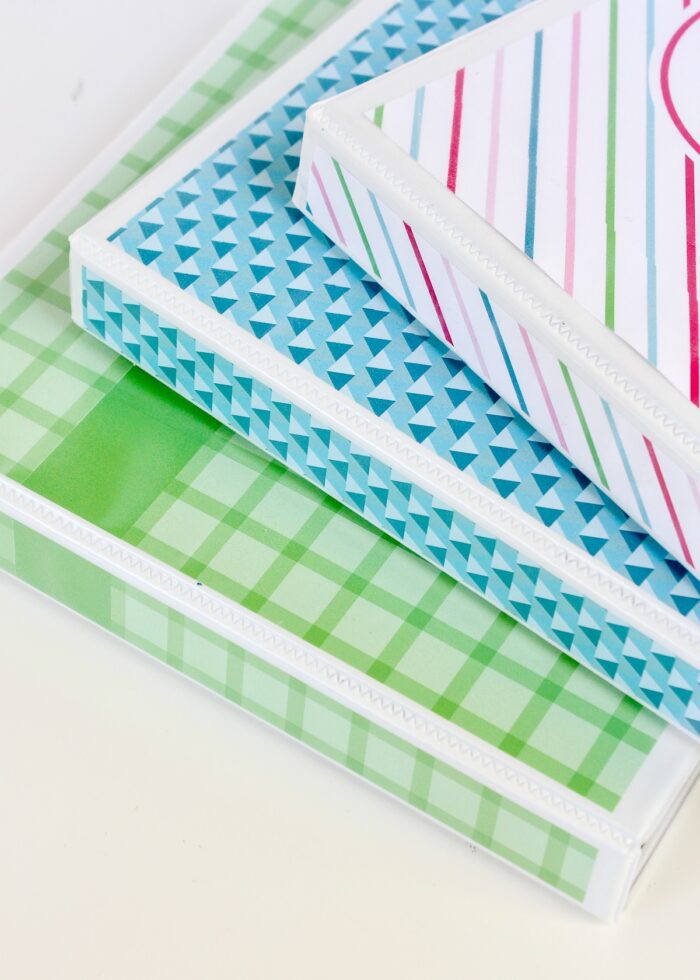
The different cover patterns and color schemes are shown below.
Fun, Colorful Designs
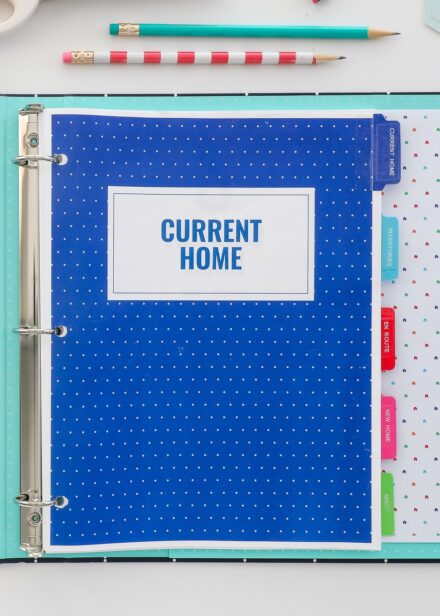
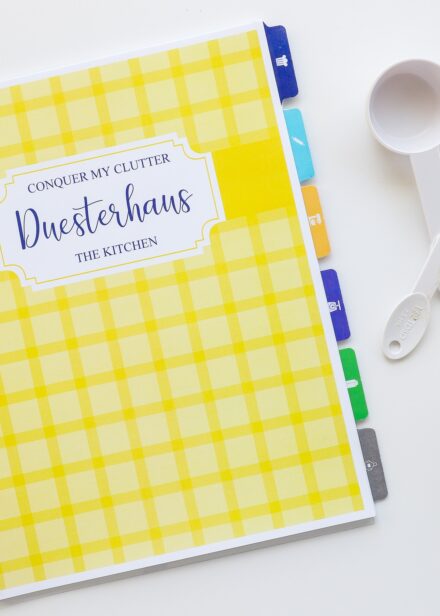
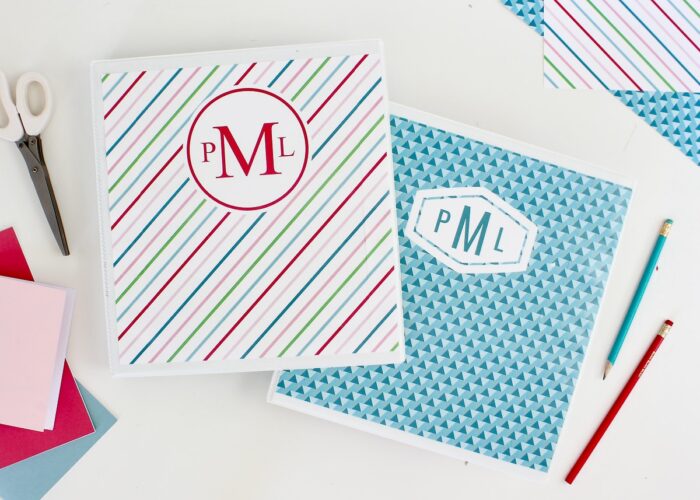
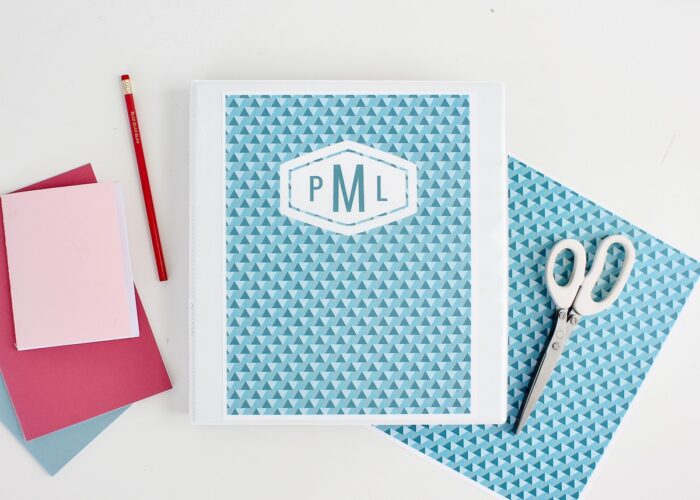
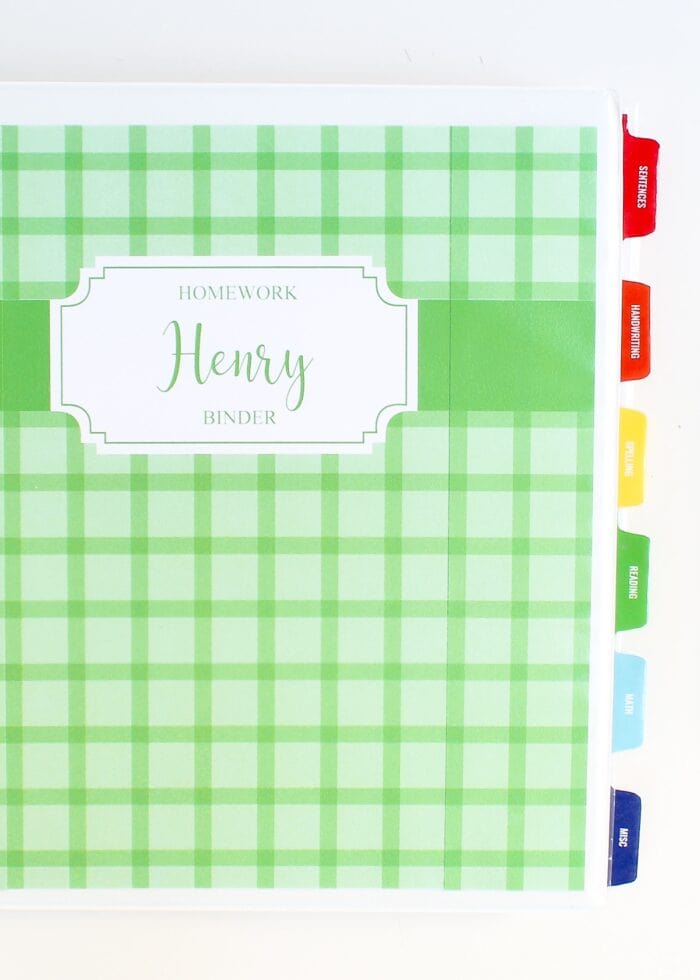
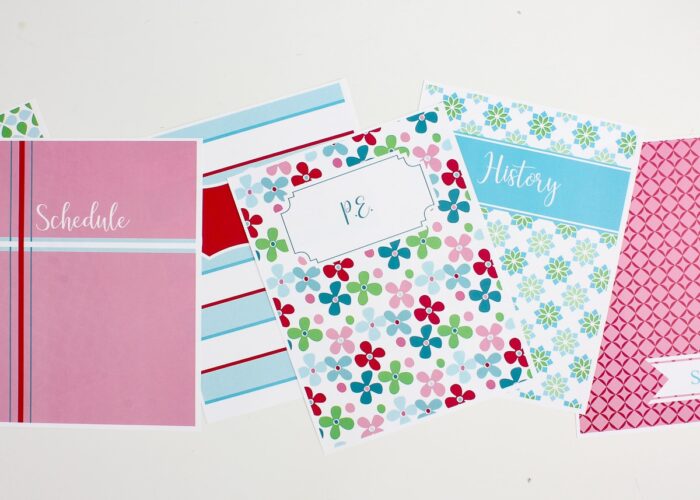
The highlight of the Beautiful Binder Bundle is the 10 different printable binder covers, each featuring a fun, colorful pattern and blank spot for labeling. Not only can the pages from a single color family be mixed and matched to your heart’s content (to create a collection of coordinating binders or color code within one binder), but the different color schemes and variety of patterns ensure you’ll land on a combination that perfectly suits your preferences!
Editable Binder Covers, Dividers, & Tabs
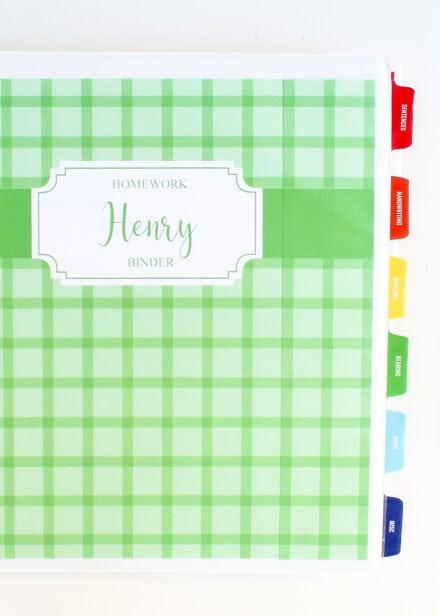
The chic binder covers, divider pages, and tabs all feature editable text boxes, so you can type in any name, label, subject, or other identifier you need. While you can type in anything you want, it’s important to note that the colors and fonts cannot be changed, as they are pre-set to match the overall cover designs.

Although printing out your own binder covers and making your own tabbed dividers isn’t terribly difficult, I want to share some fun and creative uses for the printable pages included in the Beautiful Binder Bundle to help you create perfectly-customized solutions!
Editing the Printable Binder Materials
Editing the Printable Binder Covers
Seven of the ten printable binder cover designs feature a “label” field, where you can type in whatever title/name you want on the binder. Some cover designs include several text fields so you can add necessary descriptions, as shown on the top/bottom binders in the image below.
To add your own text to the binder covers:
- Open any of the printable binder cover templates (PDF) in Adobe Acrobat Reader.
- Take note of the light blue boxes within the document; these boxes indicate the locations where you can insert your own text.
- Click on a blue box and type away.
- Once you have the text exactly as you want it, print the page out or save it for future use.
NOTE: It’s important to note that the colors, font, and size of the text in these fields IS pre-set and cannot be changed. If your title/word doesn’t fit, you will need to make it shorter.
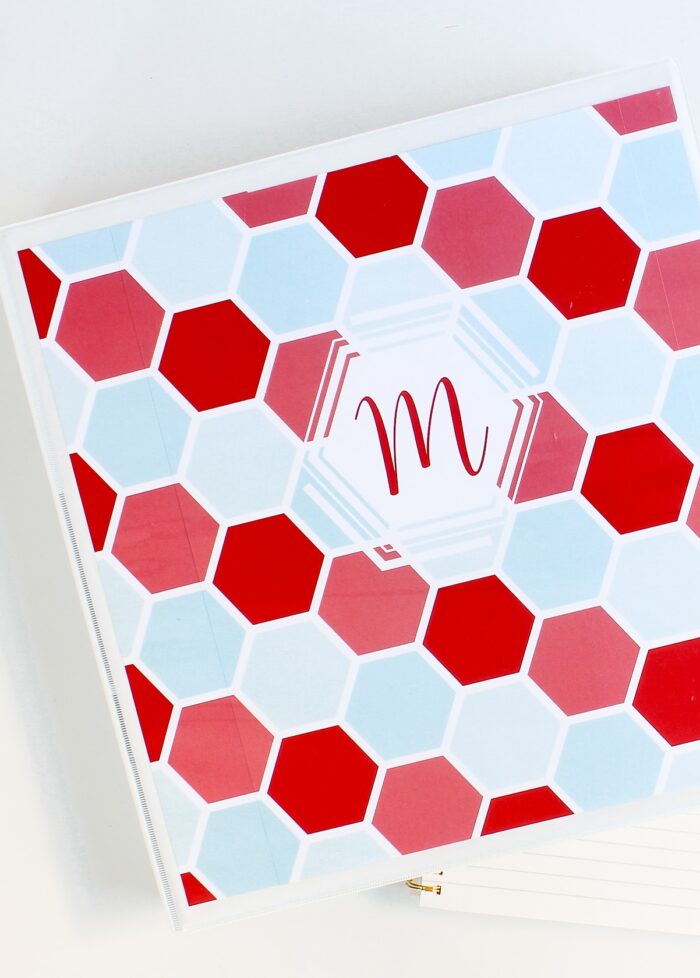
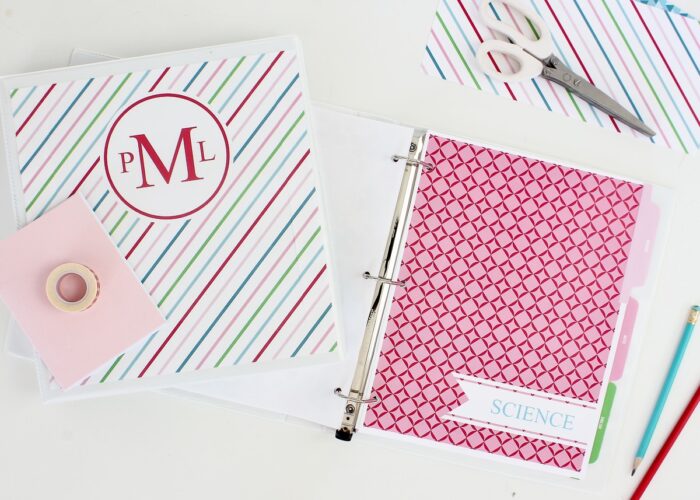
Editing the Monogram Binder Covers
Three of the ten binder cover printables feature a monogram design (instead of a word-length label). Customizing these for your own personal initials is also quick and easy!
- Open any of the Beautiful Binder Bundle kits in Adobe Acrobat Reader.
- Locate the monogram binder cover you want to use.
- The monogram covers have three unique editable text fields: one large, two small.
- The colors, size, and font of these fields are pre-set, so all you need to do is type in your letters and print!
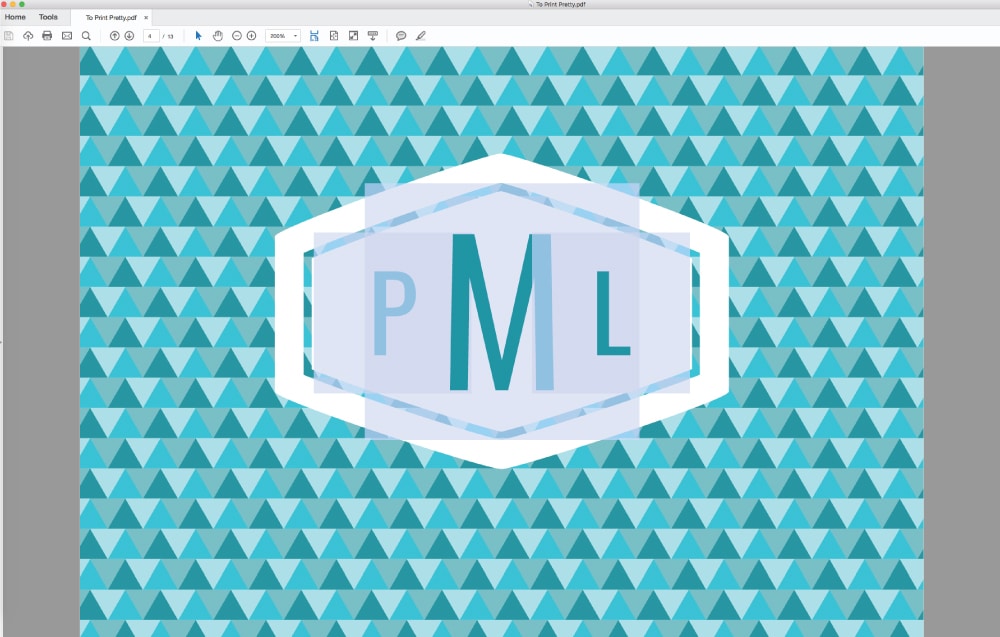
The triangle and striped covers feature a three-lettered monogram, while the hexagon cover features a single letter (which is edited the exact same way).
How to Print & Assemble the Binder Covers
Standard-Size Cover
All of the printable binder covers in the Beautiful Binder Bundle are designed to be printed on standard 8.5×11″ paper, making them truly print-and-go!
- Add the text to the cover you want.
- Print out with your home color printer.
- Slide the page into the clear front pocket of any binder.
Couldn’t be any easier, right?!?
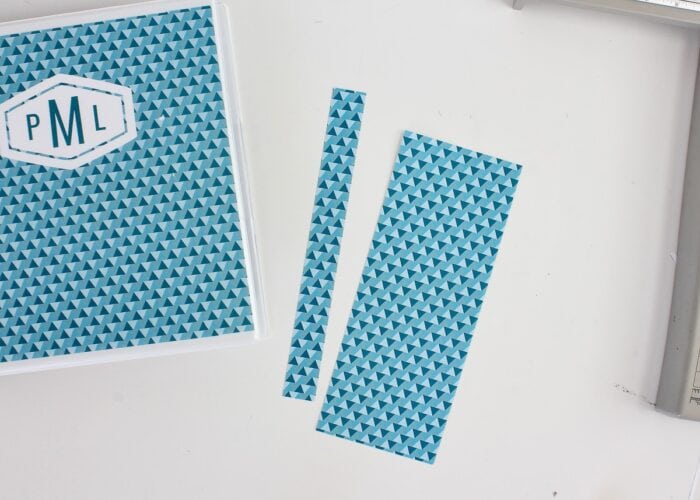
Wide Cover
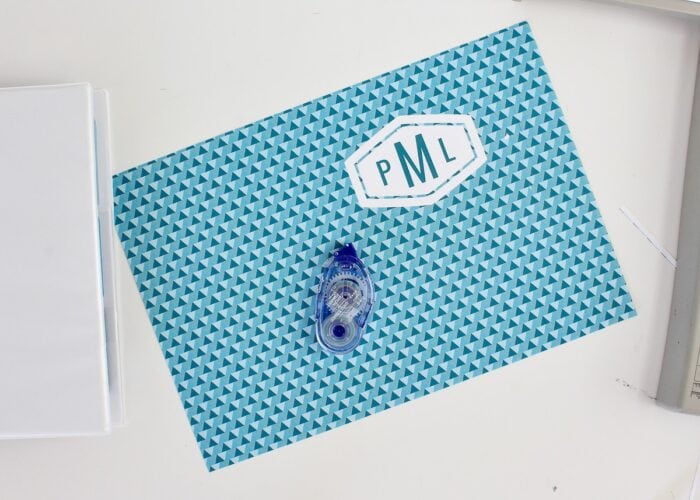
While an 8.5×11″ piece of paper will nicely fill the front covers of smaller binders (1/2″), many larger binders feature a 10″ wide cover. I don’t love the blank strips on either side of the cover (and how the page slips all around the clear pocket), so each cover was designed to be extendable in order to perfectly fit any size binder you have!
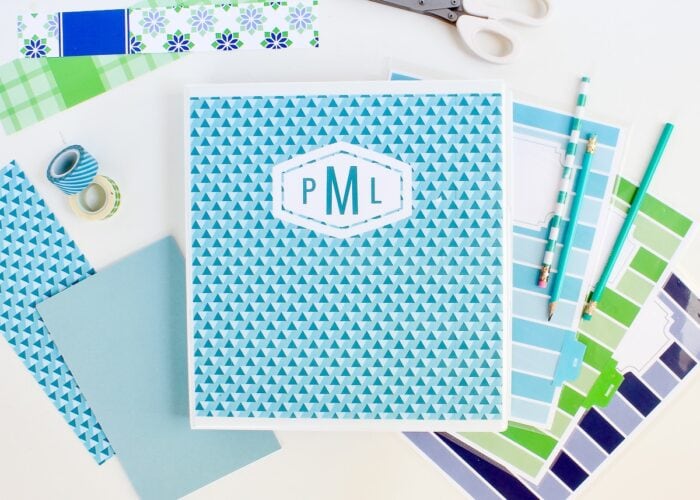
In addition to the 10 printable binder covers that have a place to insert text, each kit also includes 10 coordinating “pattern only” pages. While you can certainly use the pattern-only sheets however you wish, they are perfect for widening your covers and/or adding coordinating spines!
To widen your cover page, print both the cover and “pattern only” sheet (with the same background image) onto paper or cardstock.
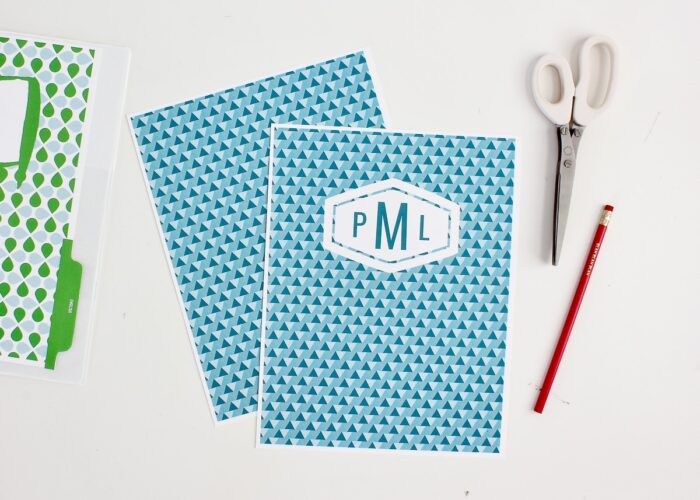
Use a paper trimmer or scissors to slice off any white margin on both sheets of paper.
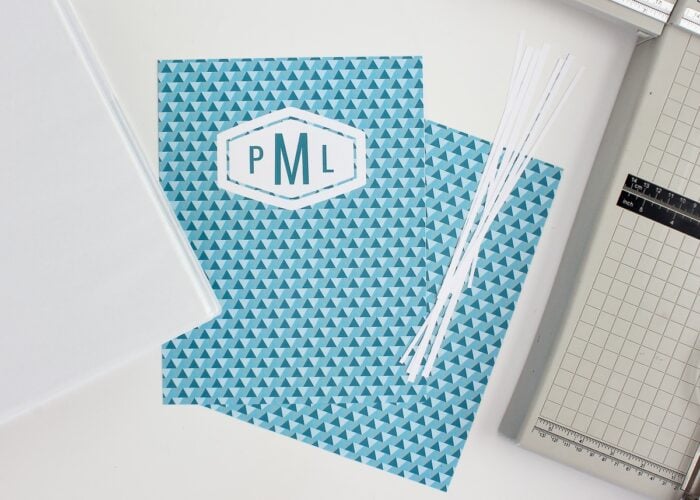
Then, taking care to match up the pattern perfectly, use double-sided tape or roller adhesive to attach the “pattern only” sheet to the right side of the cover.
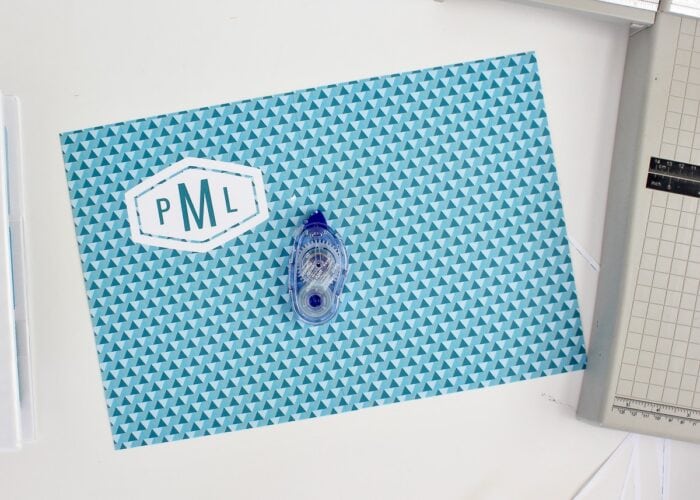
Measure ~5″ (adjust if you have a bigger binder) to the right from the center of the typed label (in my case, the center of the M) and trim with a paper cutter. The right side of your extended binder cover is now complete.
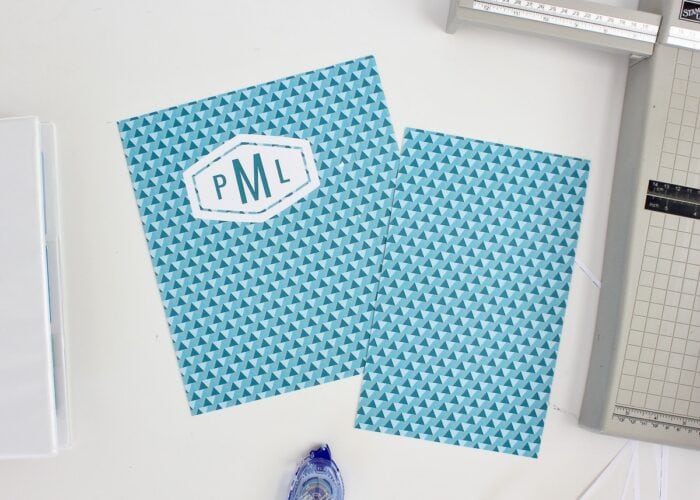
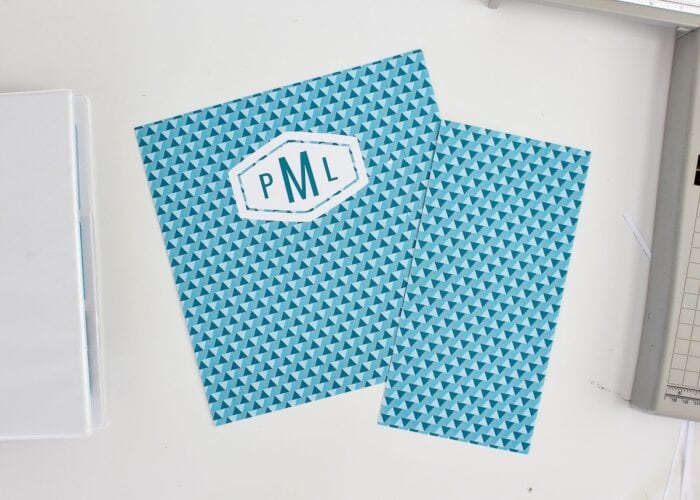
Take the remaining slice of “pattern only” paper and attach it to the left side, lining up the pattern just as you did before.
Use the paper trimmer to slice down the entire sheet to 10″ wide (or whatever dimension your binder is). Now you have a 10″ wide binder cover with your label in the center!
How to Print & Assemble Binder Spines
To create coordinating spines for your binders, simply print out another “pattern only” page (or use the excess from your binder cover) and trim it down to the correct width of your particular binder spine.
TIP! Print the different spine and cover sheets onto heavy white cardstock so they are easier to slide into the clear pockets.
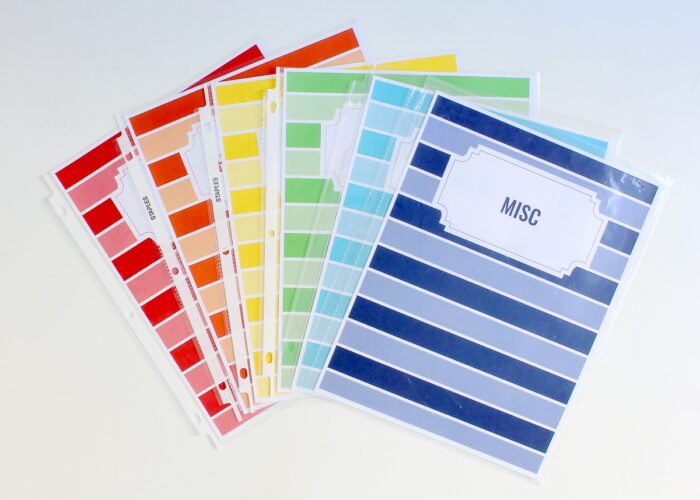
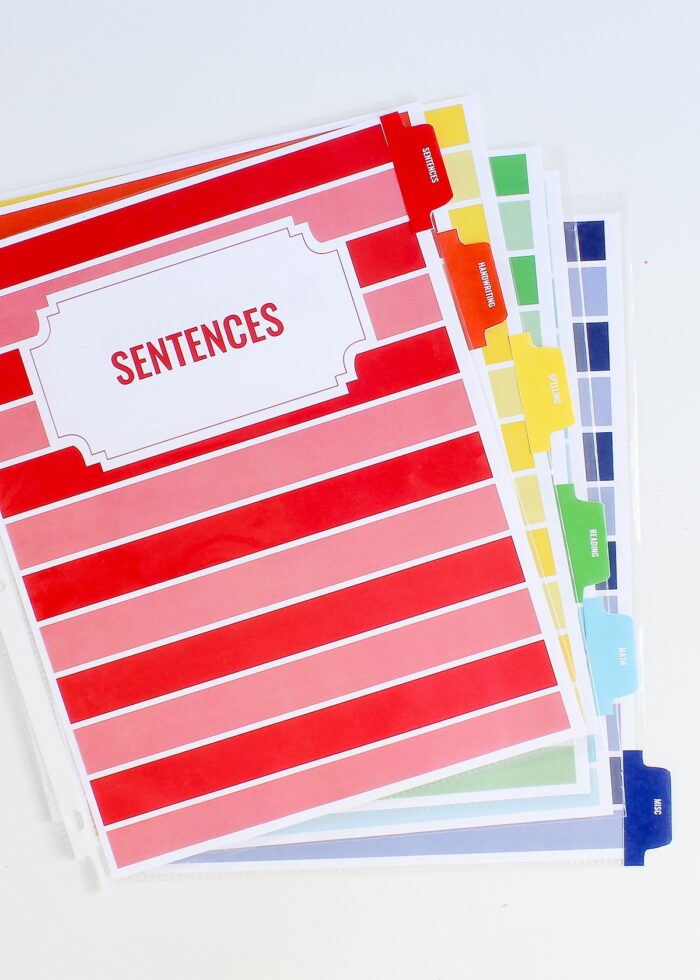
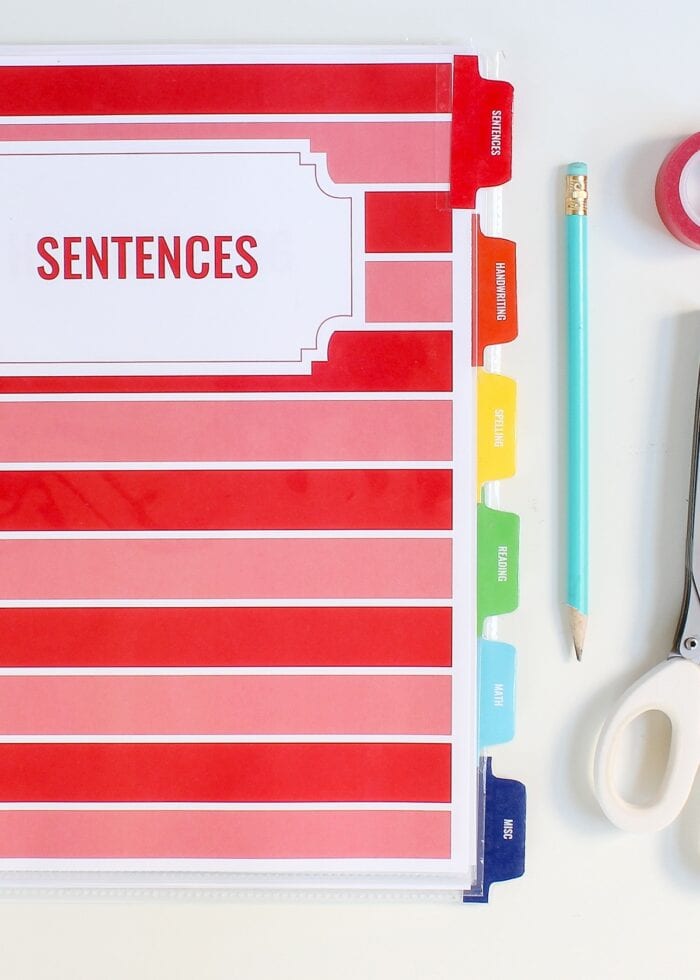
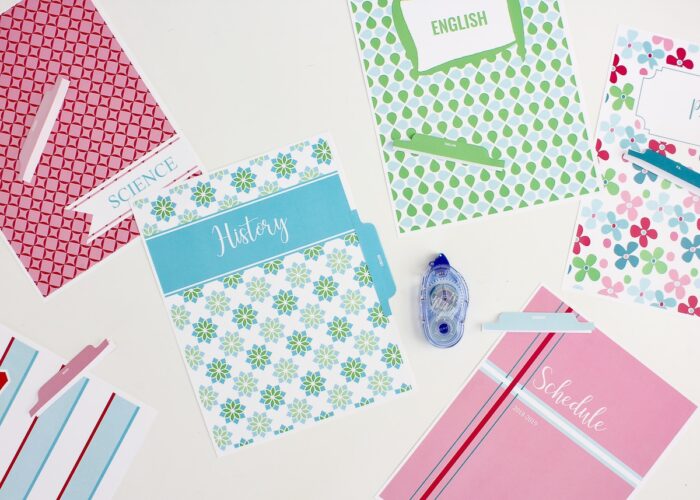
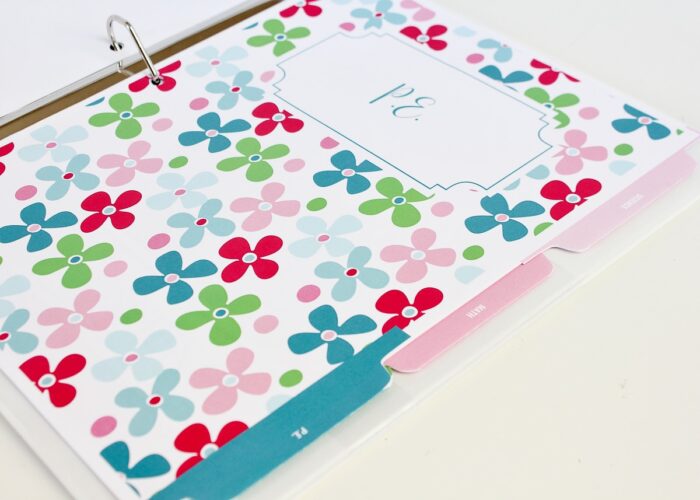
How to Make Binder Dividers
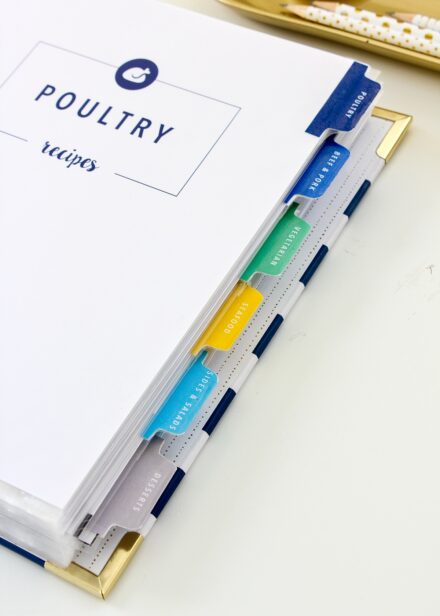
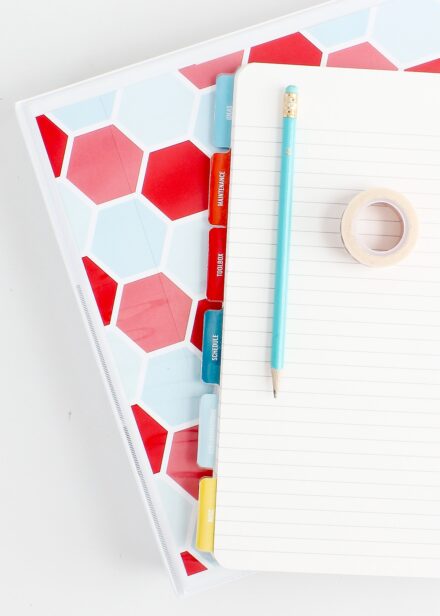
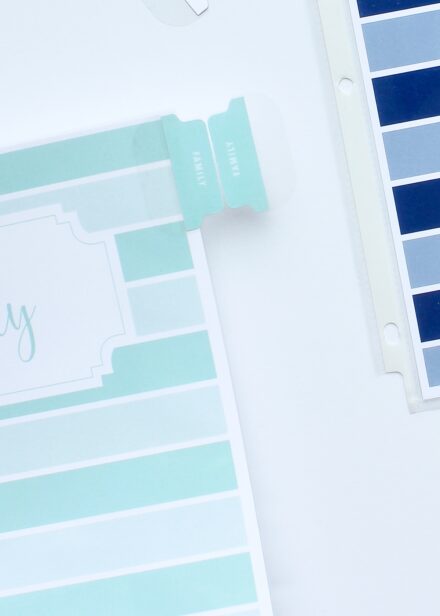
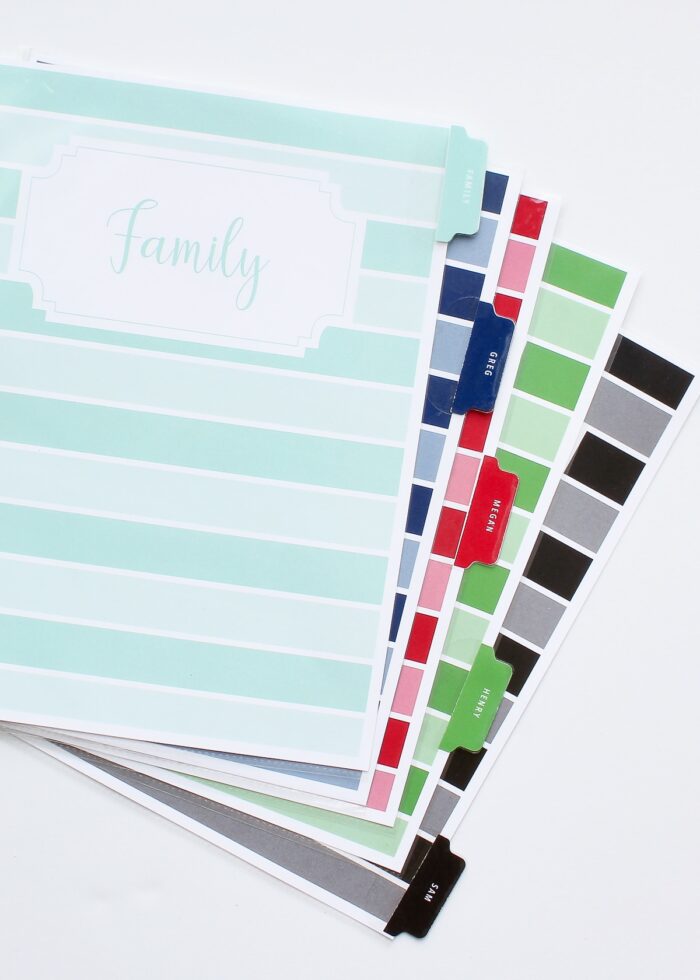
Each kit in the Beautiful Binder Bundle includes 6 sheets with coordinating two-tone stripes. These pages also feature label text boxes. So while they can technically function as stripe binder covers themselves, they were intended to be coordinating divider pages for inside the binder.
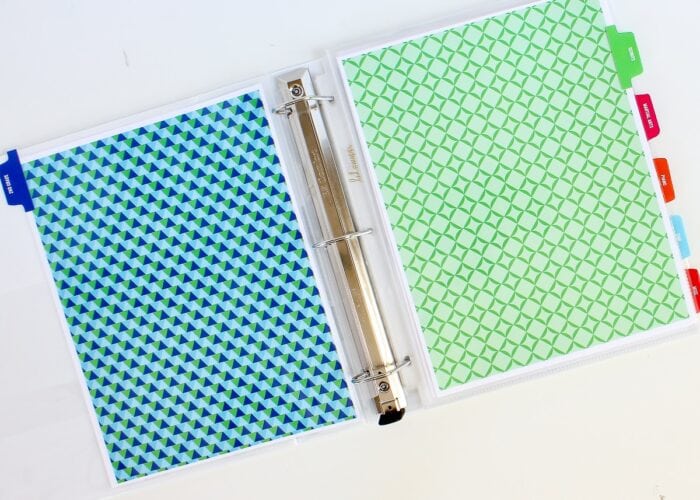
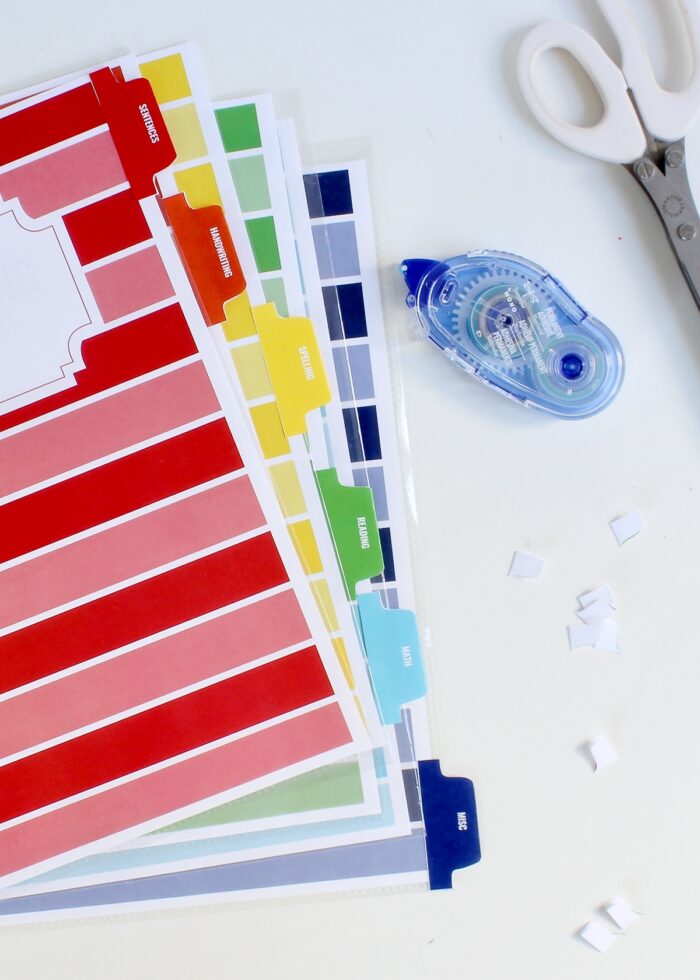
My absolute favorite way to make dividers for my binders is using page protectors. Not only do the plastic coverings help the divider pages stand out a bit more in a full binder, but they also help extend the tab further to the right (so they are easy to see and grab).
To make dividers with page protectors:
- Type the category names into the label boxes on the striped pages (or any pages you wish!)
- Print onto heavy white cardstock (to give them some heft)
- Slide them into clear page protectors
- Add tabs to the outside of the page protectors (I show how to do this further down in the post)
- Slide them right into your binder to have chic dividers that perfectly match your printable binder covers!
Other Binder Divider Ideas
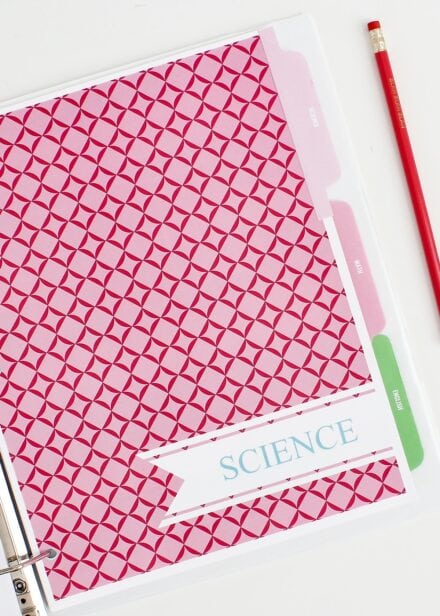
If there’s one thing the kits inside the Beautiful Binder Bundle offer, it’s flexibility! So since you can type anything into any of the colorful binder covers. you can therefor use any of them as dividers.
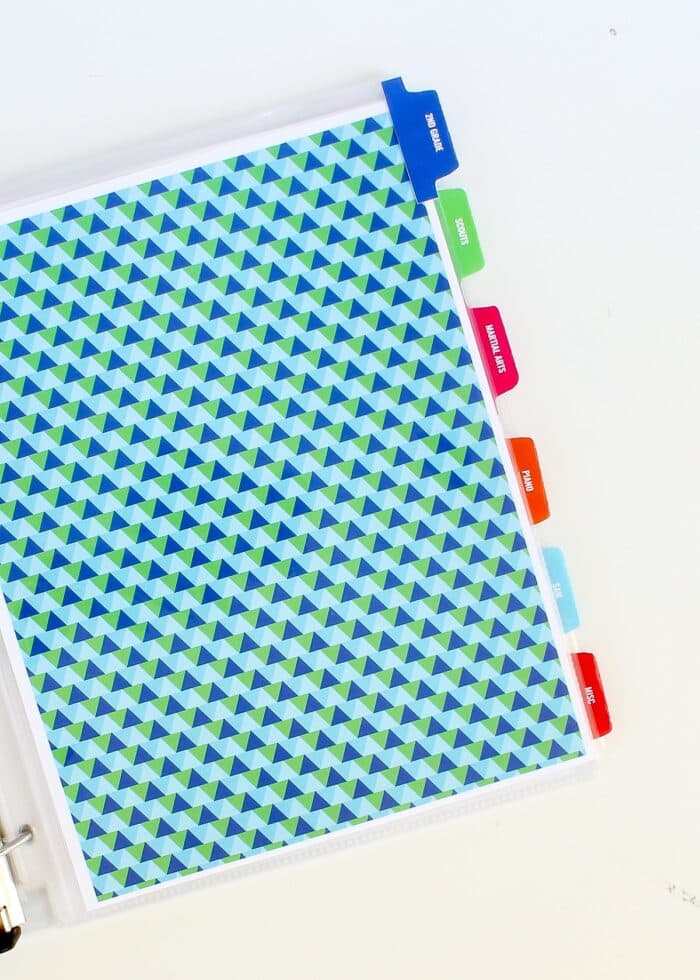
Below, I used several different covers from the Pretty color scheme as dividers for a 4th grade school binder. After typing a different subject onto each cover, I printed them onto heavy cardstock and punched each one with a three-hole punch. The heavier paper (plus the tabs) help them stand out as dividers among a binder full of paper.

Another option is to not use the labeled covers at all! For another school binder, I just printed the “pattern only” sheets double-sided onto heavy cardstock. The labeled tabs (instructions down below) help me know which section is which; and boy I just love those bright splashes of color as I page through!
How to Make Divider Tabs
Alright, friends – let’s talk about divider tabs!!! (You’re now going to see what a serious paper/office supply geek I really am!)
Whenever I printed out other free binder cover templates I found online, I didn’t like having to rely on store-bought tabs (that obviously didn’t match) to keep everything sorted out. Well, no more! The Beautiful Binder Bundle kits have three different (and VERY easy!) ways to make tabs for any binder system you are putting together. And best of all, they will coordinate perfectly with all your other printed materials (e.g., covers, dividers, spines, etc)!
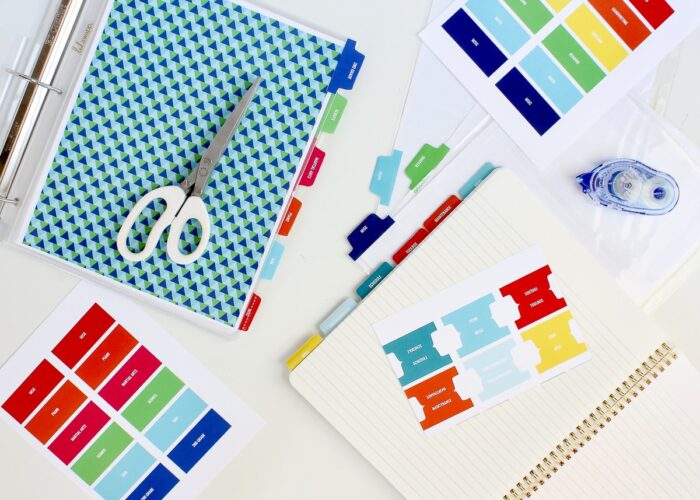
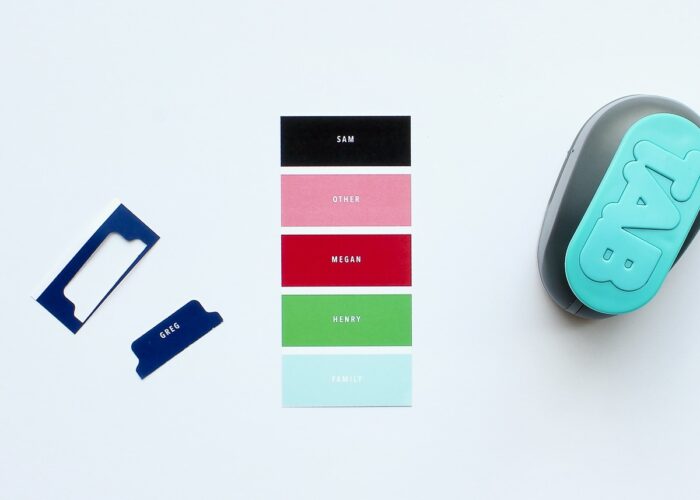
Each kit includes two pages of color-coordinating tabs in three different shapes/sizes:
- Small print-and-cut tabs
- Large print-and-cut tabs
- Colored boxes (which can be trimmed/punched down and slid into clear tabs such as these and these).
All of these tabs have editable text fields so you can type in whatever you need on your tabs!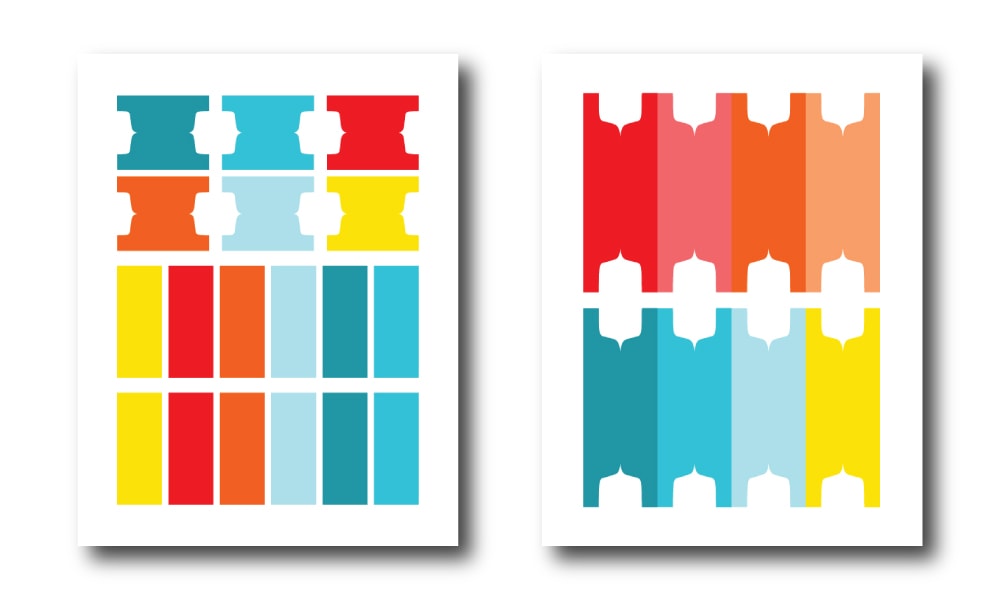
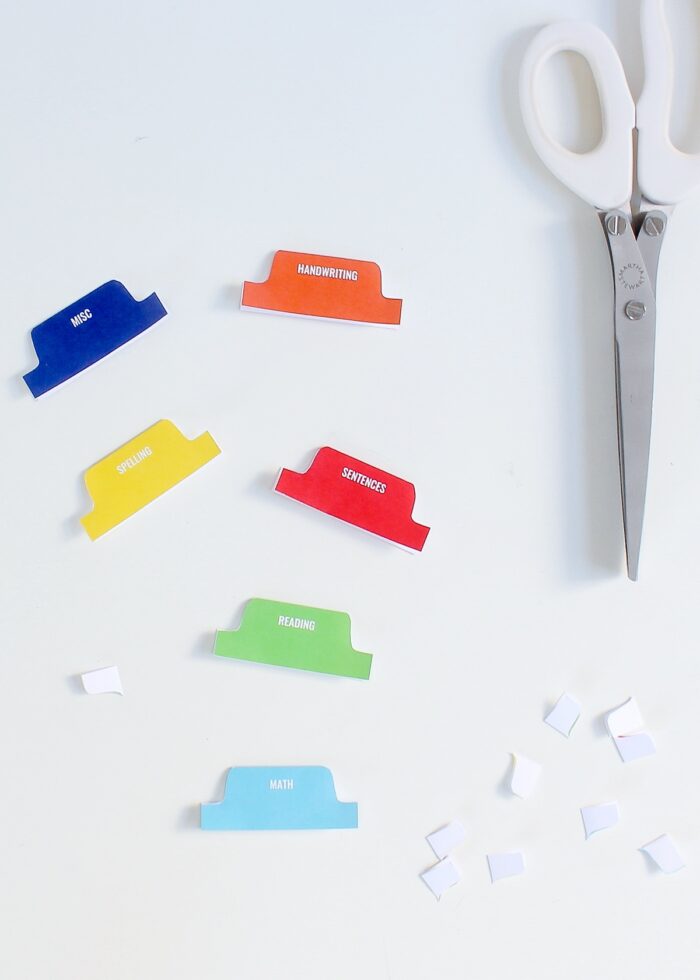
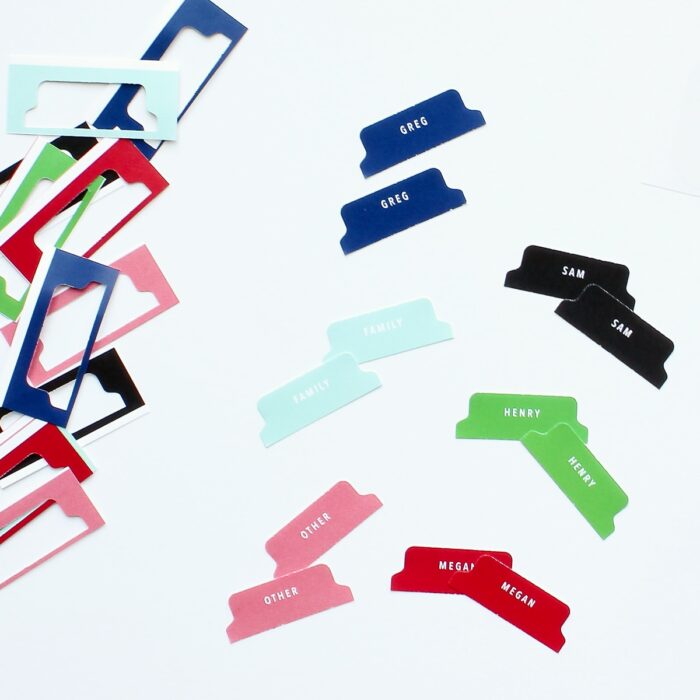
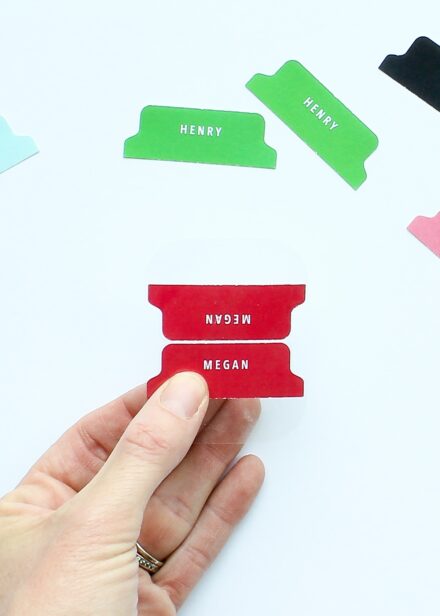
Small Print-and-Cut Tabs
These tabs are sized to fit 6 down a page, and color coordinate with the 6 colors used throughout the rest of the kit.
Start by typing your category names onto the tabs, and print them out onto white cardstock. Then, cut out each tab shape with a paper trimmer as shown below (NOTE: I didn’t cut out the notches yet).
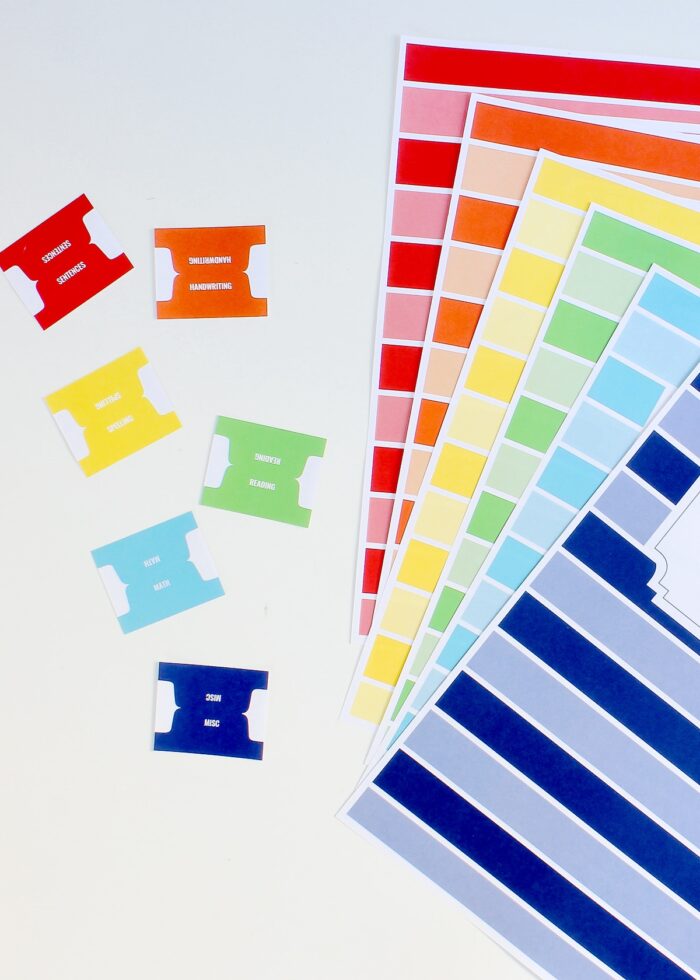
Next, fold each tab in half, as shown below.
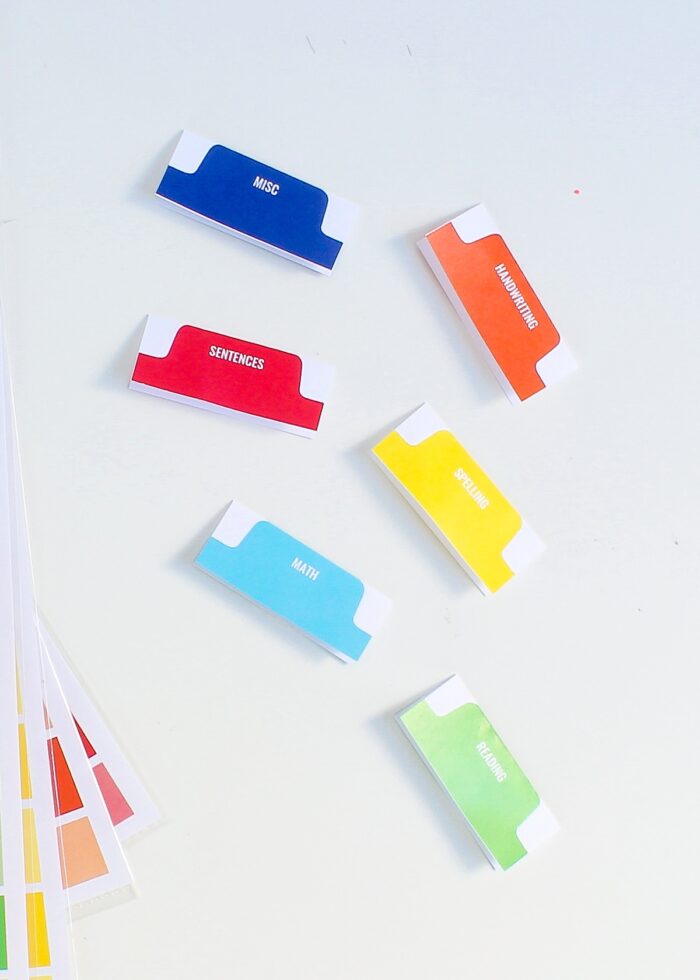
Once folded, use a sharp scissors to cut out the white notches on each tab.
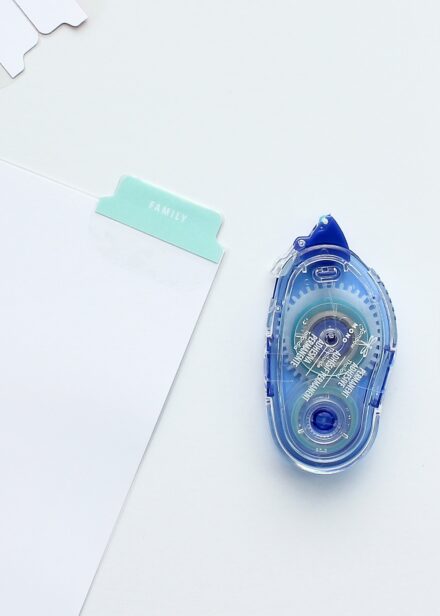
Whether you have your dividers inside page protectors or printed onto thick cardstock, use roller adhesive to attach each tab to the right side of the corresponding divider page. I like to use the white margin on the divider page to line up the placement of the tab. Also, ensure you space them evenly down the length of all the divider pages.
You may certainly leave your tabs just like this, but I like to make mine a little more durable. Sending a sheet this wide through a laminator isn’t really an option, so I use the next best thing: packing tape!
Simply fold some packing tape over each tab (front to back) and then use a scissors to notch out the corners. Not only does this step make your tabs a little more durable, but the tape ensures they will stay stuck to your divider pages for the long haul!
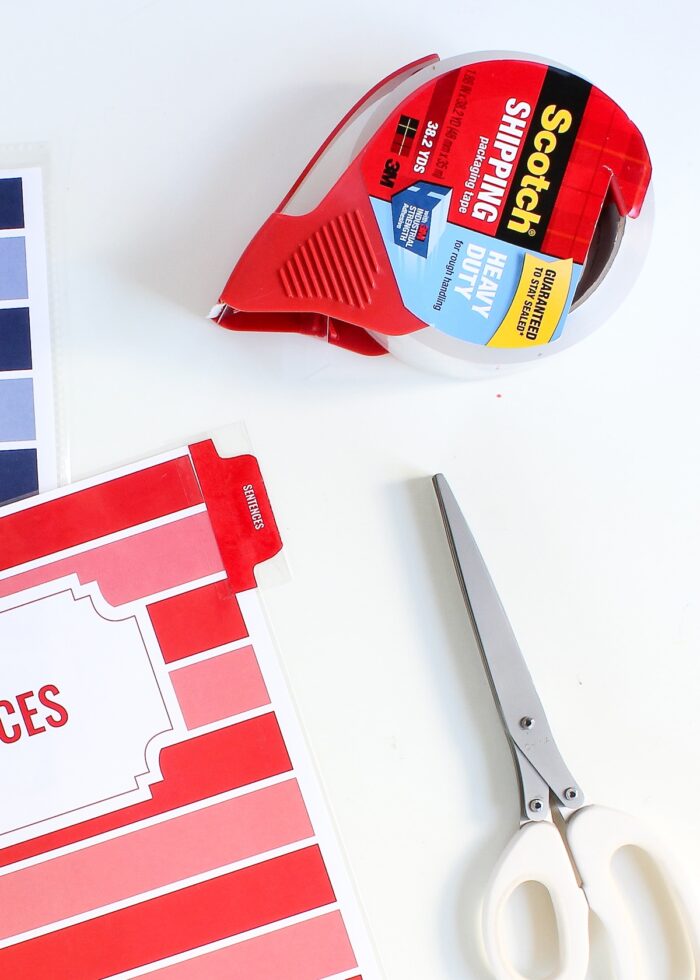
This print-cut-tape method might seem a little…primitive…but it’s actually my very favorite way to make custom tabs for all my binders. Not only is it really easy (just print, cut, tape), but this method creates perfectly matching tabs that are clean, custom, and durable. I first made tabs like this for my Kitchen Binder more than 5 years ago and they are holding up AWESOME! I’ve since made them this way for every binder I assemble.
Large Print-and-Cut Tabs
The exact same method can be used to make bigger tabs. Simply edit and print the larger tabs, then cut and attach the same way as shown above.
Getting the spacing on the larger tabs is a bit easier since they only run three down the page. I recommend starting with the middle tab and then spacing out the top and bottom ones accordingly.
Punched Tabs
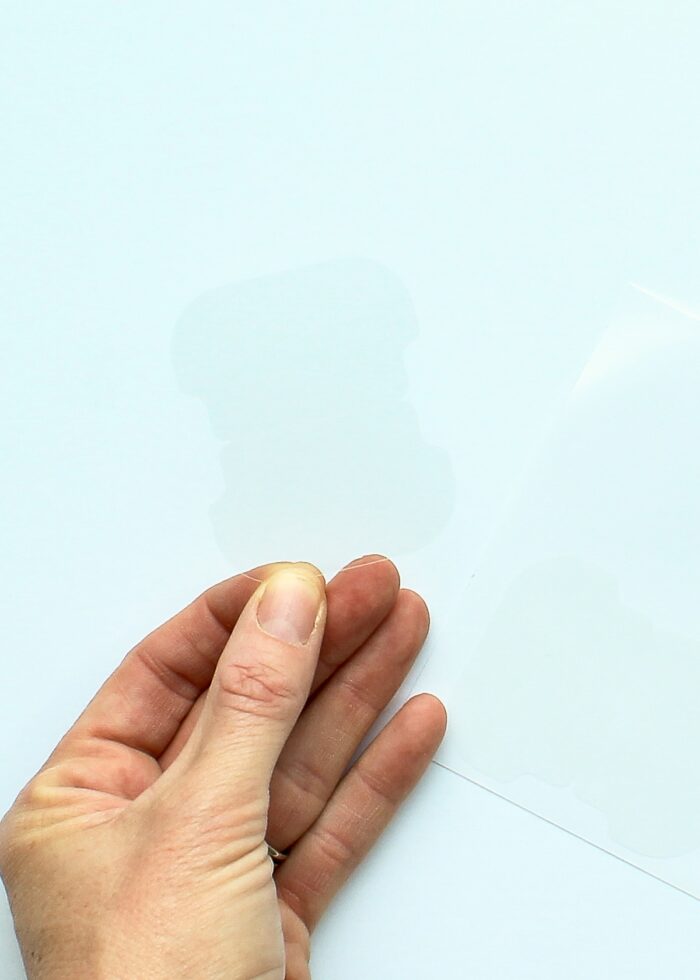
If all that cutting and taping seems like too much of a nuisance to you, I want to show you one more fun way to make coordinating tabs for your binders using these printable kits. This method is how I made the tabs for our family’s Important Documents Binder, and you’ll love how quick they are (and professional-looking too!)!
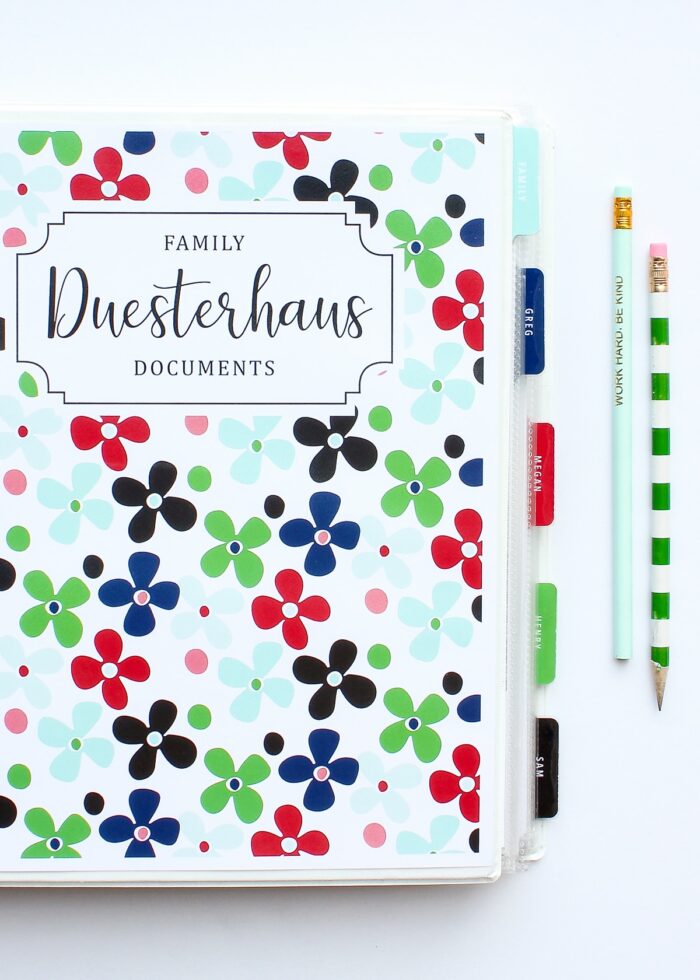
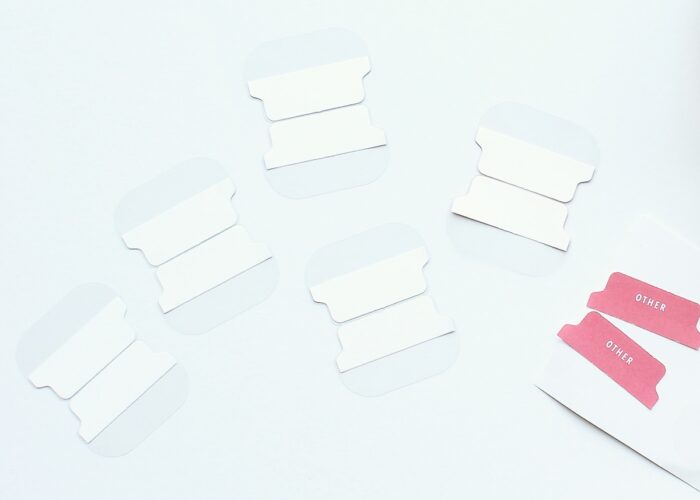
This method combines the editable colored blocks in the Beautiful Binder Bundle with this awesome Tab Punch and coordinating stickers by WeRMemory Keepers.
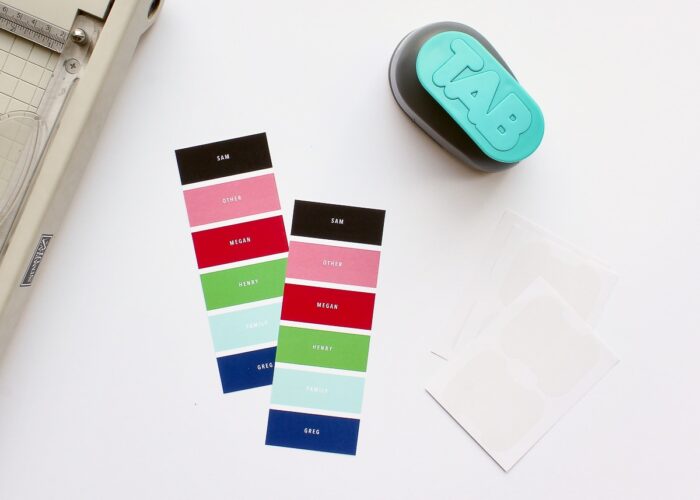
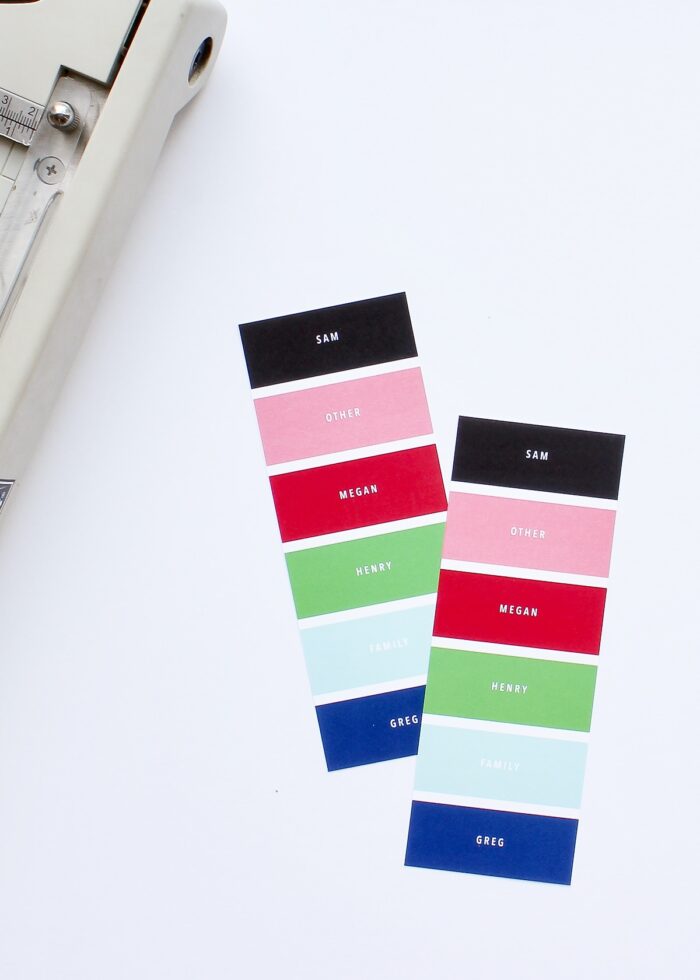
Start by adding your text to the colored blocks and then trim them down with a scissors or paper trimmer (Note: You’ll need to cut two of each color for double-sided tabs).
Then, flip the Tab Punch over (so you can see what you’re doing) and center the bottom tab in the window. Punch out the tab.
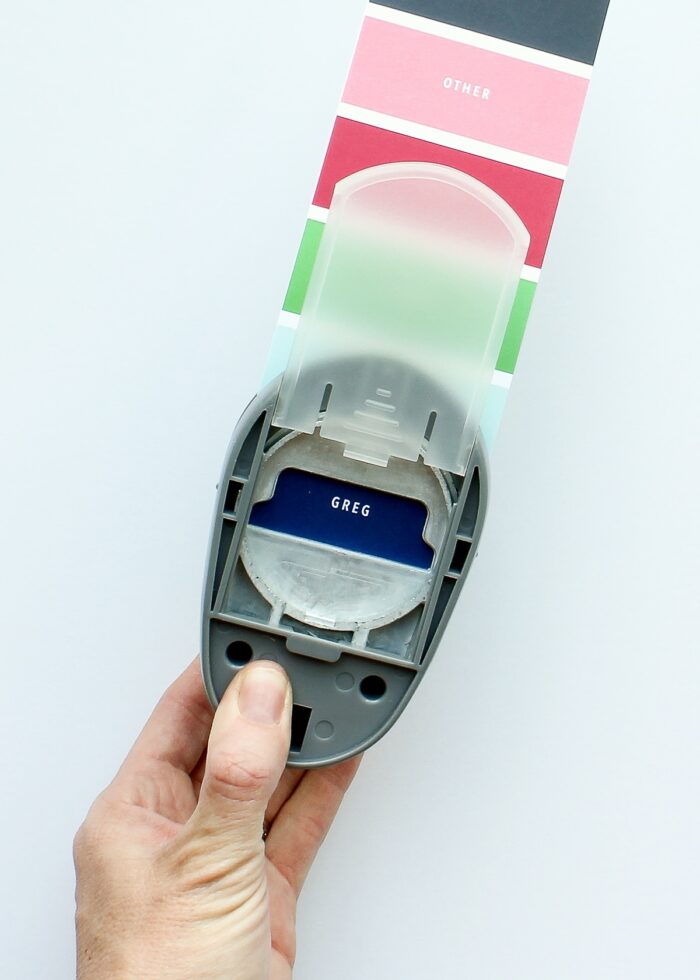
In order to keep punching tabs, you will need to slice off each color block as you move up the strip.
Next, peel off the clear adhesive tab stickers from the paper backing and place them sticky-side-up on your work surface.
Place the two matching punched-out tabs, colored-side down, onto the sticky adhesive, making sure that everything is straight.
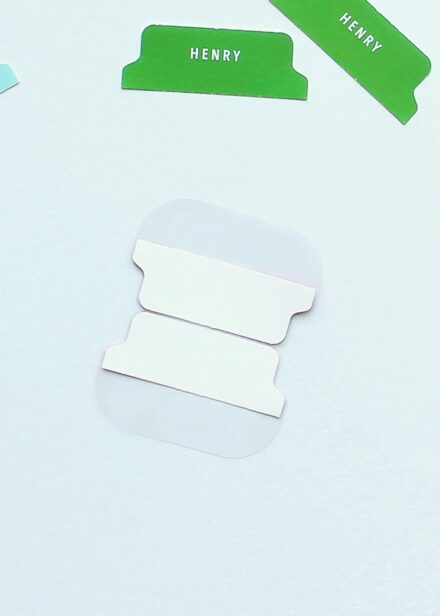
Before applying your tabs, spend some time figuring out your tab placement. These are sized to fit 6 down the page, but you can use as many or as few as you need.
Once you know where they should go, fold over the tabs along the edge of your dividers/pages. The adhesive tabs will stick, holding everything in place while creating perfectly “laminated” tabs down the side!
TIP! I found a dash of roller adhesive on the inside of the paper cutouts (before they’re folded together) helpful to keep the tab closed up nice and tight.
These clear tab “stickers” create the same durable results as my packing tape hack shown above, but in a much quicker and cleaner way! This is seriously one of my new favorite labeling products!

Get These Kits!
All 5 binder color schemes are bundled together into one convenient download. Learn more about the Beautiful Binder Bundle or download it immediately below!
Have an All Access Pass to The Organization Toolbox? Login HERE to get this download!
If you can’t already tell, I am practically giddy over these cute binder covers. With ten fun patterns and five color schemes to choose from, there are SO many possibilities for creating binders that are coordinated, customized, and just so YOU!
Whether you want to use these to get ready for the next school year, organize other resources from The Organization Toolbox, or simply create a beautiful binder for your own personal needs…get to it, my friends! Because the only thing more fun than looking at all these pictures of pretty office supplies is creating them yourself!

Megan


4 Comments on “Make Your Own Cute Binders (with Printable Binder Covers!)”
Oooh! I’m super picky about graphics and patterns. I usually only like 2 or 3 from a set but I LOVE 8 out of 10 here. Now I have excited jazz hands too!
Also, what is the 2018/2019 Activities and Information file? That sounds like an exciting idea…
Megan, I just ran across your page when I saw the tab option on Pinterest. This is one of the “best” sites I have come across with almost everything included in the post and simply described on “how to do” including making those tabs! I never heard about the clear tab stickers before and that’s a great idea. I’d love to start learning to make these myself someday and you’re a great inspiration. I go through and share what I find a lot on my Pinterest page, especially planners. There is a part of me that doesn’t want to even share your page and keep it to myself! No worries though, I’m sharing it with everyone. I just wanted to thank you for the great tab and page insert explanation.
Hi Barbara!
Thank you so much for such a nice message. I am so glad you found me and find my ideas helpful and inspiring! I personally love that Tab punch and find myself using it ALL the time!
Again, thanks for the blog-love and happy to have you along as a follower!
Megan