The Gallery Wall Up Close!
On Tuesday, I revealed my niece’s pink and orange bedroom makeover! As I mentioned, one of the main features of the room (and easily the part of the room that took the most work!) is the gallery wall behind the new daybed! There are so many goodies and fun projects on this wall, I wanted to give you all an up-close look!

I don’t know about you, but I have been seeing some amazing gallery walls around the blog-o-sphere lately, and I was so excited to do one in this makeover! However, what I DIDN’T realize was that to put a wall like this together, you need a lot of projects, a lot of time, and a lot of creativity! There are still some blank spots on this wall that will allow for expansion if myself, my sister, or my niece dream up other things to put up! But for now, we are calling it done!
Here’s what we came up with!
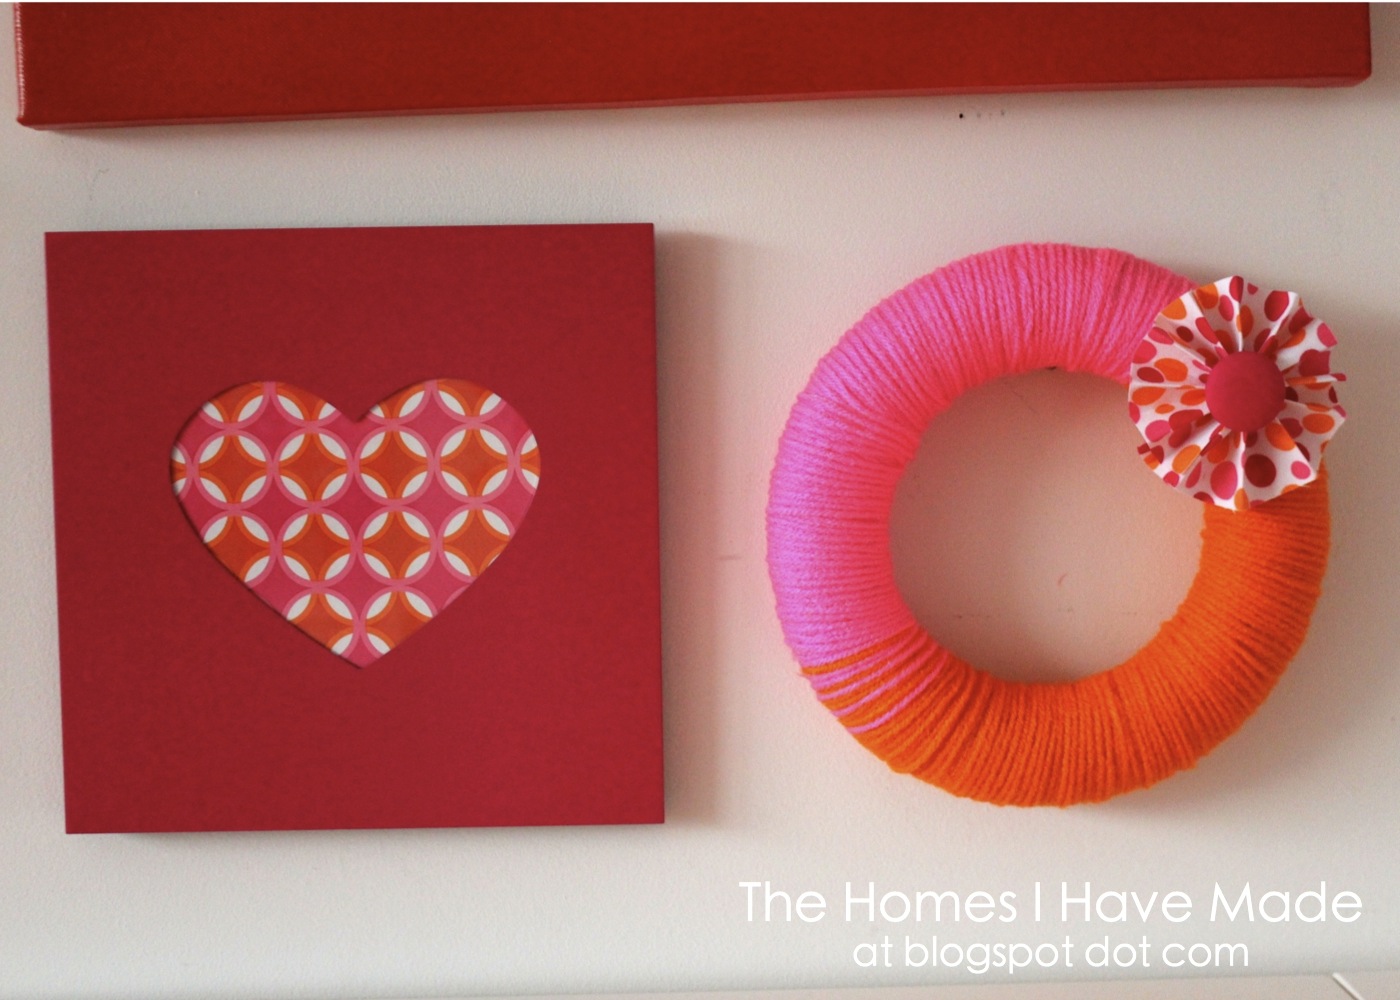
(Below left) A pink heart-shaped picture frame (from Hobby Lobby) is filled with geometric wrapping paper (from Target). So simple yet one of my favorite features on the wall!
(Below right) A small Styrofoam wreath (from Michaels) is wrapped half in orange yarn and half in pink yarn (from my sister’s basement 😉 A fabric medallion was made out of matching fabric using this tutorial!
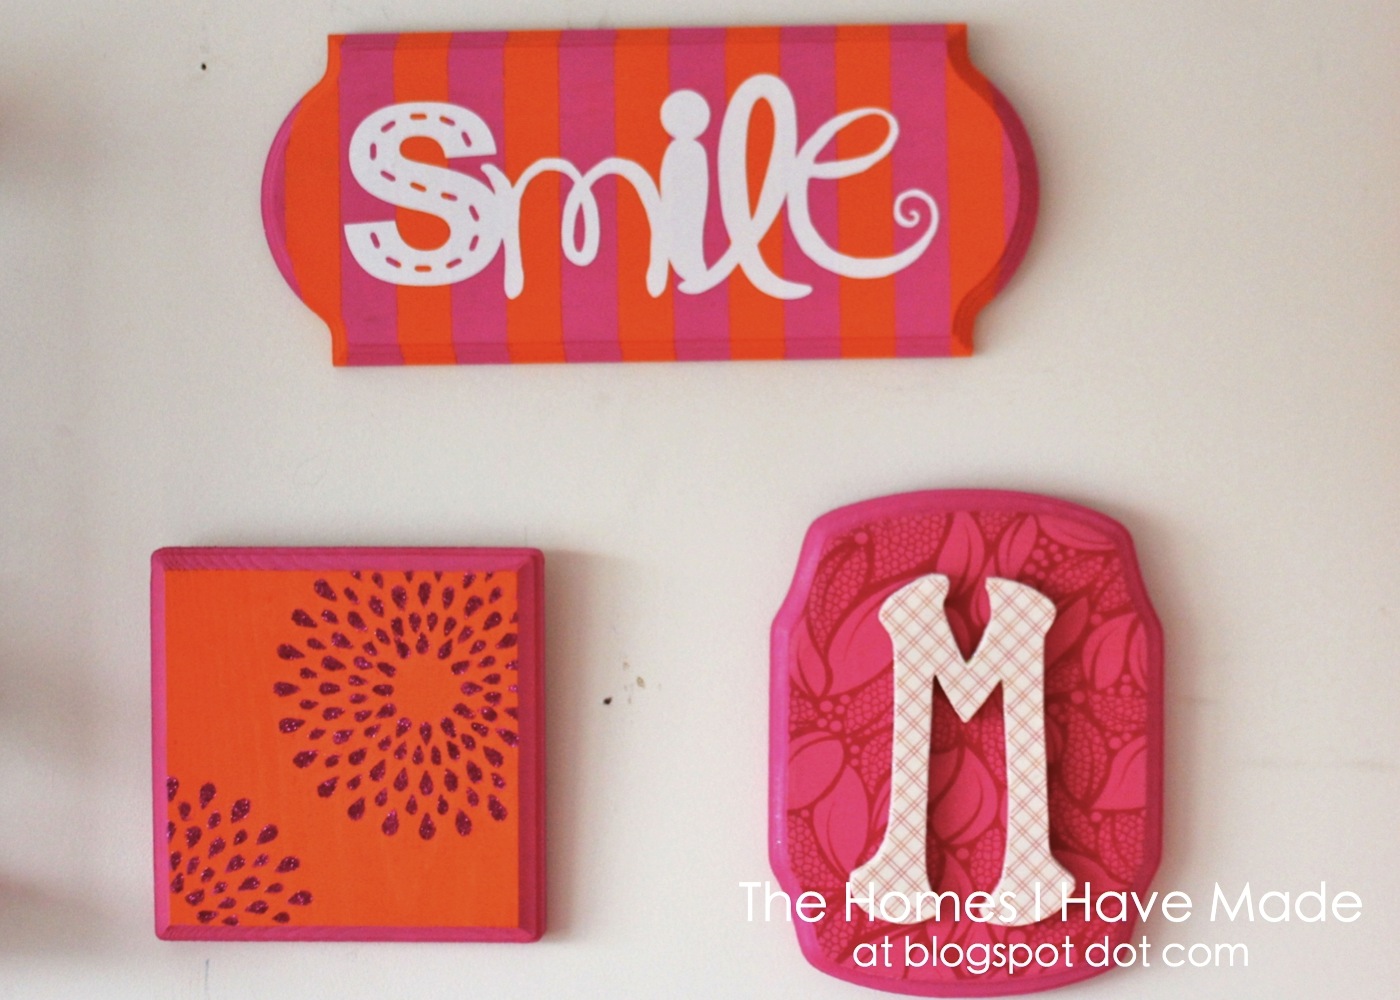
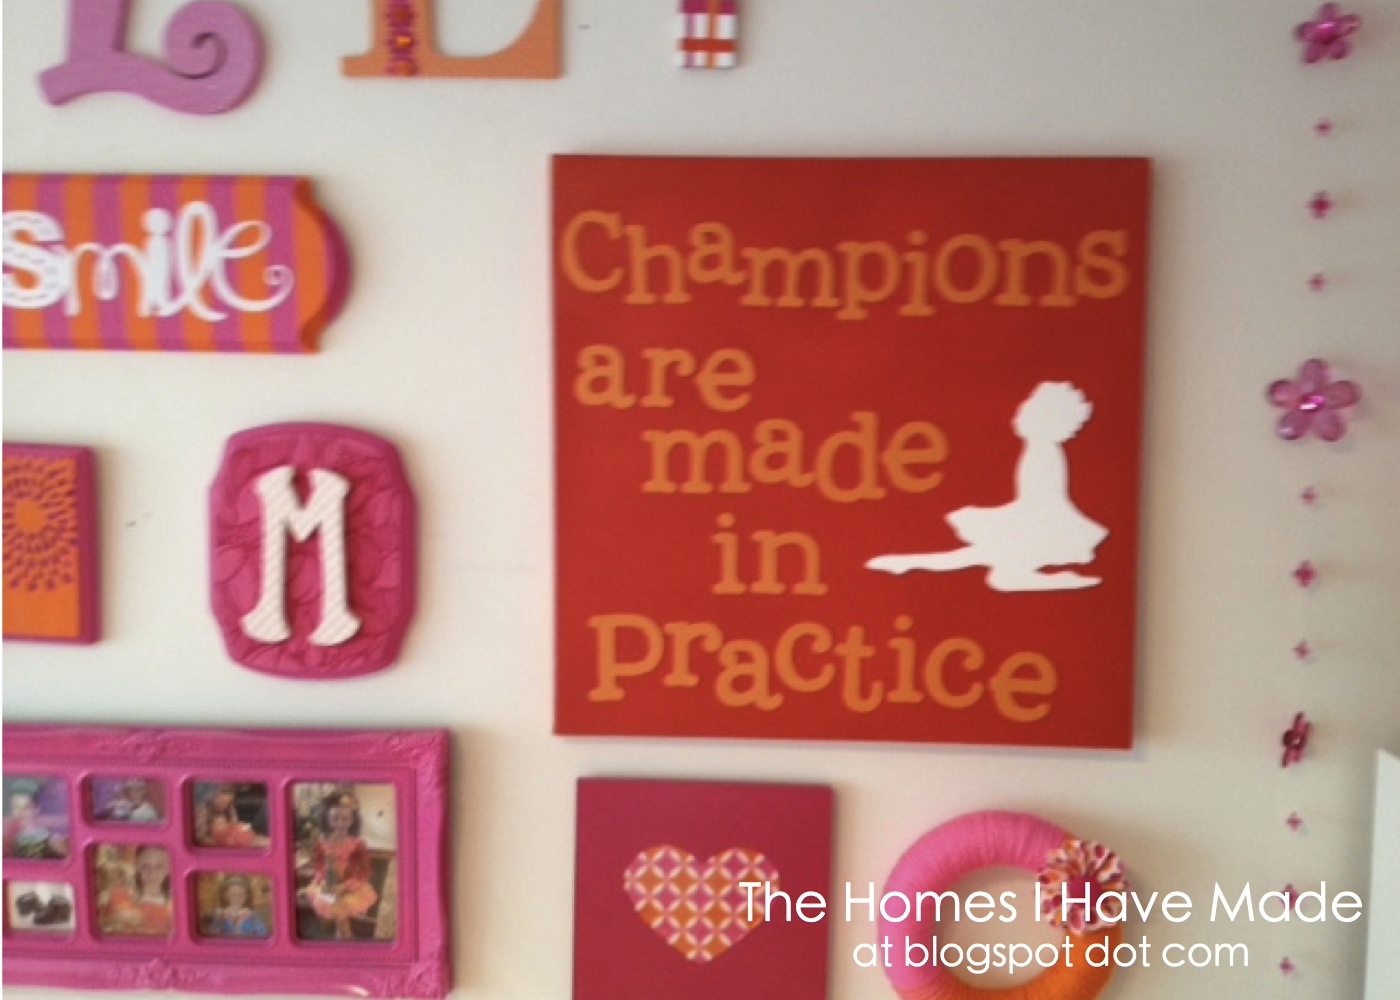
(below) Three wooden plaques (from Michaels) were given three individual treatments using paint, glitter, fabric, vinyl and scrapbook paper! I have tutorials on how to make each one – they’ll be up next week for you!
Each letter to spell out my niece’s name was given a different treatment as well!
(below) The “M” was already white when we bought it (from Hobby Lobby). My sister cut varying-sized circles out of pink and orange vinyl with her Cricut and put them right on!

(below) The “O” was brown cardboard to start (not sure where we picked this one up). We first painted the edges with pink craft paint. Then traced the “O” onto coordinating fabric and attached it with spray adhesive! The pink bow was simply tied right on!

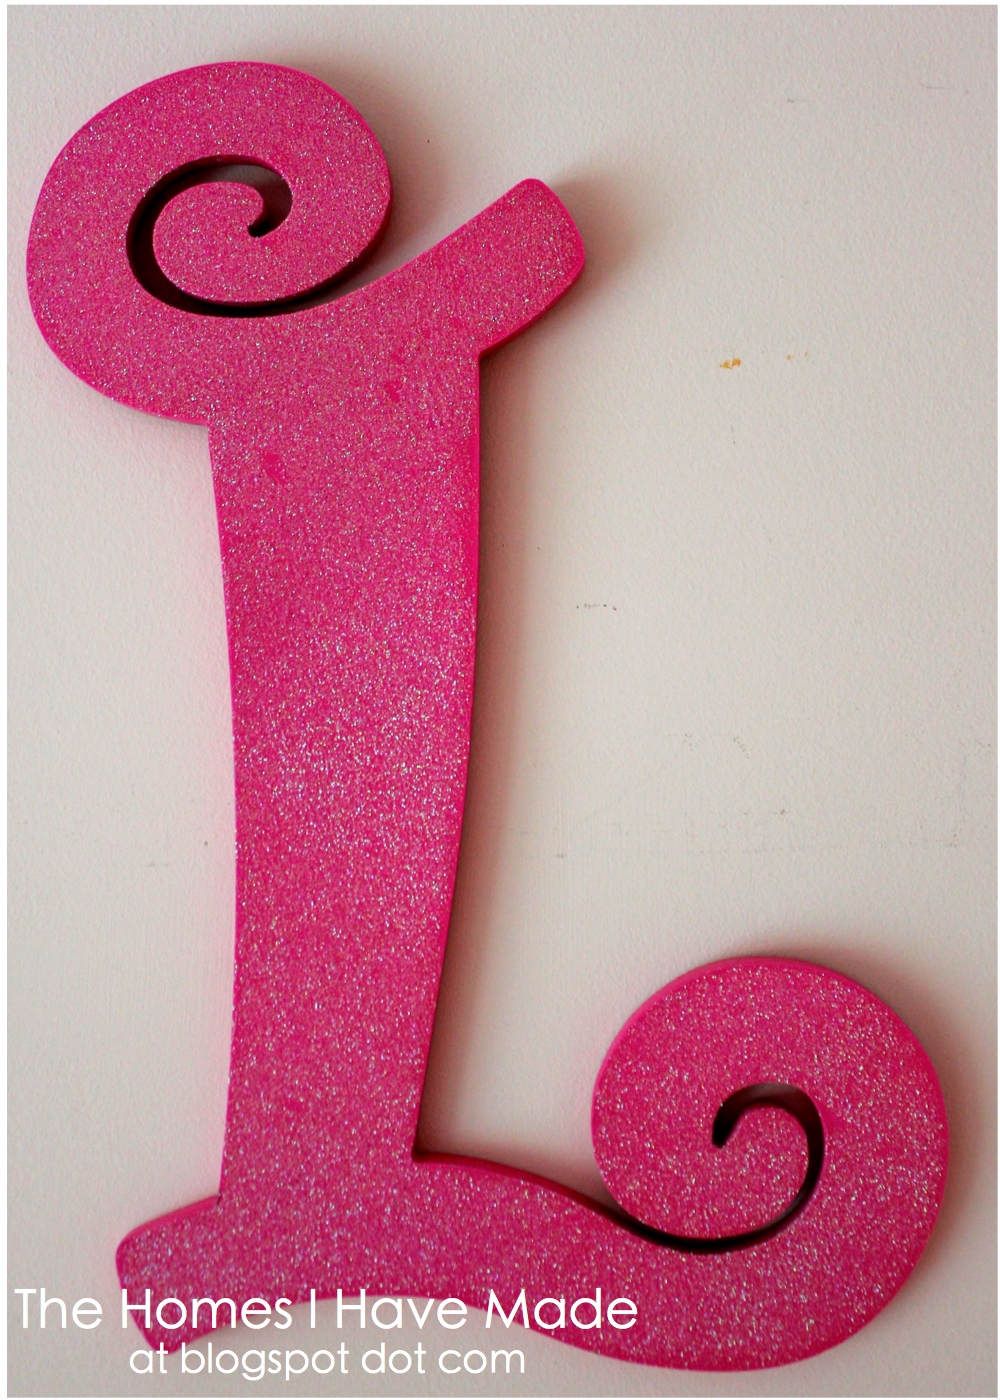
(below) This “L” was purchased and put up as is! Hey, don’t mess with a good thing, right?!?
(below) But this “L” needed fixing up! The brown cardboard letter’s edges (not sure where we picked this one up either) were painted with pink acrylic paint, same as the “O.” We then traced the “L” onto orange polka-dot scrapbook paper and attached with craft glue. The felt flower trim (from Michaels) and orange buttons added much needed bling down the center!

(below) Lastly, the “Y” was painted white; and then similarly to the “M,” we cut strips of pink and orange vinyl (using a paper cutter) and overlaid them in a plaid pattern!

(below) I was super excited to finally get to try my hand at some paint chip art for this room as well! (Although I felt very criminal walking out of Lowe’s with a handful of paint chips!) Using a variety of pinks and oranges, I laid the paint chips out first (to decide my pattern) and then glued them to a piece of cardboard cut to fit my frame. The “LAUGH” was cut out of white card stock using the Cricut, and was glued right on top! This is another one of my favorites!

(below) This was another project my sister and I were anxious to try: button art on a canvas! We used our flower template that we used throughout the whole room to place the buttons. Once everything was in place and we determined we had enough buttons, my sister went back and glued them all down one-by-one! Such neat texture, don’t you think?!? The “fame”is cut from vinyl. Note – we had a tough time getting the vinyl to stick to the canvas, so we ended up gluing it!

(below) Finally, the last element we finished up was this orange canvas! (You might even notice that in some pictures it’s not quite done..shhh…. 😉 We spray painted a large canvas bright orange. My sister then cut this phrase and Irish dancer out of vinyl and glued down all the pieces! Such a great motivational reminder to my “Champion” niece!!
There are a few other little elements on this wall that we didn’t make, but I can tell you where we found them!
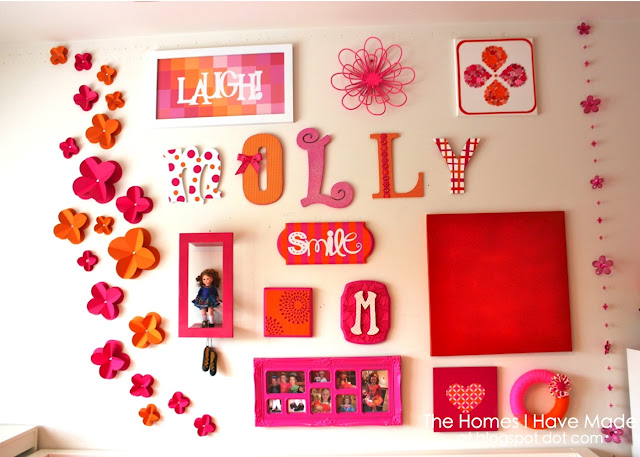
(top row center) 3D wire flower – Hobby Lobby
(far right) Plastic Flower Garland – Hobby Lobby
(third row left) 3D Doll Shelf – Hobby Lobby
(bottom center) Pink picture frame – Hobby Lobby
And last but not least, we made the 3D wall flowers down the left side…get the full tutorial here!

Hope you enjoyed the close up of our gallery wall! See you next week with some tutorials! Have a great weekend!

I am linking this post to:


See You Soon!
Megan
Megan

3 Comments on “The Gallery Wall Up Close!”
LOVE all of it! So cute!
love the colors. Might have to show this to my 7 year old.
This wall is so amazing! I really love the colors pink and orange together. All of these ideas are so great I might have to do walls for my two granddaughters!