Tips for Hanging Vinyl Stripes on the Wall
The family room in our current rental has proved quite challenging for me. Not only was the layout tricky to get right (because of just a few solid walls and lots of windows), but the brown walls, brown carpet, and dated fireplace made the whole room feel dark and muddy rather than the light and bright style I prefer. Because we can’t paint the walls or pull out the carpet, I was really struggling to come up with a design plan for this room that would not only give it that fresh, comfortable and stylish feel I was craving, but also make the whole space look and feel brighter. After much inspiration searching and brainstorming, I finally landed on a design plan that would meet my design goals while staying within our renter-friendly parameters (you can see my plan HERE!); and I am so excited to be revealing my first project in this room. Today, I want to show you the stripes we put on our family room wall and chat a bit about why we went in this direction and what we learned along the way!

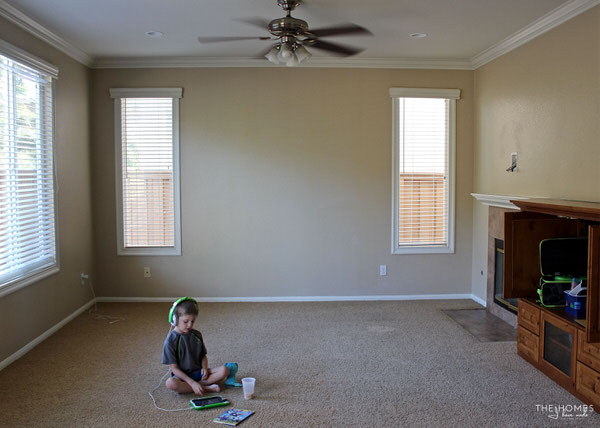
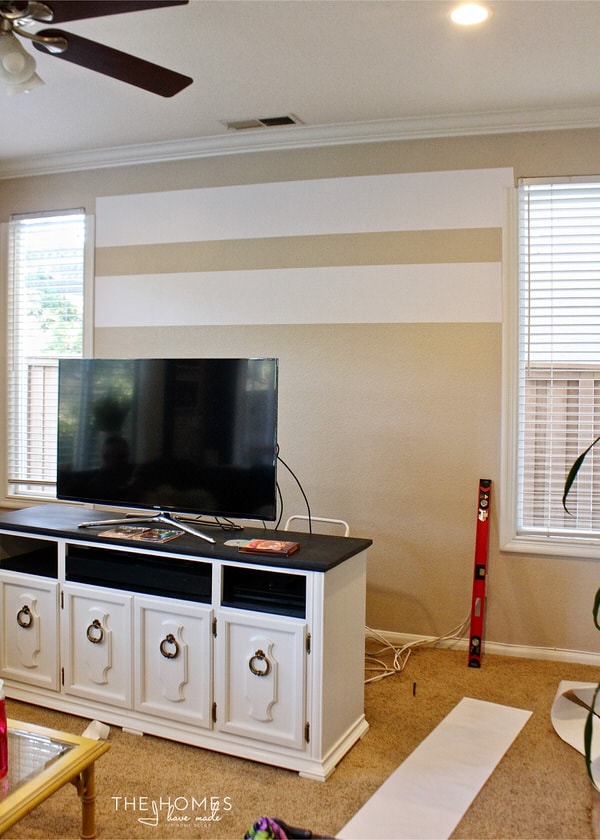
Just to recap, here is the room the day we moved in…
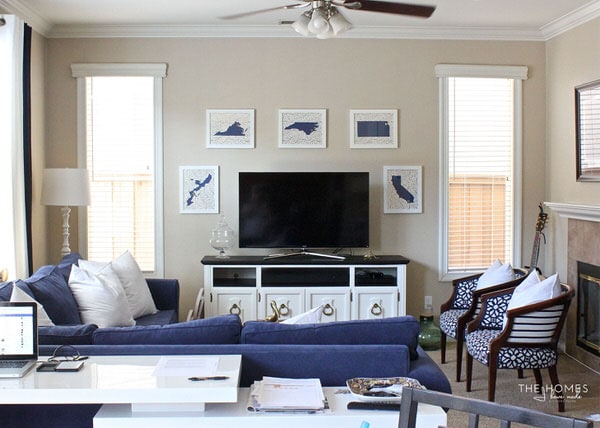
…and how it has looked pretty much since we got our furniture situated last summer…
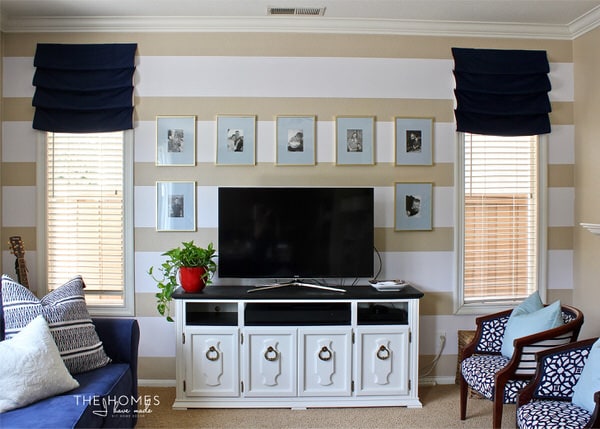
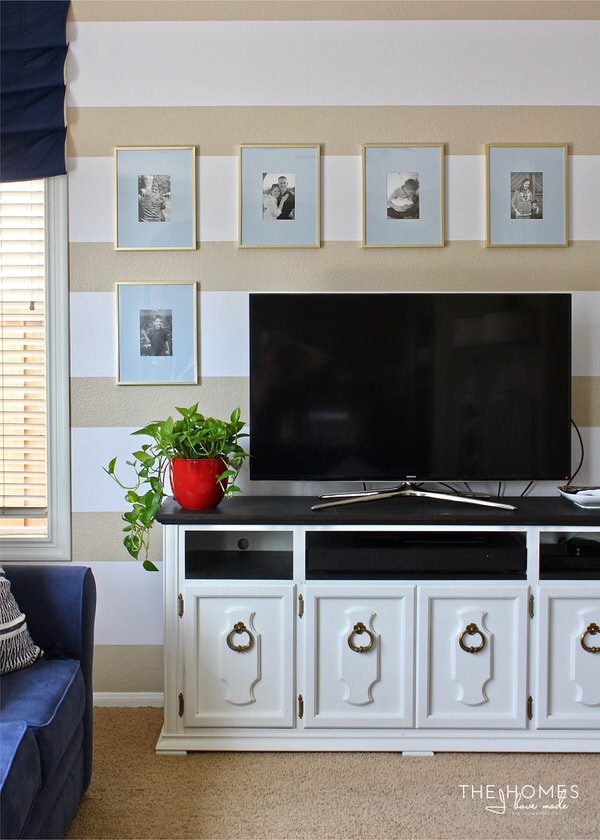
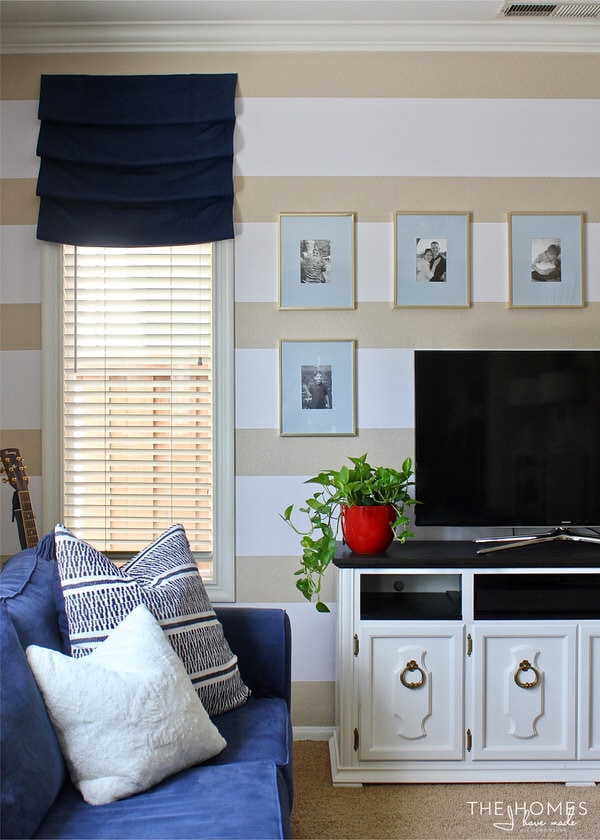
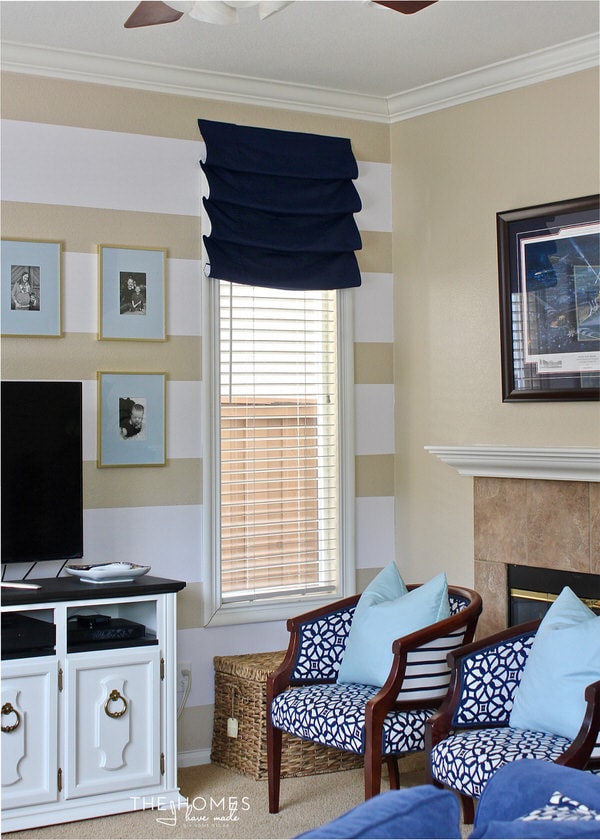
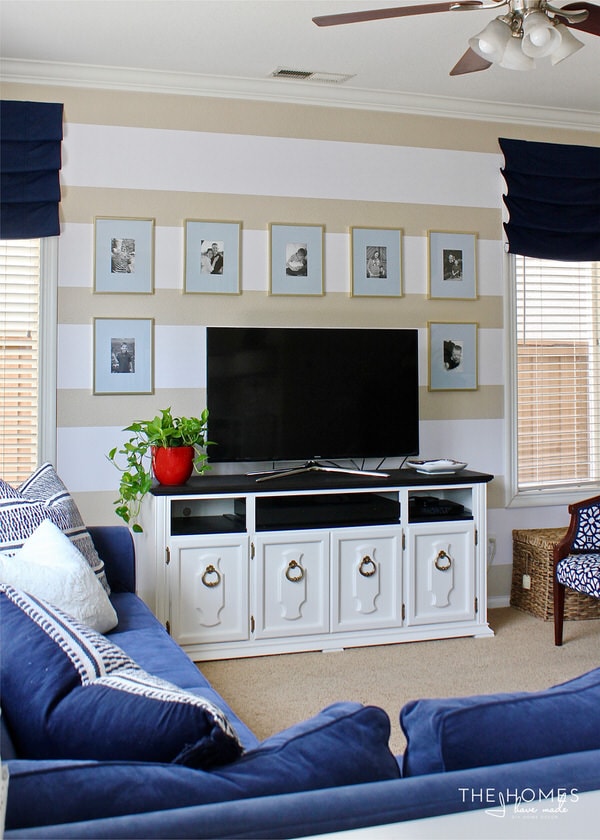
And now, the room looks like this!
*affiliate links used. You can read my Disclosure and Privacy policy here.
There is obviously a lot that has changed in here that I’ll get to in the coming weeks; but the biggest change, without a doubt, are the white stripes! To get the stripes, we applied 12″ wide, white, removable wall stripes from Walls Need Love. It was a relatively low-cost, quick and paint-free project. It’s completely renter-friendly and very much helped brighten the room, camouflage our ugly walls, and bring in more of my style. But as with any DIY project, there is a bit more to why we went this route and how it worked for us…
Why We Chose Vinyl Stripes
From the second we moved in to this house last summer, I knew I wanted to do some sort of feature wall on the far side of our family room. Our kitchen, dining room, and family room are all one, big, open space laid out in a straight line; and I felt a statement wall at the end of the space would be a great way to add some of our style in a pretty focused and simple way. Our landlord is pretty reluctant to let us paint without permission and handing over lots of details (like what paint colors we will use and adding a “must re-paint clause” to our lease each and every time #eyeroll). Also, our main level is VERY open concept, so I feared just painting one wall would look funny, and we’d find ourselves needing to extend the paint treatment to other walls in order to make it work. I’ve never shied away from painting our rentals; but this time around, the hassle just wasn’t worth it.
Knowing that paint was off the table, my original plan was to wallpaper the far wall. I’ve used both peel-and-stick and regular wallpaper successfully in several of our homes (including this one); and after a lot of researching, I fell very hard for this honey-comb wallpaper from Walls Need Love. The bright white paper would lighten up the entire space, the gold details would tie nicely into other elements around the room, and the contemporary yet classic design would work perfectly to bring this house a little more in line with our design style.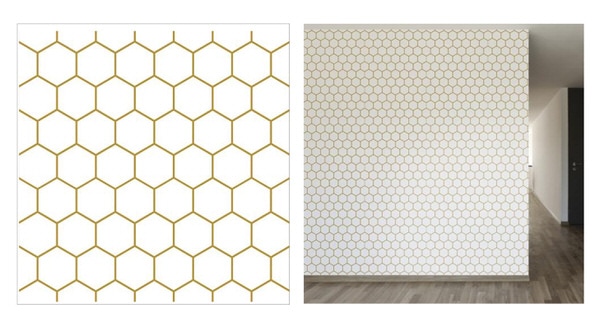
However, when I started adding up the cost for just this single wall, it came out to around $500. Major.Ouch. I don’t know about you, but that’s not in my rental decor budget! After wallowing about it for a few days, I accepted that wallpapering this wall just wasn’t in the cards, so I set about finding a different idea that would still provide the pattern, brightness, and peel-and-stick technology I needed but for a lot less money! Enter the Easy Stripes!
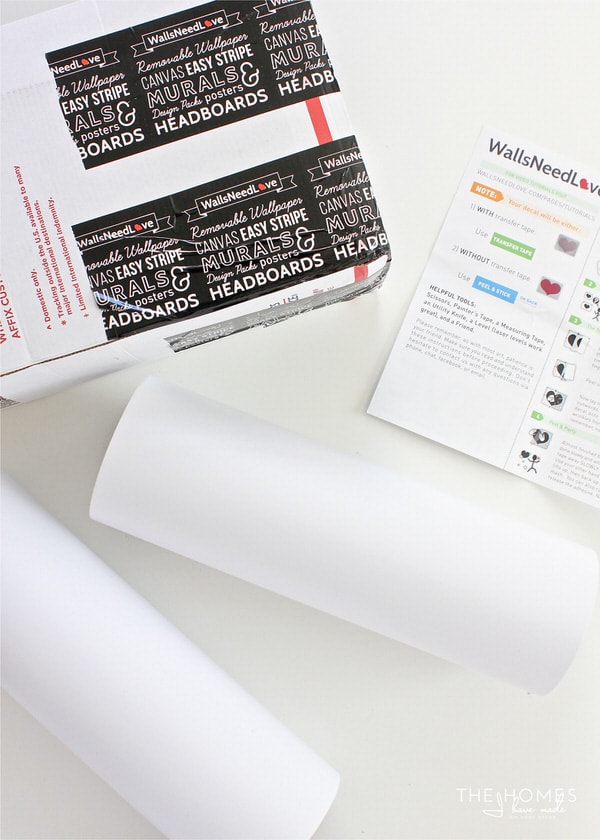
These stripes are made of the same peel-and-stick material the wallpaper is made of, but are just a fraction of the cost. They come in 25 different colors and 12 different widths, so I knew I would be able to come up with some sort of design I loved for a lot less money than the wallpaper. Plus…you all know I have a serious affinity for stripes and have them somewhere in every house we live in. It seemed like a win-win alternative. After some quick math (and timing my order during a promotion Walls Need Love was running on the stripes), I determined I could get enough vinyl to create five 12″ tall, 14′ wide stripes for around $100. Sold!
Tips for Applying Vinyl Stripes to Your Wall
So I will be veeeerrry honest with you. After doing this project, Greg and I (jokingly) decided that these wall stripes must be called Easy Stripes because they don’t require paint, don’t make a mess, and are very easy to remove. However, we wouldn’t exactly call the application process easy. I mean, we were essentially applying 14′ long stickers to our 8′ tall wall (oh…and with an almost-6 year old and a newborn baby underfoot!), all while trying to keep the stripes straight and bubble free. I can genuinely say that I love the result and I do love this product very much, but we learned some things along the way that might help make your Easy Stripes installation a little easier than ours!
Note: Easy Stripes come with really good application directions. So instead of detailing out step-by-step instructions for you here, I recommend using their directions while keeping these pointers in mind!
PLAN BEFORE YOU ORDER
Before you order and certainly before you start applying stripes to your wall, spend some time measuring the wall(s) you want to stripe, brainstorming designs, and even hashing out some potential layouts on a virtual wall (see how to do that HERE). I knew I wanted to use white stripes because they would provide the lightest and brightest option in our dark and drab room; and I also chose to go with 12″ wide stripes (the widest offered) to cover up as much of the brown wall as I possibly could! What I wasn’t sure about was the layout. So before ordering, I created four different renderings for us to consider. Almost as soon as I had the different options created on my computer screen, Greg and I knew the horizontal, uneven layout was the best for our room!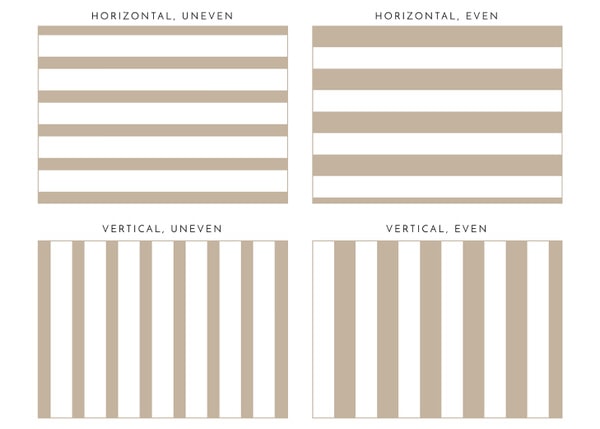
CUT STRIPES BEFORE APPLYING TO THE WALL
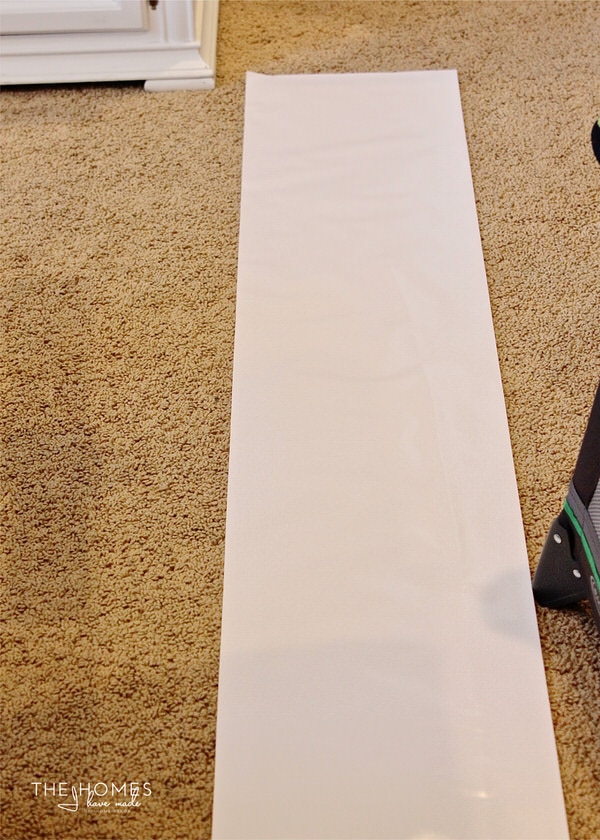
Once you have your design figured out and your stripes in hand, it’s time to apply them to the wall. We found cutting the stripes to our needed length (and then removing the paper backing and applying to the wall) was easier than just stretching and sticking the entire roll across the wall as we went. Although skinner stripes and shorter walls are likely easier to work with, trimming the stripes down to your desired length will make any stretch of vinyl more manageable to hang. Just be sure you measure twice before cutting to ensure you don’t mis-cut (and therefor waste vinyl); and I always recommend adding a few extra inches to ensure each cut runs the full length you need it to. It’s easy to trim away excess with a ruler and sharp craft knife.
USE A LEVEL TO MARK “GUIDES”
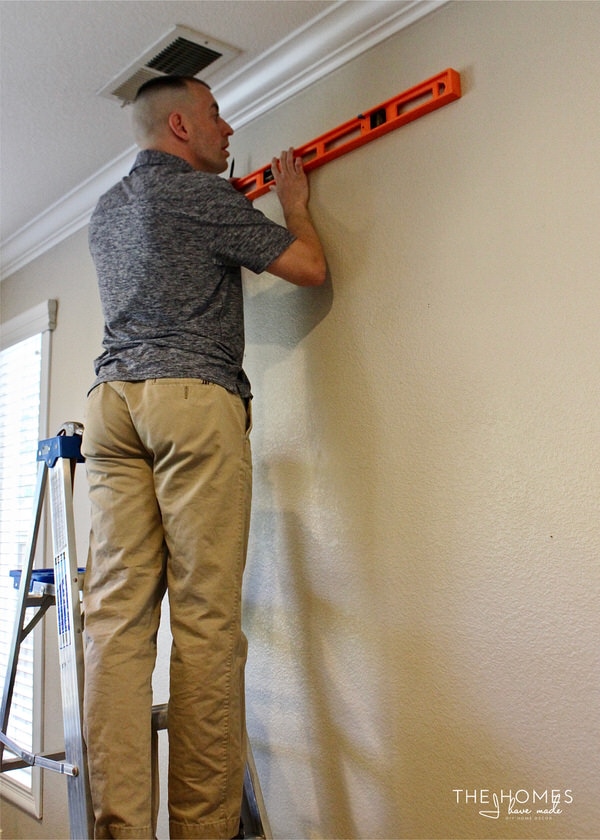
Our original instinct was to draw pencil lines across the wall and then hang the stripes up against the lines. However, this would mean there would be pencil lines across our wall when the paper eventually came down. Plus, because our stripes were so wide and so long, they were a little wieldy to manage. (Getting them to line up perfectly against that line was easier said than done, and the line would then peek out from behind the stripe at random intervals.) Instead, we found it easier to make tiny little tick marks every 18″ or so across the wall at each stripe height, and then line the stripe up with each mark as we moved horizontally across the wall. This not only allowed for a little flexibility in placement to accommodate the vinyl, but also kept our walls from being significantly marked up.
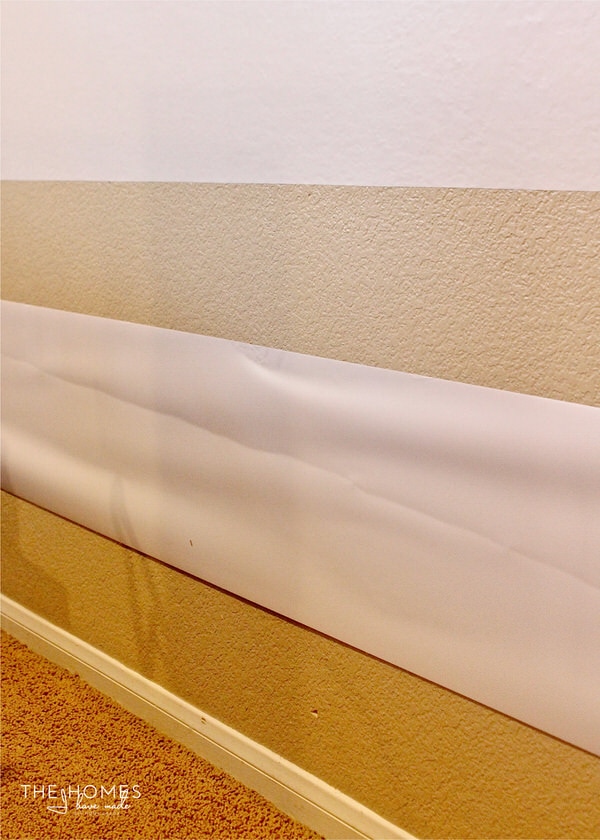
REMOVE THE ENTIRE PAPER BACKING
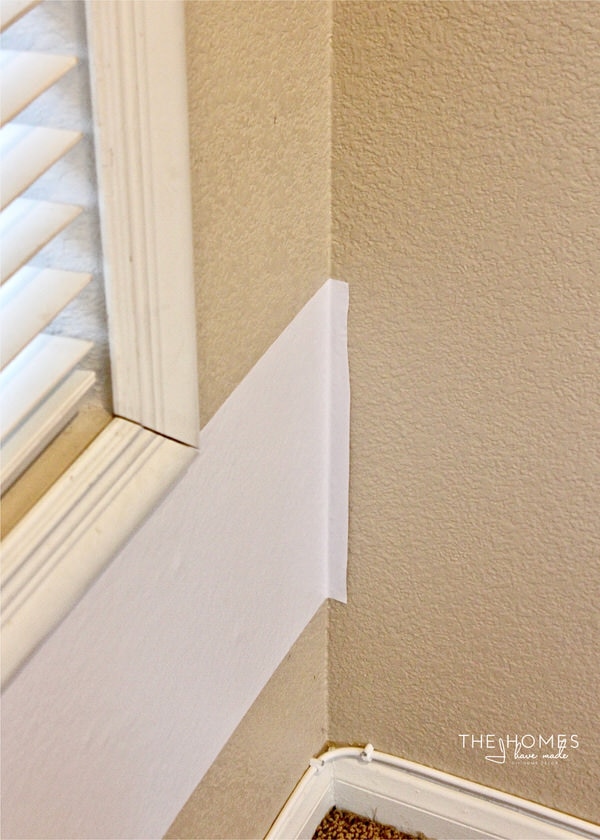
If you’ve ever seen any of my tutorials on how I line drawers and shelves with contact paper, I typically recommend peeling off the paper backing AS you stick the paper to your surface. Removing all the paper backing to reveal an entire sheet of sticky paper is often very difficult to work with; and keeping it from sticking to various surfaces and itself is practically impossible. We tried that same method with these stripes, but actually found the opposite to be true. Because our stripes were so long, they were also quite heavy. Not having enough sticky surface exposed caused the stripes to fall as we were applying them; and we actually found it easier to haphazardly stick the entire stripe to the wall (along those tick marks) and then smooth and trim from there.
START WHERE YOU CAN’T SEE
Even if you read a thousand tutorials and prepare yourself the best you can for this kind of project, working with vinyl stripes and getting them to line up just right takes some practice (even for someone who has worked with A LOT of vinyl). We started at the very top of our wall and moved down because that measuring and math was easier for our sleep-deprived brains (did, I mention we did this project when Sam was about 3 weeks old?).
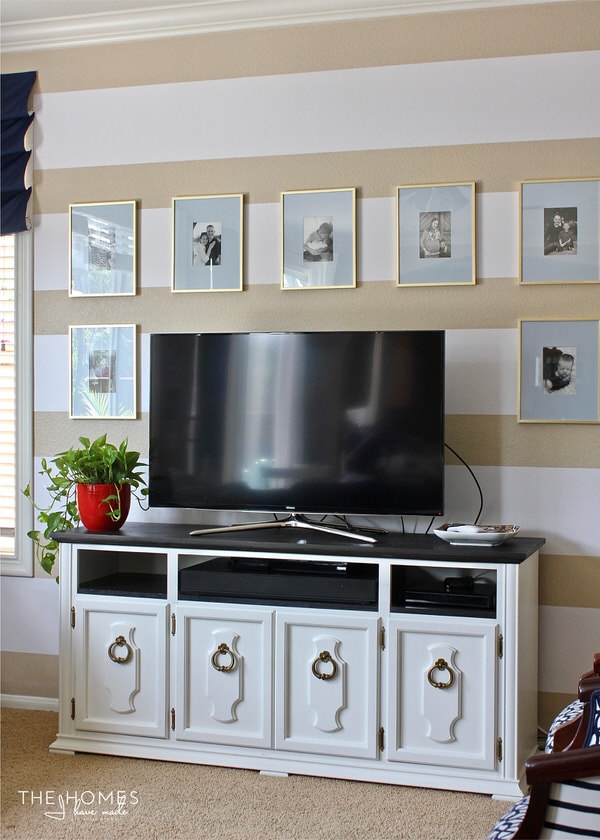
However, those first two stripes were a bit dicey going up as we struggled with the wide, long and sticky paper. By the third, fourth, and fifth stripe, we had a great system down. The stripes went up quick and smooth and looked the best. The bummer? The bottom three stripes are behind our television and can’t really be seen. I wish we had started at the bottom to learn and figure out our process, so that we’d have it perfected by the time we reached the top where the full stripes are visible. So, lesson learned: if you have a section of your wall that will be covered with furniture, start there (if you can figure out the math for your placement!) to perfect your system before striping the walls that “count.”
JUST GO FOR IT
I’ve wallpapered a lot of walls. I’ve used vinyl and contact paper on all sorts of projects. Still, this project REALLY intimidated me. Our walls are tall, and peel-and-stick papers can be very frustrating to work with. I’m pretty sure I had the stripes for a full month before I finally committed to hanging them. But here’s the thing: this entire project…from opening the box of stripes and moving the TV stand away from the wall to loading up all the trash and putting the TV stand back in place…took us less than 2 hours (and that included feeding breaks for Sam). Yes…the long sticky stripes (especially the very wide kind) can be a bit exasperating to work with. Yes, the peel-and-stick paper can get stuck on things and wrinkle easily. But! They are also incredibly durable and easy to fix. We had to peel off and re-stick several of the initial stripes, smooth out some pretty big bubbles and cut away excess around trim and corners. Even with all that tugging and pulling and peeling, the stripes are still up, smooth and looking awesome 4 months later. There was no paint to buy and mix, no tarps to lay down, no mess to clean up. The commitment and risk are low and the payoff, in my opinion, is pretty high. And if you really messed it up or just don’t like it…you can just peel them right off. See? Easy! 😉
I turned to Easy Stripes because they were an affordable and doable alternative to paint and wallpaper for our current living situation. Although there were a few moments we almost threw in the towel on this project, I am so glad we persevered. I genuinely didn’t expect this “work around” solution to look so great or to love the striped treatment as much as I do. I certainly don’t mind the work of painting stripes on our walls, but you better bet that I’m excited to just peel these down in a matter of minutes when it’s time for us to eventually go! Easy stripes, indeed!
If cost was no issue, I would have wallpapered this entire wall and never looked back. The truth is though, sometimes the budget is the biggest design decision maker of all! Later this week, I’m going to share even more strategies for cutting the cost of wallpaper so it can fit within any budget. If you’ve been dying to get this trend into your home but can’t handle the price tag, be sure to stop by on Friday for my tried-and-true tricks! See you then!
I did not receive compensation for this blog post; however Walls Need Love did provide a gift card for me to purchase a product of my choice to use and review. Please remember that I only work with brands and products I fully support and that make sense for my home, my family, and this blog. All opinions are 100% my own!
Megan

5 Comments on “Tips for Hanging Vinyl Stripes on the Wall”
You guys did a great job! It looks awesome! 😄
VERY SURPRISED THE VINYL STAYS ON YOUR PEBBLY TYPE WALLS …. AWESOME ! I WORKED WITH SOLID SHEETS OF YINYL A FEW YEARS AGO FOR MY GRANDSON’S NURSERY. CUT 3 DIFFERENT SIZE CIRCLES OUT FROM 6″ TO 12″ DIAMETER & APPLIED THEM IN A WAVE PATH AROUND THE ROOM. LOVED THE LOOK. LOVE REMOVEABLE VINYL FOR DECORATING ! YOU ACHIEVED SUCH AN INVITING FEELING IN YOUR ROOM …. STRIPES WERE A TERRIFIC CHOICE. THANKS FOR ALL YOU SHARE ! ALWAYS HELPFUL !!
Oh my gosh! I love walls need love! I fell hard for a wall mural and went with it in my overly yellow basement. The stripes here look awesome and you have now inspired me to do purple stripes in my daughters bedroom. Thank you!!!
This is beautiful! I am really enjoying your blog. We moved 9 times in 6 years and all of them were small rentals. We have our own home now and it’s almost 4000 square feet but I still love the temporary rental solutions. I love it that my taste can change but I don’t have to waste time peeling and repairing “permanent” ideas that were obviously never going to be loved permanently!
When we moved into our new home the living room was dark greenish gray. It’s a big room so the color works and it is pretty. But it was just a little . . . .much. I too love stripes so I just purchased a $6 roll or white contact paper and stuck it to the biggest blank wall in an unmeasured stripe pattern. I also use contact paper on the toe kick of my bathroom vanities because i think it looks surprisingly fun in a bathroom. I’m glad I went with something cheap because my 3 year old decided to pick at a vinyl stripe and tore it! I would have been upset if I had paid a fortune for peel and stick wallpaper that wall but hey, it was $6 so I think we’ll live. Contact Paper works really well and is super cheap!
Thanks so much for leaving such a nice comment, Jessica! And I love your tip on the contact paper – I’ve also used contact paper in various places too and it definitely provides a great temporary solution for a great price!
Have a great weekend!
Megan