DIY Large Pin Board (with an acrylic dry-erase surface!)

I mentioned last week that the large, bulky black desk that we’ve had for years finally got broken in our most recent move, giving me the reason I’ve been waiting for to get rid of it! In its place, I found this really sleek and simple desk in the clearance section of a local furniture store. I will share more about this desk in a post I have planned for later on, but it’s pretty cool because it completely rotates in every direction. It can be flat (the way I have it here), or it can be an L-shape. And it can reverse to have the desk and shelves on either side. For a family who moves so much and is constantly faced with different room layouts, it really meets my needs perfectly!
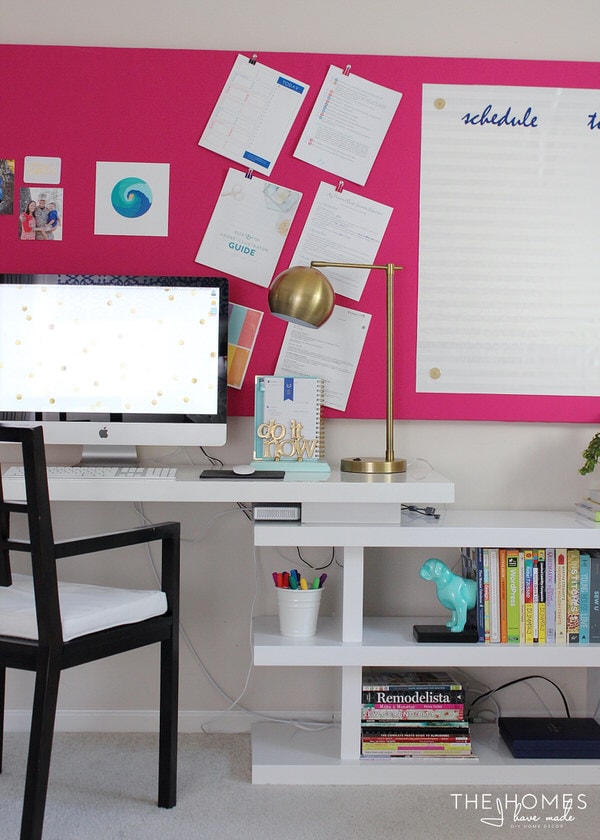
Anyway, when we got the desk home and the computer situated, I hung up my door panels-turned-dry-erase boards above the shelf side of the desk. Honestly, the functionality of these panels work SO SO SO well for me, but aesthetically, they were really driving me crazy. It was way too much white on such a bland wall, and I was missing one key functionality: a pin board. With much less desk space than I had before, I noticed important papers were piling up, and I was constantly shifting piles around to create some work space. I found myself yearning for a place to pin things up where I could see and remember them, but they wouldn’t clutter up my desk.
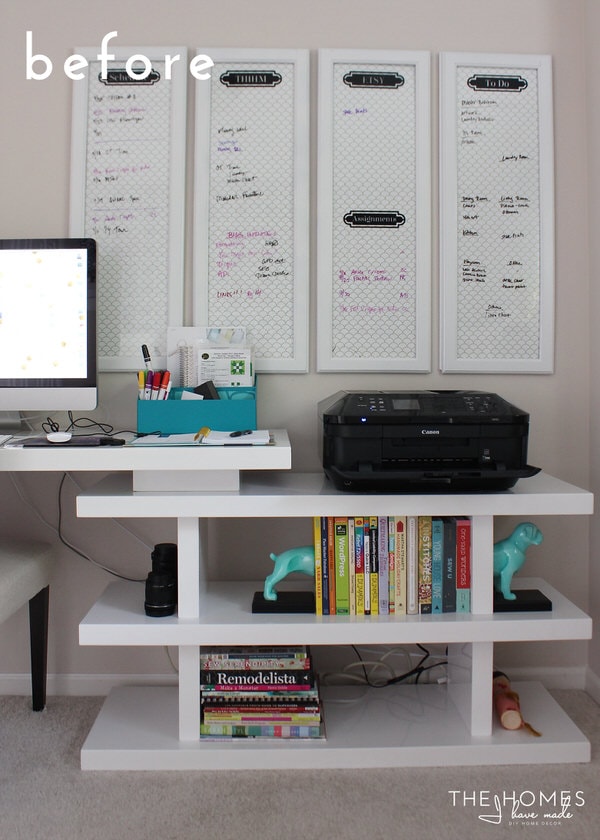
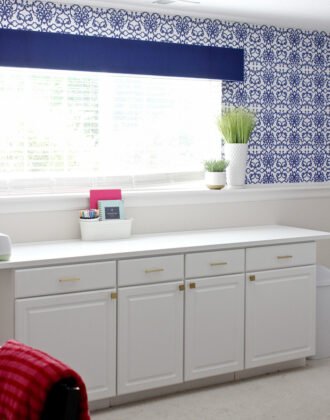
I had my heart set on a jumbo-sized pin board that would stretch the entire desk length. Not only would this give me tons of space to pin up whatever I needed, but it would also help balance out the long desk and provide some much needed color on this side of the room (the other half looks like this!). I had the pin board part of the project figured out, but one thing I didn’t want to loose was the dry-erase functionality of my door panels. For my blog schedule and to-do lists, the dry erase boards just work so well. My schedule is fluid and my ideas come and go, so I like to scribble them down and erase them with ease. Adding the dry-erase surface to my large pin board proved the major headache, but I’m happy to report, I figured it out!
Take a look!
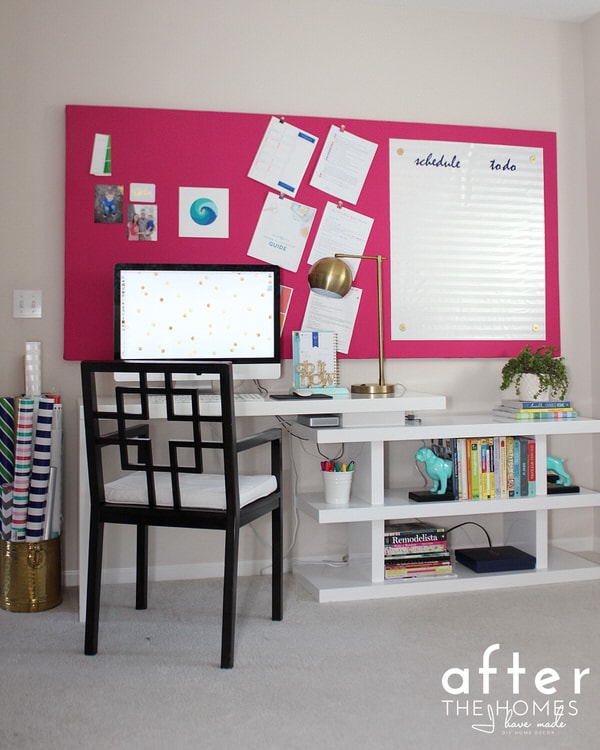
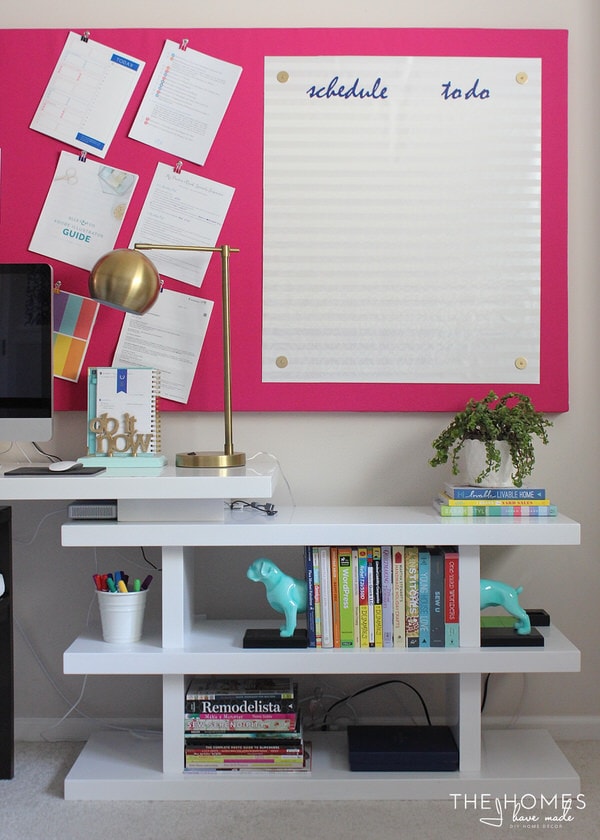
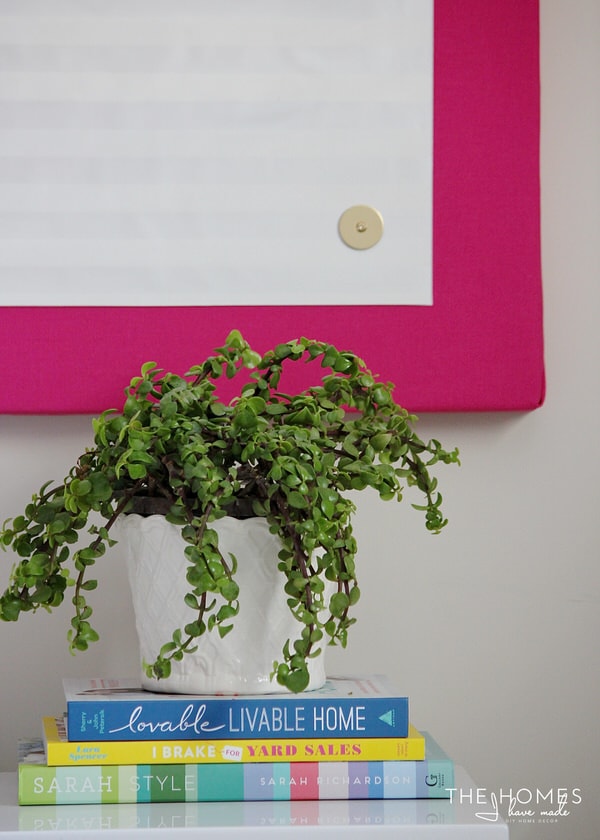
Pink! I know what you guys are thinking! (“Isn’t the rest of the room blue?”) Yes, yes it is. To keep the room from feeling a bit matchy matchy, I wanted something that would play off the blue but still be bright and fresh. Kelly green was my first choice, but it felt so predictable considering that is the color scheme in pretty much the rest of the house. I really couldn’t shake the pink from my initial concepts for this space, and when I found the raspberry-colored canvas I didn’t hesitate for a second. From the door (and the rest of the lower level), you can’t see the pink at all, so it’s a fun surprise and a jolt I felt the room needed. It may look a bit disjointed now, but I have plans to pull it all together!
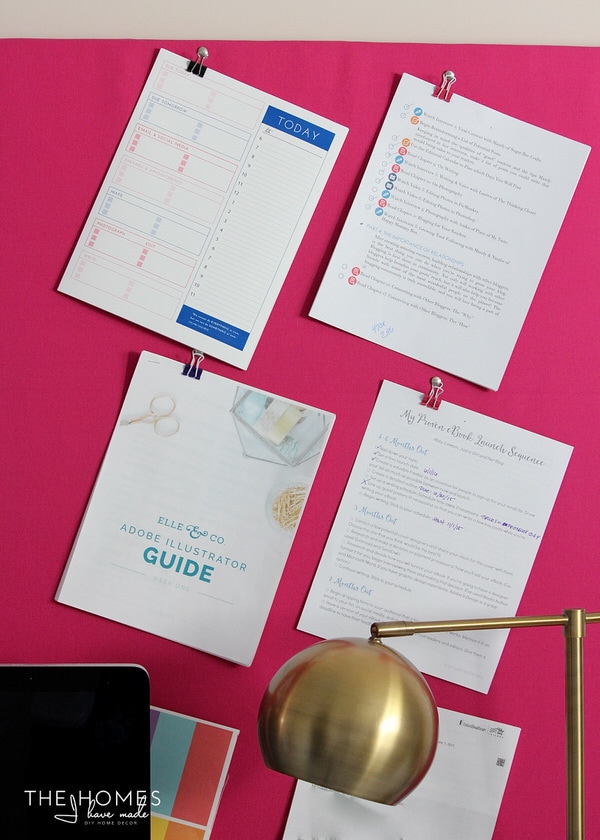
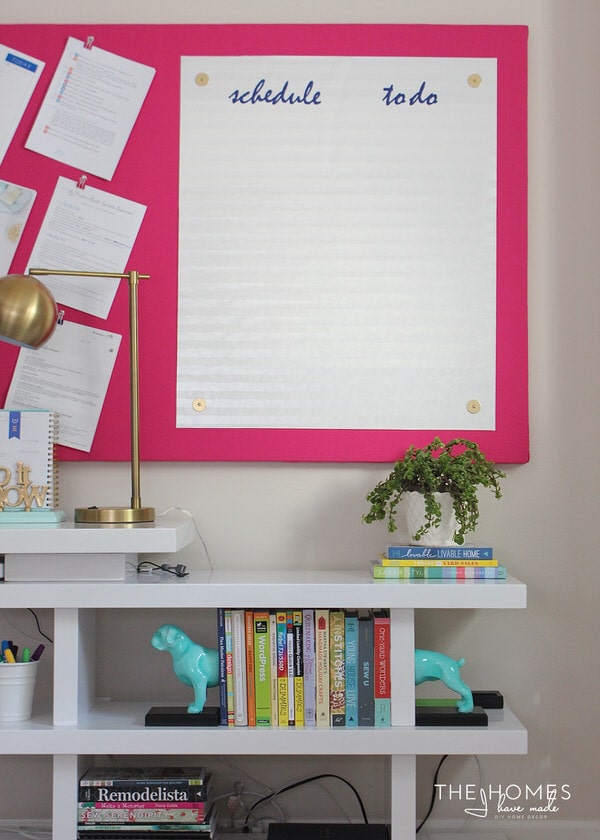
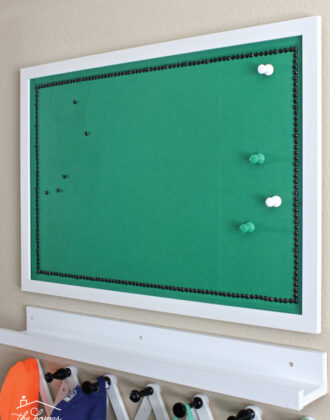
As I said, the main functionality I was trying to add here was a space to pin up my important papers that I use and reference on a regular basis. This 40×85″ board (made from a sheet of foam insulation) certainly provides me enough space to pin away!
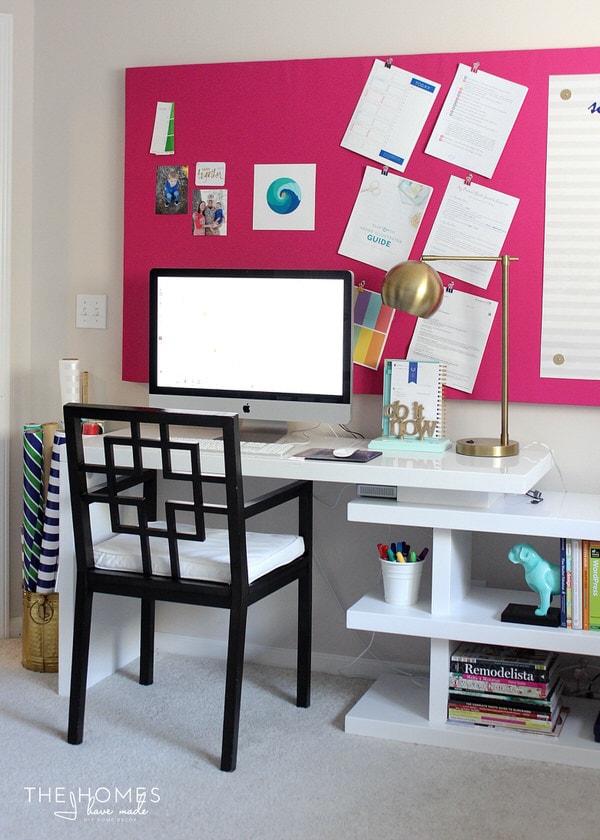
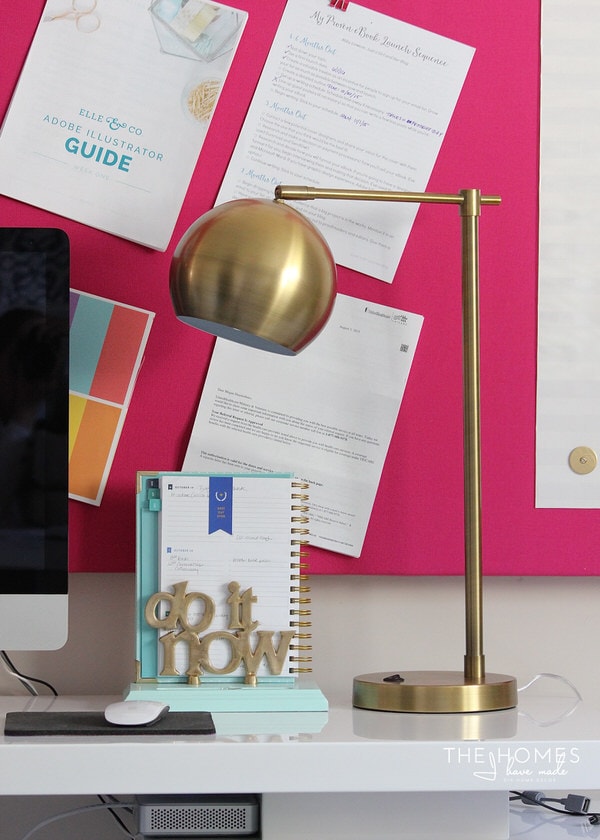
(I finally snagged myself one of these fabulous task lamps from Target. It was on sale, so I was shocked there were any left. It took all of my will power to resist buying two. But we have so.many.lamps already, I just couldn’t do it. I might regret that later on…they would make fabulous bedside reading lamps!)
Truth be told, in just an hour or so, Greg and I had the pin board put together and up on the wall. I just couldn’t figure out how to make the dry-erase board happen so I tried to convince myself I didn’t need it. But after a few days of trying other methods of keeping my blog schedule, I committed to figuring it out (which is why this post didn’t go live last week!). I couldn’t call this project done until it was functioning just as I needed it to…and I needed a dry-erase surface.
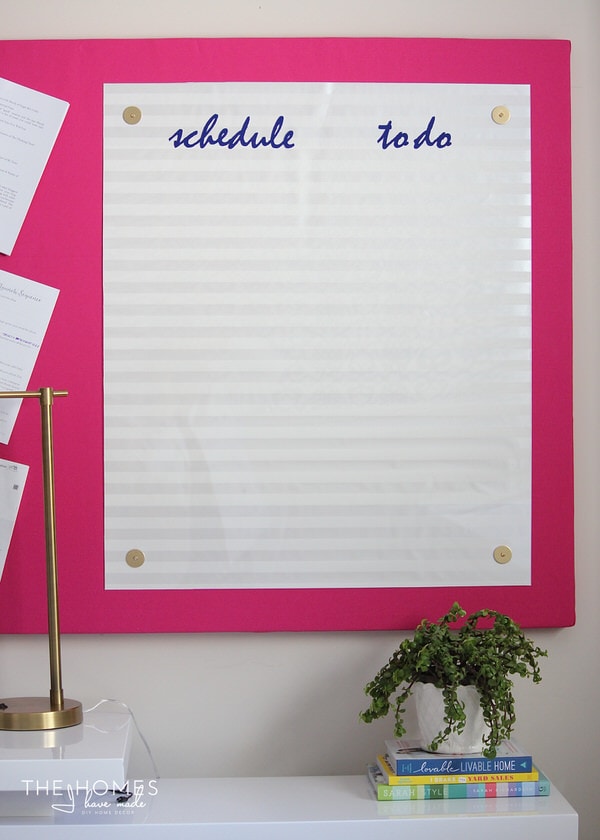
The dry-erase surface is a sheet of plexiglass with wrapping paper underneath. It’s actually the plexiglass that used to sit atop the black desk we got rid of (and I wouldn’t be lying if I said this project was partly born out of desire to use up that plexiglass!) What was so complicated? Well, as I said, the pin board is made of styrofoam insulation sheeting, which isn’t the strongest of materials. It’s great for pinning up papers and pictures, just not so great for drilling and securing things to.
Every idea I came up with seemed complicated and fruitless. I was worried about the styrofoam not being able to support the weight of a framed or pre-made dry erase board. I really wanted to use the plexiglass I already had, but I also wanted it to look clean and polished and not awkwardly rigged up. Above all, I wanted the board to be sturdy and easy to use. The one here is all of these things! I am so, so, so thrilled with how it turned out, and the solution was really so simple!
Are you ready to see how I did it? If you’d like to try this project yourself…
Here is What You Need:
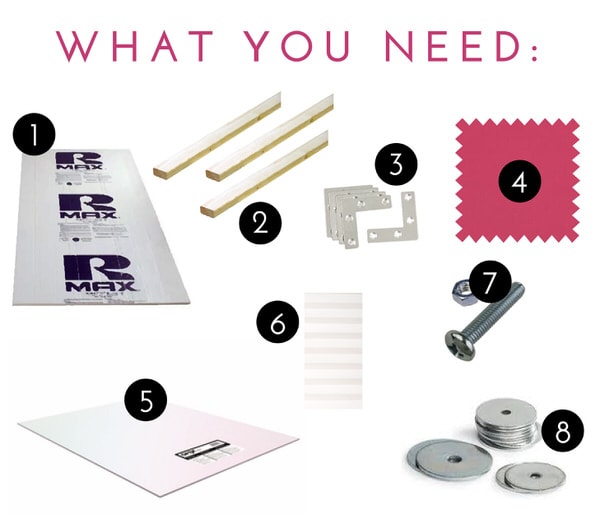
- 1″-thick foam insulation sheeting in the size and shape you want. We bought the 4×8′ sheet for $12, then cut it down to a size that fit better over the desk.
- 1×2″ lengths of wood to create a simple frame to support the insulation. We bought three 8′ lengths ($3/each) to create a frame that was 40×85″.
- L-brackets. We were not up for precise measuring, miter cuts, wood glue and screws, so to make this frame come together quickly, we used four basic 5″ L- brackets, one at each corner. ($3/each)
- Fabric. Be sure to select fabric that is opaque (so as not to see the insulation/wording underneath); and to avoid having to make seams, pick a fabric that offers enough width to cover your entire board. I used three yards of raspberry-colored canvas that came in 60″ width. ($25)
- Acrylic sheet. Buy or cut-down to your desired dimensions using a plexiglass cutter. (had on hand)
- Wrapping paper. Any type of fabric or paper could work under the acrylic here. Pick something you can write over and still be able to read easily. (had on hand)
- Screws with nuts. I am sure there is a technical name for these, but the nut is the most important element here. Get one for each corner of the acrylic sheet. (had on hand)
- Washers. Pick washers in whatever size you like aesthetically, you’ll need two for each corner of the acrylic. I sprayed my gold with spray paint before starting. (had on hand)
- Supplies (not shown): scissors, staple gun & staples, wood screws, flat-mount hanging hardware, drill and drill bit, ruler (had all on hand)
My total cost in supplies for this huge board was about: $60!
Here is What You Do:
Start by determining the size board you want and if necessary, cut down the foam insulation sheet to that size. I cut the 4×8′ sheet down to 40×85″ using a large and sharp kitchen knife. After trying a variety of tools, it worked the best and cut the cleanest!
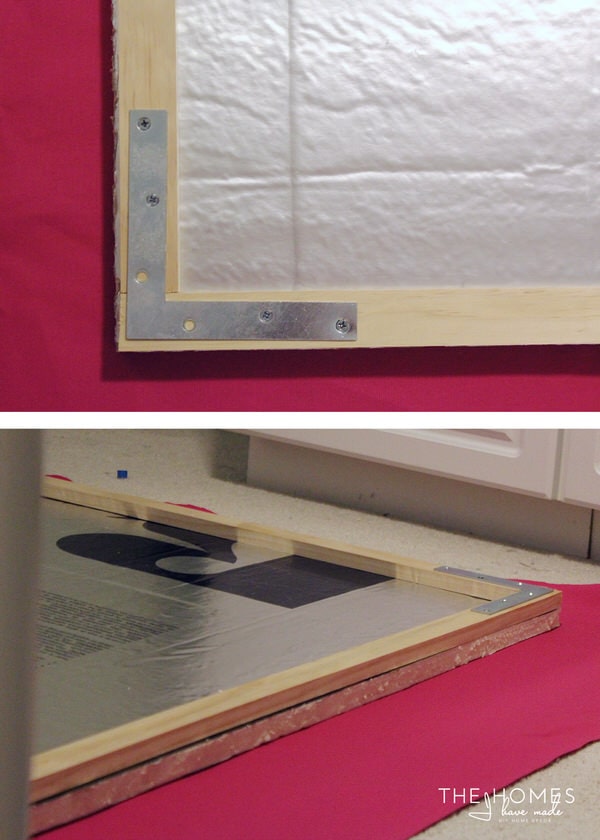
Next, construct a simple frame out of the 1x2s in the same dimensions as your foam insulation sheet. Either screw, glue, or use L-brackets to attach the wood at the corners.
Iron your fabric to remove any creases, and then place the foam sheet and wood frame down onto the wrong side of your fabric.
Secure the insulation to the wood frame and attach the fabric all in one step. Simply pull the fabric taught over the edges and staple the fabric to the wood frame using a staple gun. Take care to fold the fabric cleanly and consistently at each corner. Before moving on, attach the hanging hardware to the wooden frame.
If you only want to make a giant pin board, hang it on the wall and you’re all done! If you want to add an acrylic dry-erase surface, read on!
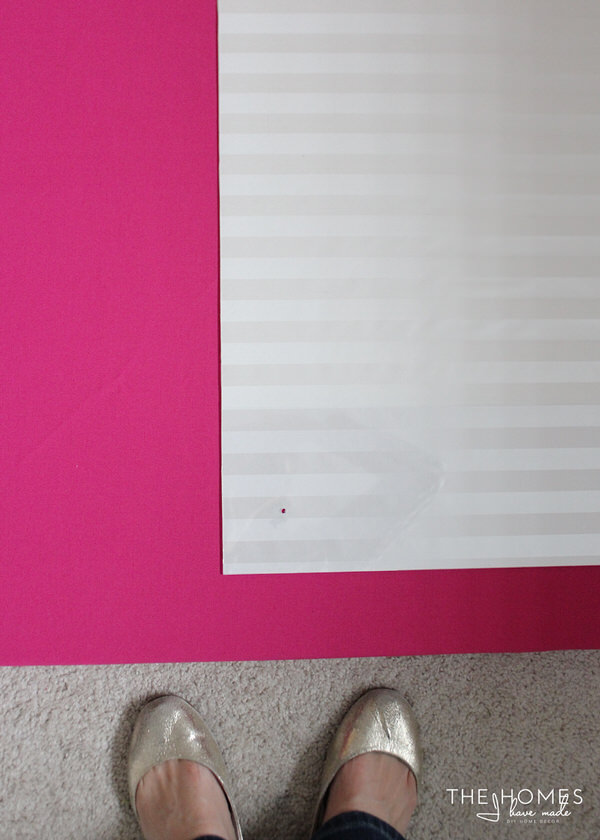
Measure and trim down the sheet of acrylic to your desired size and then add holes to each corner. Friends, I’ve cut a lot of acrylic and put holes in acrylic on a few occations…and I’ve hated doing it (both tasks were two of my mental blocks on this project!). I had the easiest go of it this time around (practice makes perfect I guess!). Here was my method:
- To cut: score and score and score and score a line over and over using a ruler and plexiglass cutter. Then move the acrylic to a table edge and snap off the acrylic along the scored line. Don’t worry about cutting the acrylic all the way through, if you score it enough, it will snap perfectly!
- To put holes in acrylic: Last time I did this, I went the hot nail/melting route and it was long and messy. This time, I used Sarah’s trick of drilling the holes using a drill ON REVERSE. It works like a charm. I practiced first and made hole after hole without a single crack or split. Go slow, and you’ll end up with perfectly sized holes in your acrylic sheet, all ready for mounting!

Next, trim down whatever paper you want to place underneath the acrylic sheet and use the holes in the acrylic to punch holes in the paper as well. Because any adhesive would be visible through the acrylic, I only secured the paper to the plexi right at the corners where the large washers would sit (and cover any visible adhesive).
Once you have your paper trimmed and secured, place it onto the wrapped insulation sheet and center where you want it.
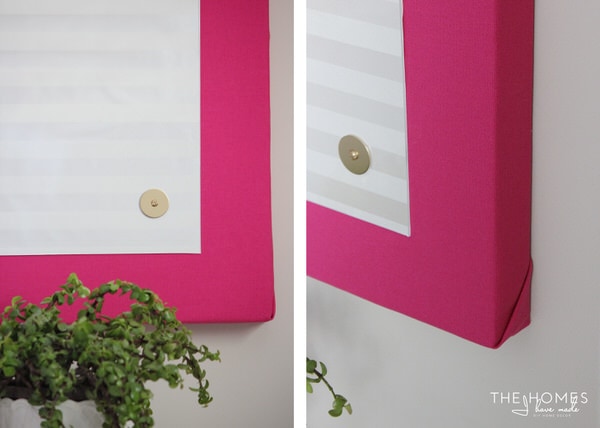
Attaching the acrylic was the hardest part for me to figure out mentally. It’s so simple and obvious, it just took me a long minute to get there! At each corner, I used a large washer (in front), a 1.5″ screw, a small washer (in back) and a nut to cinch everything down. (I didn’t get to snap pictures on my actual board, so I re-created it using an extra piece of foam core I had around. The foam insulation is quite a bit thicker than what is shown below, so I had just enough screw to attach the washer and nut.)
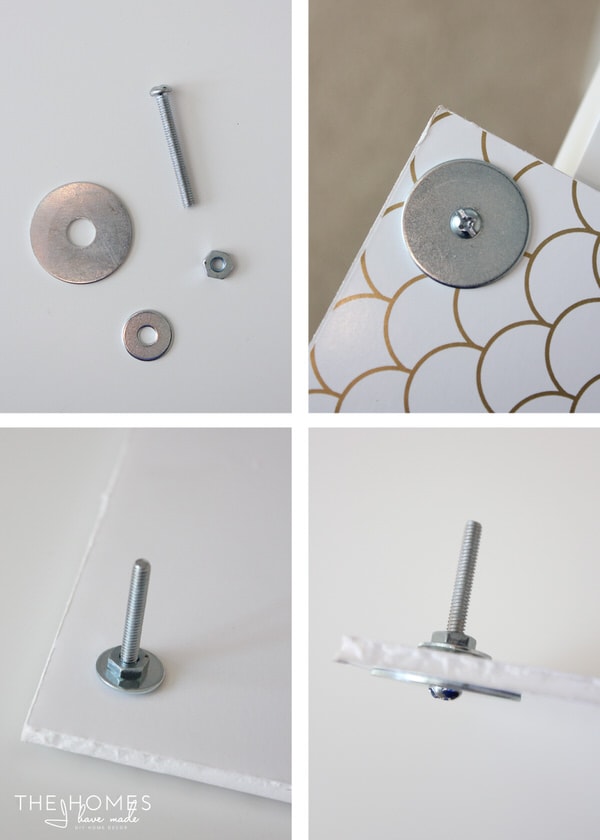
Thanks to the washers, the screws shouldn’t pull through the insulation even with everything cinched down nice and tight. And since we attached the acrylic in four spots, the weight should be spread loaded enough to stay nice and secure!
This is one of those projects that was thiiiiiiis close to being a big ol’ fail at several instances along the way. I had to pause frequently and really think about how best to proceed so as not to ruin the whole thing all together. With it now done and up and running, it couldn’t be more perfect. The perseverance certainly paid off with this one!
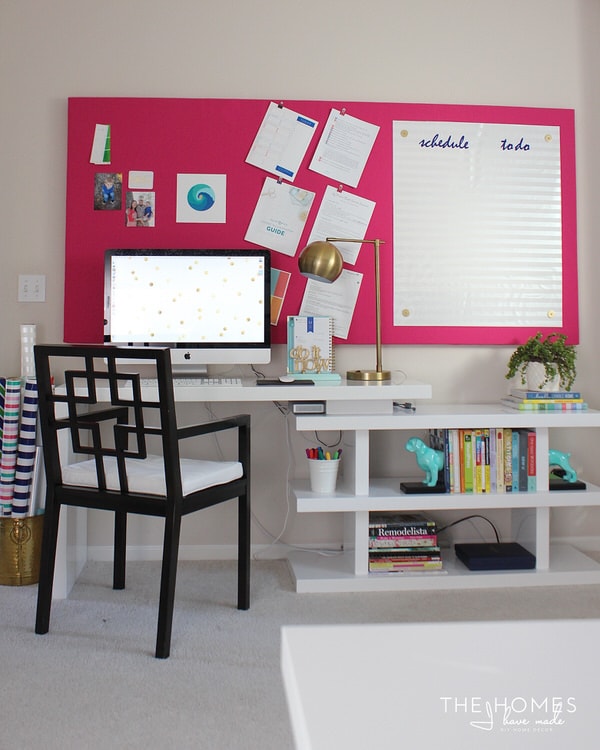
Here’s the view from my sewing table now. The bright pop of pink just makes me smile, and I am so excited to finally have a place to pin and organize all my work related things. Now to finish off a few little details to bring the whole space together!
I’d love to know what you guys think of my DIY Large Pin Board? I think I have a thing for board projects…I sure do a lot of them, don’t I?!? Are you surprised, worried or excited by the pink? Intrigued about the foam insulation? Leave any questions below and I’m happy to answer them!
This took up more of my weekend than I wanted, so I am now scurrying to finish up Henry’s Halloween costume. I hope to have it up here for you on Wednesday! These next few weeks are really, really busy for me, so hang in there with me if I’m not around on my usual days. So many fun projects up my sleeve, just not enough hours to get them all done!
Have a great start to your week, friends!
Megan

18 Comments on “DIY Large Pin Board (with an acrylic dry-erase surface!)”
LOVE the pink. Maybe because I secretly love pink. But the blue and green are also such great colors for decorating.
I love how you found a way to do an inexpensive pin board that totally fits. We are just switching our kids rooms around and this might be really fun in my older daughters room. Nice thing is I can do it for both girls if I really wanted, and not break the bank. 🙂
Now to really get those costumes done….they won’t take long, I just have a million other things I would rather do!
Hey Miranda!
Thanks so much for commenting! So I went with foam insulation for a few reasons. 1) I was intrigued! I like trying to find easy and inexpensive work arounds to fit a functionality I am needing. 2) It was super cheap! 3) It is VERY lightweight, so I didn’t need to worry about having to put anchors or other study hanging hardware into our rental walls, and 4) We’ve found that really big things don’t move well, so I wanted something that would truly fit the need for the next 9 months. I didn’t want to invest in something that I would have to sell or have a hard time trashing come move time. With this solution, I can deconstruct the board, keep the wood and fabric, and replace the insulation after we move!
The insulation certainly isn’t as strong as cork, but so far the push pins are holding pretty tight. I am aware that I can’t just pin all over the board over and over or it might start to break down so I am conscious about where and what I pin! I’ll definitely do a follow up post come the Spring to share how it’s held up over time!
Thanks for reading and hope you have a good night!
Megan
Okay, I’ll bite. Why did you go with foam insulation? Aren’t you worried that it’ll break down with the pins being constantly pulled out and repositioned?
Hey Miranda!
Thanks so much for commenting! So I went with foam insulation for a few reasons. 1) I was intrigued! I like trying to find easy and inexpensive work arounds to fit a functionality I am needing. 2) It was super cheap! 3) It is VERY lightweight, so I didn’t need to worry about having to put anchors or other study hanging hardware into our rental walls, and 4) We’ve found that really big things don’t move well, so I wanted something that would truly fit the need for the next 9 months. I didn’t want to invest in something that I would have to sell or have a hard time trashing come move time. With this solution, I can deconstruct the board, keep the wood and fabric, and replace the insulation after we move!
The insulation certainly isn’t as strong as cork, but so far the push pins are holding pretty tight. I am aware that I can’t just pin all over the board over and over or it might start to break down so I am conscious about where and what I pin! I’ll definitely do a follow up post come the Spring to share how it’s held up over time!
Thanks for reading and hope you have a good night!
Megan
I love the new desk, especially the versatility for different room situations, but also it’s light and open look. The pin board is wonderful – go big or go home, right? I also wondered about the strength of it, but I’m sure more of those framing boards could also be used across the back so it wouldn’t bow if you pushed on it too hard. It also made me think you could sandwich a metal sheet in one area under the fabric, and use all those fun magnetic organizing tools. Just love it when you show us how to re-purpose a much less expensive product for something useful like a bulletin board.
I love your new look on the blog – it’s so bright and cheery. I only have one small problem. I love to read (and write, I guess!) comments, but I’m having a hard time reading them because the ink shade is very pale. I’m sure it’s my eyes, and not the color and haven’t noticed anybody else mentioning it. I’ll play with the brightness.
Aloha,
Tenney
Hi Tenney!
Thanks so much for commenting, I’m so glad you liked this project! Oooo – I love the metal sheet under the fabric idea…might have to try that on the next go around 😉 As I told the other reader, I am not too concerned about how well the board holds up in the looooong run. We are moving in the Spring, and things like this don’t move great, so I was looking for a quick and easy (and cheap!) way to meet my need for right now. I will certainly do a follow-up post to let you all know how well the insulation board holds up to frequent pinning, only time will tell I think!
The comment text is quite pale, isn’t it?! It used to be white, so I think the font color is somehow set in my site’s themes. I am having some blog things tweaked in the coming week, so I will see what I can do about darkening it up. Thanks for letting me know!
Hope you have a great night!
Megan
hi Megan
Mi comment will ne shorter than i wpuld as this keyboazf is si strange for me
I fo love pink really
What a nice desk organisation and a lovely corner full of joy
You bring so lovely ideas to us readers and ou is so inspirinc
Have a Nice time and hello from along the sea
Michèle
I’m re-doing our office, and this is exactly what I need.
Thanks for sharing at the Create-Share-Inspire link party.
Thanks so much, Emily!
Yes, this pinboard has been awesome for keeping blog-related stuff under control!
Thanks for hosting another great party and opportunity to share our stuff! Happy Monday!
Megan
For a much sturdier, slightly more expensive, and a heck of a lot heavierpinboard you can go with Homasote (sometimes called sound insulation). Homasote is used in the construction of sound proof walls and is made from pressed paper. I have found it at Home Depot on the east coast, but it isn’t available for retail everywhere. I bought. 4′ x 8′ board, cut it into 8 smaller pieces, covered each with a large drop cloth and ended up with 8 – 2′ x 2′ pinboards for about $5 each. We are in the military too, so cutting the large board into smaller pieces made it easier to transport and configure, but still yield a huge 4′ x 8′ board when I wanted one!
Hey Jen!!!
I read a lot into Homasote, actually! But was having a tough time tracking it down 🙁 The insulation won’t be nearly as durable, but at least I don’t feel bad throwing it away when it’s move time. I have to say though, making 8 2×2′ foot boards that can be hung all together is BRILLIANT! So portable AND modular based on the size of your wall from house to house! I absolutely love that idea and am tucking that one away for future houses!
Thanks so much for sharing! Happy Monday!
Megan
This is beautiful…am definitely going to try this for my apartment. I think one of my dollar stores sells inexpenseive cork squares so I may glue some of these on top of the insulation to make it last longer.
One question I have is, how did you hang this? Did you use D-rings or picture hangers? Just trying to figure out the best way to hang it.
Thanks for perservering…
Hi Melissa!
Thank you so much! I hope the project works out well for you. We hung the entire thing on two of these: http://www.amazon.com/Selby-Hardware-Interlocking-Flushmount/dp/B0006LBU70
Hope that helps and let me know how it turns out!
Megan
I love the desk! Where is it from?
HI Alyssa!
Thank you so much! The desk was found in the clearance section at Nebraska Furniture Mart. I used to be able to find the listing/product online, but haven’t been able to find it this morning! Sorry I can’t be of more help!
Hope you’re having a good weekend!
Megan
Pingback: A Creative and Organized Home Office + Craft Room - Just a Girl and Her Blog
Going to try making this for my daughter’s room this weekend! How did you attach the foam insulation to the wood frame?
Glad to hear you’re giving this project a try!
We didn’t attach the foam to the wood frame. Just wrapped the fabric super tight around both the foam and the frame (securing to the wood) to hold it all together!
Good luck!Megan