Chippy Window Turned Gorgeous Mirror

Do you ever see projects in magazines or online and think, “I could never do that!”?? This window-to-mirror transformation was one of those projects. I was fixated on the idea of a large window mirror above our newly transformed hutch in our entryway, but didn’t really have the slightest idea on how to go about making one. I almost chickened out and just bought one on several different occasions! Once I found the “perfect” window at a local salvage yard, I decided to give the DIY route a try. I took the whole project one step at a time, and in the end, was amazed by three things: 1) how easy of a DIY project this was, 2) how truly cheap it was, and 3) how amazing the end result is!!!
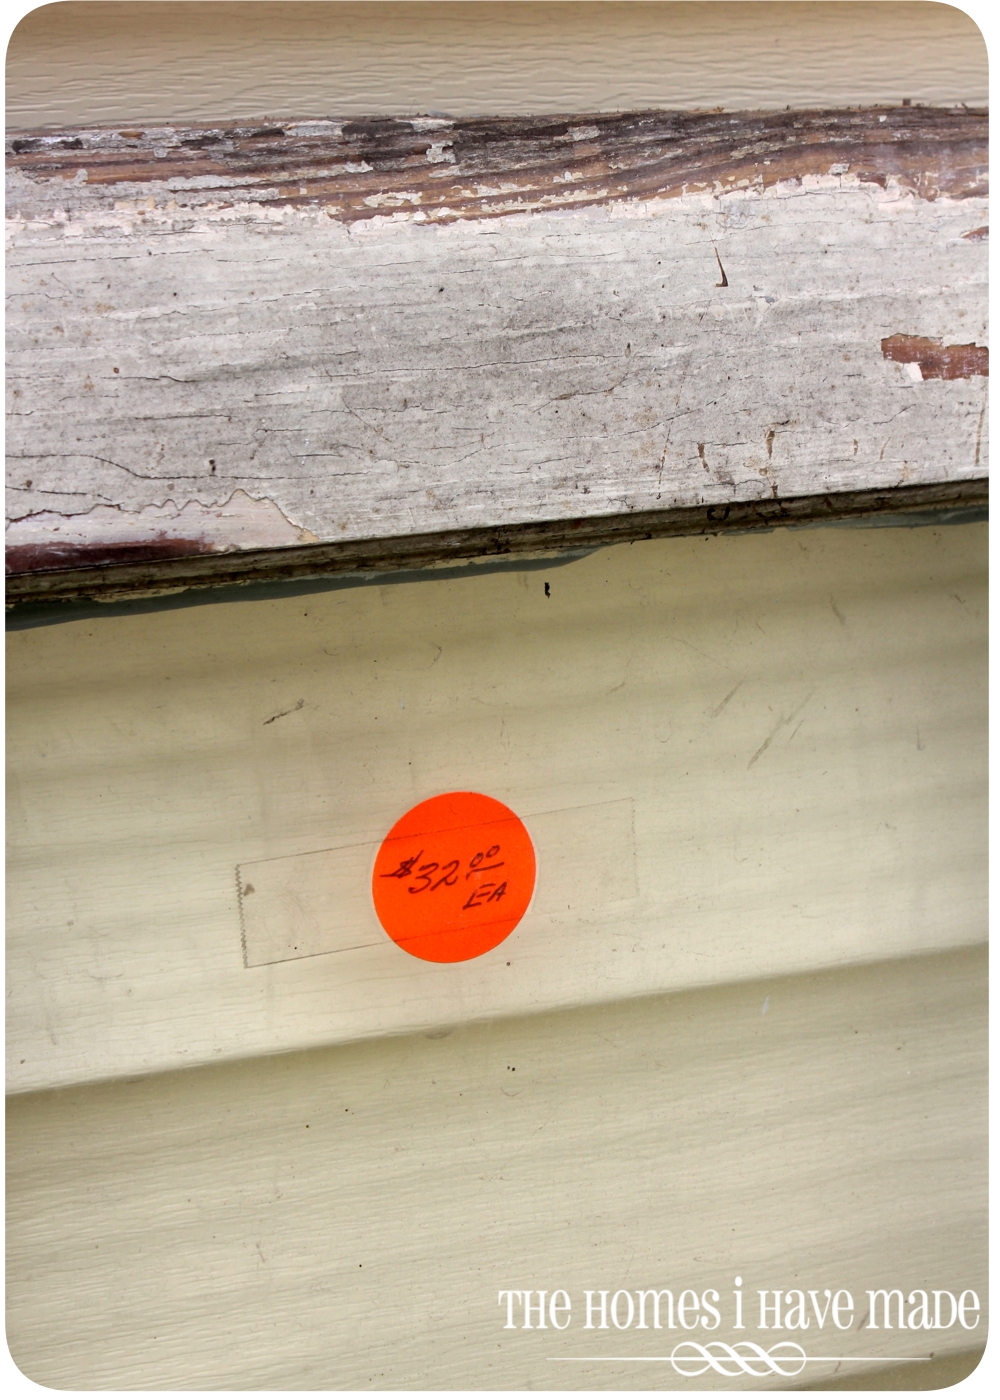
Here’s the window I started out with. Gross. Old. Chippy. And missing one glass window pain…but the size was exactly what I was looking for, and the wooden panes were external to the glass (which these days, can be kinda hard to find)!

Even though the price tag says $32, the nice old man who owns the salvage yard sold it to me for $10 (because it was missing a glass pane, or so he said 😉
See how I made it beautiful after the jump!
In one naptime, I had the entire window frame sanded “clean.” It helped that the paint was practically falling off the window. The sanding also lodged all the caulk loose, so I was able to pop out the remaining glass panels without much effort. I didn’t want this to be a long and painful project, so I also sanded all the panes with our rotary sander. It dulled some of the ridge detail, but it got the paint off in a jiffy!

Once sanded and cleaned of dust, I primed the frame with two coats of my favorite spray primer: Zinsser 123 Primer; and then followed up with two coats of plain ol’ Rust-oleum High Gloss White (same finish we used on the end table bases). I was going to distress the window, but since I didn’t spend any time touching up holes, cracks or rough corners, the window already had enough “wear and tear” showing through.

Next came time for the mirrors. I thought finding a place to cut mirrors and inserting them into the window frame would be this big, complicated, expensive production. Boy was I wrong. Am I the only person who didn’t know that Lowes cuts glass and mirror to size for FREE?!?! Sure, you have to buy one of their in-stock sizes and cut it down, but the in-stock sheets are really cheap. I bought two 24″X30″ sheets and had them each cut into three 10″x20″ rectangles, for a total of 6 rectangles. I had all the mirror cut for this huge mirror (measures about 45″x35″) for less than $20!!!!
I then laid all the cut mirrors into the window panes, and used window push points to hold the mirrors in place. These are pretty easy to push right into the window frame with a flathead screwdriver.
We finished off all the seams and edges with Silicone sealant. This stuff went on really easily, and was dry and ready to go in about three hours!

And really…that was it! Here’s that old chippy window with some new paint and mirrors! What a difference some paint makes, don’t you think?

To hang the mirror, we purchased a $10 Hangman. These things are great: easy to put up, level every time, and strong enough to hold really heavy things! (Henry was quite Daddy’s little helper!)

While Daddy was installing the wall-mounted portion of the Hangman, Henry had fun with the new mirror. I think he’s thinking, “hey, I’m pretty cute!”
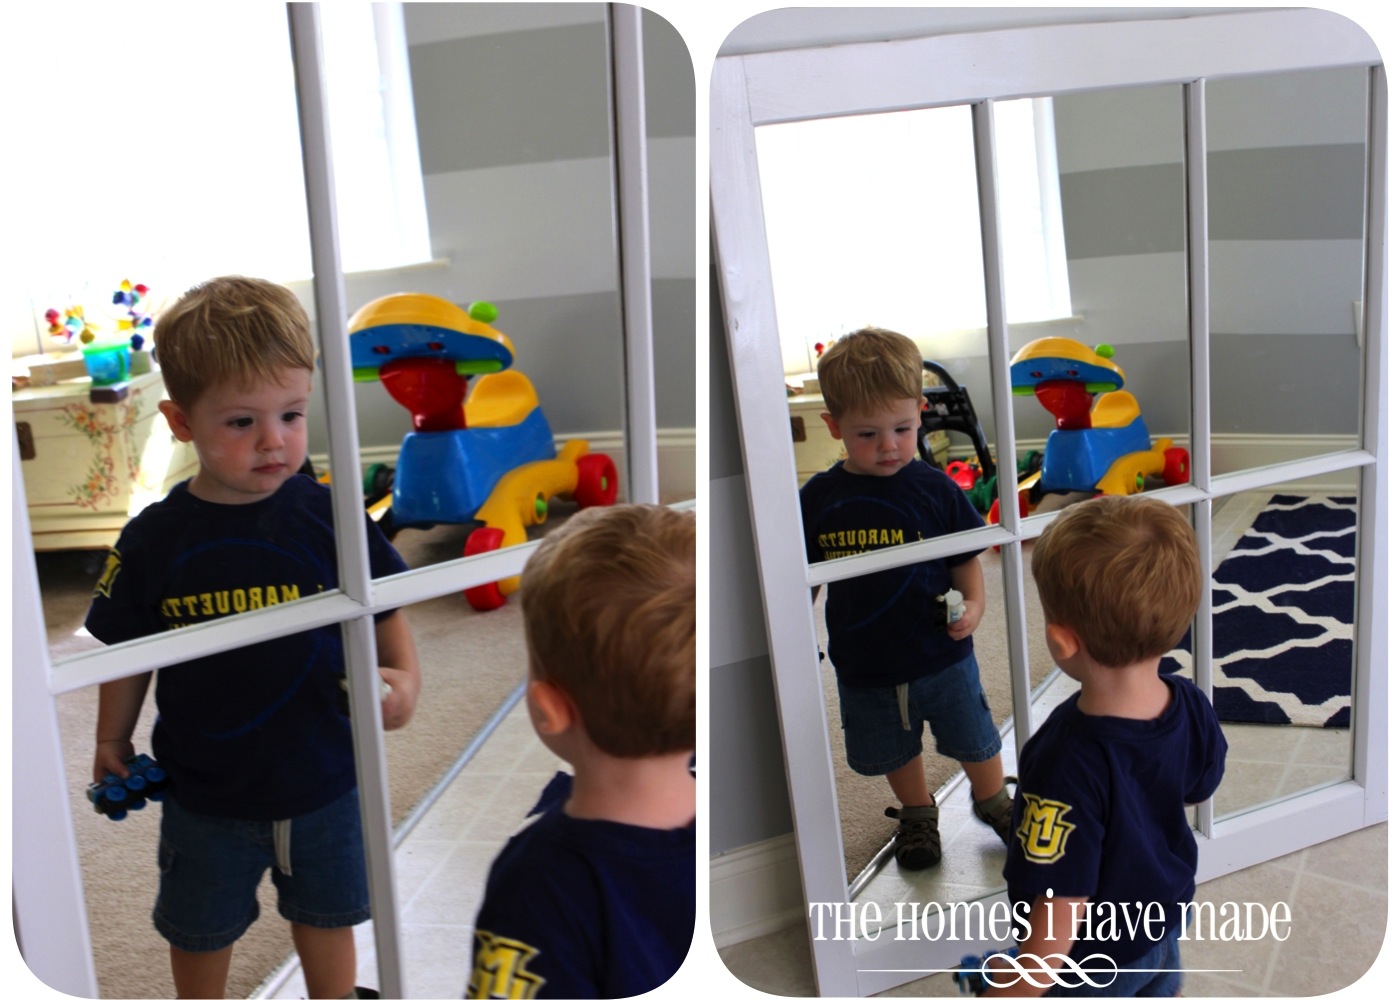
In minutes, our new window was hung!

Sans accessories, the entryway has quite the statement pieces in it: a new hutch, a fantastic lamp, and now a “new” window mirror.

And taking pictures of the mirror while in the mirror was too much fun to pass up 🙂

Oh, and I wanted to say a quick word about cost. I know I don’t do cost tallies too often (because truth be told, I am really bad at tracking costs), but this one was such a bargain, I have to show you!
- Old, chippy window: $10
- 6 10″x20″ mirrors: $20
- Paint and Primer: $7
- Window points and sealant: $5
- Total: $42 (not counting the Hangman device)
$42 to turn this chippy, yucky window into a fantastic entryway mirror!

And to turn our entryway from ho hum…to fabulous!

This was such a fun project because I had never done anything like it before…AND the starting product was so yucky…that it was incredibly gratifying to give it a new life. My confidence is bolstered…wonder what I’ll give a try next!
Hope everyone has a great start to their week! I’m working away this week on Halloween costumes and painting that coordinating dresser. While I am doing those things, I hope to have another big project reveal up for you shortly!
Megan

4 Comments on “Chippy Window Turned Gorgeous Mirror”
Happy to see Henry wearing his Marquette University Shirt…………
Lovely mirror. I love the idea of using an old window for a mirror. I also really love your striped walls!
Thanks for the Lowe's mirror cutting tip.
I had no idea Lowes would cut glass and mirror! One question: Did you remove the glass from your window prior to installing the mirrors? Or just lay the mirror behind the glass? I have an old door with lots of window panes like yours, but I have no idea on how I would go about removing the glass if that was how you did it. Any tips? Thanks!