Tween Girl’s Bedroom Makeover – Part II – New Furniture
posted byMeganon
March 5, 2012
This post may contain affiliate links.
As promised, I am back today to show you some updated photos of our progress in my niece’s bedroom! (You may recall, that I am helping my sister clean, sort, organize, and makeover her 10-year-old daughter’s room. You can see the before photos and inspiration boards here!) Well, we they have been hard hard hard at work sorting every last inch of this room, and I am so excited to show you the photos of our progress!
Before we could get to all the fun stuff (fabric, paint, crafts)…the clutter and furniture had to be dealt with first. (Major bummer to the 10 year old…but we were determined to do this thing right!) However, before we could sort all the stuff…we had to have things to put all the stuff in! After brainstorming ideas on how to arrange the room and organize all of Ms. M’s clothes, dolls, and toys, we set off for the cheep, stylish, kid-friendly furniture “Mecca”…IKEA!
The bed was the first pick! We really liked the idea of a daybed for this tween bedroom – what little girl young lady wouldn’t love a “couch-like” bed with lots of fun pillows! We ultimately decided on this lovely lady because of the combined 3-drawer storage and trundle bed underneith the daybed.
We centered it on the wall to make it the focal point of the room. Here’s how it looks (sans bedding!).
There’s lots more “progress” pictures after the jump!
We were all about infusing as much (aesthetic) storage into this room as we could. This fun unit holds 7 different size bins to hold shoes, magazines, stuffed animals and purses!
We have the piece nestled on the side of the bed to not only function as fun display areas, but also as a bedside table!
Next, we removed the closet doors and dealt with the inside of the closet!
A hanging curtain rod helps to spilt the closet up into sections. Dresses and longer items on the left, tops on the upper right, and skirts on the bottom right. Since everything isn’t crammed in, hopefully, more clothes will make it on hangers than on the floor (Mom and Aunt can dream, right?!?). We also added another shelf to the top of the (existing) shelf) to provide more cubbies and a second shelf on top! This is the one we chose!
We specifically chose a free-standing/removable unit because 1) installation was easier, and 2) this piece can be removed and used in another location as needed!
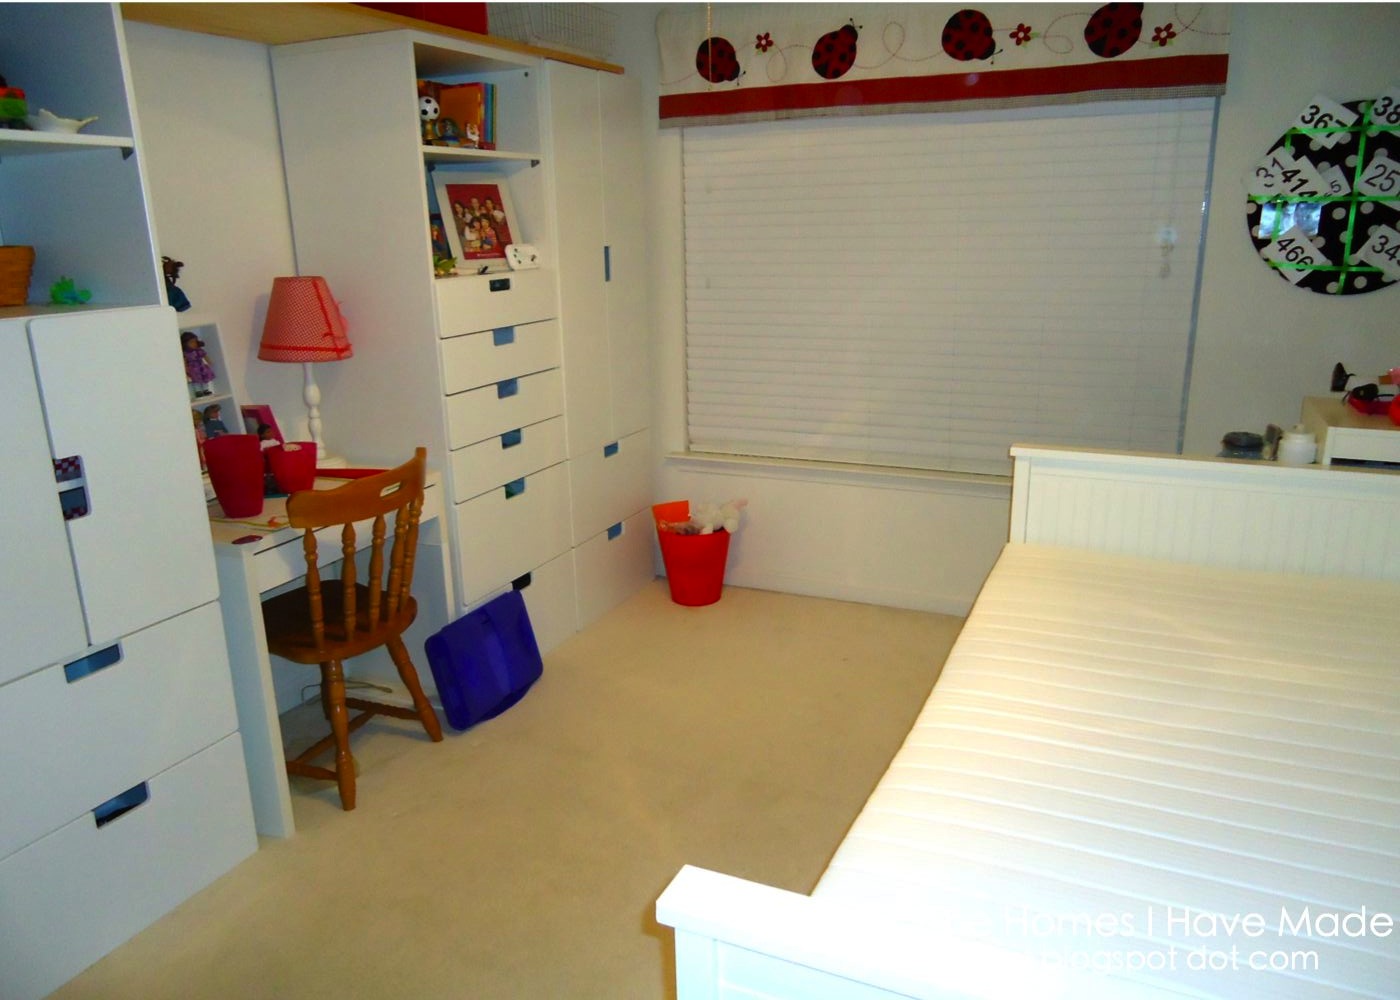
If there is one organization tip I’ve heard a million times from “experts,” it’s to “go up!” In order to give M as much storage as possible in this tiny rom, we wanted the whole left side of the room to have floor-to-cieling built-ins. Since that’s a bit costly, we went the next best route. This storage system from IKEA gave us lots of different drawer/locker/open shelf options and were the perfect size for this tiny space!
We got three units and mixed and matched drawer and shelf sizes! We left one unit “slot” open and added a desk. A wood “plank” runs all along the top of the units (once it’s painted to match…this really will look like built-ins!). These units look AMAZING in this room, and give my niece about 10 times more storage than she had before!
Finally, because they are SO SO fun to look at…here are some quick before and after shots of our progress to date!
View from the door:
Close-up of the closet:
Another view of the closet:
Left-side wall:
Although it’s a HUGE improvement already…we are just getting sarted! Now…all the fun stuff can begin! It’s time to say FAREWELL to all the lady bugs…
and HELLO to a fun and funky new room!
Have a great Monday…I’m off to play with some pink and orange fabric 😉
Lots of great ideas in this space!! I've added this post to 2 of my pinterest boards and would love to feature it on an upcoming blog article series that I'm planning to highlight in the month of May on my website. 🙂
I'm looking forward to see what you did. It is going to be wonderful with the new fabrics. I love, love, love the lady bug quilt. I hope your sister keeps it as an extra blanket.


2 Comments on “Tween Girl’s Bedroom Makeover – Part II – New Furniture”
Lots of great ideas in this space!! I've added this post to 2 of my pinterest boards and would love to feature it on an upcoming blog article series that I'm planning to highlight in the month of May on my website. 🙂
Cheers & Happy Organizing!
~H
I'm looking forward to see what you did. It is going to be wonderful with the new fabrics. I love, love, love the lady bug quilt. I hope your sister keeps it as an extra blanket.